
Articles
How To Remove Washer Agitator
Modified: February 28, 2024
Looking for articles on how to remove a washer agitator? Find step-by-step instructions and helpful tips in our comprehensive guide.
(Many of the links in this article redirect to a specific reviewed product. Your purchase of these products through affiliate links helps to generate commission for Storables.com, at no extra cost. Learn more)
Introduction
Welcome to our guide on how to remove a washer agitator. The agitator is an essential component of your washing machine that helps to move the clothes around during the wash cycle. Over time, it may become worn out or develop issues that require it to be cleaned or replaced. Whether you’re experiencing a malfunctioning agitator or simply want to give it a thorough cleaning, this article will provide you with step-by-step instructions to remove the agitator safely and efficiently.
While the process of removing a washer agitator may seem daunting at first, with the right tools and some basic knowledge, it can be a relatively simple task. However, it’s crucial to follow safety precautions and properly disconnect the washer from the power source before performing any maintenance or repairs. Neglecting these precautions can lead to serious injury or damage to the machine.
In this article, we’ll guide you through each step of removing the agitator, from unplugging the washer to reassembling the agitator once the necessary cleaning or replacement is done. So, let’s get started!
Please note that these instructions are general guidelines and may vary depending on the make and model of your washing machine. Always consult your appliance’s manual or manufacturer’s website for specific instructions related to your machine.
Key Takeaways:
- Safely remove and clean or replace your washer agitator by following step-by-step instructions, ensuring optimal washing machine performance and prolonging its lifespan.
- Prioritize safety, gather necessary tools, and follow manufacturer guidelines to successfully remove, clean, or replace your washer agitator, maintaining a safe and efficient washing machine.
Read more: Maytag Washer How To Remove Agitator
Safety Precautions
Before attempting to remove the washer agitator, it’s important to ensure your safety and prevent any accidents. Here are some essential safety precautions to follow:
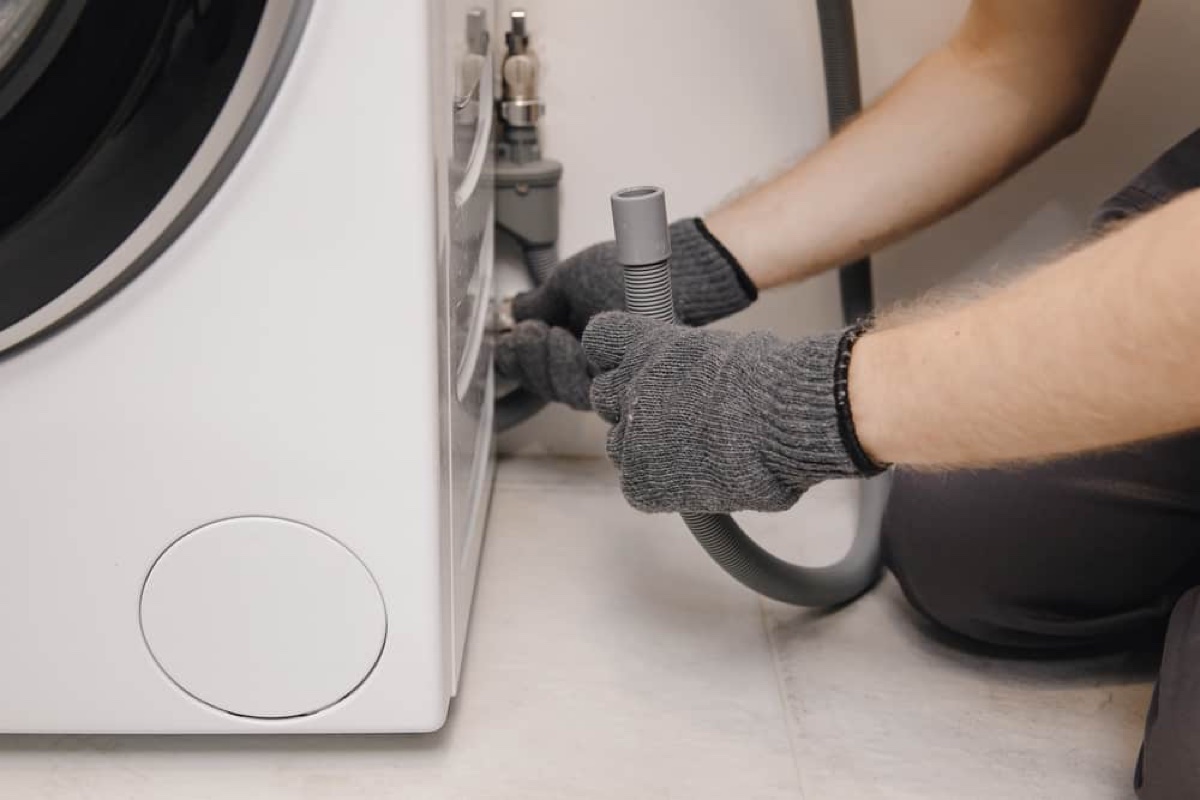
- Unplug the washer: Always start by disconnecting the washing machine from the power source. This will prevent any electrical accidents while working on the machine.
- Wear protective gear: It’s advisable to wear gloves to protect your hands during the removal process. Additionally, wearing safety goggles can prevent any debris or cleaning agents from entering your eyes.
- Clear the area: Make sure you have a clear and well-lit workspace to work on the washing machine. Remove any obstacles or objects that might hinder your movement or cause accidents.
- Follow manufacturer instructions: Read the appliance’s manual or visit the manufacturer’s website for specific safety guidelines and precautions related to your washing machine model.
- Use proper tools: Make sure you have the necessary tools on hand for the removal process. Using the wrong tools can damage the agitator or other components of the washing machine.
- Work with a partner (if needed): Some agitators can be heavy or require some extra force to remove. If necessary, enlist the help of a partner to ensure stability and prevent any strain or injuries.
- Be cautious with chemicals: If you’re using any cleaning agents or solvents, follow the instructions and precautions provided by the manufacturer. Some chemicals can be harmful if mishandled or come into contact with your skin or eyes.
- Stay focused and patient: Removing the agitator may require some time and effort. Be patient throughout the process and avoid rushing. Stay focused and double-check your actions to minimize the risk of accidents.
By following these safety precautions, you can ensure a safe working environment and minimize the risks associated with removing the washer agitator. Safety should always be the top priority when working on any appliance or machinery.
Tools and Materials Needed
Before you begin removing the washer agitator, gather the following tools and materials:
Tools:
- Adjustable wrench or socket wrench set
- Flathead screwdriver
- Pliers
- Bucket or tray (for catching excess water)
- Cleaning brush or toothbrush
- Mild cleaning agent or vinegar (for cleaning the agitator)
Materials:
- New agitator (if replacement is necessary)
- Clean cloth or towel
- Water
Having these tools and materials ready beforehand will make the removal process smoother and more efficient. Ensure that the wrench or socket wrench set is the correct size to fit the agitator bolt, as this can vary depending on the specific washing machine model.
If you’re planning to clean the agitator instead of replacing it, using a mild cleaning agent or vinegar can help remove any built-up grime, residue, or odors. The cleaning brush or toothbrush will assist in scrubbing the agitator gently.
Keep in mind that if you determine the agitator needs to be replaced, it’s essential to purchase a compatible agitator for your specific washing machine model. Consult the appliance’s manual or contact the manufacturer for guidance on finding the correct replacement part.
Lastly, having a bucket or tray handy will be useful for catching any excess water that may spill out during the removal process. This will help prevent any water damage to your floor or surrounding area.
Gathering these tools and materials in advance will ensure that you have everything you need for the agitator removal process, saving you time and effort during the task.
Step 1: Unplug the Washer
The first and most crucial step in removing the washer agitator is to unplug the washing machine from the power source. This step is essential to ensure your safety throughout the entire process.
Locate the power cord of the washing machine and firmly unplug it from the electrical outlet. It is important to verify that the machine is completely disconnected from the power before proceeding.
Unplugging the washer eliminates the risk of electrocution or accidental activation of the machine while you are working on it. It also prevents any spinning of the agitator during the removal process, making it easier and safer to handle.
Take a moment to double-check that the washer is properly unplugged and that there is no power running to the machine. You can do this by turning on the machine and ensuring that it doesn’t start. Additionally, make sure there are no lights or indicators on the control panel that show that the washer is still receiving power.
Once you have confirmed that the machine is unplugged and powered off, proceed to the next step of removing the washer agitator. Remember, safety should always be your top priority when working on any appliance.
Step 2: Remove the Fabric Softener Dispenser (If Applicable)
In some washing machines, the agitator may have a fabric softener dispenser attached to it. Before removing the agitator, it’s important to check if your machine has this additional component and remove it if necessary.
To remove the fabric softener dispenser, follow these steps:
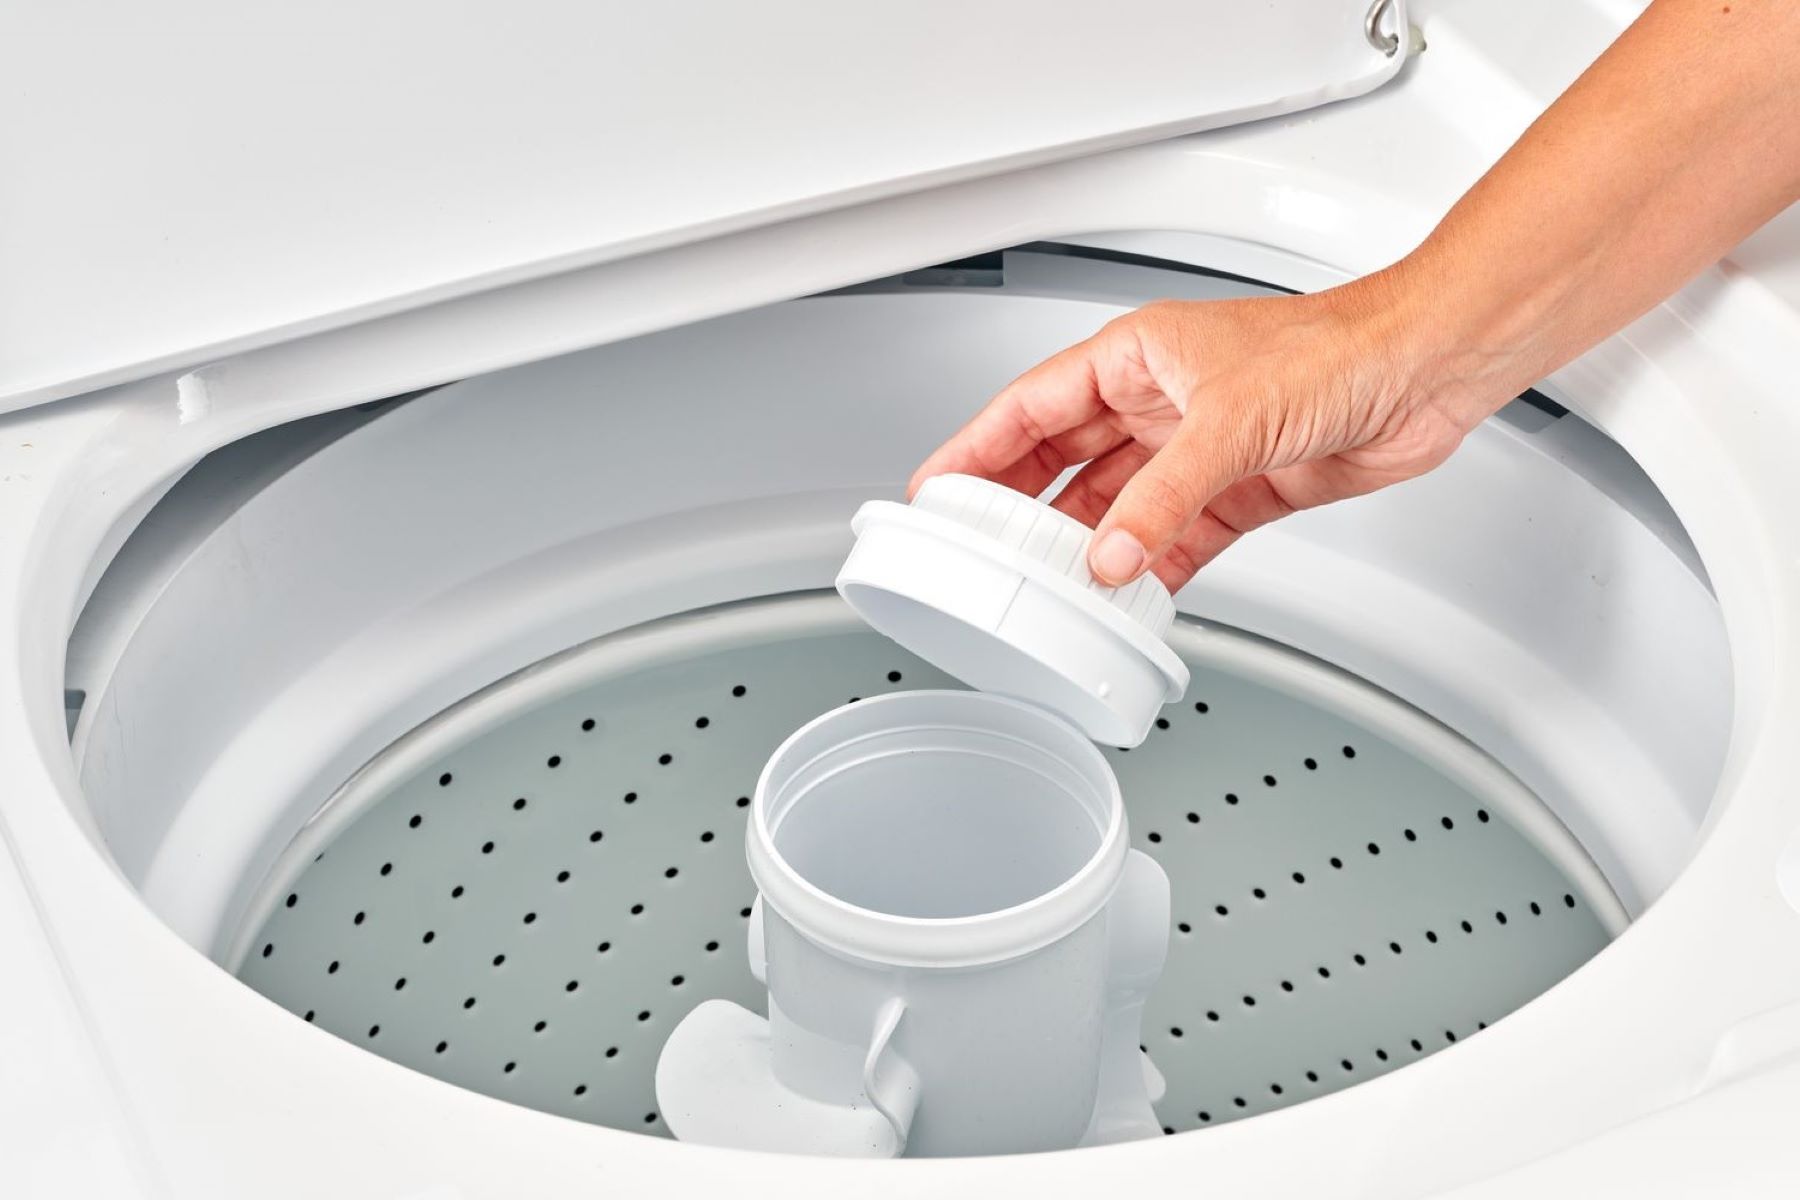
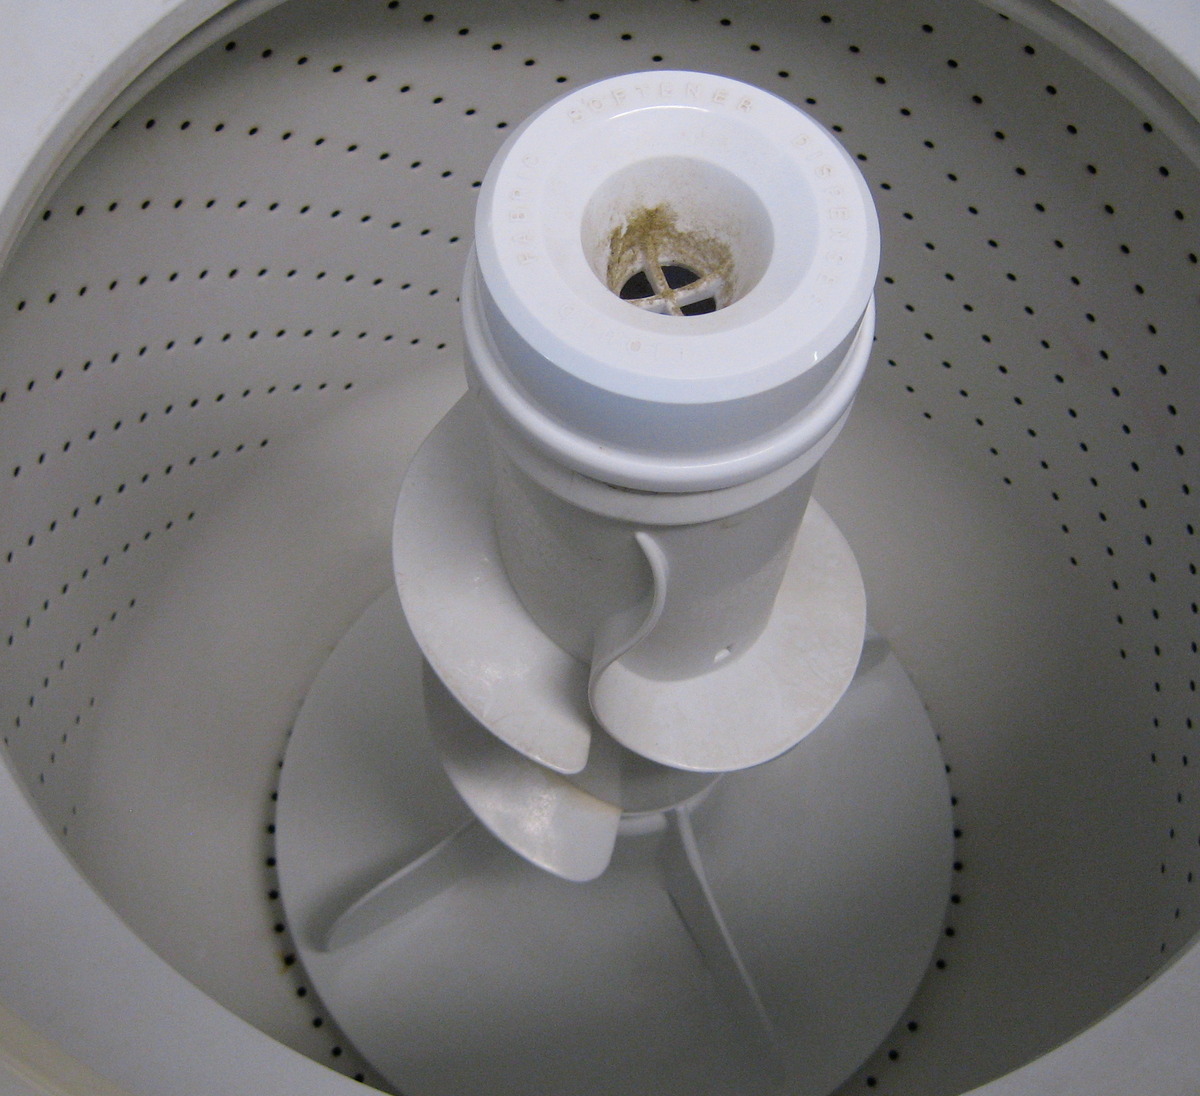
- Locate the fabric softener dispenser on top of the agitator. It is usually a removable cup or compartment.
- Gently pull up on the dispenser to detach it from the agitator. It may be secured with a clip or simply placed on top.
- Inspect the dispenser for any residue or buildup. If necessary, clean it with warm, soapy water and a brush or sponge.
- Set the fabric softener dispenser aside in a safe location.
Removing the fabric softener dispenser allows for easier access to the agitator and prevents it from getting in the way during the removal process.
If your washing machine does not have a fabric softener dispenser, you can proceed to the next step of removing the agitator.
Remember to refer to your appliance’s manual or contact the manufacturer if you are uncertain about how to remove the fabric softener dispenser from your specific washing machine model.
With the fabric softener dispenser removed (if applicable), you are now ready to proceed to the next step of removing the washer agitator.
Read more: How To Remove Agitator From Ge Washer
Step 3: Remove the Agitator Cap
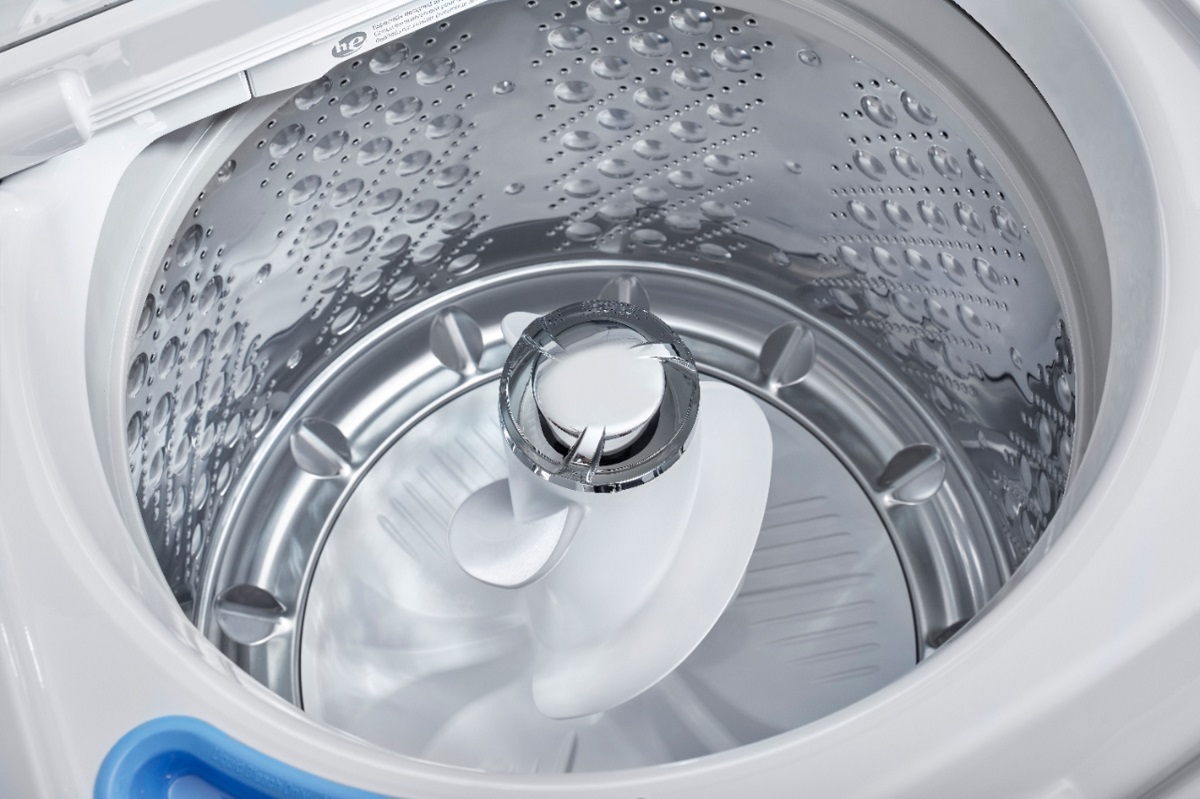
Once you have unplugged the washing machine and, if applicable, removed the fabric softener dispenser, it’s time to remove the agitator cap. The agitator cap is the uppermost part of the agitator and covers the bolt that holds the agitator in place.
Follow these steps to remove the agitator cap:
- Locate the agitator cap on top of the agitator. It is usually a round or oval-shaped piece.
- Gently pry the agitator cap off using a flathead screwdriver or your fingertips. Apply even pressure around the edges of the cap to loosen it.
- If the cap is stubbornly stuck, try wiggling it side to side while applying slight upward pressure. Be careful not to use excessive force to avoid damaging the cap or agitator.
- Once the agitator cap is loose, carefully lift it off the agitator, revealing the bolt underneath.
Set the agitator cap aside in a safe place, as you will need to reinstall it later when reassembling the agitator.
Removing the agitator cap exposes the bolt that is holding the agitator in place. This bolt needs to be removed in the next step to release the agitator.
Remember, different washing machine models may have slight variations in how the agitator cap is removed. Always refer to your appliance’s manual or contact the manufacturer for specific instructions regarding your particular washing machine model.
With the agitator cap successfully removed, you are now ready for the next step in removing the washer agitator.
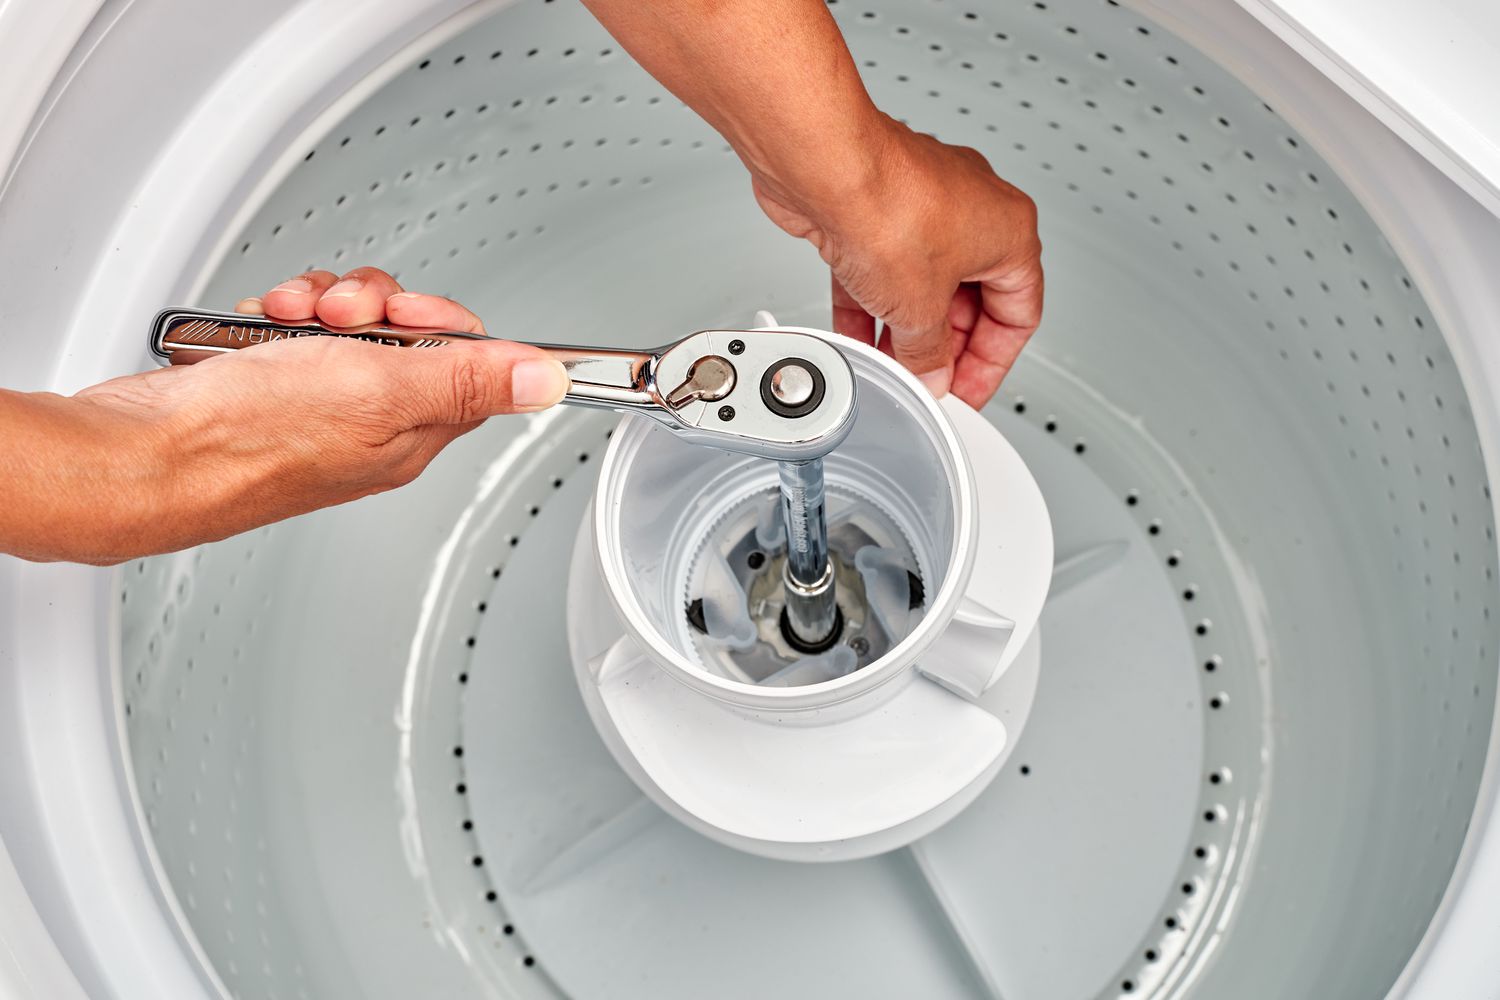
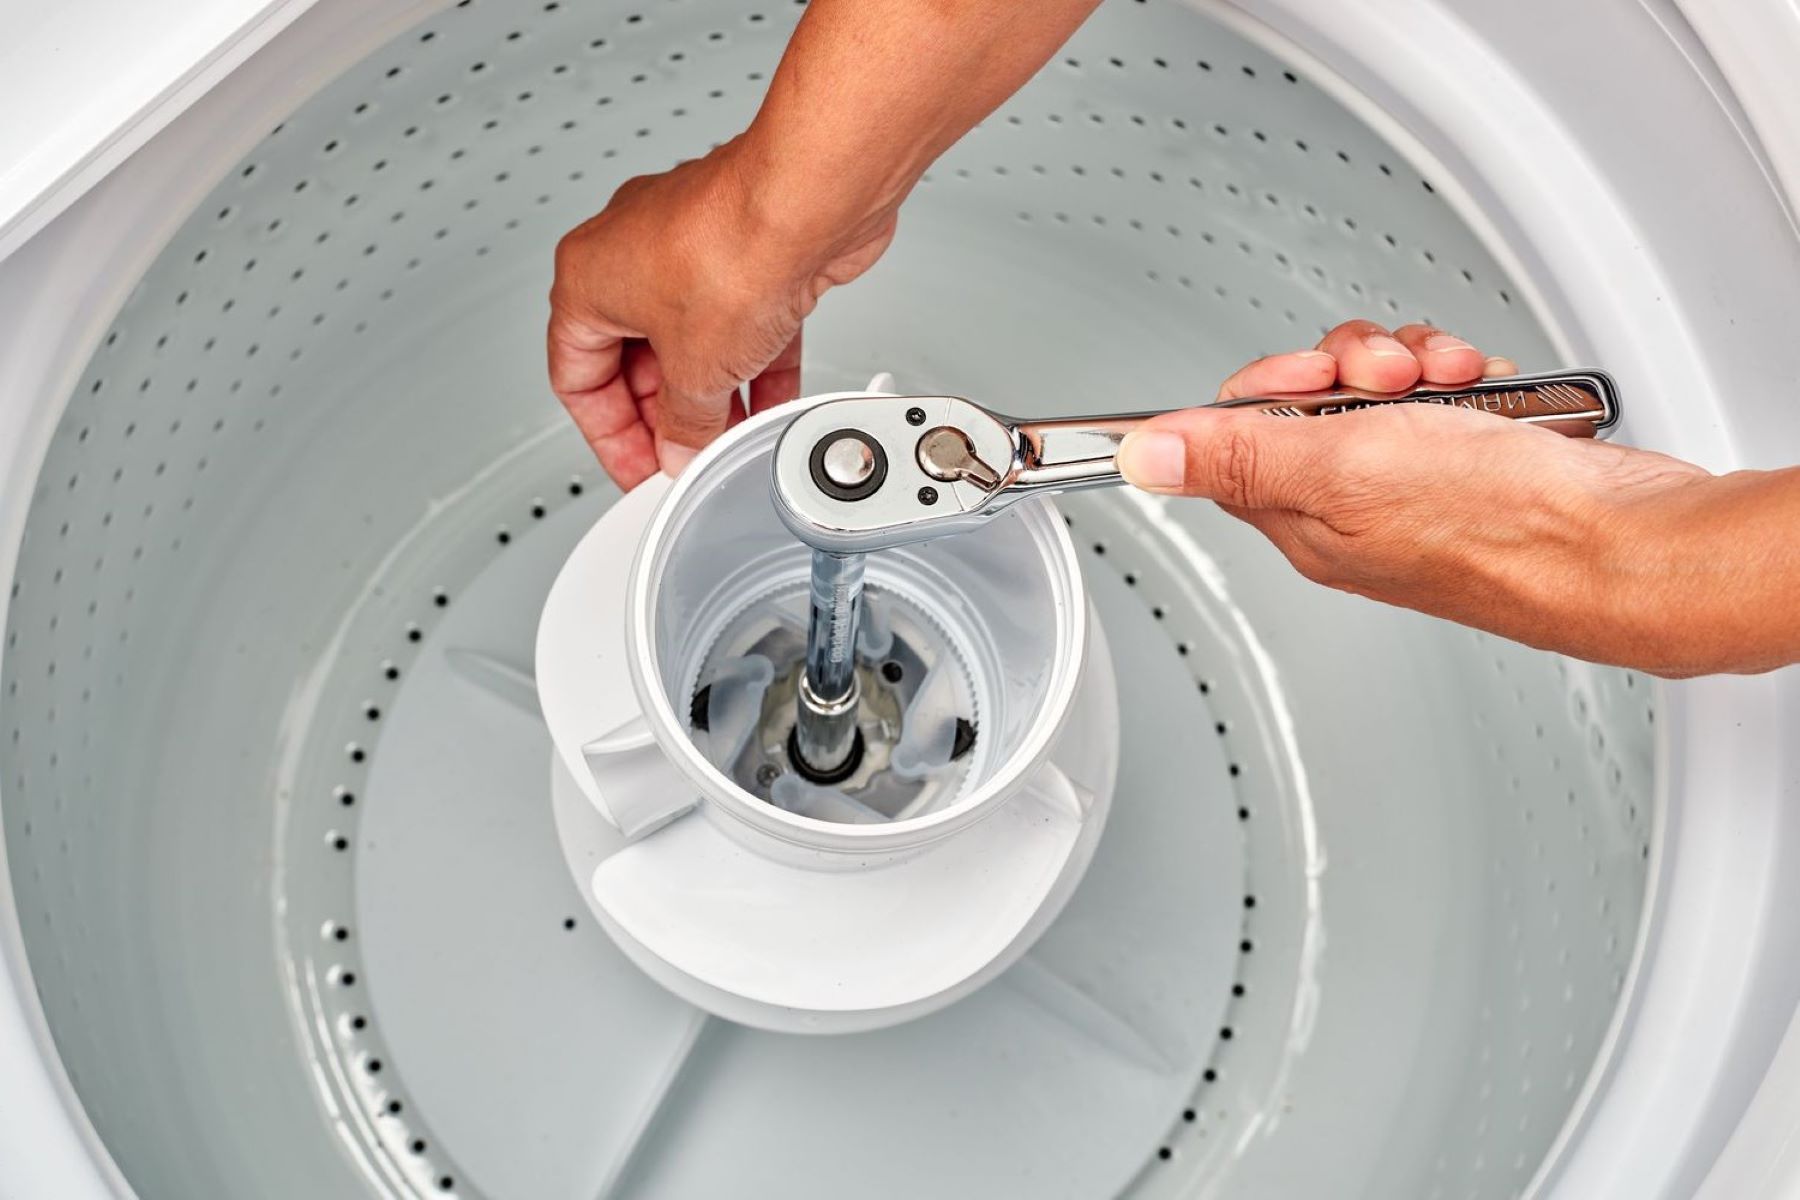
Before attempting to remove the washer agitator, make sure to unplug the washer and consult the manufacturer’s manual for specific instructions. Use a socket wrench to loosen the agitator bolt and then lift the agitator out of the washer.
Step 4: Remove the Agitator Bolt
After removing the agitator cap, you will need to remove the agitator bolt to release the agitator from the washing machine. The bolt secures the agitator to the drive shaft and needs to be loosened before lifting the agitator out.
Follow these steps to remove the agitator bolt:
- Locate the agitator bolt underneath the agitator cap. It is usually a hexagonal or square-shaped bolt.
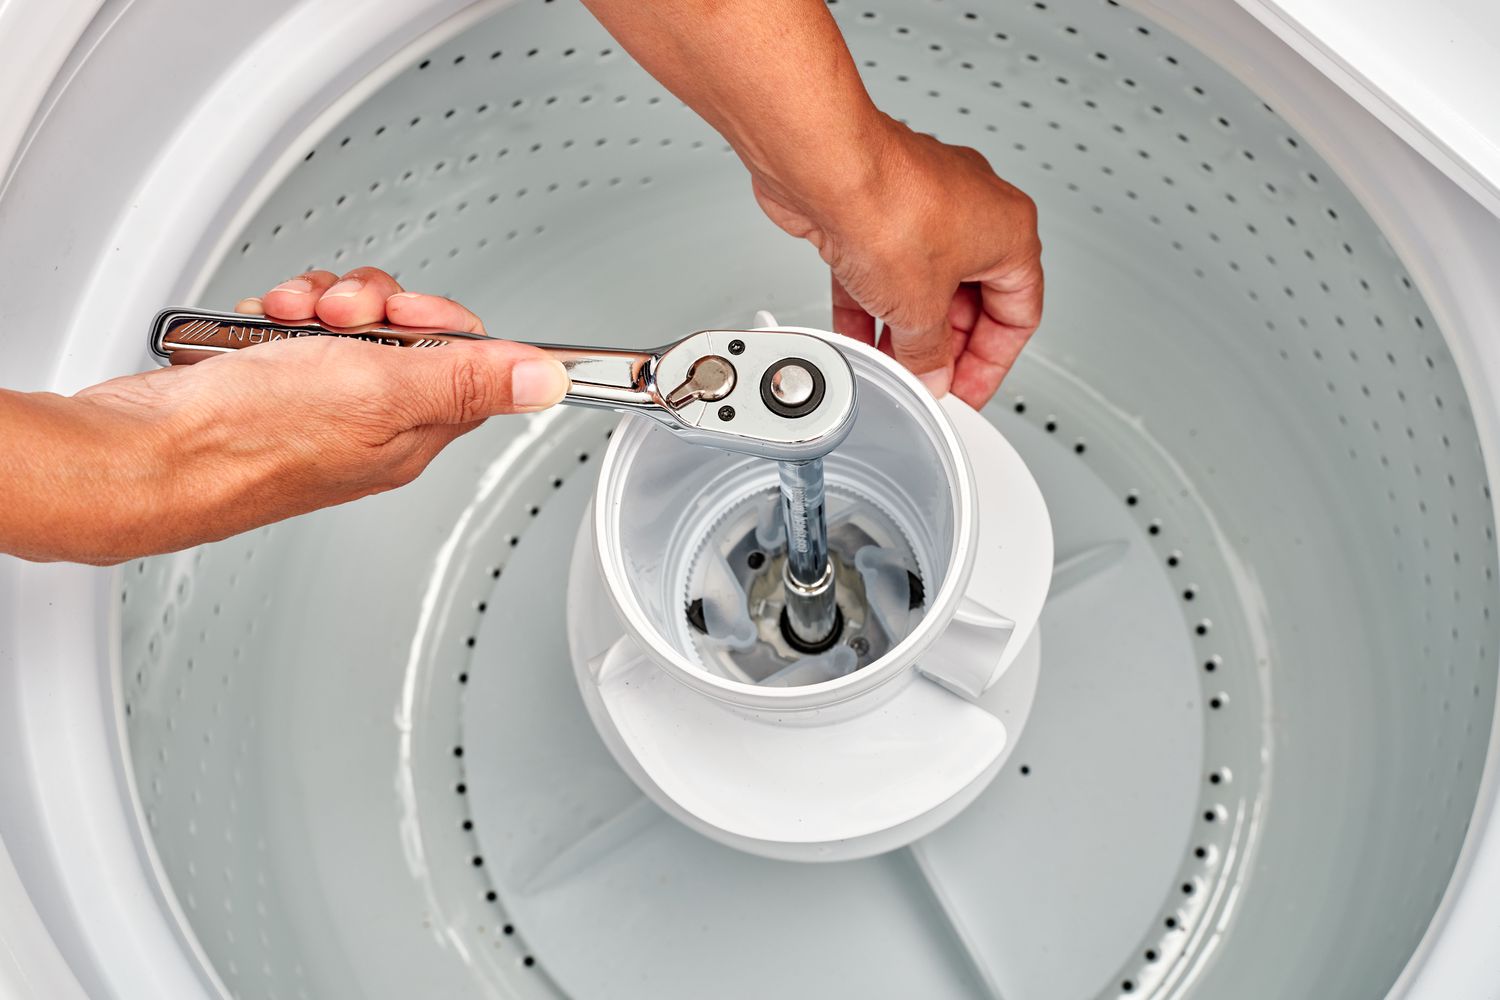
- Using an adjustable wrench or socket wrench set, fit the wrench onto the agitator bolt. Make sure the wrench size matches the bolt size.
- Turn the wrench counterclockwise to loosen the agitator bolt. It may require some force, but be careful not to apply too much pressure to avoid stripping the bolt or damaging the washing machine.
- Continue loosening the bolt until it is completely unscrewed from the drive shaft.
- Once the agitator bolt is fully unscrewed, carefully lift it out and set it aside.
Keep in mind that the agitator bolt may be coated with grease or other debris, so handle it with care to avoid any mess or stains.
Removing the agitator bolt allows the agitator to be lifted out of the washer, as it is no longer secured to the drive shaft. The agitator can be heavy, so be prepared to support it when lifting.
Remember to consult your appliance’s manual or contact the manufacturer if you encounter any difficulties during the removal of the agitator bolt. Different washing machine models may have specific instructions or variations in the bolt’s removal process.
With the agitator bolt successfully removed, you are now ready to proceed to the next step of lifting and removing the agitator from the washing machine.
Step 5: Lift and Remove the Agitator
Now that you have removed the agitator bolt, it’s time to lift and remove the agitator from the washing machine. The agitator should now be free to come off the drive shaft and out of the machine’s tub.
- Grasp the bottom of the agitator firmly with your hands. Be mindful of any sharp edges or protrusions that could cause injury.
- Gently lift the agitator straight up, applying even upward pressure. It may require some wiggling or twisting to loosen it from its position.
- Continue lifting until the agitator is completely separated from the drive shaft.
- Set the agitator aside on a clean and stable surface. Take care not to damage or tip it over, as this can result in cracks or other damage.
Removing the agitator allows you to clean it thoroughly or replace it, depending on your needs. If you’re cleaning the agitator, follow the manufacturer’s instructions for the appropriate cleaning agent and method. Use a brush or toothbrush to scrub away any residue or buildup.
If you have determined that the agitator needs to be replaced, consult your appliance’s manual or contact the manufacturer for guidance on finding the correct replacement part for your specific washing machine model.
Remember to handle the agitator with care, as it can be heavy and may contain sharp parts. If it feels too heavy to lift on your own, ask for assistance from a partner to ensure safe removal.
With the agitator successfully lifted and removed, you are now ready to clean, replace, or perform any necessary maintenance on it.
Note: The removal process may vary slightly depending on the make and model of your washing machine. Always refer to your appliance’s manual or contact the manufacturer for specific instructions related to your machine.
Step 6: Clean or Replace the Agitator
Now that you have removed the agitator from the washing machine, it’s time to clean it thoroughly or assess whether it needs to be replaced. This step will depend on the condition of the agitator and your specific needs.
If you’re looking to clean the agitator:
- Inspect the agitator for any visible dirt, residue, or buildup.
- Use a cleaning brush or toothbrush to scrub the surface of the agitator gently. Pay special attention to any hard-to-reach areas.
- If necessary, soak the agitator in a solution of warm water and a mild cleaning agent, or vinegar for around 30 minutes. This can help loosen and remove stubborn stains or odors.
- After soaking, scrub the agitator again with the brush to remove any loosened dirt or residue.
- Rinse the agitator thoroughly with clean water to remove any cleaning solution or vinegar residue.
- Wipe the agitator dry with a clean cloth or towel.
If you discover any cracks, damage, or excessive wear on the agitator, it may be necessary to replace it rather than attempting to clean it. Consult your appliance’s manual or contact the manufacturer for guidance on finding the correct replacement agitator for your specific washing machine model.
Remember to follow any specific cleaning instructions recommended by the manufacturer to ensure the best results and to avoid damaging the agitator.
Once you have cleaned or replaced the agitator, you can proceed to the next step of reassembling it and reinstalling it into the washing machine.
It’s crucial to note that the cleaning or replacement process may differ depending on the make and model of your washing machine. Always refer to your appliance’s manual or contact the manufacturer for specific instructions related to your machine.
Read more: How To Remove Agitator From Kenmore Washer
Step 7: Reassemble the Agitator
After cleaning or replacing the agitator, it’s time to reassemble it and reinstall it back into the washing machine. Follow these steps to ensure a proper reassembly:
- Position the agitator back onto the drive shaft, aligning it properly.
- Push the agitator down firmly to ensure it is securely seated on the drive shaft.
- Take the agitator bolt that you removed earlier and thread it back into place on the drive shaft.
- Using an adjustable wrench or socket wrench set, tighten the agitator bolt clockwise until it is securely fastened. Be careful not to overtighten, as it can lead to damage.
- If the washing machine has a fabric softener dispenser, reattach it to the top of the agitator. If it does not have one, move on to the next step.
- Take the agitator cap and place it over the agitator, ensuring it is aligned properly.
- Press the agitator cap down firmly until it snaps into place.
With the agitator reassembled, give it a gentle tug to ensure that it is securely attached and does not come loose during operation.
Once the agitator is successfully reassembled and securely in place, you can proceed to the final step of this process.
Remember, the reassembly process may vary slightly depending on the make and model of your washing machine. Always refer to your appliance’s manual or contact the manufacturer for specific instructions related to your machine.
Conclusion
Congratulations! You have successfully learned how to remove and reassemble a washer agitator. By following the step-by-step instructions provided in this guide, you were able to safely remove the agitator, clean or replace it as needed, and successfully reassemble it back into the washing machine.
Proper maintenance and care of your washing machine, including the agitator, can help prolong its lifespan and ensure optimal performance. Regular cleaning of the agitator can prevent buildup and odors, while replacing a worn-out or damaged agitator can restore your machine’s washing efficiency.
Remember to always prioritize your safety throughout the removal process by following the recommended safety precautions, such as unplugging the washer and wearing protective gear.
If you encounter any difficulties during the removal or reassembly process, it is always wise to consult your appliance’s manual or contact the manufacturer for specific instructions related to your washing machine model.
By taking the time to properly maintain and care for your washer agitator, you can enjoy clean and fresh laundry for years to come.
Thank you for reading our guide, and we hope it has been helpful in enhancing your understanding of how to remove, clean, or replace a washer agitator!
Frequently Asked Questions about How To Remove Washer Agitator
Was this page helpful?
At Storables.com, we guarantee accurate and reliable information. Our content, validated by Expert Board Contributors, is crafted following stringent Editorial Policies. We're committed to providing you with well-researched, expert-backed insights for all your informational needs.

0 thoughts on “How To Remove Washer Agitator”