Home>Articles>How To Fix The Back Of A Separated Pantry Cabinet Particle Board
Articles
How To Fix The Back Of A Separated Pantry Cabinet Particle Board
Modified: February 23, 2024
Learn how to fix the back of a separated pantry cabinet made of particle board with these helpful articles.
(Many of the links in this article redirect to a specific reviewed product. Your purchase of these products through affiliate links helps to generate commission for Storables.com, at no extra cost. Learn more)
Introduction
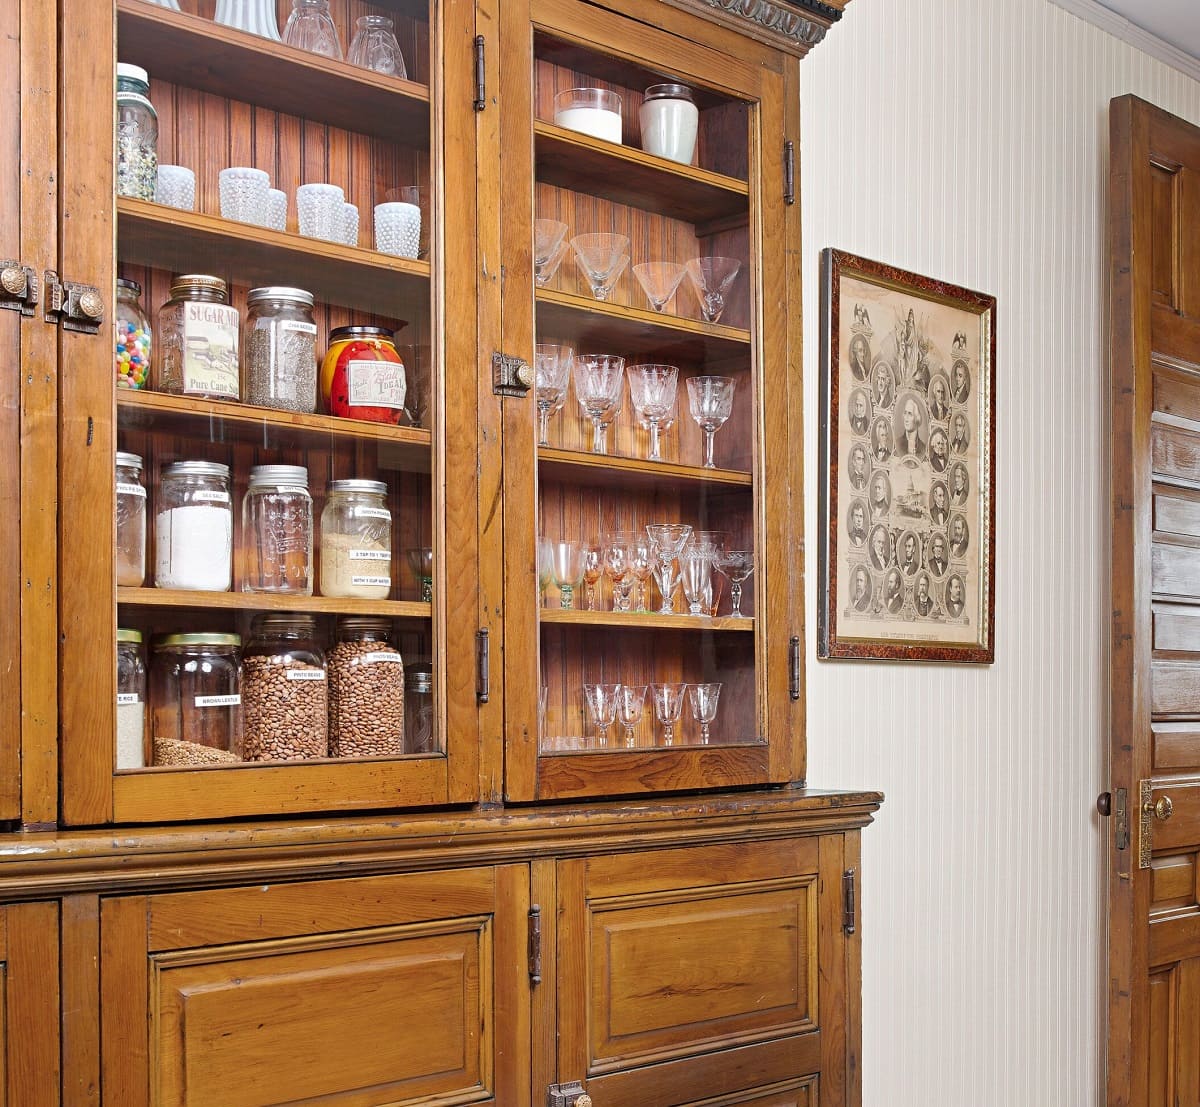
Having a well-organized and functional pantry cabinet is essential for any kitchen. However, over time, the back of a pantry cabinet made of particle board can become separated or damaged, compromising the stability and usefulness of the cabinet. This can be a frustrating issue for homeowners, as it may lead to items falling out or difficulty in accessing stored goods.
Luckily, repairing the back of a separated pantry cabinet made of particle board is a relatively simple task that can be done with the right tools and materials. In this article, we will guide you through the step-by-step process of fixing the back of your pantry cabinet, helping you restore its strength and functionality.
Before we dive into the repair process, it’s important to gather the necessary tools and materials. Here’s what you’ll need:
- Utility knife
- Screwdriver
- Wood glue
- Clamps
- Sandpaper
- Paint or stain (optional)
- Paintbrush or roller (optional)
- Protective gloves
- Protective eyewear
- Old cloth or rag
By having these tools and materials on hand, you’ll be ready to tackle the repair process and bring your pantry cabinet back to its original condition.
Key Takeaways:
- Revitalize your pantry cabinet by repairing the back with simple steps and basic tools. Save money and extend the life of your cabinet while enjoying a functional and organized kitchen space.
- With the right tools and materials, you can easily fix the back of your pantry cabinet made of particle board. Follow the step-by-step process to restore stability and functionality, saving the cost of a replacement.
Tools and Materials Needed
Before you begin repairing the back of your separated pantry cabinet made of particle board, it’s important to gather the necessary tools and materials. Here’s a list of what you’ll need:
- Utility knife: This will be used to remove any loose or damaged particle board.
- Screwdriver: You may need a screwdriver to remove any screws or nails holding the back of the cabinet in place.
- Wood glue: Wood glue is essential for bonding the separated particle board and restoring the cabinet’s stability.
- Clamps: Clamps are necessary to hold the particle board in place while the glue dries.
- Sandpaper: Sandpaper is used to smooth out any rough edges or imperfections after the repair is completed.
- Paint or stain (optional): If desired, you can repaint or refinish the pantry cabinet to match your kitchen decor.
- Paintbrush or roller (optional): If you choose to repaint the cabinet, a paintbrush or roller will be needed for application.
- Protective gloves: It’s always a good idea to wear protective gloves to prevent any injuries or irritation from handling tools and materials.
- Protective eyewear: Safety glasses or goggles will protect your eyes from any debris that may be generated during the repair process.
- Old cloth or rag: This will come in handy for cleaning up any excess glue or wiping away dust or dirt.
By gathering these tools and materials before you begin the repair process, you’ll ensure that you have everything you need to successfully fix the back of your pantry cabinet. It’s important to have them within reach to make the process smoother and more efficient.
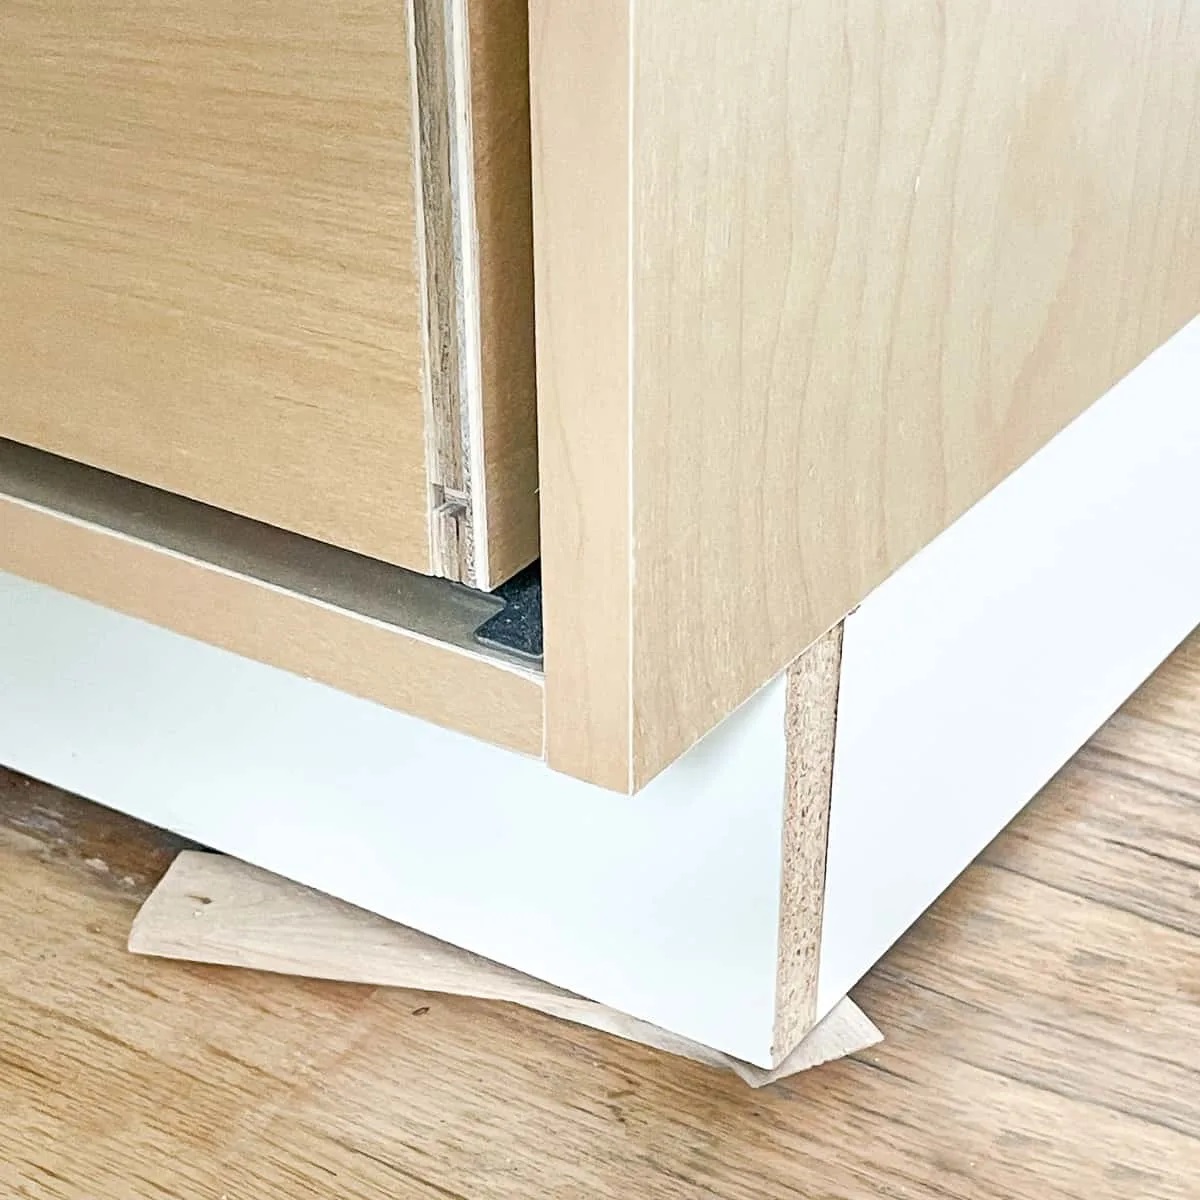
Step 1: Assessing the Damage
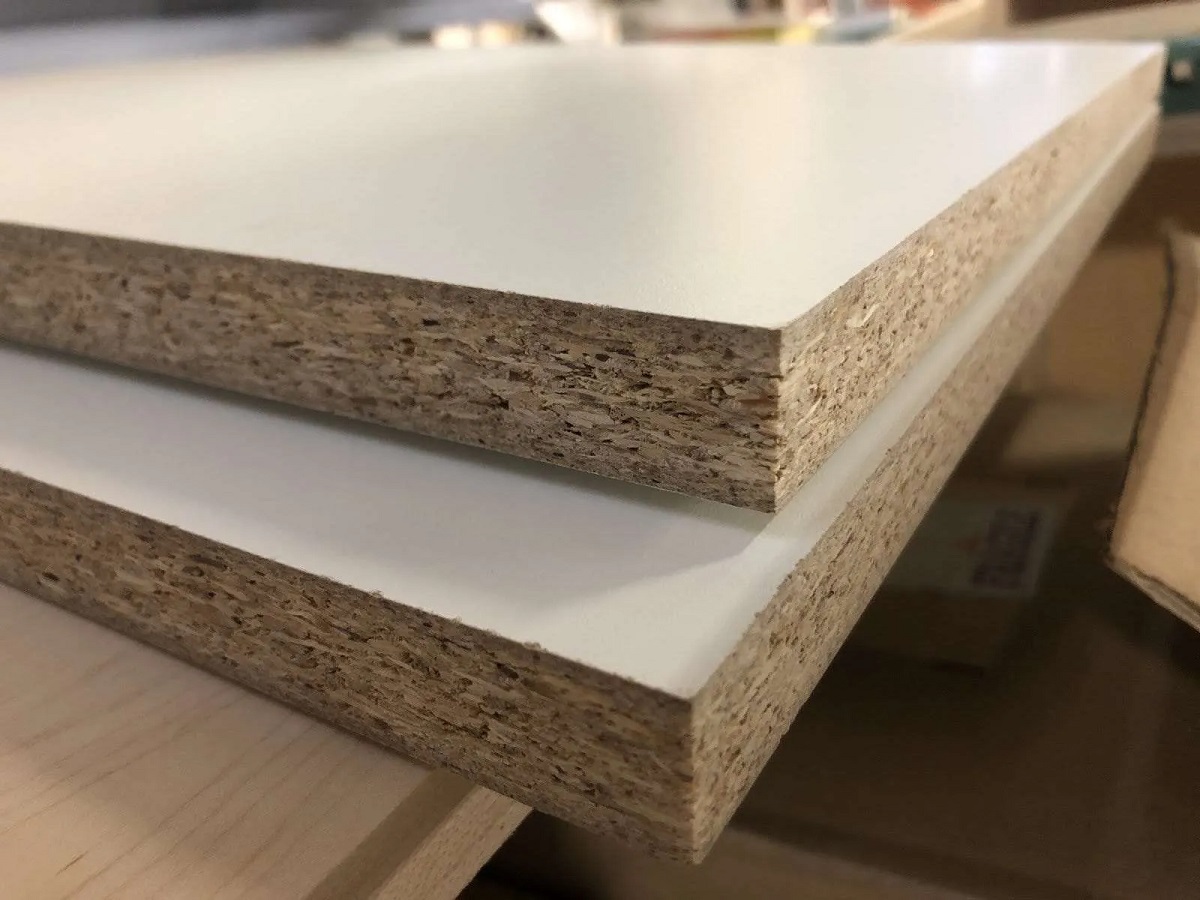
The first step in repairing the back of your separated pantry cabinet is to assess the extent of the damage. Take a close look at the back of the cabinet and identify any areas where the particle board has become separated or damaged.
Look for signs of warping, cracks, or loose pieces of particle board. If the damage is minor and limited to a small area, the repair process will be relatively straightforward. However, if the damage is extensive or the particle board is severely warped, you may need to consider replacing the entire back panel.
If you determine that the damage is repairable, proceed to the next step. If you’re unsure or the damage is beyond repair, it’s best to consult a professional or consider replacing the pantry cabinet altogether.
Remember to wear protective gloves and eyewear during the assessment process to ensure your safety.
Once you’ve assessed the damage and determined that it is repairable, you’re ready to move on to the next step: removing loose or damaged particle board.
Step 2: Removing Loose or Damaged Particle Board
Now that you have assessed the damage to the back of your pantry cabinet, it’s time to remove any loose or damaged particle board. This step is crucial to ensure that the repair is effective and that the new adhesive can bond properly.
Start by using a utility knife to carefully cut away any loose or damaged sections of particle board. Take your time and make precise cuts to avoid causing further damage to the cabinet.
Next, use a screwdriver to remove any screws or nails that may be holding the damaged particle board in place. Be sure to keep track of these fasteners as you will need them later to reattach the repaired back panel.
Once you have removed the loose or damaged particle board, take a moment to clean out any debris or dust from inside the cabinet. Use an old cloth or rag to wipe away any dirt or residue.
By removing the loose or damaged particle board, you are creating a clean and stable surface for the repair process. With this step complete, you can now move on to the next step: cleaning and preparing the surface.
Step 3: Cleaning and Preparing the Surface
After removing the loose or damaged particle board from the back of your pantry cabinet, it’s important to clean and prepare the surface before applying the wood glue.
Start by using a damp cloth or sponge to wipe down the entire surface of the cabinet’s back panel. This will remove any dirt, dust, or residue that may hinder the adhesive’s effectiveness.
Next, allow the surface to dry completely before moving on to the next step. This is important because moisture can interfere with the bonding process of the wood glue.
Once the surface is dry, inspect it for any remaining rough edges or imperfections. Use sandpaper to smooth out these areas, ensuring a clean and even surface for the repair.
When sanding, be sure to wear protective gloves and eyewear to prevent any injuries or irritation from the sanding dust.
After sanding, use a clean cloth or rag to wipe away any dust or debris from the surface. This will ensure that the wood glue adheres properly without any interference.
With the surface clean and prepared, you are now ready to move on to the next step: applying the wood glue.
Read more: What Is A Pantry Cabinet
Step 4: Applying Wood Glue
Now that you have cleaned and prepared the surface of the pantry cabinet, it’s time to apply wood glue to bond the separated particle board back together.
Start by applying a generous amount of wood glue to one of the edges of the separated particle board. Use a small brush or a disposable glue spreader to evenly distribute the glue along the edge.
Once the glue is applied, carefully align the separated edges of the particle board and press them firmly together. Ensure that the edges are flush and that the glue is evenly distributed between the two pieces.
Hold the glued edges in place for a few moments to allow the adhesive to start bonding. This initial bonding is important for the stability of the repair.
Continue to apply wood glue and align the remaining edges of the separated particle board, working your way around the entire back panel of the pantry cabinet.
If there are any gaps or uneven sections between the particle board pieces, use a putty knife or a flat object to spread the excess glue and fill in the gaps. This will provide additional strength and stability to the repaired area.
Remember to work quickly and efficiently when applying the wood glue, as it has a limited open time for bonding. Follow the manufacturer’s instructions for the specific wood glue you are using.
With the wood glue applied and the separated edges bonded together, you are now ready to move on to the next step: reinforcing the repair with clamps.
Use wood glue to reattach the separated particle board in the back of the pantry cabinet. Apply pressure and let it dry completely before using the cabinet again.
Step 5: Reinforce with Clamps
After applying the wood glue to bond the separated particle board, it’s important to reinforce the repair with clamps to ensure a strong and secure bond.
Start by positioning the clamps along the edges of the repaired section. Place them at regular intervals, ensuring that the clamping pressure is evenly distributed.
Gently tighten the clamps to apply pressure to the glued edges. Be careful not to tighten them too much, as this can cause the wood glue to squeeze out excessively and create a mess.
Double-check the alignment of the particle board edges to ensure they are still flush and properly bonded. Adjust the clamps if needed to achieve optimal alignment.
Leave the clamps in place for the recommended drying time indicated on the wood glue manufacturer’s instructions. This will typically be several hours or overnight.
During this drying period, it’s important to keep the clamped area undisturbed. Avoid applying any pressure or stress on the repaired section to allow the wood glue to set and create a strong bond.
Once the recommended drying time has passed, carefully remove the clamps from the repaired area. Take care not to disrupt the bond between the particle board pieces.
With the clamps removed, the wood glue will continue to cure and harden over the next several hours. Allow sufficient time for the glue to fully dry and reach its maximum strength before moving on to the next step.
With the repair properly reinforced with clamps, you’re now ready to proceed to the next step: allowing the wood glue to dry.
Step 6: Allow Glue to Dry
Now that you have reinforced the repair with clamps, it’s important to allow the wood glue to dry fully. This step is crucial for the strength and stability of the repaired back panel of your pantry cabinet.
The drying time for wood glue can vary depending on the specific product you are using. It is recommended to consult the manufacturer’s instructions for the recommended drying time.
During the drying process, it is important to keep the repaired area undisturbed. Avoid putting any weight or stress on the repaired section to ensure the bonding process is not disrupted.
It is advisable to leave the pantry cabinet in a well-ventilated area during the drying period. This will help facilitate the evaporation of moisture from the wood glue, allowing it to dry more efficiently.
While waiting for the wood glue to dry, you can take this opportunity to clean up any excess glue that may have squeezed out during the application and clamping process. Use a damp cloth or sponge to carefully wipe away any glue residue.
Once the recommended drying time has elapsed, you can perform a final check to ensure that the wood glue is completely dry. Gently tap on the repaired area with your fingers to see if it feels solid and secure.
If the wood glue is still tacky or feels slightly flexible, it is an indication that it has not fully dried. In this case, it is recommended to give it more time to dry before proceeding to the next step.
With the wood glue completely dry and the repaired section solidified, you can now move on to the next step: sanding and smoothing.
Step 7: Sanding and Smoothing
After allowing the wood glue to dry thoroughly, it’s time to sand and smooth the repaired area of your pantry cabinet. This step will not only improve the appearance of the cabinet but also create a seamless finish.
Start by using sandpaper with a medium grit, such as 120 or 150, to gently sand the repaired section. Sand in a circular motion, applying even pressure to smooth out any rough edges or uneven surfaces.
Be careful not to sand too aggressively, as this can remove too much material and jeopardize the integrity of the repair. Instead, focus on gradually blending the repaired area with the surrounding particle board.
As you sand, periodically check the surface with your fingertips to ensure it feels even and smooth. It may be helpful to use a light source at a low angle to reveal any imperfections that require further sanding.
If there are any noticeable gaps or unevenness in the repaired section, you can use fine-grit sandpaper, such as 220 or higher, to refine the surface even more. Sand in a controlled and careful manner to achieve the desired result.
Once you are satisfied with the smoothness of the repaired section, use a clean cloth or rag to wipe away any sanding dust or debris from the surface. This will ensure a clean and dust-free surface for the final steps of the repair process.
At this stage, you will have successfully sanded and smoothed the repaired area of the pantry cabinet. The next step will depend on your preference, as you can either choose to repaint or refinish the cabinet or proceed with reassembling it.
If you decide to repaint or refinish the pantry cabinet, continue to the next step; otherwise, skip to the final step to reassemble the cabinet.
Read more: How To Fix A Brick Wall That Is Separating
Step 8: Repainting or Refinishing
If you want to give your pantry cabinet a fresh new look, you can choose to repaint or refinish it after repairing the back panel. This step allows you to customize the cabinet’s appearance and match it with your kitchen decor.
If you decide to repaint the pantry cabinet, start by selecting a high-quality paint that is suitable for the particle board surface. Consider using a primer to ensure better adhesion and a smoother finish.
Before you begin painting, make sure to clean the surface of any dust or debris. You can use a damp cloth or sponge to wipe away any residue from the sanding process.
Next, use a paintbrush or roller to apply the paint evenly to the entire back panel of the pantry cabinet. Follow the manufacturer’s instructions for the recommended number of coats and drying time between each coat.
If you prefer to refinish the pantry cabinet instead, you can consider applying a wood stain or varnish. This will enhance the natural beauty of the particle board while providing protection against moisture and wear.
Prepare the surface for refinishing by cleaning it thoroughly and ensuring it is dry. Apply the wood stain or varnish according to the product’s instructions, using a brush or rag to achieve an even coverage.
Once you have finished painting or refinishing the back panel, allow the paint or finish to dry completely. This may take several hours or even overnight, depending on the product you used.
If desired, you can apply additional coats of paint or finish for a more professional and durable result. Just make sure to follow the manufacturer’s instructions and allow sufficient drying time between coats.
With the painting or refinishing complete, you are now ready to move on to the final step: reassembling the pantry cabinet.
Step 9: Reassembling the Pantry Cabinet
After completing the necessary repairs, cleaning, and any desired painting or refinishing, it’s time to reassemble your pantry cabinet and restore its functionality. This final step ensures that all components are securely attached and the cabinet is ready to be used again.
Start by gathering the screws or nails that were originally removed from the back panel during the repair process. Carefully align the repaired back panel with the cabinet frame and use a screwdriver or hammer to reattach it securely.
Take your time during this step to ensure that the screws or nails are properly inserted and tightened. Be cautious not to overtighten, as this may cause the particle board to crack or split.
Once the back panel is securely reattached, check the stability of the entire cabinet. Test its strength by gently pushing on different areas and making sure there is no excessive movement or wobbling.
If you notice any loose or unstable sections, double-check the attachment of the back panel and tighten any screws or nails that may be causing the issue.
Lastly, inspect the entire pantry cabinet for any remaining debris or dust. Use a soft cloth or brush to clean any surfaces that may have accumulated dirt during the repair process.
With the reassembly complete and the cabinet thoroughly cleaned, your pantry cabinet is now ready to store your kitchen essentials again. Enjoy the satisfaction of having a functional and restored pantry cabinet.
Remember, regular maintenance and care will help prolong the lifespan of your repaired pantry cabinet. Keep an eye out for any signs of wear or damage and address them promptly to prevent further issues.
By following these steps and utilizing the proper tools and materials, you have successfully fixed the back of your separated pantry cabinet made of particle board. With a little effort and attention to detail, you have saved yourself the cost of a new cabinet and extended the life of your existing one.
Congratulations on completing the repair process and enjoy your revitalized pantry cabinet!
Conclusion
Repairing the back of a separated pantry cabinet made of particle board is a task that can be accomplished with the right tools, materials, and a little know-how. By following the step-by-step process outlined in this guide, you can restore the functionality and stability of your pantry cabinet, saving you the cost of a replacement.
The assessment of the damage and the careful removal of loose or damaged particle board are crucial first steps. Cleaning and preparing the surface ensure a proper bonding surface for the wood glue. Applying the wood glue and reinforcing the repair with clamps provide a strong and secure bond.
Allowing the wood glue to dry fully before sanding and smoothing the repaired area is essential for achieving a seamless finish. If desired, repainting or refinishing the pantry cabinet can give it a fresh new look that matches your kitchen decor.
Reassembling the pantry cabinet completes the repair process, ensuring that all components are securely attached. This step involves carefully attaching the back panel and checking the stability of the entire cabinet.
With your pantry cabinet repaired and reassembled, it is ready to be used again for storing your kitchen essentials. Regular maintenance and care will help extend the lifespan of your pantry cabinet, so keep an eye out for any signs of wear or damage and address them promptly.
By following these steps and putting in the effort, you have successfully fixed the back of your separated pantry cabinet made of particle board. Not only have you saved money, but you have also breathed new life into your existing cabinet, creating a functional and organized space within your kitchen.
Remember, if you encounter extensive damage or feel uncomfortable with the repair process, it is always a good idea to consult a professional for assistance. They can provide expert advice and ensure the repair is done correctly.
Congratulations on completing the repair process and enjoy the renewed functionality of your pantry cabinet!
Frequently Asked Questions about How To Fix The Back Of A Separated Pantry Cabinet Particle Board
Was this page helpful?
At Storables.com, we guarantee accurate and reliable information. Our content, validated by Expert Board Contributors, is crafted following stringent Editorial Policies. We're committed to providing you with well-researched, expert-backed insights for all your informational needs.

0 thoughts on “How To Fix The Back Of A Separated Pantry Cabinet Particle Board”