Articles
How To Fix Cracks In Basement Floor
Modified: October 28, 2024
Learn how to fix cracks in your basement floor with our informative articles. Discover effective solutions to prevent further damage and maintain a sturdy foundation.
(Many of the links in this article redirect to a specific reviewed product. Your purchase of these products through affiliate links helps to generate commission for Storables.com, at no extra cost. Learn more)
Introduction
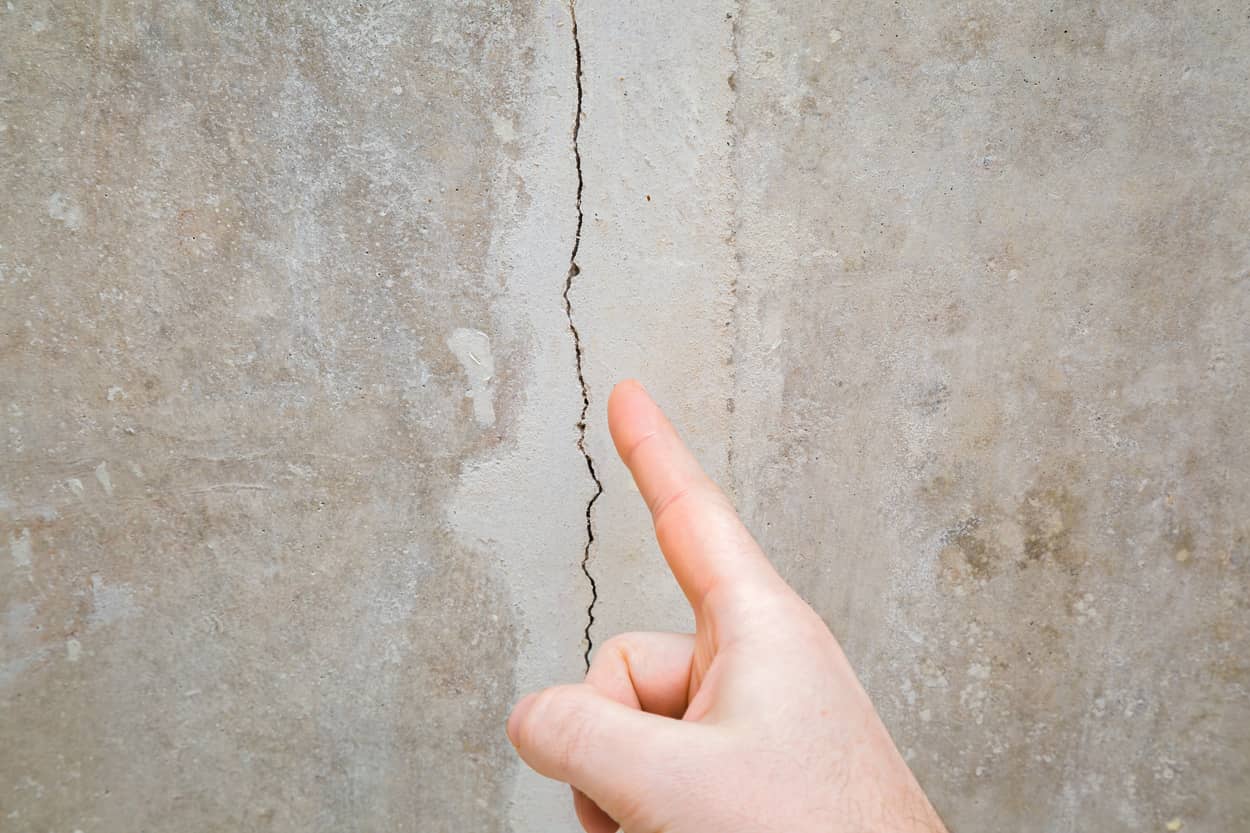
Cracks in the basement floor can be a common issue that many homeowners encounter. These cracks can be caused by a variety of factors, such as settling of the foundation, fluctuations in temperature, or excessive moisture. Not only can these cracks be unsightly, but they can also lead to further structural damage if left untreated.
If you’ve noticed cracks in your basement floor, don’t panic. Fortunately, there are steps you can take to fix them and restore the integrity of your basement floor. In this article, we’ll guide you through the process of fixing cracks in your basement floor, providing you with helpful tips and techniques.
Before we dive into the steps, it’s important to understand the common causes of cracks in basement floors. This knowledge will help you address the root cause and prevent future cracks from occurring.
Key Takeaways:
- Understanding the common causes of cracks in basement floors is crucial for effective repair and prevention. Identifying the root cause helps in choosing the right repair method and materials.
- Proper preparation, thorough cleaning, and careful application of sealant or patching compound are essential for successful crack repair. Smoothing, leveling, and allowing sufficient drying and curing time ensure a seamless and durable finish.
Common Causes of Cracks in Basement Floors
Understanding the common causes of cracks in basement floors is crucial in effectively addressing the problem. Here are some of the main factors that contribute to the formation of cracks:
- Settling of the foundation: Home foundations naturally settle over time due to the weight of the structure and the soil beneath. This settling can create stress on the basement floor, leading to cracks.
- Temperature fluctuations: Extreme temperatures can cause the materials in the basement floor to expand and contract. This expansion and contraction over time can result in cracks forming.
- Excessive moisture: Basements are often prone to moisture issues, such as water seepage or high humidity levels. Moisture can weaken the concrete or cause the soil below to shift, leading to cracks in the floor.
- Poor construction techniques: If the basement floor was not properly constructed or the concrete was mixed incorrectly, it may be more susceptible to cracking.
- Heavy loads: Placing heavy objects or equipment directly on the basement floor can exceed its weight-bearing capacity, causing cracks to form.
Identifying the specific cause of the cracks in your basement floor can help you determine the most appropriate repair method. In some cases, it may be necessary to address the underlying issue to prevent future cracks from occurring.
Now that you understand the common causes of cracks in basement floors, let’s move on to the next section, where we’ll discuss the tools and materials you’ll need for the repair process.
Tools and Materials Needed
Before you start repairing the cracks in your basement floor, make sure you have the necessary tools and materials on hand. Here’s a list of what you’ll need:
- Safety gear: Safety should always be a priority. Be sure to have gloves, safety glasses, and a dust mask to protect yourself during the repair process.
- Crack filler or sealant: Depending on the size and severity of the cracks, you’ll need a suitable crack filler or sealant. Epoxy or polyurethane sealants are commonly used for basement floor cracks.
- Paint scraper or wire brush: To effectively clean and prepare the crack, you’ll need a paint scraper or wire brush to remove any loose debris, paint, or old sealant from the surface.
- Chisel or masonry hammer: If the cracks in your basement floor are larger or deeper, you may need a chisel or masonry hammer to widen the cracks slightly for better adhesion of the sealant.
- Concrete patching compound: In some cases, you may need a concrete patching compound to fill and repair larger cracks. This compound helps restore the structural integrity of the floor.
- Trowel or putty knife: A trowel or putty knife will be essential for applying the crack filler, patching compound, or sealant. It allows for smooth and even application.
- Sanding block or sandpaper: After the crack filler or patching compound has dried, you may need to sand down any rough edges or uneven surfaces to achieve a seamless finish.
- Clean cloth or sponge: To clean the surface before and after applying the sealant or patching compound, have a clean cloth or sponge handy.
- Plastic sheet or tarp: Depending on the drying time of the sealant or patching compound, you may need a plastic sheet or tarp to cover the area and protect it from foot traffic.
Having these tools and materials readily available will ensure a smoother and more efficient repair process. In the next section, we’ll walk you through the step-by-step guide to fixing cracks in your basement floor.
Step-by-Step Guide to Fixing Cracks in Basement Floor
Now that you have your tools and materials ready, it’s time to start repairing the cracks in your basement floor. Follow this step-by-step guide for a successful repair:
- Prepare the crack: Before you begin, make sure the crack is dry and free from any loose debris. Use a paint scraper or wire brush to gently remove any loose particles or old sealant from the crack.
- Clean and remove debris: Thoroughly clean the crack and its surroundings using a damp cloth or sponge. This will ensure proper adhesion and bonding of the sealant or patching compound.
- Apply sealant or patching compound: Depending on the size and severity of the crack, apply a suitable crack filler or sealant. Use a trowel or putty knife to spread the sealant evenly over the crack, making sure to fill it completely.
- Smooth and level the surface: After applying the sealant, use the trowel or a putty knife to level the surface and ensure a smooth finish. Remove any excess sealant to create a seamless blend with the surrounding floor.
- Allow time for drying and curing: Follow the manufacturer’s instructions for the recommended drying and curing time of the sealant or patching compound. It’s important to allow sufficient time for it to dry completely before moving on to the next step.
- Evaluate and monitor the repaired crack: Once the repair is complete and the sealant has dried, evaluate the quality of the repair. Look for any signs of reoccurrence or continued cracking. Monitor the area over time to ensure the effectiveness of the repair.
Following these steps will help you effectively fix cracks in your basement floor and restore its integrity. However, it’s important to note that significant or recurring cracks may require professional assistance to address the underlying issues adequately.
In the next section, we’ll provide additional tips and considerations to further assist you in the crack repair process.
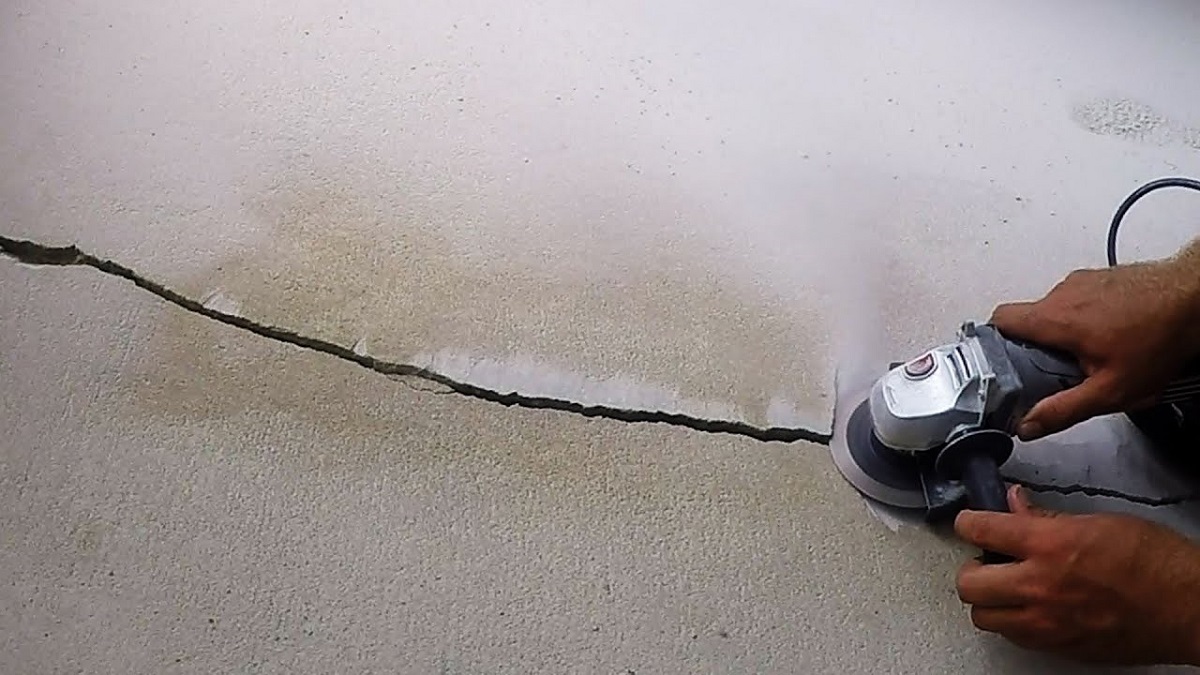
Prepare the Crack
The first step in fixing cracks in your basement floor is to prepare the crack itself. Proper preparation is essential to ensure the best possible adhesion and longevity of the repair. Here’s how you can prepare the crack:
- Assess the crack: Take a close look at the crack to determine its size and depth. This will help you choose the appropriate repair method and materials.
- Clean the crack: Use a paint scraper or wire brush to remove any loose debris, paint, or old sealant from the crack. Make sure the crack is clean and free of any obstructions that could interfere with the repair process.
- Widen the crack if necessary: In some cases, you may need to widen the crack slightly to allow for better adhesion of the repair materials. Use a chisel or masonry hammer to carefully widen the crack, ensuring that the edges are smooth and even.
- Remove dust and debris: After cleaning and widening the crack, use a brush or vacuum to remove any dust or debris from the crack and its surrounding area. A clean surface will promote better bonding of the repair materials.
By taking the time to properly prepare the crack, you’ll create an optimal environment for the repair materials to adhere to the basement floor. This will improve the overall effectiveness and durability of the repair.
Now that the crack is prepared, you’re ready to move on to the next step: cleaning and removing debris. This step is crucial to ensure a clean and stable foundation for the repair materials to adhere to. Stay tuned!
Read more: How To Fix A Crack In Concrete Floor
Clean and Remove Debris
Once you have prepared the crack in your basement floor, the next step is to thoroughly clean the crack and remove any debris. This is an important step to ensure proper adhesion and a successful repair. Follow these steps to clean and remove debris from the crack:
- Use a brush or vacuum: Start by using a brush or vacuum to remove any loose debris, dirt, or dust from the crack. This will help create a clean surface and allow the repair materials to bond effectively.
- Dampen a cloth or sponge: Dampen a clean cloth or sponge with water. This will help remove any remaining particles and provide a moist surface for the repair materials to adhere to.
- Clean the crack: Gently wipe the cloth or sponge along the crack, ensuring that you cover the entire length of the crack. This will help remove any remaining dirt or dust that may have been missed by the brush or vacuum.
- Wipe away excess moisture: After cleaning the crack, use a dry cloth or sponge to wipe away any excess moisture. It’s important to have a slightly damp, but not soaking wet, surface for the repair materials.
By thoroughly cleaning the crack and removing debris, you create an ideal foundation for the repair materials to bond with the basement floor. This will enhance the effectiveness and longevity of the repair.
Now that the crack is clean and free of debris, it’s time to move on to the next step: applying sealant or patching compound. This step will help fill and repair the crack, restoring the integrity of your basement floor. Keep reading to learn more!
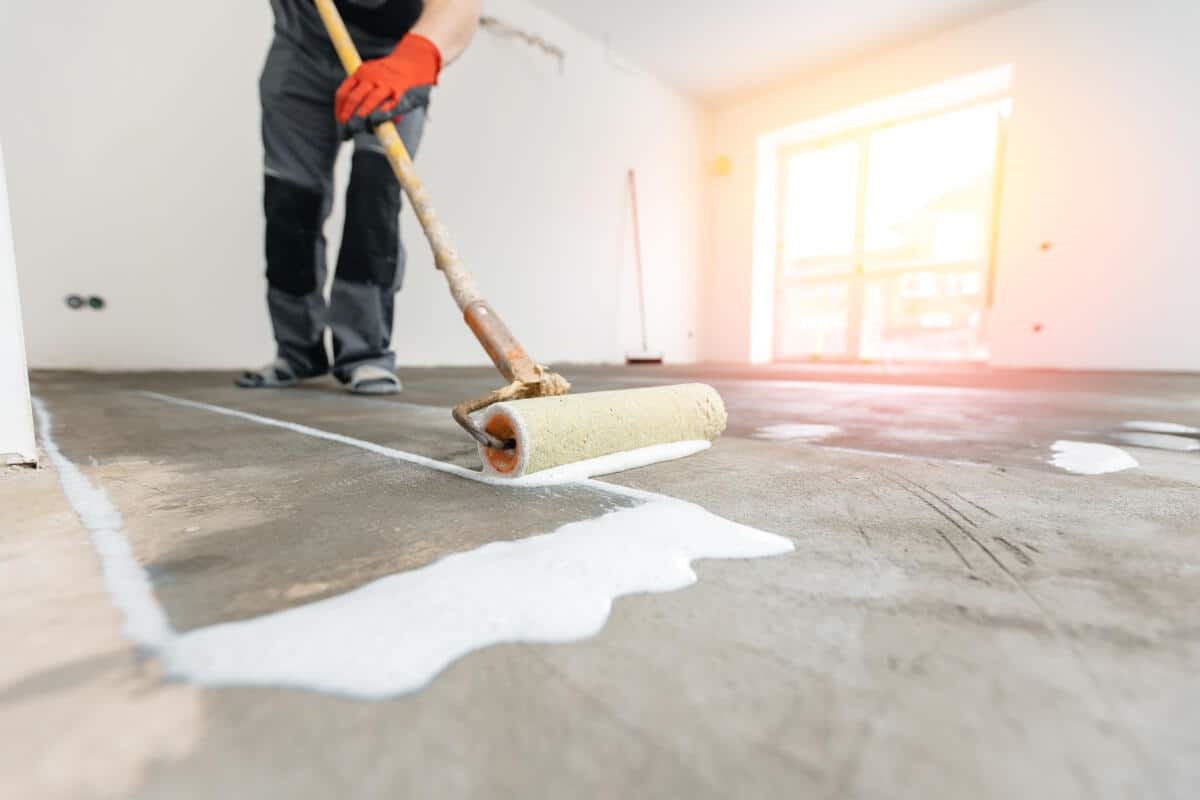
Use a concrete patching compound to fill in the cracks in your basement floor. Clean the area thoroughly before applying the compound and follow the manufacturer’s instructions for the best results.
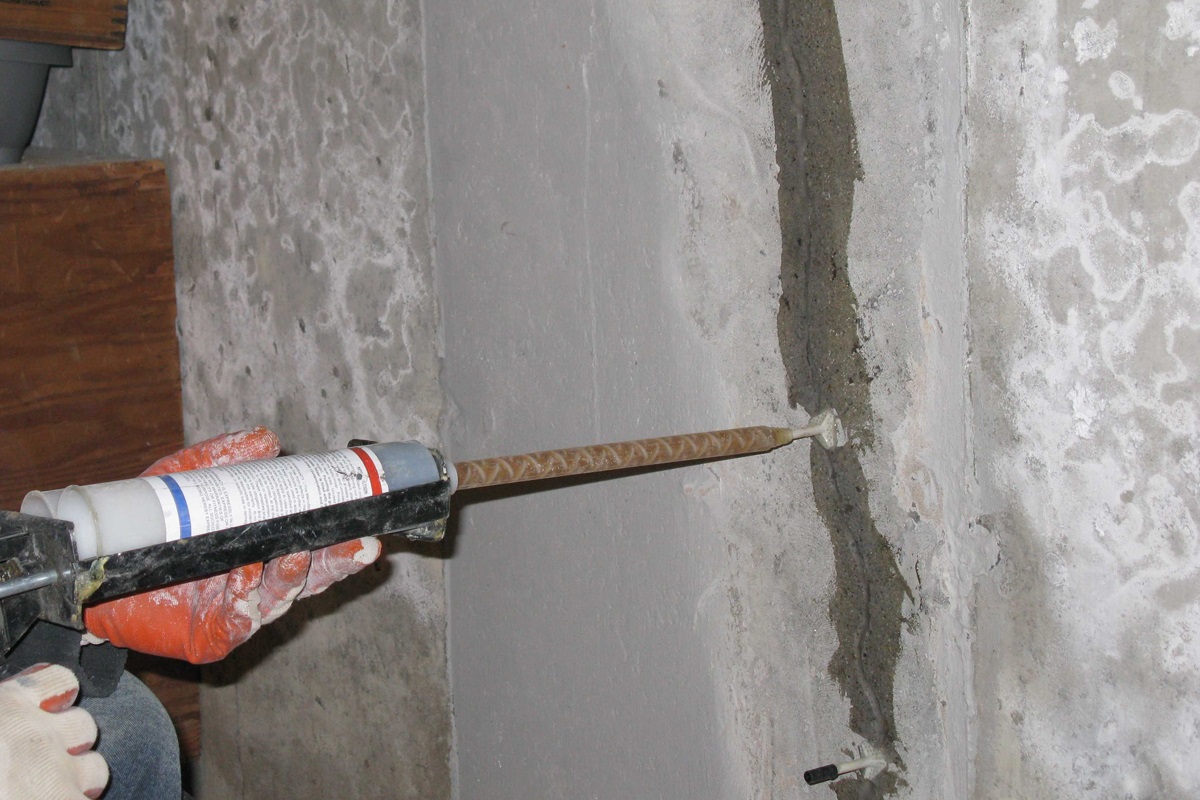
Apply Sealant or Patching Compound
After preparing the crack and cleaning it thoroughly, the next step in fixing cracks in your basement floor is to apply a suitable sealant or patching compound. This step will help fill and repair the crack, ensuring a smooth and level surface. Follow these guidelines to apply the sealant or patching compound:
- Select the appropriate product: Choose a sealant or patching compound that is specifically designed for repairing cracks in concrete or basement floors. Look for products that offer excellent adhesion and durability.
- Prepare the sealant or patching compound: Follow the instructions provided by the manufacturer to prepare the sealant or patching compound. This may involve mixing two components or simply opening a pre-mixed container.
- Apply the sealant or patching compound: Use a trowel or putty knife to apply the sealant or patching compound to the crack. Start at one end of the crack and work your way towards the other end, ensuring that the crack is completely filled and covered.
- Smooth and level the surface: After applying the sealant or patching compound, use the trowel or putty knife to smooth and level the surface. Make sure the repair material blends seamlessly with the surrounding floor, achieving a uniform appearance.
- Remove excess sealant or compound: Carefully remove any excess sealant or patching compound from the surface using the edge of the trowel or putty knife. This will help create a neat and professional-looking repair.
By applying the appropriate sealant or patching compound and ensuring a smooth and level surface, you are taking the necessary steps to restore the integrity of your basement floor. This repair process will help prevent further damage and improve the overall aesthetics of your basement.
Now that the crack is filled and repaired, it’s time to move on to the next step: smoothing and leveling the surface. Stay tuned to learn more about achieving a seamless finish!
Smooth and Level the Surface
Once the sealant or patching compound has been applied to the crack, the next step in fixing cracks in your basement floor is to smooth and level the surface. This step is crucial to achieve a seamless finish and ensure that the repaired area blends in with the rest of the floor. Follow these steps to smooth and level the surface:
- Allow the sealant or patching compound to partially set: Before smoothing and leveling the surface, allow the sealant or patching compound to partially set according to the manufacturer’s instructions. This will ensure that the material is firm enough to work with, but still malleable.
- Use a trowel or putty knife: Take a trowel or putty knife and gently glide it over the repaired area. Apply slight pressure to flatten and level the surface, ensuring that it blends seamlessly with the surrounding floor.
- Smooth out any ridges or uneven areas: If there are any ridges, bumps, or uneven areas, use the trowel or putty knife to smooth them out. Work with small strokes, applying even pressure as you go.
- Blend the repaired area with the surrounding floor: Continuously observe and compare the repaired area with the rest of the floor. Make adjustments as needed to ensure that the repaired section matches the texture and level of the surrounding surface.
- Remove excess material: As you smooth and level the surface, periodically remove any excess sealant or patching compound that may build up on the trowel or putty knife. This will help you achieve a clean and precise repair.
By smoothing and leveling the surface, you will create a seamless and professional-looking repair in your basement floor. Taking the time to ensure a smooth finish will not only enhance the appearance of your floor but also improve the overall integrity of the repaired area.
Now that the surface has been smoothed and leveled, it’s time to move on to the next step: allowing time for drying and curing. This step is crucial to ensure that the repair fully sets and achieves its maximum strength. Stay tuned for more information!
Allow Time for Drying and Curing
After smoothing and leveling the surface of the repaired crack in your basement floor, the next step is to allow sufficient time for drying and curing. This step is crucial to ensure that the sealant or patching compound fully sets and achieves its maximum strength. Follow these guidelines for proper drying and curing:
- Refer to the manufacturer’s instructions: Different sealants and patching compounds have varying drying and curing times. It is important to carefully read and follow the instructions provided by the manufacturer for the specific product you are using.
- Avoid foot traffic and heavy loads: During the drying and curing process, it is crucial to avoid any foot traffic or placing heavy objects on the repaired area. Doing so could compromise the integrity of the repair and may result in cracks or damage.
- Provide proper ventilation: Ensure that the area is well-ventilated to allow the repair material to dry properly. Open windows or use fans to facilitate air circulation and expedite the drying process.
- Protect the repaired area: To prevent accidental damage or contamination, consider covering the repaired area with plastic sheeting or a tarp. This will offer an additional layer of protection during the drying and curing period.
- Monitor the repair: Regularly inspect the repaired area to ensure that it is drying and curing properly. Look for any signs of moisture or cracking, and make any necessary adjustments or repairs if required.
Allowing enough time for drying and curing is essential for the long-term success of the repair. Rushing this step could result in a weaker and less durable repair. Patience is key to achieving the best results.
Now that you have allowed enough time for drying and curing, it’s important to evaluate and monitor the repaired crack to ensure its effectiveness. In the next section, we’ll discuss the importance of evaluation and monitoring. Keep reading!
Read more: How To Fix A Cracked Shower Floor
Evaluate and Monitor the Repaired Crack
Once you have completed the repair process for the crack in your basement floor, it is crucial to evaluate and monitor the repaired area to ensure its effectiveness and longevity. Follow these steps to evaluate and monitor the repaired crack:
- Inspect the repair: Carefully examine the repaired crack to determine if it has been filled and sealed effectively. Look for any signs of gaps, cracks, or unevenness in the repaired area. If any issues are detected, you may need to revisit the repair process to address them.
- Observe for reoccurrence: Keep a close eye on the repaired crack to see if it reopens or if new cracks develop nearby. This can be an indication of unresolved underlying issues that may need professional attention.
- Check for water penetration: After the repair has had time to fully dry, test the area for any signs of water penetration. Use a spray bottle or pour water over the repaired crack and observe if any leakage occurs. If water enters the crack, it may indicate that further measures need to be taken to address the waterproofing of your basement.
- Monitor over time: Regularly monitor the repaired crack over the course of several weeks and months. Take note of any changes, such as expansion, shifting, or continued cracking. These observations will help you address any potential issues before they worsen.
- Consider professional assistance if needed: If the crack reoccurs or shows signs of significant structural damage, it may be necessary to seek professional assistance. A qualified contractor or structural engineer can provide a thorough evaluation and recommend appropriate solutions.
Evaluating and monitoring the repaired crack will help you ensure its efficacy and durability. By detecting and addressing any issues early on, you can prevent further damage and maintain the structural integrity of your basement floor.
With the completion of the evaluation and monitoring process, you have successfully repaired the crack in your basement floor. By following the steps outlined in this guide and keeping a watchful eye on the repaired area, you can enjoy a strong and durable basement floor for years to come.
Additional tips and considerations:
Conclusion
Fixing cracks in your basement floor is a task that requires careful preparation, attention to detail, and patience. By following the step-by-step guide outlined in this article, you have learned how to properly repair and restore the integrity of your basement floor. Here are some key takeaways:
1. Understand the common causes of cracks in basement floors, such as settling of the foundation, temperature fluctuations, excessive moisture, poor construction techniques, and heavy loads. Identifying the cause can help prevent future cracks.
2. Gather the necessary tools and materials, including safety gear, crack filler or sealant, a paint scraper or wire brush, chisel or masonry hammer, concrete patching compound, trowel or putty knife, sanding block or sandpaper, clean cloth or sponge, and plastic sheet or tarp.
3. Follow the step-by-step guide, which includes preparing the crack, cleaning and removing debris, applying sealant or patching compound, smoothing and leveling the surface, allowing time for drying and curing, and evaluating and monitoring the repaired crack.
4. Remember to refer to the manufacturer’s instructions for specific products and drying/curing times, and always prioritize safety by wearing appropriate protective gear.
5. Regularly evaluate and monitor the repaired crack to ensure its effectiveness and address any potential issues promptly. Consult a professional if needed, especially for significant or recurring cracks.
By following these guidelines and considering the additional tips and considerations, you can successfully repair cracks in your basement floor and maintain a strong and stable foundation. A well-maintained basement floor not only improves the aesthetics of your home but also ensures the long-term durability and value of your property.
Remember, when it comes to structural repairs, it’s essential to prioritize safety and, if necessary, consult with professionals who can provide expert advice and assistance. With the right approach, your basement floor will remain solid and stable, providing you with peace of mind for years to come.
Additional Tips and Considerations
As you work on fixing cracks in your basement floor, here are some additional tips and considerations to keep in mind:
- Address underlying issues: While repairing the cracks in your basement floor is important, it’s equally essential to address any underlying issues that may have caused the cracks. This may involve addressing drainage problems, improving ventilation, or addressing foundation settling. Consulting with a professional can help you identify and rectify these issues.
- Consider waterproofing: If your basement experiences recurring moisture issues, consider implementing waterproofing measures. This can include installing a sump pump, applying waterproof coatings or sealants, and ensuring proper drainage around the foundation. Waterproofing can protect your basement floor from future damage and minimize the risk of cracks.
- Regularly inspect and maintain: Proper maintenance and regular inspections can help prevent the emergence of new cracks. Periodically check for signs of moisture, monitor the humidity levels, and address any issues promptly. Regular cleaning and maintaining the floor’s surface can also help extend its lifespan.
- Consider professional assistance: While many cracks in basement floors can be repaired as a DIY project, there may be instances where professional assistance is necessary. If you’re dealing with extensive damage, recurring cracks, or structural concerns, consulting with a qualified contractor or structural engineer is recommended.
- Invest in preventative measures: Taking proactive steps to prevent cracks in your basement floor can save you time, effort, and money in the long run. These measures may include installing proper drainage systems, maintaining consistent humidity levels, avoiding excessive weight on the floor, and monitoring for signs of foundation settling.
- Document the repair process: Keep a record of the repair process, including before and after photos, the materials used, and any additional notes. This documentation can be useful for future reference, especially if you plan to sell your home or provide information to potential buyers.
By keeping these additional tips and considerations in mind, you can enhance the effectiveness and longevity of your basement floor crack repairs. Regular maintenance and proactive measures are key to ensuring the overall stability and durability of your basement.
Now that you have a comprehensive understanding of how to fix cracks in your basement floor and are armed with useful tips, you’re ready to tackle this project with confidence. Remember to prioritize safety, take your time, and consult professionals when needed. Good luck with your basement floor repair!
Frequently Asked Questions about How To Fix Cracks In Basement Floor
Was this page helpful?
At Storables.com, we guarantee accurate and reliable information. Our content, validated by Expert Board Contributors, is crafted following stringent Editorial Policies. We're committed to providing you with well-researched, expert-backed insights for all your informational needs.


0 thoughts on “How To Fix Cracks In Basement Floor”