Articles
How To Seal Basement Floor
Modified: January 18, 2024
Learn how to properly seal your basement floor with these informative articles. Prevent moisture and increase the longevity of your flooring.
(Many of the links in this article redirect to a specific reviewed product. Your purchase of these products through affiliate links helps to generate commission for Storables.com, at no extra cost. Learn more)
Introduction
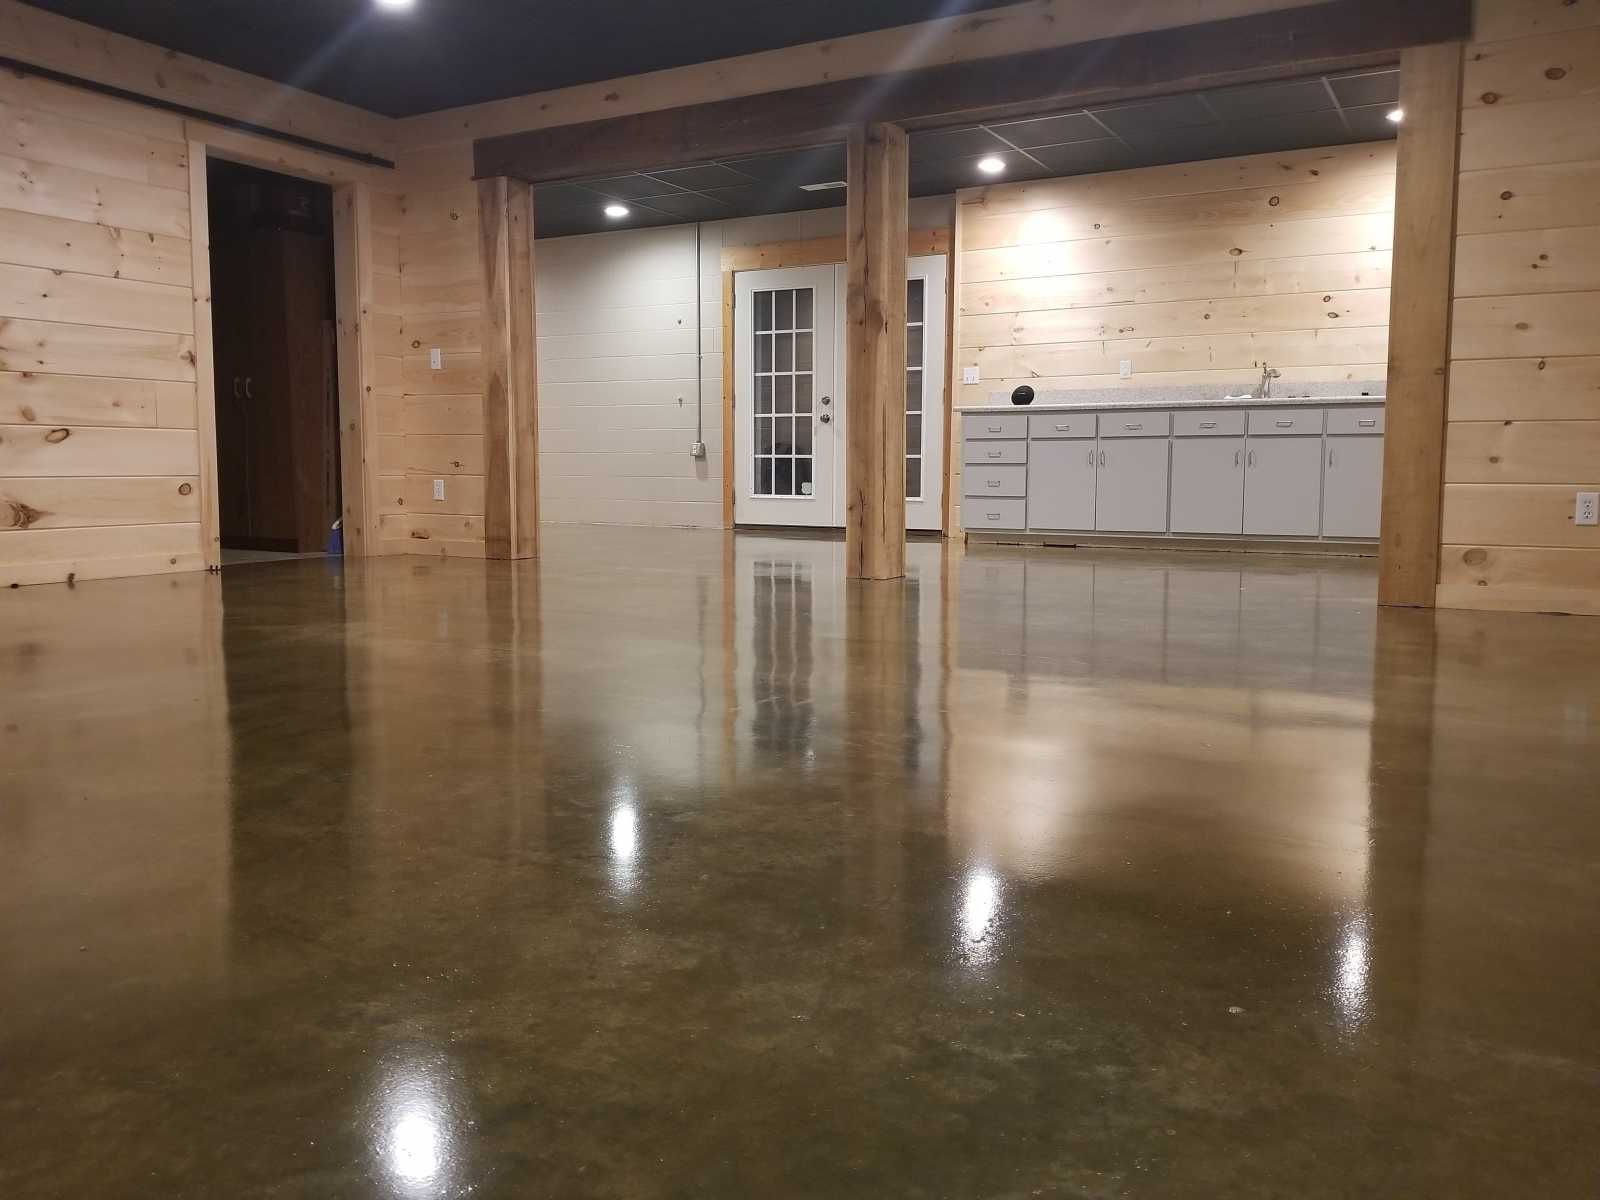
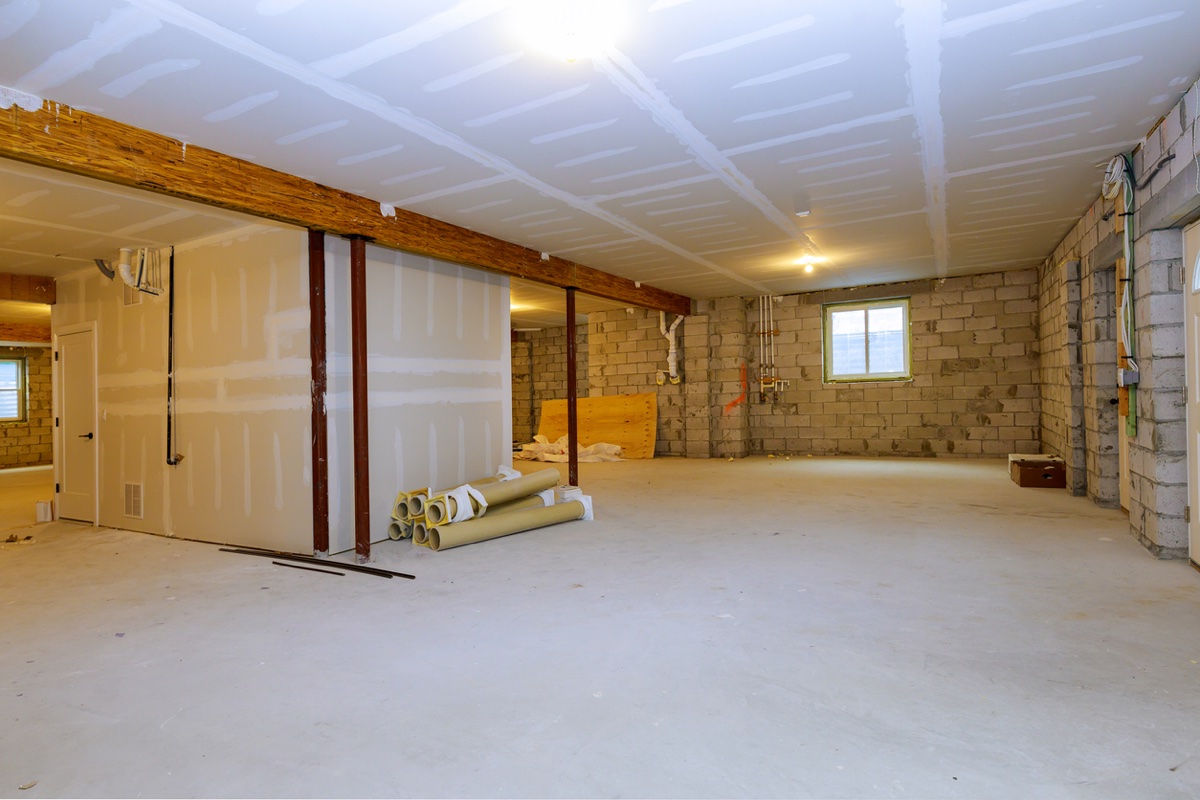
A basement is a valuable space in any home, providing additional living area, storage, or even specialized rooms like a home office or a gym. However, basements are prone to moisture issues, which can lead to mold, mildew, and structural damage. One effective way to combat these problems is by sealing the basement floor.
Sealing the basement floor helps create a barrier between the concrete surface and potential sources of moisture, such as water seepage or humidity. This process not only prevents moisture-related issues but also enhances the overall durability and longevity of the basement floor.
If you’re planning to seal your basement floor, this article will guide you through the step-by-step process. From preparing the floor to applying multiple coats of sealant, you’ll learn everything you need to know to successfully seal your basement floor and protect your home investment.
Before you start the sealing process, it’s essential to gather the necessary materials. You’ll need a few basic tools such as a broom, mop, bucket, scrub brush, and a shop vacuum. For the sealing process itself, you’ll need crack filler, primer, and a high-quality basement floor sealant. These materials can be found at your local hardware store or home improvement center.
Now that you have everything ready, let’s dive into the step-by-step process of sealing your basement floor. Following these instructions carefully will ensure a successful seal that will safeguard your basement from moisture-related issues for years to come.
Key Takeaways:
- Protect your basement from moisture and structural damage by following a step-by-step process to seal the floor. Proper preparation, filling cracks, and applying primer and sealant are essential for long-lasting protection.
- Ensure a professional finish by applying a second coat of sealant, addressing any missed spots, and properly disposing of materials. Regular monitoring and maintenance will extend the lifespan of the seal and keep your basement protected.
Read more: How To Seal Concrete Basement Floor
Step 1: Prepare the basement floor
Before you can begin sealing your basement floor, it’s crucial to prepare the surface properly to ensure optimal results. Here’s what you need to do:
- Clean the floor: Start by removing any debris, dust, or loose material from the basement floor. Use a broom or a shop vacuum to sweep the floor thoroughly. This step is essential because any dirt or debris left on the surface can interfere with the adhesion of the sealant.
- Repair any cracks or gaps: Carefully inspect the basement floor for any cracks or gaps. These are common in older homes or basements that have experienced settling or water damage. Use a crack filler or concrete patching compound to fill in any cracks or gaps. Follow the manufacturer’s instructions for applying the filler and allow it to dry completely before moving on to the next step.
- Check for moisture: Before proceeding, it’s essential to check for any signs of excess moisture in your basement. Use a moisture meter to test the humidity levels in the area. If the moisture levels are too high, it’s crucial to address the underlying issue before sealing the floor. This may involve installing a dehumidifier, improving drainage, or fixing any leaks or water seepage problems.
- Inspect the floor for oil stains: If you notice any oil stains on the floor, use a degreasing cleaner or a mixture of warm water and dish soap to remove them. Oil stains can prevent proper adhesion of the sealant, so it’s important to clean them thoroughly before proceeding.
By following these steps, you’ll ensure that your basement floor is adequately prepared for the sealing process. Taking the time to clean, repair, and address any moisture issues will help create a solid foundation for the sealant and maximize its effectiveness.
Step 2: Fill cracks and gaps
Cracks and gaps in the basement floor can compromise the effectiveness of the sealant and allow moisture to penetrate the surface. It’s crucial to properly fill these areas before applying the sealant. Here’s how to fill cracks and gaps in your basement floor:
- Preparation: Begin by thoroughly cleaning the cracks and gaps in the floor. Use a broom or a brush to remove any loose debris or dust. You can also use a shop vacuum to ensure the areas are completely clean.
- Choose the right filler: Select an appropriate filler for your specific type of flooring material and the size of the cracks. There are various options available, such as epoxy-based crack fillers or concrete patching compounds. Consult with a professional or the product manufacturer to determine the best choice for your situation.
- Application: Follow the manufacturer’s instructions for the selected crack filler. Typically, you’ll mix the components or prepare them as instructed. Using a putty knife or a trowel, apply the filler into the cracks and gaps, ensuring they are completely filled. Smooth the surface of the filler to create a seamless finish.
- Allow curing time: Let the filler cure according to the manufacturer’s guidelines. This can range from a few hours to several days, depending on the product. During this time, it’s important to avoid any foot traffic or placing heavy objects on the filled areas.
- Sanding (if necessary): If the filled areas are not flush with the rest of the floor, you may need to sand them down to achieve a smooth and even surface. Use sandpaper or an electric sander to carefully sand the filled areas until they are level with the surrounding floor.
Filling cracks and gaps in your basement floor is a crucial step in the sealing process. By properly addressing these areas, you’ll prevent moisture from seeping through the floor and ensure a solid foundation for the sealant. Taking the time to complete this step will contribute to the long-term effectiveness of your basement floor sealing project.
Step 3: Clean the floor
Before applying any sealant, it’s important to thoroughly clean the basement floor to remove any dirt, dust, or contaminants that could interfere with the adhesion of the sealant. Here’s how to clean your basement floor effectively:
- Sweep or vacuum: Start by sweeping the entire floor to remove loose debris and dirt. Use a broom or a dust mop to sweep the surface thoroughly. Alternatively, you can use a shop vacuum to suck up any dirt and dust from the floor.
- Remove stains: Inspect the floor for any stains or spills. Depending on the type of stain, you can use different cleaning methods. For general stains, you can use a mixture of warm water and a mild detergent. Apply the solution to the stain and scrub gently with a brush or mop. For tougher stains, you may need to use a specialized cleaner or follow the manufacturer’s instructions.
- Address oil or grease stains: If you notice any oil or grease stains on the floor, they may require additional cleaning. Use a degreaser or a mixture of warm water and dish soap to tackle these stains. Apply the solution to the stain and scrub vigorously with a brush. Rinse the area with clean water and repeat if necessary.
- Rinse the floor: After cleaning the floor, it’s important to rinse it thoroughly to remove any residue from the cleaning products. Use clean water and a mop or a wet-dry vacuum to rinse the floor. Make sure to change the water or empty the vacuum tank as needed to ensure a complete rinse.
By properly cleaning the basement floor, you’ll create a clean and smooth surface for the sealant to adhere to. Removing dirt, stains, and contaminants will ensure that the sealant bonds effectively and provides long-lasting protection for your basement floor.
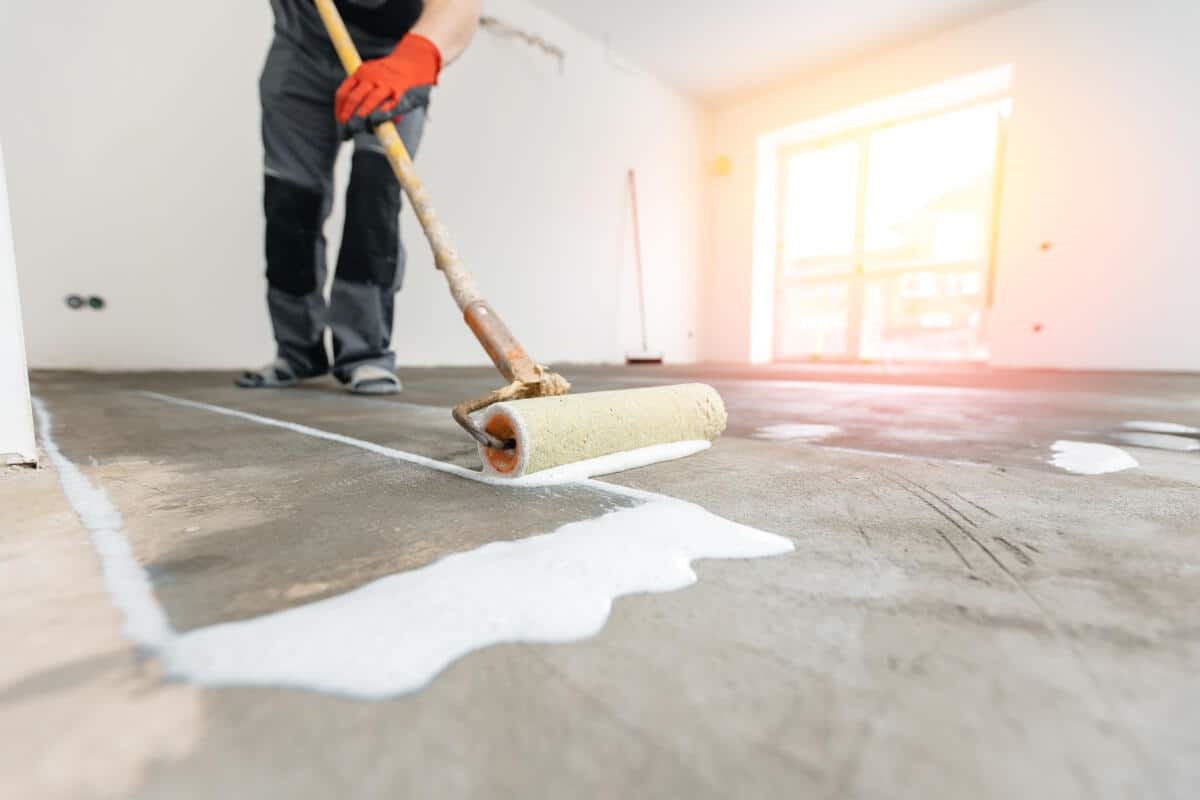
Step 4: Apply primer
Applying primer to your basement floor is an important step in the sealing process. The primer helps to enhance adhesion and ensures that the sealant bonds properly to the surface. Here’s how you can apply primer to your basement floor:
- Choose the right primer: Select a primer that is specifically formulated for use on concrete or basement floors. Consider factors such as the type of sealant you’ll be using and any specific requirements mentioned by the manufacturer.
- Prepare the floor: Before applying the primer, make sure the floor is clean and dry. Remove any dust or debris by sweeping or using a shop vacuum. If there are any remaining stains or spills, address them accordingly before proceeding.
- Mix the primer: Follow the manufacturer’s instructions to mix the primer properly. Use a stir stick or a paint mixer to ensure a consistent and homogeneous mixture. Some primers may require dilution with water, while others are ready to use as-is.
- Apply the primer: Start by cutting in around the edges of the floor using a brush or a roller with a smaller nap. This will ensure even coverage along the walls and corners. Then, use a roller with a longer nap to apply the primer to the larger areas of the floor. Work in small sections to ensure that you completely cover the entire surface.
- Allow drying time: After applying the primer, allow it to dry according to the manufacturer’s instructions. This can vary depending on the product and environmental conditions. It’s important to allow the primer sufficient drying time to ensure proper adhesion of the sealant.
By applying primer to your basement floor, you create a strong foundation for the sealant to adhere to. The primer enhances the bonding capabilities and helps maximize the effectiveness of the sealant, providing long-lasting protection for your basement floor against moisture and other potential issues.
Before sealing your basement floor, make sure to thoroughly clean and dry the surface to ensure proper adhesion of the sealant. Use a concrete cleaner and allow the floor to dry completely before applying the sealant.
Read more: How To Seal A Basement Window
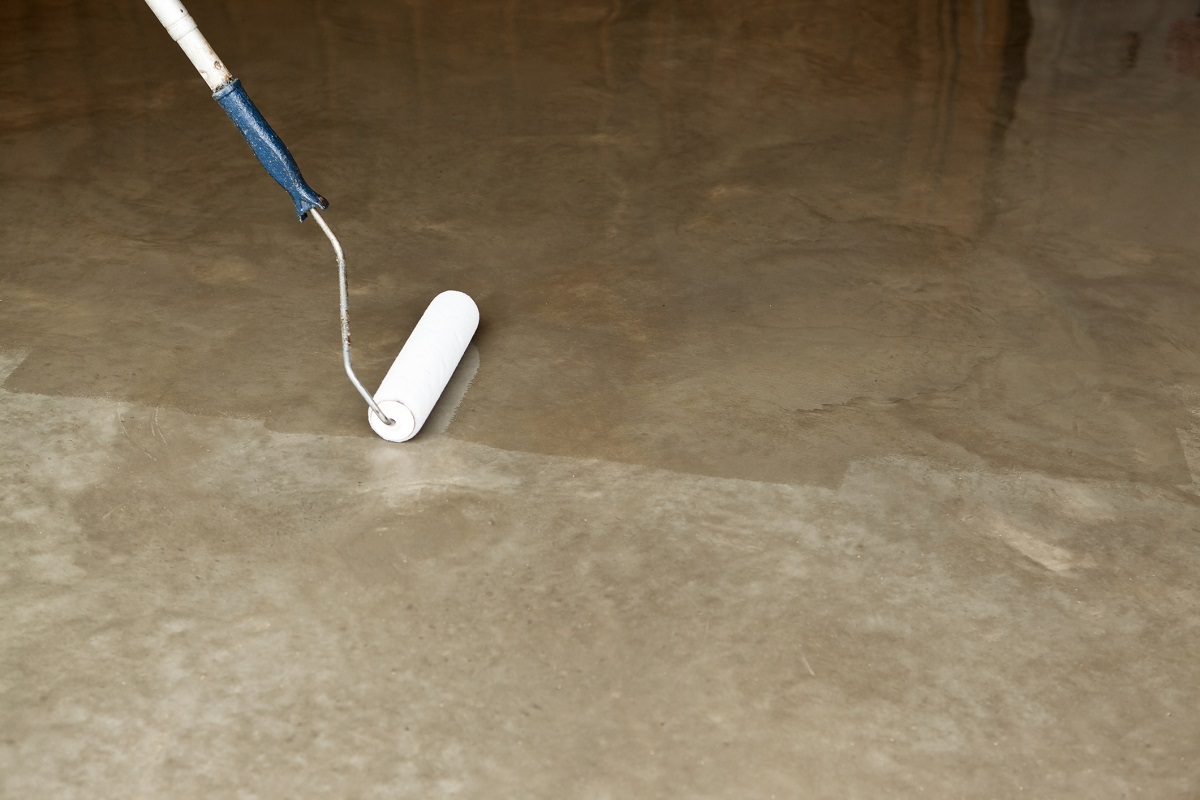
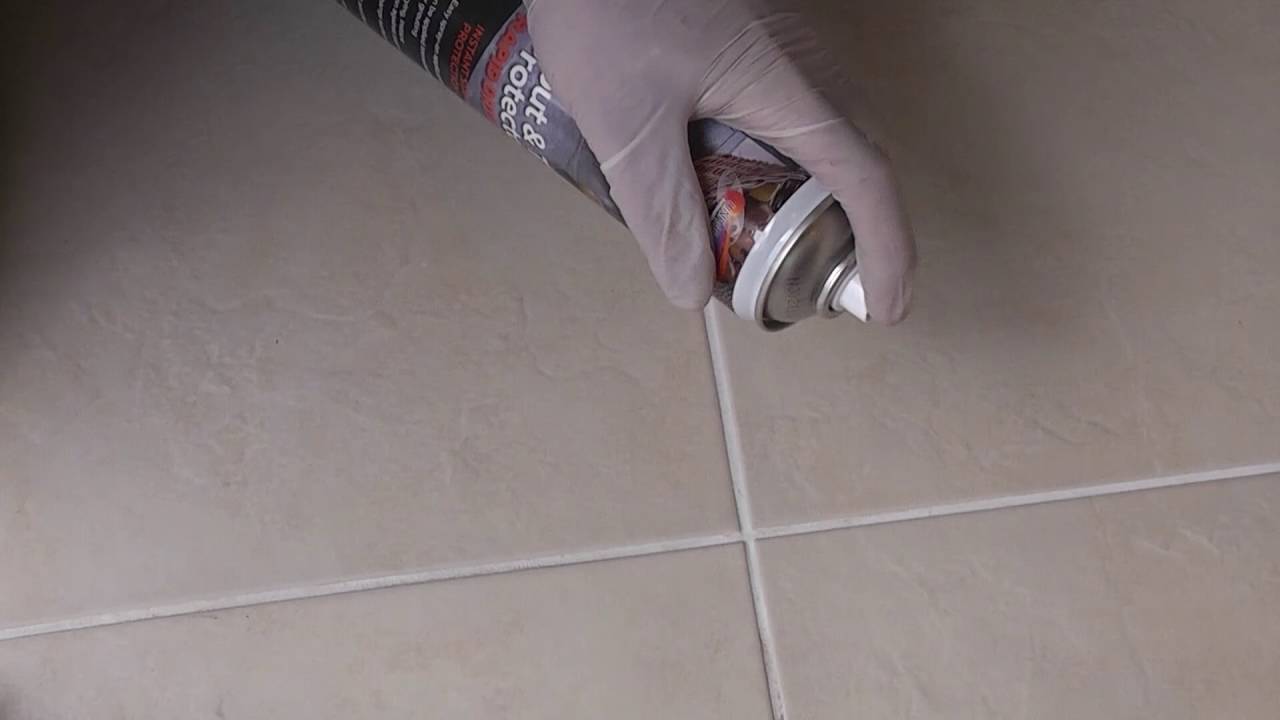
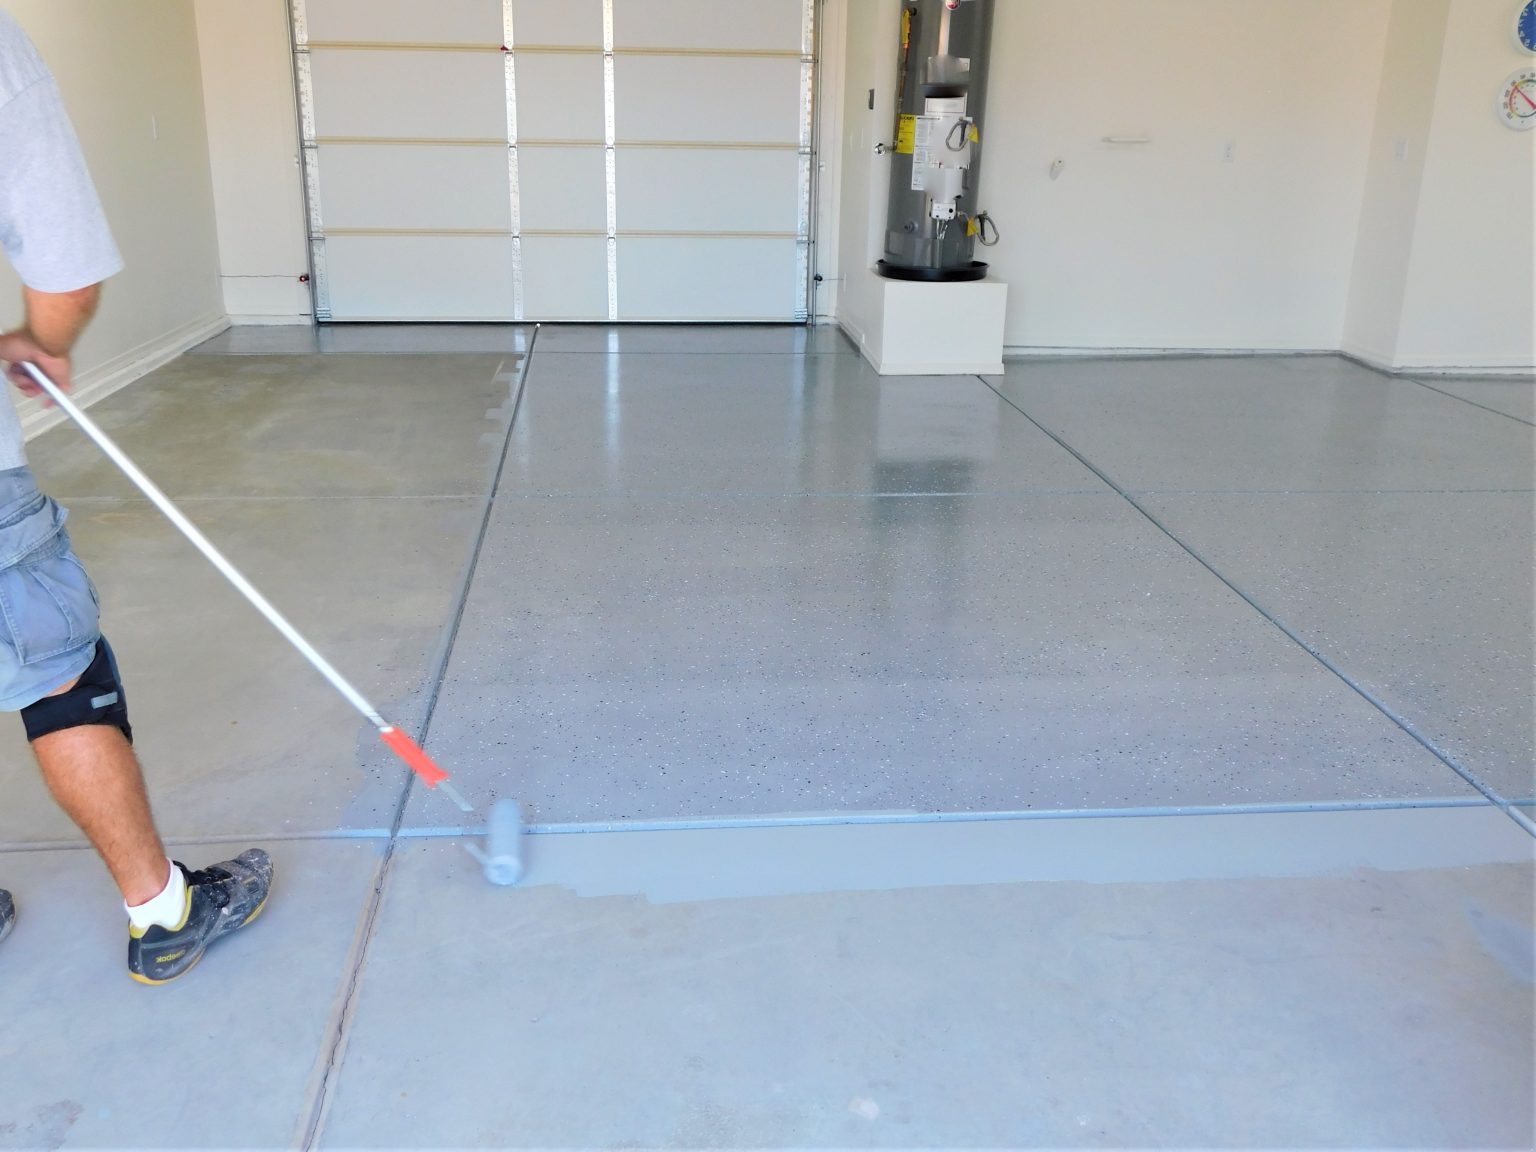
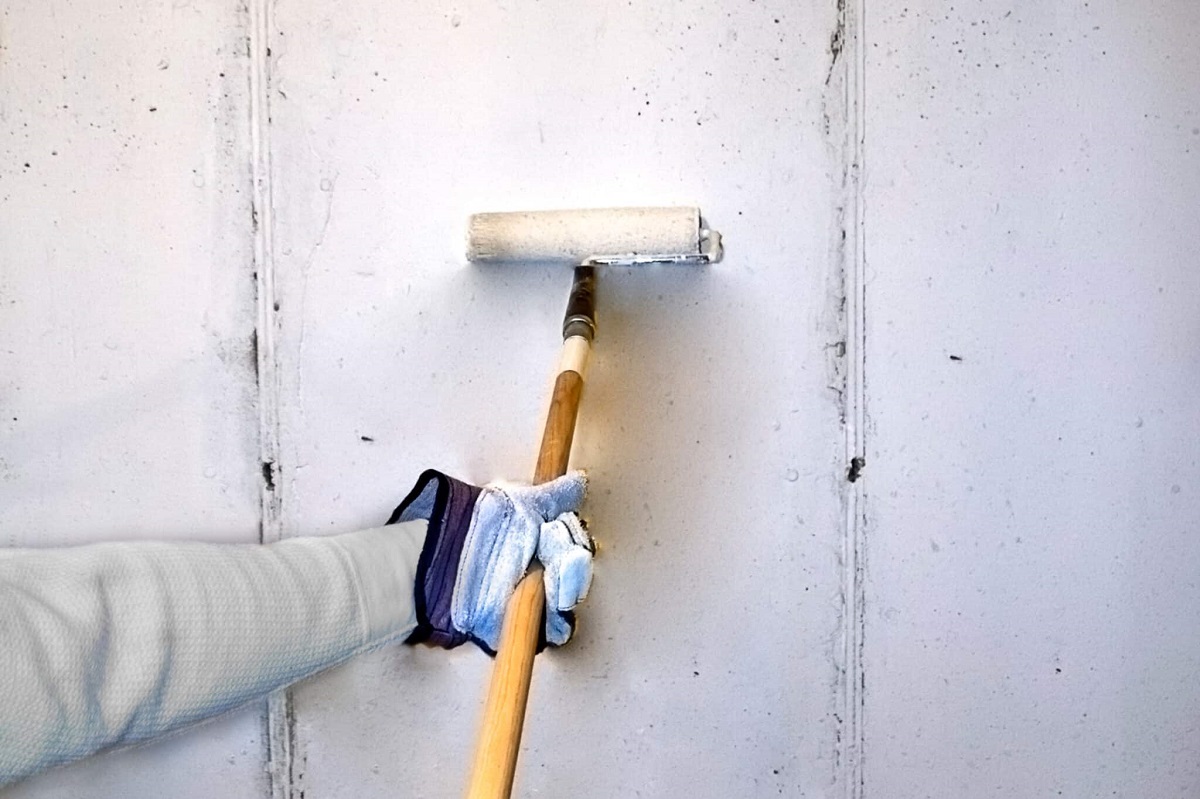
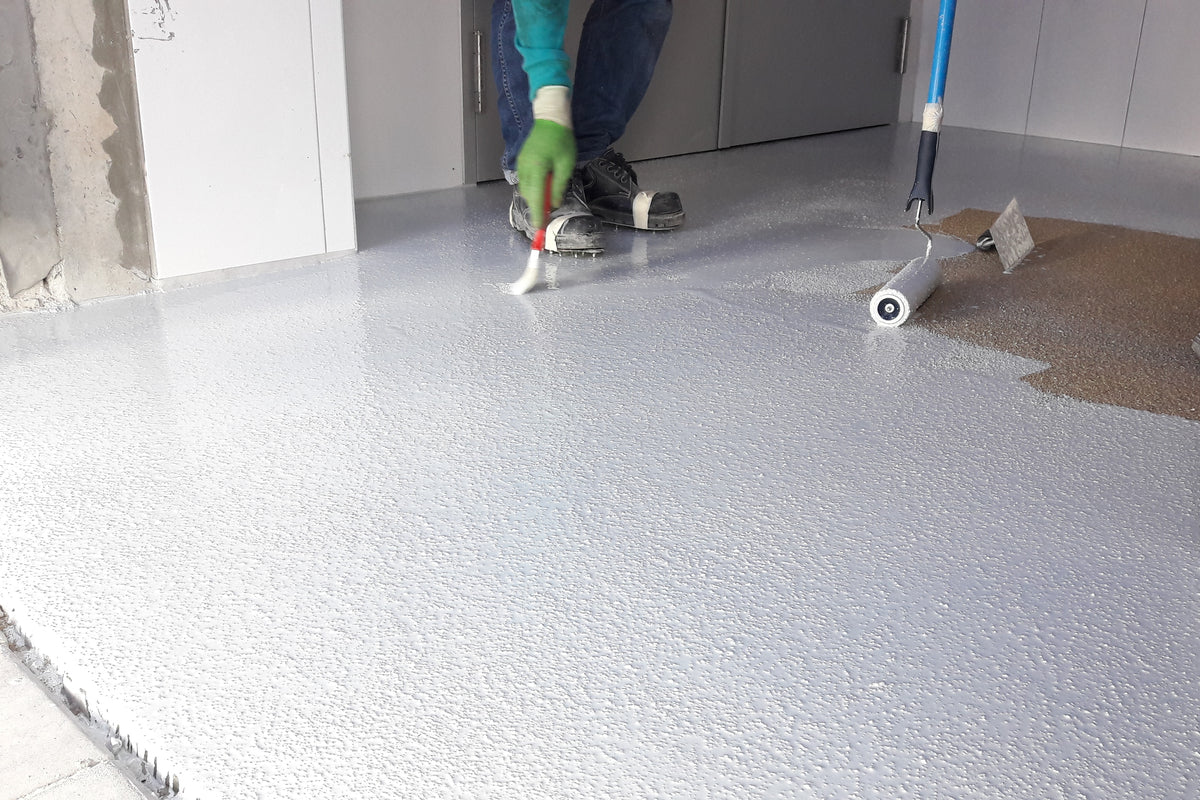
Step 5: Seal the basement floor
Sealing the basement floor is the key step in protecting it from moisture and ensuring its longevity. Here’s how you can effectively seal your basement floor:
- Select the right sealant: Choose a high-quality basement floor sealant that is specifically designed for concrete surfaces. Consider factors such as the type of sealant, its durability, and any specific requirements mentioned by the manufacturer.
- Prepare the sealant: Follow the manufacturer’s instructions to properly prepare the sealant. This may involve mixing or shaking the product to ensure an even consistency.
- Start in a corner: Begin the application process in a corner of the basement, away from the exit. This will ensure that you don’t paint yourself into a corner and can easily exit the area without stepping on the freshly applied sealant.
- Apply the sealant: Use a paintbrush or a roller to apply the sealant to the floor. Start with a small section and work your way towards the exit in a systematic pattern, ensuring even coverage. Apply the sealant in thin, overlapping coats, following the manufacturer’s recommended application thickness.
- Smooth out any puddles or excess sealant: As you apply the sealant, pay attention to any puddles or areas where the sealant seems excessive. Use a paintbrush or a roller to smooth out these areas and ensure an even application. Excessive sealant can lead to uneven drying and a less effective seal.
- Work in sections: Divide the basement floor into manageable sections and complete one section at a time. This will help you maintain control over the application process and ensure that each section receives sufficient coverage.
- Take breaks as needed: Depending on the size of your basement, sealing the floor can be a time-consuming process. Take breaks as needed to avoid fatigue and ensure that you’re applying the sealant with precision and care.
By properly sealing your basement floor, you create a protective barrier that safeguards against moisture and other potential issues. The sealant will help maintain the integrity of the concrete, improve its durability, and enhance the overall condition of your basement.
Step 6: Allow the sealant to dry
After applying the sealant to your basement floor, it’s crucial to allow sufficient drying time. This will ensure that the sealant cures properly and forms a strong, protective barrier. Here’s what you need to do:
- Read the instructions: Consult the manufacturer’s instructions to determine the recommended drying time for the specific sealant you used. Different sealants have varying drying times, which can be influenced by factors such as humidity and temperature.
- Avoid foot traffic: During the drying process, it’s essential to avoid walking on the freshly applied sealant. Foot traffic can disrupt the curing process and lead to uneven drying or damage to the sealant. Make sure to create barriers or use caution signs to prevent anyone from accidentally stepping on the sealed floor.
- Provide proper ventilation: Adequate ventilation is important for the drying process. Open windows and doors to allow air circulation in the basement. This will help expedite the evaporation of any solvent-based components in the sealant that may hinder drying time.
- Monitor the drying progress: Keep an eye on the drying progress of the sealant. Observe any changes in color or texture, as these may indicate that the sealant is curing properly. If you notice any areas that appear to be taking longer to dry, allow additional time for those sections to fully cure.
- Consider weather conditions: Extreme weather conditions can impact the drying time of the sealant. If it is especially humid or cold, the drying process may take longer. Ensure that the basement is adequately heated or ventilated to promote proper drying.
- Plan accordingly: Depending on the sealant and the drying conditions, the process may take anywhere from a few hours to several days. Avoid exposing the floor to heavy use or placing furniture back on it until the sealant has completely dried and cured.
Allowing the sealant to dry properly is essential to its effectiveness and longevity. By following the manufacturer’s instructions and taking the necessary precautions, you’ll ensure that the sealant forms a durable protective layer that will keep your basement floor safe from moisture and damage.
Step 7: Apply a second coat (optional)
Applying a second coat of sealant to your basement floor is an optional step that can provide additional protection and enhance the longevity of the seal. While not always necessary, a second coat can offer greater durability and ensure a more robust barrier against moisture. Here’s what you need to consider:
- Assess the need: Evaluate the quality of the first coat and the condition of your basement floor. If you notice any areas that appear thinner or unevenly covered, applying a second coat can help address these concerns and provide a more consistent seal.
- Allow drying time: Before applying a second coat, make sure the first coat is adequately dry and has cured as per the manufacturer’s instructions. This is typically outlined in the drying time guidelines provided by the sealant product. It’s crucial to give the first coat sufficient time to set and create a strong foundation for the second coat.
- Prepare the surface: Clean the floor once again to ensure it is free from any dust, debris, or contaminants. Use a broom or a shop vacuum to remove any loose particles that may interfere with the adhesion of the second coat.
- Apply the second coat: Follow the same application process as you did with the first coat. Use a paintbrush or a roller to evenly apply the sealant, working in small sections to maintain control and ensure full coverage. Pay extra attention to any areas that may have been missed or appear thinner during the application of the first coat.
- Allow drying time (again): Once you have applied the second coat, allow it to dry and cure according to the manufacturer’s instructions. This may require additional drying time compared to the first coat, as the second coat needs to bond to the first layer and create a cohesive seal.
- Assess the results: Once the second coat has fully dried, assess the appearance and condition of your basement floor. The second coat should provide a more robust seal and enhanced protection. If you’re satisfied with the results, proceed to the final steps of the sealing process. However, if you feel that a third coat is necessary to achieve the desired level of protection, consult with the manufacturer’s guidelines and repeat the application process accordingly.
Applying a second coat of sealant can be beneficial in providing an extra layer of protection and ensuring a more thorough seal. Assess the condition and coverage of your first coat, and if necessary, consider adding a second coat to enhance the durability and performance of your basement floor seal.
Step 8: Finishing touches and clean-up
After completing the sealing process for your basement floor, there are a few final steps to ensure a professional finish and tidy up any mess. Here’s what you need to do:
- Inspect for missed spots: Take a final look at your sealed basement floor to check for any areas that may have been missed during the sealing process. If you notice any gaps or thin spots, touch them up by applying a small amount of sealant to ensure complete coverage and protection.
- Remove any excess sealant: If there are any drips, smudges, or excess sealant on the floor or the surrounding surfaces, clean it up promptly. Use a cloth or a paper towel to gently remove any unwanted sealant. If the sealant has already dried, you may need to carefully scrape it off with a putty knife or a similar tool. Be cautious not to damage the sealed floor while removing excess sealant.
- Dispose of materials properly: Dispose of any used brushes, rollers, or other sealing tools according to your local waste disposal guidelines. Sealant residue should be disposed of in accordance with the manufacturer’s instructions or local regulations to ensure proper environmental practices.
- Allow for curing time: Although the sealant may be dry to the touch, it’s important to allow it sufficient time to fully cure. This can range from a few days to a couple of weeks, depending on the product and environmental conditions. Avoid placing heavy furniture or subjecting the floor to excessive wear until the sealant has fully cured.
- Monitor and maintain: Regularly inspect your sealed basement floor for any signs of wear, damage, or water intrusion. Address any concerns promptly to ensure long-term protection. Additionally, follow any maintenance recommendations provided by the sealant manufacturer to retain the seal’s effectiveness for years to come.
By taking these final steps and completing the finishing touches, you’ll ensure a professional and well-maintained appearance for your sealed basement floor. Regular monitoring and proper maintenance will help extend the lifespan of the seal and keep your basement protected from moisture and potential damage.
Read more: How To Seal A Wood Floor
Conclusion
Sealing your basement floor is a crucial step in protecting your home investment and safeguarding against moisture-related issues. By following the step-by-step process in this guide, you can successfully seal your basement floor and ensure its durability for years to come.
Starting with the preparation of the floor, filling cracks and gaps, and thoroughly cleaning the surface, you create a solid foundation for the sealing process. Applying primer enhances the adhesion of the sealant, while the sealant itself forms a protective barrier against moisture and other potential issues.
Allowing the sealant to dry and considering a second coat, if necessary, further strengthens the protection provided to your basement floor. Completing the process with finishing touches and clean-up ensures a professional finish and maximizes the effectiveness of the sealant.
Regularly monitor and maintain your sealed basement floor, addressing any wear, damage, or water intrusion promptly. By taking these steps, you can enjoy a durable, moisture-resistant basement floor, free from issues such as mold, mildew, and structural damage.
Remember, each basement is unique, and specific instructions may vary depending on the type of floor, sealant, and environmental factors. Always refer to the manufacturer’s guidelines and seek professional advice if needed. With proper sealing and ongoing maintenance, your basement can become a functional, attractive space in your home for years to come.
Frequently Asked Questions about How To Seal Basement Floor
Was this page helpful?
At Storables.com, we guarantee accurate and reliable information. Our content, validated by Expert Board Contributors, is crafted following stringent Editorial Policies. We're committed to providing you with well-researched, expert-backed insights for all your informational needs.


0 thoughts on “How To Seal Basement Floor”