Articles
How To Fix Basement Floor Cracks
Modified: December 7, 2023
Learn effective techniques to fix basement floor cracks with our informative articles. Find step-by-step guides and expert tips for seamless basement floor repair.
(Many of the links in this article redirect to a specific reviewed product. Your purchase of these products through affiliate links helps to generate commission for Storables.com, at no extra cost. Learn more)
Introduction
Having a basement in your home can provide valuable extra space for storage, a recreational area, or even a living space. However, one common issue that many homeowners face with their basement is the occurrence of floor cracks. Basement floor cracks can be caused by a variety of factors, such as soil settlement, moisture, temperature changes, or even structural issues. These cracks can not only be unsightly but can also lead to further damage if left unaddressed.
In this article, we will discuss the common causes of basement floor cracks, the different types of cracks you may encounter, and provide you with a step-by-step guide on how to fix these cracks yourself. By learning how to fix basement floor cracks, you can save time and money by avoiding the need to hire a professional contractor.
Before we dive into the steps of fixing basement floor cracks, it is important to understand the common causes behind their occurrence. This knowledge will help you prevent future cracks and ensure that your repairs are effective and long-lasting.
Key Takeaways:
- Understanding the common causes and types of basement floor cracks is crucial for effective DIY repairs. Proper preparation, cleaning, and filling techniques, along with finishing touches, can help you achieve a seamless and polished repair.
- While DIY repairs are suitable for minor cracks, it’s essential to consult a professional for significant or structural cracks. Regular maintenance and timely repairs can ensure a sturdy and crack-free basement floor, providing a safe and comfortable space for your family.
Read more: How To Fix Cracks In Basement Floor
Common Causes of Basement Floor Cracks
Basement floor cracks can be caused by a combination of various factors. Understanding these causes will help you identify the root issue and prevent future cracks. Below are some of the common causes of basement floor cracks:
- Soil Settlement: The soil on which your home is built can naturally settle over time. This settlement can lead to shifts in the foundation, putting pressure on the basement floor and causing cracks to appear. If your home is located in an area with expansive soils, where the soil expands and contracts with moisture content, the risk of basement floor cracks is even higher.
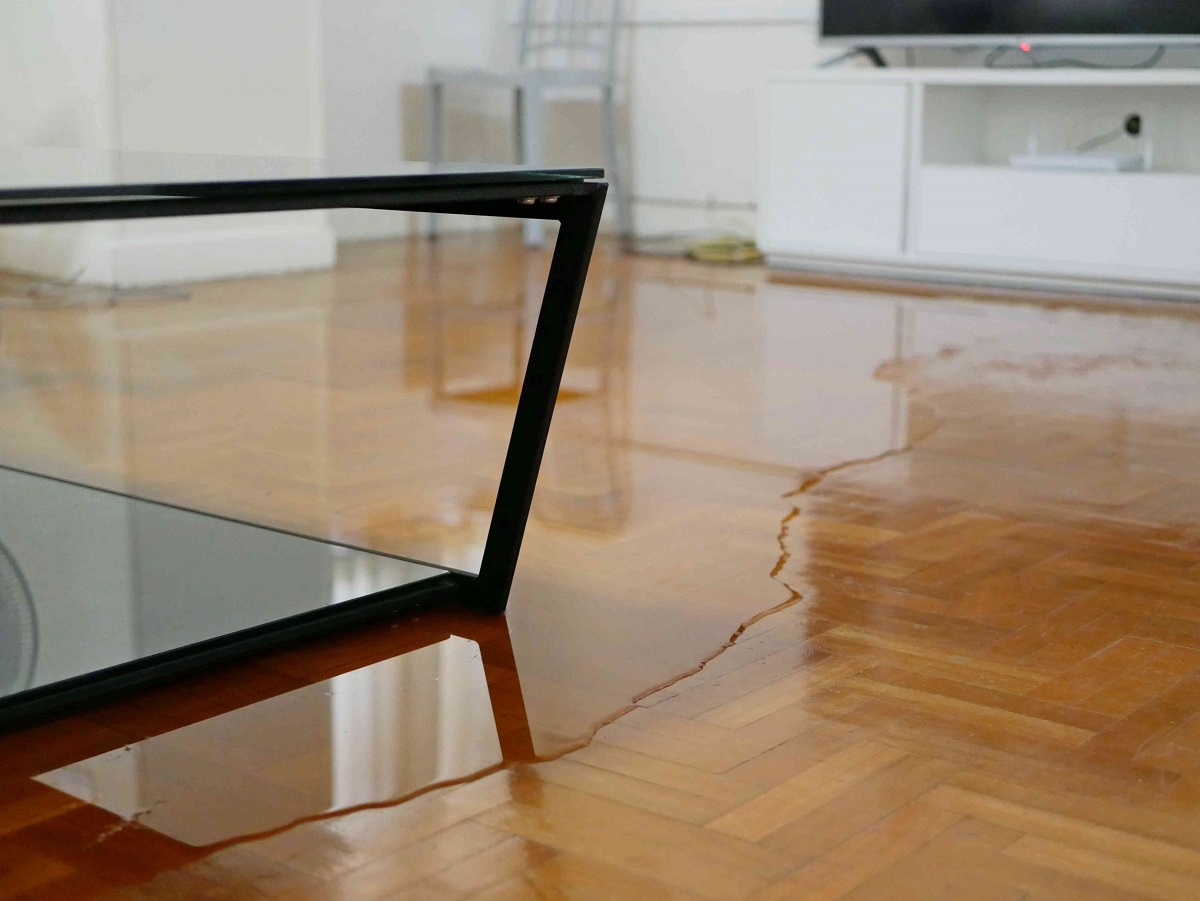
- Hydrostatic Pressure: Hydrostatic pressure occurs when water accumulates around your foundation. This pressure can cause the basement floor to crack and even push inward. Poor drainage systems, improper grading, or heavy rain can contribute to hydrostatic pressure.
- Temperature Changes: Extreme temperature fluctuations can cause concrete to expand and contract, leading to cracks in the basement floor. This is especially common in areas with harsh winters, where freezing and thawing cycles can cause significant damage over time.
- Structural Issues: In some cases, basement floor cracks may be a result of underlying structural issues within the foundation. These could include inadequate reinforcement, poor construction techniques, or even foundation settling. It is essential to address these issues promptly to prevent further damage.
- Improperly Cured Concrete: If the concrete used for your basement floor was not cured correctly, it can be prone to cracking. Improper curing can result from factors such as insufficient moisture during the curing process or not allowing enough time for proper drying and hardening.
- External Factors: There are several external factors that can contribute to basement floor cracks. These include earthquakes, nearby construction activity, tree roots exerting pressure on the foundation, or even heavy vehicles driving close to the home.
Identifying the cause of your basement floor cracks is crucial to ensure effective repairs and prevent further damage. By addressing the underlying issue, you can take the necessary steps to fix the cracks and avoid future occurrences. Now that we have explored the common causes of basement floor cracks, let us move on to discuss the different types of cracks you may encounter.
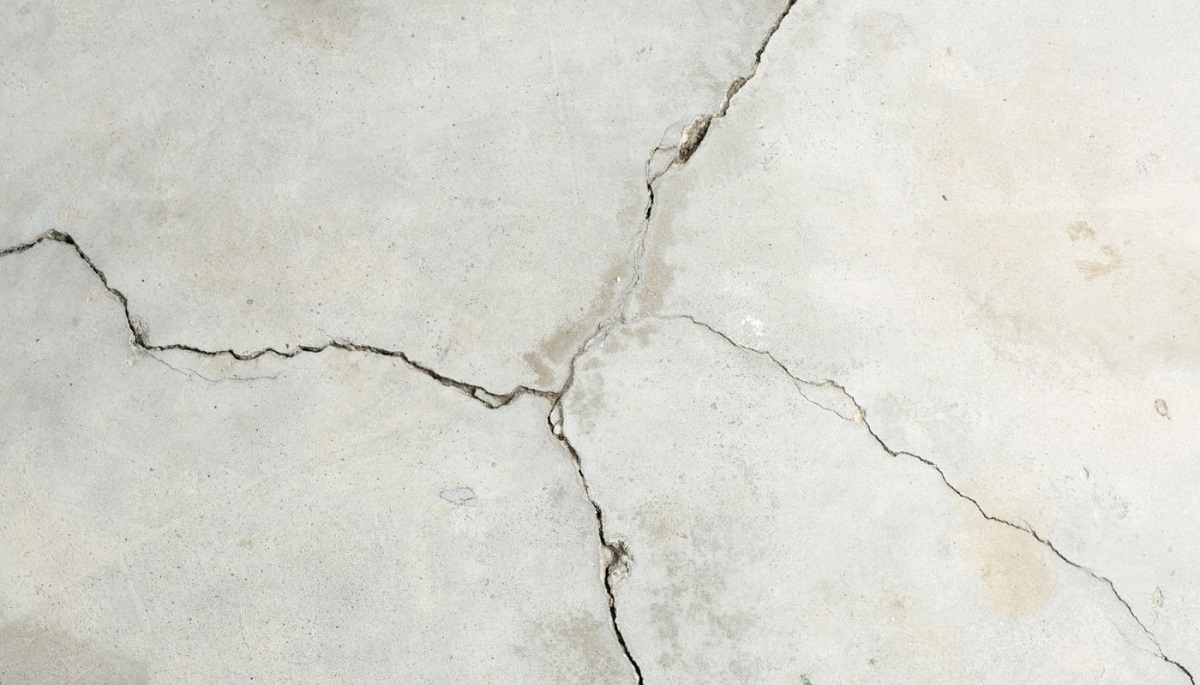
Types of Basement Floor Cracks
Basement floor cracks can vary in size, shape, and severity. Understanding the different types of cracks can help you determine the appropriate repair method. Here are some of the common types of basement floor cracks:
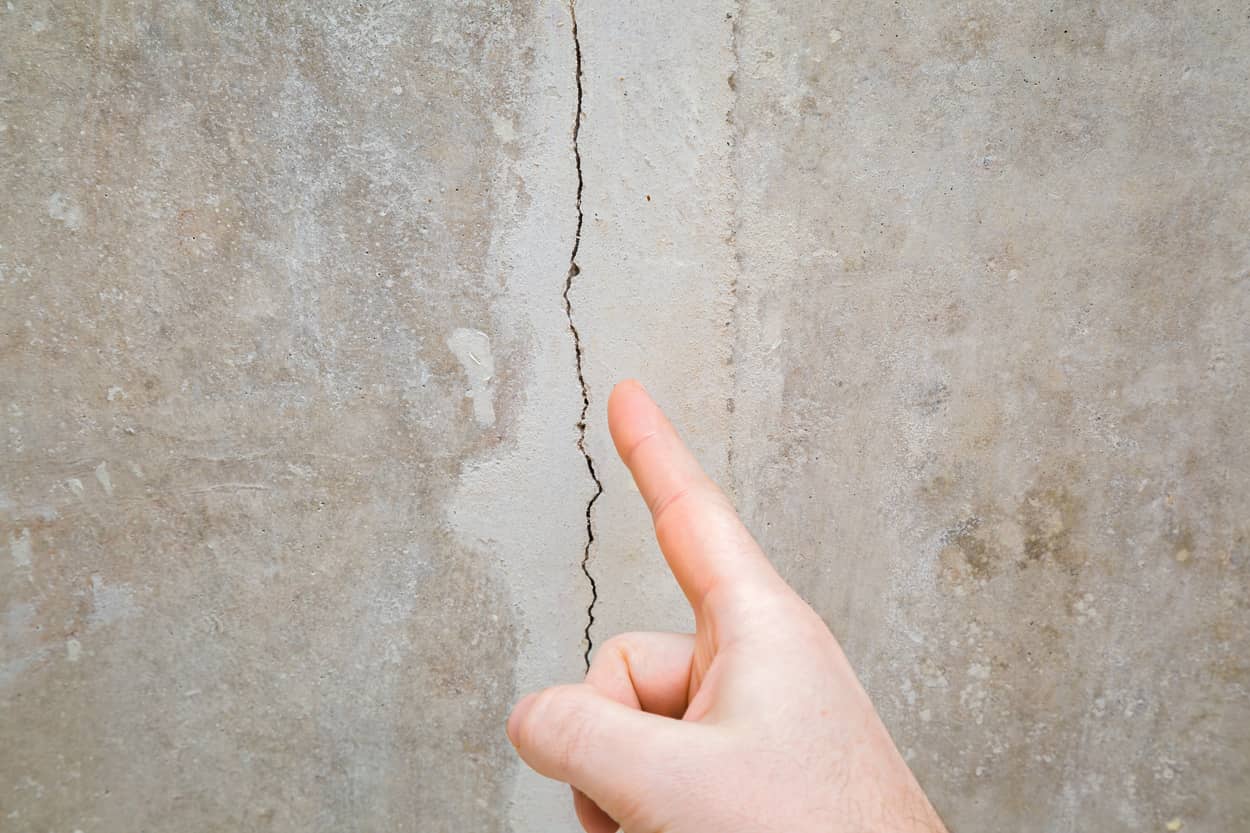
- Hairline Cracks: Hairline cracks are thin cracks that may resemble a hair strand. They are typically less than 1/8 inch wide and do not pose an immediate threat to the structural integrity of your basement floor. However, they can still allow moisture to seep through, leading to potential water damage and mold growth.
- Shrinkage Cracks: Shrinkage cracks often occur during the curing process of the concrete. They are caused by the natural shrinkage that concrete undergoes as it dries and hardens. These cracks are usually small and vertical, running in a straight or diagonal pattern. While they may not cause significant structural issues, they can be a sign of poor concrete mix or improper curing.
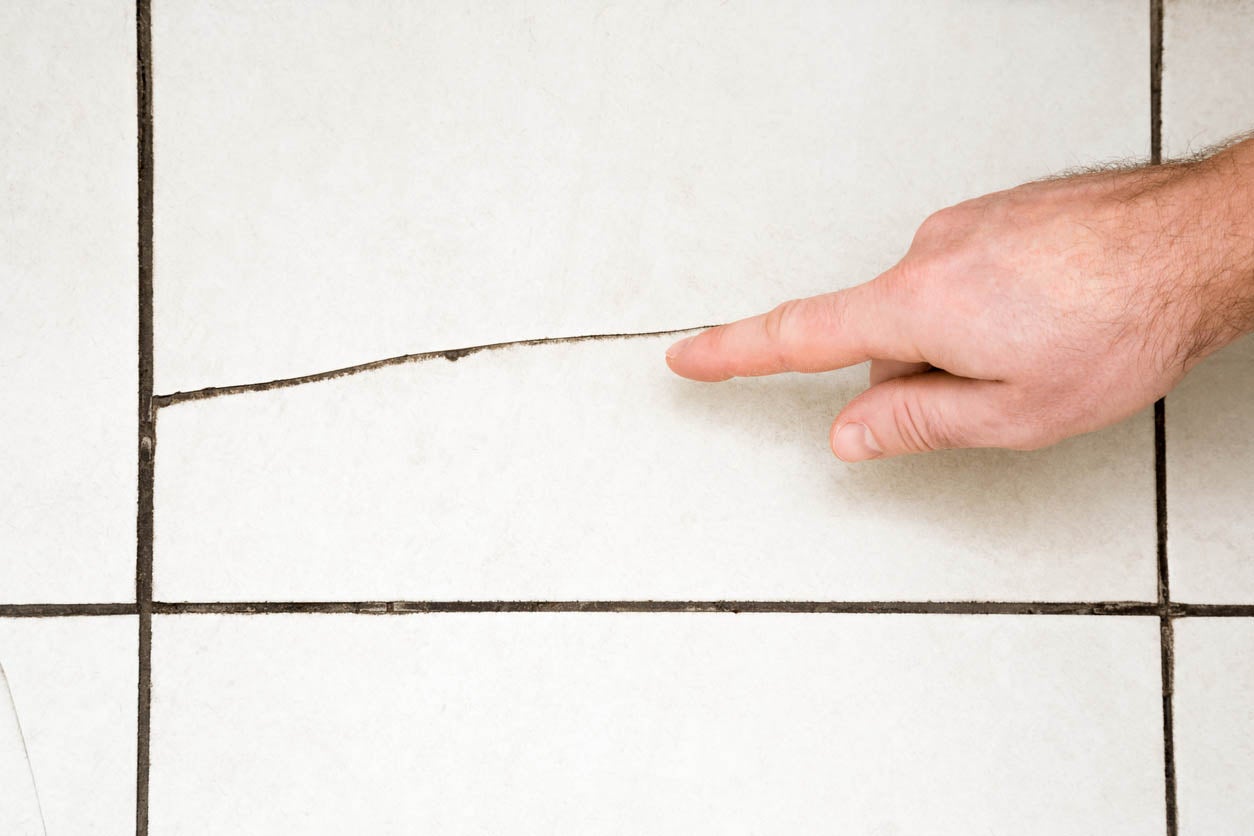
- Settlement Cracks: Settlement cracks are a result of soil settlement or foundation movement, causing the basement floor to sink or shift. These cracks can appear as wider gaps and may extend from the basement floor to the walls. If left untreated, settlement cracks can lead to further damage and instability in the foundation.
- Heaving Cracks: Heaving cracks occur when the basement floor is pushed upward, often as a result of frost heave or excessive moisture in the soil. These cracks are typically more severe and may indicate a larger underlying problem with the foundation or drainage system.
- Structural Cracks: Structural cracks are the most severe type of basement floor cracks. They are wide, deep, and may be accompanied by other signs of foundation issues, such as bowing walls or uneven floors. Structural cracks require immediate attention from a professional, as they can jeopardize the stability and safety of your home.
Identifying the type of crack in your basement floor is crucial for determining the appropriate repair method. While hairline and shrinkage cracks may only require simple DIY repairs, settlement, heaving, and structural cracks should be inspected and addressed by a professional contractor.
Now that we have discussed the common causes and types of basement floor cracks, let us move on to the tools and materials you will need for repairing these cracks.
Tools and Materials Needed
Before you begin fixing basement floor cracks, it’s important to gather the necessary tools and materials to ensure a successful repair. Here is a list of tools and materials you will need:
- Safety Equipment: Safety should be your top priority. Wear protective gear such as safety goggles, gloves, and a dust mask to protect yourself from any potential hazards. Additionally, make sure to work in a well-ventilated area.
- Hammer and Chisel: A hammer and chisel will be necessary to remove any loose concrete or debris from the crack. Use a hammer to carefully chip away at the edges of the crack and a chisel to widen the opening if necessary.
- Wire Brush: A wire brush will help you clean the crack and remove any dirt, dust, or loose particles. Use the wire brush to scrub the crack and ensure a clean surface for the repair material to adhere to.
- Vacuum or Shop-Vac: After using the wire brush, it’s important to thoroughly clean out the crack. A vacuum or shop-vac will help remove any remaining debris or dust, ensuring a clean surface for the repair.
- Concrete Crack Filler: Choose a high-quality concrete crack filler that is specifically designed for basement floor repairs. There are various options available, including epoxy or polyurethane-based crack fillers. Select a product that is suitable for the size and type of crack you are repairing.
- Applicator: Depending on the crack filler you choose, you may need an applicator to fill the crack. This could be a caulk gun for tube-based fillers or a trowel for other types of fillers. Follow the manufacturer’s instructions for the specific applicator recommended for the product.
- Concrete Patching Compound: If the crack is larger or deeper, you may need a concrete patching compound to fill the void. This compound will help create a level and smooth surface after the crack is filled.
- Putty Knife or Trowel: A putty knife or trowel will be necessary for applying and smoothing the crack filler or patching compound. Choose a tool that is suitable for the size of the crack and allows for precise application.
- Sanding Block: Once the patching compound has dried, you may need to sand down the repaired area to achieve a smooth finish. Use a sanding block to gently sand the surface, ensuring it blends seamlessly with the surrounding floor.
- Concrete Sealer: Lastly, consider applying a concrete sealer to protect the repaired area. A concrete sealer will help prevent future moisture penetration and prolong the life of your basement floor.
Gathering these tools and materials before starting the repair process will ensure that you have everything you need to complete the job efficiently and effectively. Now that you are well-equipped, let’s proceed to the step-by-step guide on how to fix basement floor cracks.
Step 1: Preparation
Before you begin the process of fixing basement floor cracks, it is essential to prepare the area and ensure that you have a clean and stable surface to work with. Follow these steps for proper preparation:
- Clear the Area: Start by removing any items or furniture from the area around the crack. This will give you more space to work and prevent any obstacles during the repair process.
- Protect Surrounding Surfaces: Use plastic tarps or drop cloths to cover nearby walls, furniture, or anything else that could be potentially damaged by the repair materials or debris.
- Inspect the Crack: Carefully inspect the crack to determine its size, depth, and whether it is an active or inactive crack. An active crack may indicate ongoing foundation movement and may require additional measures to prevent further damage.
- Prepare the Tools and Materials: Make sure you have all the necessary tools and materials ready and easily accessible. Double-check that you have the correct crack filler, applicator, and any other materials needed for the specific type and size of the crack.
- Clean the Crack: Use a wire brush to thoroughly clean the crack and remove any loose debris, dirt, or dust. Be sure to scrub both the inside and edges of the crack to create a clean surface for the repair material to adhere to.
- Vacuum the Crack: After using the wire brush, it’s important to remove any remaining debris or dust from the crack. Use a vacuum or shop-vac to suck up any loose particles, ensuring a clean and debris-free surface.
- Check for Moisture: Before proceeding with the repair, check the crack for any signs of moisture. Use a moisture meter or simply observe if there are any damp areas around or within the crack. If you notice moisture, it may be necessary to address any underlying moisture issues before proceeding.
Proper preparation is key to a successful basement floor crack repair. By clearing the area, protecting surrounding surfaces, inspecting and cleaning the crack, and ensuring you have all the necessary tools and materials ready, you will be well-prepared to move on to the next step: filling the crack.
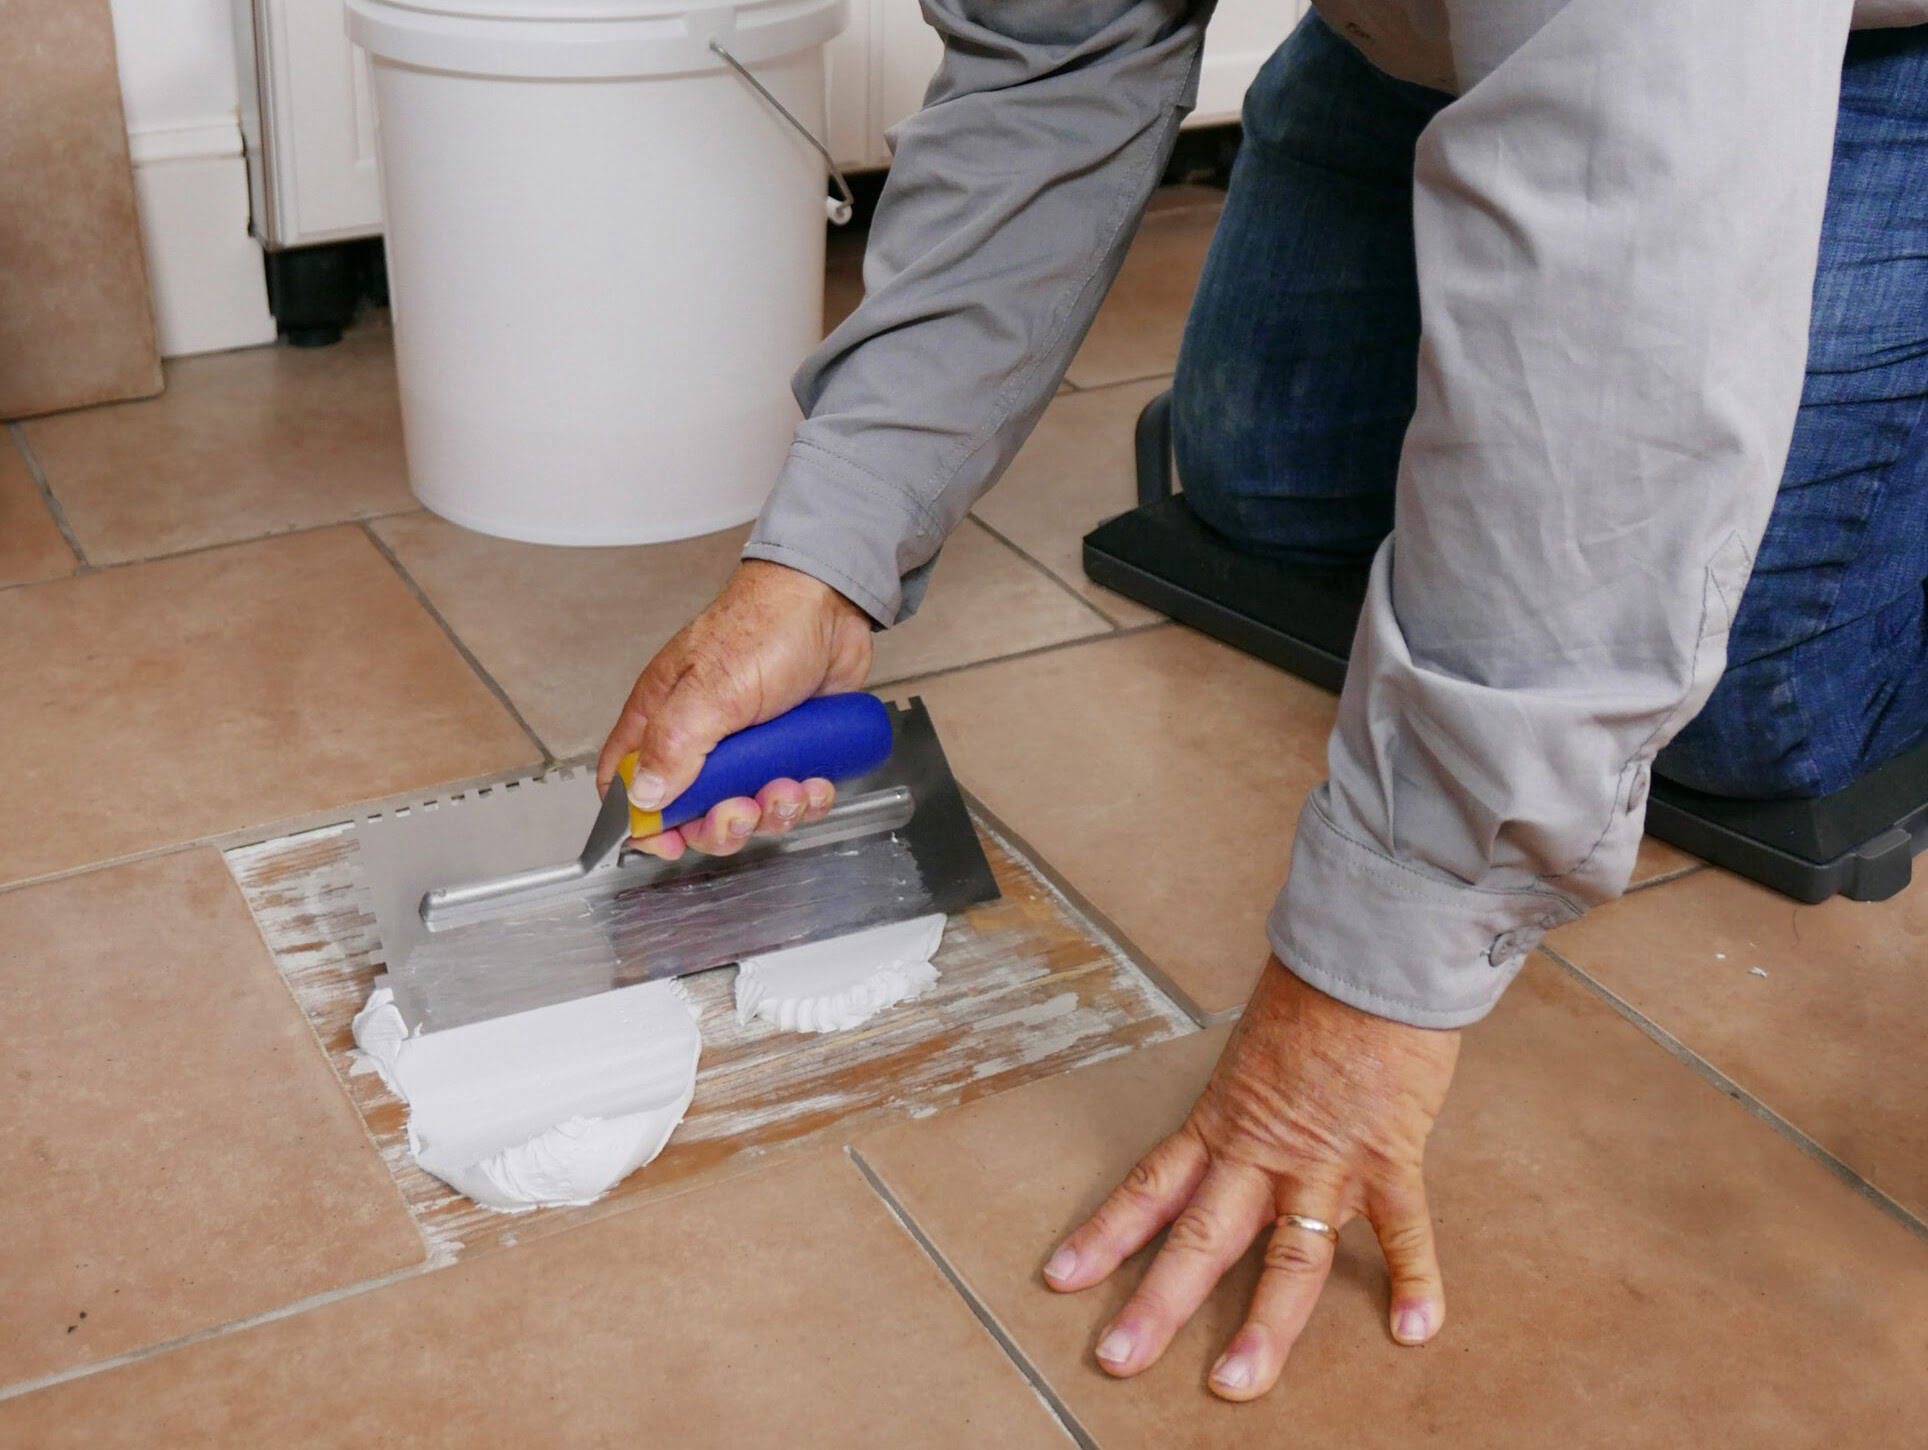
Use a concrete patching compound to fill in the cracks in your basement floor. Make sure to clean the area thoroughly before applying the compound and follow the manufacturer’s instructions for the best results.
Step 2: Cleaning the Crack
Once you have completed the initial preparation in step 1, it’s time to focus on cleaning the crack thoroughly. Properly cleaning the crack is crucial for ensuring that the repair material adheres properly and creates a strong bond. Follow these steps to clean the crack effectively:
- Remove Loose Debris: Begin by using a small brush or a compressed air canister to remove any loose debris or dust from within the crack. Be thorough in your cleaning, ensuring that there are no remaining loose particles that could hinder the repair process.
- Scrub the Crack: Use a wire brush to scrub the crack and remove any stubborn dirt or residue. Make sure to focus on the inside and edges of the crack, as this is where the repair material will bond with the existing concrete.
- Use a Cleaning Solution: For particularly stubborn stains or contaminants, you may need to use a cleaning solution. There are various concrete cleaning solutions available on the market, or you can create your own by mixing equal parts water and vinegar. Apply the cleaning solution to the crack and scrub with the wire brush to remove any deep-seated dirt or stains.
- Rinse the Crack: After scrubbing the crack with the cleaning solution, rinse it thoroughly with clean water. Use a sponge or a cloth to wipe away any remaining residue, ensuring that the crack is clean and free of any cleaning solution.
- Dry the Crack: Allow the crack to dry completely before moving on to the next step. This may take a few hours or even overnight, depending on the humidity level in the basement. It is important to ensure that the crack is completely dry to allow for proper adhesion of the repair material.
Cleaning the crack is a crucial step in the repair process. By removing loose debris, scrubbing the crack with a wire brush, using a cleaning solution if necessary, rinsing away the residue, and allowing the crack to dry completely, you will create a clean and stable surface for the repair material to adhere to. Once the crack is dry, you are ready to move on to step 3: filling the crack.
Step 3: Filling the Crack
Now that the crack is clean and dry, it’s time to proceed with filling it. This step involves applying the appropriate crack filler material to seal the crack and prevent further water penetration. Follow these steps to effectively fill the crack:
- Select the Crack Filler: Choose a high-quality crack filler that is suitable for your specific type and size of crack. Epoxy or polyurethane-based crack fillers are commonly used for basement floor repairs. Read and follow the manufacturer’s instructions for the specific product you are using.
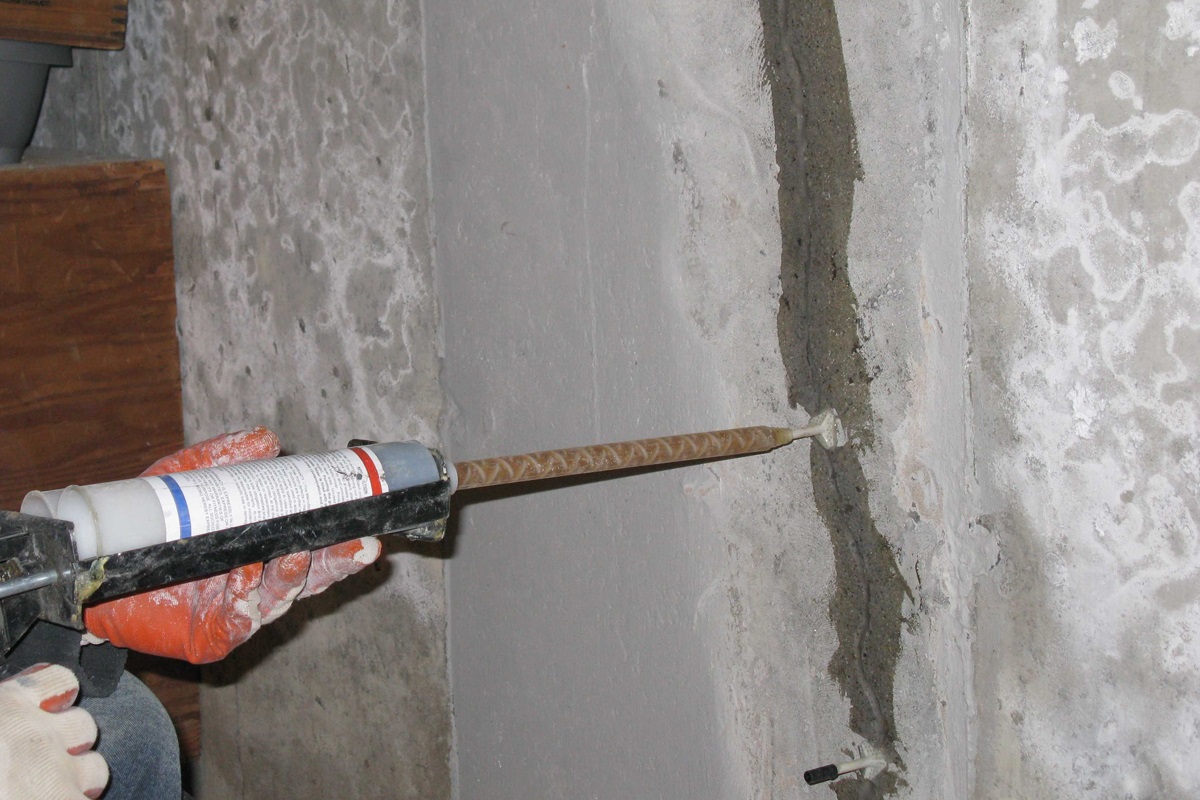
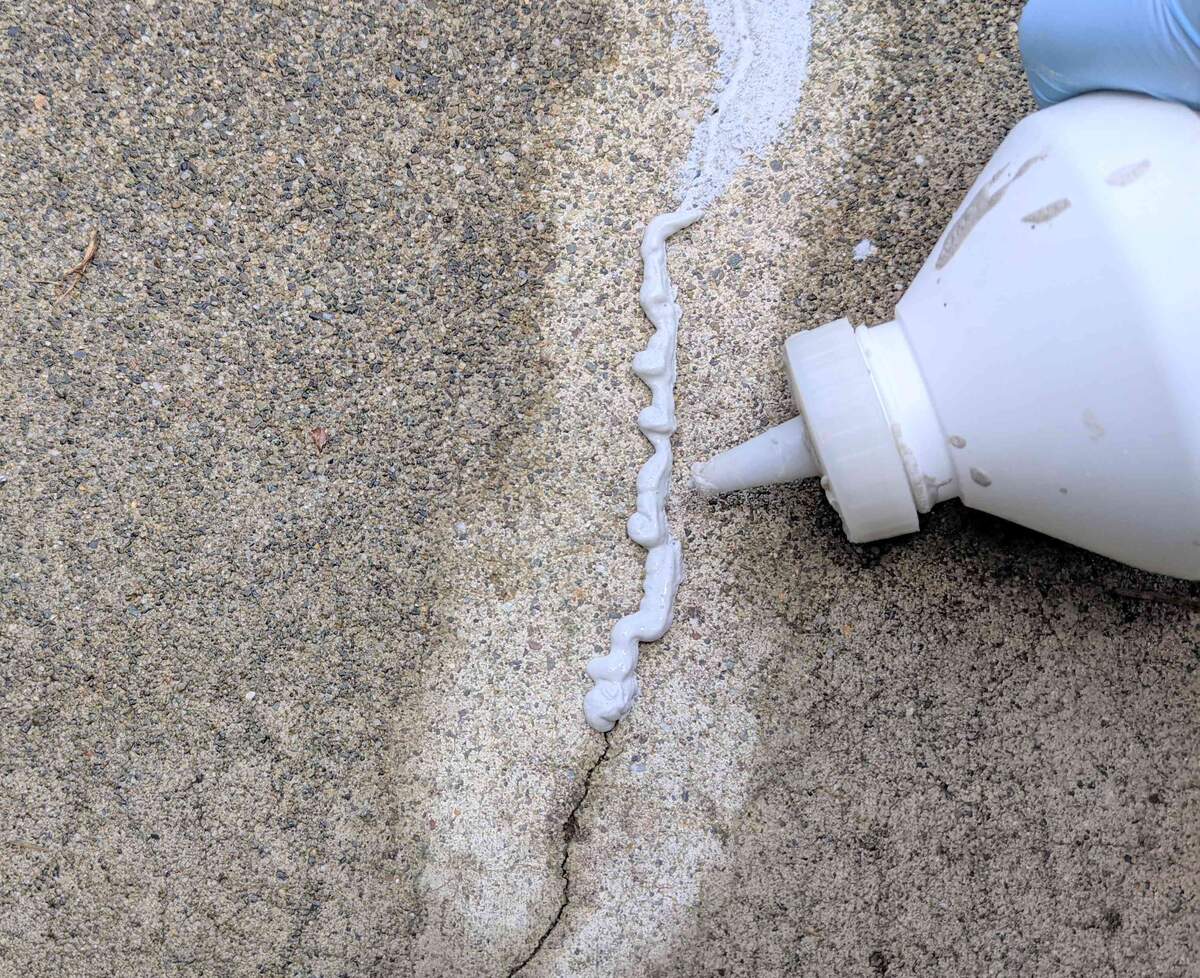
- Prepare the Crack Filler: If you are using a tube-based crack filler, cut the nozzle at a 45-degree angle to create a small opening. Load the tube into a caulk gun or use a similar applicator recommended by the manufacturer. For other types of crack fillers, mix the components according to the instructions provided.
- Apply the Crack Filler: Begin by squeezing the crack filler into the crack from one end to the other, ensuring that it completely fills the entire length and depth of the crack. Use a smooth, consistent motion to achieve an even application.
- Smooth the Surface: Use a putty knife or trowel to smooth the surface of the crack filler and create a level finish. Spread the filler slightly beyond the edges of the crack to ensure full coverage and a seamless blend with the existing floor.
- Remove Excess Filler: While the crack filler is still wet, use a damp cloth or sponge to remove any excess filler from the surrounding floor area. This will help achieve a neat and clean appearance.
- Allow the Crack Filler to Cure: Follow the manufacturer’s instructions for the recommended curing time. Typically, crack fillers will require several hours to dry and fully cure. Avoid walking on or placing any heavy objects on the repaired area during this time.
By selecting the appropriate crack filler, properly preparing it, applying it evenly and smoothly, and allowing it to dry and cure as instructed, you will effectively seal the crack and prevent further water penetration. Once the crack filler has fully cured, you can move on to the next step: smoothing and leveling the repaired area.
Step 4: Smoothing and Leveling
After the crack filler has dried and cured, it’s time to focus on smoothing and leveling the repaired area. This step will ensure that the surface is even and blends seamlessly with the surrounding floor. Follow these steps to achieve a smooth and level finish:
- Inspect the Repaired Area: Begin by inspecting the repaired area to ensure that the crack filler has fully cured and is stable. Check for any unevenness or rough patches that may need to be addressed.
- Sand the Surface: Use a sanding block or sandpaper to gently sand down any rough edges or uneven areas. Sand in a circular motion, paying attention to achieving a smooth and level finish. Take care not to sand too aggressively, as this may damage the surrounding floor.
- Remove Dust and Debris: After sanding, use a vacuum or a damp cloth to clean off any dust or debris from the sanded surface. This will ensure a clean and smooth surface for the finishing touches.
- Apply Concrete Patching Compound: If the crack was particularly deep or required a significant amount of filler, you may need to apply a concrete patching compound to level the surface. Follow the manufacturer’s instructions to mix and apply the patching compound, ensuring that it blends seamlessly with the surrounding floor.
- Smooth and Level the Surface: Use a putty knife or trowel to spread and smooth the patching compound, ensuring an even and level surface. Feather the edges of the compound to blend it with the rest of the floor. Take your time to achieve a seamless transition between the repaired area and the surrounding floor.
- Allow the Patching Compound to Dry: Follow the manufacturer’s instructions for the recommended drying time of the patching compound. This may vary depending on the product used. Avoid walking on or placing any heavy objects on the repaired area until the patching compound is fully dry.
By carefully inspecting, sanding, cleaning, applying patching compound (if necessary), and ensuring a smooth and level surface, you will achieve a professional-looking repair. Once the patching compound is fully dry, you can move on to the final step: applying the finishing touches.
Step 5: Finishing Touches
With the crack repaired, it’s time to focus on the final step: adding the finishing touches to ensure a seamless and polished appearance. Follow these steps to complete your basement floor crack repair:
- Sand the Repaired Area: Gently sand the repaired area, using a fine-grit sandpaper or sanding block. This step will help to blend the repaired area with the surrounding floor, creating a smooth and even surface.
- Remove Dust and Debris: After sanding, use a vacuum or a damp cloth to remove any dust or debris from the repaired area. This will ensure a clean surface for the next step.
- Apply a Concrete Sealer: Consider applying a concrete sealer to protect the repaired area and prevent future moisture penetration. Choose a high-quality concrete sealer suitable for basement floors and follow the manufacturer’s instructions for application.
- Allow the Sealer to Dry: Give the sealer sufficient time to dry and cure. This may take anywhere from a few hours to a day, depending on the product used. Avoid walking on or placing any objects on the sealed area until it is fully dry.
- Restore the Area: Once the sealer is dry, you can restore the area by returning any furniture or items that were removed during the repair process. Make sure to handle them with care to avoid damaging the newly repaired floor.
- Maintain the Basement Floor: Regularly inspect your basement floor for any signs of new cracks or damage. Address any issues promptly to prevent further damage. Additionally, maintain proper drainage around your home’s foundation to minimize the risk of basement floor cracks in the future.
By sanding, cleaning, applying a concrete sealer, allowing it to dry, restoring the area, and implementing regular maintenance, you will complete the process of fixing your basement floor crack. With these finishing touches, your basement floor will be visually appealing and well-protected.
Remember, if you encounter any large or structural cracks, or if you are uncertain about the severity of the damage, it is always advisable to consult with a professional contractor who can provide expert guidance and assistance. They will assess the situation and recommend the most suitable repair solution for your specific needs.
With proper maintenance and timely repairs, you can ensure that your basement floor remains strong, durable, and crack-free, providing you with a reliable space for storage, recreation, or even a cozy living area.
Read more: How To Fix A Crack In Concrete Floor
Conclusion
Basement floor cracks can be a common issue homeowners face, but with the right knowledge and tools, they can be effectively repaired. By understanding the common causes of basement floor cracks, the types of cracks you may encounter, and following the step-by-step guide provided in this article, you can successfully fix these cracks yourself.
Remember, proper preparation is key to a successful repair. Clearing the area, protecting surrounding surfaces, inspecting and cleaning the crack, and gathering the necessary tools and materials are essential first steps. Once the crack is clean and dry, filling the crack with an appropriate crack filler and allowing it to cure will seal the crack and prevent further water penetration.
Smoothing and leveling the repaired area and adding the finishing touches, such as sanding, applying a concrete sealer, and restoring the area, will ensure a seamless and polished appearance. Regular maintenance and timely repairs are crucial to keep your basement floor in good condition and prevent future cracks.
It’s important to note that for significant or structural cracks, or if you have any doubts about the severity of the damage, consulting a professional contractor is highly recommended. They can provide expert guidance and assistance to address any underlying issues and ensure a reliable and long-lasting repair.
By taking the time to fix basement floor cracks, you can not only improve the aesthetics of your basement space but also protect the structural integrity of your home. With proper care and maintenance, you can enjoy a sturdy and crack-free basement floor for years to come.
Remember, if you are unsure or uncomfortable with the repair process, it’s always best to consult a professional. They have the expertise and experience to handle basement floor cracks and ensure a successful repair.
Take pride in your home and take the necessary steps to fix basement floor cracks, creating a safe and comfortable environment for you and your family.
Frequently Asked Questions about How To Fix Basement Floor Cracks
Was this page helpful?
At Storables.com, we guarantee accurate and reliable information. Our content, validated by Expert Board Contributors, is crafted following stringent Editorial Policies. We're committed to providing you with well-researched, expert-backed insights for all your informational needs.


0 thoughts on “How To Fix Basement Floor Cracks”