Articles
How To Frame Cathedral Ceiling
Modified: December 7, 2023
Learn how to frame a cathedral ceiling with these informative and helpful articles. Gain expert insights and step-by-step instructions to tackle your project successfully.
(Many of the links in this article redirect to a specific reviewed product. Your purchase of these products through affiliate links helps to generate commission for Storables.com, at no extra cost. Learn more)
Introduction
When it comes to home design, cathedral ceilings have become increasingly popular due to their dramatic and spacious appearance. These high, vaulted ceilings add an architectural element that can transform any room into a grand and elegant space. However, framing a cathedral ceiling requires careful planning and precise execution to ensure structural integrity and safety.
In this article, we will guide you through the process of framing a cathedral ceiling, from understanding its unique characteristics to choosing the right materials and implementing effective framing techniques. Whether you’re a DIY enthusiast or a professional contractor, this comprehensive guide will provide you with the knowledge and steps needed to successfully frame a cathedral ceiling.
Before we delve into the details, it’s important to note that framing a cathedral ceiling is a complex task and may require the assistance of a structural engineer or experienced contractor. Safety should always be the top priority, so make sure to consult local building codes and regulations before proceeding with any construction work.
In the following sections, we will explore the key aspects of framing a cathedral ceiling, including material selection, measurement and planning, framing techniques, and the installation of support beams and roof structures. We will also provide tips for securing sheathing and insulation, as well as the finishing touches that will complete your cathedral ceiling.
Whether you’re looking to add character to your living room, create a stunning master bedroom, or simply enhance the overall ambiance of your home, framing a cathedral ceiling can be a rewarding project. So, let’s get started on this exciting journey!
Key Takeaways:
- Framing a cathedral ceiling requires meticulous planning, precise measurements, and careful selection of materials to ensure structural integrity and safety. Seek professional guidance and follow proper techniques for a visually stunning outcome.
- The finishing touches, such as trim, lighting, and décor, play a crucial role in transforming a cathedral ceiling into an enchanting focal point. Attention to detail and maintenance are essential for long-term beauty and structural integrity.
Read more: How To Build A Ceiling Frame
Understanding Cathedral Ceilings
A cathedral ceiling is characterized by its high, sloping design that creates a sense of spaciousness and grandeur in a room. Unlike traditional flat ceilings, cathedral ceilings add architectural interest and can significantly enhance the overall aesthetics of a space.
There are several reasons why homeowners choose to incorporate cathedral ceilings into their homes. Firstly, they provide a sense of openness and airiness, making a room feel larger and more inviting. The high slope of the ceiling also allows for better air circulation and natural light distribution, resulting in a more comfortable and energy-efficient living environment.
It’s important to note that not all homes are suitable for cathedral ceilings. Factors such as the size and structure of the house, as well as local building codes and regulations, need to be taken into consideration. Additionally, the roof pitch and ceiling height can affect the feasibility of installing a cathedral ceiling.
One key consideration when planning a cathedral ceiling is the joist size and span. The joists are responsible for supporting the weight of the ceiling and the roof above it. Depending on the size of the room and the load requirements, larger or more closely spaced joists may be necessary to ensure structural integrity.
Another critical aspect to consider is the insulation of a cathedral ceiling. Because these ceilings have an exposed underside, proper insulation is vital to maintain a comfortable indoor temperature. Insulation helps to minimize heat loss in winter and heat gain in summer, resulting in energy savings and improved comfort.
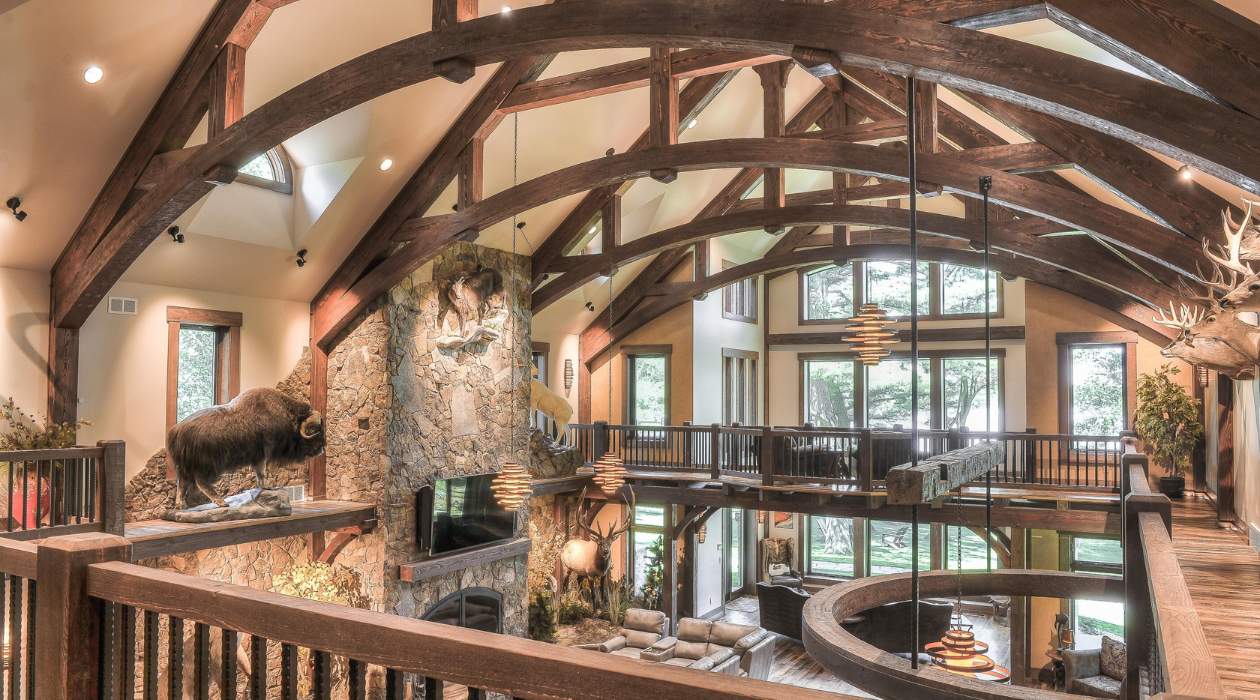
Cathedral ceilings come in a variety of designs, including arched, barrel vault, and exposed beam styles. Each design offers its own unique aesthetic appeal and can complement different architectural styles. When choosing a design, it’s important to consider the overall theme of your home and select a style that harmonizes with the existing elements. Additionally, incorporating skylights or windows into the cathedral ceiling can further enhance the natural light flow and bring in panoramic views.
Understanding the unique characteristics and considerations of cathedral ceilings is crucial before embarking on the framing process. By taking these factors into account, you can ensure a successful and visually stunning outcome.
Choosing the Right Materials
When it comes to framing a cathedral ceiling, selecting the right materials is essential for ensuring structural stability and longevity. Here are some key considerations when choosing materials for your cathedral ceiling project:
1. Lumber:
The primary material for framing a cathedral ceiling is lumber. It’s important to choose high-quality, pressure-treated or kiln-dried lumber that is capable of withstanding the weight of the ceiling and roof. Commonly used sizes for ceiling joists include 2×6, 2×8, or 2×10, depending on the span and load requirements. Consult with a structural engineer or building professional to determine the appropriate size and grade of lumber for your specific project.
2. Connectors and Fasteners:
Using the right connectors and fasteners is crucial for providing secure connections between the ceiling joists, rafters, and other structural components. Utilize joist hangers, hurricane ties, and support brackets to ensure the load transfer and structural integrity of the cathedral ceiling. Make sure to select connectors and fasteners that are compatible with the lumber type and size you are using.
3. Sheathing:
Sheathing is an essential component of the cathedral ceiling assembly, as it provides a stable base for the roof covering and helps distribute the load. Common types of sheathing materials include plywood and OSB (oriented strand board). Choose sheathing with the appropriate thickness and grade for your specific project, taking into consideration factors such as local building codes and the overall structural requirements.
4. Insulation:
Proper insulation is essential for maintaining a comfortable indoor environment and energy efficiency. Insulate your cathedral ceiling using insulation material with the appropriate R-value for your climate. Consider using insulation with a vapor barrier to prevent moisture buildup. Spray foam insulation is also a popular option for cathedral ceilings, as it provides excellent insulation and air sealing properties.
5. Roofing Material:
When selecting the roofing material for your cathedral ceiling, consider factors such as durability, aesthetics, and compatibility with your home’s architectural style. Common options include asphalt shingles, metal roofing, clay or concrete tiles, or wood shakes. Consult with a roofing specialist to determine the best roofing material for your specific needs and preferences.
Choosing the right materials sets the foundation for a successful cathedral ceiling framing project. Ensure that you select materials of suitable quality, durability, and compatibility to achieve a structurally sound and visually appealing result.
Measuring and Planning
Accurate measurements and detailed planning are essential for a successful cathedral ceiling framing project. Here are the key steps involved in measuring and planning:
Read more: How To Make Cathedral Window Quilt Pattern
1. Determine Ceiling Height:
Start by measuring the existing ceiling height or the desired height for the cathedral ceiling. Take into account any architectural features or obstructions, such as beams or trusses, that may affect the height of the ceiling.
2. Calculate Roof Pitch:
The roof pitch determines the angle of the cathedral ceiling. Measure the rise (vertical distance) and the run (horizontal distance) to calculate the roof pitch. This information is crucial for determining the length and angle of the rafters and the overall framing design.
3. Identify Load Bearing Walls:
Identify the load-bearing walls in the room where you plan to install the cathedral ceiling. These walls will support the weight of the ceiling and roof. Consult with a structural engineer or building professional to ensure that the load-bearing walls are capable of supporting the additional load.
4. Design Roof Structure:
Using the measurements and roof pitch, design the roof structure for the cathedral ceiling. This includes determining the spacing and length of the rafters, as well as the location of ridge beams or collar ties for additional support. Consider factors such as snow load, wind load, and local building codes when designing the roof structure.
5. Create a Materials List:
Based on the design and measurements, create a detailed materials list, including the quantity and dimensions of lumber, connectors, fasteners, sheathing, insulation, and roofing materials. This will help you accurately estimate the cost and ensure that you have all the necessary materials on hand before starting the framing process.
6. Obtain Building Permits:
Before proceeding with any construction work, check with local authorities to determine whether you need building permits for framing a cathedral ceiling. Submit the necessary documents and obtain the required permits to ensure compliance with building codes and regulations.
By carefully measuring and planning your cathedral ceiling project, you can minimize errors and complications during the construction process. Taking the time to gather accurate measurements, understand the roof pitch, identify load-bearing walls, and create a comprehensive materials list will set the stage for a successful framing project.
Framing Techniques
Framing a cathedral ceiling requires using specific techniques to ensure structural integrity and support the weight of the ceiling and roof. Here are some key framing techniques to consider:
1. Determine Rafter Spacing:
Based on the design and load requirements, determine the spacing between the rafters. Typically, rafters are spaced 16 or 24 inches apart. Consult with a structural engineer or building professional to determine the appropriate spacing for your specific project.
2. Install Ridge Beam or Collar Ties:
A ridge beam or collar ties are essential for providing additional support and preventing the rafters from sagging or spreading apart. The ridge beam runs horizontally along the peak of the ceiling, while collar ties are installed horizontally between opposing rafters. The choice between a ridge beam or collar ties depends on the design and structural requirements of the cathedral ceiling.
3. Cut and Install Rafters:
Cut the rafters to the appropriate length and angle based on the roof pitch and design. Ensure that each rafter is cut accurately to maintain a consistent slope for the cathedral ceiling. Install the rafters, starting from the load-bearing walls and working towards the center of the ceiling.
4. Secure Rafters to Ridge Beam or Collar Ties:
Secure the rafters to the ridge beam or collar ties using nails, screws, or appropriate connectors. Make sure that each rafter is securely fastened to provide stability and ensure structural integrity.
5. Install Ceiling Joists:
Install the ceiling joists between the load-bearing walls to provide additional support to the ceiling. The size and spacing of the joists will depend on the design and load requirements of the cathedral ceiling. Use joist hangers or appropriate connectors to secure the joists to the load-bearing walls.
Read more: How To Frame A Fireplace
6. Consider Ventilation and Electrical:
When framing a cathedral ceiling, consider incorporating ventilation channels or soffit vents to ensure proper air circulation in the attic space. Additionally, plan for the installation of electrical wiring and fixtures, such as overhead lighting or ceiling fans. Consult with an electrician to determine the appropriate electrical setup for your cathedral ceiling.
Remember to consult local building codes and regulations and seek guidance from professionals to ensure safety and compliance throughout the framing process. By following these framing techniques, you can create a sturdy and visually appealing cathedral ceiling that enhances the overall ambiance of your space.
Installing Support Beams
Support beams are a critical component of framing a cathedral ceiling as they provide additional structural support and help distribute the weight of the ceiling and roof. Here are the steps to consider when installing support beams for your cathedral ceiling:
1. Determine Beam Type:
Select the appropriate type of support beam for your cathedral ceiling. Common options include ridge beams, collar ties, and purlins. The choice will depend on the design, load requirements, and architectural style of the ceiling. Consulting with a structural engineer or building professional is essential to ensure the selection of the right beam type.
2. Measure and Cut Beams:
To install the support beams, accurately measure the length and angle required for each beam. Cut the beams to the appropriate size, ensuring that the cuts are precise for a snug fit and proper support.
3. Locate the Position of Support Beams:
Determine the position of the support beams in relation to the rafters. Typically, support beams are placed at regular intervals along the length of the cathedral ceiling to provide adequate support and prevent sagging.
4. Install Ridge Beam:
If using a ridge beam, position it horizontally along the peak of the ceiling. Secure the ridge beam to the load-bearing walls or existing structural elements using appropriate connectors or hardware. Ensure that the beam is level and properly aligned for optimal support.
5. Attach Collar Ties:
If collar ties are being used, position them horizontally between opposing rafters. Collar ties prevent the rafters from spreading apart and provide additional support to the cathedral ceiling. Secure the collar ties to the rafters using nails or appropriate connectors, ensuring that they are level and securely fastened.
6. Install Purlins:
For a more elaborate cathedral ceiling design, you may choose to install purlins. Purlins are horizontal beams that run perpendicular to the rafters and provide additional support. Secure the purlins to the rafters using appropriate connectors or brackets.
Throughout the installation process, it is essential to double-check measurements and ensure that the support beams are positioned correctly and securely attached. Additionally, consult with building professionals or local authorities to ensure compliance with building codes and regulations.
By properly installing support beams, you will ensure the structural integrity and stability of your cathedral ceiling, allowing it to withstand the weight of the ceiling and roof while adding a visually appealing architectural element to your living space.
Read more: How To Frame A Roof
Building the Roof Structure
Building the roof structure is a crucial step in framing a cathedral ceiling. It involves constructing the framework that supports the roof covering and provides stability and protection to your home. Here are the steps to consider when building the roof structure for your cathedral ceiling:
1. Install Roof Trusses or Rafters:
Depending on your design and construction preferences, you can choose to install pre-fabricated roof trusses or individual rafters. Roof trusses are pre-engineered and manufactured off-site, making them a popular choice for efficient and precise roof construction. If you prefer traditional methods, individual rafters can be installed. Position the trusses or rafters according to your roof design and secure them to the support beams or ridge beam using appropriate connectors or hardware.
2. Ensure Alignment and Levelness:
As you install the roof trusses or rafters, ensure they are aligned and level. Use a leveling tool and check for any inconsistencies or deviations that may affect the structural integrity of the roof. Proper alignment and levelness are crucial for creating a secure and visually appealing roof structure.
3. Add Bracing and Support:
To reinforce the roof structure, add bracing and support elements as needed. This may include collar ties, which connect opposing rafters and provide extra stability. Install diagonal or lateral bracing as required to prevent lateral movement and improve overall strength.
Read more: How To Frame A Bathtub
4. Incorporate Ventilation:
Ventilation is essential to maintain a healthy roof and attic space. Proper ventilation helps to prevent moisture buildup, reduce the risk of mold and mildew, and extend the lifespan of the roofing materials. Install ridge vents, soffit vents, or other ventilation systems in accordance with local building codes and the specific needs of your roof design.
5. Apply Roof Sheathing:
Once the roof structure is in place, it’s time to apply roof sheathing. Common materials used for roof sheathing include plywood or oriented strand board (OSB). Secure the sheathing to the roof trusses or rafters using appropriate fasteners or nails according to the manufacturer’s guidelines. This layer provides a stable base for the roof covering and helps distribute the weight evenly.
6. Install Underlayment and Roof Covering:
After the sheathing is in place, install an underlayment to provide an extra layer of protection against moisture and improve the lifespan of the roof covering. Depending on your choice of roof covering, this may include synthetic underlayment, felt paper, or other materials. Finally, install the roof covering of your choice, such as asphalt shingles, metal roofing, or clay tiles, following the manufacturer’s instructions and industry best practices.
Remember to consult with building professionals or local authorities throughout the roof construction process to ensure compliance with building codes and regulations. Building a sturdy and well-constructed roof structure is vital in providing the necessary protection and stability to your cathedral ceiling and home.
Securing Sheathing and Insulation
Securing the sheathing and adding insulation to your cathedral ceiling are crucial steps in ensuring energy efficiency, comfort, and structural integrity. Here’s what you need to know about securing sheathing and installing insulation:
Read more: How To Frame Closet
1. Sheathing Installation:
Once the roof structure is in place, it’s time to install the roof sheathing. Common options for sheathing materials are plywood or oriented strand board (OSB). Begin by positioning the sheathing panels on the roof trusses or rafters, ensuring proper alignment and coverage. Secure the sheathing using appropriate fasteners or nails, following the manufacturer’s guidelines and any local building codes.
2. Sealing and Weatherproofing:
To enhance the weatherproofing and durability of your cathedral ceiling, it’s important to properly seal the sheathing. Apply a waterproof barrier, such as a self-adhesive membrane or roofing felt, to create a barrier against water intrusion. Pay extra attention to the edges and joints of the sheathing to prevent any potential leaks or moisture ingress.
3. Install Roofing Underlayment:
Before installing the final roof covering, it’s recommended to apply a roofing underlayment. This additional layer provides an extra level of protection against moisture, helps to prevent leaks, and improves the longevity of the roof. Common underlayment options include synthetic underlayment or felt paper, which should be installed according to the manufacturer’s instructions.
4. Insulation Installation:
Insulating your cathedral ceiling is crucial for maintaining a comfortable indoor environment and reducing energy consumption. Choose insulation materials with the appropriate R-value for your climate zone. Common options include fiberglass batts, spray foam insulation, or rigid foam boards. Install the insulation between the roof rafters, ensuring a snug fit and covering any gaps or voids. Pay extra attention to areas around electrical fixtures, vents, and other penetrations to maintain proper insulation continuity.
Read more: How To Store Framed Artwork
5. Vapor Barrier:
In colder climates, it’s important to install a vapor barrier along with the insulation to prevent moisture condensation within the ceiling assembly. The vapor barrier should face the living space and be installed on the warm side of the insulation. Ensure the vapor barrier is well-sealed to prevent any moisture from penetrating the insulation layers.
6. Fire Safety Measures:
When insulating a cathedral ceiling, it’s essential to consider fire safety. Install fire-rated insulation or use fire-resistant materials in areas where the insulation comes into contact with heat sources or electrical fixtures. Consult with local building codes and regulations to ensure compliance with fire safety standards.
Working carefully and diligently to secure the sheathing and install insulation will help create a well-insulated and energy-efficient cathedral ceiling. Remember to follow manufacturer instructions, building codes, and safety guidelines throughout the process to ensure a structurally sound and comfortable living space.
Finishing Touches
Completing the finishing touches on your cathedral ceiling is the final step in creating a stunning and functional space. These details add personality and enhance the overall aesthetics of your ceiling. Here are some key finishing touches to consider:
1. Trim and Molding:
Add trim and molding to the edges of your cathedral ceiling for a polished and elegant look. Choose from a variety of styles, such as crown molding, baseboards, or decorative trims, that complement the architectural style of your home. Install the trim carefully and ensure that it is securely fastened for a professional finish.
Read more: How To Frame A Screen Porch
2. Paint or Stain:
Apply a fresh coat of paint or stain to the ceiling beams, rafters, and other visible elements of your cathedral ceiling. Opt for colors that enhance the overall ambiance of the space and complement the interior design of your home. Light, neutral colors can create a sense of openness, while darker tones can add drama and depth.
3. Lighting Fixtures:
Choose lighting fixtures that accentuate the beauty of your cathedral ceiling. Consider installing recessed lights, pendant lights, or chandeliers to highlight architectural elements or create focal points in the room. Consult with a lighting professional to determine the best placement and type of fixtures that fit your specific needs and design preferences.
4. Skylights or Windows:
Maximize natural light and take advantage of the expansive space by incorporating skylights or windows into your cathedral ceiling. These additions not only bring in abundant daylight but also provide beautiful views and a connection to the outdoors. Consult with a professional to ensure proper installation and consider energy-efficient options to minimize heat gain or loss.
5. Accessories and Décor:
Add the final touches to your cathedral ceiling with carefully selected accessories and décor items. Consider hanging artwork, installing a ceiling fan, or incorporating decorative elements that complement the style and theme of the room. Pay attention to scale and proportion to create a harmonious and visually pleasing space.
Read more: How To Distress Picture Frames
6. Maintenance and Care:
Regular maintenance is essential to keep your cathedral ceiling looking its best. Ensure proper cleaning, dusting, and occasional inspections to identify any signs of damage or wear. Address any issues promptly to maintain the structural integrity and longevity of your ceiling.
With these finishing touches, you can transform your cathedral ceiling from a structural element into an enchanting and visually captivating focal point of your living space. Pay attention to the details and design elements that resonate with your personal style, ultimately creating a cathedral ceiling that reflects your unique taste and enhances the overall beauty of your home.
Conclusion
Framing a cathedral ceiling is a challenging yet rewarding endeavor that can transform the look and feel of any space. By understanding the unique characteristics of cathedral ceilings and following the proper techniques, you can create a visually stunning and structurally sound ceiling that adds elegance and grandeur to your home.
Throughout this article, we have explored the important aspects of framing a cathedral ceiling, from understanding its architectural appeal to selecting the right materials, measuring and planning, implementing framing techniques, securing sheathing and insulation, and adding the final touches. Each step plays a crucial role in achieving a successful outcome.
Remember, safety should always be a priority. Consult with professionals, such as structural engineers or experienced contractors, to ensure compliance with building codes and regulations. Seek guidance when needed and never hesitate to ask for help.
Whether you’re a DIY enthusiast or a professional contractor, framing a cathedral ceiling requires attention to detail, precise measurements, and a commitment to quality craftsmanship. Throughout the process, take the time to carefully select materials, plan meticulously, and follow proper installation techniques to create a durable and visually stunning result.
Once complete, your cathedral ceiling will be a focal point that captivates the eye and adds a sense of grandeur to your living space. It will provide an open and airy atmosphere, enhance natural lighting, and even contribute to energy efficiency. With the right finishing touches and proper maintenance, your cathedral ceiling will continue to be a source of pride and admiration for years to come.
So, go ahead and embark on this exciting journey of framing a cathedral ceiling. Let your creativity shine and enjoy the process of transforming your home with this architectural masterpiece. Get ready to bask in the beauty of your newly framed cathedral ceiling and relish in the inviting and stunning atmosphere it creates.
Frequently Asked Questions about How To Frame Cathedral Ceiling
Was this page helpful?
At Storables.com, we guarantee accurate and reliable information. Our content, validated by Expert Board Contributors, is crafted following stringent Editorial Policies. We're committed to providing you with well-researched, expert-backed insights for all your informational needs.


0 thoughts on “How To Frame Cathedral Ceiling”