Home>Interior Design>How To Frame Closet

Interior Design
How To Frame Closet
Modified: October 26, 2024
Learn how to frame a closet with our expert interior design tips and tricks. Create a stylish and functional closet space for your home renovation project.
(Many of the links in this article redirect to a specific reviewed product. Your purchase of these products through affiliate links helps to generate commission for Storables.com, at no extra cost. Learn more)
Introduction
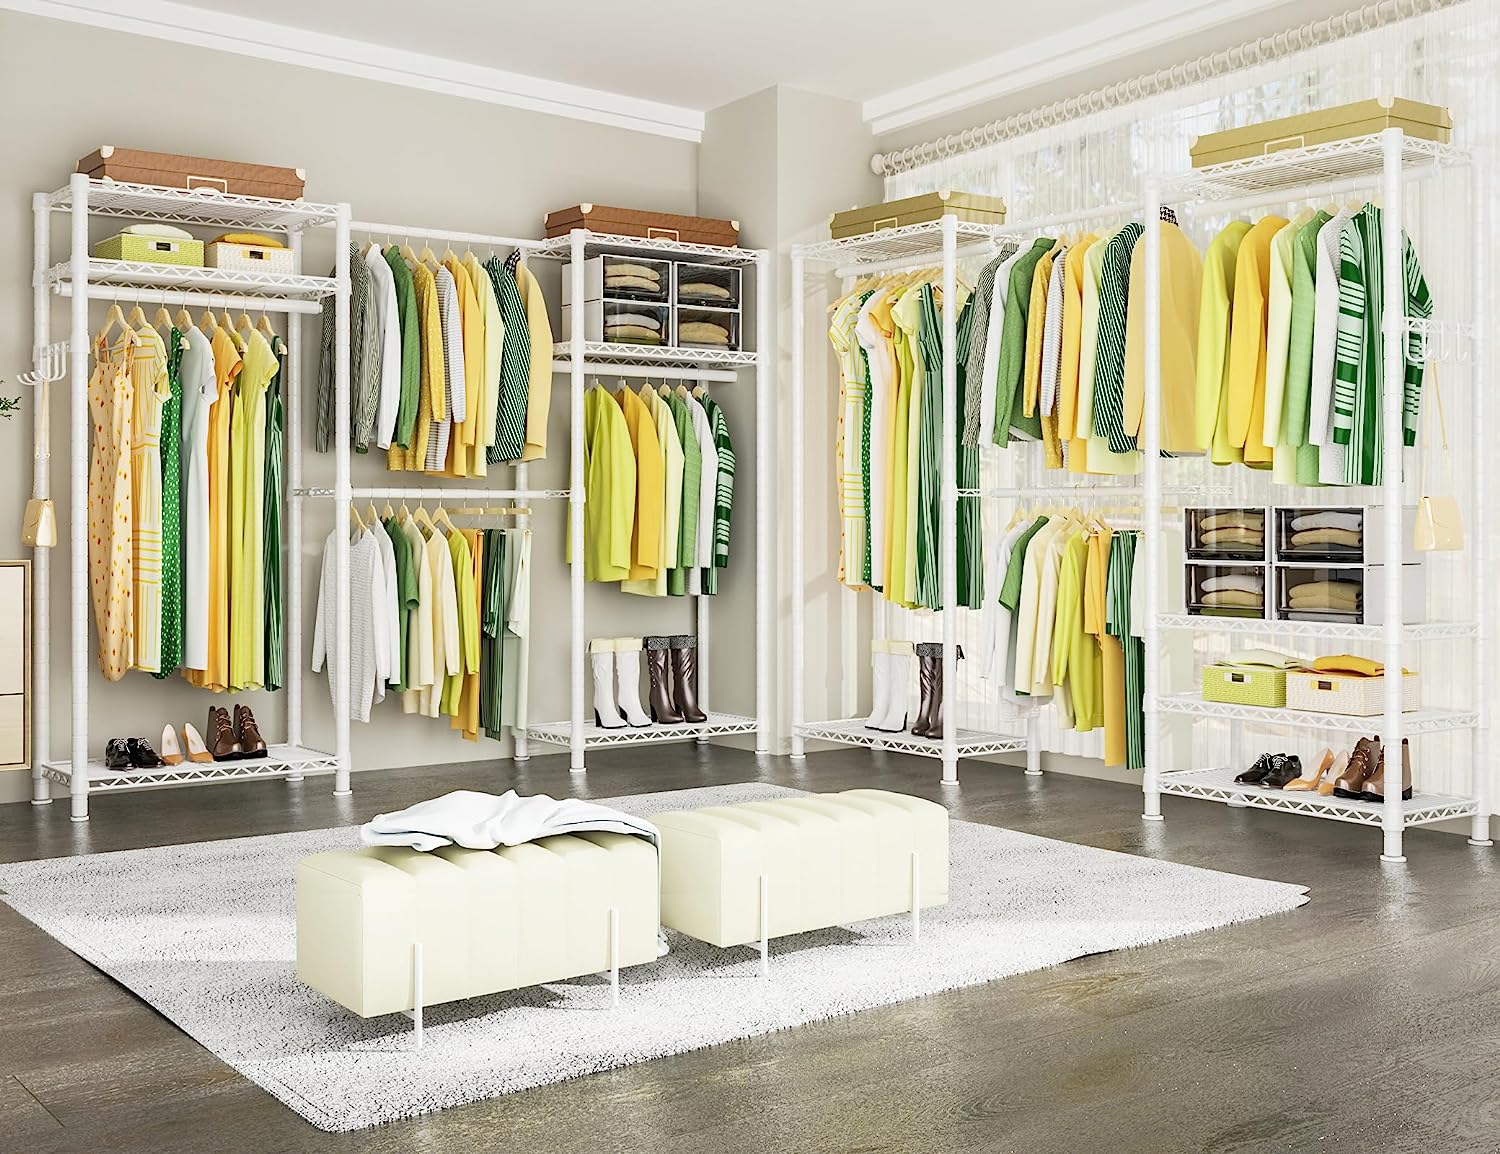
Welcome to our comprehensive guide on how to frame a closet! If you’re looking to optimize your closet space and create a more organized and functional wardrobe area, framing a closet is an essential step. A well-designed closet frame not only provides structural support but also offers the flexibility to customize your storage solutions.
In this article, we will take you through a step-by-step process of measuring, choosing the right frame type, gathering tools and materials, installation, and adding shelves and rods. By the end, you’ll have all the knowledge needed to frame your closet like a pro!
Whether you’re a DIY enthusiast or a homeowner looking to revamp your closet, this guide will give you the confidence to tackle this project with ease. So, let’s jump right into it and transform your closet into a functional and stylish storage space!
Key Takeaways:
- Transform your closet into a functional and stylish storage space by following our step-by-step guide on framing a closet. Maximize storage capacity and enhance your interior design with precision and creativity.
- Gain the knowledge and skills to create a well-structured and aesthetically pleasing closet. From accurate measurements to adding the final touches with trim and paint, elevate your storage space with confidence and creativity.
Read more: How To Frame A Closet Door
Step 1: Measure the Closet Space
The first and most crucial step in framing a closet is accurately measuring the space. This step ensures that you have the correct dimensions for your frame and that it fits perfectly into your closet area. Here’s how you can get started:
- Clear out your closet: Before you begin measuring, remove all items from your closet to have a clear and unobstructed space.
- Measure the width: Take a measuring tape and measure the width of the closet from one side to the other. Make sure to measure at different heights as the width might vary.
- Measure the height: Next, measure the height of the closet from the floor to the ceiling. Again, take measurements at multiple spots to account for any variations.
- Measure the depth: Measure the depth of the closet by measuring from the back wall to the front door or opening. This measurement will help determine the size of the frame.
- Note any obstructions: Take note of any obstructions such as light fixtures, electrical outlets, or baseboards that may be present in the closet. This will help you plan for any modifications needed.
Once you have taken accurate measurements of your closet space, record them on a notepad or in a digital document. These measurements will serve as a guide throughout the framing process, ensuring that your frame fits perfectly into the space.
Remember, precision is key when measuring the closet space. Taking the time to double-check your measurements will save you from potential issues later on and ensure a seamless framing process.
Step 2: Choose the Closet Frame Type
Once you have measured your closet space, the next step is to choose the right type of frame for your closet. The frame type you select will depend on your personal preferences, the size and layout of your closet, and the storage solutions you have in mind.
Here are four common types of closet frames to consider:
- Standard Frame: The standard frame, also known as a basic frame, is a simple and straightforward option. It involves installing vertical studs alongside the walls of the closet and horizontal supports across the top and bottom. This type of frame allows for individual customization of shelves and rods.
- Modular Frame: A modular frame is a pre-fabricated system that comes with built-in components such as shelving units, drawers, and hanging rods. This type of frame is ideal if you prefer a ready-to-use solution without the need for extensive customization.
- Wire Frame: A wire frame, as the name suggests, utilizes wire shelving units that are attached to the walls of the closet. This type of frame allows for excellent ventilation and visibility of your stored items.
- Built-in Frame: If you prefer a more custom and seamless look, a built-in frame might be the right choice. This frame type involves building the closet frame directly into the walls of the room, providing a built-in and integrated appearance.
Consider your storage needs, budget, and aesthetic preferences when choosing the frame type. Take into account factors such as durability, ease of installation, and the ability to reconfigure the storage layout in the future.
It’s also important to note that some frame types, such as the modular and wire frames, may come with specific installation instructions and requirements. Be sure to familiarize yourself with these guidelines to ensure a successful installation.
By carefully selecting the frame type that best suits your needs, you can create a closet that maximizes storage space, enhances functionality, and complements your overall interior design.
Step 3: Gather the Necessary Tools and Materials
Before you begin framing your closet, it’s essential to gather all the necessary tools and materials. Having everything prepared in advance will save you time and ensure a smooth installation process. Here’s a list of the tools and materials you’ll need:
Tools:
- Tape measure
- Level
- Stud finder
- Power drill
- Screwdriver
- Saw (circular saw or hand saw)
- Hammer
- Pencil or marker
- Safety goggles
Read more: How To Make A Closet
Materials:
- 2×4 or 2×3 lumber for the frame
- Drywall screws
- Wood screws
- Drywall or plywood for the walls
- Shelving units
- Hanging rods
- Trim and molding (optional)
- Drywall compound (if necessary)
- Paint or stain (if desired)
Ensure that you have the appropriate sizes and quantities of lumber and screws based on your closet dimensions and frame type. It’s also a good idea to have some extra drywall screws and wood screws on hand in case any get lost or damaged during installation.
Additionally, if you are planning to install shelves or hanging rods, make sure you have the necessary hardware and brackets to support them securely. Consider the weight capacity of the hardware to accommodate the items you plan to store.
Remember to prioritize safety by wearing safety goggles when cutting or drilling into materials. If you’re not comfortable using power tools, consider seeking assistance from a professional or someone experienced in carpentry.
By gathering all the tools and materials beforehand, you’ll be well-prepared to start framing your closet and create a functional and stylish storage space.
Step 4: Remove any Existing Closet Shelving or Rods
Before you can begin framing your closet, it’s important to remove any existing shelving or rods that are currently in place. This step will provide you with a clean slate to work with and ensure a smooth installation process. Here’s how to remove existing closet shelving or rods:
- Clear out the closet: Empty the closet of all items, including clothes, shoes, and any other stored items. This will give you ample space and access to work.
- Assess the current shelving or rod system: Take a look at the existing setup and determine how it is mounted or attached to the walls. Look for screws or brackets that may be holding the shelves or rods in place.
- Remove the screws or brackets: Using a screwdriver or power drill, carefully remove the screws or brackets that secure the shelving or rods to the wall. Place the screws or brackets in a safe and easily accessible location as you may need them later.
- Take down the shelving or rods: Gently pull the shelves or rods away from the wall, being cautious not to damage the surrounding area or cause any injury. If there are any stubborn parts that are difficult to remove, use a hammer or pry bar to carefully pry them away from the wall.
- Inspect the walls: Once the shelving or rods are removed, take a close look at the walls to identify any damages or holes that may need repair. Fill any holes with drywall compound and sand them down until smooth.
Removing existing shelving or rods may require some effort, but it is an important step in the process. It allows you to start fresh and ensures that your new closet frame will fit properly without any obstructions.
Be mindful of the materials you are working with and take necessary precautions to avoid any accidents. If you are unsure about the removal process or if the existing system is complex, it is recommended to seek guidance from a professional.
With the existing shelving or rods removed, you are now ready to move on to the next step of framing your closet to create a functional and organized space!
Step 5: Install the Closet Frame
Now that you have cleared out the existing closet space and removed any shelving or rods, it’s time to start installing the closet frame. The frame will provide the structure and support for your closet organization system. Follow these steps to install the closet frame:
- Start with the top plate: Measure and cut a piece of 2×4 or 2×3 lumber to match the width of your closet. This will serve as the top plate of the frame. Place it horizontally along the top of the closet, parallel to the ceiling, and secure it to the studs in the wall using wood screws.
- Install the vertical studs: Measure and cut vertical studs based on the height of your closet. Space them evenly along the side walls of the closet, ensuring they are plumb (vertically straight) and stable. Secure each stud to the top plate and the bottom plate using screws.
- Add the bottom plate: Cut another piece of lumber to match the width of the closet and install it horizontally along the bottom of the frame, parallel to the floor. Use screws to attach it firmly to the vertical studs.
- Create the door opening: Determine the desired width of the door opening and mark it on one of the vertical studs. Carefully cut along the marked lines using a saw, ensuring that the opening is straight and level. Install additional studs around the door opening for support.
- Consider additional support: Depending on the size and layout of your closet, you may need to add additional horizontal supports or cross bracing for added stability. Measure and cut the lumber accordingly, and secure it in place using screws.
As you assemble the closet frame, use a level to ensure that all components are straight and even. This will ensure that your shelves and rods fit properly within the frame.
It’s important to note that specific instructions and measurements may vary depending on the type of frame you selected in the previous step. Refer to the manufacturer’s guidelines or consult with a professional if you’re using a pre-fabricated or specialized frame system.
By following these steps and using proper techniques, you can successfully install the closet frame, setting the foundation for your organized and functional closet space.
Step 6: Secure the Frame to the Wall
Once you have installed the closet frame, it’s important to secure it to the walls for stability and durability. This step ensures that the frame remains securely in place, even with the weight of shelves and hanging items. Here’s how you can secure the frame to the wall:
- Locate the wall studs: Use a stud finder to locate the vertical studs in the wall. These studs provide the strongest and most secure attachment points for your frame.
- Mark the stud locations: Once you have located the studs, mark their positions on the top plate and the bottom plate of the frame using a pencil or marker. This will guide you in placing the screws accurately.
- Pre-drill pilot holes: Using a power drill, pre-drill pilot holes through the top and bottom plates of the frame, at the marked stud locations. Make sure the pilot holes are slightly smaller in diameter than the screws you will be using.
- Secure the frame to the wall: With the pilot holes drilled, place the frame back into position in the closet. Align the pilot holes with the marked stud locations on the wall. Start at one end of the frame and use a screwdriver or power drill to drive screws through the pilot holes and into the studs. Repeat this process along the entire length of the frame, making sure each screw is tightened securely.
- Check for stability: Once you have secured the frame to the wall, give it a gentle shake to ensure it is stable and well-supported. If you notice any movement or instability, add additional screws or brackets as necessary.
Securing the closet frame to the wall is an important step in ensuring the long-term durability and structural integrity of your closet. Proper anchoring will prevent the frame from shifting or becoming loose over time, even with regular use of the closet space.
Remember to use screws that are appropriate for the material of your wall and frame. If you’re unsure about the process or if you have specific wall materials, it’s recommended to consult a professional for guidance.
With the frame securely attached to the wall, you can now move on to the next step of installing shelves and rods, bringing your organized closet space to life.
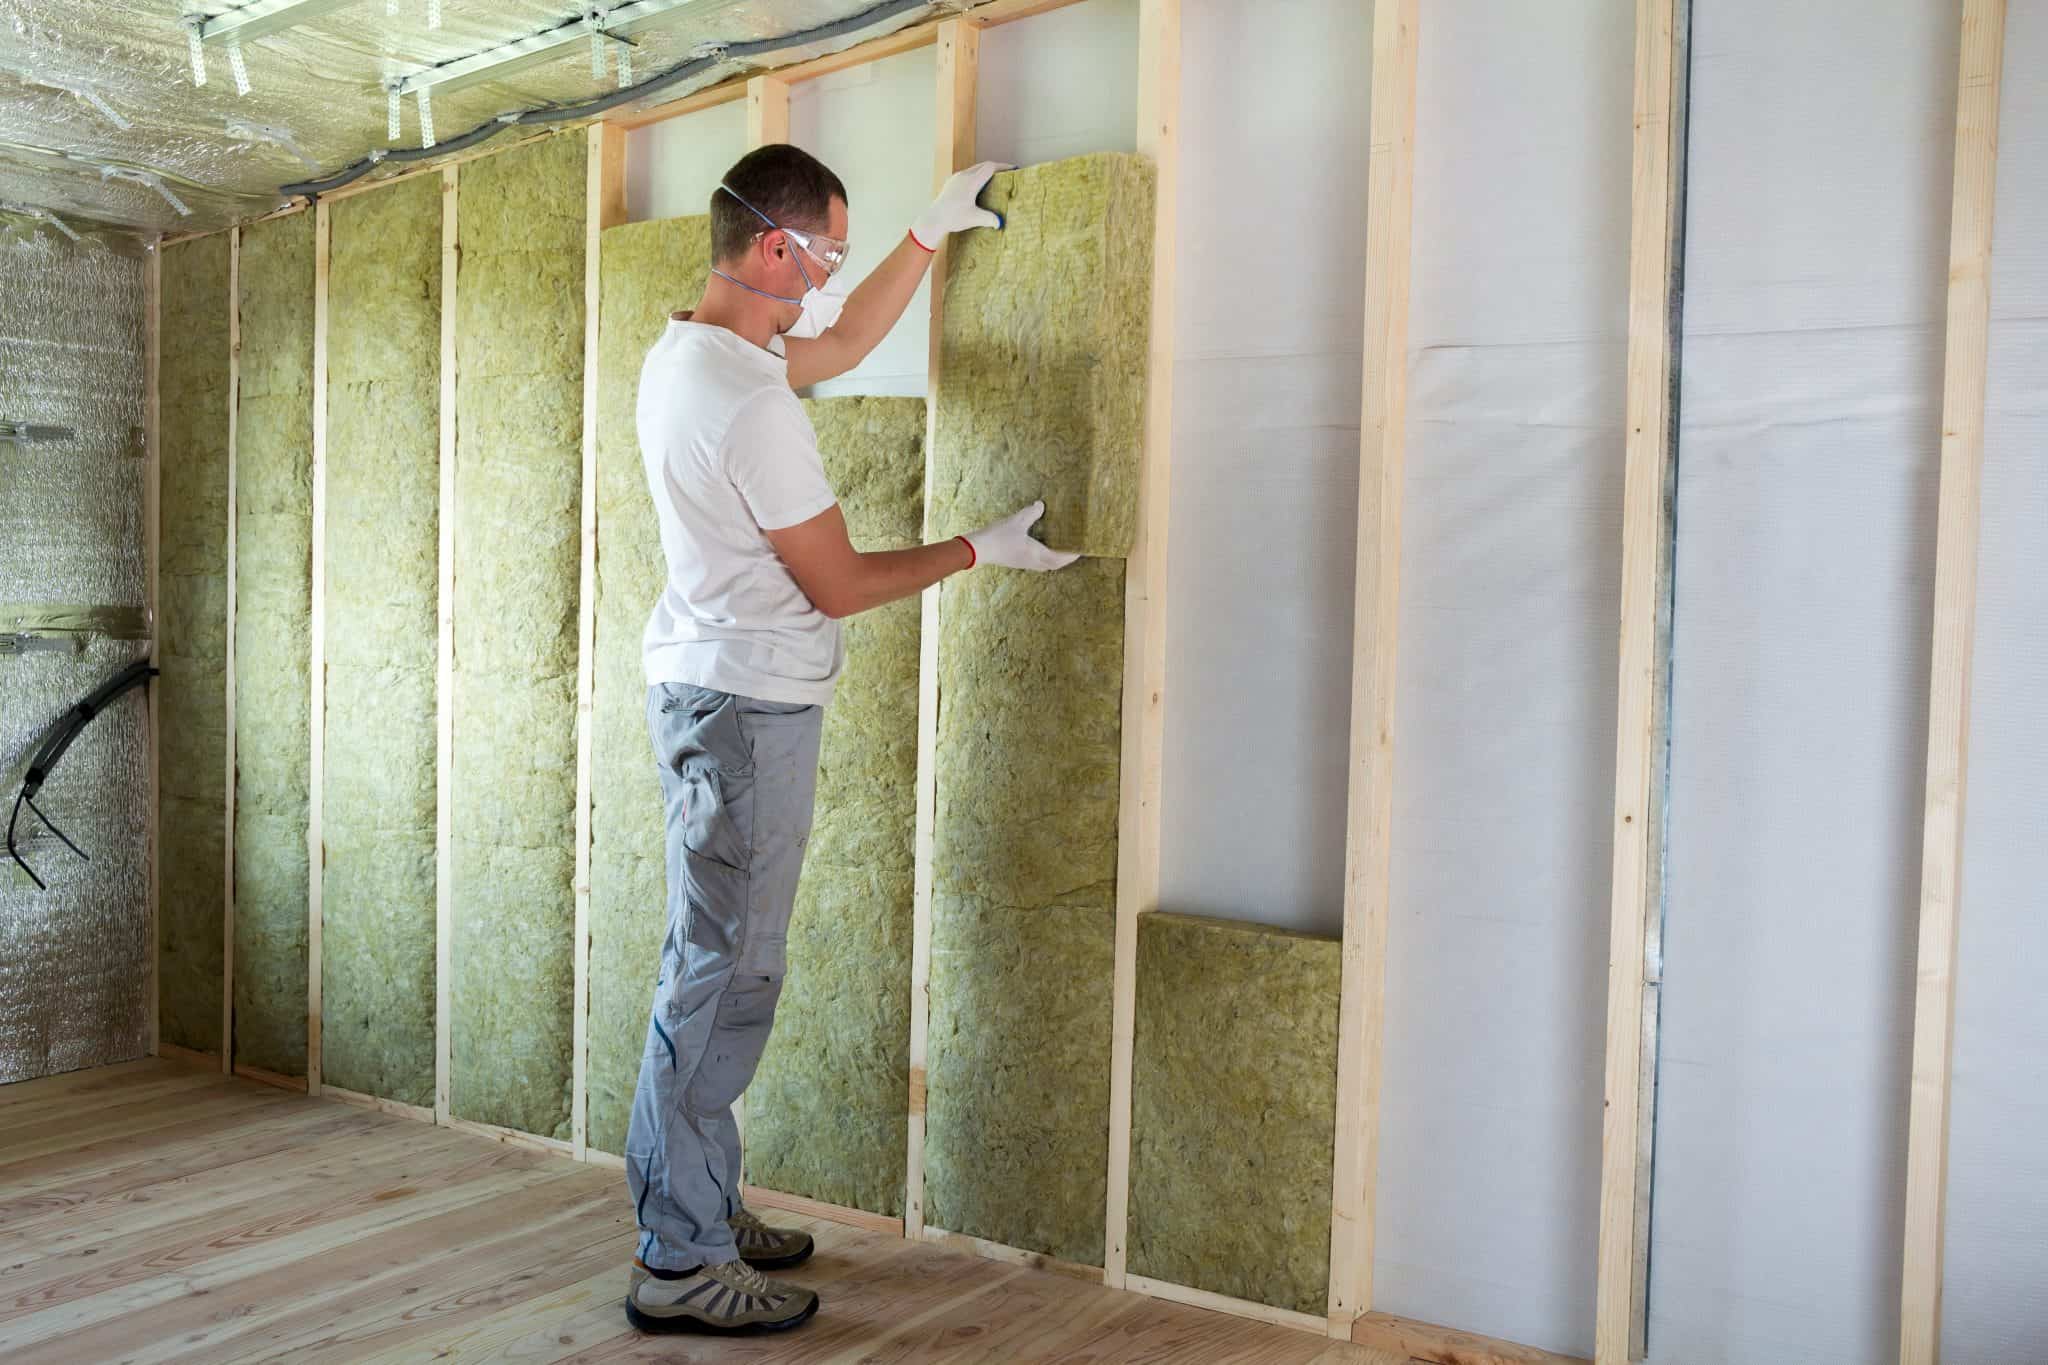
When framing a closet, use 2×4 lumber to create the frame, ensuring it is level and square. Install a header across the top for support and use a stud finder to locate and secure the frame to the wall studs.
Read more: How To Paint A Closet
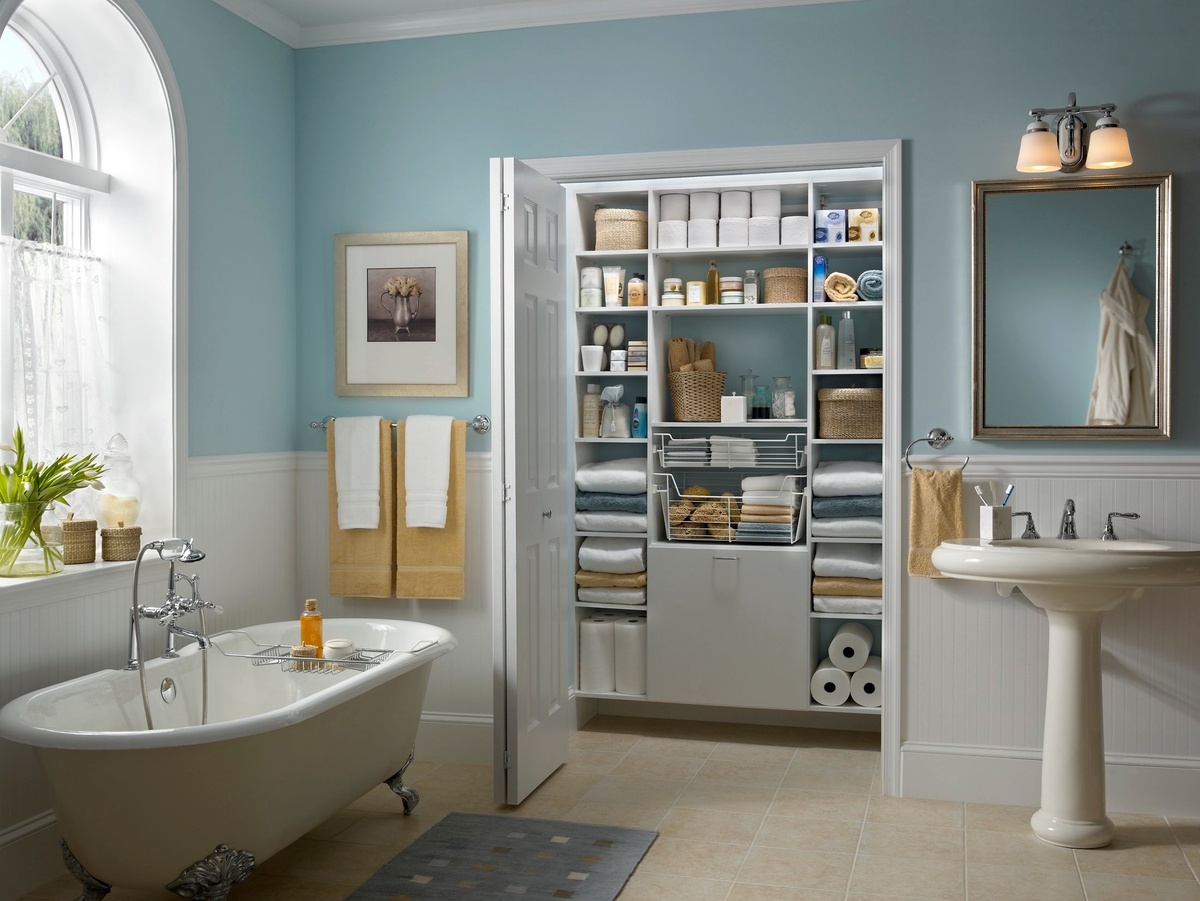
Step 7: Add Closet Shelves and Rods
Now that the frame is securely in place, it’s time to add shelves and rods to complete your closet organization system. Adding these components will allow you to maximize storage space and keep your belongings organized. Follow these steps to add shelves and rods to your closet frame:
- Measure and cut the shelves: Start by measuring the width and depth of your closet frame to determine the dimensions for your shelves. Use a saw to cut the shelves to the desired length. If you prefer adjustable shelves, consider using shelf brackets or track systems.
- Install the shelf brackets or track systems: Depending on the type of shelving system you choose, follow the manufacturer’s instructions to install the brackets or track systems along the vertical studs of the closet frame. Position them at the desired heights to accommodate your storage needs.
- Place the shelves on the brackets or tracks: Once the brackets or tracks are installed, place the shelves on top, ensuring they fit securely. Adjust the height of the shelves as needed to accommodate different items and maximize space utilization.
- Install the hanging rods: If you have clothing items that require hanging, measure and cut the hanging rods to fit the width of your closet. Install rod brackets along the vertical studs at a suitable height, and place the rods into the brackets.
- Test the stability and adjust as necessary: Give the shelves and hanging rods a gentle shake to ensure they are stable and properly supported. Make any necessary adjustments to the brackets or tracks to ensure a secure fit.
When adding shelves and rods, consider the weight capacity and adjust the spacing accordingly. Place heavier items on lower shelves and ensure that the rods can support the weight of your clothing without sagging.
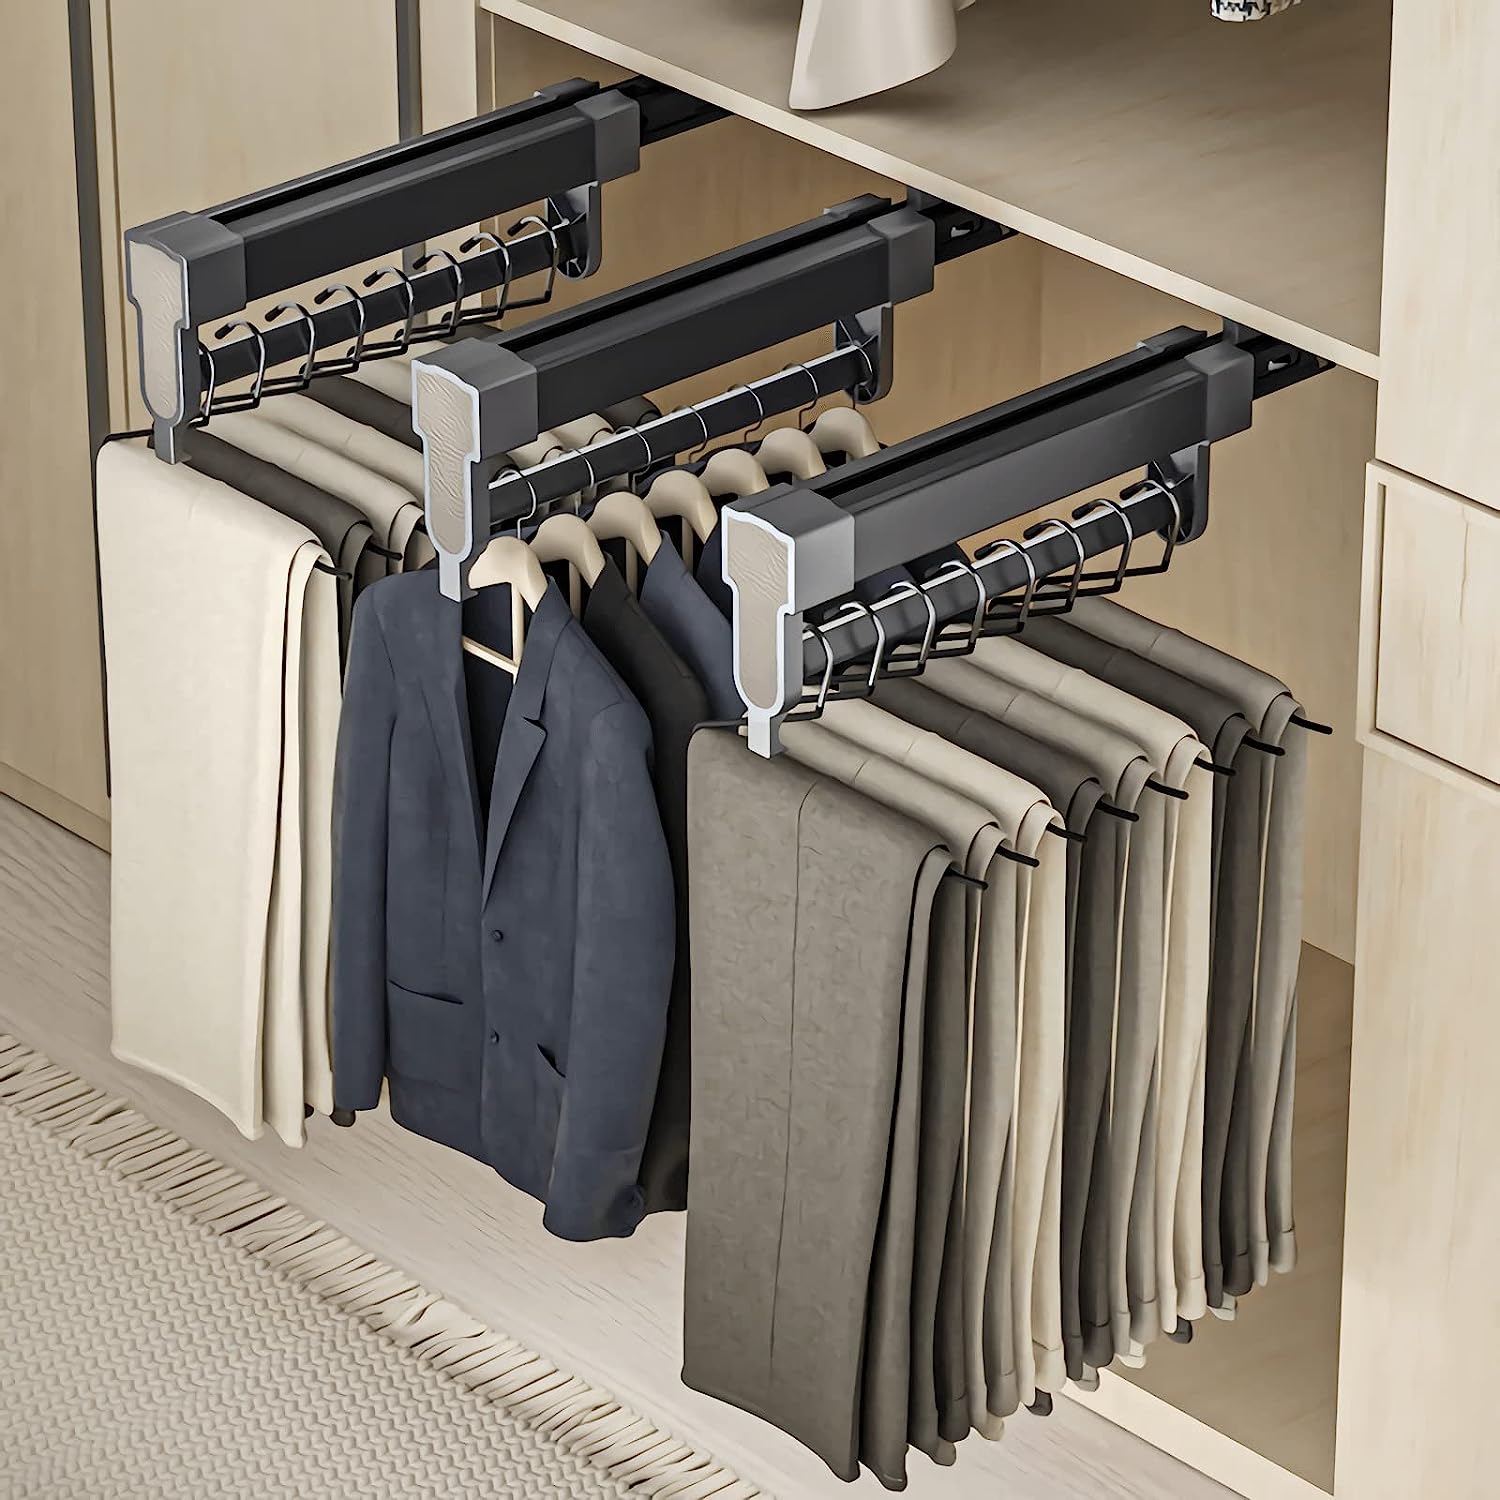
Additionally, if you prefer a more customized storage solution, you can incorporate additional accessories such as drawer units, shoe racks, or hooks onto the frame. These accessories can further enhance the functionality and organization of your closet space.
By adding shelves and rods to your closet frame, you can create designated areas for different items, making it easier to find what you need and keep your closet tidy and organized.
Step 8: Test and Adjust the Closet Frame
After installing the shelves and rods, it’s important to test the functionality and stability of your closet frame. This step ensures that the frame can withstand the weight of your belongings and that everything is aligned and level. Here’s what you need to do:
- Load the shelves: Start by placing items on the shelves, distributing the weight evenly. This will help you determine if any adjustments need to be made to the placement of the shelves or the support brackets.
- Hang clothing on the rods: Hang your clothing items on the rods, making sure to distribute the weight evenly. Check for any signs of sagging or instability. If needed, reinforce the rod brackets or consider adding additional support along the length of the rods.
- Test for stability: Give the closet frame a gentle shake to see if it remains stable. Check for any wobbling or movement that may need to be addressed. If you notice any issues, tighten screws, add additional support brackets, or make adjustments as necessary.
- Check for levelness: Ensure that the shelves and rods are level, both horizontally and vertically. Use a level to verify this. If you find any unevenness, adjust the position of the shelves or rods to achieve a balanced and visually pleasing result.
- Make necessary adjustments: Based on your testing, make any necessary adjustments to the frame, shelves, or rods. This may include repositioning shelves, reinforcing brackets, or adding additional supports as needed.
By thoroughly testing and adjusting the closet frame, you can avoid future issues such as sagging shelves or instability. It’s crucial to ensure that your frame is sturdy, reliable, and capable of supporting your belongings.
Regularly inspect the frame and make any necessary repairs or modifications to maintain its functionality and longevity. Taking the time to perform this step will greatly enhance the usability and durability of your closet organization system.
Step 9: Finish with Trim and Paint
To complete the framing and installation process of your closet, the final step is to add trim and paint. This step adds a polished and finished look to your closet, making it blend seamlessly with the rest of your interior design. Here’s how to finish your closet with trim and paint:
- Choose the trim: Select the type and style of trim that complements your overall aesthetic. Common options include baseboards, crown molding, and trim around the door opening. Consider the material and color of the trim to ensure it matches the closet frame and other elements in the room.
- Measure and cut the trim: Measure the length of each section where you plan to add trim. Use a saw to cut the trim pieces to the appropriate sizes, ensuring clean and precise cuts.
- Install the trim: Starting with the baseboards, attach the trim pieces to the walls or studs using a nail gun or screws. Take care to align the trim properly and ensure it sits flush against the wall and frame. Repeat this process for the crown molding and any other trim pieces you have selected.
- Fill gaps and seams: Use caulk or wood filler to fill in any gaps or seams between the trim and the walls or frame. Smooth the filler with a putty knife, and allow it to dry before proceeding.
- Prepare for painting: Once the trim is installed and any filler is dry, prepare the surfaces for painting. Sand down any rough areas or imperfections, and wipe away any dust or debris with a damp cloth.
- Apply a primer: Use a paint primer specifically designed for the type of material your closet frame and trim are made of. Apply the primer evenly, following the manufacturer’s instructions.
- Paint the closet: Choose a paint color that complements the overall color scheme of your room. Apply paint to the closet frame and trim using a brush or roller, ensuring even coverage. Apply multiple coats if necessary, allowing each coat to dry completely before applying the next.
- Allow for proper drying time: Once the paint is applied, allow ample time for it to dry completely before placing any items back into the closet. Follow the paint manufacturer’s instructions for recommended drying times.
The addition of trim and a fresh coat of paint gives your closet a cohesive and finished look. It elevates the overall aesthetic and integrates it seamlessly into the design of your space.
Remember to protect the surrounding area when painting, and open windows or use proper ventilation to ensure proper air circulation during the painting process.
By following these steps, you can add the final touches to your closet and create a stylish and cohesive storage solution that reflects your personal style.
Conclusion
Congratulations! You have successfully learned how to frame a closet and create an organized and functional storage space. By following the step-by-step guide outlined in this article, you have gained the knowledge and skills to transform your closet into an area that maximizes storage capacity and enhances your overall interior design.
Throughout the process, you measured the closet space accurately, chose the appropriate frame type, gathered the necessary tools and materials, removed any existing shelving or rods, installed the closet frame, secured it to the wall, added shelves and rods, tested and adjusted the frame, and finished with trim and paint. Each step contributed to the creation of a well-structured and aesthetically pleasing closet.
Remember, the key to a successful closet framing project is precision, attention to detail, and patience. Take the time to carefully measure, plan, and execute each step. By doing so, you ensure that your closet frame is sturdy, functional, and efficient in meeting your storage needs.
Additionally, feel free to incorporate your personal creativity in the design of your closet. Whether it’s selecting unique trim or paint colors or adding decorative elements, make your closet a reflection of your personal style and taste.
Now that you have the knowledge and confidence, it’s time to put your newfound skills into action. Start planning and implementing the framing of your closet, and enjoy the benefits of a well-organized and visually appealing storage space.
Remember, framing a closet goes beyond just the practicality of organization; it contributes to the overall atmosphere and functionality of your home. So, get ready to embark on this exciting project and create a closet that enhances your daily life and brings joy to your living space!
Frequently Asked Questions about How To Frame Closet
Was this page helpful?
At Storables.com, we guarantee accurate and reliable information. Our content, validated by Expert Board Contributors, is crafted following stringent Editorial Policies. We're committed to providing you with well-researched, expert-backed insights for all your informational needs.


0 thoughts on “How To Frame Closet”