Articles
How To Frame A Porch Deck
Modified: October 20, 2024
Learn how to frame a porch deck with our informative articles.
(Many of the links in this article redirect to a specific reviewed product. Your purchase of these products through affiliate links helps to generate commission for Storables.com, at no extra cost. Learn more)
Introduction
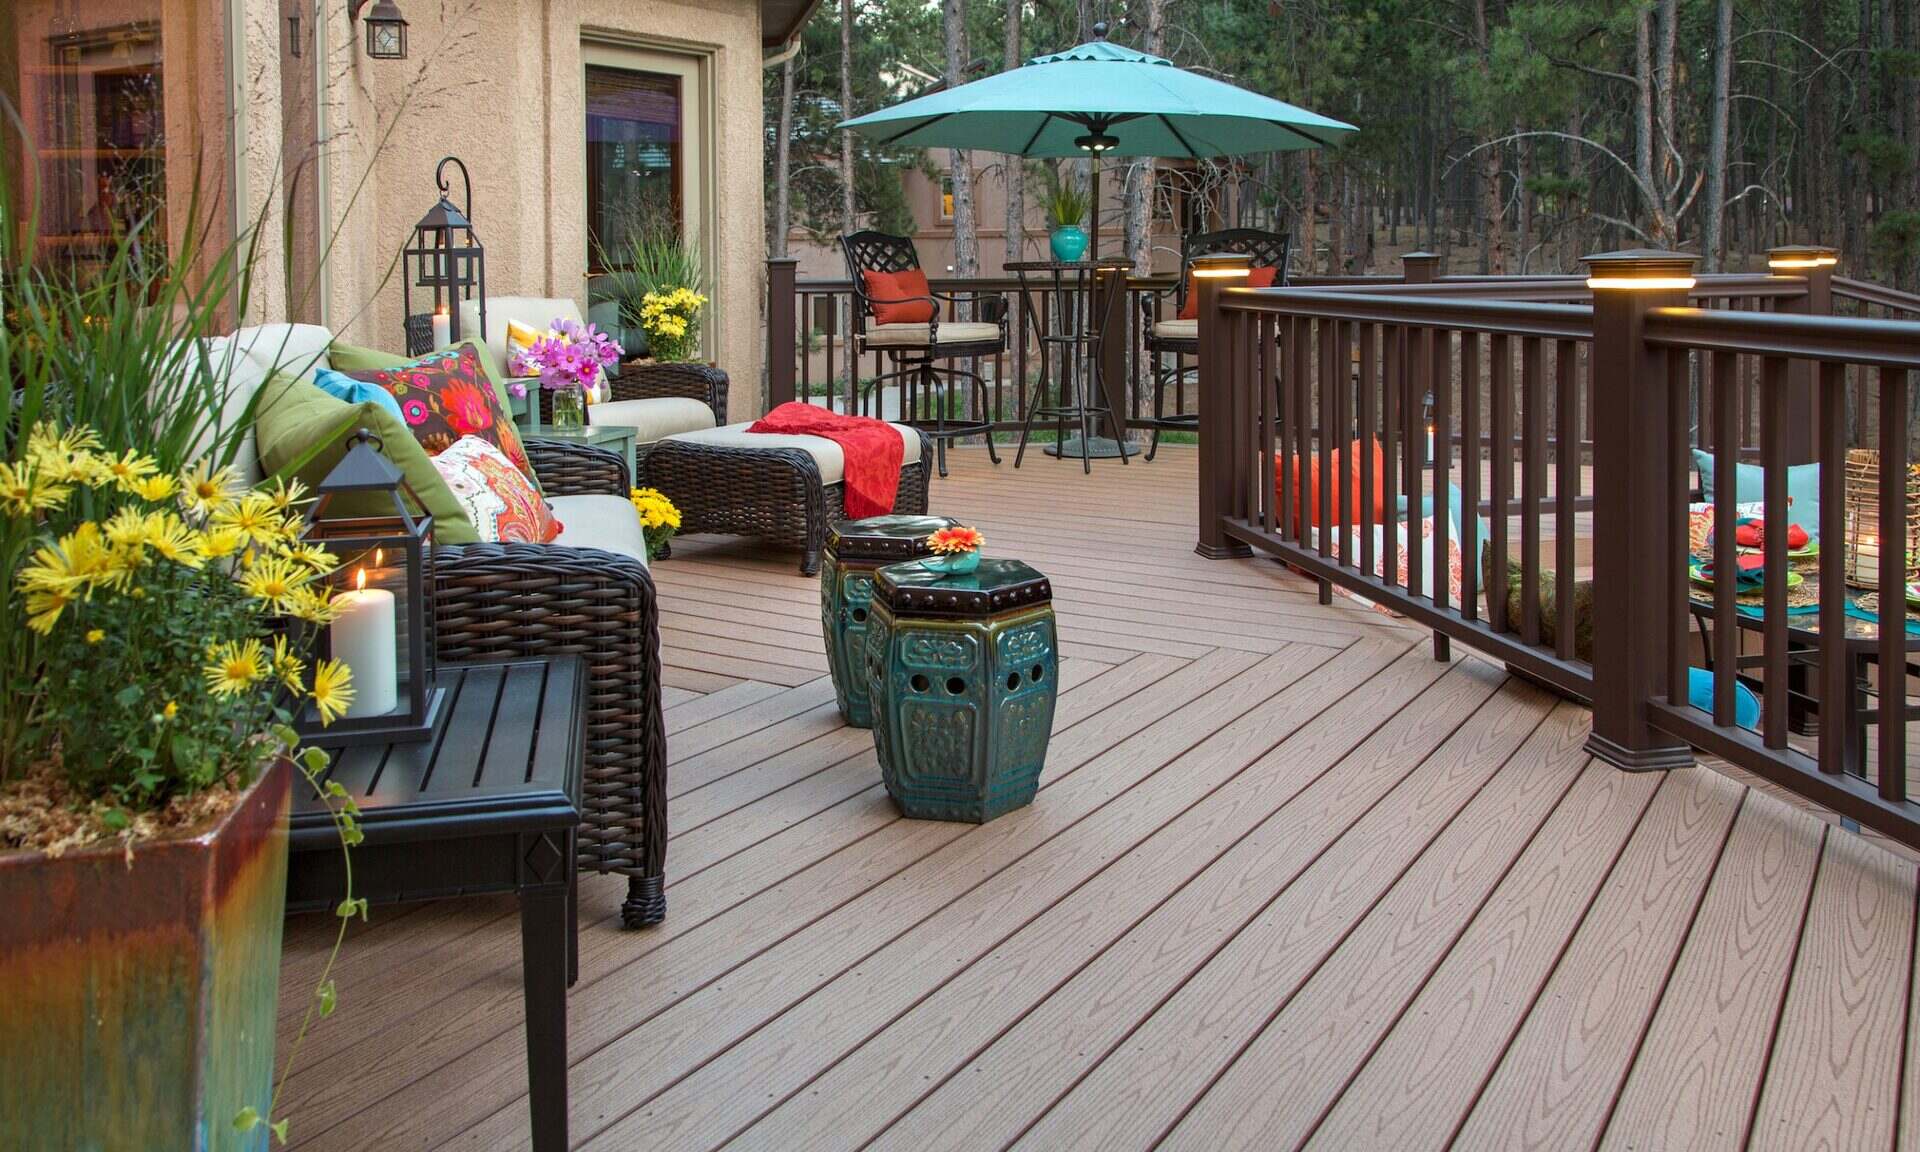
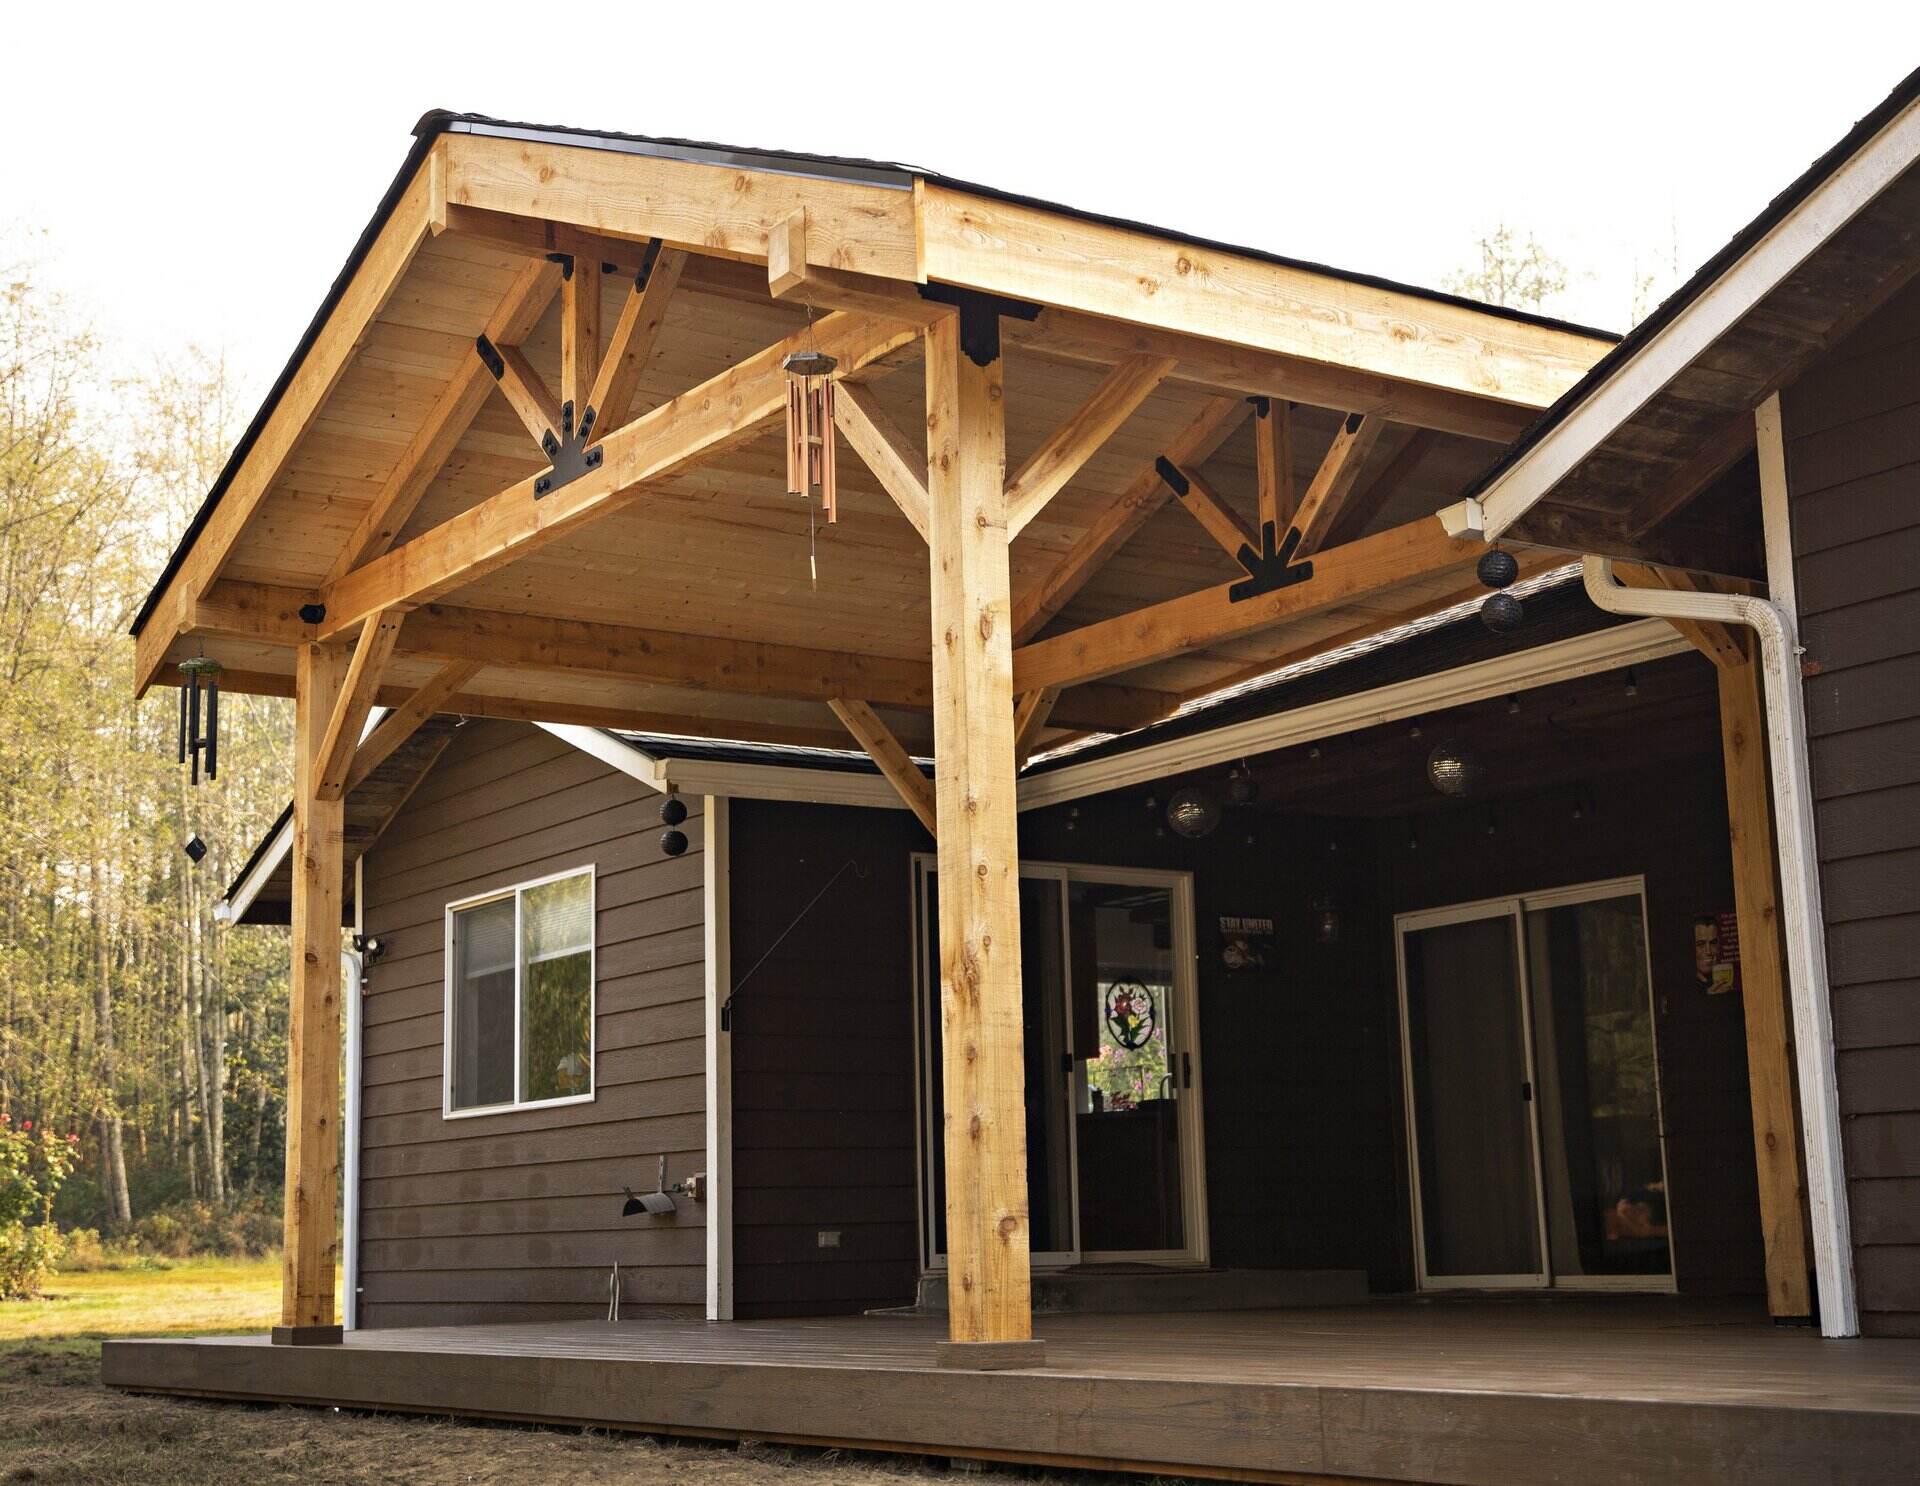
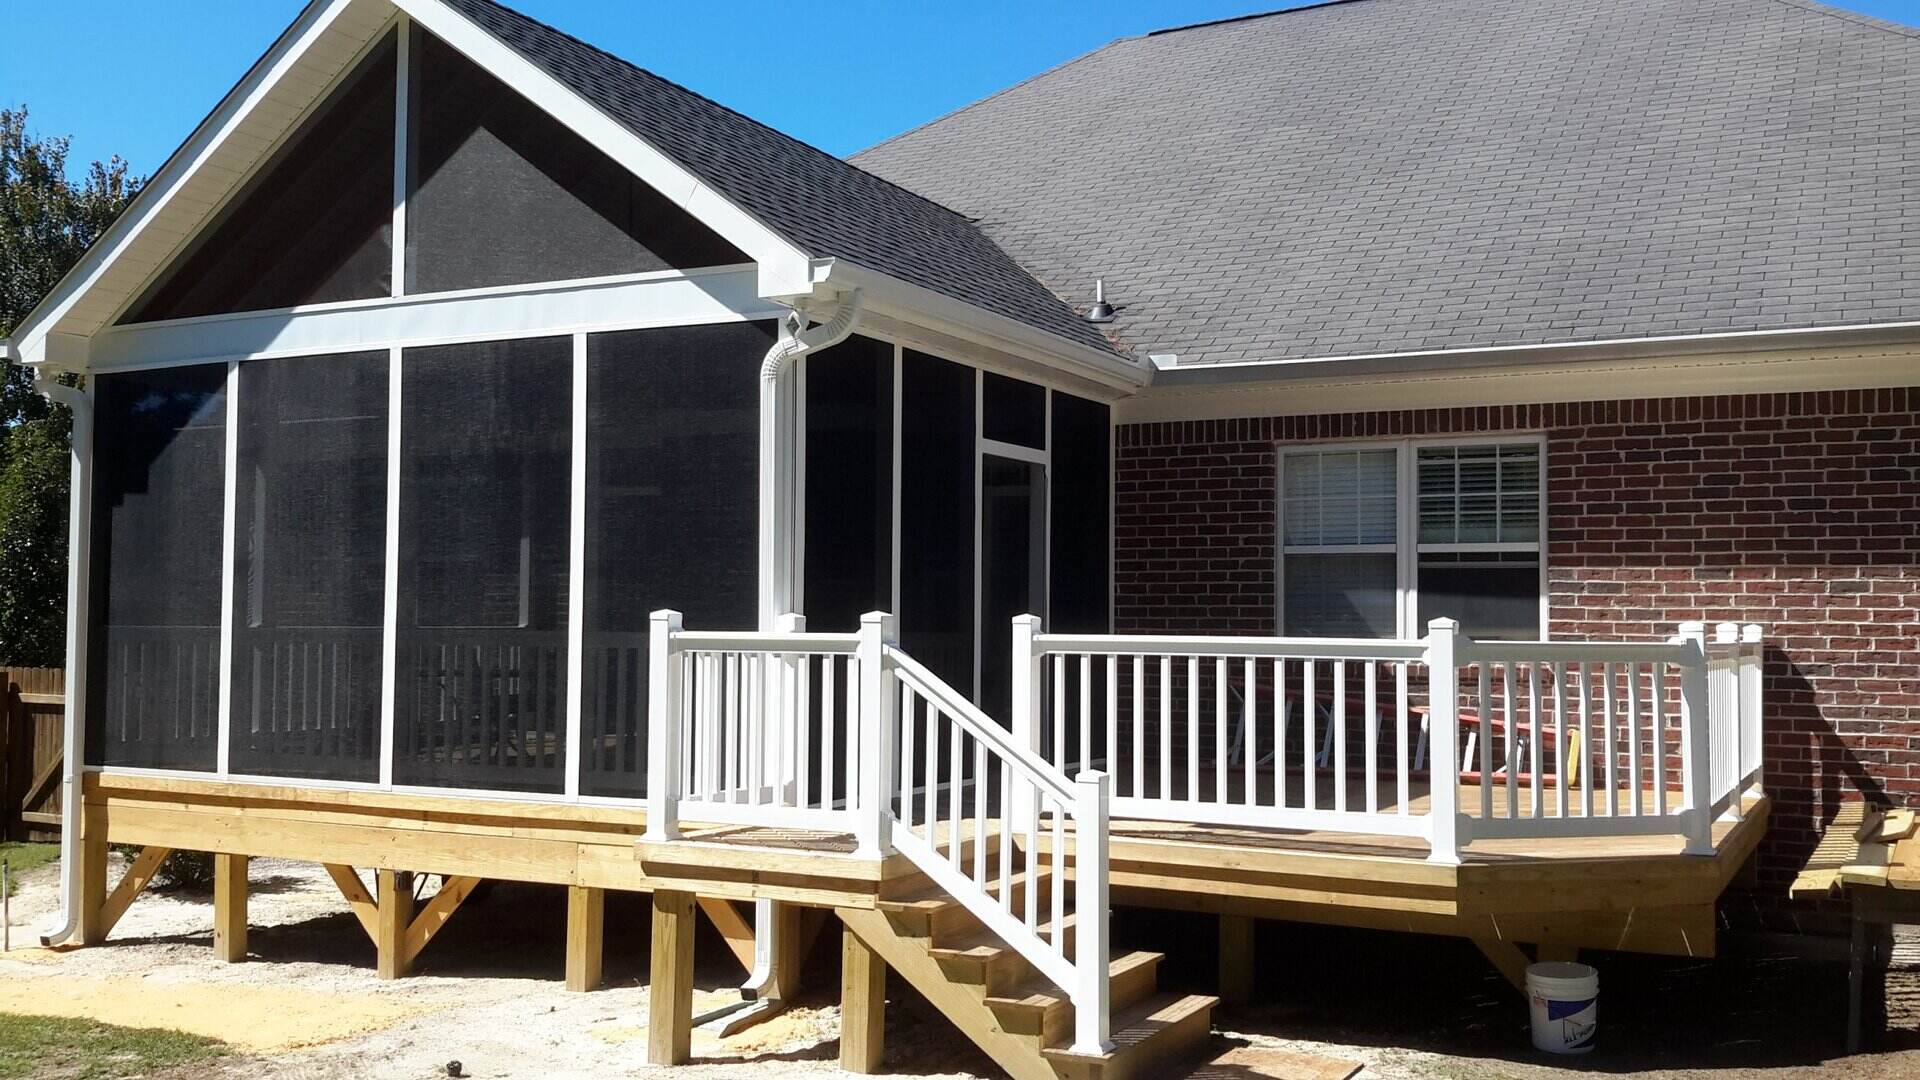
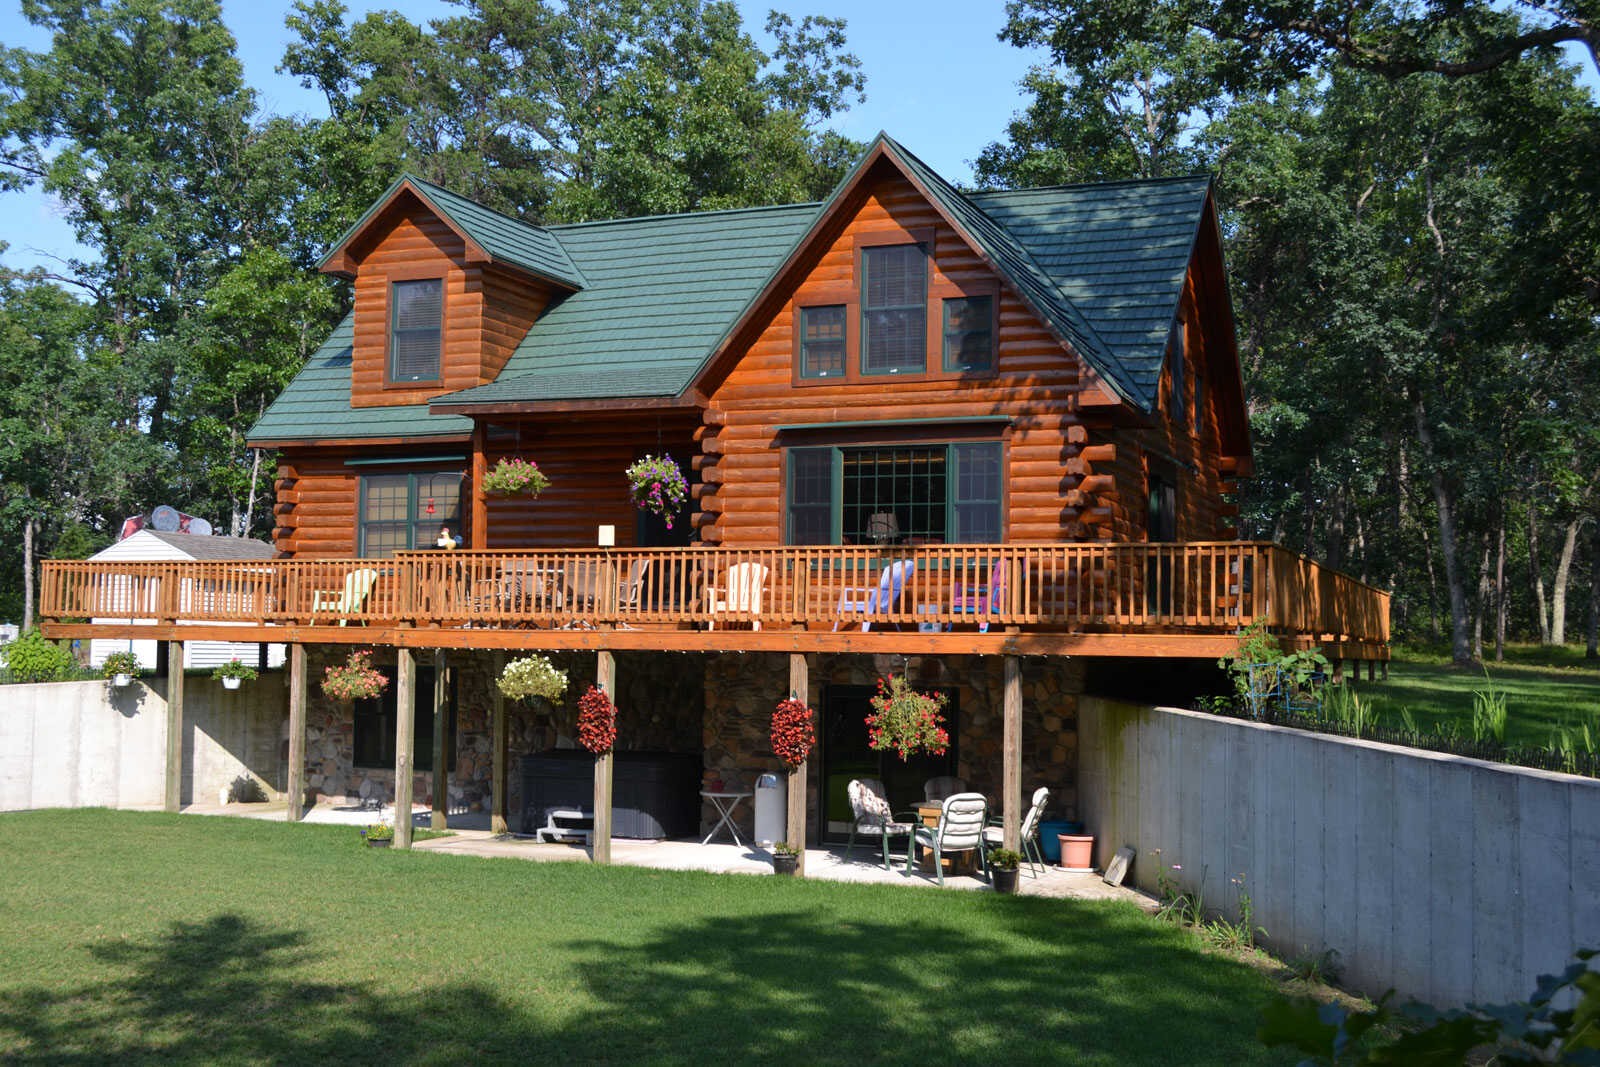
Building a porch deck is a great way to enhance the beauty and functionality of your outdoor space. Whether you want to create a cozy sitting area or an entertainment area, a porch deck provides a versatile and inviting space for relaxation and enjoyment. Framing a porch deck is an essential step in the construction process, as it establishes the foundation and support for the deck structure.
In this article, we will guide you through the step-by-step process of framing a porch deck. We will cover everything from measuring and planning to the final finishing touches. By following this comprehensive guide, you will be able to build a sturdy and well-structured porch deck that will be the envy of your neighbors.
Before we dive into the construction process, let’s first go over the materials and tools you will need to complete the project:
Key Takeaways:
- Framing a porch deck requires careful planning, precise measurements, and attention to detail. From setting the ledger board to installing the railings, each step contributes to creating a sturdy and visually appealing outdoor space.
- Adding finishing touches such as lighting, furniture, and decor enhances the functionality and aesthetics of a porch deck. Personalizing the space and ensuring safety measures are essential for creating a welcoming outdoor environment.
Read more: How To Paint A Deck And Porch
Materials and Tools Needed
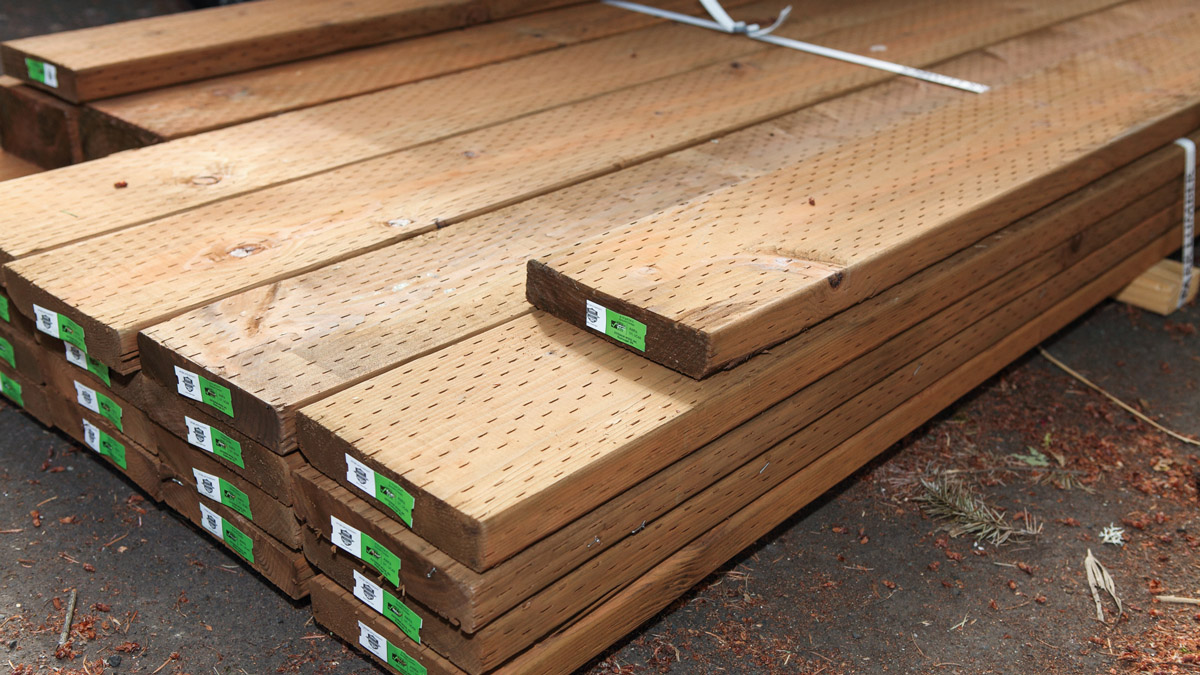
- Pressure-treated lumber
- Decking boards
- Support posts
- Joists
- Ledger board
- Concrete mix
- Post anchors
- Galvanized screws
- Circular saw
- Hammer
- Drill
- Tape measure
- Level
- String line
- Pencil
- Protective gear (gloves, safety glasses, etc.)
Now that you have gathered the necessary materials and tools, let’s move on to the first step of framing a porch deck.
Key Takeaways:
- Framing a porch deck requires careful planning, precise measurements, and attention to detail. From setting the ledger board to installing the railings, each step contributes to creating a sturdy and visually appealing outdoor space.
- Adding finishing touches such as lighting, furniture, and decor enhances the functionality and aesthetics of a porch deck. Personalizing the space and ensuring safety measures are essential for creating a welcoming outdoor environment.
Read more: How To Paint A Deck And Porch
Materials and Tools Needed
Before you begin framing a porch deck, it is essential to gather all the materials and tools that you will need for the project. Here is a list of the key items:
- Pressure-treated lumber: This type of wood is resistant to rot and decay, making it ideal for outdoor construction projects. You will need pressure-treated lumber for the support posts, joists, and decking boards.
- Decking boards: These are the boards that will cover the surface of your porch deck. Choose durable and weather-resistant decking boards that complement the style of your home.
- Support posts: These vertical posts will provide structural support for your porch deck. They should be made from pressure-treated lumber and securely anchored to the ground.
- Joists: Joists are horizontal beams that support the decking boards. They should be made from pressure-treated lumber and spaced evenly across the deck’s frame.
- Ledger board: The ledger board is attached to the house to provide additional support for the deck. It is usually made from pressure-treated lumber and should be securely fastened to the house’s exterior wall.
- Concrete mix: You will need concrete mix to create a solid foundation for the support posts. Follow the manufacturer’s instructions for mixing and pouring the concrete.
- Post anchors: Post anchors are metal brackets that secure the support posts to the concrete foundation. Make sure to choose post anchors that are suitable for outdoor use.
- Galvanized screws: Use galvanized screws to secure the various components of the deck frame together. Galvanized screws are corrosion-resistant and will provide a long-lasting hold.
- Circular saw: A circular saw is essential for cutting the lumber to the desired lengths. Make sure to follow safety precautions and always wear protective gear when using power tools.
- Hammer: You will need a hammer for driving nails and other small tasks during the construction process.
- Drill: A drill is necessary for pre-drilling holes and driving screws into the lumber.
- Tape measure: Use a tape measure to accurately measure the dimensions of the porch deck and ensure that everything is level and aligned.
- Level: A level is crucial for ensuring that the deck framework and all its components are perfectly level and plumb.
- String line: A string line will help you create straight and level reference lines for aligning the deck frame and support posts.
- Pencil: Keep a pencil handy for marking measurements and making notes on the lumber.
- Protective gear: Remember to wear protective gear, such as gloves and safety glasses, to protect yourself during construction.
Gathering all the necessary materials and tools before you start framing your porch deck will make the construction process much smoother and more efficient. With everything at hand, you’ll be ready to move on to the next step: measuring and planning.
Step 1: Measure and Plan
Before you begin framing your porch deck, it is crucial to measure the area and create a detailed plan. Proper measurements and planning will ensure that your deck is structurally sound and meets your specific needs. Follow these steps to measure and plan your porch deck:
- Measure the space: Use a tape measure to determine the dimensions of the area where you want to build your porch deck. Measure the length, width, and height requirements, considering any existing structures or obstacles that may affect the deck’s design.
- Consider the deck’s purpose: Determine how you intend to use the deck. Will it be used primarily for dining, entertaining, or lounging? Consider the furniture and appliances you plan to have on the deck and factor in the additional space required.
- Design and layout: Based on the measurements and purpose, create a design and layout for your porch deck. This includes deciding on the shape, number of levels, and any special features, such as stairs or built-in seating. Consider the available space and how the deck will integrate with your home’s architecture.
- Check local regulations: Before proceeding, check with your local building department to ensure that you comply with any zoning or construction regulations. Obtain any necessary permits or approvals required for the project.
- Draw a scaled plan: Using graph paper or a computer-aided design (CAD) software, draw a scaled plan of your porch deck. Include all the measurements, dimensions, and features to accurately represent your intended design.
- Double-check your plan: Review your plan to ensure that it meets your requirements and aligns with your budget. Make any necessary adjustments or modifications based on your review.
By measuring and planning carefully, you will have a clear vision of your porch deck and be well-prepared for the construction process. Remember to keep your design practical, considering factors such as maintenance, accessibility, and ease of use. Once you have a finalized plan, you can move on to the next step: preparing the area for deck construction.
Step 2: Prepare the Area
Now that you have measured and planned your porch deck, it’s time to prepare the area for the construction process. Proper preparation ensures a stable and long-lasting deck. Follow these steps to prepare the area:
- Clear the space: Remove any obstacles, debris, or vegetation from the area where the deck will be built. Clearing the space will provide a clean work area and prevent any interference during construction.
- Mark the deck perimeter: Use stakes and string lines to mark the perimeter of the deck according to your plan. This will create a visual guide for the construction and ensure accurate placement of the deck framework.
- Excavate the area: If necessary, dig holes at the locations where the support posts will be installed. The depth and diameter of the holes will depend on your local building codes and the type of soil in your area. Aim for a depth that provides a stable and firm foundation.
- Level the ground: Use a shovel or a tamper to level the ground within the deck perimeter. Make sure the soil is compacted and even to provide a stable base for the deck framework.
- Install weed barrier: Lay a weed barrier fabric over the excavated area to prevent weed growth and minimize soil erosion underneath the deck.
- Pour concrete footings: If required by your local building codes, pour concrete footings in the excavated holes to provide additional support for the support posts. Follow the specific instructions for mixing the concrete and ensure it sets properly.
- Let the concrete cure: Allow the concrete footings to cure fully before proceeding with the deck construction. Follow the manufacturer’s recommendations for curing time.
Preparing the area properly will create a solid foundation for your porch deck and help ensure its stability and longevity. Take the time to clear and level the space, install necessary footings, and let the concrete cure. By doing so, you’ll be ready for the next step: setting the ledger board.
Read more: How To Frame A Screen Porch
Step 3: Set the Ledger Board
Setting the ledger board is a critical step in framing your porch deck, as it provides essential support and stability. The ledger board is attached to the existing structure of your house and acts as a secure anchor for the deck. Follow these steps to set the ledger board:
- Locate the ledger board position: Determine the height and position of the ledger board based on your deck design and plan. It should be level and aligned with the desired deck height.
- Mark the ledger board location: Use a pencil and level to mark the position of the ledger board on the exterior wall of your house. Ensure that the marks are level and parallel to the ground.
- Attach a ledger flashing: To protect against water damage, install a ledger flashing behind the ledger board. The flashing should extend at least 2 inches beyond the ledger board and be bent to create a moisture barrier.
- Secure the ledger board: Use lag screws or galvanized bolts to secure the ledger board to the house’s exterior wall. Make sure the fasteners penetrate into the wall studs or structural framing. Space the fasteners adequately along the entire length of the ledger board.
- Check for level and alignment: Use a level to ensure that the ledger board is perfectly horizontal and aligned with your previously marked lines. Make any necessary adjustments to achieve the desired levelness.
- Seal the ledger board: Apply a waterproof sealant to the top and edges of the ledger board to protect it from moisture. This will help prevent rot and prolong the lifespan of your porch deck.
Setting the ledger board correctly is crucial for the structural integrity and safety of your porch deck. Take the time to accurately position and securely attach the ledger board, ensuring it is level and properly sealed. Once the ledger board is in place, you can proceed to the next step: installing the support posts.
When framing a porch deck, make sure to use pressure-treated lumber to prevent rot and decay. Additionally, ensure that the framing is level and properly supported to provide a stable and long-lasting structure.
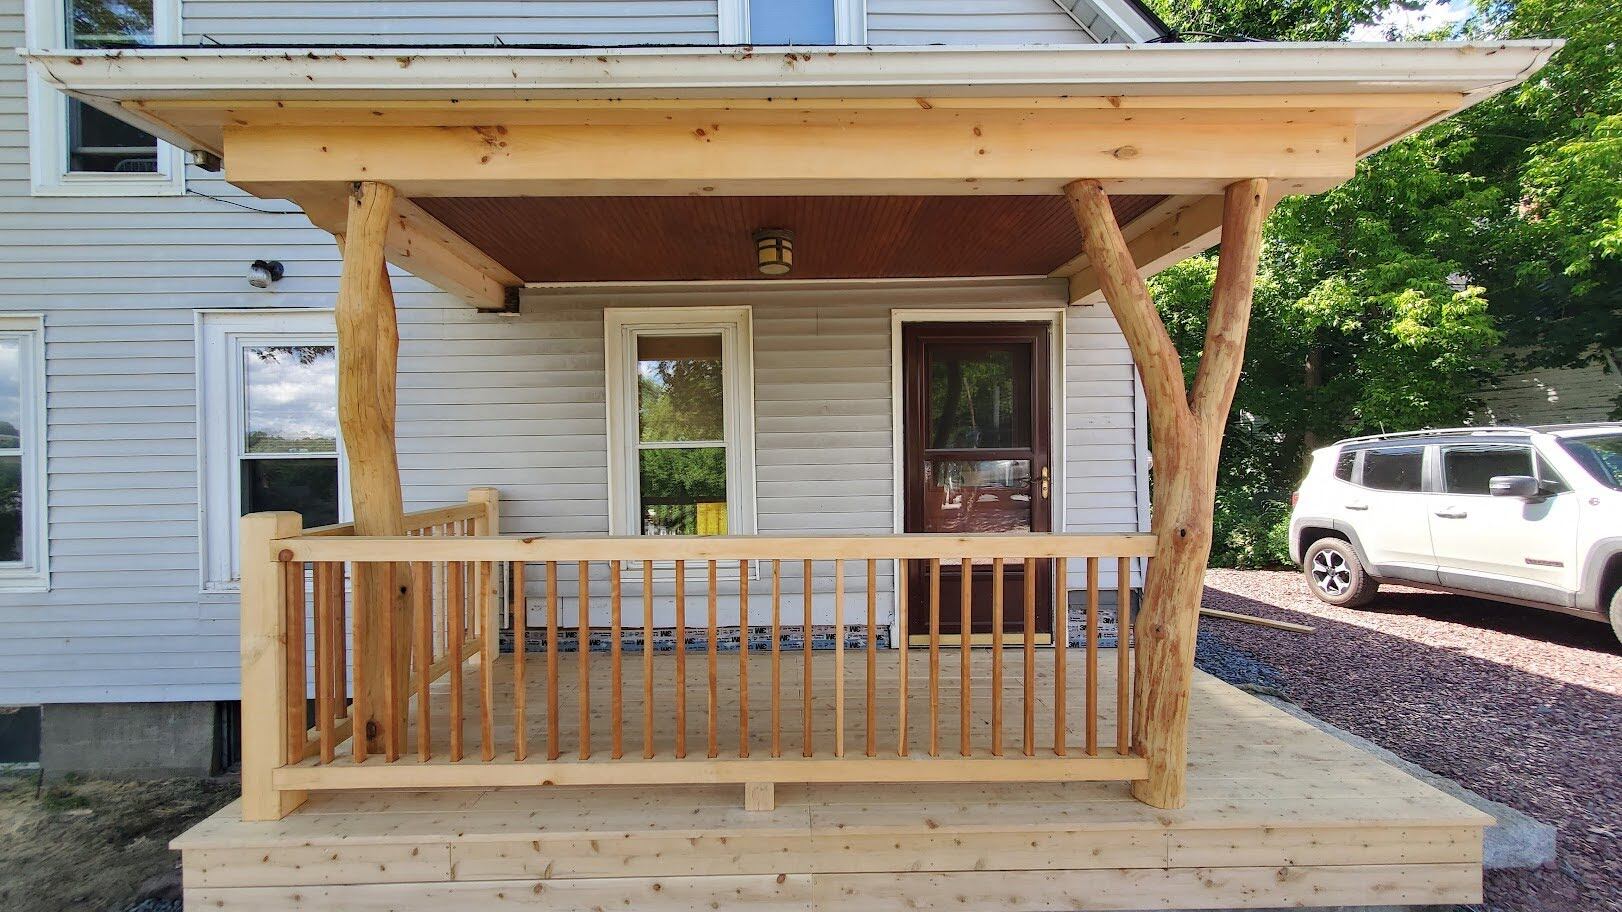
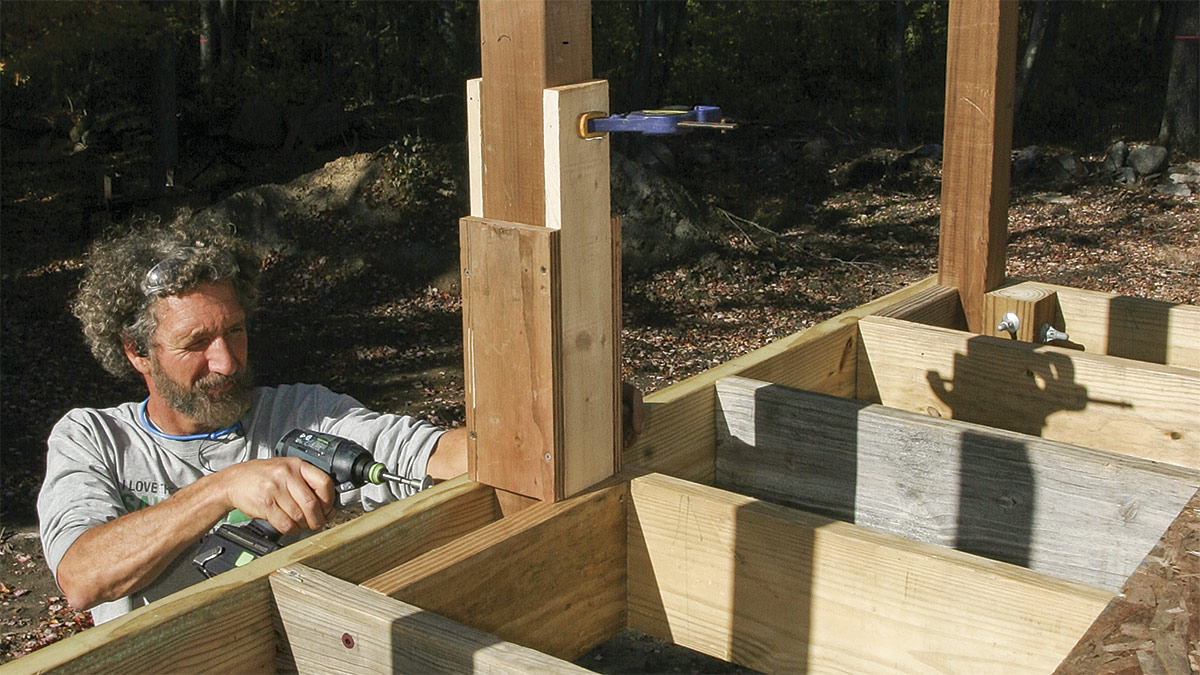
Step 4: Install the Support Posts
Support posts are essential for providing stability and load-bearing capacity to your porch deck. These vertical posts will bear the weight of the deck, ensuring it remains structurally sound and secure. Follow these steps to install the support posts:
- Determine the post locations: Based on your deck design and plan, determine the positions of the support posts. The spacing will depend on the dimensions and load requirements of your deck. Typically, posts are installed at each corner and at regular intervals along the perimeter.
- Measure and cut the support posts: Use pressure-treated lumber to cut the support posts to the desired height. Remember to account for the height of the deck framework and the depth of the footings.
- Attach post anchors: Secure post anchors to the concrete footings using concrete screws or anchors. Ensure that the post anchors are level and aligned with the deck perimeter.
- Set the support posts: Insert the support posts into the post anchors, making sure they are plumb and level. Use a level to check for vertical alignment and adjust the posts if needed. Secure the posts to the anchors using appropriate fasteners.
- Secure the support posts to the ledger board: Use metal connectors or brackets to attach the support posts to the ledger board. Ensure the connections are secure and provide stable support.
- Check for post stability: Shake or apply pressure to the support posts to verify their stability. They should be sturdy and rigid, with minimal movement. Reinforce connections or make adjustments if any instability is detected.
Installing the support posts correctly is crucial for the safety and structural integrity of your porch deck. Take the time to accurately position and securely attach the support posts, ensuring they are plumb and stable. Once the support posts are in place, you can move on to the next step: installing the joists.
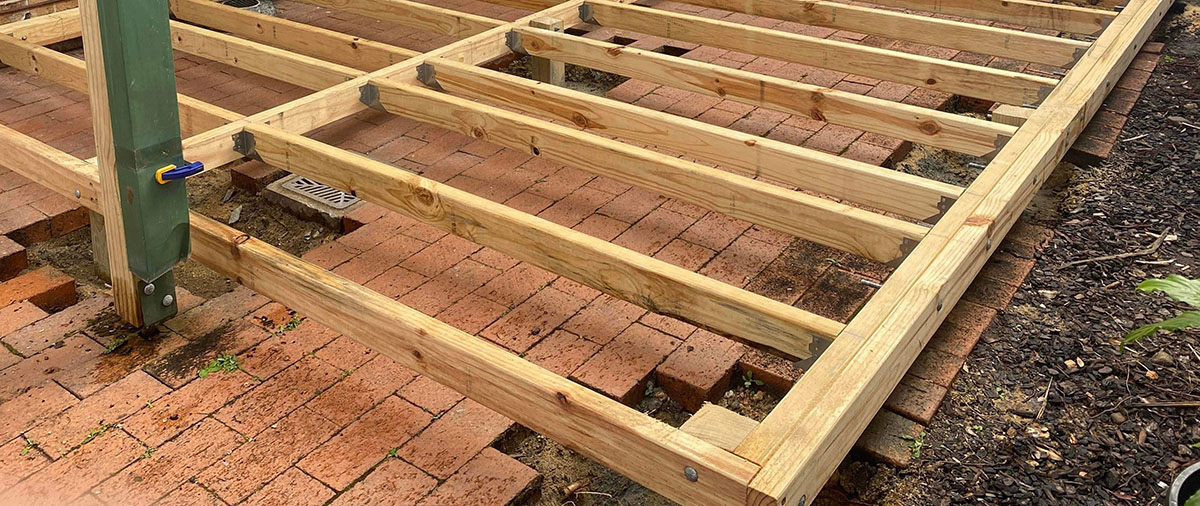
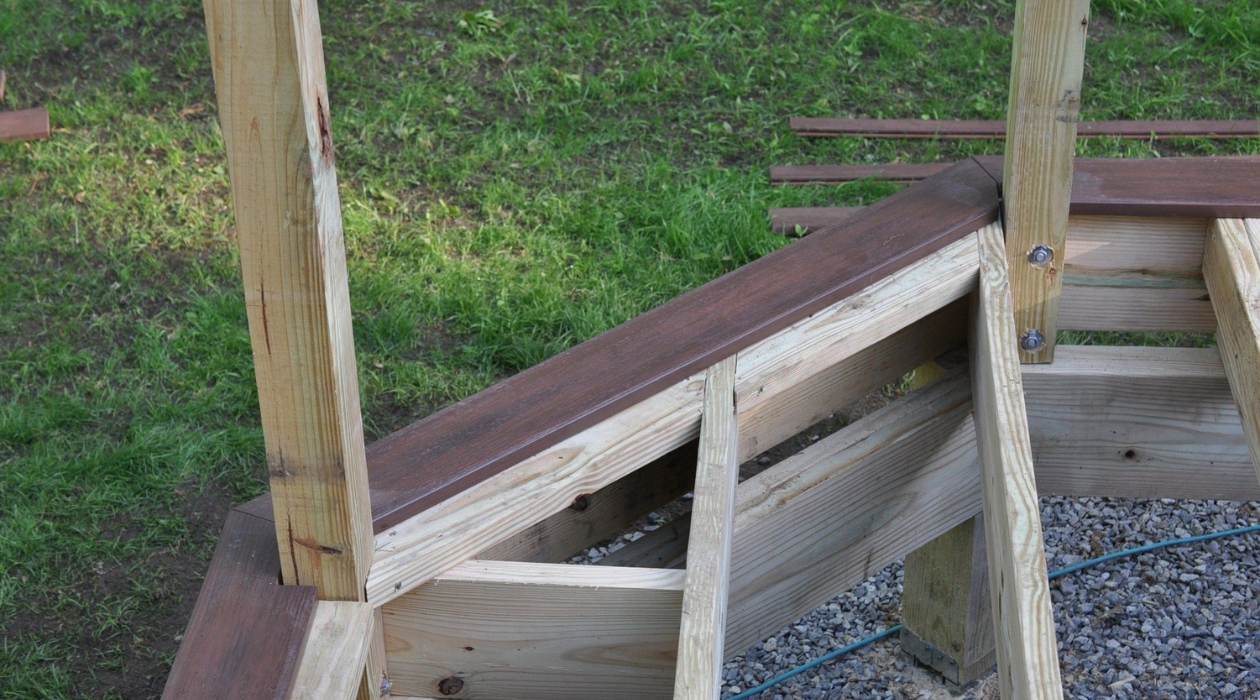
Step 5: Install the Joists
The joists play a vital role in supporting the decking boards and providing stability to your porch deck. These horizontal beams distribute the load evenly across the deck structure, ensuring its strength and durability. Follow these steps to install the joists:
- Measure and cut the joists: Use pressure-treated lumber to cut the joists to the desired length. Measure and mark the joist spacing based on your deck design and local building codes. Typically, joists are spaced 16 inches apart, but this can vary depending on the size and load requirements of your deck.
- Attach joist hangers: Install joist hangers to the ledger board at each marked joist location. Joist hangers are metal brackets that securely hold the joists in place. Place the joist hangers with nails or screws as specified by the manufacturer.
- Set the joists: Place the cut joists into the joist hangers, ensuring they are level and aligned with the ledger board. Use a level to check for horizontal alignment and adjust the joists if necessary. Secure the joists to the hangers with nails or screws.
- Install intermediate blocking: Install additional blocking between the joists at regular intervals to provide extra support and prevent joist twisting or sagging. Secure the blocking with nails or screws.
- Check for levelness: Use a level to check for levelness across the joists. Make any necessary adjustments to ensure an even and flat surface for the decking boards.
Proper installation of the joists is crucial for the strength and stability of your porch deck. Take the time to accurately measure, cut, and securely attach the joists, ensuring they are level and properly aligned. Once the joists are installed, you are ready for the next step: attaching the decking boards.
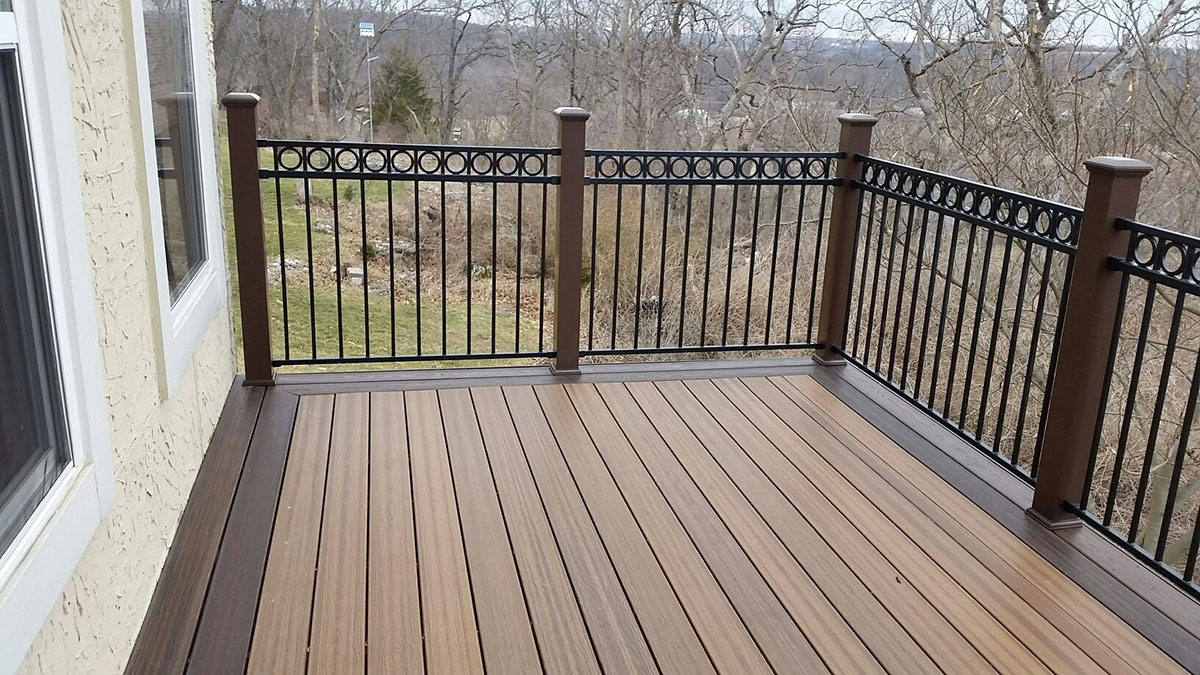
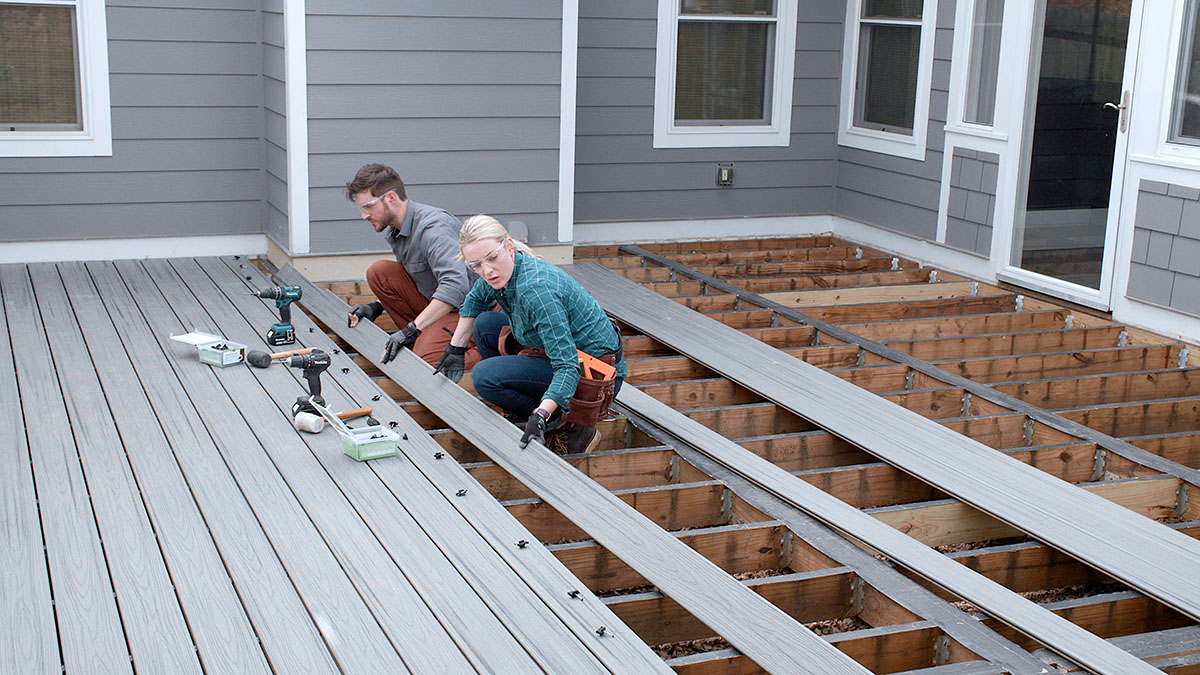
Step 6: Attach the Decking Boards
Attaching the decking boards is an exciting part of framing your porch deck, as it brings your project one step closer to completion. The decking boards not only provide a functional surface for your deck but also contribute to its overall aesthetic appeal. Follow these steps to attach the decking boards:
- Plan the layout: Before you begin attaching the decking boards, plan the layout and pattern. Consider the size and length of the boards and how they will fit together. You may choose to stagger the boards for visual interest.
- Start from the outer edge: Begin by attaching the first decking board along the outer edge of the deck frame. Make sure it is flush with the edge and centered on the joist. Use galvanized decking screws to secure the board in place.
- Continue with the remaining boards: Proceed to attach the remaining decking boards, working your way towards the center of the deck. Leave a small gap, approximately 1/8 inch, between each board to allow for expansion and drainage.
- Use a chalk line: For a straight and uniform look, use a chalk line to create a reference line for aligning the decking boards. This will help ensure consistent spacing and alignment.
- Cut the boards to fit: As you reach the outer edges or corners of the deck, you may need to cut the decking boards to fit. Use a circular saw or a jigsaw to make the necessary cuts, ensuring accurate measurements.
- Secure the boards: Secure each decking board with multiple screws, placing them through the board and into the joists below. Make sure the screws are driven at an angle to prevent splitting and add to the overall stability of the deck.
- Check for levelness and alignment: Periodically use a level to check for levelness across the decking boards and ensure they are aligned with your references. Make any necessary adjustments as you progress.
- Finish the ends: Once all the decking boards are attached, finish the ends by trimming them to the desired length. You can use a circular saw or a jigsaw to make clean and accurate cuts.
Attaching the decking boards is an important step that requires attention to detail and precision. Take the time to carefully install each board, ensuring proper spacing, alignment, and secure attachment. With the decking boards in place, your porch deck is starting to take shape.
Read more: How To Build A Decking Frame
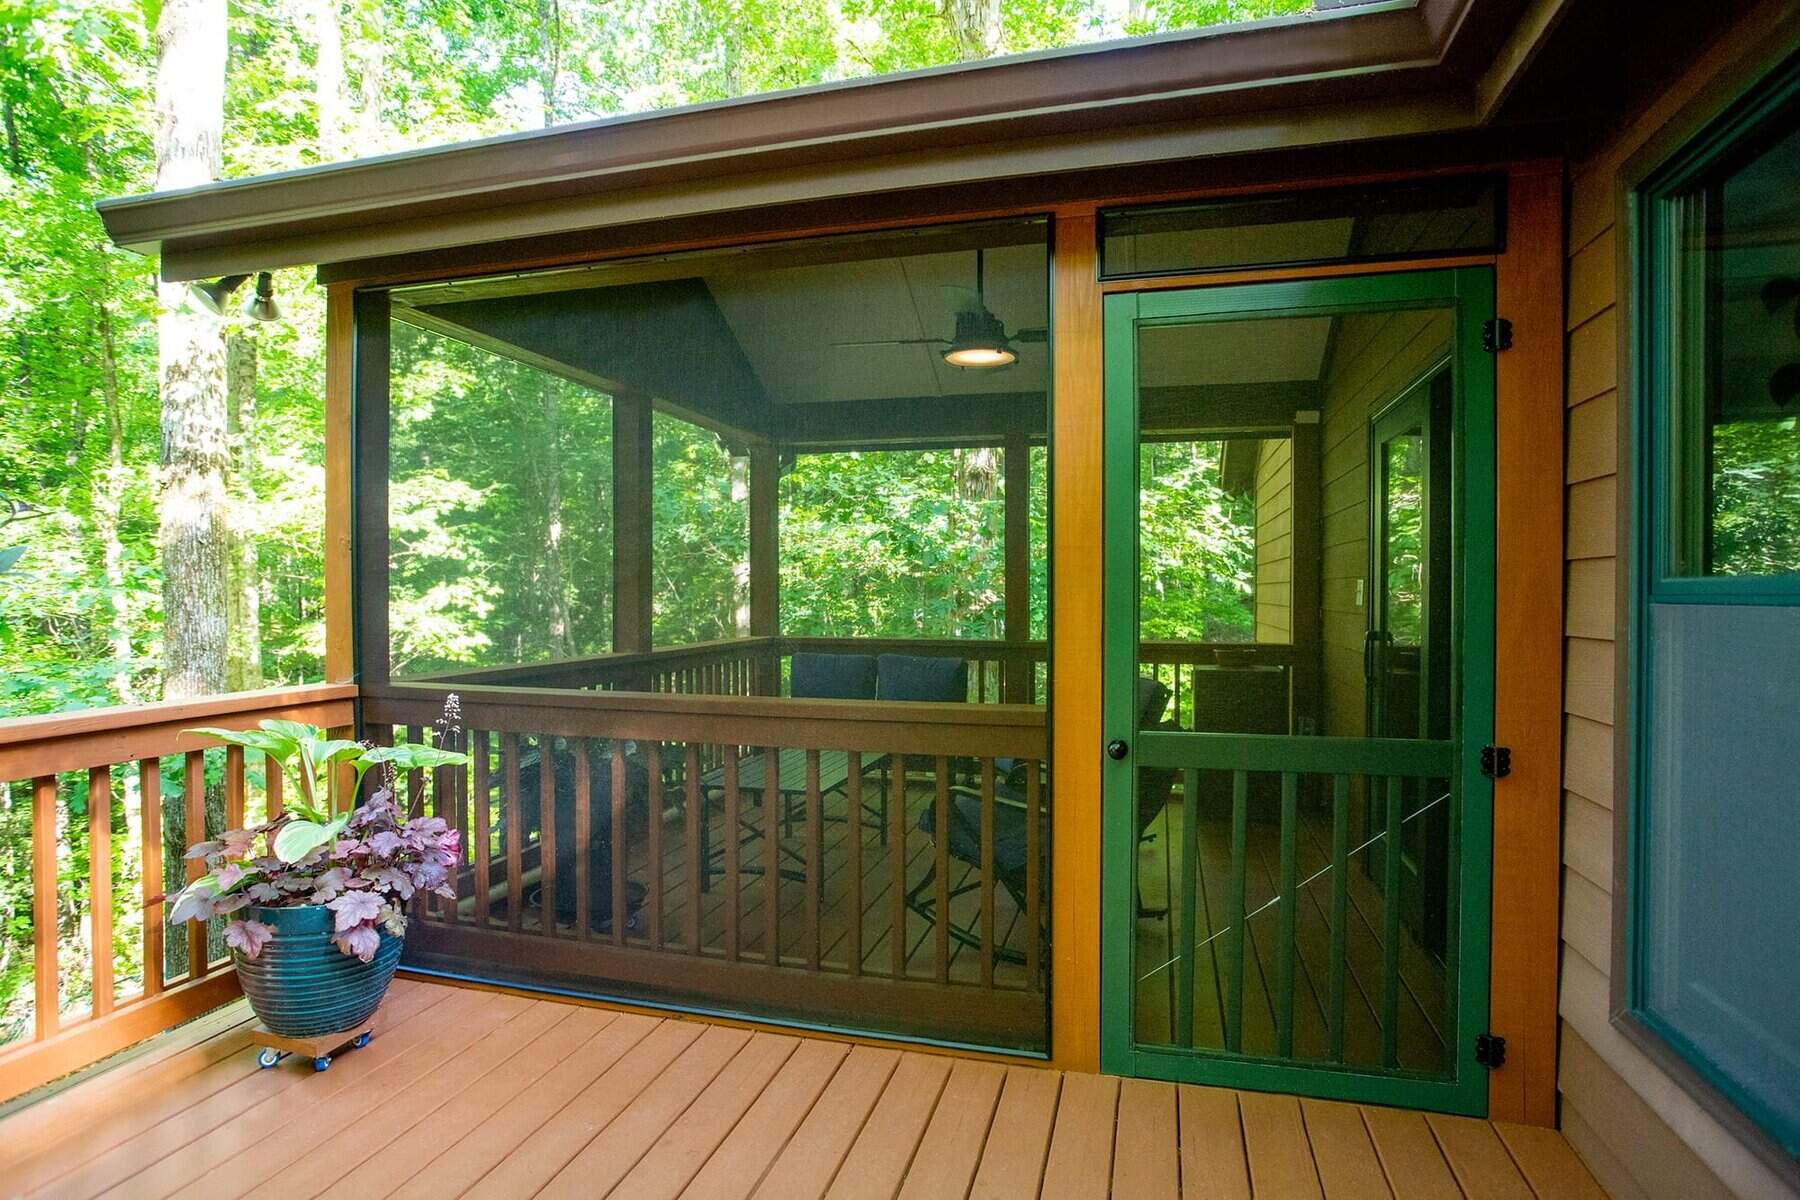
Step 7: Install the Railings
Installing railings on your porch deck not only enhances the safety of the structure but also adds a decorative element to the overall design. Railings provide a barrier and support along the edges of the deck, preventing accidental falls and providing stability. Follow these steps to install the railings:
- Check local building codes: Before proceeding with the installation, familiarize yourself with the local building codes and regulations regarding porch deck railings. Ensure that your chosen railing design and materials meet these requirements.
- Determine the railing style: Decide on the style and design of your railings based on your personal preference and the overall aesthetic of your porch deck. There are various options to choose from, including wooden railings, metal railings, glass panels, or a combination of materials.
- Measure and cut the railing posts: Measure and mark the locations for the railing posts along the outer edges of the deck. Use pressure-treated lumber to cut the posts to the desired height, ensuring they are level and aligned.
- Attach the railing posts: Secure the railing posts to the deck frame by using brackets or post anchors. Make sure the posts are plumb and securely fastened, providing a solid base for the railings.
- Install the top and bottom rails: Attach the top and bottom rails to the railing posts, creating a framework for the rest of the railing. Use screws or brackets to securely fasten the rails to the posts.
- Add the balusters or spindles: Attach the balusters or spindles between the top and bottom rails to create the vertical support for the railing. Make sure they are evenly spaced and securely attached to the rails.
- Secure the railing caps: Install the railing caps or handrails on top of the balusters for added comfort and safety. Secure them firmly to the railing posts, ensuring a secure grip for those using the deck.
- Finish and protect the railings: Apply a protective finish or stain to the railings to enhance their durability and resistance to the elements. Follow the manufacturer’s instructions for the proper application and drying time.
Installing the railings on your porch deck not only provides safety but also adds an attractive finishing touch. Take the time to carefully measure, cut, and secure the railing components, ensuring they are level, aligned, and securely attached. Once the railings are installed, your porch deck is almost complete.
Step 8: Add Finishing Touches
As you near the completion of framing your porch deck, it’s time to add the finishing touches that will elevate the overall look and feel of the space. These final details will enhance both the functionality and aesthetics of your deck, creating a welcoming and inviting outdoor area. Follow these steps to add the finishing touches:
- Install staircases, if needed: If your porch deck has multiple levels or requires access to the ground, install staircases or steps. Ensure they are secure, properly aligned, and meet the necessary building codes for safety.
- Apply a protective coat: Protect your deck and enhance its longevity by applying a waterproof sealant or a protective deck stain. This will shield the wood from moisture, UV rays, and general wear and tear.
- Add lighting: Install outdoor lighting fixtures to illuminate your porch deck, allowing you to enjoy it during the evening hours. Consider adding pathway lighting, deck post lights, or string lights to create a warm and inviting atmosphere.
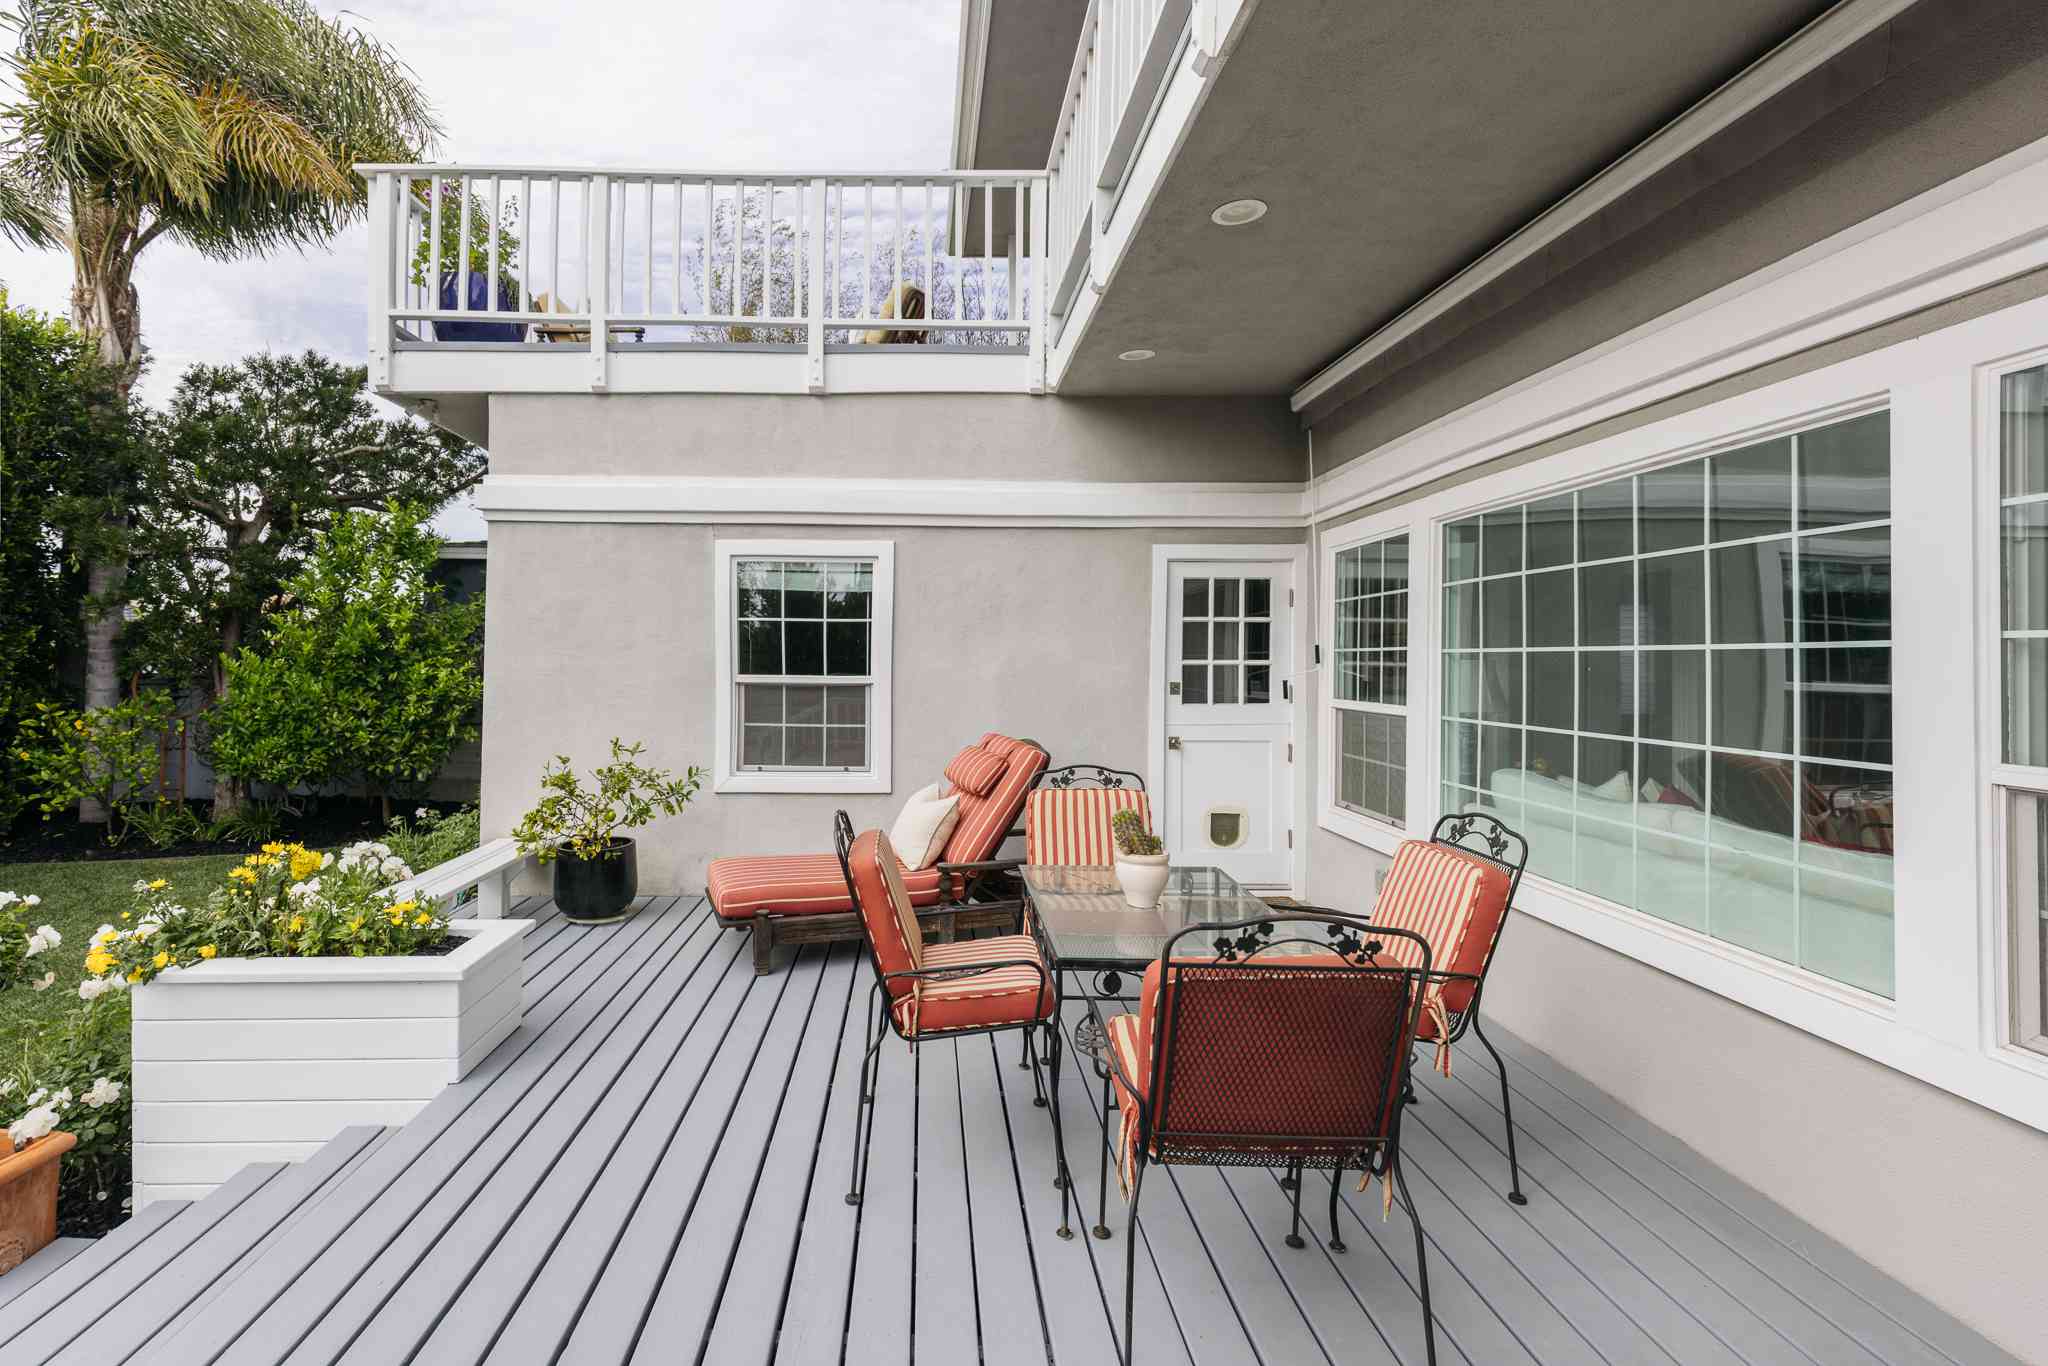
- Incorporate seating and outdoor furniture: Furnish your porch deck with comfortable seating and outdoor furniture, such as chairs, tables, and loungers. Choose materials that can withstand outdoor conditions and complement the style of your deck.
- Accessorize with plants and decor: Add natural beauty to your porch deck by incorporating potted plants, flowers, and greenery. Consider hanging baskets or wall planters to save space. Additionally, include decorative elements like outdoor rugs, pillows, and artwork to personalize the space.
- Ensure safety measures: Install safety features like handrails and anti-slip coatings to prevent accidents and promote a secure environment on your deck.
- Maintain and clean regularly: Regular maintenance is key to preserving the quality and longevity of your porch deck. Clean it regularly, remove debris, and inspect for any damage or wear that needs to be addressed.
By adding these finishing touches, your porch deck will become a functional and visually appealing outdoor space where you can relax and entertain. Take the time to choose the right materials, furnishings, and decor that reflect your style and enhance your enjoyment of your deck for years to come.
Conclusion
Building and framing a porch deck is a rewarding project that can transform your outdoor space into a beautiful and inviting area for relaxation and entertainment. By following the step-by-step guide provided in this article, you can successfully frame your porch deck while ensuring its stability, safety, and longevity.
From measuring and planning to installing the railings and adding the finishing touches, each step plays a crucial role in creating a well-structured and aesthetically pleasing porch deck. Make sure to gather all the necessary materials and tools, take accurate measurements, and follow local building codes and regulations. Additionally, pay attention to proper alignment, levelness, and secure attachment of the various components.
Remember that while functionality and structural integrity are important, adding your personal touch to the design is equally essential. Consider the overall style of your home and outdoor space and choose materials, colors, and decor that complement your existing aesthetics.
Regular maintenance is key to preserving the beauty and longevity of your porch deck. Clean it regularly, address any repairs promptly, and apply protective coatings as needed. By doing so, you can enjoy your porch deck for years to come.
Now that you have all the knowledge and guidance necessary to frame a porch deck, it’s time to put your skills into action and create the outdoor space of your dreams. Get ready to enjoy countless hours of relaxation, fun, and memorable moments with family and friends on your beautifully crafted porch deck.
Frequently Asked Questions about How To Frame A Porch Deck
Was this page helpful?
At Storables.com, we guarantee accurate and reliable information. Our content, validated by Expert Board Contributors, is crafted following stringent Editorial Policies. We're committed to providing you with well-researched, expert-backed insights for all your informational needs.

0 thoughts on “How To Frame A Porch Deck”