Articles
How To Ground Plastic Electrical Box
Modified: October 20, 2024
Learn how to properly ground plastic electrical boxes in this informative article. Find step-by-step instructions and expert tips to ensure safety and compliance.
(Many of the links in this article redirect to a specific reviewed product. Your purchase of these products through affiliate links helps to generate commission for Storables.com, at no extra cost. Learn more)
Introduction
Welcome to this comprehensive guide on how to ground a plastic electrical box. Proper grounding is an essential aspect of electrical installations, as it ensures the safety of both you and your electrical system. While metal electrical boxes are naturally conductive and provide grounding through their connection to the building’s grounding system, plastic electrical boxes require additional steps to be properly grounded.
This article will walk you through the process of grounding a plastic electrical box in a detailed, step-by-step manner. Before we dive into the specific steps, please keep in mind that working with electrical wiring can be dangerous. If you do not have experience or are unsure about any aspect of the process, it is always recommended to consult a professional electrician.
Safety should always be the top priority when working with electricity. Before starting any electrical work, make sure to turn off the power to the circuit you will be working on from the electrical panel. Additionally, using proper safety gear such as safety glasses and insulated gloves is highly recommended.
Now that we’ve covered the importance of grounding and the safety precautions, let’s move on to the tools and materials you will need for this project.
Key Takeaways:
- Prioritize safety by turning off the power, using proper safety gear, and following electrical codes when grounding a plastic electrical box. This ensures a safe working environment and minimizes the risk of accidents.
- Properly grounding a plastic electrical box involves steps such as disconnecting and reconnecting the wiring, securing the box, and testing the grounding connection. Following these steps ensures the safety and functionality of your electrical system.
Read more: How To Tell If Electrical Box Is Grounded
Safety Precautions
When working with electricity, it is crucial to prioritize safety at all times. Here are some important safety precautions to follow when grounding a plastic electrical box:
- Turn off the power: Before you begin any work, make sure to turn off the power to the circuit you will be working on. Locate the circuit breaker in your electrical panel and flip it to the off position. Use a voltage tester to double-check that the power has been successfully turned off.
- Use proper safety equipment: Protect yourself by wearing safety glasses, insulated gloves, and appropriate clothing. These safety measures will help minimize the risk of electrical shock.
- Work in a well-ventilated area: Make sure you have good ventilation while working on your electrical box. This will help dissipate any potentially harmful fumes that may be released during the process.
- Inspect the wiring: Before you begin grounding the plastic electrical box, thoroughly inspect the wiring for any signs of damage or wear. If you notice any frayed wires or exposed conductors, they should be replaced before proceeding.
- Avoid water and damp conditions: Keep the work area dry and avoid working in damp conditions or when it is raining. Moisture increases the risk of electrical shock.
- Do not overload the circuit: Ensure that the circuit you are working on is not overloaded. Overloading a circuit can lead to overheating and potentially cause a fire.
- Follow electrical codes and regulations: Familiarize yourself with local electrical codes and regulations to ensure that you adhere to all guidelines. This will help ensure the safety and compliance of your electrical installation.
- Call a professional if unsure: If you are unsure about any aspect of grounding a plastic electrical box or dealing with electrical wiring, it is always best to seek the assistance of a licensed electrician. They have the expertise and experience to handle complex electrical tasks safely and effectively.
By following these safety precautions, you can minimize the risk of accidents and ensure a safe working environment. Now that we’ve covered the safety measures, let’s move on to the tools and materials you’ll need for the job.
Tools and Materials Needed
Before you begin grounding a plastic electrical box, gather the following tools and materials:
Tools:
- Phillips head screwdriver
- Flathead screwdriver
- Wire stripper
- Electrical tape
- Needle-nose pliers
- Wire connectors (specifically grounding connectors)
- Voltage tester
- Cordless drill (optional)
- Drill bits (if using a cordless drill)
Materials:
- Grounding wire (copper or green insulated wire)
- Grounding screw or grounding clip
- Plastic electrical box
- Cover plate
Having these tools and materials readily available will ensure that you have everything you need to properly ground a plastic electrical box. Now, let’s move on to the step-by-step process of grounding the box.
Read also: 10 Amazing Electrical Box Plastic for 2025
Step 1: Turn Off the Power
Before you begin working on the plastic electrical box, it is crucial to turn off the power to the circuit you will be working on. This step is essential to prevent any risk of electrical shock. Follow these steps to turn off the power:
- Locate the electrical panel: Identify the location of your electrical panel. It is usually found in a basement, garage, or utility room.
- Open the electrical panel: Remove the panel cover by unscrewing the screws or flipping the latch, depending on the design of your panel.
- Identify the circuit breaker: Locate the circuit breaker that controls the circuit you will be working on. The breakers are typically labeled for easy identification.
- Switch off the circuit breaker: Flip the switch of the corresponding circuit breaker to the “off” position. This will cut off the power supply to the circuit.
- Verify power is off: Use a voltage tester to double-check that the power has been successfully turned off. Test the wires or outlets in the area you will be working on to ensure they are not live.
Once you have confirmed that the power is off, you can safely proceed to the next steps of grounding the plastic electrical box. Remember to exercise caution and treat all wires and connections as if they are live until verified otherwise. Let’s move on to step 2, which involves removing the cover plate.
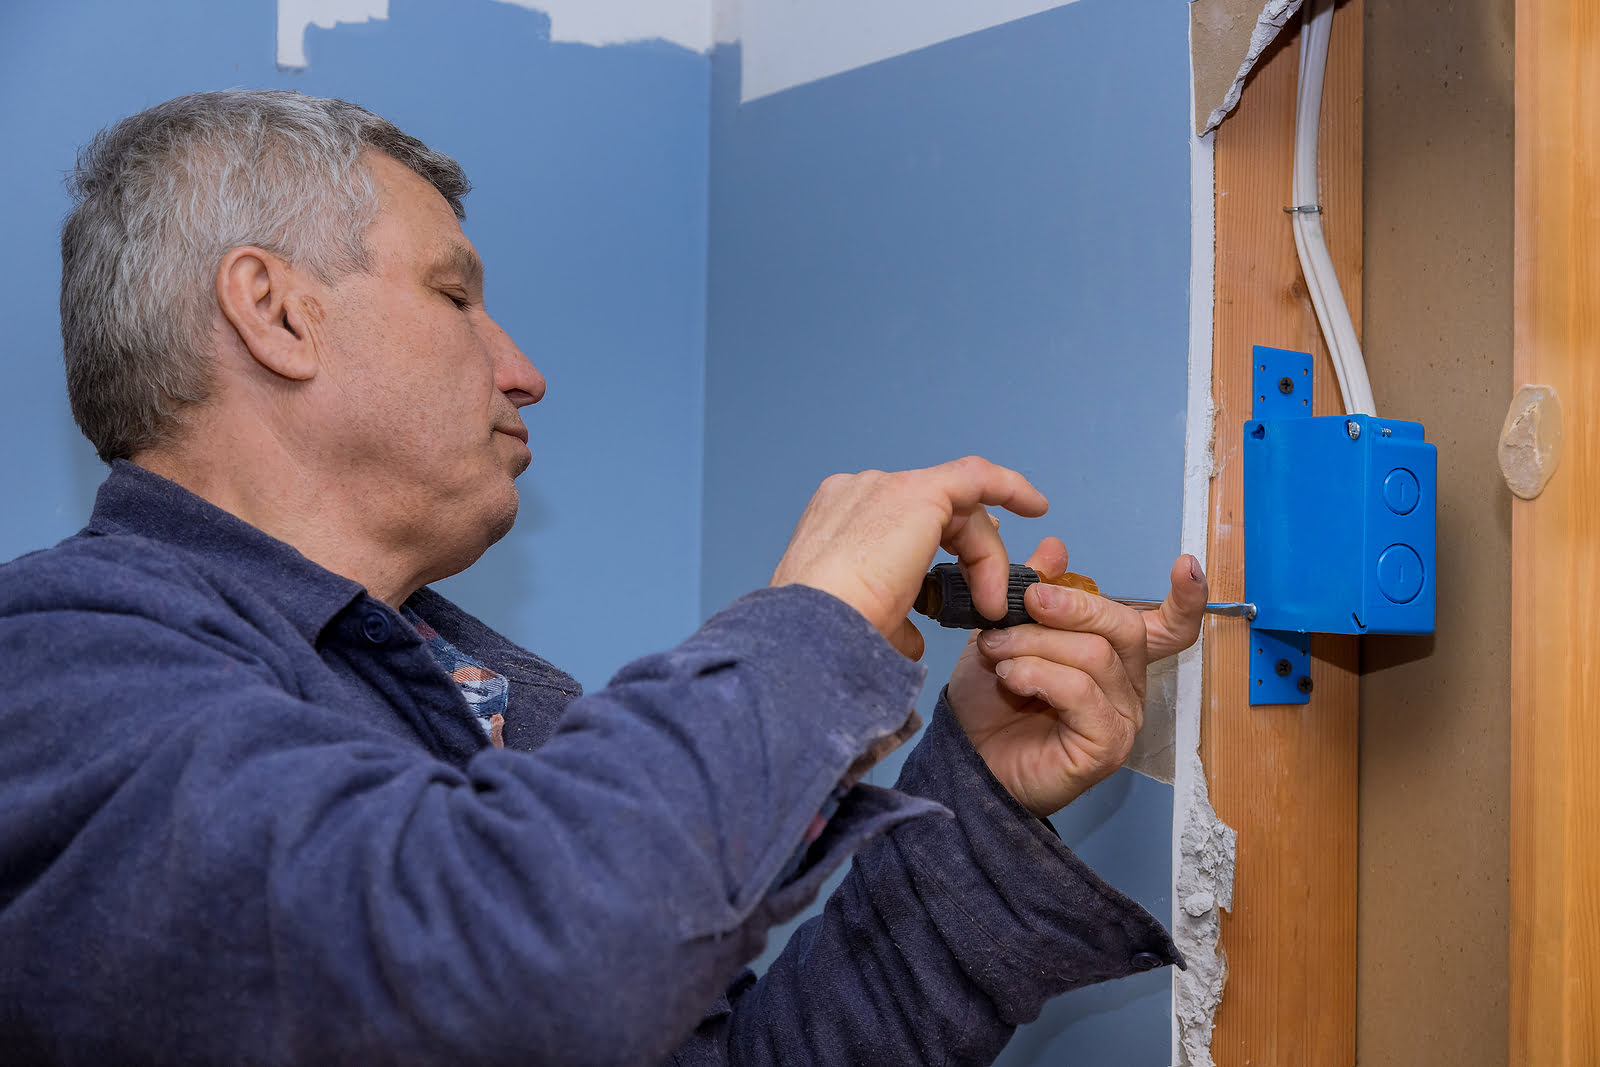
Step 2: Remove the Cover Plate
With the power turned off and verified, you can now proceed to remove the cover plate from the plastic electrical box. Follow these steps:
- Inspect the cover plate: Take a close look at the cover plate to identify how it is attached to the box. Most cover plates are secured with screws, while others may have a locking mechanism or clips.
- Use a screwdriver: If the cover plate is secured with screws, use a suitable screwdriver (typically a Phillips head) to unscrew them counterclockwise. Place the screws in a safe location so that they can be easily retrieved later.
- Release the locking mechanism or clips: If the cover plate has a locking mechanism or clips, carefully release them using a flathead screwdriver or your fingers. Follow the manufacturer’s instructions for your specific cover plate.
- Remove the cover plate: Once the screws or locking mechanism/clips are detached, gently pull the cover plate away from the plastic electrical box. Set it aside in a safe place.
By removing the cover plate, you will have clear access to the plastic electrical box, making it easier to proceed with the next steps. Make sure to keep the cover plate in a safe location so that it can be reinstalled later. Now, let’s move on to step 3, where we will learn how to unscrew the box from the wall.
Step 3: Unscrew the Box
Now that you have removed the cover plate, it is time to unscrew the plastic electrical box from the wall. Follow these steps:
- Inspect the box: Take a moment to inspect the plastic electrical box. Look for any visible screws or fasteners holding the box in place.
- Use a screwdriver: If there are screws securing the box, use a suitable screwdriver (typically a Phillips head) to unscrew them counterclockwise. Set the screws aside in a safe place for later use.
- Release any additional fasteners: In some cases, the plastic electrical box may also be secured to the wall with additional fasteners, such as nails or staples. Use a pair of needle-nose pliers or a flathead screwdriver to release these fasteners if necessary.
- Remove the electrical box: Once all screws and fasteners are loosened or removed, gently pull the plastic electrical box away from the wall. Take care not to damage the wiring inside the box.
By unscrewing and removing the plastic electrical box, you will create the necessary space to work on grounding it properly. Ensure that you handle the box and any attached wiring with care to avoid any accidental damage. Now let’s move on to the next step, where we will learn how to disconnect the wiring.
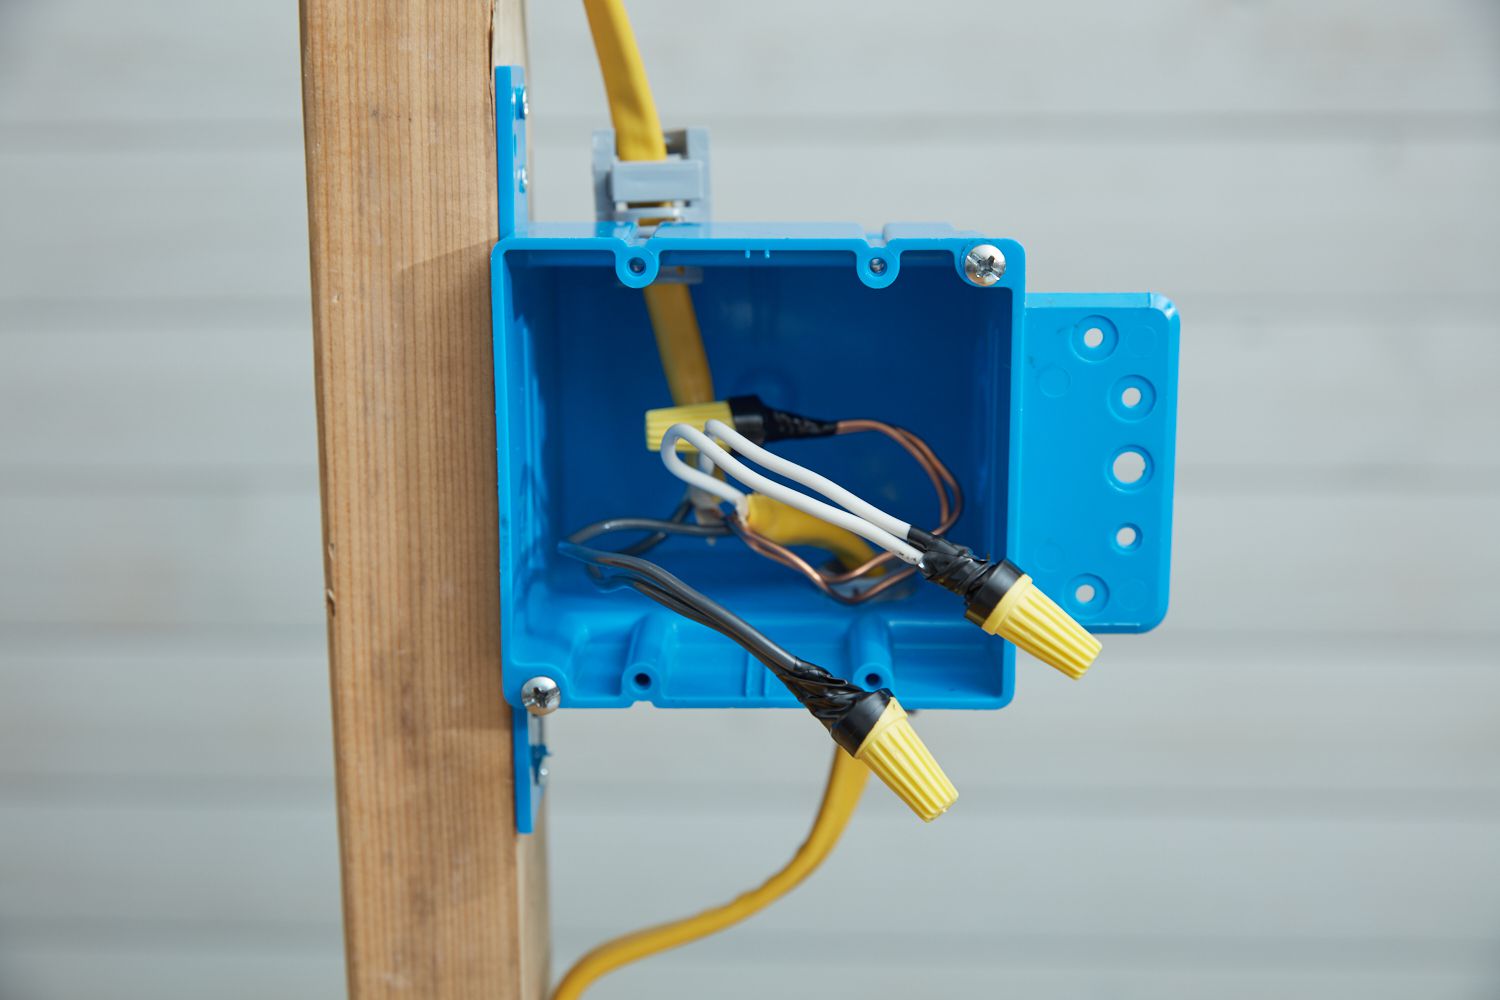
Step 4: Disconnect the Wiring
Now that the plastic electrical box is removed from the wall, it’s time to disconnect the wiring. It’s essential to disconnect the wiring properly to ensure a safe and smooth grounding process. Follow these steps:
- Identify the wiring connections: Take a careful look at the wiring inside the plastic electrical box. Identify the various wiring connections, including the line wires, load wires, and ground wire.
- Label or take a photo (optional): If you want to ensure a hassle-free reconnection later, you can choose to label each wire or take a photo of the wiring connections before disconnecting them. This step is especially helpful if there are multiple wires and connections inside the box.
- Disconnect the line wires: The line wires are the wires that supply power to the box. Use a pair of wire strippers or needle-nose pliers to loosen the wire connectors holding the line wires. Gently separate the line wires from the connectors.
- Disconnect the load wires: The load wires are the wires that go from the box to the electrical devices or fixtures. Follow the same process as with the line wires to disconnect the load wires from the connectors.
- Disconnect the ground wire: The ground wire is crucial for proper grounding. Look for a green or bare copper wire inside the box that is connected to a grounding screw or clip. Loosen the screw or release the clip to disconnect the ground wire.
Disconnecting the wiring allows you to prepare for the proper grounding of the plastic electrical box. Remember to handle the wires carefully and avoid damaging them during the disconnection process. Once the wiring is safely disconnected, we can move on to the next step, which involves grounding the plastic electrical box.
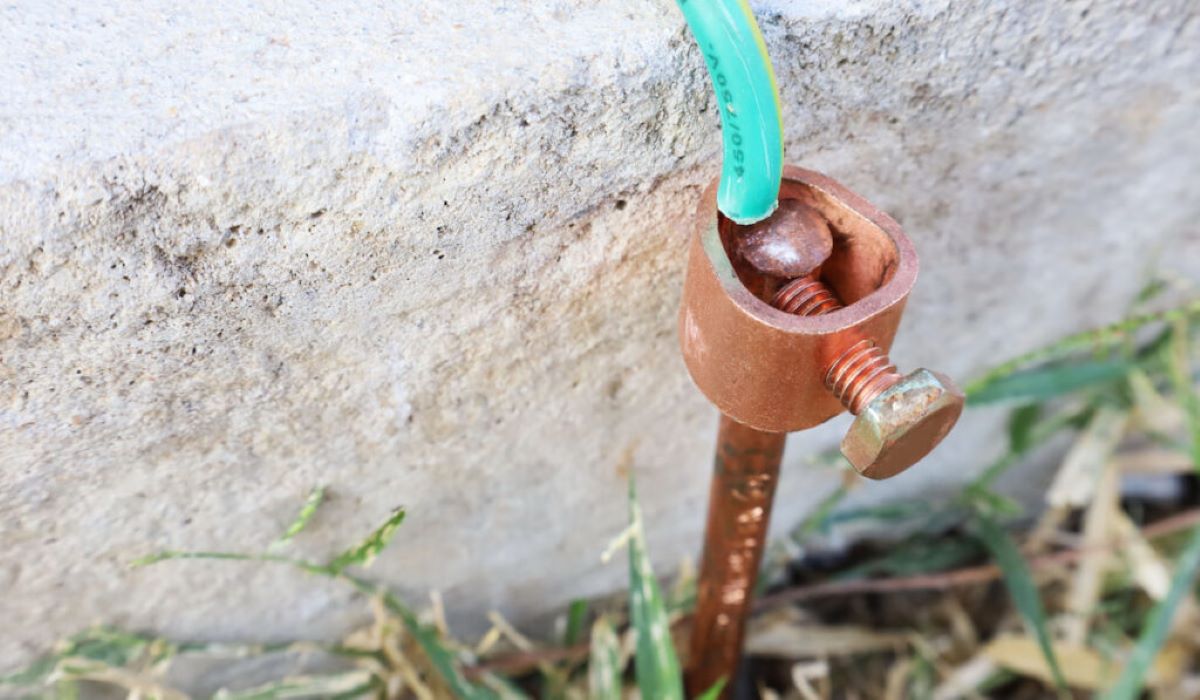
When grounding a plastic electrical box, use a grounding clip or screw to connect the grounding wire to the box. Make sure the box is securely mounted to a grounded metal junction box.
Read more: How To Ground Electrical Wires
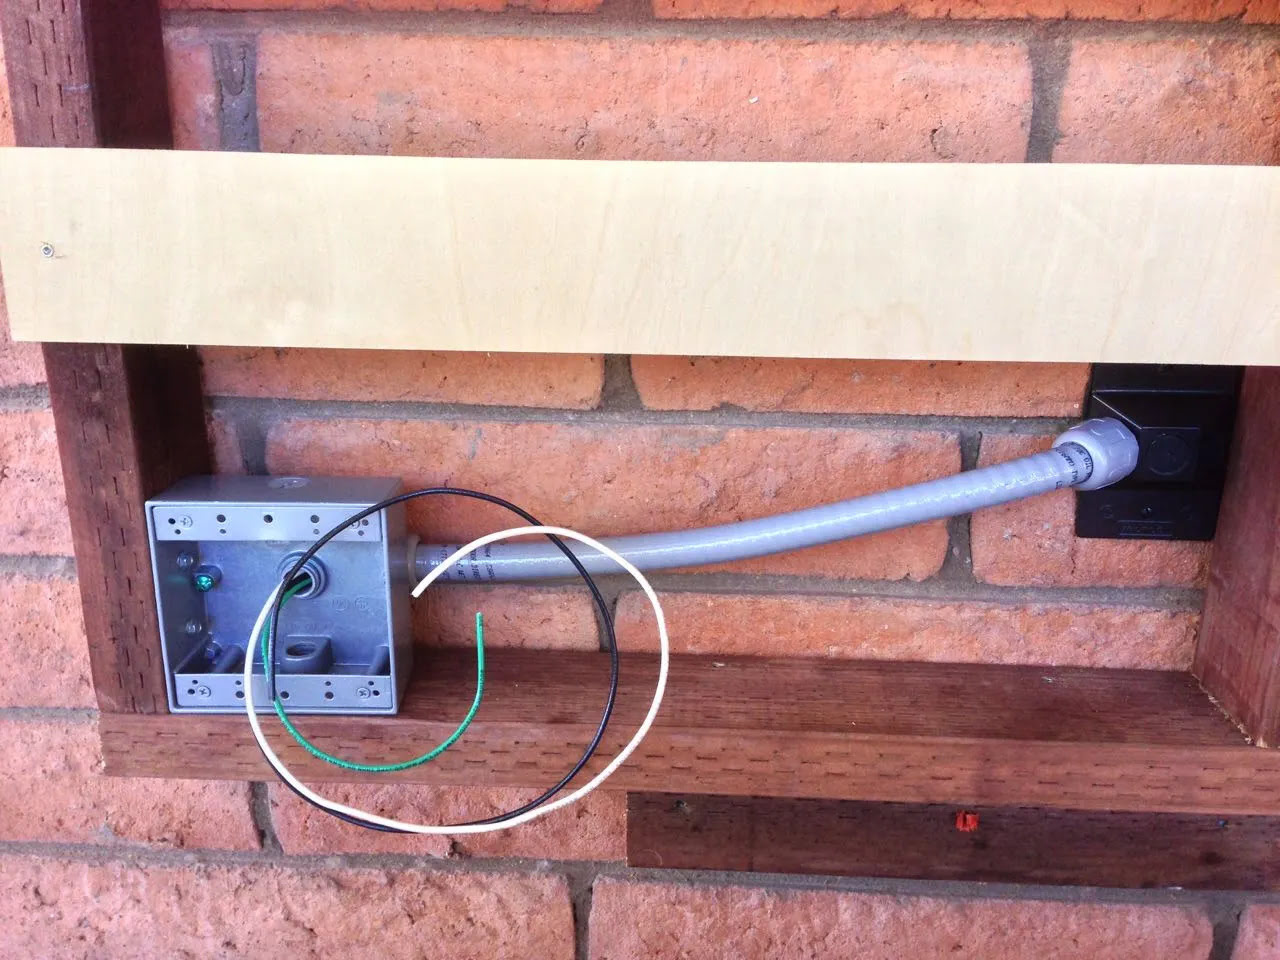
Step 5: Grounding the Plastic Electrical Box
Grounding a plastic electrical box is a crucial step to ensure the safety and proper functioning of your electrical system. Follow these steps to effectively ground the plastic electrical box:
- Prepare the grounding wire: Cut a length of bare copper or green insulated wire to serve as the grounding wire. The length of the wire should be sufficient to reach the ground connection point.
- Locate the ground connection point: Look for a grounding screw or clip in the vicinity of the plastic electrical box. This can be found nearby on the electrical panel or in the electrical box itself.
- Connect the grounding wire: Attach one end of the grounding wire to the identified ground connection point. If using a grounding screw, wrap the wire around the screw and tighten it securely. If using a grounding clip, insert the wire into the clip and ensure it is securely fastened.
- Secure the other end of the grounding wire: Once the grounding wire is connected to the ground connection point, secure the other end of the wire to the grounding terminal or grounding screw inside the plastic electrical box. Make sure it is tightly secured to ensure a proper connection.
- Verify the proper grounding: Use a voltage tester to check the grounding connection. Touch one probe of the voltage tester to the grounding wire and the other probe to a known ground, such as a metal piping or grounding rod. The voltage tester should indicate that there is continuity or a proper connection.
Grounding the plastic electrical box ensures that any fault or excess electricity is safely directed to the ground, protecting your electrical system from potential damage or danger. Once you have completed the grounding process, you can proceed to the next step, where we will learn how to reconnect the wiring.
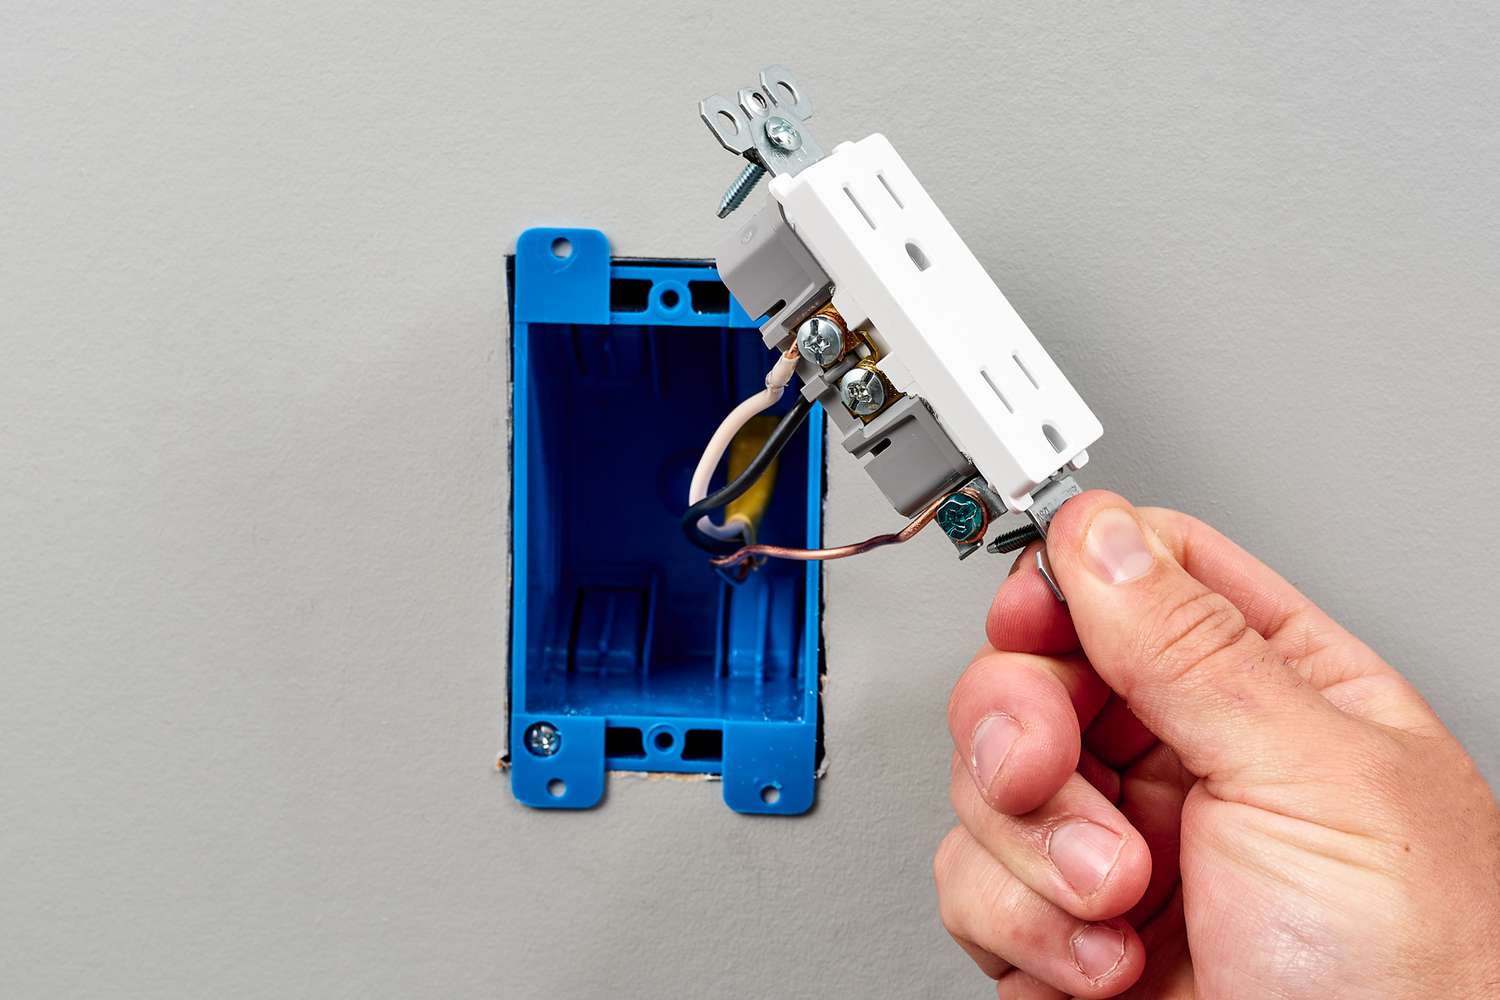
Step 6: Reconnect the Wiring
After successfully grounding the plastic electrical box, it’s time to reconnect the wiring. Properly reconnecting the wiring ensures the safe and efficient flow of electricity through your electrical system. Follow these steps to reconnect the wiring:
- Reconnect the ground wire: Begin by reconnecting the ground wire. Locate the ground screw or clip inside the plastic electrical box and attach the other end of the grounding wire to it. Tighten the screw or secure the clip to ensure a secure connection.
- Reconnect the line wires: Identify the line wires (usually black or hot wires) within the plastic box. Use wire connectors to rejoin these line wires together. Insert the corresponding line wires into the wire connector and twist it clockwise until it is secure. Make sure there are no exposed wire strands outside the connector.
- Reconnect the load wires: Identify the load wires (usually colored wires leading to electrical devices or fixtures) within the box. Similar to the line wires, use wire connectors to rejoin these load wires together. Insert the corresponding load wires into the wire connector and twist it clockwise until it is secure.
- Ensure proper insulation: As you reconnect the wiring, make sure that the wire connections are properly insulated. Use electrical tape to wrap around the wire connectors and ensure that there are no exposed wires or loose connections.
- Double-check connections: Before proceeding, double-check all the wiring connections to ensure they are secure and properly joined. Inspect each wire connector and ensure that there are no loose or dangling wires.
Reconnecting the wiring is a crucial step to restore the electrical functionality of the box. Take your time to ensure that all connections are securely made and properly insulated to guarantee a safe and reliable electrical system. Now, let’s move on to the next step, where we will learn how to secure the plastic electrical box back into place.
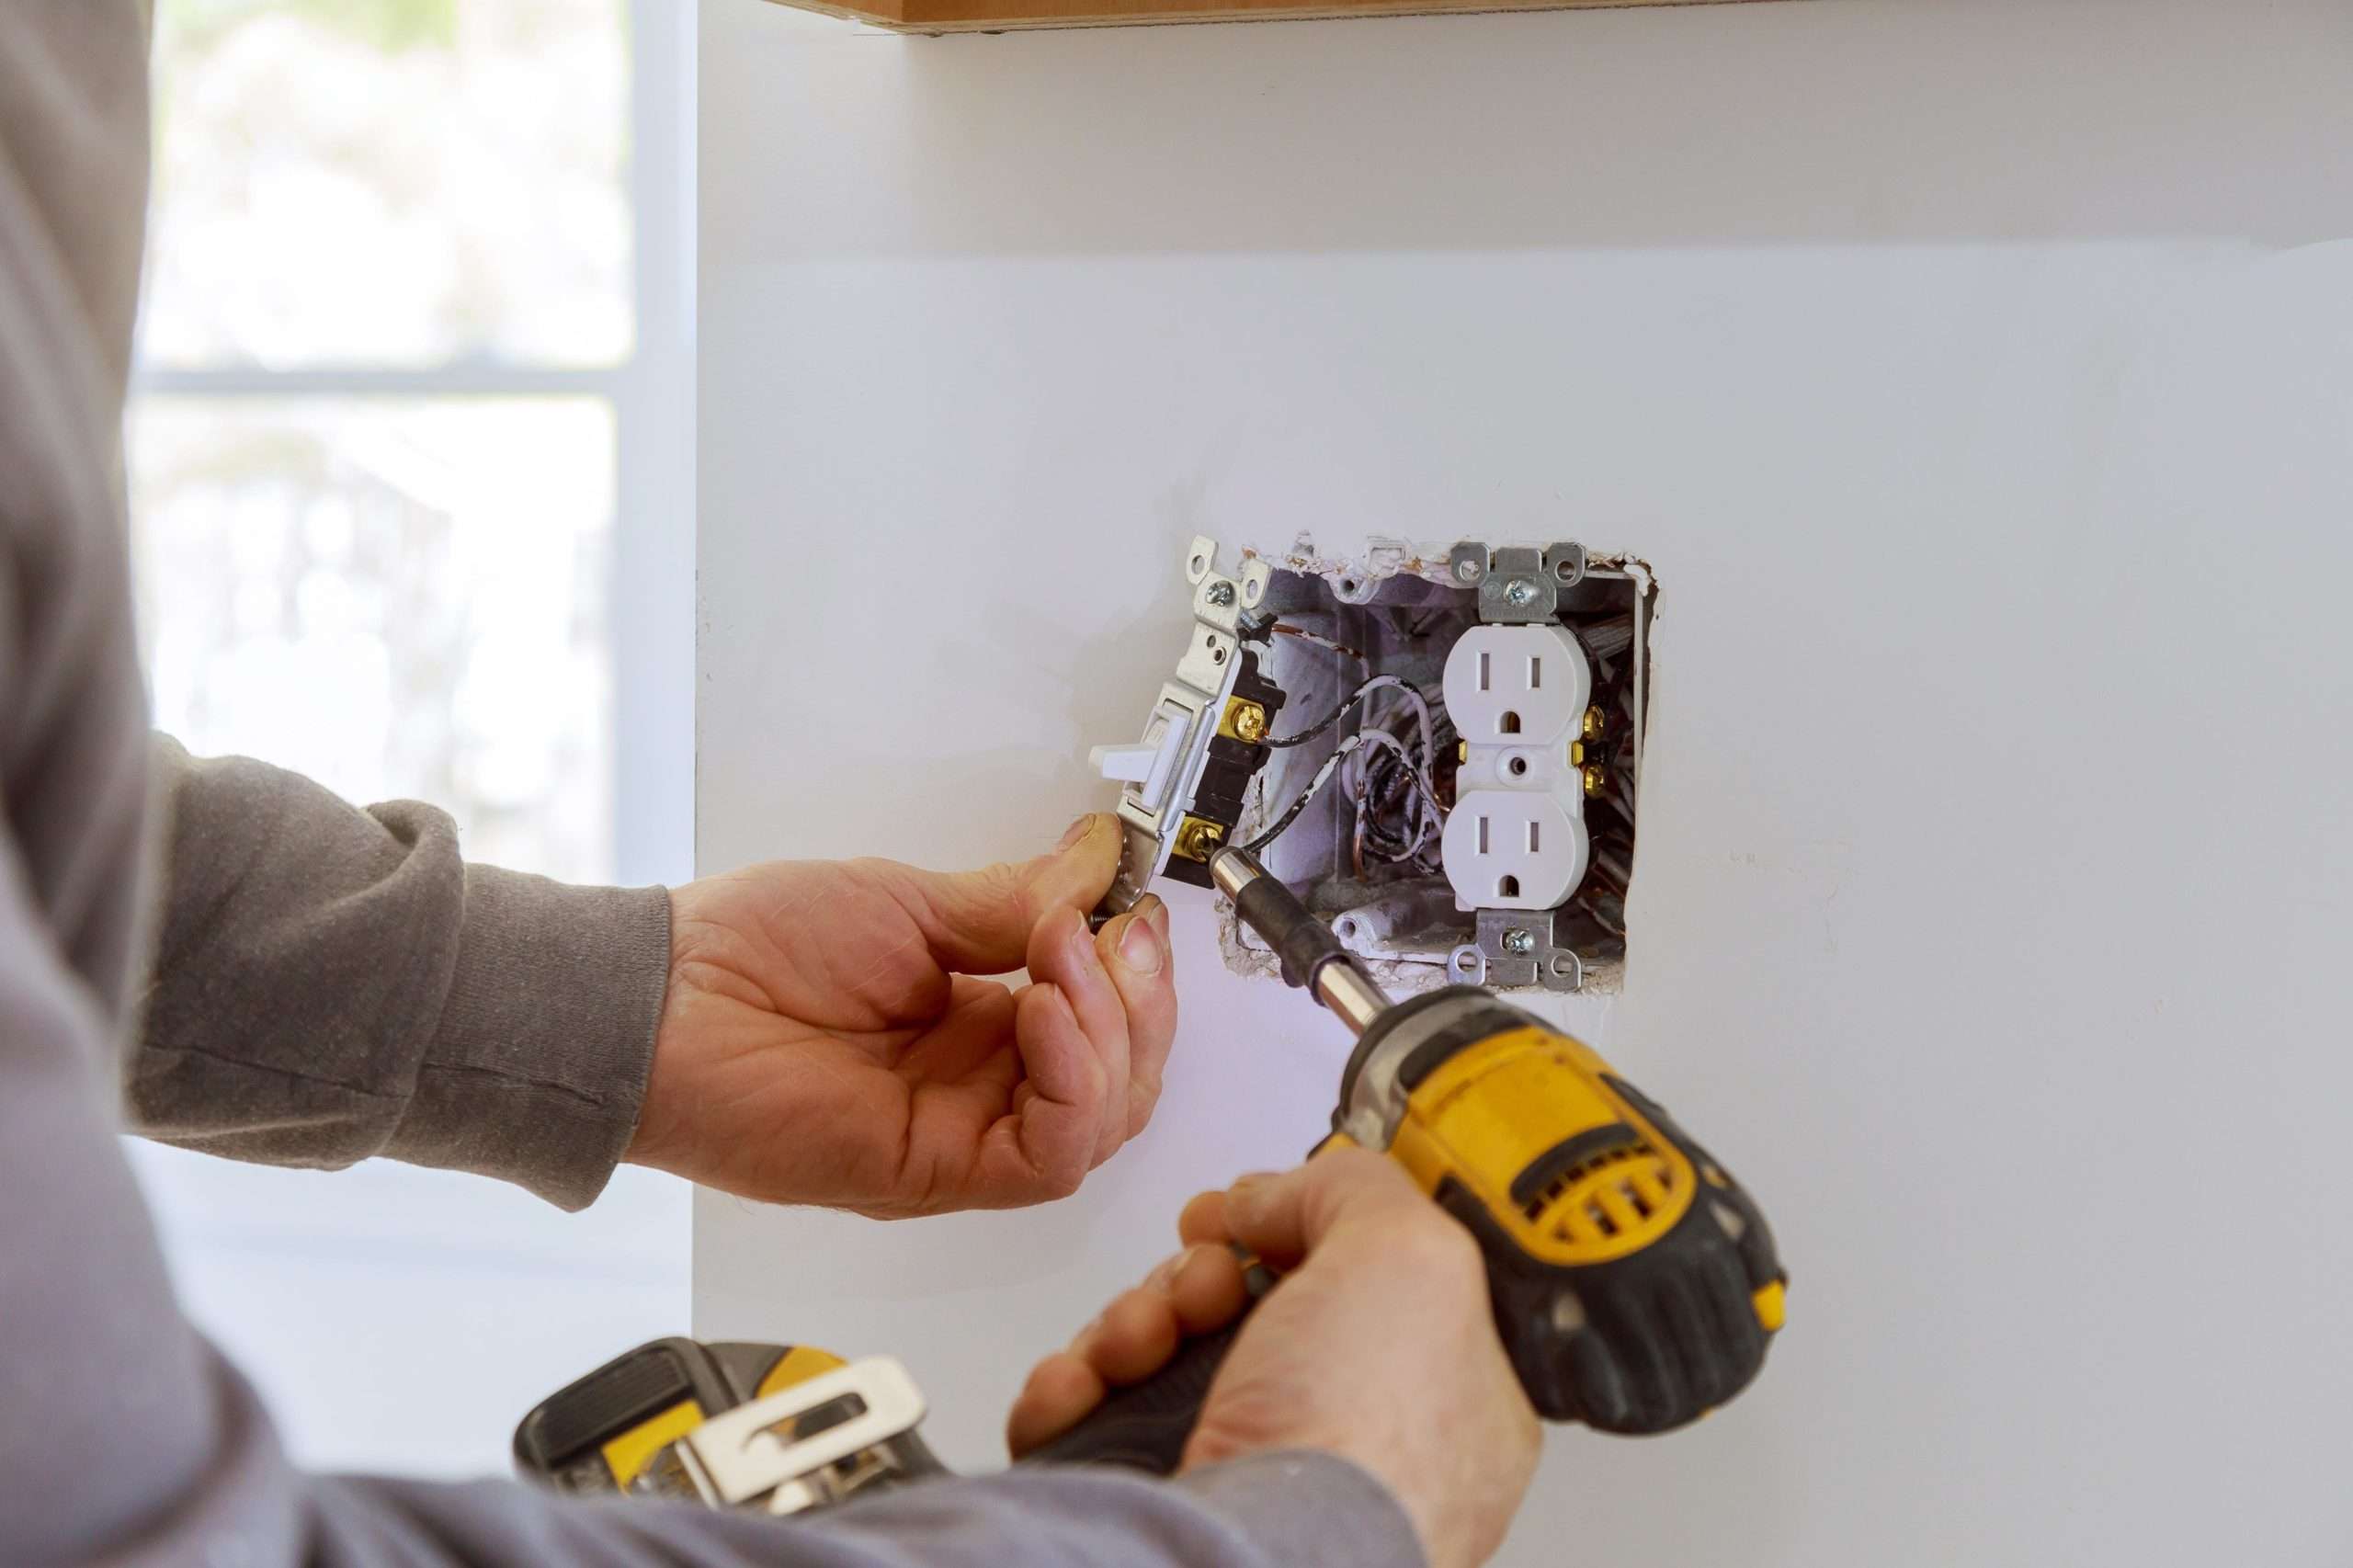
Step 7: Secure the Box
Once you have reconnected the wiring, it’s time to secure the plastic electrical box back into its designated spot on the wall. Properly securing the box ensures stability and safety for your electrical connections. Follow these steps to securely attach the plastic electrical box:
- Position the box: Align the plastic electrical box with the opening in the wall where it was originally mounted. Ensure that the box is level and flush with the wall surface.
- Locate mounting holes: Look for the mounting holes in the box that align with the predetermined anchor points on the wall.
- Attach the screws: Insert screws into the mounting holes and tighten them securely. Use a screwdriver or a cordless drill with an appropriate drill bit to drive the screws into the wall.
- Check stability: Once the screws are tightened, give the box a gentle shake to ensure it is firmly secured to the wall. Verify that there is no excessive movement or wobbling.
- Inspect the wiring inside: Take a moment to inspect the wiring inside the box to ensure that it is not pinched, twisted, or stressed. Make any necessary adjustments to the wiring to maintain its integrity.
Securing the plastic electrical box not only provides stability to the electrical connections but also ensures that there are no loose or exposed wiring that could potentially cause hazards or malfunctions. Once you have securely attached the box, it’s time to move on to the final step of the grounding process—testing the grounding.
Step 8: Test the Grounding
After grounding the plastic electrical box and securing it in place, it is essential to test the grounding to ensure a proper connection and electrical safety. Follow these steps to test the grounding:
- Turn on the power: Go back to the electrical panel and switch on the circuit breaker that corresponds to the circuit you have been working on. This will restore power to the circuit.
- Prepare the voltage tester: Ensure that the voltage tester is in good working condition. Follow the manufacturer’s instructions to properly use the tester and ensure your safety.
- Test the grounding connection: Touch one probe of the voltage tester to the grounding wire inside the plastic electrical box. Then, touch the other probe to a known ground, such as a metal piping or grounding rod. The voltage tester should indicate that there is continuity, confirming a successful grounding connection.
- Check for proper functionality: Once the grounding is verified, test the devices or fixtures that are connected to the plastic electrical box to ensure they are functioning properly. Turn on switches, plug in appliances, or use a circuit tester to confirm that the electrical system is working as expected.
- Monitor for any issues: Keep an eye on the electrical system and the plastic electrical box for any signs of abnormalities. Watch for flickering lights, overheated outlets, or any other indications of potential issues. If you notice any problems, contact a licensed electrician to inspect and address them.
By testing the grounding connection and ensuring the proper functionality of the electrical system, you can have confidence in the safety and reliability of your plastic electrical box. If the grounding or any issues are detected during testing, it is recommended to seek assistance from a professional electrician for further inspection and troubleshooting.
With the testing completed successfully, you have successfully grounded your plastic electrical box. Congratulations on completing the process! Remember, if you ever have concerns about electrical work or are unsure about any aspect of it, it is always best to consult a professional electrician for assistance.
With that, you have completed the step-by-step guide on how to ground a plastic electrical box. By following these steps and ensuring proper grounding, you have taken important steps towards maintaining a safe and efficient electrical system in your home or workspace.
Remember, electrical work can be complex and potentially hazardous. If you are unsure or inexperienced, it is always recommended to seek the assistance of a qualified electrician to ensure the job is done correctly and safely.
Thank you for reading, and best of luck with your electrical grounding projects!
Read more: How To Bend Plastic Electrical Conduit
Conclusion
Congratulations on successfully grounding your plastic electrical box! Proper grounding is essential for the safety and functionality of your electrical system. By following the step-by-step guide outlined in this article, you have learned how to safely and effectively ground a plastic electrical box.
Throughout the process, we emphasized the importance of safety precautions such as turning off the power, using appropriate safety gear, and following electrical codes and regulations. These precautions ensure your well-being and minimize the risk of accidents or electrical hazards.
We also discussed the tools and materials needed for the job, including screwdrivers, wire strippers, grounding wire, and wire connectors. Having the right tools at hand makes the process more efficient and helps you achieve a successful grounding connection.
We walked through each step, from turning off the power and removing the cover plate, to unscrewing the box, disconnecting the wiring, grounding the plastic electrical box, reconnecting the wiring, securing the box, and finally, testing the grounding connection.
By following these steps, you have ensured that your plastic electrical box is properly grounded, allowing for the safe dissipation of any excess electrical current. This helps protect your electrical system from damage and reduces the risk of electrical shocks or fires.
Remember, if you have any doubts or are unfamiliar with electrical work, it is always best to seek the assistance of a licensed electrician. They have the expertise and knowledge to handle complex electrical tasks safely and effectively.
Thank you for taking the time to learn about grounding a plastic electrical box. By prioritizing safety and following the steps outlined in this guide, you have taken an important step towards maintaining a safe and reliable electrical system. Have confidence in your newly grounded plastic electrical box and enjoy the peace of mind that comes with a properly grounded electrical system!
Frequently Asked Questions about How To Ground Plastic Electrical Box
Was this page helpful?
At Storables.com, we guarantee accurate and reliable information. Our content, validated by Expert Board Contributors, is crafted following stringent Editorial Policies. We're committed to providing you with well-researched, expert-backed insights for all your informational needs.


0 thoughts on “How To Ground Plastic Electrical Box”