Articles
How To Open An Electrical Box
Modified: August 27, 2024
Learn how to open an electrical box safely and efficiently with our informative articles. Ensure you have the knowledge and skills necessary to tackle any electrical project.
(Many of the links in this article redirect to a specific reviewed product. Your purchase of these products through affiliate links helps to generate commission for Storables.com, at no extra cost. Learn more)
Introduction
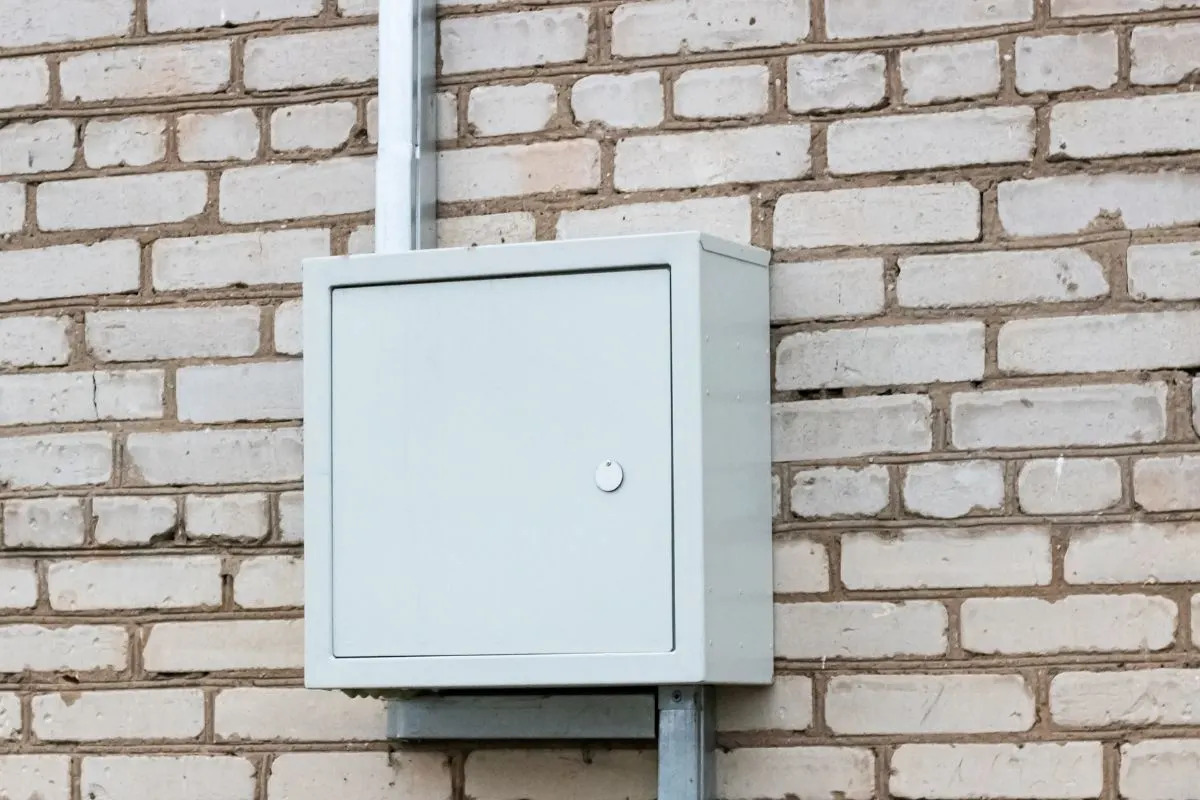
Opening an electrical box is a task that may be necessary for various reasons, such as installing new electrical devices, troubleshooting electrical issues, or performing routine maintenance. However, before attempting to open an electrical box, it is crucial to prioritize safety and follow proper procedure to avoid electrical hazards.
In this article, we will guide you through the step-by-step process of opening an electrical box safely and effectively. We will also highlight the necessary tools and materials you will need to complete the task. Whether you are a DIY enthusiast or a professional electrician, this article will provide you with the knowledge and confidence to open an electrical box with ease.
Before we begin, it is important to note that working with electricity can be dangerous. If you are not confident in your abilities or unsure about any aspect of the process, we highly recommend consulting a licensed electrician to ensure the job is done correctly and safely. Remember, safety should always be the top priority when working with electricity.
Now, let’s dive into the essential safety precautions you need to keep in mind before opening an electrical box.
Key Takeaways:
- Prioritize safety by turning off the power supply, using insulated tools, and wearing protective gear before opening an electrical box. Properly identifying and labeling wires is crucial for safe reconnection.
- Inspect the electrical box for damage, wear, and loose connections before installing a new device. Test the new device for proper functionality and replace the cover plate securely to ensure electrical safety.
Read more: How To Open A Mattress In A Box
Safety Precautions
Before you begin opening an electrical box, it is crucial to take the necessary safety precautions to protect yourself from potential electrical hazards. Here are some important safety measures to consider:
- Turn off the power: Before opening an electrical box, always make sure to turn off the power supply to the circuit. Locate the circuit breaker connected to the box and switch it off. This step will help prevent any electric shocks or accidents while working on the box.
- Use the right tools and equipment: Make sure you use insulated tools specifically designed for electrical work. Insulated screwdrivers, wire strippers, and pliers will help protect you from electric shock.
- Wear appropriate protective gear: To safeguard yourself while working on an electrical box, it is crucial to wear safety glasses, gloves, and non-conductive footwear.
- Avoid moisture: Never attempt to open an electrical box when it is wet or damp. Exposing electricity to moisture can cause short circuits and pose a significant safety risk.
- Inspect the box and wires: Before opening the electrical box, visually inspect it for any signs of damage or exposed wires. If you notice any issues, do not proceed and contact a professional electrician for assistance.
- Be cautious of live wires: Always assume that the wires inside the electrical box are live and carry an electric current. Avoid coming into contact with the wires or any exposed connections.
- Work in a well-lit area: Ensure that the area around the electrical box is well-lit so that you can clearly see what you are doing. This will help reduce the chances of making mistakes or accidental contact with live wires.
- Do not overload the circuit: When opening an electrical box to install a new device, make sure you do not exceed the maximum load capacity of the circuit. Consult the electrical specifications and safely distribute the load to avoid overloading the circuit.
- Seek professional help when needed: If you encounter any issues that you are unsure how to handle or if you are not confident in your abilities, it is always best to seek the assistance of a qualified electrician.
By following these safety precautions, you can minimize the risks associated with opening an electrical box and ensure a safe working environment.
Tools and Materials Needed
Before you begin opening an electrical box, it is important to gather the necessary tools and materials to ensure a smooth and efficient process. Here are the tools and materials you will need:
- Screwdriver: A screwdriver is essential for removing the screws that secure the cover plate of the electrical box. Choose a screwdriver that fits the type of screws used on your specific electrical box.
- Wire cutters/strippers: Wire cutters or wire strippers are used to safely cut or strip the insulation from electrical wires. This tool will come in handy when disconnecting and reconnecting wires inside the electrical box.
- Non-contact voltage tester: This tool allows you to detect the presence of electricity without the need for direct contact with the wires. It is used to verify that the power has been turned off before working on the electrical box.
- Labeling materials: It is important to label the wires inside the electrical box to ensure proper identification and reconnection. Use masking tape or adhesive labels to mark the wires with their corresponding connections.
- Insulated gloves and safety glasses: Safety gloves and glasses are essential for protecting your hands and eyes from potential electrical hazards. Ensure that your gloves are made of insulated material and rated for electrical work.
- Flashlight: A flashlight will come in handy to illuminate the inside of the electrical box, especially in dimly lit areas. It will help you see the wires, connections, and any potential issues.
- Electrical tape: Electrical tape is used to secure and insulate wire connections. It provides an added layer of protection and helps prevent accidental contact between wires.
- Replacement device: If you are opening an electrical box to install a new device, ensure that you have the replacement device ready. This could be an outlet, switch, or any other electrical component you wish to install.
- Personal protective equipment (PPE): Safety should always be a priority when working with electricity. Wear appropriate personal protective equipment, such as safety gloves, safety glasses, and non-conductive footwear, to protect yourself from potential hazards.
By gathering these essential tools and materials, you will be well-prepared to open an electrical box and perform the necessary tasks safely and efficiently.
Step 1: Turn off the Power Supply
The first and most important step before opening an electrical box is to turn off the power supply to the circuit. This step is crucial to ensure your safety and prevent any electrical accidents while working on the box.
Here’s how to turn off the power supply:
- Locate the circuit breaker: Identify the circuit breaker that controls the power supply to the electrical box you intend to open. Circuit breakers are usually located in the main electrical panel or a sub-panel in your home or building.
- Identify the correct breaker: Look for the breaker that corresponds to the specific circuit you are working on. Most breakers are labeled to indicate which part of the building or room they supply power to. If the breaker is not labeled, you may need to test it using a non-contact voltage tester to identify the correct one.
- Switch off the breaker: Once you have identified the correct breaker, switch it off by flipping the switch to the “off” position. This will cut off the power supply to the electrical box, ensuring that it is safe to proceed with opening it.
- Verify power is off: To be certain that the power supply is indeed turned off, use a non-contact voltage tester to check for the absence of electrical current inside the electrical box. Place the non-contact voltage tester near the wires or terminals within the box. If the tester does not detect any voltage, it is safe to proceed. If voltage is detected, double-check the breaker to ensure it is switched off correctly.
It is important to note that if you are unsure about the circuit breaker or if you are unable to turn off the power supply, it is recommended to seek the assistance of a licensed electrician. They have the expertise and knowledge to safely handle electrical systems.
By following these steps and ensuring that the power supply to the electrical box is turned off, you have taken a crucial safety measure before proceeding to open the box.
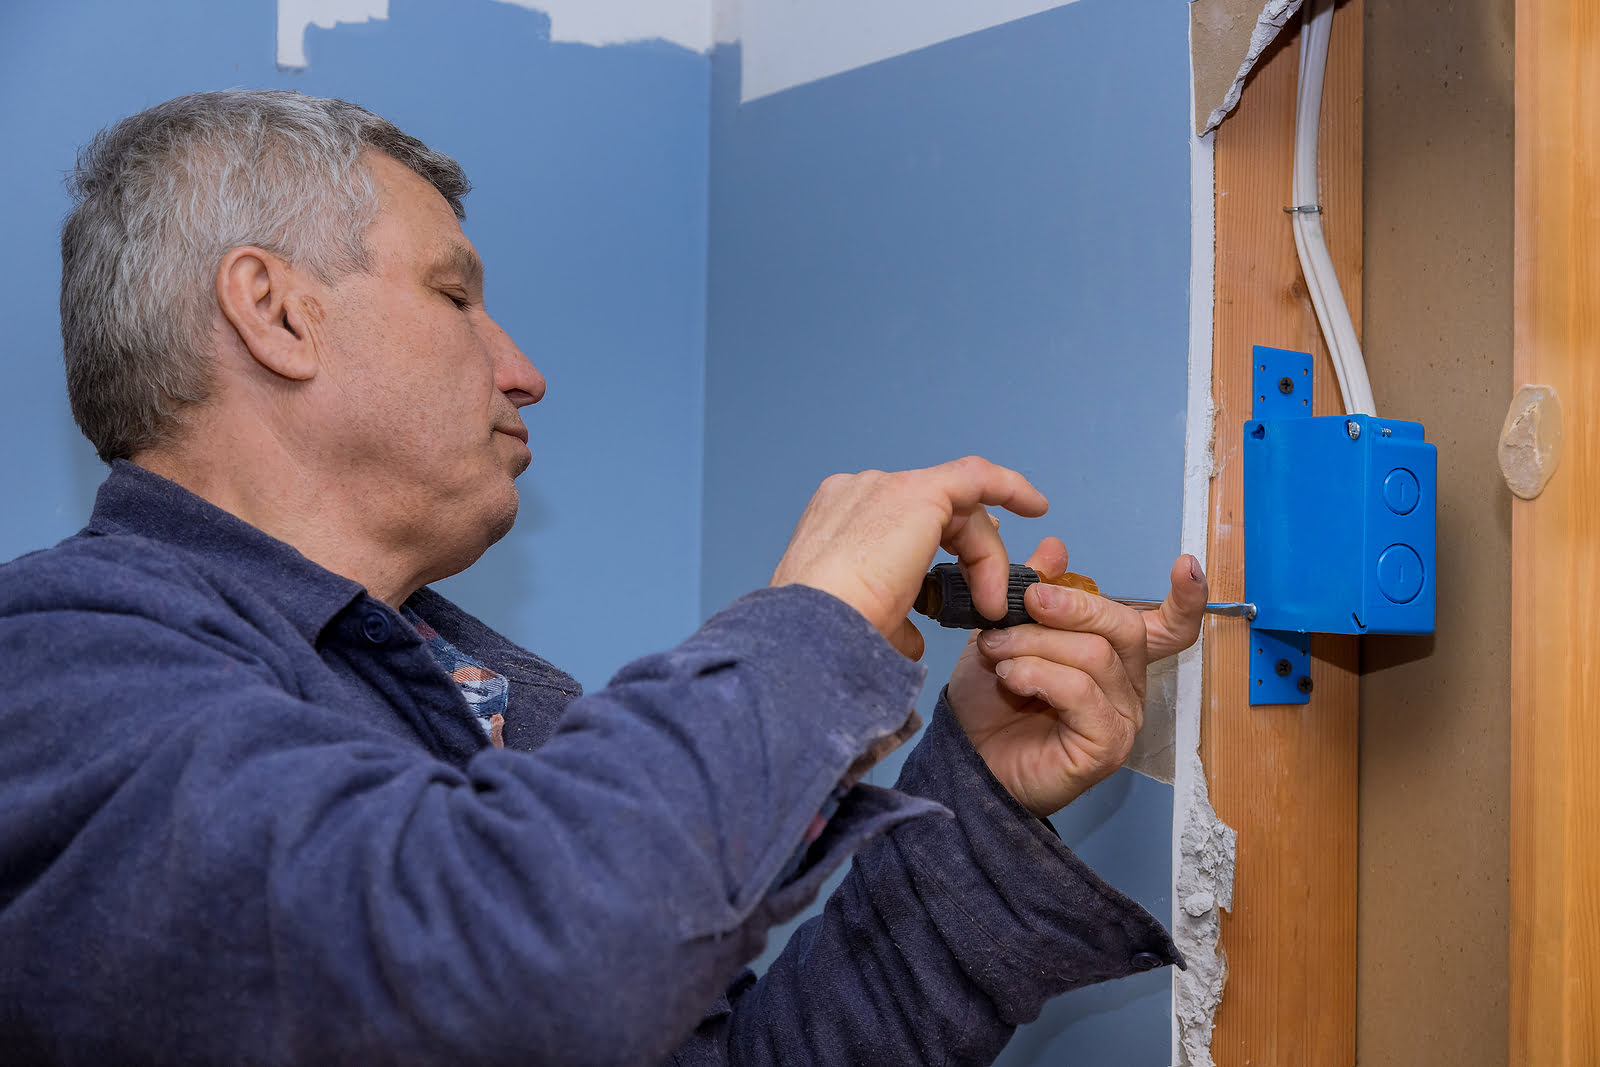
Step 2: Remove the Cover Plate
After ensuring that the power supply to the electrical box is turned off, you can proceed to remove the cover plate. The cover plate is the outer covering that protects the wiring and components inside the electrical box.
Here’s how to remove the cover plate:
- Inspect the cover plate: Before removing the cover plate, visually inspect it for any screws or fasteners securing it to the electrical box. The type and number of screws may vary depending on the design of the box and the cover plate.
- Use the appropriate screwdriver: Select the right screwdriver for the type of screws used on the cover plate. Common types of screws include Phillips head and flathead. Insert the screwdriver into the screw head and turn it counterclockwise to loosen and remove the screws.
- Set aside the screws: As you remove each screw, set them aside in a safe place to prevent loss. Keeping the screws together ensures that you can easily reattach the cover plate when you are done working inside the electrical box.
- Gently pry off the cover plate: Once all the screws have been removed, use your fingers or a small, flat tool, such as a flathead screwdriver or a putty knife, to gently pry off the cover plate from the electrical box. Be careful not to exert too much force to avoid damaging the cover plate or the box itself.
- Inspect the inside of the box: After removing the cover plate, take a moment to visually inspect the interior of the electrical box. Look for any visible signs of damage, loose connections, or exposed wires. If you notice any issues, it is best to consult a professional electrician for further inspection and repairs.
With the cover plate removed, you now have access to the wires and electrical components inside the box. Take care not to touch any exposed wires or connections, as they may still carry an electrical charge. Now that you have successfully removed the cover plate, you can proceed to the next steps of the process.
Read more: How To Open An Outdoor Breaker Box
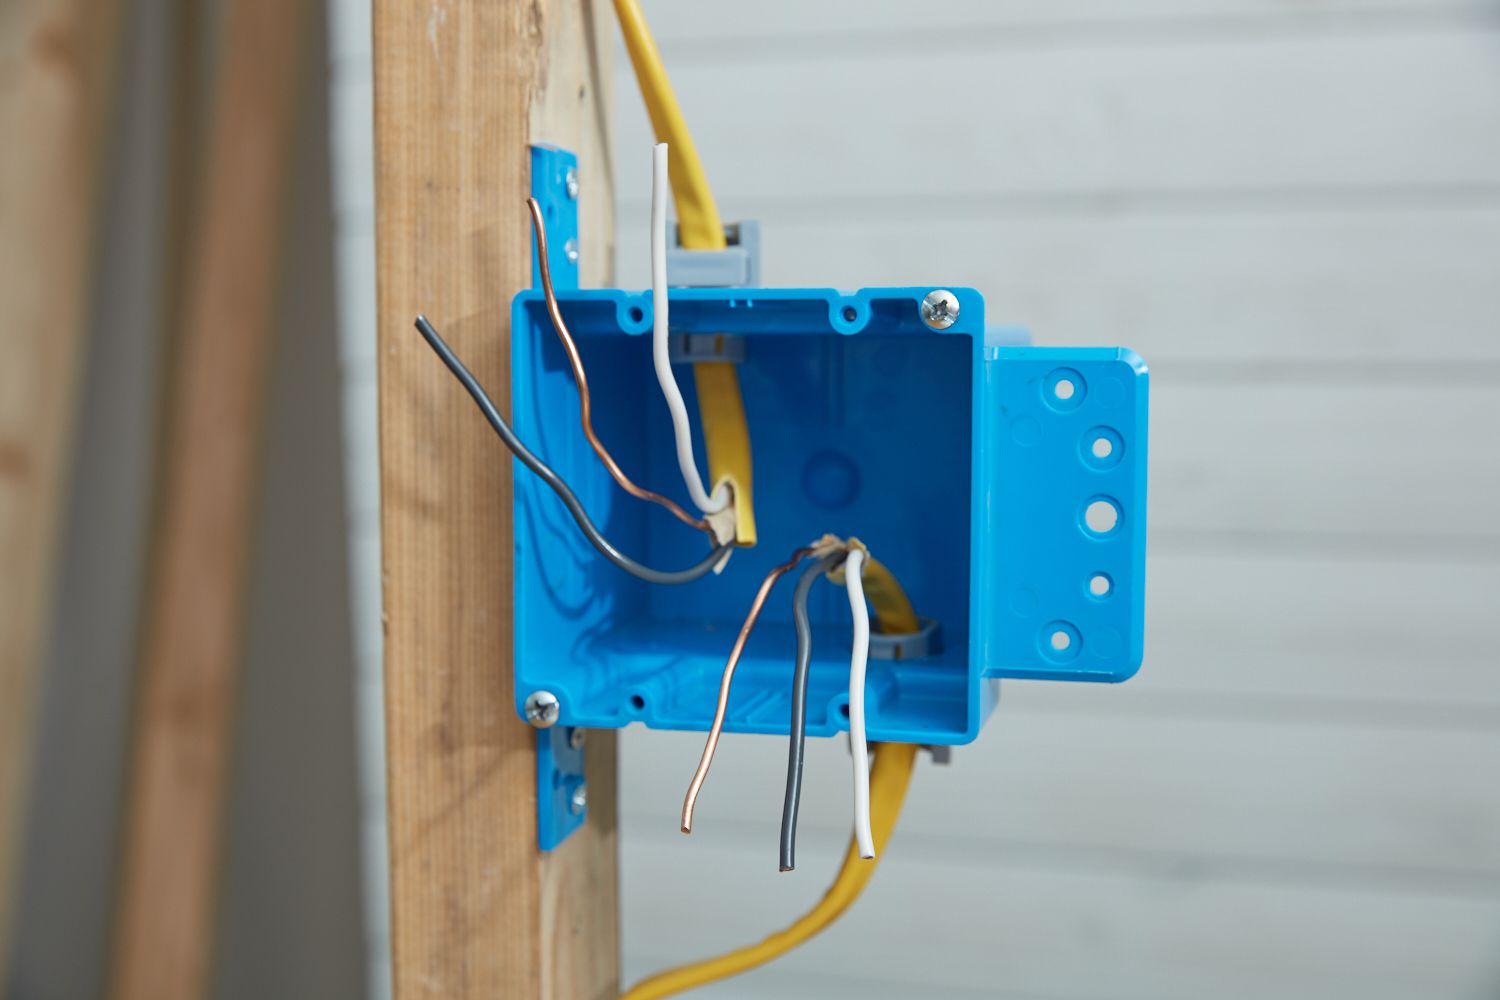
Step 3: Identify and Label Wires
Once you have successfully removed the cover plate from the electrical box, the next step is to identify and label the wires inside. Properly identifying and labeling the wires is crucial for safe and accurate reconnection later on.
Here’s how to identify and label the wires:
- Observe the wiring: Take a close look at the wires inside the electrical box. Identify the different colors and patterns, as they indicate the purpose of each wire. Common wire colors include black, white, green, and red.
- Refer to wiring diagrams: If available, refer to any wiring diagrams or electrical plans that may be provided with the electrical box or the device you are working on. These diagrams can help you understand the wiring configuration and properly identify each wire.
- Use masking tape or labels: To label the wires, use masking tape or adhesive labels. Cut small pieces of tape or labels and write down the purpose of each wire (e.g., “Hot,” “Neutral,” “Ground”). Attach the tape or labels to their respective wires, ensuring that they are secure and easily readable.
- Take clear photos as reference: In addition to labeling the wires, it can be helpful to take clear photos of the wiring configuration before disconnecting any wires. These photos will serve as a visual reference during the reconnection process.
- Double-check the labels: After labeling the wires, double-check to ensure that each label is correctly matched with its corresponding wire. This ensures that there is no confusion or mistakes when it comes time to reconnect the wires.
Remember, if you are uncertain about the wiring or unable to identify the wires accurately, it is recommended to consult a qualified electrician. They have the expertise to properly identify and label the wires to ensure a safe electrical connection.
By taking the time to properly identify and label the wires, you are setting yourself up for a smooth and hassle-free reconnection process in the following steps.
Step 4: Disconnect the Wires
With the wires properly identified and labeled, it’s time to disconnect them from their respective terminals or screws inside the electrical box. Disconnecting the wires will allow you to remove the old device or make any necessary adjustments.
Follow these steps to disconnect the wires:
- Start with the hot wire: Begin by identifying the hot wire, which is usually black or red in color. Using insulated pliers or wire cutters/strippers, carefully grip the wire near the terminal or screw and gently loosen it in a counterclockwise direction. Once loosened, gently pull the wire out of the terminal, ensuring not to damage or strain the wire.
- Disconnect the neutral wire: Next, locate the neutral wire, which is typically white or gray. Follow the same process as with the hot wire to disconnect it from its terminal or screw.
- Remove the ground wire: The ground wire is usually green or bare copper. It is crucial for safety purposes. Disconnect it in the same manner as the other wires, being careful not to damage the wire or the connection.
- Additional wires: Depending on the device and wiring setup, there may be additional wires present, such as traveler wires for three-way switches or wires for special functions. Take note of these wires and disconnect them according to their purpose and color.
- Set aside the disconnected wires: As you disconnect each wire, set them aside in a safe and organized manner. You can place them on a clean, non-metallic surface or use wire connectors to temporarily secure the disconnected ends.
- Inspect the wires: While disconnecting the wires, inspect them for any signs of damage, corrosion, or loose connections. If you notice any issues, it is best to consult a professional electrician for further inspection and repairs.
By following these steps, you can safely disconnect the wires from the electrical box, preparing it for the next steps of the process. Remember to handle the wires with care and avoid touching any exposed ends while they are still connected to a power source.
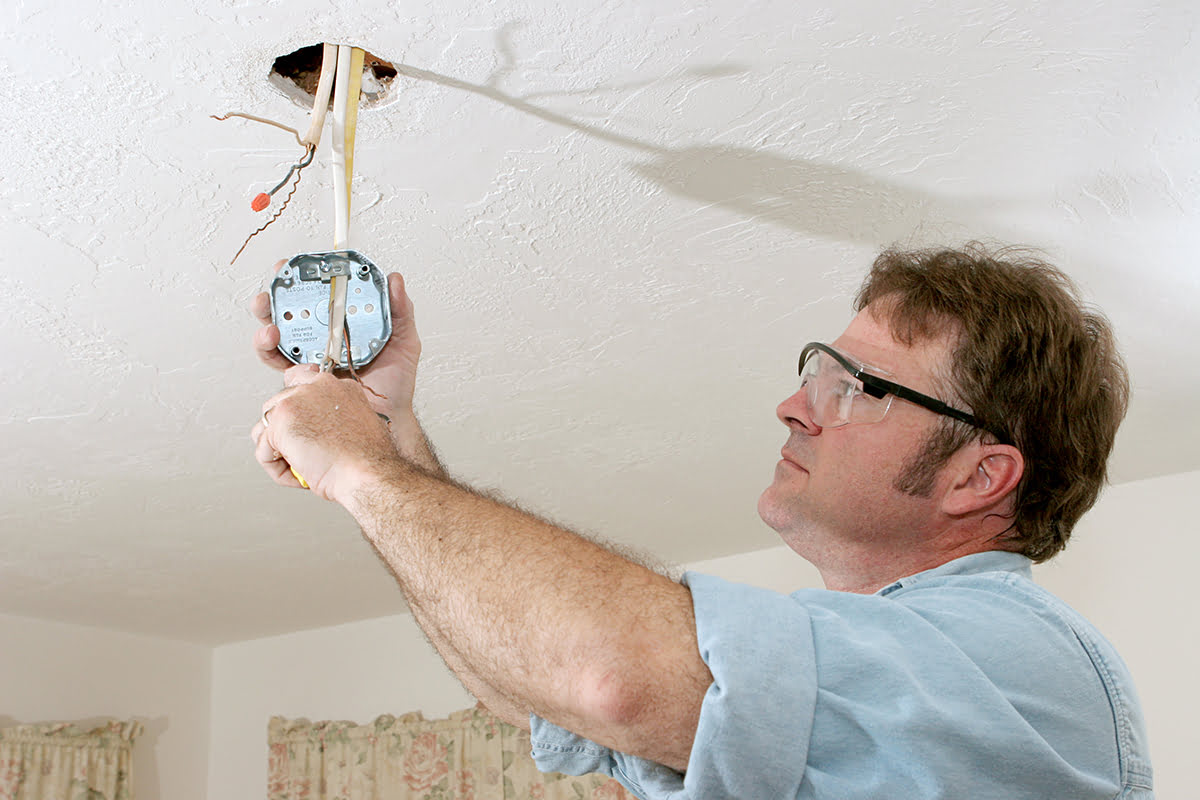
Before opening an electrical box, always turn off the power at the circuit breaker to avoid the risk of electric shock. Use a voltage tester to ensure the box is safe to open.
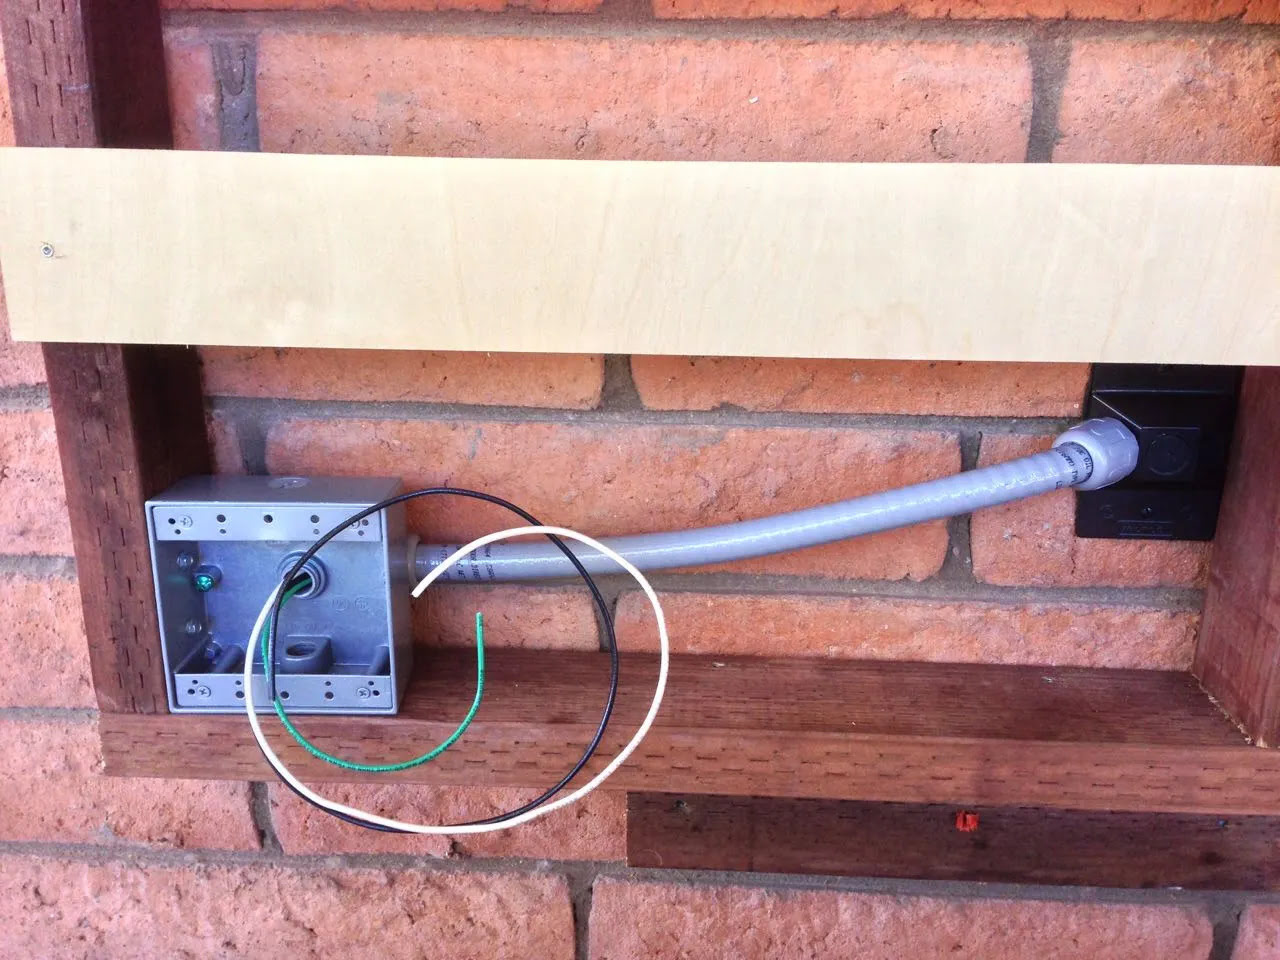
Step 5: Inspect the Electrical Box
After disconnecting the wires, it is important to take a moment to inspect the electrical box. This step allows you to check for any signs of damage, wear, or other issues that may need attention before proceeding with the installation of a new device or making any adjustments.
Follow these steps to inspect the electrical box:
- Look for cracks or damage: Examine the walls and edges of the electrical box for any cracks or visible damage. These issues can weaken the structure and may require repair or replacement.
- Check for loose connections: Inspect the terminal screws or wire connectors inside the box to ensure that they are securely fastened. Loose connections can lead to electrical problems and should be tightened if necessary.
- Inspect for proper grounding: Check the grounding wire and connection to the electrical box. The grounding wire should be securely attached to a designated grounding screw or terminal to provide safety in the event of a fault or electrical surge.
- Ensure proper insulation: Verify that the wires inside the box are properly insulated and not exposed. Exposed wires can create a safety hazard and should be addressed accordingly.
- Clear any debris or obstructions: Remove any dust, debris, or obstructions from inside the electrical box. Foreign materials can interfere with proper connectivity and cause issues with the new device or electrical function.
- Inspect for proper sizing: Ensure that the electrical box is appropriately sized for the intended purpose and in compliance with electrical codes. If necessary, consult a professional electrician to determine if the box needs to be replaced with a larger size to accommodate new wiring or devices.
By performing a thorough inspection of the electrical box, you can identify any potential issues that may impact the installation or functionality of a new device. If you notice any significant problems or are unsure about the condition of the box, it is recommended to seek the guidance of a licensed electrician.
Once you are satisfied with the inspection and any necessary repairs or adjustments have been made, you can proceed to the next steps of the process to install and connect the new device.
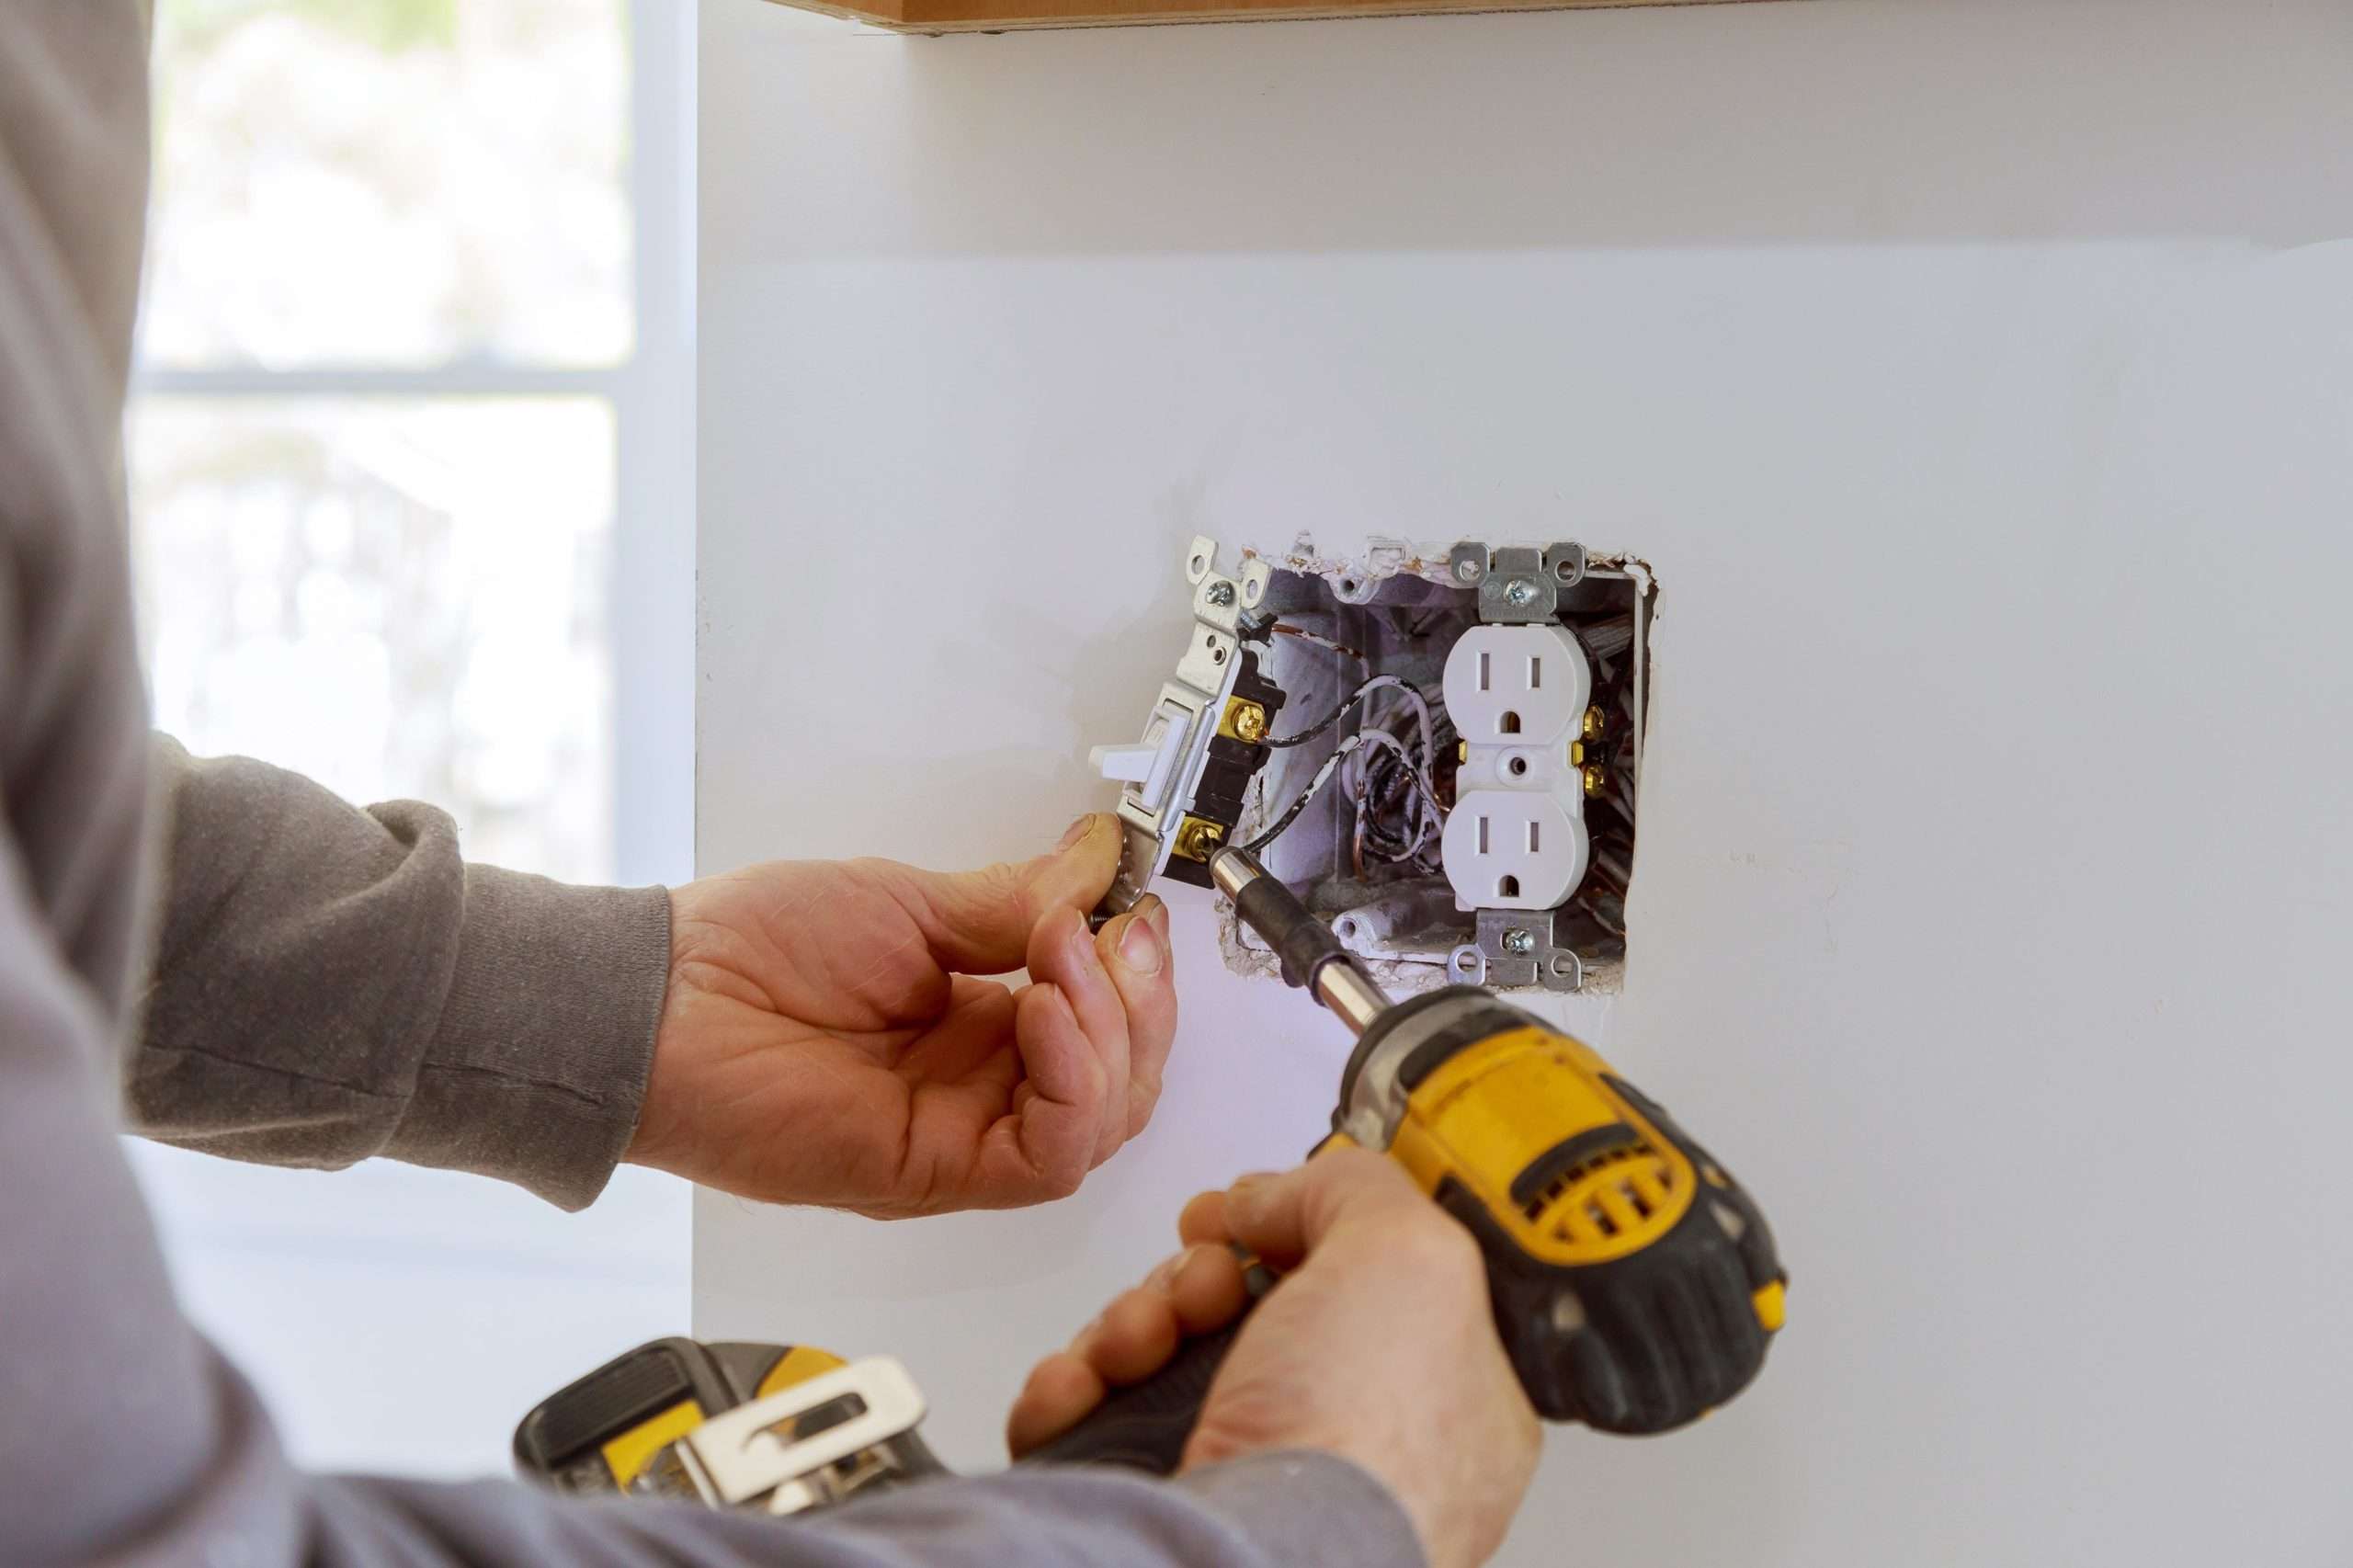
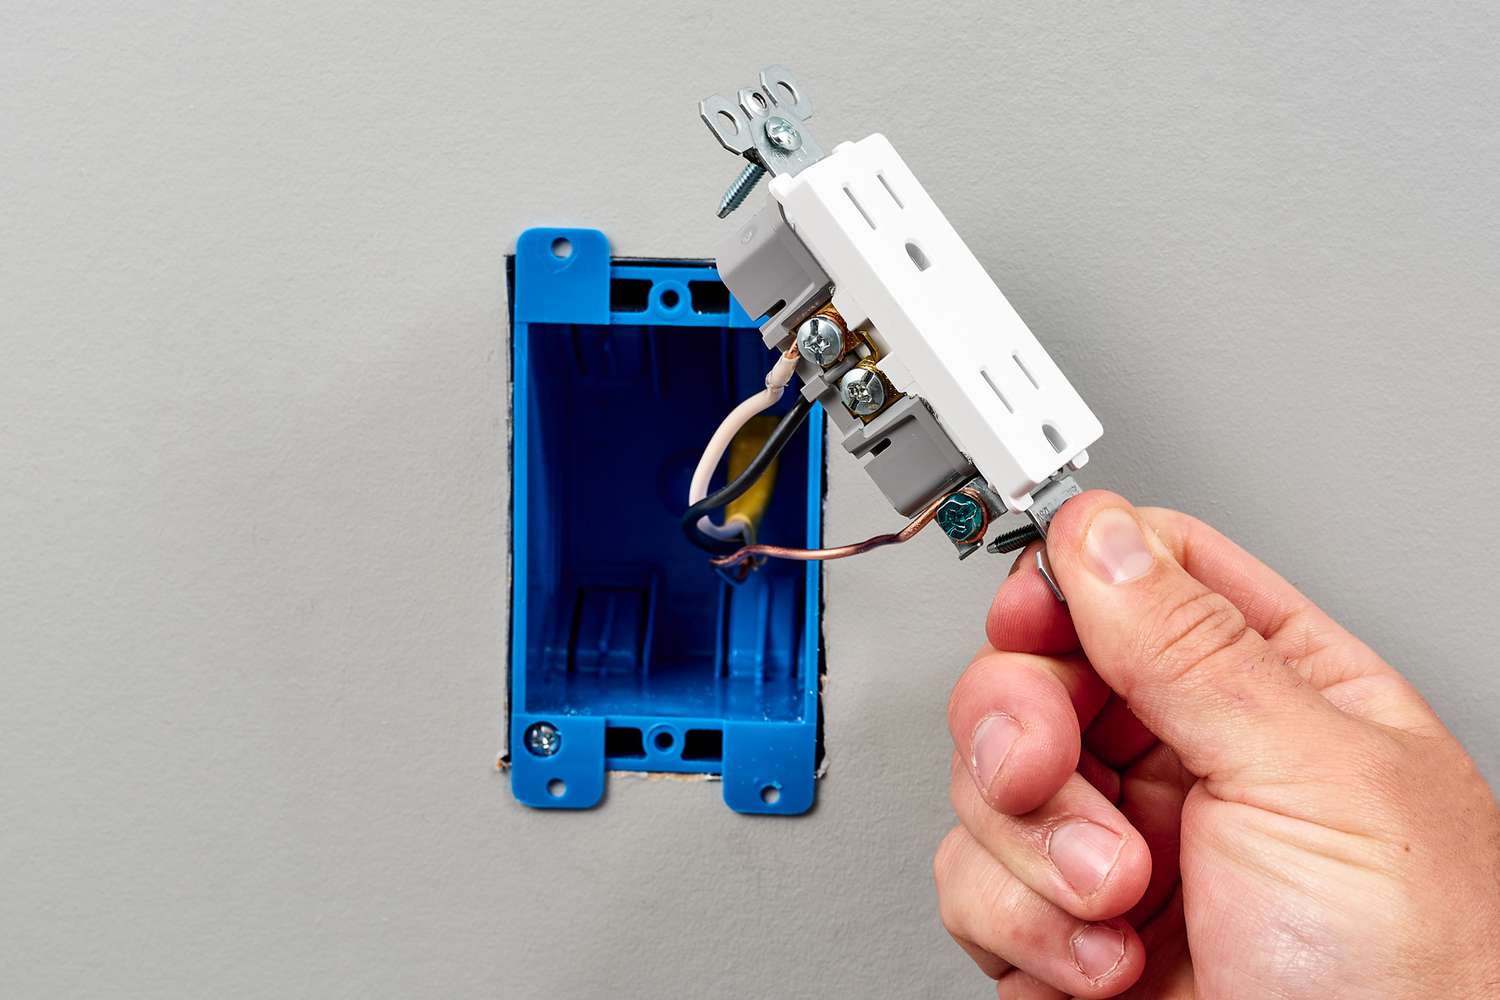
Step 6: Install and Secure New Device
After inspecting the electrical box and ensuring that it is in good condition, it is time to install and secure the new device. Whether you are installing a new outlet, switch, or any other electrical component, this step will guide you through the process.
Follow these steps to install and secure the new device:
- Prepare the device: Before installation, make sure your new device is suitable for the electrical box and compatible with your wiring setup. Read the manufacturer’s instructions and ensure you have the necessary hardware or connectors that may be required for installation.
- Connect the wires: Take your labeled wires and connect them to the corresponding terminals or screws on the new device. Make sure to match the hot wire with the appropriate terminal, the neutral wire with the corresponding terminal, and the ground wire to the designated grounding screw or terminal.
- Secure the device: Once the wires are properly connected, carefully position the new device inside the electrical box. Align it with the screw holes or mounting brackets provided and use the appropriate screws or mounting hardware to secure the device in place. Follow the manufacturer’s instructions for proper installation.
- Tighten the screws: Use a suitable screwdriver to tighten the terminal screws or mounting screws on the new device. Ensure that the screws are securely fastened, but be cautious not to overtighten and risk damaging the device or wires.
- Double-check the connections: After securing the new device, double-check the wire connections to ensure they are tight and secure. Gently tug on each wire to confirm that they are snugly connected. This will help prevent loose connections and potential electrical issues.
- Follow any additional instructions: Some devices may have specific installation requirements or additional steps to follow. Refer to the manufacturer’s instructions for any specific guidelines or recommendations related to your particular device.
By following these steps, you can properly install and secure your new electrical device in the electrical box. Keep in mind that if you are unsure about any aspect of the installation or encounter any difficulties, it is best to consult a licensed electrician for assistance.
Now that the new device is securely installed, you can proceed to the next step of reconnecting the wires to complete the installation process.
Read more: How To Use An Electric Wine Opener
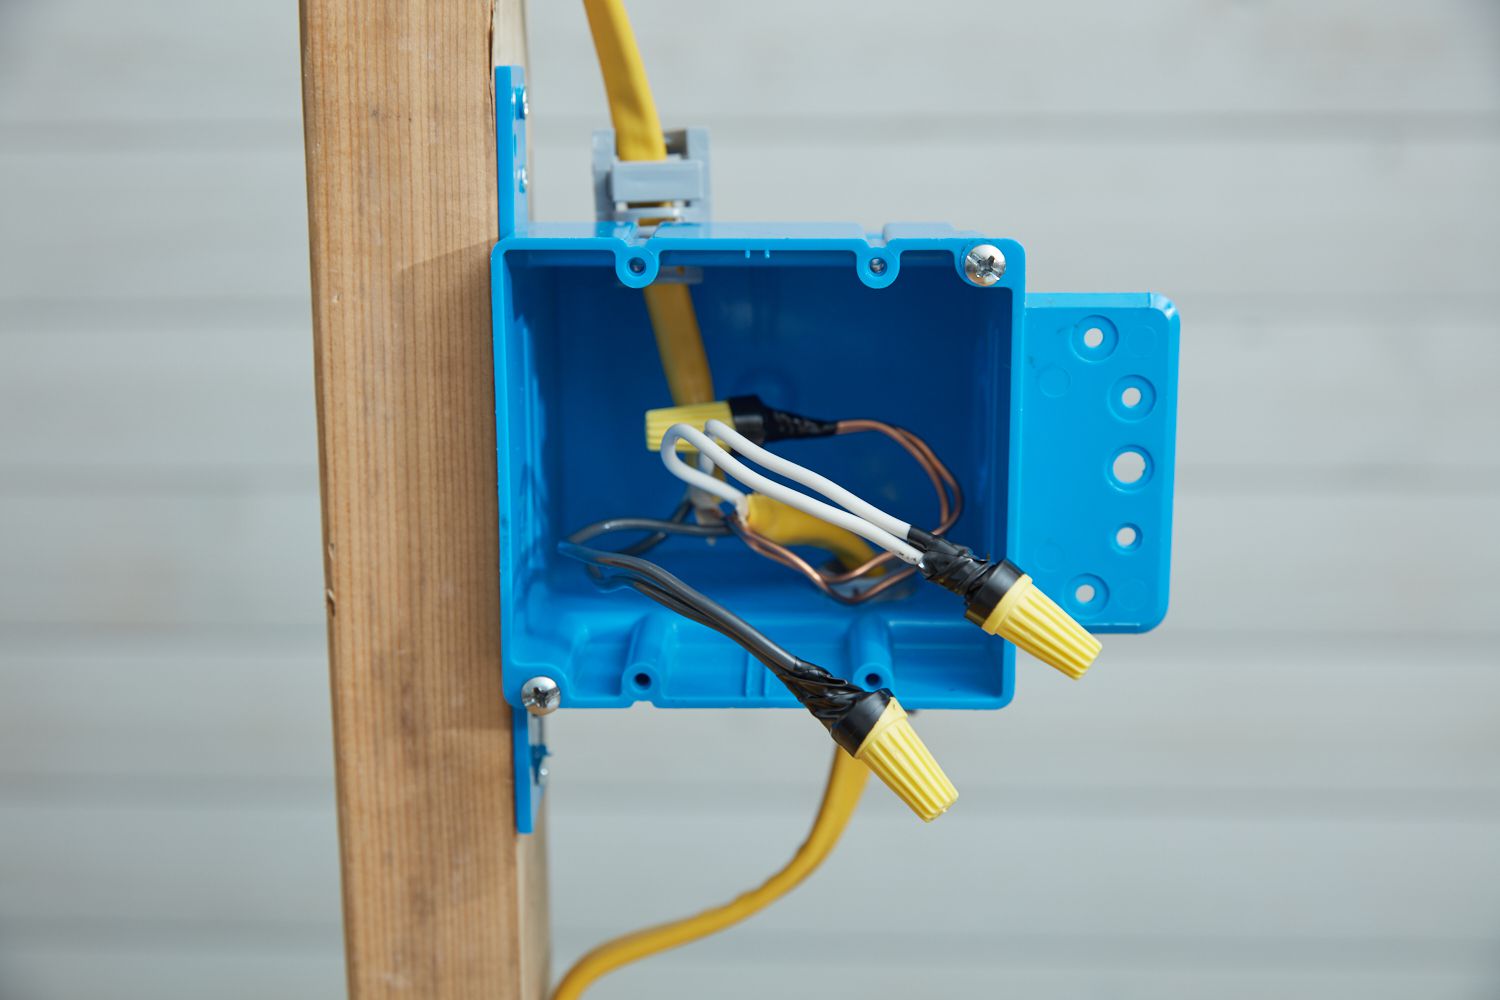
Step 7: Reconnect the Wires
With the new device securely installed, it’s time to reconnect the wires inside the electrical box. Reconnecting the wires properly will ensure the safe and efficient operation of the electrical system.
Follow these steps to reconnect the wires:
- Refer to your labels and photos: If you labeled the wires and took photos before disconnecting them, use these references to match the wires with their corresponding connections. This will help ensure accurate reconnection.
- Reattach the grounding wire: Locate the grounding screw or terminal in the electrical box and reattach the grounding wire, typically green or bare copper. Ensure the wire is securely fastened to provide proper grounding.
- Connect the neutral wire: Identify the neutral wire, usually white or gray, and connect it to the corresponding neutral terminal or screw on the new device. Make sure the connection is secure but not over-tightened.
- Attach the hot wire: Identify the hot wire, typically black or red, and connect it to the appropriate hot terminal or screw. Double-check that the connection is secure and properly aligned.
- Connect any additional wires: If there are any additional wires, such as traveler wires for three-way switches or wires for special functions, reconnect them according to their purpose and color.
- Ensure proper wire connections: After reconnecting all the wires, double-check each connection to ensure they are secure and properly seated. This includes giving gentle tugs on the wires to ensure they are snugly connected.
- Verify insulation: Inspect the wire connections to ensure that the wires are properly insulated and no bare copper is exposed. If necessary, apply electrical tape over the exposed portions for added protection.
Always remember to handle the wires with care and avoid touching any exposed ends while they are still connected to a power source. If you encounter any difficulties or are unsure about any aspect of the reconnection process, it is advisable to consult a licensed electrician for assistance.
With the wires securely reconnected, you can proceed to the next step to test the new device and ensure proper functionality.
Step 8: Test the New Device
After reconnecting the wires, it is important to test the new device to ensure it is functioning properly. Testing the device will help verify that all connections have been made correctly and that the electrical system is operating as intended.
Follow these steps to test the new device:
- Double-check the power supply: Before testing, verify that the power supply to the electrical box is turned on. Make sure the circuit breaker or switch for the specific circuit is in the “on” position.
- Switch on the device: If the new device is a switch or control, activate it to the “on” position. If it is an outlet, plug in a small electrical device, such as a lamp, to test its functionality.
- Observe the device: Check if the new device is operating as expected. Ensure that the switch controls the desired electrical function, or verify that power is being supplied to the plugged-in device through the outlet.
- Test any additional features: If the new device has any additional features or settings, test them to ensure they are functioning as intended.
- Check for proper power flow: Use a voltage tester to check for proper power flow to the device. Safely touch the tester to the terminals or wiring connected to the device to confirm the presence of power.
- Verify the device’s stability: Ensure that the new device is securely installed and that there is no movement or looseness. A stable and secure device is essential for safe and reliable operation.
- Monitor for any issues: Pay attention to any abnormal behavior, such as flickering lights or unusual sounds, as they may indicate an electrical issue. If you notice any problems, promptly turn off the power supply and consult a professional electrician.
By testing the new device, you can confirm that the installation was successful and that the electrical system is operating as intended. If you encounter any issues or the device does not function as expected, it is recommended to consult a licensed electrician for further inspection and troubleshooting.
Once you have confirmed that the new device is operating correctly, you can proceed to the final step of replacing the cover plate.
Step 9: Replace the Cover Plate
After testing the new device and ensuring its proper functionality, the final step is to replace the cover plate on the electrical box. Reattaching the cover plate not only provides a clean and finished appearance but also adds an extra layer of safety by preventing accidental contact with the electrical wiring.
Follow these steps to replace the cover plate:
- Align the cover plate: Position the cover plate over the electrical box, aligning it with the screw holes or mounting brackets. Make sure the plate is flush against the wall or surface.
- Secure the cover plate screws: Take the screws that were removed earlier and insert them into the screw holes on the cover plate. Use a screwdriver to tighten them securely, but be cautious not to overtighten and risk damaging the cover plate or the electrical box.
- Check for proper fit: Once the screws are tightened, ensure that the cover plate sits securely in place without any wobbling or movement. It should fit snugly against the electrical box.
- Inspect for any gaps or misalignment: Take a moment to inspect the perimeter of the cover plate to ensure that there are no gaps or misalignment. If necessary, adjust the position of the plate or tighten the screws further to achieve a proper fit.
- Verify the cover plate’s stability: Give the cover plate a gentle tug to confirm that it is securely attached. It should not come loose or detach easily.
- Turn on the power: Once the cover plate is securely in place, you can turn the power supply back on by flipping the circuit breaker switch to the “on” position.
- Test the device again: To ensure that the device continues to function properly, test it once more to verify that it is receiving power and operating as expected.
By following these steps, you can safely and effectively replace the cover plate on the electrical box. Remember, if you encounter any difficulties or are unsure about any aspect of the process, it is always best to consult a licensed electrician for assistance.
Congratulations! You have successfully opened an electrical box, installed a new device, and secured the cover plate, completing the process. By following the appropriate safety precautions and procedures, you have accomplished the task with confidence and ensured electrical safety.
Conclusion
Opening an electrical box may seem daunting, but by following the proper procedure and prioritizing safety, you can complete the task smoothly and effectively. Throughout this article, we have discussed the step-by-step process to open an electrical box, from turning off the power supply to replacing the cover plate.
Remember, safety should always be the top priority when working with electricity. Take the necessary safety precautions, such as turning off the power supply and wearing appropriate protective gear. Use the right tools and equipment and seek professional help if you are unsure about any aspect of the process.
We have also emphasized the importance of properly identifying and labeling the wires inside the electrical box. This ensures that the wires are correctly connected during the reconnection process, promoting a safe and efficient electrical connection.
Inspecting the electrical box for any damage, wear, or loose connections is crucial before proceeding with the installation of a new device. By ensuring the box is in good condition, you can prevent potential issues and ensure a reliable and long-lasting electrical system.
Once the new device is installed, it is essential to test its functionality to ensure that it is operating as expected. This includes verifying proper power flow and monitoring for any abnormal behavior that may indicate an electrical issue.
Finally, by replacing the cover plate on the electrical box, you not only provide a finished look but also add an extra layer of safety by preventing accidental contact with the electrical wiring.
In conclusion, opening an electrical box requires careful attention to detail, adherence to safety precautions, and proper knowledge of the process. Whether you are a DIY enthusiast or a professional electrician, following these steps will enable you to open an electrical box safely and effectively.
However, if you are unsure about any aspect of the process or encounter any difficulties, it is always best to consult a licensed electrician who can provide expert guidance and ensure the job is done correctly and safely.
By approaching the task with knowledge, caution, and preparation, you can successfully open an electrical box and carry out necessary installations or repairs with confidence.
Frequently Asked Questions about How To Open An Electrical Box
Was this page helpful?
At Storables.com, we guarantee accurate and reliable information. Our content, validated by Expert Board Contributors, is crafted following stringent Editorial Policies. We're committed to providing you with well-researched, expert-backed insights for all your informational needs.


0 thoughts on “How To Open An Electrical Box”