
Articles
How To Hang Ladder From Ceiling
Modified: August 27, 2024
Learn how to hang a ladder from your ceiling with these helpful articles. Find step-by-step instructions and expert tips to make the process easy and safe.
(Many of the links in this article redirect to a specific reviewed product. Your purchase of these products through affiliate links helps to generate commission for Storables.com, at no extra cost. Learn more)
Introduction
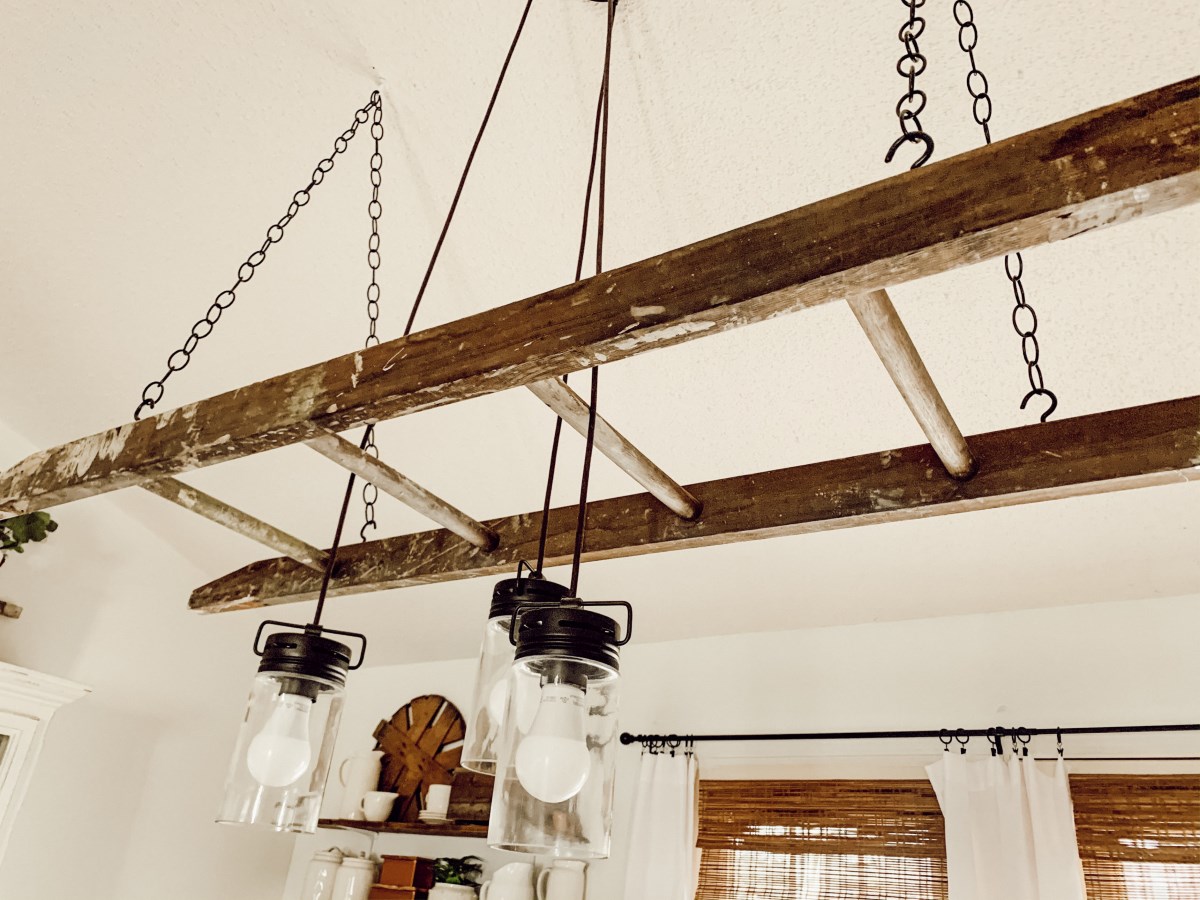
Welcome to our comprehensive guide on how to hang a ladder from the ceiling. If you’re looking for an efficient and space-saving way to store your ladder, hanging it from the ceiling is a great option. Not only does it free up floor space, but it also keeps your ladder easily accessible whenever you need it.
Before we dive into the step-by-step process of hanging a ladder from the ceiling, it’s essential to assess your ceiling structure and gather the necessary materials. By following this guide, you’ll have your ladder securely mounted in no time.
We’ll discuss various techniques depending on the type of ceiling you have, such as drywall, wooden beams, or concrete. Additionally, we’ll cover the different types of ceiling anchors or hooks you can use to ensure a stable and reliable hanging solution for your ladder.
Keep in mind that safety is of utmost importance when handling ladders, even during the installation process. Always take necessary precautions, wear proper safety gear, and follow the ladder manufacturer’s instructions.
So, let’s get started with step 1: assessing the ceiling structure.
Key Takeaways:
- Efficiently hang your ladder from the ceiling by assessing the structure, gathering materials, and following safety precautions. Enjoy the convenience of a space-saving storage solution while ensuring stability and reliability.
- Prioritize safety and proper weight distribution when hanging and using a ladder from the ceiling. Follow step-by-step instructions for secure installation and testing, and enjoy the added convenience and organization in your space.
Read more: How To Hang Unistrut From The Ceiling
Step 1: Assessing the Ceiling Structure
Before you begin the process of hanging your ladder from the ceiling, it’s important to assess the structure of your ceiling. This involves determining the type of ceiling you have and locating the ceiling joists or support beams.
The type of ceiling you have will determine the specific method and materials you’ll need to safely hang your ladder. The three most common types of ceilings are drywall, wooden beams, and concrete.
If you have a drywall ceiling, you’ll need to locate the underlying joists or support beams for proper ladder installation. To find the joists, you can use a stud finder tool or look for any visible signs, such as nail or screw heads, indicating their location.
Once you’ve determined the ceiling type and located the joists or support beams, you’ll want to mark their positions accurately. This will be crucial for later steps when installing the ceiling anchors or hooks to hang your ladder securely.
Using a measuring tape, measure and mark the desired location for hanging your ladder on the ceiling. It’s important to choose a spot that provides enough space for the ladder to hang freely without obstruction.
Next, find the center of the ceiling joists or support beams. You can do this by measuring the distance between adjacent joists and dividing it in half. Mark the center point on each joist, as this is where you’ll install the ceiling anchors or hooks.
Remember, it’s crucial to have a solid and stable support for your ladder. By accurately locating the ceiling joists or support beams, you can ensure that your ladder hangs securely without any risk of falling or collapsing.
Now that you’ve assessed the ceiling structure and located the ceiling joists or support beams, you’re ready to move on to the next step: gathering the necessary materials.
Step 2: Gathering the Necessary Materials
Before you can hang your ladder from the ceiling, you’ll need to gather the necessary materials to ensure a secure and successful installation. Here’s a list of essential items you’ll need:
- Ladder: Choose a ladder that is suitable for your needs and matches the weight capacity required for the tasks you’ll be performing. Make sure it is in good condition and free from any damage.
- Ceiling anchors or hooks: Select the appropriate ceiling anchors or hooks based on your ceiling type and the weight of your ladder. These anchors or hooks will provide the necessary support to hold the ladder securely in place.
- Measuring tape: Use a measuring tape to accurately measure the distance between the ceiling joists or support beams, as well as the desired location for hanging your ladder on the ceiling.
- Drill and appropriate drill bits: Depending on the type of ceiling anchors or hooks you’re using, you’ll need a drill to create pilot holes for installation. Make sure you have the right size drill bits for the anchors or hooks you’ve chosen.
- Screws or bolts: Purchase screws or bolts that are appropriate for the type of ceiling anchors or hooks you’ve selected. Ensure they are long enough to securely attach the anchors or hooks to the ceiling joists or support beams.
- Safety equipment: Don’t forget to prioritize safety during the installation process. Wear gloves to protect your hands and safety glasses to shield your eyes from any debris that may arise while drilling or attaching the ladder.
By gathering all the necessary materials in advance, you’ll ensure a smooth and efficient installation process. Now that you have everything you need, let’s move on to step 3: measuring and marking the ceiling joists.
Step 3: Measuring and Marking the Ceiling Joists
Now that you have all the necessary materials assembled, it’s time to measure and mark the ceiling joists or support beams. This step is crucial for accurately hanging your ladder and ensuring its stability. Here’s what you need to do:
1. Marking the location of the ladder on the ceiling:
Using your measuring tape, measure the length of your ladder and decide on the desired position for hanging it from the ceiling. Factors to consider include the height and accessibility you require for the ladder. Once you’ve determined the ideal location, use a pencil to mark it on the ceiling.
2. Finding the center of the ceiling joists:
Locating the ceiling joists is essential to provide a secure and stable foundation for the ladder. Begin by measuring the distance between adjacent joists using your measuring tape. Divide this distance by two to find the center point of each joist.
Starting from the previously marked location for your ladder, measure the distance to the nearest joist on each side. This will allow you to identify the exact center point on each joist where you’ll install the ceiling anchors or hooks.
Using a pencil, mark these center points on the ceiling, ensuring they are aligned with the previously marked location of the ladder.
By measuring and marking the ceiling joists accurately, you’ll create a solid and secure attachment point for your ladder. This will prevent any potential accidents or instability when the ladder is hanging. Once you’ve completed this step, you’re ready to move on to step 4: installing the ceiling anchors or hooks.
When hanging a ladder from the ceiling, use heavy-duty hooks or brackets secured into ceiling joists for maximum support. Make sure to distribute the weight evenly and use appropriate hardware for the ladder’s size and weight.
Step 4: Installing the Ceiling Anchors or Hooks
With the location of the ladder marked on the ceiling and the center points of the ceiling joists identified, it’s time to install the ceiling anchors or hooks. This step is crucial for securely hanging your ladder from the ceiling. Here’s what you need to do:
1. Choosing the right anchors or hooks:
Consider the weight and size of your ladder when selecting the appropriate ceiling anchors or hooks. It’s important to choose anchors/hooks that have a weight capacity suitable for your ladder. Additionally, make sure they are compatible with the type of ceiling you have (drywall, wooden beams, or concrete).
2. Pre-drilling holes for anchors or hooks:
Using a drill and the appropriate drill bit, pre-drill holes for the ceiling anchors or hooks at the marked center points of the ceiling joists. Make sure the drill bit size matches the recommended size provided by the manufacturer of the anchors/hooks.
For drywall ceilings, it’s important to drill into the ceiling joists rather than just the drywall. This will provide a secure and stable anchoring point for the ladder. Use a stud finder or follow any visible signs (such as nail or screw heads) to locate the joists accurately.
3. Installing the anchors or hooks securely:
Once the holes are drilled, insert the ceiling anchors or hooks into the holes. Make sure they fit snugly and are flush against the ceiling. For drywall ceilings, you may need to use plastic anchors or toggle bolts for added stability.
Tighten the screws or bolts provided with the anchors/hooks to secure them firmly in place. Ensure that they are tight enough to hold the weight of the ladder but not so tight that they damage the ceiling or compromise the integrity of the anchors/hooks.
Repeat this process for each of the marked center points on the ceiling joists where you’ll be installing the ladder anchors/hooks.
By choosing suitable anchors/hooks and installing them securely, you’ll have a reliable support system for hanging your ladder. Now that the anchors/hooks are in place, it’s time to move on to step 5: hanging the ladder.
Read more: How To Hang Surfboard From The Ceiling
Step 5: Hanging the Ladder
Now that the ceiling anchors or hooks are installed, it’s time to hang your ladder securely from the ceiling. Follow these steps to ensure a safe and stable hanging process:
1. Positioning the ladder on the ceiling:
Carefully lift your ladder and position it beneath the installed ceiling anchors or hooks. Align the ladder’s top rungs or brackets with the corresponding anchors/hooks, ensuring they are centered and fit securely.
2. Securing the ladder to the ceiling anchors or hooks:
Once the ladder is positioned correctly, attach it to the ceiling anchors/hooks by inserting the ladder’s rungs or brackets onto them. Ensure each rung or bracket is firmly seated onto the corresponding anchor/hook.
For added security, you may use additional straps or ropes to further secure the ladder to the ceiling. This can provide extra stability and prevent any accidental movement or dislodgment.
3. Checking for stability and making adjustments if necessary:
After the ladder is hung, carefully test its stability by gently shaking or applying slight pressure. Check for any movement or signs of looseness in the ladder or ceiling anchors/hooks.
If you notice any instability or if the ladder feels unbalanced, it may indicate that the anchors/hooks need to be adjusted or reinforced. In such cases, carefully remove the ladder, make the necessary adjustments to the anchors/hooks, and reattach the ladder securely to ensure stability.
Remember to always follow the ladder manufacturer’s guidelines and weight capacity limits to prevent accidents and ensure safe usage.
Now that your ladder is securely hung from the ceiling, you can proceed to the final step: testing and safety considerations.
Step 6: Testing and Safety Considerations
After successfully hanging your ladder from the ceiling, it’s essential to test its stability and consider important safety factors. Follow these steps to ensure the ladder is safe to use and to prevent accidents:
1. Testing the ladder’s stability and weight-bearing capacity:
Before climbing the ladder, test its stability by applying gentle pressure or giving it a slight shake. If the ladder feels wobbly or unstable, double-check the installation of the ceiling anchors/hooks and make any necessary adjustments. It’s crucial to ensure that the ladder is securely attached to the ceiling.
Verify that the ladder’s weight-bearing capacity matches the weight of the person who will be using it and any additional equipment or materials they will be carrying. Exceeding the ladder’s weight limit can lead to accidents and damage.
2. Ensuring proper ladder weight distribution:
When using the ladder, distribute your weight evenly between the rungs or steps to maintain balance and stability. Avoid leaning or overreaching to avoid tipping the ladder. Keep your body centered within the ladder’s sides and never stand on the top rung or step, as it is not designed to support your weight.
3. Safety precautions and considerations when using the ladder:
Always follow general ladder safety guidelines, such as maintaining three points of contact (two hands and one foot or two feet and one hand) at all times while ascending or descending the ladder. Wear appropriate footwear with non-slip soles and avoid carrying heavy objects while on the ladder.
Additionally, ensure that the area around the ladder is clear of obstructions or tripping hazards. Secure any loose cables, cords, or objects that may interfere with your movement or cause accidents.
Finally, be mindful of your surroundings and avoid working on the ladder during inclement weather conditions. Wet or slippery conditions can make the ladder unstable and increase the risk of falling.
By conducting proper testing, ensuring weight distribution, and adhering to safety precautions, you can confidently and safely use the ladder hung from the ceiling.
Congratulations! You have successfully completed all the steps required to hang your ladder from the ceiling. Enjoy the added convenience and space-saving benefits provided by this storage solution.
If you have any further questions or require assistance, feel free to consult the ladder manufacturer’s instructions or seek guidance from a professional.
Conclusion
Congratulations! You’ve reached the end of our comprehensive guide on how to hang a ladder from the ceiling. By following the step-by-step instructions and considering important safety factors, you have successfully created a space-saving storage solution for your ladder.
Throughout this guide, we discussed the importance of assessing the ceiling structure, gathering the necessary materials, measuring and marking the ceiling joists, installing the ceiling anchors or hooks, hanging the ladder, and testing its stability. These steps ensure a secure and reliable hanging method for your ladder, freeing up valuable floor space and providing easy accessibility.
Remember, safety should always be your top priority when handling ladders. Always follow the ladder manufacturer’s guidelines, pay attention to weight capacity limits, distribute your weight evenly, and utilize proper safety equipment when using the ladder.
Now that your ladder is hanging securely from the ceiling, take a moment to appreciate the convenience and organization it brings to your space. No more tripping over or struggling to find a place to store your ladder!
We hope this guide has been informative and helpful in guiding you through the process of hanging a ladder from the ceiling. If you have any further questions or need assistance, don’t hesitate to consult the ladder manufacturer’s instructions or seek advice from a professional.
Thank you for reading, and best of luck with your ladder hanging project!
Frequently Asked Questions about How To Hang Ladder From Ceiling
Was this page helpful?
At Storables.com, we guarantee accurate and reliable information. Our content, validated by Expert Board Contributors, is crafted following stringent Editorial Policies. We're committed to providing you with well-researched, expert-backed insights for all your informational needs.










0 thoughts on “How To Hang Ladder From Ceiling”