
Articles
How To Hang Paper Lanterns From The Ceiling
Modified: May 6, 2024
Learn how to hang paper lanterns from the ceiling with these helpful articles. Discover tips and tricks for creating a stunning display.
(Many of the links in this article redirect to a specific reviewed product. Your purchase of these products through affiliate links helps to generate commission for Storables.com, at no extra cost. Learn more)
Introduction
Welcome to the ultimate guide on how to hang paper lanterns from the ceiling! Paper lanterns are a beautiful and versatile decorative element that can add a touch of elegance and whimsy to any space. From weddings and parties to home decor, these delicate lanterns create a stunning visual impact and a serene ambiance.
In this article, we will walk you through the step-by-step process of hanging paper lanterns from the ceiling, ensuring a secure and eye-catching display. Whether you’re a DIY enthusiast or just looking to spice up your space, this guide is here to help you achieve an impressive result.
Before we dive into the process, let’s gather the materials you’ll need to get started.
Key Takeaways:
- Create a visually stunning display by carefully choosing the location, measuring and marking installation points, and securing the lanterns for a balanced and elegant arrangement.
- Infuse any space with charm and elegance by hanging paper lanterns from the ceiling, adding a touch of whimsy and creating a captivating ambiance.
Read more: How To Hang Unistrut From The Ceiling
Materials Needed
Before we begin, make sure you have the following materials on hand:
- Paper lanterns: Choose the size, shape, and color of the lanterns that best suit your needs and decor style.
- String or fishing line: This will be used to suspend the lanterns from the ceiling.
- Command hooks or ceiling hooks: These hooks will provide the support needed to hang the lanterns.
- Tape measure: This will be used to measure the distance between each lantern and ensure an even alignment.
- Pencil or marker: These will be used to mark the spot where the hooks will be installed.
- Step stool or ladder: Depending on the height of your ceiling, you may need a step stool or ladder to reach the installation area.
- Scissors: You’ll need scissors to cut the string or fishing line to the desired length.
- Optional: LED lights or fairy lights to insert inside the lanterns for an enchanting glow.
Once you have gathered all the materials, let’s move on to the step-by-step process of hanging your paper lanterns from the ceiling.
Step 1: Choosing the Location
The first step in hanging paper lanterns from the ceiling is to choose the perfect location for your display. Consider the purpose of the event or the desired atmosphere for your space and select a suitable area to hang the lanterns.
Here are a few factors to keep in mind when choosing the location:
- Aesthetics: Assess the overall layout and design of the room. Identify any focal points or areas that could benefit from an enhanced visual appeal.
- Spatial Considerations: Take into account the size of the room and the height of the ceiling. You want to ensure that the lanterns are not too crowded or too spread out, creating a balanced and visually pleasing arrangement.
- Accessibility: Consider the practicality of reaching the installation area. Make sure you have a safe and stable platform such as a step stool or ladder to reach the desired location.
- Lighting: Take note of the availability of natural light and existing light fixtures in the room. You can strategically place the lanterns in areas where they will be illuminated, creating a captivating glow.
Once you have considered these factors, choose a location that aligns with your vision and enhances the overall ambiance of the space. This could be above a dining table, in a corner, or along a hallway. The possibilities are endless, so let your creativity guide you.
Now that you have selected the ideal spot, it’s time to move on to the next step: measuring and marking the installation points.
Step 2: Measuring and Marking
Before you start installing the hooks, it’s important to measure and mark the precise spots where the lanterns will be hung. This will ensure that your display is symmetrical and visually pleasing.
Follow these steps to properly measure and mark the installation points:
- Start by deciding on the spacing between the lanterns. This will depend on your personal preference and the size of the lanterns. A general guideline is to leave around 18-24 inches of space between each lantern for an even distribution.
- Using a tape measure, measure the distance from the first installation point to the next one, following the spacing you determined.
- Mark the spots with a pencil or marker on the ceiling. You can use a ladder or step stool to reach the installation area.
- Continue measuring and marking the remaining installation points until you have marked all the spots where the lanterns will be hung.
Double-check your markings to ensure they are level and aligned. This will help you achieve a professional-looking display.
Once you have measured and marked all the installation points, you’re ready to move on to the next step: installing the hooks.
Step 3: Installing the Hooks
Now that you have measured and marked the spots where the lanterns will be hung, it’s time to install the hooks that will provide the support needed to hang the lanterns securely.
Follow these steps to properly install the hooks:
- Choose the type of hook that suits your needs and the weight of your paper lanterns. Command hooks are an excellent choice as they are easy to install and don’t require drilling into the ceiling. However, if you prefer a more permanent solution, ceiling hooks can be installed using screws and anchors.
- Carefully read and follow the instructions provided by the hook manufacturer for proper installation. Make sure the hooks are suitable for your type of ceiling (e.g., drywall, plaster, etc.) to ensure a secure hold.
- Position the hook over the marked spot on the ceiling and press firmly to adhere it or insert the screw and anchor into the designated spot.
- Repeat the process for each installation point, ensuring a consistent and level placement of the hooks.
Once all the hooks are installed, give them a gentle tug to ensure they are firmly in place. If any hooks feel loose, reinforce them by retightening or readjusting as necessary.
With the hooks securely installed, you’re ready to move on to the next step: preparing the lanterns for hanging.
Use clear fishing line or thin wire to hang paper lanterns from the ceiling. Attach the line to the metal frame of the lantern and secure it to a hook or ceiling fixture. Adjust the length of the line to create a visually appealing display.
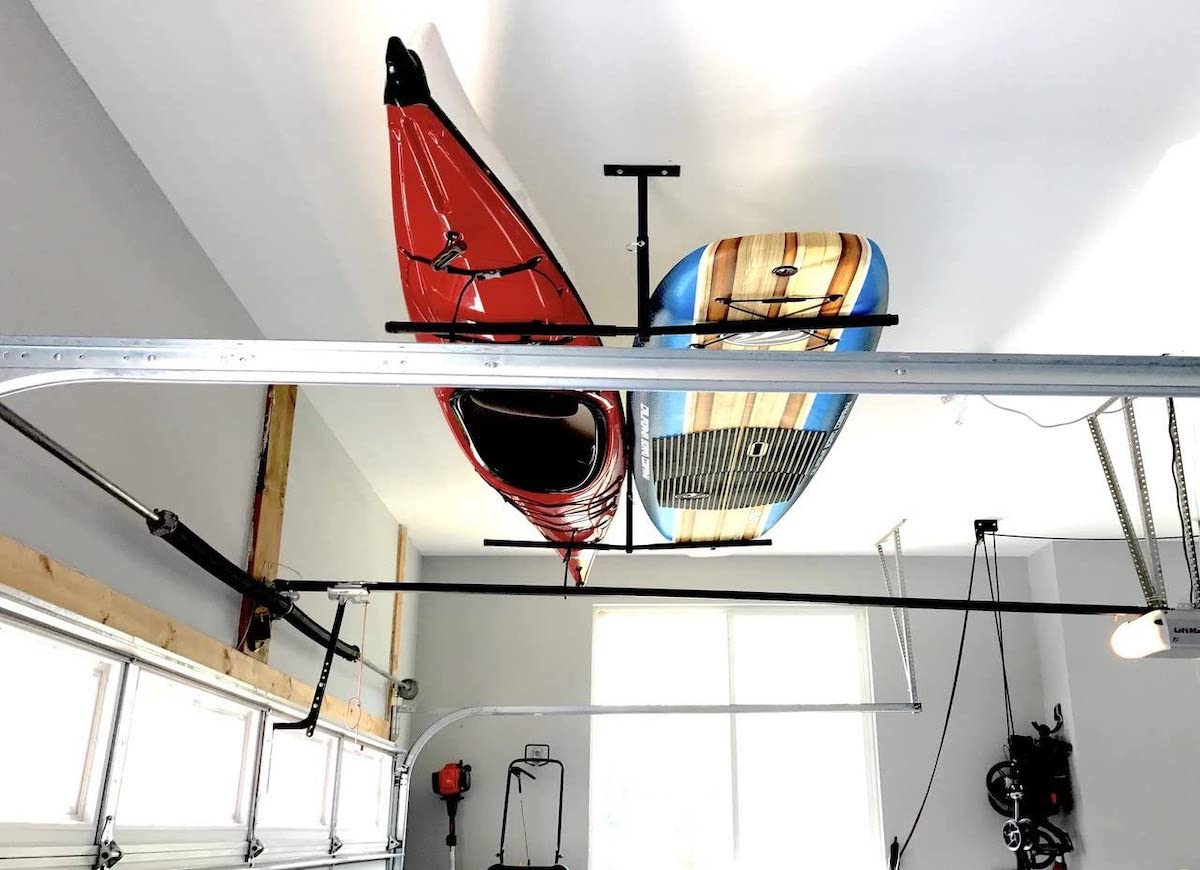
Read more: How To Hang Surfboard From The Ceiling
Step 4: Preparing the Lanterns
Before you hang the paper lanterns, it’s important to prepare them properly to ensure a smooth and effortless installation.
Follow these steps to properly prepare the lanterns:
- Carefully unpack the paper lanterns and inspect them for any damages or defects.
- If your lanterns have metal frames, gently expand them to their full shape. Be cautious not to apply too much force to avoid damaging the delicate paper.
- If desired, insert LED lights or fairy lights into the lanterns to create a magical and glowing effect. Make sure the lights are securely attached to the inside of the lanterns.
Now that your lanterns are prepared, you’re ready to move on to the exciting part: hanging them from the ceiling!
Step 5: Hanging the Lanterns
With everything prepared, it’s time to hang the paper lanterns from the hooks on the ceiling. Follow these steps for a successful and visually appealing display:
- Cut a length of string or fishing line for each lantern, ensuring it is long enough to reach from the hook on the ceiling to the desired height for the lantern.
- Take one end of the string or fishing line and securely attach it to the hook. Depending on the type of hook you’re using, you may need to loop the string around or tie it in a knot.
- Gently hold the other end of the string or fishing line and carefully lift the lantern to the desired height while keeping it level.
- Once the lantern is at the desired height, attach the other end of the string or fishing line to the lantern. Many lanterns have a small metal ring or loop where the string or fishing line can be tied or looped through.
- Repeat these steps for each lantern, making sure to adjust the height to achieve an even alignment and an aesthetically pleasing arrangement.
Take your time to ensure each lantern is hung securely and at the desired height. This will create a stunning display that will enhance the overall ambiance of your space.
Now that the lanterns are hung, let’s move on to the next step: adjusting and securing the display.
Step 6: Adjusting and Securing
Once you have hung all the paper lanterns from the ceiling, it’s important to take the time to adjust and secure the display to ensure everything looks perfect and remains in place. Follow these steps to complete the process:
- Stand back and assess the overall arrangement of the lanterns. Make any necessary adjustments to the height or positioning to create a balanced and visually pleasing display.
- Use a step stool or ladder to reach each lantern individually. Gently adjust the strings or fishing lines to ensure that each lantern is level and aligned with the others.
- If necessary, trim any excess string or fishing line to create a cleaner appearance. Be careful not to cut the string too short, ensuring that the lanterns remain securely hung.
- If you’re using LED lights or fairy lights inside the lanterns, turn them on to verify that they are functioning properly and that the desired lighting effect is achieved.
- Once you are satisfied with the arrangement, double-check that all the hooks are securely in place and the lanterns are hanging stably. Give each lantern a gentle tug to ensure it is properly secured.
By taking the time to adjust and secure the display, you can ensure that your paper lanterns will remain in place and provide a stunning visual impact for your space.
Congratulations! You have successfully hung paper lanterns from the ceiling. Enjoy the magical ambiance they bring to your space and the compliments that are sure to follow.
Remember that safety is of utmost importance when dealing with any hanging decorations. Always exercise caution and follow any specific instructions or recommendations provided by the manufacturer or venue.
Now that you’ve mastered the art of hanging paper lanterns, you can proudly showcase your creative flair and enjoy the beautiful atmosphere they create in your home or at your special event.
Wishing you many memorable moments surrounded by the charm and elegance of paper lanterns!
Conclusion
Decorating with paper lanterns and hanging them from the ceiling is a wonderful way to add visual interest and create a captivating atmosphere in any space. With the steps outlined in this guide, you now have the knowledge and confidence to hang paper lanterns with ease and achieve a stunning display.
From choosing the perfect location to preparing the lanterns and securing them in place, each step is essential in creating a visually appealing arrangement. By measuring and marking the installation points, installing the hooks securely, and carefully hanging each lantern at the desired height, you can achieve a beautifully balanced display that will impress your guests and enhance the ambiance of any room.
Remember to take your time when adjusting and securing the lanterns, ensuring they are level and aligned for a professional and polished appearance. Safety should always be a priority, so be sure to follow any manufacturer’s instructions and use appropriate equipment and materials.
Now it’s time to unleash your creativity and transform your space with the charm and elegance of paper lanterns. Whether you’re hosting a special event, enhancing your home decor, or adding flair to a business space, paper lanterns provide a versatile and enchanting decorative touch.
Enjoy the magical ambiance that paper lanterns create and the joy they bring to everyone who experiences them. Share your newfound knowledge with others, and inspire them to embark on their own paper lantern hanging adventures.
Thank you for joining us in this comprehensive guide on how to hang paper lanterns from the ceiling. We hope it has empowered you to create your dream display and infused your space with warmth, beauty, and a touch of whimsy.
Happy decorating!
Now that you've mastered hanging paper lanterns, why not dive into other home decor adventures? For those who enjoy crafting, our article on DIY home decor projects for kids and parents offers a plethora of creative projects perfect for both kids and parents. Ready to spruce up your work-from-home space? Our guide on home office lighting ideas provides innovative solutions to brighten your home office effectively. Both pieces are packed with actionable tips sure to inspire your next home improvement project!
Frequently Asked Questions about How To Hang Paper Lanterns From The Ceiling
Was this page helpful?
At Storables.com, we guarantee accurate and reliable information. Our content, validated by Expert Board Contributors, is crafted following stringent Editorial Policies. We're committed to providing you with well-researched, expert-backed insights for all your informational needs.


0 thoughts on “How To Hang Paper Lanterns From The Ceiling”