Articles
How To Hang A Bed Canopy From The Ceiling
Modified: October 30, 2024
Learn how to easily hang a bed canopy from the ceiling with our step-by-step articles. Transform your bedroom into a dreamy oasis!
(Many of the links in this article redirect to a specific reviewed product. Your purchase of these products through affiliate links helps to generate commission for Storables.com, at no extra cost. Learn more)
Introduction
Adding a canopy to your bed not only creates a cozy and romantic atmosphere, but it also adds a touch of elegance and luxury to your bedroom. While there are various types of bed canopies available, hanging a canopy from the ceiling is a popular choice as it gives the illusion of a floating bed.
In this article, we will guide you through the steps to hang a bed canopy from the ceiling. With just a few materials and some basic tools, you can transform your ordinary bed into a dreamy retreat.
Before we get started, it’s important to note that the method described in this article assumes that you have a standard bed frame or a bed with a headboard. If you have a different type of bed, you may need to modify the process accordingly.
Now, let’s gather the necessary materials and get ready to turn your bedroom into a haven of tranquility.
Key Takeaways:
- Create a dreamy retreat by hanging a bed canopy from the ceiling using simple materials and tools, adding elegance and luxury to your bedroom for a cozy and romantic atmosphere.
- Personalize your bed canopy to match your bedroom’s style, experiment with fabric choices and embellishments, and enjoy the enchanting ambiance of your own luxurious retreat.
Read more: How To Hang Unistrut From The Ceiling
Step 1: Gather the necessary materials
Before you begin the project, collect all the materials and tools you’ll need to hang the bed canopy from the ceiling. Having everything on hand will make the process much smoother and more efficient. Here’s a list of what you’ll need:
- Ceiling hooks: These will be used to suspend the canopy from the ceiling. Make sure to choose hooks that are sturdy enough to support the weight of the fabric.
- Measuring tape: You’ll need this to measure the distance between the bed and the ceiling, as well as the width and length of the bed.
- Canopy fabric: Select a fabric of your choice that matches the style and color scheme of your bedroom. Options include sheer materials like chiffon or tulle for a romantic look, or heavier fabrics for a more dramatic effect.
- Scissors: You’ll need them to cut the fabric to the desired length and shape.
- Thread and needle: These are necessary if you plan to sew any hems or alterations on the fabric.
- Stud finder: If your ceiling is made of drywall, a stud finder will help you locate the ceiling joists for extra support.
- Drill and screws (if necessary): If you cannot find suitable ceiling hooks, you may need to install screw-in hooks directly into the ceiling.
Once you have gathered all the materials, ensure that you have enough fabric to fully cover the bed and create the desired canopy effect. It’s always best to have some extra fabric on hand in case of any mistakes or adjustments needed along the way.
Now that you have all the necessary tools and materials, you’re ready to move on to the next step: determining the ideal location for hanging the bed canopy.
Step 2: Determine the ideal location
Choosing the right location to hang your bed canopy from the ceiling is crucial for both aesthetic purposes and practicality. Consider the following factors when determining the ideal spot:
Bed position:
Start by deciding where you want the bed canopy to be positioned in relation to your bed. Most people prefer to hang the canopy directly above the headboard or at the foot of the bed for a visually pleasing arrangement. However, you can also opt for a canopy that covers the entire bed for a more dramatic effect.
Ceiling height:
Take into account the height of your ceiling when choosing the location. You want to ensure that the canopy hangs at a height that allows easy access to the bed without feeling cramped. As a general rule of thumb, leave at least 18-24 inches between the top of the mattress and the bottom of the canopy.
Read more: How To Hang Surfboard From The Ceiling
Room layout:
Consider the overall layout and design of your bedroom. Take note of any existing furniture or fixtures that may obstruct the canopy or make it appear crowded. Ensure that the chosen location allows for adequate space and complements the overall style of the room.
Lighting:
Think about how natural light enters the room and how it will interact with the canopy. Hanging the canopy near a window can create a beautiful interplay of light and fabric, adding a magical touch to the space. However, if you prefer a darker sleeping environment, you may want to choose a location away from direct sunlight.
Once you have considered these factors, mark the chosen location using a pencil or masking tape. This will serve as a guide when measuring and installing the ceiling hooks in the next step.
Now that you’ve determined the ideal location, it’s time to move on to step 3: measuring and marking the hanging points.
Step 3: Measure and mark the hanging points
Accurate measurements are crucial when it comes to hanging a bed canopy from the ceiling. Follow these steps to ensure that the canopy is positioned correctly and hangs evenly:
1. Measure the distance from the ceiling to the desired height of the canopy:
Using a measuring tape, determine how far down from the ceiling you want the canopy to hang. You may have already made this decision in Step 2, but it’s important to double-check the measurements to ensure accuracy. Mark this distance on the wall or ceiling near the chosen location.
Read more: How To Hang Tablecloths From The Ceiling
2. Measure the width and length of the bed:
Measure the width and length of your bed using a measuring tape. This will help you determine the dimensions of the canopy fabric you will need. Additionally, measure the distance from the headboard to the foot of the bed to ensure that the canopy will fully cover the mattress.
3. Determine the placement of the ceiling hooks:
Based on the measurements taken in Steps 1 and 2, determine the placement of the ceiling hooks. Ideally, they should be positioned equidistant from the edges of the bed and evenly spaced along the length of the bed. Use the measuring tape to mark these points on the ceiling or wall.
4. Use a level for accuracy:
Before proceeding to install the hooks, use a level to ensure that the marks you’ve made are perfectly horizontal. This will prevent the canopy from hanging crookedly and provide a visually pleasing result.
By measuring and marking the hanging points accurately, you will lay the foundation for a well-balanced and visually appealing bed canopy. Now let’s move on to the next step: installing the ceiling hooks.
Step 4: Install the ceiling hooks
Now that you have measured and marked the hanging points for your bed canopy, it’s time to install the ceiling hooks. Follow these steps to ensure proper installation:
Read more: How To Hang Swing From The Ceiling
1. Determine the type of ceiling:
Take a moment to identify the type of ceiling you have. It could be either drywall or a more solid material like plaster or wood. This will help you choose the appropriate method for installing the hooks.
2. Use a stud finder (if applicable):
If your ceiling is made of drywall, it’s important to locate the ceiling joists for added support. Use a stud finder to find the joists and mark their location on the ceiling. This step is especially crucial if you plan on using screw-in hooks.
3. Install the hooks:
If you have a standard ceiling, you can use adhesive hooks designed for hanging lightweight items. Follow the manufacturer’s instructions to attach the hooks securely to the ceiling at the marked hanging points.
If you have located the ceiling joists or are working with a more solid ceiling material, you can opt for screw-in hooks. Carefully drill pilot holes at the marked hanging points, making sure to align them with the ceiling joists. Then, screw in the hooks securely, ensuring they are straight and firmly anchored.
4. Test the hooks:
Once the hooks are installed, give them a gentle tug to ensure that they are securely fastened. You don’t want the hooks to come loose and compromise the stability of the canopy.
With the ceiling hooks now in place, you’re one step closer to creating your dreamy bed canopy. The next step is to prepare the canopy fabric for hanging.
Read more: How To Hang A Picture From The Ceiling
Step 5: Prepare the canopy fabric
Now that you have installed the ceiling hooks, it’s time to prepare the canopy fabric for hanging. Follow these steps to ensure that the fabric is ready and properly sized:
1. Cut the fabric:
Using scissors, cut the canopy fabric to the desired length and shape. Measure the width and length of the bed, and add an extra foot or two to each dimension to allow for draping and gathering. This will give the canopy a flowing and elegant look.
2. Hem the edges (optional):
If your fabric is prone to fraying, consider hemming the edges to give them a finished look and prevent unravelling. You can do this by folding the raw edges of the fabric inward and sewing them in place using a needle and thread. Alternatively, you can use fabric glue or hemming tape for a no-sew option.
3. Add embellishments (optional):
If desired, you can further enhance the canopy fabric by adding decorative elements. Consider attaching lace trim, ribbon, or fabric flowers to the edges or corners of the fabric. Be creative and personalize the canopy to match your bedroom’s style and your own taste.
Read more: How To Hang Ornaments From The Ceiling
4. Attach curtain rings or clips:
To easily hang the canopy from the ceiling hooks, attach curtain rings or clips to the top edge of the fabric. Space the rings or clips evenly along the width of the canopy, ensuring they are securely attached.
By properly preparing the canopy fabric, you will ensure that it is the perfect size and shape for your bed canopy. The next step is to hang the bed canopy itself, so let’s move on to Step 6.
Step 6: Hang the bed canopy
With the canopy fabric prepared, it’s time to hang it from the ceiling hooks and bring your bed canopy to life. Follow these steps to ensure a secure and visually pleasing installation:
1. Start at one side of the bed:
Begin by standing on one side of the bed and holding the fabric with the attached rings or clips. Position yourself so that you are facing the side of the bed where you want to start hanging the canopy. This will help you achieve a neat and symmetrical look.
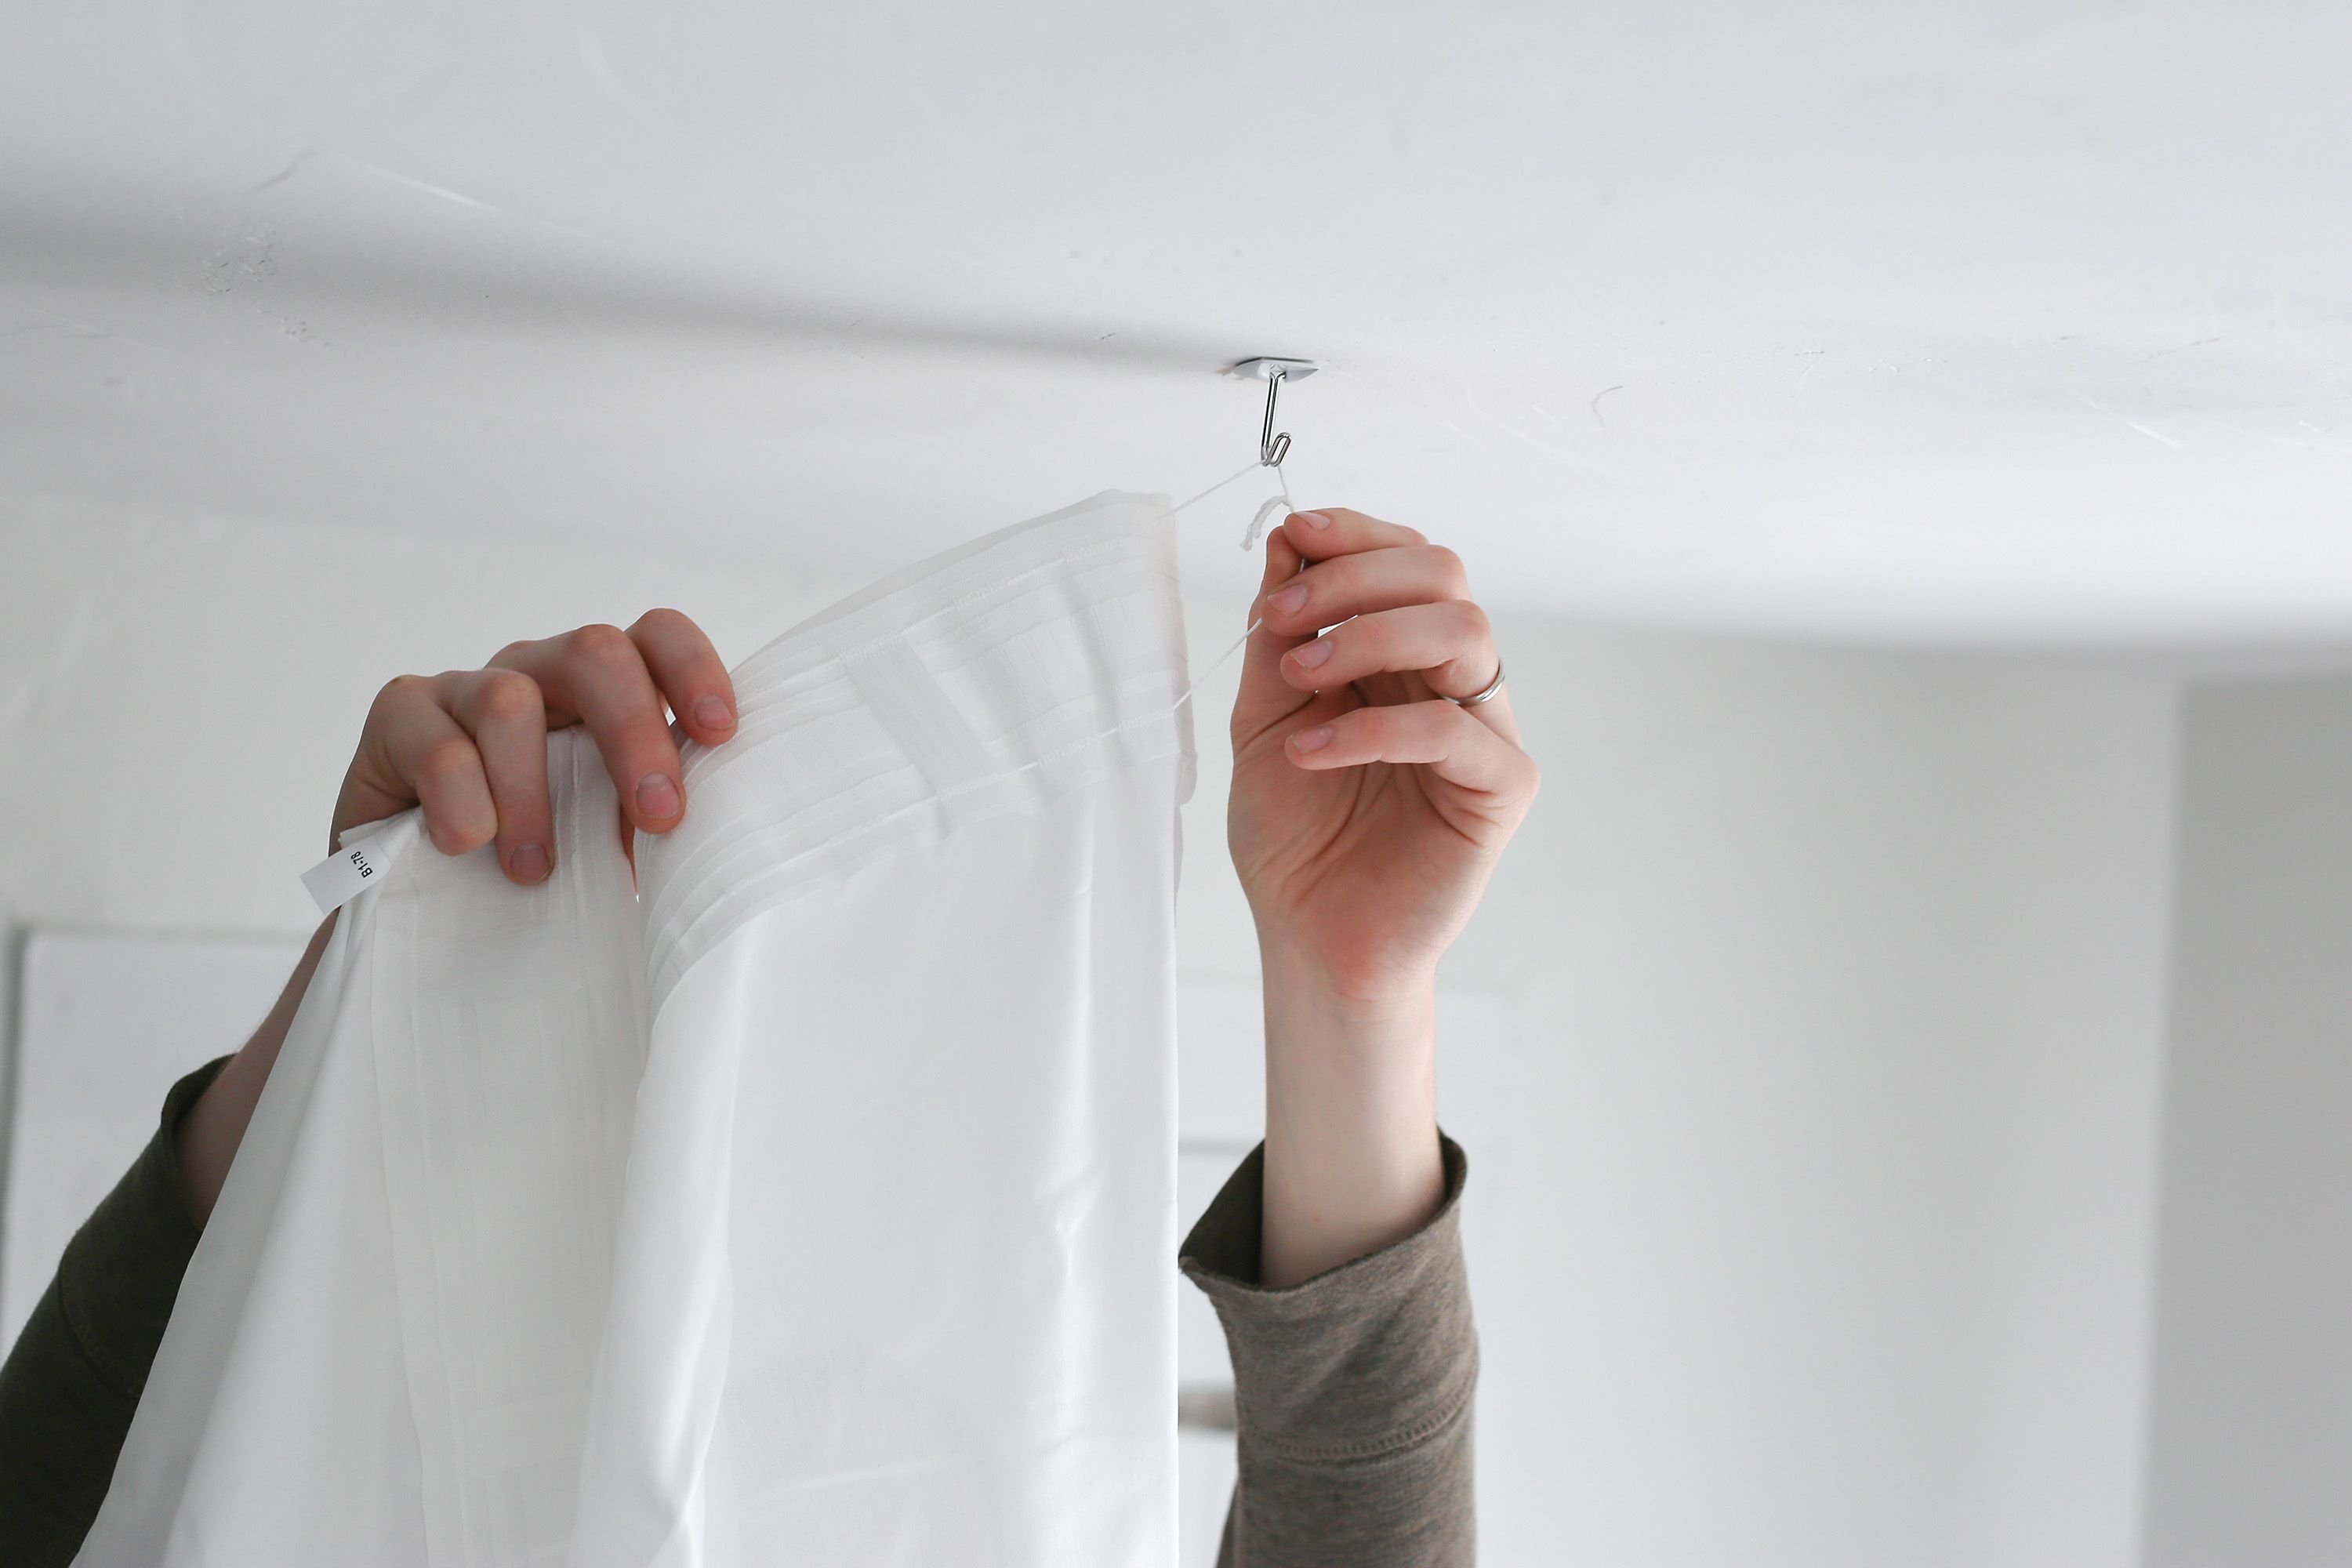
2. Hook the rings/clips onto the ceiling hooks:
Take the end of the fabric with the rings or clips and hook them onto the corresponding ceiling hooks at the designated hanging points. Ensure that the fabric is evenly draped and that the rings or clips are securely attached to the hooks.
Read more: How To Hang A Chandelier From The Ceiling
3. Repeat on the other side of the bed:
Move to the opposite side of the bed and repeat the process, hooking the rings or clips onto the ceiling hooks. Adjust the fabric as needed to maintain an even and balanced appearance.
4. Step back and adjust:
Once both sides of the canopy are hanging, step back and assess the overall look. Make any necessary adjustments to ensure that the fabric is evenly distributed and that it creates a visually pleasing canopy shape.
Remember to take your time with this step, as the way the canopy drapes and hangs will significantly impact the overall aesthetic of your bed.
With the bed canopy now hung from the ceiling, you’re almost finished! The final step is to adjust and secure the canopy to achieve the desired look and stability.
Step 7: Adjust and secure the canopy
Now that the bed canopy is hanging beautifully from the ceiling, it’s time to make final adjustments and ensure its stability. Follow these steps to create a secure and visually appealing canopy:
1. Even out the fabric:
Take a moment to inspect the canopy fabric and adjust any areas that may be uneven or lopsided. Gently pull or gather the fabric to create an even distribution and achieve the desired draped look.
Read more: How To Hang Mobile From The Ceiling
2. Secure the fabric:
To prevent the fabric from sliding or shifting, you can use small fabric or safety pins to secure the folds and drapes in place. Carefully pin the fabric at strategic points to keep it in position and maintain the desired shape.
3. Double-check the stability:
Ensure that the canopy is securely attached to the ceiling hooks and that it can withstand any movements or slight tugs. Give the canopy a gentle shake to test its stability, making any necessary adjustments or reinforcements as needed.
4. Step back and admire:
Once you are satisfied with the adjustments and the stability of the canopy, step back and take a moment to admire your handiwork. Marvel at the transformation of your bed into a cozy and elegant retreat.
Remember that the canopy can always be rearranged, adjusted, or modified to suit your preferences. Don’t be afraid to experiment and make changes until you achieve the desired look and feel.
With the bed canopy now adjusted and secured, you have successfully completed the process of hanging a bed canopy from the ceiling. Enjoy the cozy, romantic ambiance that your new canopy brings to your bedroom and indulge in the luxury of your own personal retreat.
Thank you for following this guide, and happy dreaming!
Conclusion
Adding a bed canopy to your bedroom can instantly transform the space into a romantic and luxurious retreat. By following the steps outlined in this guide, you can successfully hang a bed canopy from the ceiling and create an enchanting ambiance in your sleeping sanctuary.
We began by gathering the necessary materials, including ceiling hooks, measuring tape, canopy fabric, scissors, and more. Then, we moved on to determining the ideal location for the canopy and measuring and marking the hanging points. After that, we installed the ceiling hooks and prepared the canopy fabric by cutting it to size and adding any embellishments or finishing touches.
Next, we tackled the exciting part of hanging the canopy itself, carefully hooking the rings or clips onto the ceiling hooks and achieving an even and balanced appearance. Finally, we made necessary adjustments to the fabric and ensured its stability by securing it with pins and double-checking its attachment to the hooks.
Now, you can enjoy the beauty and elegance of your bed canopy, transforming your bedroom into a cozy haven that invites relaxation and romance. Take this opportunity to personalize and experiment with your canopy, making it uniquely yours and reflecting your personal style.
Remember, the process of hanging a bed canopy from the ceiling may require some trial and error to achieve the desired look. Don’t be afraid to experiment and adjust until you are completely satisfied with the outcome.
Now, it’s time to embrace the dreamy atmosphere, snuggle up beneath your canopy, and enjoy the magic it brings to your bedroom. Soothe your senses and drift away into a world of comfort and indulgence.
We hope this guide has been helpful in your journey to hanging a bed canopy from the ceiling. May your nights be filled with blissful dreams under the enchanting canopy!
Frequently Asked Questions about How To Hang A Bed Canopy From The Ceiling
Was this page helpful?
At Storables.com, we guarantee accurate and reliable information. Our content, validated by Expert Board Contributors, is crafted following stringent Editorial Policies. We're committed to providing you with well-researched, expert-backed insights for all your informational needs.


0 thoughts on “How To Hang A Bed Canopy From The Ceiling”