Home>Furniture>Outdoor Furniture>How To String Up Patio Lights
Outdoor Furniture
How To String Up Patio Lights
Modified: August 16, 2024
Learn how to beautifully string up patio lights to create a cozy outdoor ambiance for your outdoor furniture. Embrace the magic of outdoor lighting.
(Many of the links in this article redirect to a specific reviewed product. Your purchase of these products through affiliate links helps to generate commission for Storables.com, at no extra cost. Learn more)
Introduction
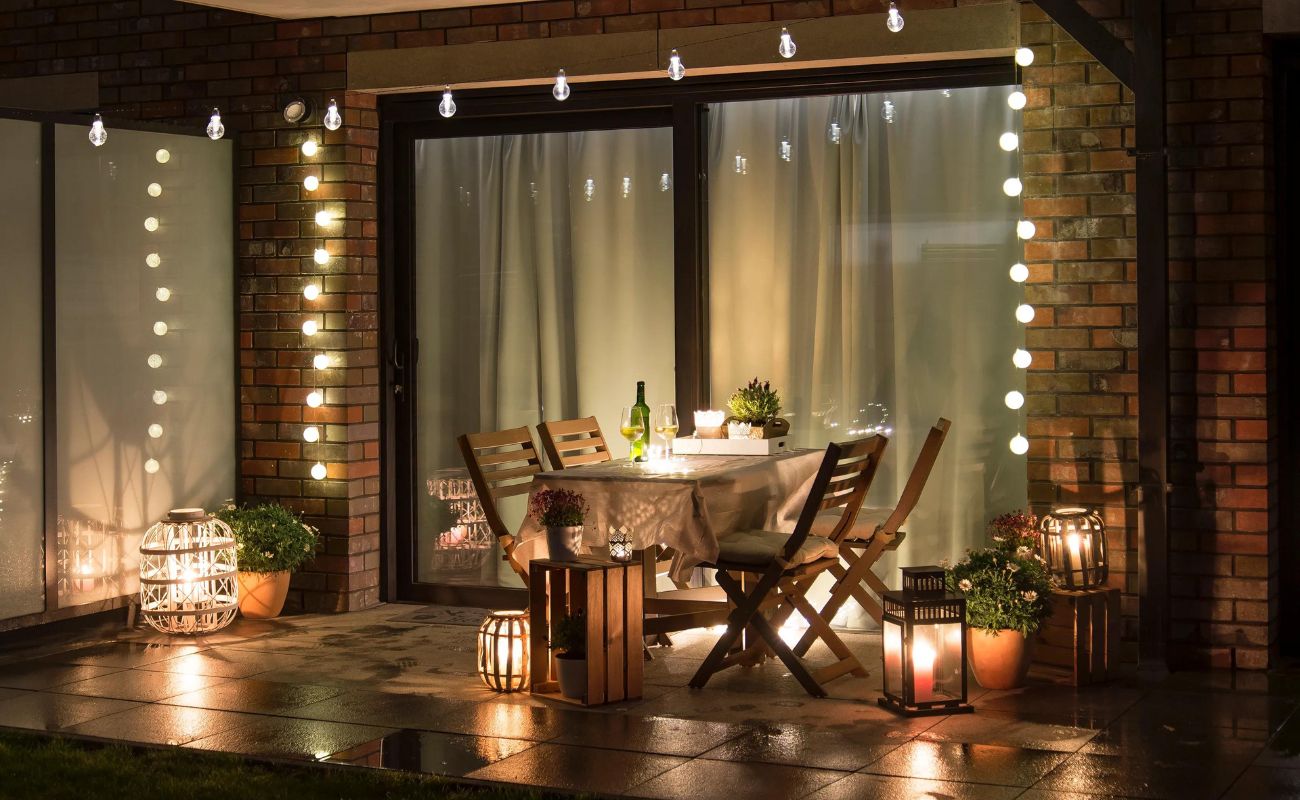
Creating an inviting outdoor space is essential for enjoying the beauty of nature right in your own backyard. One of the best ways to enhance the ambiance of your outdoor area is by stringing up patio lights. These twinkling lights not only add a touch of magic to your patio but also provide a warm and cozy atmosphere for outdoor gatherings and relaxation.
Whether you’re hosting a summer barbecue, having a romantic dinner under the stars, or simply enjoying some downtime with a book, patio lights can transform your outdoor space into a captivating retreat. In this article, we will guide you through the process of stringing up patio lights, from choosing the right lights to securing them in place, so you can create a stunning and functional outdoor oasis.
Key Takeaways:
- Create a captivating outdoor retreat by choosing the right patio lights and securing them in place. Enjoy a cozy and inviting atmosphere for gatherings and relaxation in your beautifully lit patio.
- Stringing up patio lights is a fun and rewarding process that transforms your outdoor space into a magical retreat. Follow the steps to hang and fine-tune the lights, then sit back, relax, and enjoy your enchanting patio!
Read more: How To Put Up String Lights On Balcony
Choosing the Right Patio Lights
When it comes to selecting patio lights, there are various options available to suit your personal style and the overall aesthetics of your patio. Here are a few factors to consider when choosing the right patio lights:
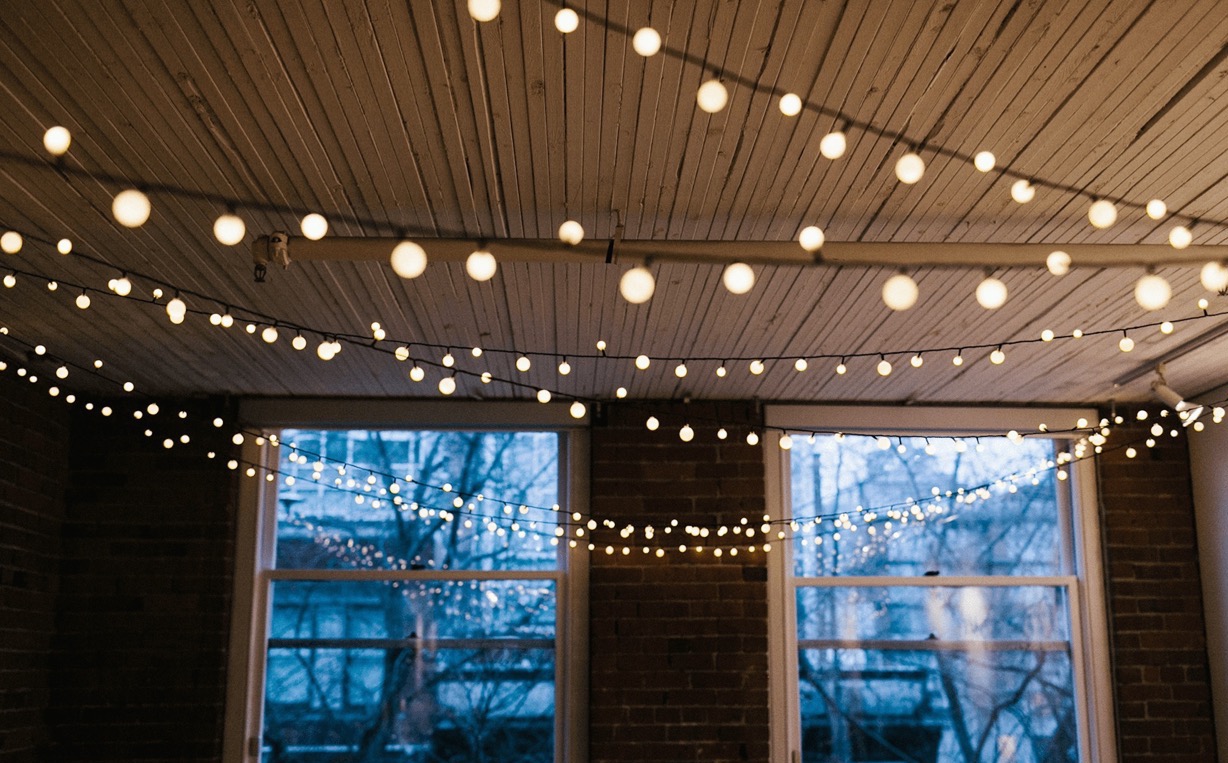
- Lighting Type: There are different types of patio lights to choose from, including string lights, lanterns, and fairy lights. String lights are a popular choice as they provide a soft and warm glow, perfect for creating a cozy atmosphere.
- Size and Length: Consider the size of your outdoor space and the desired lighting coverage. Opt for longer strands of lights if you have a large patio or want to string lights across a wide area.
- Bulb Style: The style of bulb can greatly impact the overall look of your patio. Choose from traditional incandescent bulbs, vintage Edison bulbs for a retro feel, or LED bulbs that are energy-efficient and long-lasting.
- Light Color: Decide on the color temperature of the lights, whether you prefer warm white for a cozy feel, cool white for a modern look, or multicolored lights for a festive atmosphere.
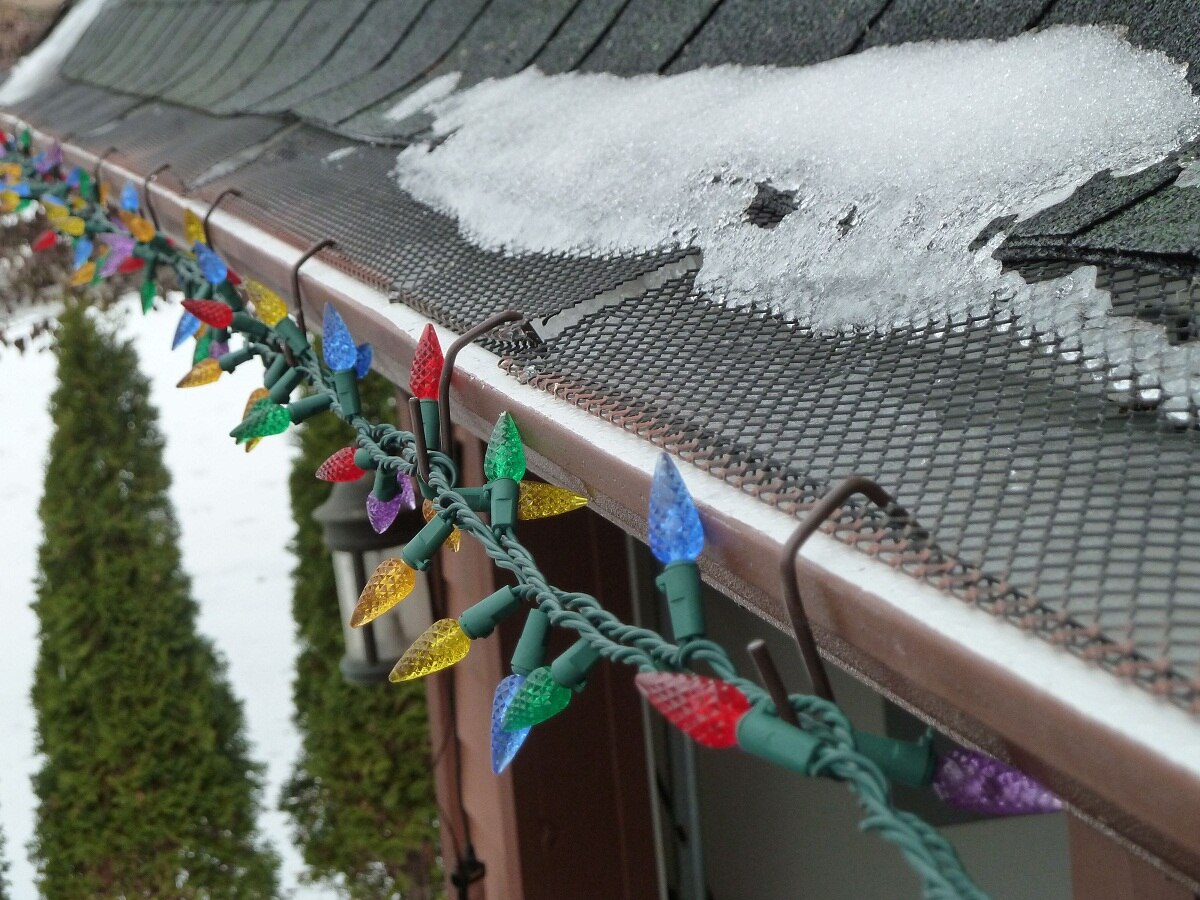
- Waterproof Rating: Since the lights will be exposed to the outdoor elements, make sure to choose lights that are labeled as waterproof or weather-resistant to ensure they will withstand rain and other weather conditions.
By considering these factors and understanding your personal preferences, you can choose patio lights that perfectly complement your outdoor space and create the desired ambiance.
Required Materials
Before you begin stringing up patio lights, it’s important to gather all the necessary materials. Here are the key items you will need:
- Patio Lights: Choose the desired type, size, and style of patio lights that best suit your outdoor space.
- Extension Cord(s): Make sure you have enough extension cords to reach the nearest power source, especially if your patio is located far from an outlet.
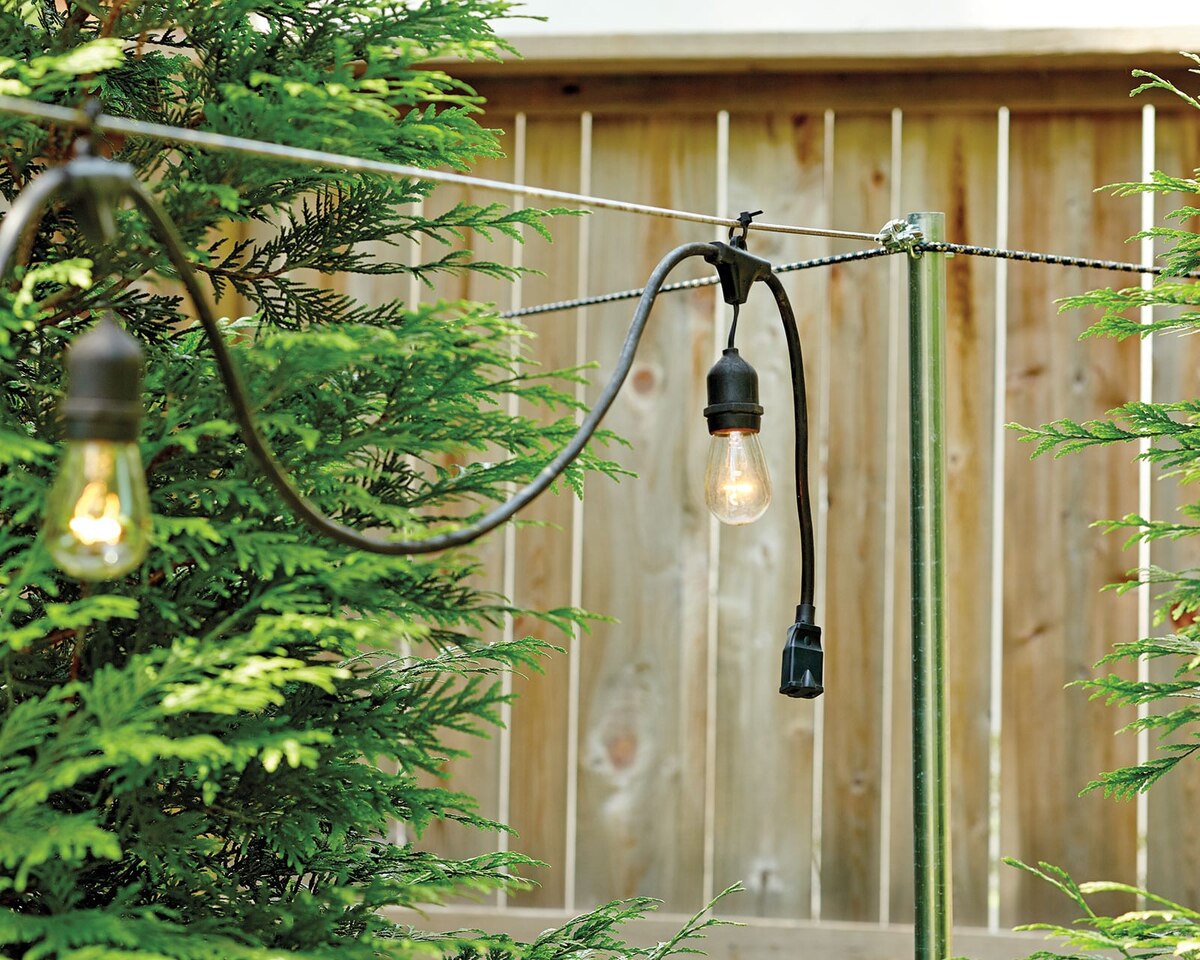
- Hooks or Clips: These will be used to hang the lights from various support structures, such as trees, fences, or pergolas.
- Scissors or Wire Cutters: These will come in handy for cutting and trimming the lights if needed.
- Zip Ties or Twist Ties: These can be used to secure the lights in place or to tidy up any excess wire.
It’s always a good idea to have some extra materials on hand, such as spare bulbs and extra extension cords, in case of any unforeseen circumstances. Additionally, ensure that all the materials you use are suitable for outdoor use and able to withstand the elements.
Once you have gathered all the necessary materials, you’re ready to move on to the next steps of the process: determining the layout and preparing the area.
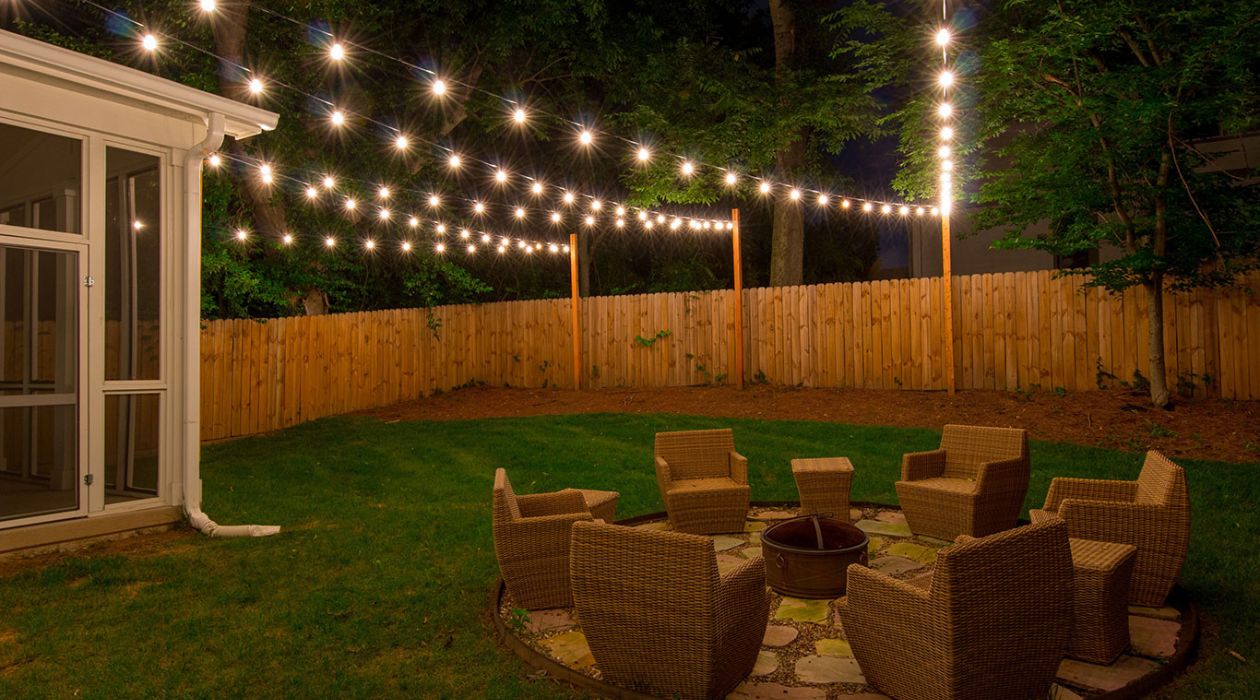
Step 1: Determine the Layout
The first step in stringing up patio lights is to determine the layout for how you want the lights to be arranged across your outdoor space. This will help you visualize where to hang the lights and ensure a balanced and appealing display. Here’s how to determine the layout:
- Measure and Plan: Start by measuring the length and width of your patio area. This will help you determine the total length of lights you’ll need and the number of support structures required.
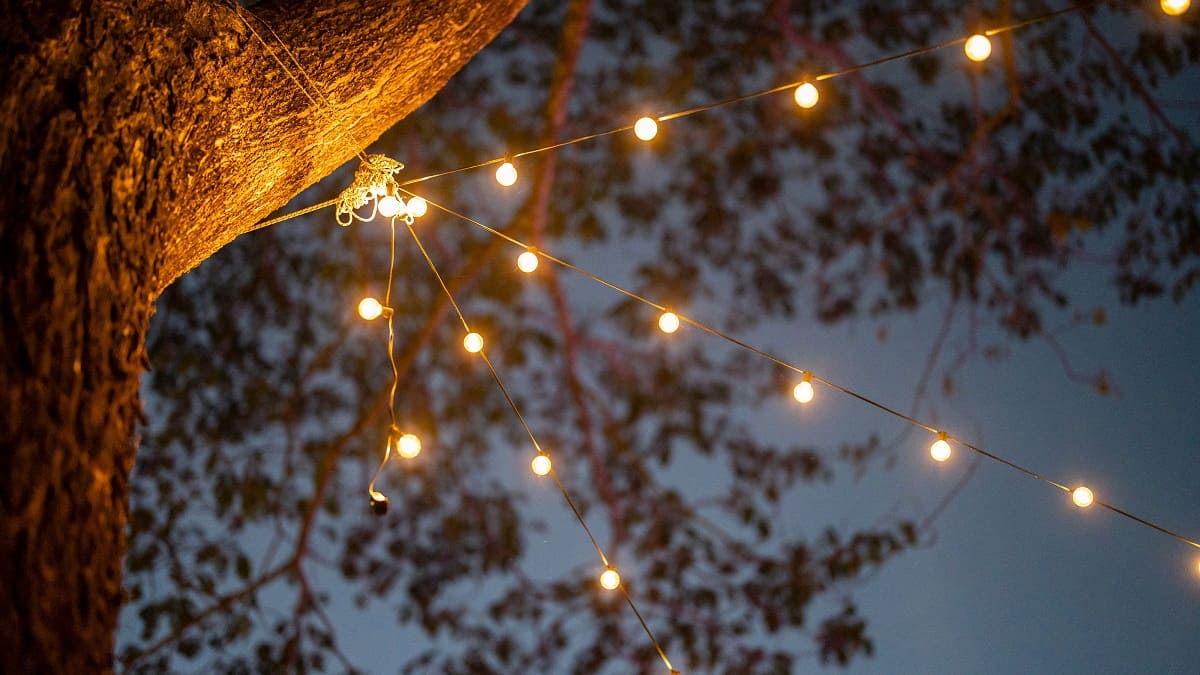
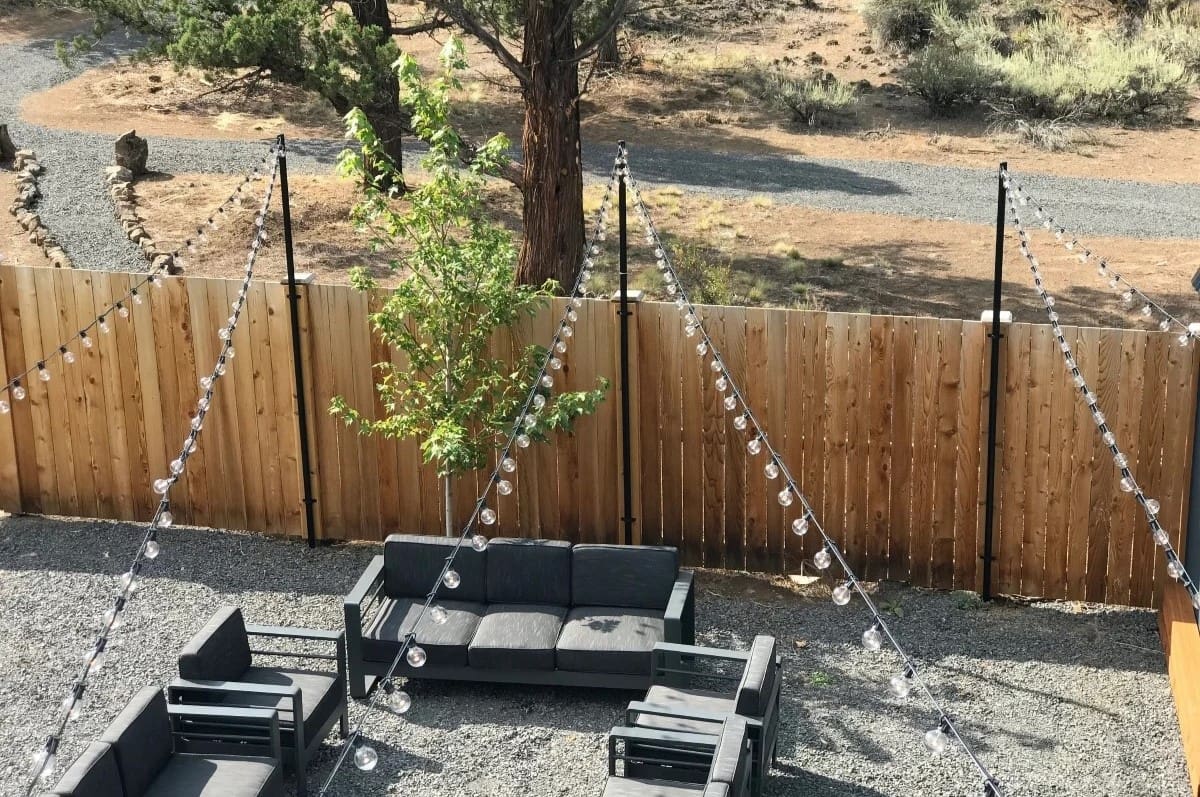
- Identify Support Structures: Look for existing structures that can support the lights, such as trees, fences, pergolas, or posts. Take note of the distance between these structures and any potential obstacles that may affect the layout.
- Create a Sketch: Use graph paper or a drawing app to create a scaled sketch of your patio area. Mark the locations of the support structures and any key features you want to highlight, such as a seating area or a pathway.
- Design the Layout: Based on your sketch, experiment with different lighting arrangements. Consider vertical, horizontal, or diagonal patterns, and visualize how the lights will complement the overall design of your patio.
- Ensure Adequate Coverage: As you plan the layout, aim for a balance of light throughout the entire patio area. Avoid leaving any dark spots or areas where the lights may overlap excessively.
By taking the time to determine the layout, you can ensure that the patio lights are hung in a way that maximizes both functionality and aesthetic appeal. Once you have finalized the layout, you’re ready to move on to the next step: preparing the area for installation.
Step 2: Prepare the Area
Before you start stringing up patio lights, it’s important to prepare the area to ensure a smooth installation process. Here are the steps to follow to prepare the area:
- Clean the Patio: Begin by clearing any debris or clutter from your patio area. Sweep the patio surface to remove dirt, leaves, or any other obstructions that may interfere with the installation process.
- Check Power Source: Locate the nearest power source and ensure that it’s working properly. Check the outlets and extension cords for any damage and make sure they are in good condition.
- Test the Lights: Before installing the lights, plug them in to ensure they are working correctly. This allows you to identify any faulty bulbs or wiring issues beforehand.
- Plan for Rain Protection: If you live in an area with frequent rain or inclement weather, consider using waterproof covers or enclosures to protect the electrical connections and prevent damage to the lights.
- Inspect Support Structures: Examine the support structures you identified during the layout planning phase. Ensure they are sturdy and able to support the weight of the lights. Make any necessary repairs or reinforcements if needed.
- Gather Tools: Collect all the tools and materials you will need for the installation process, such as hooks, clips, scissors, or wire cutters. Keep them nearby for easy access during the installation.
By preparing the area in advance, you can save time and ensure a hassle-free installation process. Once the area is clean and ready, you can move on to the next step: attaching the string lights to the support structures.
When stringing up patio lights, start by planning the layout and measuring the space. Use sturdy materials like outdoor-rated string lights and hooks. Make sure to secure the lights tightly to prevent sagging or drooping.
Read more: How To Put Up Outdoor String Lights
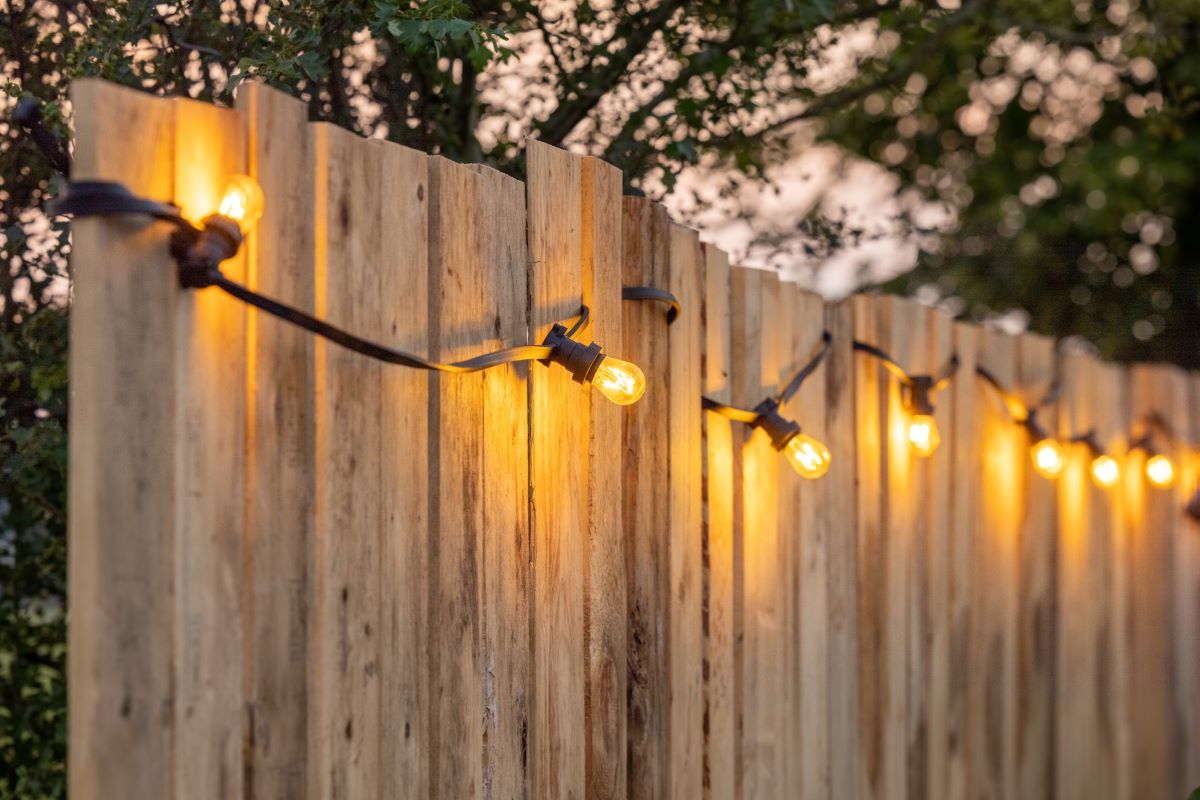
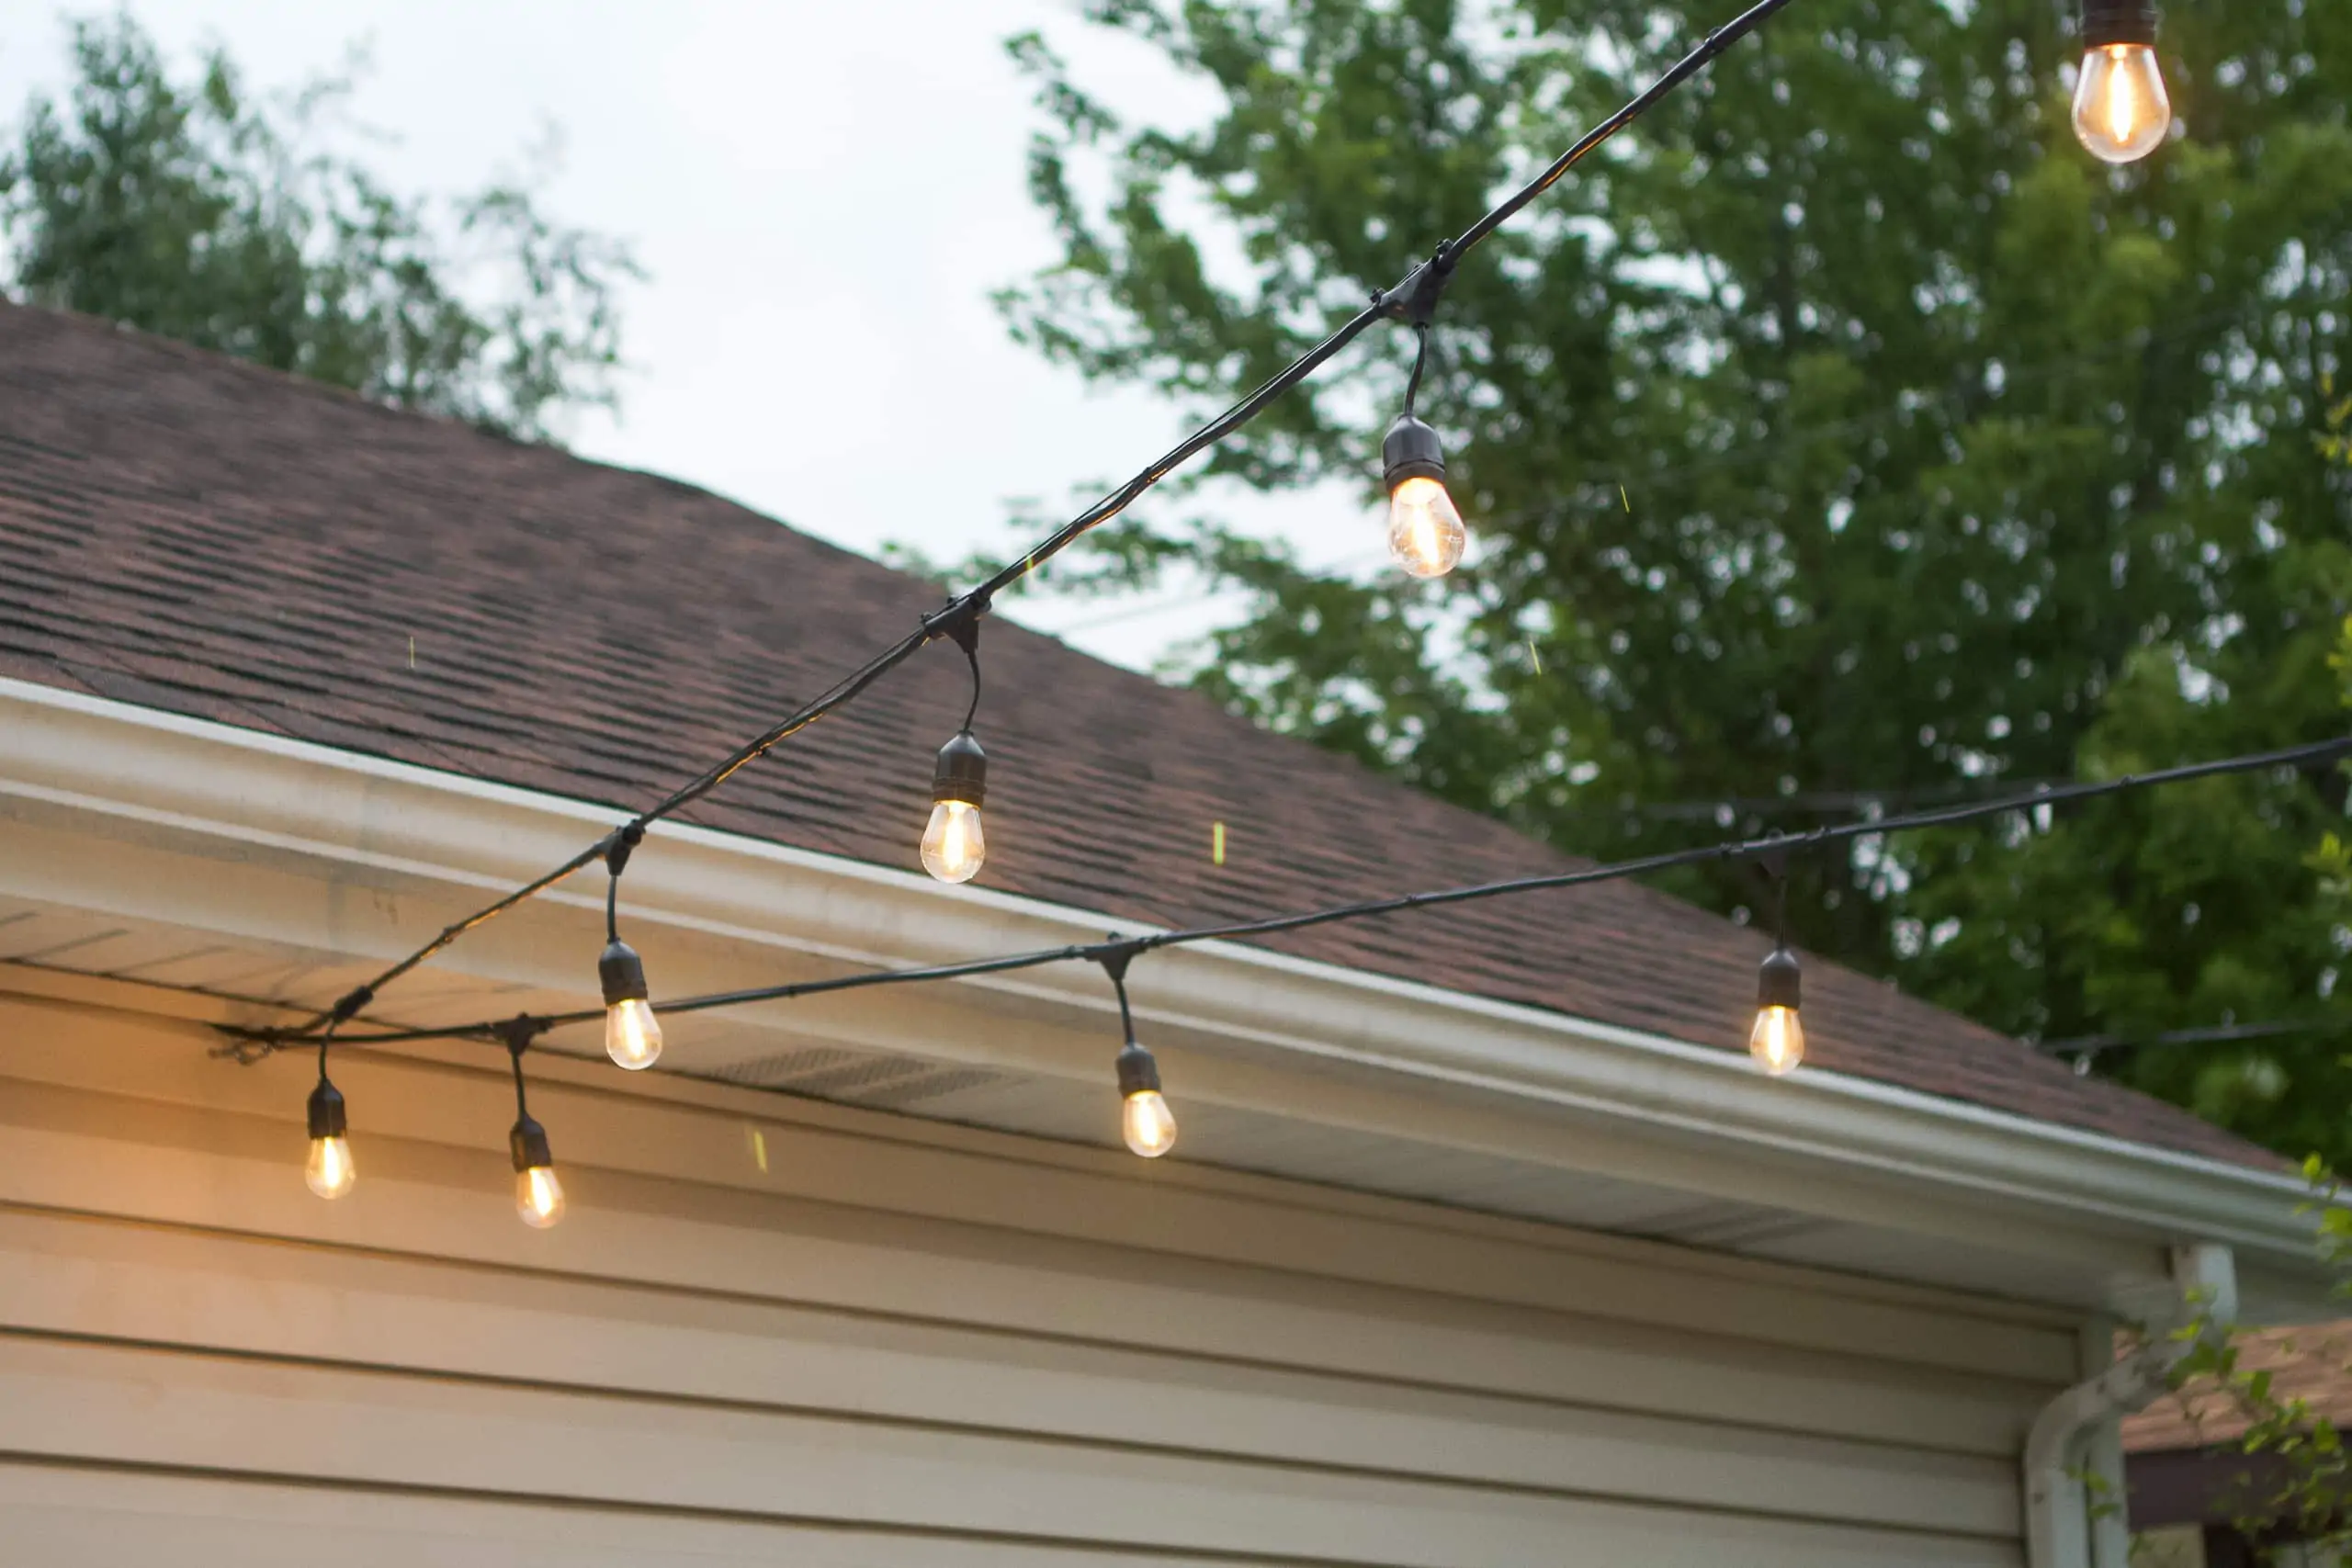
Step 3: Attach String Lights to Support Structures
With the area prepared, it’s time to start attaching the string lights to the support structures you identified during the layout planning phase. Follow these steps to securely fasten the lights:
- Start at the Power Source: Begin by locating the nearest power source and plug in the string lights or connect them to an extension cord. This will ensure you have enough length to reach all the support structures.
- Hang the Lights: Choose a support structure to start with and attach the lights using hooks or clips. Start at one end and string the lights along the desired path, gently securing them in place as you go. Adjust the spacing between each bulb according to your preference.
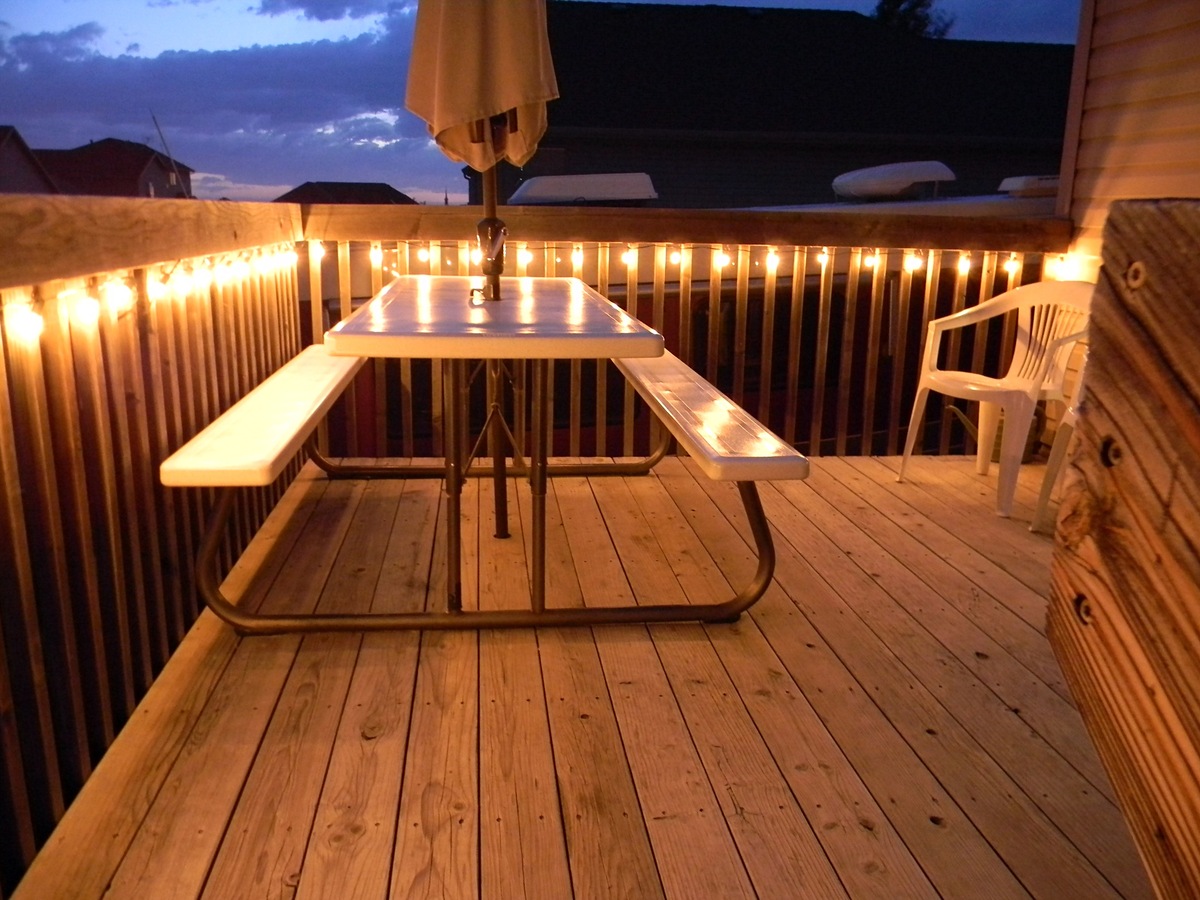
- Vary the Height: For a visually appealing display, vary the heights at which you hang the lights. This can create depth and add interest to your patio area. Consider hanging some lights higher and others lower to create a cascading effect.
- Secure the Lights: As you hang the lights, ensure they are securely attached to the support structures. Use additional hooks or clips as needed to prevent the lights from sagging or drooping. If necessary, use zip ties or twist ties to secure any excess wire and keep it neatly in place.
- Continue to Other Support Structures: Once you have finished attaching the lights to one support structure, move on to the next one and repeat the process. Follow your planned layout to maintain consistency and ensure even lighting distribution.
Throughout this process, step back occasionally to assess the overall lighting effect and make any necessary adjustments to achieve the desired appearance. Once all the lights are securely attached, you’re ready to move on to the next step: securing and hanging the lights.
Step 4: Secure and Hang the Lights
Now that the string lights are attached to the support structures, it’s time to secure and hang them in place. Follow these steps to ensure that the lights are safely and securely installed:
- Double-Check Attachments: Before fully securing the lights, double-check all the hooks or clips to ensure they are securely holding the string lights in place. Adjust any attachments that may need reinforcement.
- Tighten Zip Ties or Twist Ties: If you used zip ties or twist ties to secure any excess wire, make sure they are tightened properly. Trim any excess ties as needed to maintain a neat and tidy appearance.
- Ensure Proper Support: Confirm that the support structures are able to handle the weight of the lights. Make any necessary adjustments or additions to reinforce the support, especially if you’re expecting any wind or adverse weather conditions.
- Check for Sagging: Examine the string lights to see if they are sagging in any areas. If you notice any sagging, gently lift and adjust the lights to create a taut line. This will help ensure a clean and uniform appearance.
- Secure with Clips or Hooks: Once you are satisfied with the position of the lights, secure them in place using additional hooks or clips. This will help prevent any accidental dislodging or movement of the lights.
- Test Stability: Give the lights a gentle tug or shake to ensure they are securely hung. If any lights feel loose or unstable, readjust the attachments or reinforce them to provide a stable and safe installation.
With the string lights securely hung and properly supported, you can move on to the next step: connecting the lights and testing them.
Step 5: Connect the Lights and Test Them
Now that the string lights are securely hung, it’s time to connect them and test their functionality. Follow these steps to ensure that your patio lights are working perfectly:
- Ensure the Power Is Off: Before connecting the lights, make sure the power is turned off to avoid any electrical accidents or mishaps.
- Double-Check the Connections: Verify that all the connections between the string lights and power source are secure. Ensure that each light socket is properly aligned with the corresponding bulb.
- Turn on the Power: Flip the power switch or turn on the circuit breaker to supply electricity to the lights. Check if the lights turn on and if any bulbs are not functioning.
- Replace Faulty Bulbs: If you come across any bulbs that are not lighting up, carefully replace them with new ones. Make sure to use bulbs of the same type, wattage, and color to maintain consistency.
- Test Different Lighting Modes (If Applicable): If your patio lights have different lighting modes, such as steady, twinkling, or fading, test each mode to ensure they are functioning as expected.
- Inspect the Overall Lighting Effect: Step back and observe the overall lighting effect. Check for any areas where the lights may be too dim or too bright. Make any necessary adjustments to achieve the desired ambiance.
Remember to exercise caution when handling electricity and to follow proper safety precautions. If you encounter any electrical issues or difficulties during the testing process, it’s advisable to consult a qualified professional.
Once you’re satisfied that the lights are connected and working properly, you can move on to the next step: adjusting and fine-tuning the lighting to create the perfect atmosphere.
Step 6: Adjust and Fine-Tune the Lighting
With the patio lights connected and functioning, it’s time to fine-tune the lighting to create the desired atmosphere. Follow these steps to adjust and optimize the lighting:
- Assess the Lighting Levels: Observe the overall brightness of the patio lights and assess whether it aligns with your desired ambiance. If the lights are too bright, consider using dimmer bulbs or adding a dimmer switch to control the intensity.
- Experiment with Bulb Spacing: If you prefer a more dramatic or intimate effect, you can experiment with adjusting the spacing between bulbs. You could try grouping some bulbs closer together or spacing them further apart to achieve the desired lighting pattern.
- Add Additional Lights or Accents: If you feel that certain areas of your patio are not adequately lit, consider adding additional lights or accents. This can include spotlights, lanterns, or candles to enhance specific focal points or create a cozy atmosphere.
- Consider Colored Bulbs or Filters: If you want to create a specific mood or theme, consider using colored bulbs or filters. These can add a playful or romantic touch to your patio lighting, allowing you to customize the ambiance to your preferences.
- Utilize Light Reflectors: If you want to maximize the lighting impact, consider using light reflectors or mirrors strategically placed near the patio lights. These can help bounce and reflect the light, creating a brighter and more spacious feel.
- Experiment with Different Lighting Control: Depending on the type of patio lights you have, you may have various lighting control options. Explore different settings, timers, or remote controls to customize the lighting patterns and effects.
Take your time during this step to find the perfect balance and ambiance for your patio area. Adjusting and fine-tuning the lighting can significantly enhance the overall experience and create a captivating outdoor space.
Once you are satisfied with the lighting adjustments, it’s time for the final step: enjoy your beautifully lit patio!
Read more: How To Light Up An Outdoor Patio
Step 7: Enjoy Your Beautifully Lit Patio
Congratulations! You have now successfully strung up patio lights and fine-tuned the lighting to create an enchanting outdoor space. It’s time to sit back, relax, and enjoy the fruits of your labor. Here are some tips to fully enjoy your beautifully lit patio:
- Create a Cozy Seating Area: Arrange your outdoor furniture in a way that encourages relaxation and conversation. Add cushions, throw blankets, and comfortable seating to make your patio a cozy and inviting space.
- Set the Mood with Music: Enhance the ambiance by playing soft background music or creating a customized playlist that complements the atmosphere you want to create on your patio.
- Add Decorative Accents: Incorporate decorative elements such as outdoor rugs, lanterns, potted plants, and decorative pillows to enhance the visual appeal of your patio. These accents can further elevate the overall aesthetic and create a welcoming atmosphere.
- Host Outdoor Gatherings: Invite friends and family over for outdoor gatherings or intimate dinners under the enchanting lights. The warm and inviting ambiance will create a memorable setting for any social gathering.
- Enjoy Outdoor Activities: Make use of your beautifully lit patio by engaging in various outdoor activities. From stargazing and reading a book to enjoying a cup of tea or practicing yoga, the serene environment will provide the perfect backdrop for relaxation and leisure.
- Consider Seasonal Decorations: If you love celebrating different seasons or holidays, take advantage of the string lights by incorporating seasonal decorations. From festive ornaments during the holidays to colorful flowers during spring, these additions will enhance the seasonal charm of your patio.
- Maintain and Store the Lights: Regularly inspect the lights for any damage or malfunction and replace any faulty bulbs promptly. When the season is over, carefully remove and store the lights in a dry and protected place to ensure their longevity.
By following these tips, you’ll be able to fully enjoy the beauty and ambiance of your beautifully lit patio throughout the year. So grab a drink, gather loved ones, and bask in the magical atmosphere you’ve created!
Frequently Asked Questions about How To String Up Patio Lights
Was this page helpful?
At Storables.com, we guarantee accurate and reliable information. Our content, validated by Expert Board Contributors, is crafted following stringent Editorial Policies. We're committed to providing you with well-researched, expert-backed insights for all your informational needs.


0 thoughts on “How To String Up Patio Lights”