Articles
How To Hide Ugly Ceiling
Modified: October 28, 2024
Learn effective techniques and creative solutions in our articles on how to hide an ugly ceiling. Transform your space with easy tips and ideas.
(Many of the links in this article redirect to a specific reviewed product. Your purchase of these products through affiliate links helps to generate commission for Storables.com, at no extra cost. Learn more)
Introduction
When it comes to home interiors, the ceiling often gets overlooked. It’s a part of the room that we don’t pay much attention to until it becomes an eyesore. Whether it’s due to outdated design, water damage, or simply a lack of visual appeal, an ugly ceiling can bring down the aesthetic of an entire space.
The good news is that there are solutions available to hide those unsightly ceilings and transform them into something beautiful. In this article, we will explore various options that will help you revamp your ceiling and give your room a fresh new look. From simple cosmetic fixes to more elaborate installations, there’s sure to be a solution that suits your style and budget.
Before diving into the different ways to hide an ugly ceiling, it’s important to assess the problem and understand what you’re trying to achieve. Are you looking to cover up stains or cracks? Do you want to add texture or architectural details? Or perhaps you simply want to change the color to create a more cohesive look?
By identifying your specific needs, you can choose the most appropriate solution that addresses your concerns and enhances the overall aesthetic of your room. Let’s explore the various options available to hide an ugly ceiling and elevate your space.
Key Takeaways:
- Transform your ugly ceiling into a stunning feature by painting, installing tiles, using fabric panels, employing molding, creating architectural details, installing a suspended ceiling, or adding lighting fixtures. Each option offers a unique way to hide imperfections and enhance your space.
- Consider your budget, DIY skills, aesthetic preferences, timeframe, and maintenance requirements when choosing the right solution to hide your ugly ceiling. Whether it’s a quick paint job or a more elaborate installation, there’s a solution to suit every need and style.
Read more: How To Hide An Ugly Fence
Assessing the Problem
Before you decide on a solution to hide your ugly ceiling, it’s important to assess the problem. Take a close look at your ceiling and identify the issues that need to be addressed. This will help you determine the best course of action and ensure that you choose a solution that effectively resolves the problem.
Here are a few common issues that you might come across when dealing with an ugly ceiling:
- Stains and discoloration: If your ceiling has water stains, smoke stains, or general discoloration, you’ll want to consider a solution that provides full coverage and hides these imperfections.
- Cracks and popcorn texture: If your ceiling has cracks or is covered in outdated popcorn texture, you’ll want a solution that can either cover up these flaws or help create a smoother appearance.
- Lack of visual interest: If your ceiling is plain and lacks visual appeal, you might want to explore options that add texture, pattern, or architectural details to create a more interesting and dynamic look.
- Low ceiling height: If your ceiling height is lower than desired, you’ll want to choose a solution that doesn’t further diminish the vertical space, while still providing a visually appealing result.
By evaluating the specific issues with your ceiling, you can narrow down the options and choose a solution that effectively addresses your concerns. Keep in mind that the chosen solution should not only hide the flaws but also complement the overall style and decor of the room.
Now that you have a clear understanding of the problems with your ceiling, let’s explore the various solutions available to hide your ugly ceiling and transform it into a visually appealing element of your room’s design.
Choosing the Right Solution
When it comes to hiding an ugly ceiling, there are several solutions to choose from. Each option offers its own unique benefits and considerations, so it’s important to choose the one that best fits your needs, budget, and style preferences.
Here are some factors to consider when selecting the right solution:
- Budget: Determine how much you are willing to spend on improving your ceiling. Some solutions may be more budget-friendly than others, so it’s essential to consider your financial limitations.
- DIY vs. Professional Installation: Evaluate your DIY skills and the complexity of the solution. Some options are easily doable as a DIY project, while others may require professional expertise for a successful installation.
- Aesthetic Appeal: Consider the style and overall design of your room. Choose a solution that complements the existing decor and enhances the overall aesthetic appeal.
- Timeframe: Determine how quickly you want to complete the project. Some solutions may take longer to install or require more extensive preparation, so take this into account when making your decision.
- Maintenance: Consider the maintenance requirements of each solution. Some options may require regular cleaning or upkeep, while others may be relatively low-maintenance.
By carefully considering these factors, you can narrow down your options and choose the right solution that ticks all the boxes. Now, let’s explore some of the most popular solutions for hiding an ugly ceiling and transform your space into something extraordinary.
Option 1: Paint the Ceiling
One of the simplest and most cost-effective ways to hide an ugly ceiling is by painting it. A fresh coat of paint can do wonders in transforming the look of your space and camouflaging minor imperfections. Here’s how to go about it:
- Clean the ceiling: Before painting, make sure to clean the ceiling and remove any dust or debris. This will ensure that the paint adheres properly and provides a smooth finish.
- Choose the right paint: Opt for a high-quality ceiling paint that is specifically designed for this purpose. Consider using a flat or matte finish to help minimize any surface irregularities.
- Prepare the room: Cover the furniture and floor with drop cloths or plastic sheets to protect them from paint splatters. Use painter’s tape to protect the walls and any other adjacent surfaces.
- Apply primer: Depending on the condition of your ceiling, applying a coat of primer may help to achieve better results. Primer can help hide stains, provide better paint adhesion, and create a more consistent color.
- Paint the ceiling: Use a roller or a paint sprayer to apply the paint evenly across the ceiling. Start from one corner and work your way across the room in a systematic pattern. Make sure to apply multiple thin coats for a smooth and even finish.
- Touch up and clean: Once the paint has dried, inspect the ceiling for any missed spots or uneven areas. Touch up as needed and clean up any accidental drips or splatters.
Painting the ceiling not only helps to hide imperfections but also gives you the opportunity to change the color and create a fresh look. Consider using light colors to make the space feel larger and brighter, or use bold hues to add a dramatic touch.
Keep in mind that painting the ceiling can be a time-consuming process, especially if you have a larger room or a textured ceiling. If you’re not comfortable taking on the task yourself, consider hiring a professional painter to ensure a flawless finish.
Next, let’s explore another option that involves installing ceiling tiles to hide the ugly ceiling.
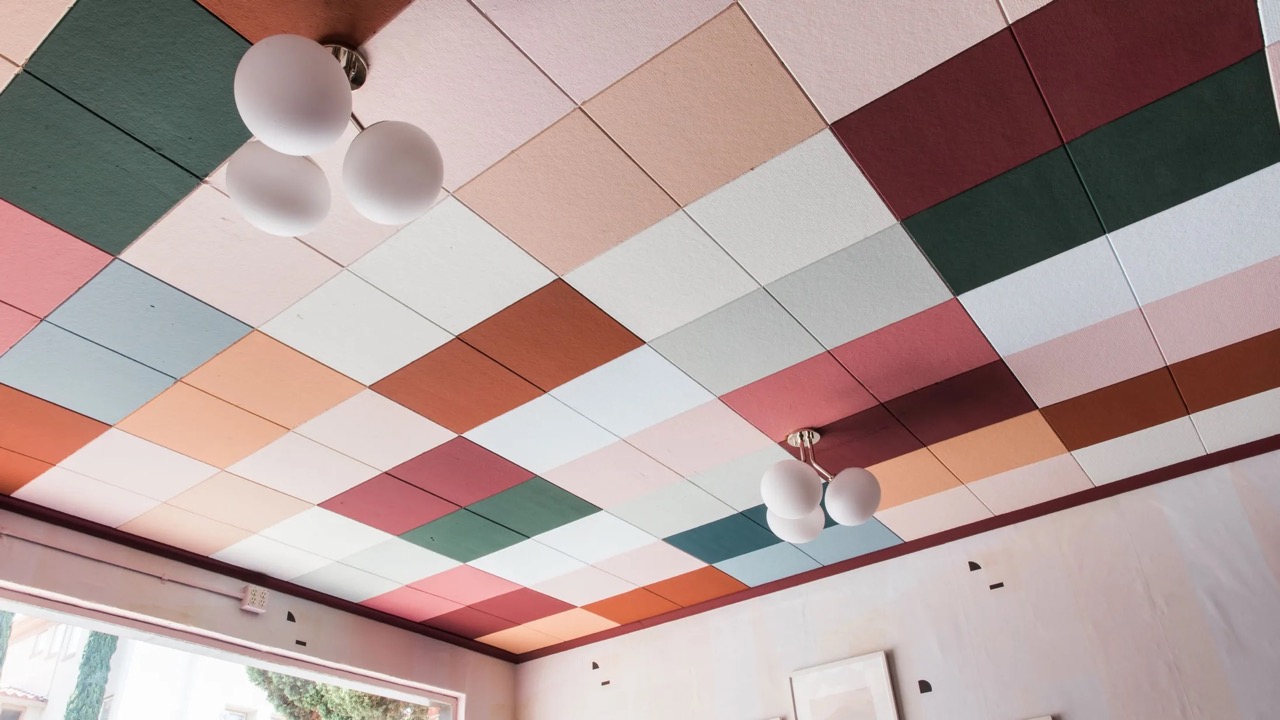
Option 2: Install Ceiling Tiles
If you’re looking for a more decorative solution to hide an ugly ceiling, installing ceiling tiles can be a great option. Ceiling tiles come in a variety of styles, materials, and finishes, allowing you to choose a design that suits your aesthetic preferences. Here’s how to install ceiling tiles:
- Measure the ceiling: Start by measuring the dimensions of your ceiling to determine the number of tiles you’ll need. This will help you calculate the quantity and plan for any cuts or adjustments.
- Choose the right tiles: Select ceiling tiles that complement the style of your room. Consider factors such as material, pattern, color, and texture. Options range from classic pressed metal tiles to modern PVC or foam tiles.
- Prepare the ceiling: Ensure that the ceiling is clean, dry, and free of any loose debris. If necessary, remove any existing light fixtures or protruding elements that may hinder the installation process.
- Begin the installation: Start in one corner of the room and work your way across. Apply adhesive to the back of each tile and press it firmly onto the ceiling, ensuring proper alignment and spacing.
- Make necessary cuts: Use a utility knife or a tile cutter to make any necessary cuts or adjustments to fit the tiles around corners, edges, or light fixtures.
- Complete the installation: Continue installing the tiles in rows, making sure to maintain a consistent pattern and spacing. Use a level and measuring tape to ensure straight lines and even placement.
- Finish the edges: To give the installation a polished look, consider installing edge trim or molding along the perimeter of the ceiling.
Installing ceiling tiles not only covers up an ugly ceiling but also adds texture, depth, and visual interest to the room. It’s a relatively affordable option that can be done as a DIY project with the right tools and materials. However, if you have a large or complex ceiling, it’s advisable to seek professional assistance for a seamless installation.
Now that we’ve explored the option of installing ceiling tiles, let’s move on to another solution: using fabric panels to hide the ugly ceiling.
Read more: How To Hide Beam In The Ceiling
Option 3: Use Fabric Panels
If you’re looking for a soft and elegant solution to hide an ugly ceiling, fabric panels can be a great choice. This option adds texture, warmth, and a touch of luxury to your space. Here’s how you can use fabric panels to transform your ceiling:
- Select the fabric: Choose a fabric that aligns with your desired aesthetic. Consider factors such as color, pattern, texture, and light-blocking capabilities. Opt for lightweight fabrics that are easy to work with and don’t put excessive weight on the ceiling.
- Measure the ceiling: Measure the dimensions of your ceiling to determine the size and number of fabric panels you’ll need. Make sure to account for any obstructions like light fixtures or vents.
- Prepare the panels: Cut the fabric panels to the desired size, leaving some extra fabric to allow for stretching and securing.
- Install a framework: Create a framework using wooden boards or lightweight metal frames. Install them securely onto the ceiling, ensuring that they are level and properly aligned.
- Attach the fabric: Stretch the fabric panels over the framework and secure them in place using staples, adhesive, or a combination of both. Ensure that the fabric is taut and free from wrinkles.
- Add optional enhancements: If desired, enhance the look of the fabric panels by incorporating decorative elements such as trim, buttons, or drapery hardware.
Using fabric panels not only hides an ugly ceiling but also helps to improve acoustics and insulation in the room. It creates a sense of warmth and adds a layer of sophistication to your decor. Keep in mind that fabric panels may require periodic maintenance, such as dusting or spot cleaning, depending on the fabric type.
Before proceeding with this option, make sure to assess the weight limitations of your ceiling. If you have a suspended or lightweight ceiling, consult with a professional to ensure that the structure can support the additional weight of the fabric panels.
Now that we’ve explored using fabric panels, let’s move on to another option: employing decorative molding to hide the ugly ceiling.
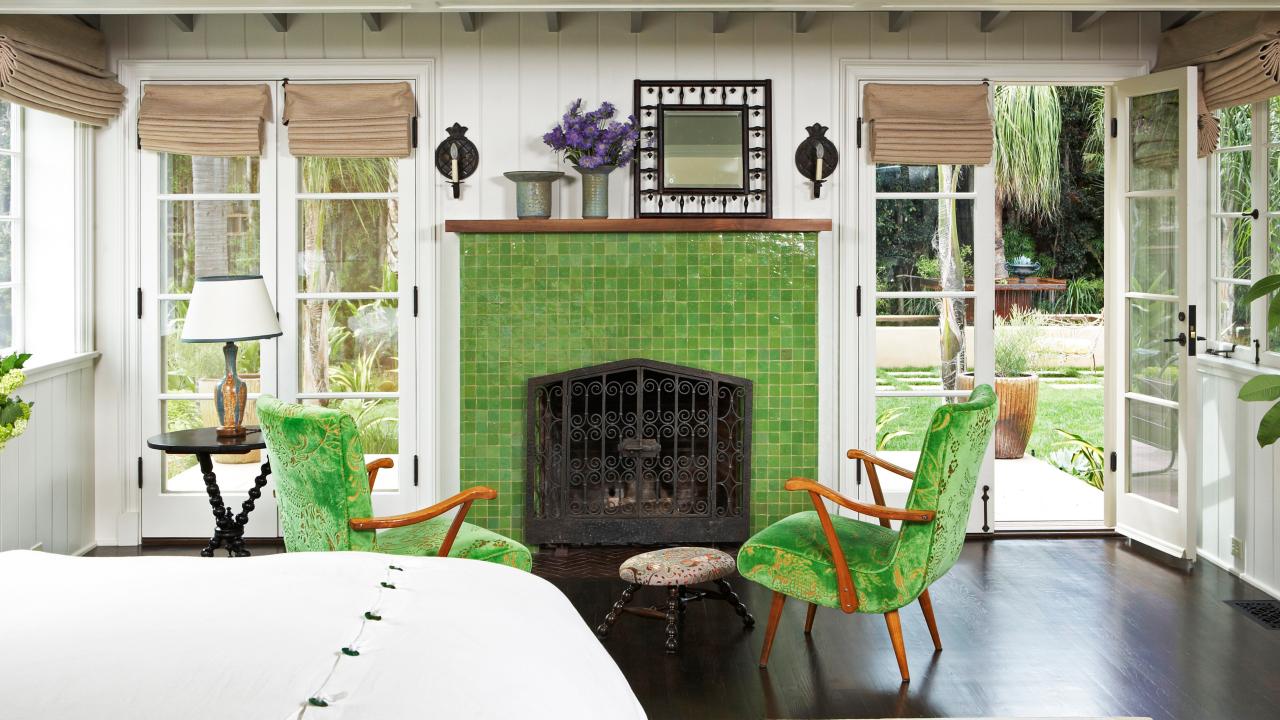
Use decorative ceiling tiles or panels to cover up an ugly ceiling. These can be easily installed and come in a variety of styles to suit your taste.
Option 4: Employ Decorative Molding
If you’re looking to add a touch of elegance and architectural charm to your space while hiding an ugly ceiling, employing decorative molding can be an excellent option. Decorative molding, also known as crown molding or ceiling trim, can transform a plain ceiling into a focal point of the room. Here’s how you can employ decorative molding to enhance your ceiling:
- Choose the right molding: Select a style of molding that complements the overall aesthetic of your room. Consider the architectural style, ceiling height, and existing decor. Options range from simple and minimalistic designs to intricate and ornate patterns.
- Measure and plan: Measure the perimeter of your ceiling and plan the placement of the molding. Take into consideration any corners, angled walls, or ceiling features that may require special attention.
- Prepare the necessary materials: Gather the necessary tools and materials, including the molding, adhesive, nails, a saw, a measuring tape, and a level.
- Install the molding: Cut the molding to the appropriate sizes and angles using a saw. Apply adhesive to the back of the molding and carefully attach it to the ceiling, following your pre-planned layout. Secure the molding with nails for added stability.
- Fill and paint: Fill any gaps or nail holes with wood filler and sand them down to achieve a smooth surface. Then, paint the molding to match the color scheme of the room or choose a contrasting color for a bold statement.
- Optional enhancements: Consider adding additional decorative elements, such as corner blocks, rosettes, or medallions, to further enhance the visual impact of the ceiling molding.
Decorative molding not only adds sophistication and character to your ceiling but also helps to create a seamless transition between the walls and the ceiling. It can visually raise the height of the ceiling, making the room feel more spacious and grand.
While installing decorative molding requires some skill and precision, it can be done as a DIY project with the appropriate tools and materials. However, if you’re not confident in your carpentry skills, it’s recommended to hire a professional to ensure a flawless installation.
Now that we’ve explored employing decorative molding, let’s move on to another option: installing a suspended ceiling.
Option 5: Install a Suspended Ceiling
If you’re dealing with an extremely damaged or unsightly ceiling, or if you’re looking for a complete overhaul of the space, installing a suspended ceiling can be an effective solution. A suspended ceiling, also known as a drop ceiling or a false ceiling, is a secondary ceiling that is hung below the original ceiling, hiding any imperfections and providing a clean and uniform look. Here’s how to install a suspended ceiling:
- Plan and measure: Assess the dimensions of the room and determine the placement of the suspended ceiling. Consider factors such as lighting fixtures, HVAC vents, and any other ceiling fixtures that need to be accommodated.
- Prepare the materials: Gather the necessary materials, including ceiling tiles, suspension wires, metal main runners, cross tees, and any additional accessories like insulation or soundproofing material.
- Create the framework: Install the metal main runners along the perimeter of the room, ensuring they are level and securely attached to the walls. Then, connect the cross tees to the main runners, creating a grid-like framework.
- Install the suspension wires: Attach suspension wires to the existing ceiling or joists, ensuring they are evenly spaced and properly aligned with the grid pattern.
- Place the ceiling tiles: Insert the ceiling tiles into the grid, carefully aligning them and making necessary cuts to accommodate fixtures or obstructions. Make sure the tiles fit snugly within the grid without any gaps.
- Install lighting and fixtures: If desired, add recessed lighting, pendant lights, or other fixtures within the suspended ceiling. Consult with an electrician for proper installation and compliance with building codes.
A suspended ceiling not only hides an ugly ceiling but also offers practical benefits such as improved acoustics, thermal insulation, and easy access to utilities above the ceiling. It provides a clean and finished look to the room and allows for effortless maintenance and repairs.
Installing a suspended ceiling can be a complex project that may require the help of professionals, especially when dealing with large or intricate spaces. It involves precise measurements, proper installation of the grid, and careful handling of the ceiling tiles.
Now that we’ve explored installing a suspended ceiling, let’s move on to another option that involves incorporating architectural details to hide the ugly ceiling.
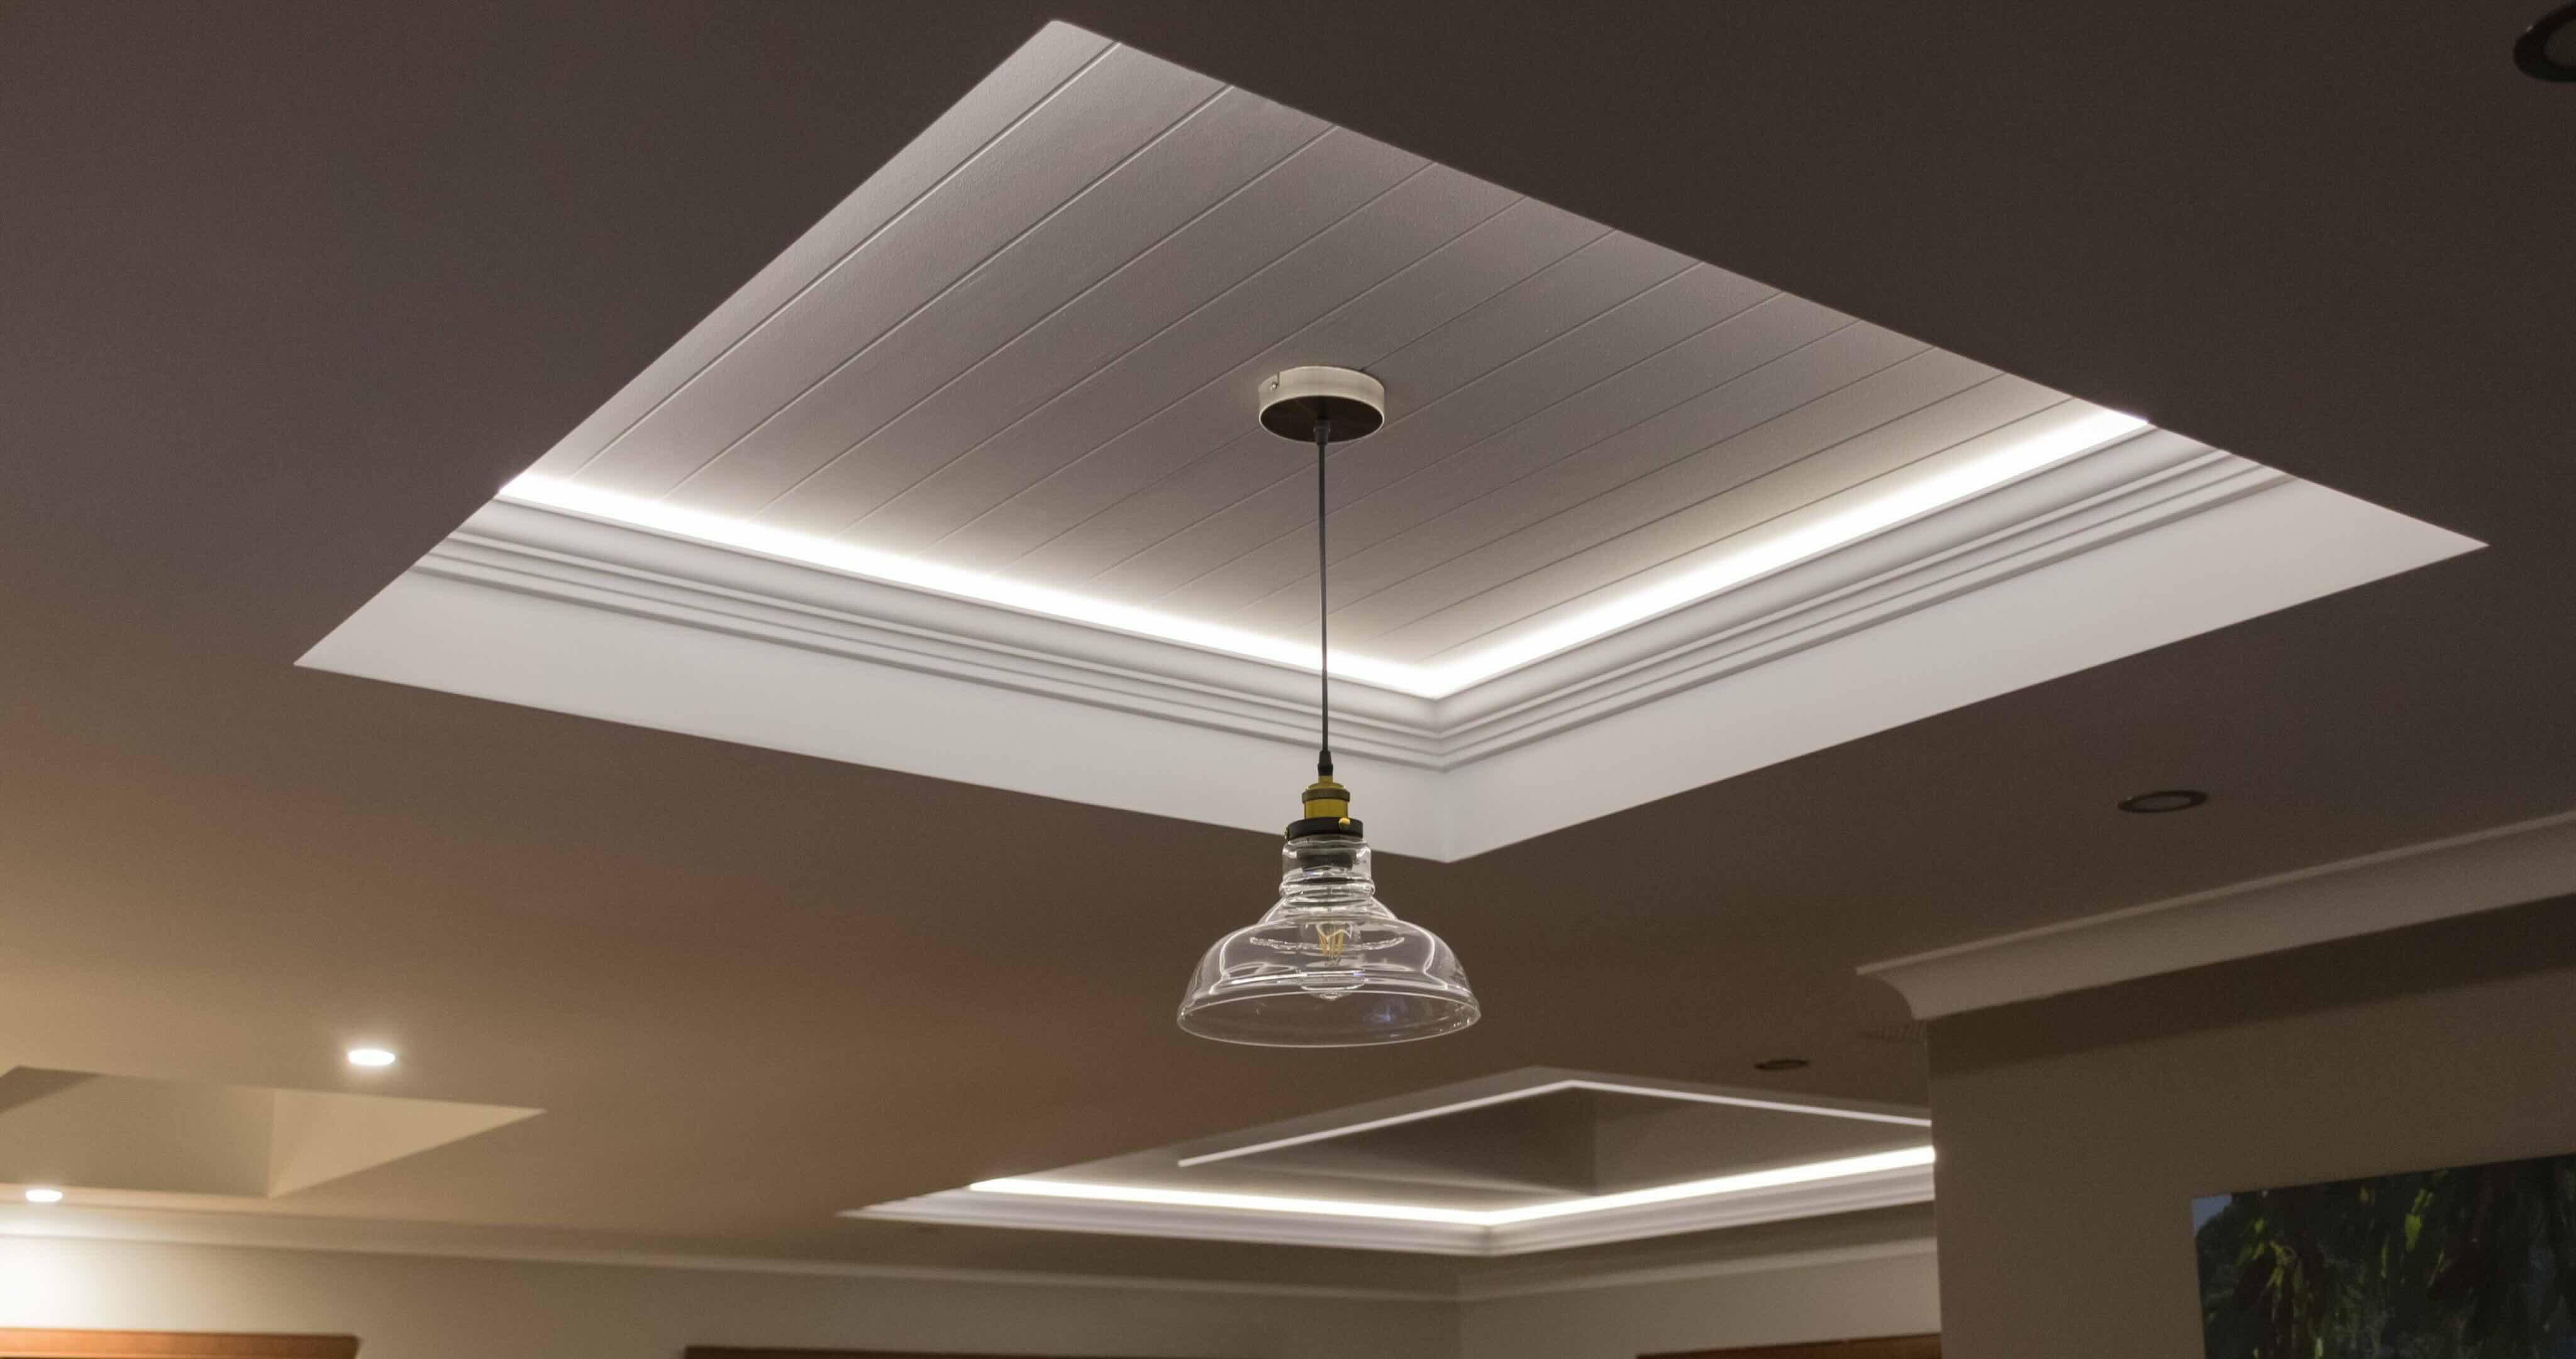
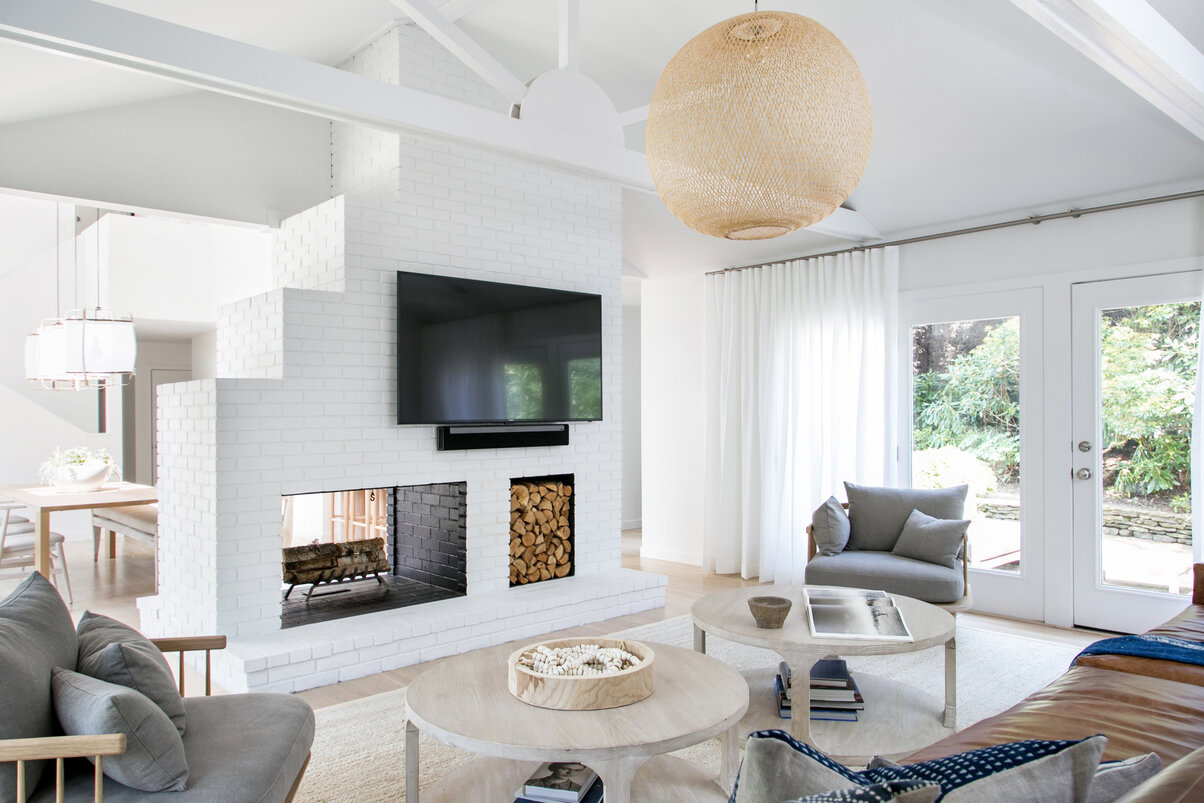
Option 6: Incorporate Architectural Details
One way to hide an ugly ceiling and add character to your space is by incorporating architectural details. These details can include ornate beams, coffered ceilings, or even creating a tray ceiling effect. By adding these architectural elements, you can transform your ceiling into a captivating focal point. Here’s how you can incorporate architectural details:
- Identify the desired architectural detail: Determine the type of architectural detail that best suits your room and design preferences. Look for inspirations and consider the architectural style of your space.
- Consult with professionals: If the architectural detail you desire involves structural changes or modifications, it’s best to consult with architects or contractors to ensure feasibility and compliance with building codes.
- Choose appropriate materials: Select high-quality materials that match the desired architectural style. This can include wood for beams, gypsum or plaster for molding, or even faux finishes for a cost-effective option.
- Plan the layout: Take measurements and plan the placement of the architectural elements. Consider factors such as room dimensions, existing ceiling fixtures, and focal points within the room.
- Install the architectural details: Follow the appropriate installation methods for each specific detail. This might involve attaching beams to the ceiling with hardware, applying molding or trim in desired patterns, or constructing a tray ceiling with drywall and framing.
- Finishing touches: Once the architectural details are installed, ensure that they are properly finished and painted to enhance their visual appeal. Consider using contrasting colors or staining to accentuate the details.
Incorporating architectural details can elevate the style and character of your space, drawing the eye upward and creating a sense of grandeur. These details can work with various design styles, from traditional to modern, and they allow you to personalize your space and make a statement.
Note that incorporating architectural details may require professional assistance, especially if structural changes or modifications are involved. It’s important to work with experienced contractors or architects to ensure the safety and integrity of the project.
Now that we’ve explored incorporating architectural details, let’s move on to another option: adding lighting fixtures to hide the ugly ceiling.
Read more: How To Hide A Ceiling Light Cord
Option 7: Add Lighting Fixtures
Adding lighting fixtures to your ceiling is not only a functional solution but also a great way to hide an ugly ceiling. Well-placed lighting can draw attention away from imperfections and create a visually appealing ambiance in your space. Here’s how you can add lighting fixtures to enhance your ceiling:
- Evaluate the space: Assess the size, layout, and function of the room to determine the type and placement of lighting fixtures that will best suit your needs.
- Choose the right fixtures: Select lighting fixtures that complement the overall style and design of your space. Consider options such as recessed lights, track lights, pendant lights, or chandeliers.
- Plan the location: Determine where you want to place the lighting fixtures on your ceiling. Consider the positioning in relation to furniture, focal points in the room, and any existing electrical wiring.
- Install the lighting: If you’re comfortable with electrical work, you can install the lighting fixtures yourself by following the manufacturer’s instructions and adhering to local electrical codes. Otherwise, it’s best to hire a licensed electrician.
- Consider dimmers and controls: Install dimmer switches or lighting controls to adjust the brightness of the fixtures based on your preferences and the desired mood for different occasions.
- Use lighting to highlight architectural features: Strategically place the lighting fixtures to showcase architectural details or create focal points on the ceiling. This can divert attention from any imperfections.
- Experiment with different lighting techniques: Explore techniques like uplighting, downlighting, or wall-washing to create visual interest and add depth to your space.
Adding lighting fixtures not only distracts from an ugly ceiling but also enhances the overall atmosphere of the room. It allows you to control the mood and brightness levels, creating a comfortable and inviting environment. Additionally, well-placed lighting fixtures can highlight other attractive features in the room, such as artwork or architectural elements.
Remember to follow proper safety protocols when working with electricity and consult with professionals if you’re unsure about any aspect of the installation. Hiring a licensed electrician can ensure that the lighting fixtures are installed correctly and safely.
Now that we’ve explored the option of adding lighting fixtures, let’s summarize the different solutions discussed to transform your ugly ceiling into a beautiful asset.
Conclusion
An ugly ceiling can detract from the overall beauty and appeal of a room, but fortunately, there are various options available to hide and transform it into a stunning feature. By assessing the specific issues with your ceiling and considering your budget, style preferences, and DIY skills, you can select the right solution to achieve your desired outcome.
If you’re looking for a quick fix that can make a significant impact, painting the ceiling with a fresh coat of paint can do wonders. It’s a budget-friendly option that allows you to change the color and create a cohesive look in the room.
For a more decorative approach, you can consider installing ceiling tiles or using fabric panels. Ceiling tiles come in a range of styles and materials, allowing you to choose a design that suits your aesthetic. Fabric panels, on the other hand, add a soft and elegant touch, creating a warm and luxurious ambiance in the space.
If you’re willing to invest in a more elaborate solution, you can opt for incorporating architectural details or installing a suspended ceiling. Architectural details, such as decorative molding or beams, add sophistication and visual interest to the ceiling. A suspended ceiling, on the other hand, offers a complete transformation by providing a clean and uniform look while offering practical benefits such as improved acoustics and easy access to utilities.
Adding lighting fixtures is another fantastic way to hide an ugly ceiling. Well-placed lighting can draw attention away from imperfections while creating a beautiful ambiance in the room. Explore different types of fixtures, such as recessed lights or pendant lights, to achieve the desired effect.
Each of these options has its own merits, and the right choice will depend on your specific needs and preferences. Remember to consider factors such as budget, DIY vs. professional installation, aesthetic appeal, timeframe, and maintenance requirements when making your decision.
Whether you choose to paint, install tiles, use fabric panels, employ molding, create architectural details, install a suspended ceiling, or add lighting fixtures, the key is to transform your ugly ceiling into a visually appealing asset that enhances the overall beauty of your space.
So don’t let an unattractive ceiling bring down the aesthetic of your room. With the right solution and a little bit of creativity, you can hide that eyesore and create a space that is both visually stunning and functional.
Frequently Asked Questions about How To Hide Ugly Ceiling
Was this page helpful?
At Storables.com, we guarantee accurate and reliable information. Our content, validated by Expert Board Contributors, is crafted following stringent Editorial Policies. We're committed to providing you with well-researched, expert-backed insights for all your informational needs.


0 thoughts on “How To Hide Ugly Ceiling”