Articles
How To Install A Bay Window
Modified: October 18, 2024
Learn how to install a beautiful bay window with our informative articles. Discover step-by-step guides and tips for a successful installation.
(Many of the links in this article redirect to a specific reviewed product. Your purchase of these products through affiliate links helps to generate commission for Storables.com, at no extra cost. Learn more)
Introduction
Welcome to our comprehensive guide on how to install a bay window. Bay windows can be a beautiful addition to any home, providing ample natural light and creating a sense of space and openness. However, the installation process can be a bit daunting for beginners. But fear not! In this article, we will take you through each step of the installation process, ensuring a successful and rewarding project.
Before we dive into the details, let’s briefly go over what a bay window is. A bay window is a combination of three or more windows that project outward from the main wall of a building, creating a visually appealing alcove or bay. These windows are typically curved or angled, allowing for a panoramic view and increased natural light. Installing a bay window can not only enhance the aesthetics of your home but also increase its value and energy efficiency.
In order to successfully install a bay window, you will need to gather some essential tools and materials. Let’s take a look at what you will need:
Key Takeaways:
- Proper preparation is key. Measure, plan, and prepare the opening meticulously to ensure a seamless and successful bay window installation. Attention to detail at this stage sets the foundation for a beautiful end result.
- The devil is in the details. From securing the frame to adding finishing touches, every step in the installation process contributes to the functionality, energy efficiency, and aesthetic appeal of your bay window. Paying attention to each detail ensures a rewarding outcome.
Read more: How To Trim A Bay Window
Tools and Materials Needed
- Tape measure
- Pencil
- Level
- Saw
- Hammer
- Drill
- Screwdriver
- Caulk gun
- Insulation
- Sealant
- Window installation kit
- Safety glasses
- Gloves
Now that you have gathered all the necessary tools and materials, it’s time to move on to the first step: measuring and planning for your bay window installation. Stay tuned!
Key Takeaways:
- Proper preparation is key. Measure, plan, and prepare the opening meticulously to ensure a seamless and successful bay window installation. Attention to detail at this stage sets the foundation for a beautiful end result.
- The devil is in the details. From securing the frame to adding finishing touches, every step in the installation process contributes to the functionality, energy efficiency, and aesthetic appeal of your bay window. Paying attention to each detail ensures a rewarding outcome.
Read more: How To Trim A Bay Window
Tools and Materials Needed
Before you begin the installation process, it’s important to ensure you have all the necessary tools and materials. Here is a comprehensive list of what you will need:
- Tape measure: You will need a tape measure to accurately measure the dimensions of the space where the bay window will be installed. This will help you determine the appropriate size for your window and frame.
- Pencil: A pencil will be used to mark the measurements on the wall and frame, ensuring precise cuts and placement.
- Level: A level is essential for ensuring that your window frame is installed correctly and is perfectly level. This will prevent any issues with the functionality and aesthetics of the bay window.
- Saw: Depending on the materials you are working with, you may need a saw to make any necessary cuts to the frame or wall. A saw with a fine-tooth blade is recommended for cleaner and more precise cuts.
- Hammer: A hammer will be used to secure the frame and any necessary hardware. It’s important to have a sturdy and reliable hammer for this task.
- Drill: A drill will be needed to create pilot holes for screws and to attach the window frame to the wall. Make sure you have the appropriate drill bits for the materials you are working with.
- Screwdriver: You will need a screwdriver to tighten screws and secure the frame. Consider using a power screwdriver or drill with a screwdriver bit for faster and more efficient installation.
- Caulk gun: A caulk gun will be used to apply caulk around the edges of the bay window, preventing any drafts or leaks. Choose a caulk gun that is compatible with the type of caulk you will be using.
- Insulation: Insulation is crucial for energy efficiency and preventing drafts. Make sure you have the appropriate insulation material for your specific needs and the size of your window frame.
- Sealant: A quality sealant will help to seal any gaps or cracks around the window frame, providing an airtight and watertight seal. Look for a sealant that is weather-resistant and suitable for the materials you are working with.
- Window installation kit: Depending on the specific manufacturer instructions, you may need a window installation kit that includes components such as brackets, screws, and flashing. This will ensure a secure and proper installation.
- Safety glasses: Safety should always be a priority when working with tools and materials. Wear safety glasses to protect your eyes from any debris or flying particles.
- Gloves: Gloves provide protection and improve your grip when handling sharp tools and materials. Choose gloves that are comfortable and suitable for the tasks involved in the installation process.
Having all the necessary tools and materials ready before you start the installation process will save you time and ensure a smooth and successful project. Now that you have everything prepared, it’s time to move on to the next step: measuring and planning for your bay window installation. Stay tuned!
Step 1: Measuring and Planning
Before you start the installation process, it’s crucial to measure the space where the bay window will be installed and carefully plan out the placement and dimensions. Here’s a step-by-step guide on how to measure and plan for your bay window installation:
- Measure the width and height: Use a tape measure to measure the width and height of the opening where the bay window will be installed. Measure from the inside of the existing frame or from the rough opening if there is no frame. It’s important to measure accurately to ensure that the bay window will fit perfectly.
- Determine the window style: Decide on the style of your bay window. Common styles include angled bay, box bay, and bow bay. Each style has its own unique appearance and functionality. Consider factors such as the architectural style of your home and the desired aesthetic effect when selecting a window style.
- Create a rough sketch: Make a rough sketch of the bay window, including the dimensions and the placement within the room. This will help you visualize how the window will look and ensure that it fits well in the space.
- Consider the view: Take into account the view from the bay window. Position the window in a way that maximizes the view and complements the overall layout and design of the room.
- Check for any structural considerations: Inspect the wall where the bay window will be installed for any structural obstacles or considerations. Check for electrical wiring, plumbing, or any load-bearing elements that may require adjustments before the installation.
- Consult a professional if needed: If you are unsure about any aspect of the measuring and planning process, it’s always a good idea to consult with a professional. They can provide guidance and expertise to ensure a successful installation.
Taking the time to measure accurately and plan out the placement and style of your bay window is crucial for a seamless installation process. It allows you to visualize the end result and address any potential challenges before starting the actual installation. Now that you have measured and planned for your bay window, let’s move on to the next step: preparing the opening. Stay tuned!
Step 2: Preparing the Opening
Now that you have measured and planned for your bay window, it’s time to prepare the opening where the window will be installed. Properly preparing the opening is crucial to ensure a secure and seamless installation. Follow these steps to prepare the opening:
- Clear the area: Remove any furniture, curtains, or blinds near the opening to create a clear workspace. This will make it easier to maneuver and install the window.
- Remove the existing window (if applicable): If there is an existing window in the opening, carefully remove it following the manufacturer’s instructions. Use a screwdriver or pry bar to remove any screws or nails holding the window in place. Be cautious not to damage the surrounding structure.
- Clean the opening: Thoroughly clean the opening, removing any dirt, debris, or old caulk. A clean surface will ensure better adherence of the new window and prevent any issues with the sealing process.
- Inspect the opening: Carefully inspect the opening for any damage or rot. Repair and reinforce any damaged areas using appropriate materials and techniques. This will provide a solid foundation for the installation.
- Check the opening’s dimensions: Double-check the measurements of the opening to ensure that it matches the required size for your bay window. Make any necessary adjustments or modifications to the opening if needed.
- Install flashing: Install weather-resistant flashing along the perimeter of the opening. This will provide added protection against water infiltration and ensure the longevity of the bay window.
- Apply a bead of caulk: Apply a bead of caulk around the edges of the opening. This will create an airtight seal and prevent drafts and leaks.
By properly preparing the opening, you are setting the stage for a successful installation and ensuring the longevity and efficiency of your bay window. With the opening prepped, we can now move on to the next step: installing the frame. Stay tuned!
When installing a bay window, make sure to properly measure the opening and ensure it is level before securing the window in place. This will help prevent any future issues with the window’s operation or appearance.
Read more: How To Measure Bay Windows For Blinds
Step 3: Installing the Frame
With the opening prepared, it’s time to move onto the next step: installing the frame for your bay window. The frame provides the structure and support for the window, ensuring a secure and proper fit. Follow these steps to successfully install the frame:
- Position the frame: Carefully position the frame in the opening, ensuring it is level and centered. Use a level to check both horizontally and vertically for proper alignment.
- Secure the frame: Once the frame is properly positioned, secure it in place. Use shims to create even spacing between the frame and the opening, ensuring it is tightly fit. Use screws or nails to secure the frame to the surrounding structure. Be sure to follow the manufacturer’s guidelines for recommended fasteners and placement.
- Check for levelness and squareness: Double-check the levelness and squareness of the frame. Adjust the shims as necessary to maintain a level and square frame. This step is crucial for the proper functioning of the bay window.
- Insulate the frame: Apply insulation around the frame to improve energy efficiency and minimize drafts. Use a suitable insulation material and ensure it is properly and evenly installed.
- Secure the corners: Pay special attention to securing the corners of the frame. Use corner brackets or reinforcement plates to provide added strength and stability.
- Verify the stability: Once the frame is secured and insulated, verify its stability and solidity. Gently apply pressure to ensure that the frame is well-supported and doesn’t shift or move.
Installing the frame is a critical step in the bay window installation process. Take your time to ensure proper alignment, levelness, and secure attachment. With the frame in place, we are now ready to move onto the next step: securing the window. Stay tuned!
Step 4: Securing the Window
Now that the frame is securely installed, it’s time to move on to the next step: securing the window in place. This step ensures that the window is properly anchored within the frame, providing stability and functionality. Follow these steps to securely install and secure the window:
- Prepare the window: If your bay window comes in separate pieces, assemble the window according to the manufacturer’s instructions. This may include attaching the sashes, mullions, and hardware.
- Place the window: Carefully place the window into the frame, ensuring that it is properly aligned and seated. Use shims to create even spacing between the window and the frame. This will help to provide a secure fit.
- Secure the window in place: Use screws or fasteners provided by the manufacturer to secure the window to the frame. Follow the specific instructions for your window type and ensure that the window is tightly secured.
- Test the window: Open and close the window to ensure smooth operation. Check for any issues with the movement or alignment and make necessary adjustments if needed.
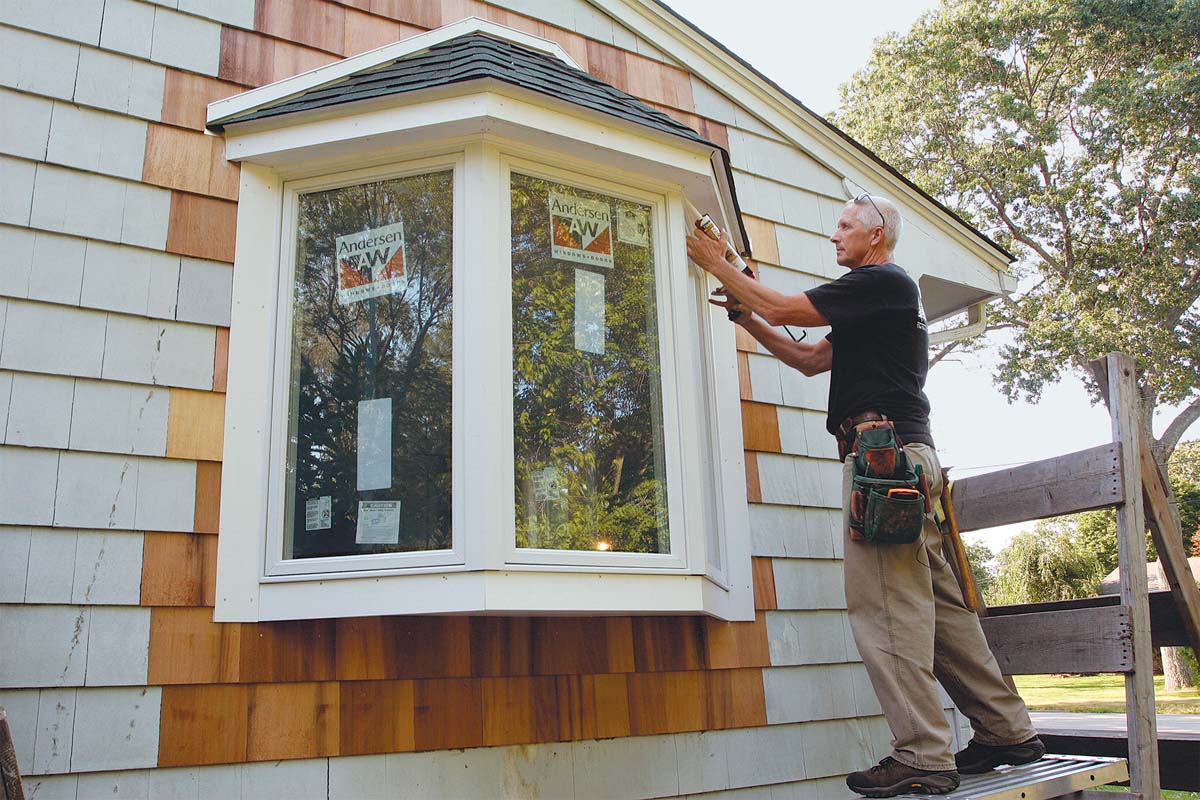
- Apply weatherproofing sealant: Apply a bead of weatherproofing sealant along the edges of the window, where it meets the frame. This will create a watertight seal and prevent any drafts or leaks.
- Check for proper insulation: Inspect the window for any gaps or areas where insulation may be compromised. Apply additional insulation if necessary to ensure energy efficiency and minimal air infiltration.
Securing the window is a crucial step to ensure the functionality and longevity of your bay window. Take your time to properly install the window and verify its stability and operation. With the window securely in place, we can now move on to the next step: insulating and sealing. Keep following along!
Step 5: Insulating and Sealing
Now that your bay window is securely installed, it’s time to focus on insulating and sealing the window. This step is essential for improving energy efficiency, preventing drafts, and ensuring a comfortable and secure interior environment. Follow these steps to effectively insulate and seal your bay window:
- Insulate around the frame: Apply insulation material around the frame of the bay window. This will help to fill any gaps and prevent air leakage, improving energy efficiency. Ensure that the insulation is evenly distributed and adequately covers all areas.
- Seal any gaps: Inspect the perimeter of the window and the frame for any gaps or cracks. Use a suitable sealant, such as silicone or caulk, to seal these areas. Pay close attention to the corners and joints, as they are common areas for air leakage.
- Apply a second layer of insulation: For added insulation, consider adding a secondary layer of insulation around the frame. This can help to further reduce heat transfer and improve energy efficiency.
- Check for proper ventilation: Ensure that your bay window has appropriate ventilation to prevent condensation and moisture buildup. Follow the manufacturer’s guidelines for ventilation requirements and install vents if necessary.
- Perform a leak test: After insulating and sealing, perform a thorough leak test to ensure that your bay window is airtight. Close the window and use a smoke pencil or a lit incense stick to check for any air leakage around the frame. If you notice any drafts, identify the source and seal it with additional caulk or sealant.
- Clean and finish: Once you have completed the insulation and sealing, clean the window and frame thoroughly. Remove any excess caulk or sealant and ensure that the window is free from any debris or fingerprints.
Insulating and sealing your bay window is crucial for energy efficiency and maintaining a comfortable environment inside your home. Take your time during this step to ensure thorough insulation and sealing, paying attention to details and addressing any areas of concern. With the insulation and sealing complete, we can now move on to the final step: adding the finishing touches. Stay tuned!
Step 6: Finishing Touches
Congratulations! You’re almost done with the installation of your bay window. Now it’s time to add the final touches to complete the project and enhance the overall appearance and functionality. Follow these steps to add the finishing touches to your bay window installation:
- Clean the window: Give the window a thorough cleaning, both inside and out. Use a gentle glass cleaner and a lint-free cloth to ensure a streak-free finish. This will allow the natural light to shine through and improve the clarity of your view.
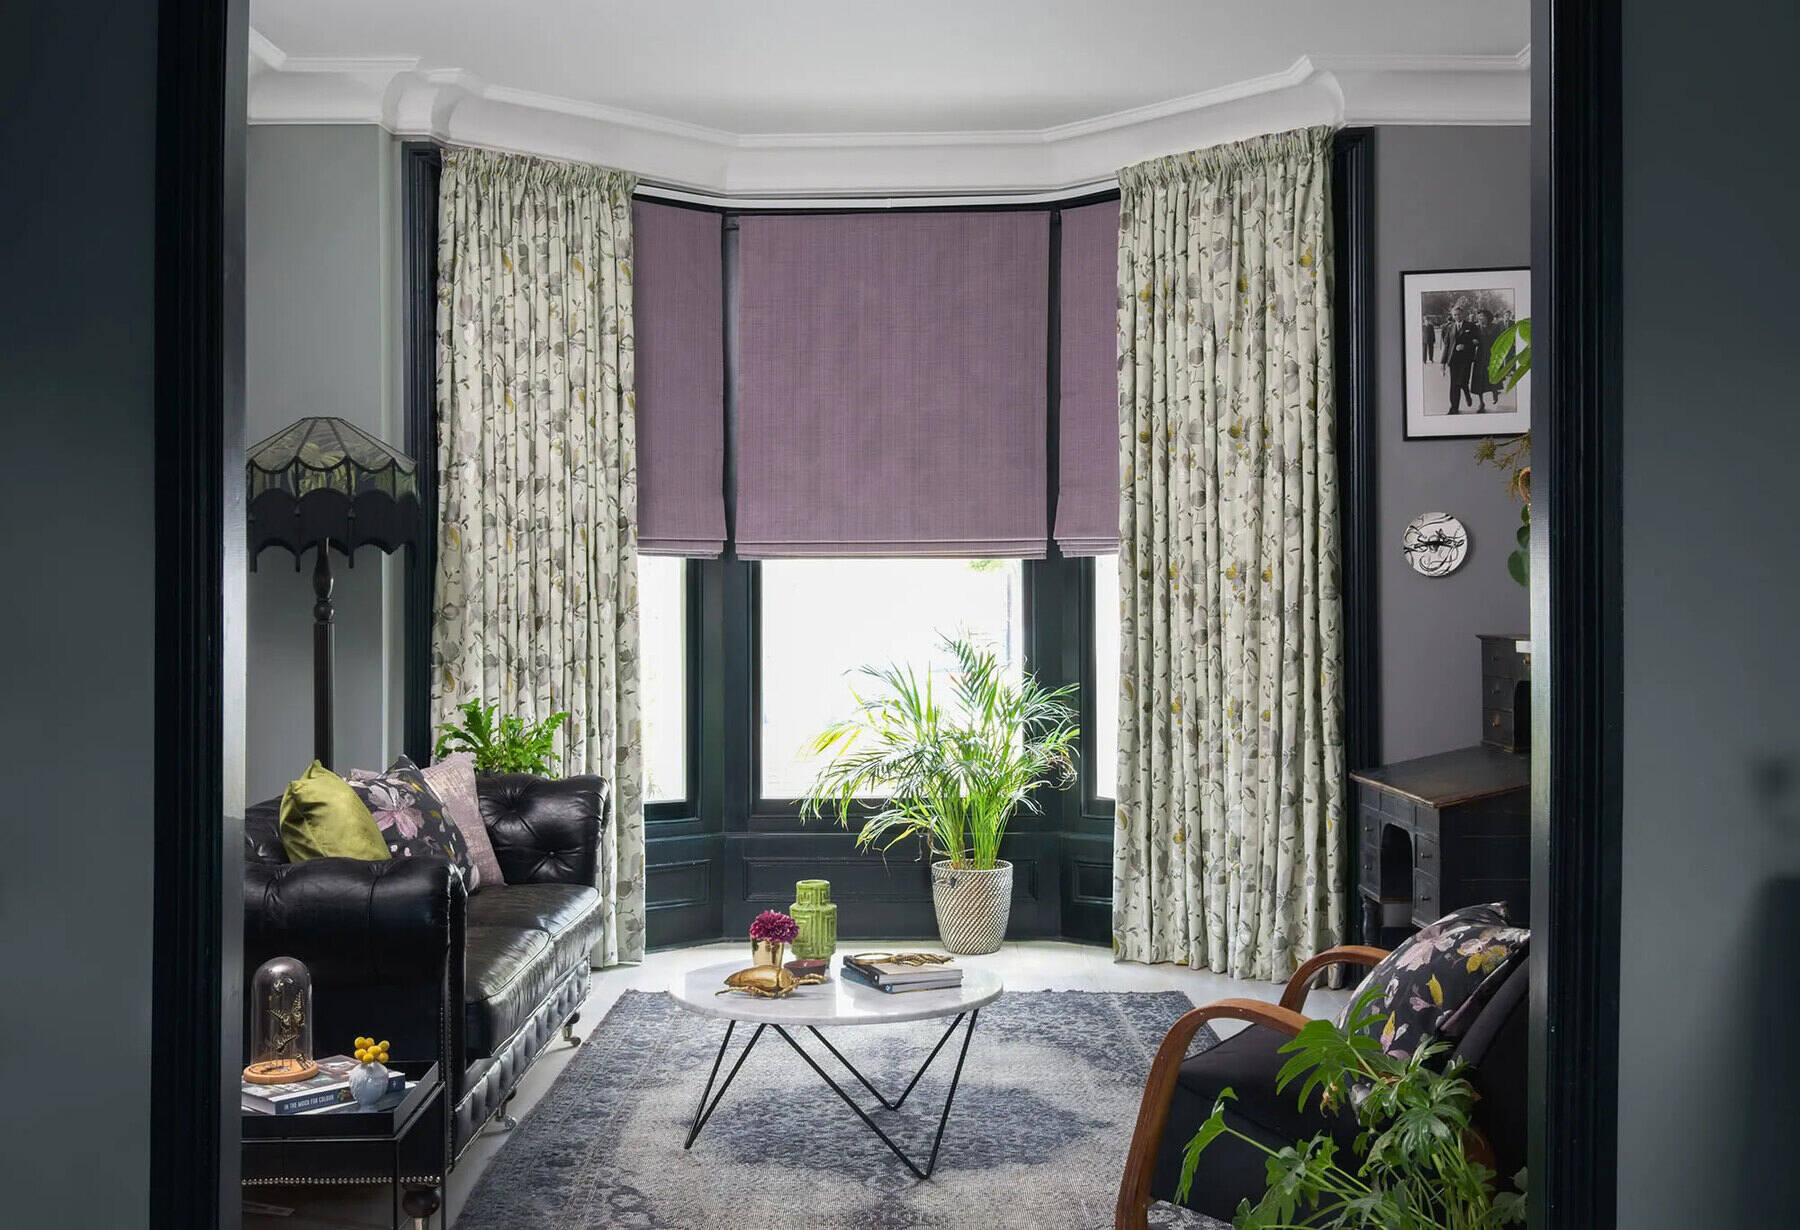
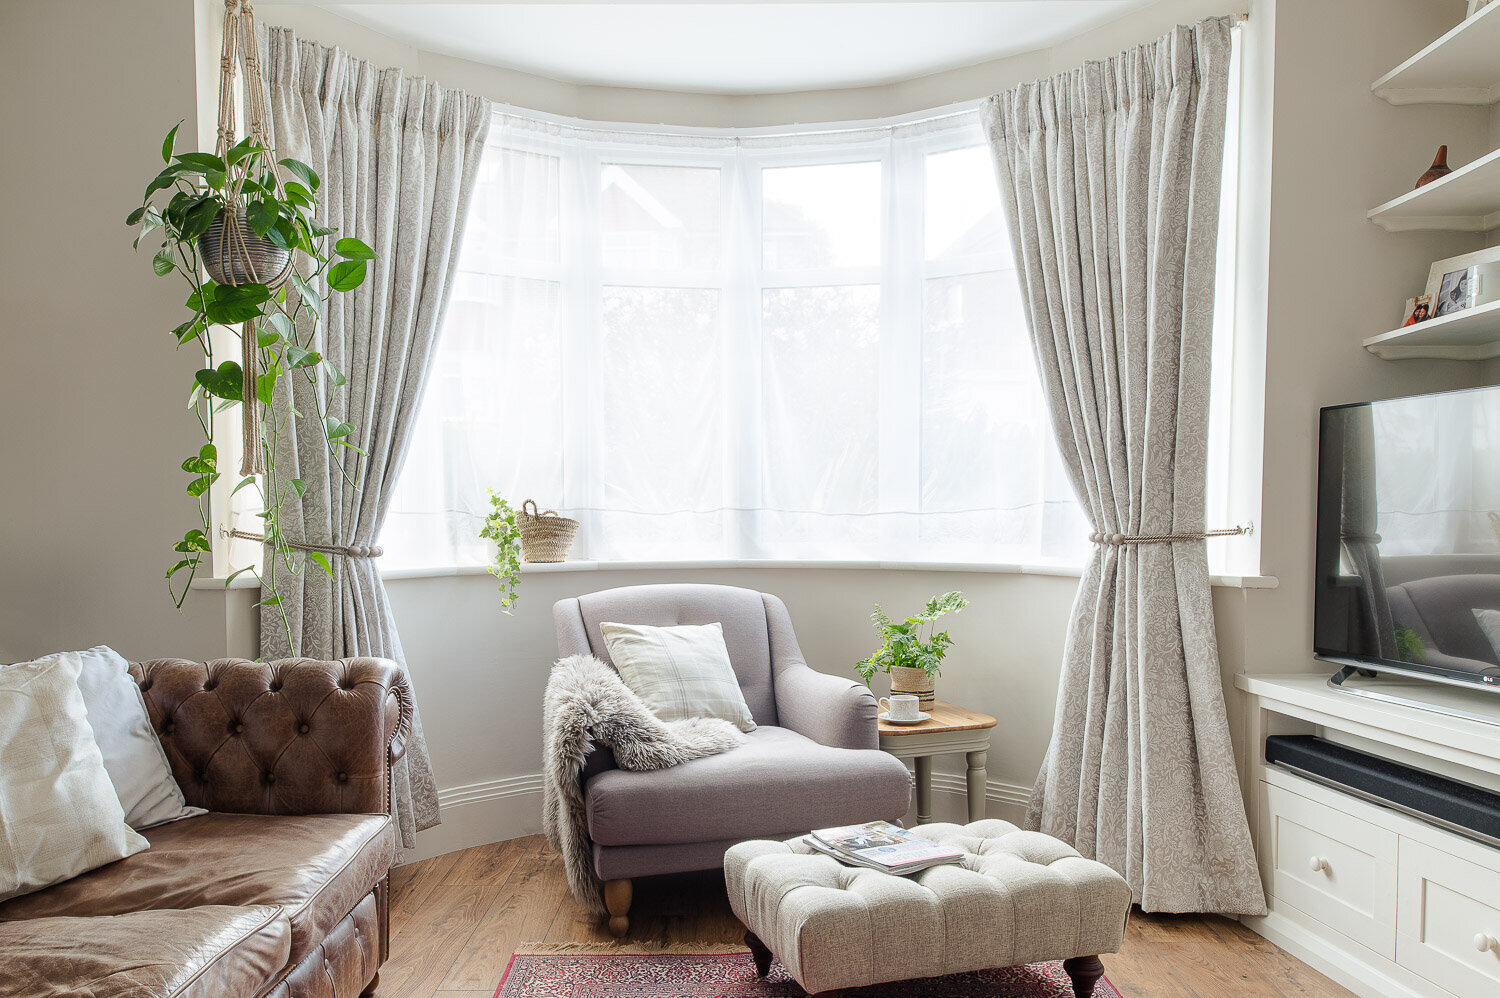
- Install window treatments: Consider adding window treatments, such as blinds, curtains, or shades, to enhance privacy and control the amount of sunlight entering the room. Choose a style that complements your interior design and personal preferences.
- Add trim or molding: Install decorative trim or molding around the bay window to enhance its visual appeal and create a polished look. Choose a style that matches the architectural style of your home and complements the window frame.
- Apply a fresh coat of paint: If desired, paint the frame and trim of the bay window to refresh its look and protect it from the elements. Choose a paint color that coordinates with your interior and exterior color scheme.
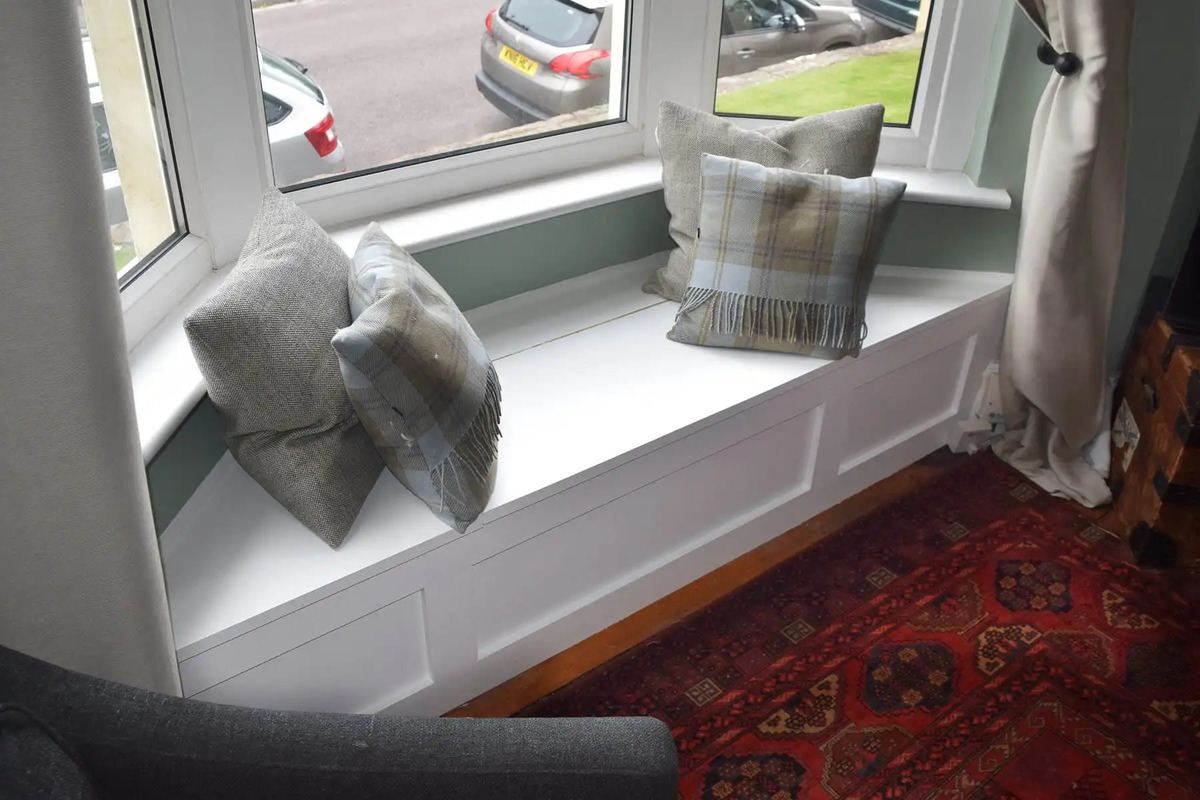
- Accessorize the space: Lastly, add some finishing touches to the surrounding area. Consider adding indoor plants, decorative accents, or seating to create an inviting and cozy space around your bay window.
By adding these finishing touches, you can truly elevate the appearance and functionality of your bay window installation. Take your time to select the right window treatments, trim, and decorations to create a space that reflects your personal style and enhances the overall ambiance of the room.
With the finishing touches complete, you have successfully installed your bay window! Sit back, relax, and enjoy the beauty and benefits of your new window. Take pride in your accomplishment and the enhanced aesthetics and value it brings to your home.
Thank you for following our comprehensive guide on how to install a bay window. We hope you found it informative and helpful throughout the installation process. If you have any further questions or need additional guidance, please don’t hesitate to seek professional assistance.
Read more: How To Put Blinds In A Bay Window
Conclusion
Congratulations on successfully completing the installation of your bay window! By following the step-by-step guide in this article, you have not only enhanced the aesthetics of your home but also increased its value and energy efficiency. Installing a bay window can bring in an abundance of natural light, create a sense of spaciousness, and provide a beautiful focal point in any room.
Throughout the installation process, we covered various important steps, such as measuring and planning, preparing the opening, installing the frame, securing the window, insulating and sealing, and adding the finishing touches. Each of these steps plays a crucial role in ensuring a successful and long-lasting installation result.
Remember, proper measurement and planning are essential to ensure the correct size and style of the bay window for your space. Preparing the opening and installing the frame with precision and care provide a solid foundation for the window installation. Securing the window, insulating, and sealing it properly contribute to energy efficiency, preventing drafts and maximizing comfort. Finally, the finishing touches add the final elements of style and personalization.
We hope this comprehensive guide has been informative and helpful to you throughout your bay window installation journey. However, it’s important to note that every home and installation may have unique requirements and considerations. If you encounter any challenges or feel unsure about any step, consulting with a professional is always a good idea.
Now that your bay window is installed, take a moment to appreciate the transformation it has brought to your home. Enjoy the natural light, the panoramic view, and the cozy space it creates. Whether you use it as a reading nook, a place for indoor plants, or simply a spot to admire the scenery, your bay window will undoubtedly become a cherished element of your home.
Thank you for investing your time and effort into completing this project. We hope you continue to find joy and satisfaction in your beautiful bay window for many years to come!
Frequently Asked Questions about How To Install A Bay Window
Was this page helpful?
At Storables.com, we guarantee accurate and reliable information. Our content, validated by Expert Board Contributors, is crafted following stringent Editorial Policies. We're committed to providing you with well-researched, expert-backed insights for all your informational needs.


0 thoughts on “How To Install A Bay Window”