Articles
How To Install Hampton Bay Blinds
Modified: January 19, 2024
Learn how to install Hampton Bay blinds with our helpful articles. Find step-by-step instructions and expert tips to make your installation a breeze.
(Many of the links in this article redirect to a specific reviewed product. Your purchase of these products through affiliate links helps to generate commission for Storables.com, at no extra cost. Learn more)
Introduction
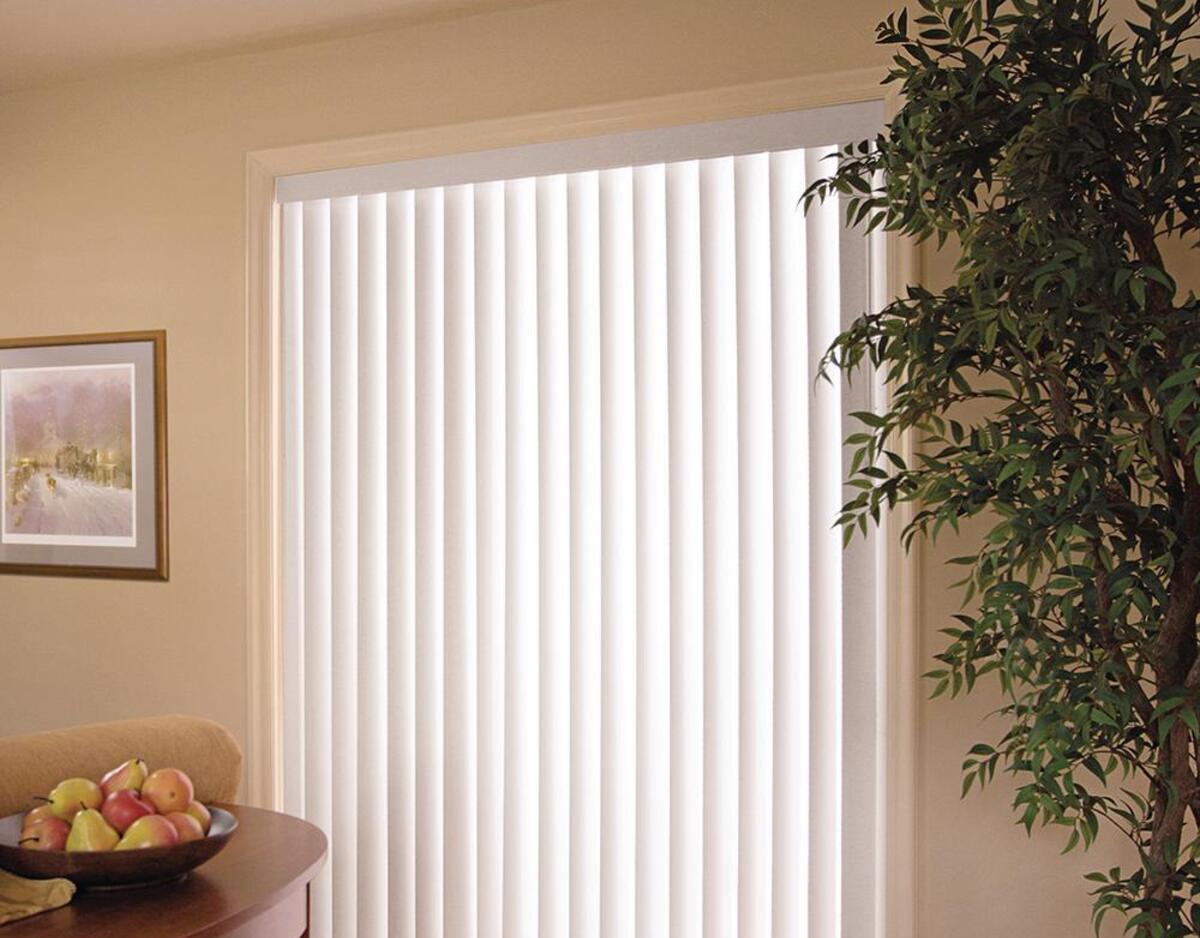
Installing Hampton Bay blinds is a great way to add style and functionality to your windows. These blinds are known for their durability, versatility, and ease of installation. Whether you’re a seasoned DIY enthusiast or a beginner, this comprehensive guide will walk you through the process of installing Hampton Bay blinds in your home.
With their sleek design and superior light control, Hampton Bay blinds are a popular choice among homeowners. Whether you’re looking for blinds for your living room, bedroom, or kitchen, Hampton Bay offers a wide range of options to suit your needs and enhance your home’s aesthetic appeal.
In this guide, we’ll cover everything you need to know about installing Hampton Bay blinds, from measuring your windows to adjusting and perfecting the installation. So, let’s get started on transforming your windows with these stylish blinds!
Key Takeaways:
- Elevate your windows with stylish and functional Hampton Bay blinds. Follow our comprehensive guide for a seamless installation process, from measuring to testing, and enjoy enhanced privacy and light control.
- Transform your space with the elegance of Hampton Bay blinds. With easy installation and proper maintenance, you can enjoy the beauty and functionality of these versatile window coverings for years to come.
Read more: How To Install Hampton Bay Ceiling Fan
Materials Needed
Before you begin the installation process, it’s important to gather all the necessary materials. Having everything on hand will make the installation smoother and more efficient. Here are the materials you’ll need:
- Hampton Bay blinds kit: Make sure you have the correct size and style for your windows.
- Tape Measure: To accurately measure your windows for the blinds.
- Pencil: For marking the positions of the brackets and headrail.
- Screwdriver: To secure the brackets and headrail in place.
- Level: To ensure that the blinds are installed straight and level.
- Drill (optional): If you need to create pilot holes for the screws.
- Step ladder: If your windows are high and you need extra height to reach.
It’s important to note that the specific materials required may vary depending on the type of Hampton Bay blinds you are installing. Refer to the manufacturer’s instructions provided with your blinds kit for any additional materials that may be needed.
Once you have gathered all the necessary materials, you’ll be ready to move on to the next step: measuring your window to ensure the blinds fit perfectly.
Step 1: Measure the Window
Accurate measurements are crucial to ensure that your Hampton Bay blinds fit perfectly in your window. Here’s how to measure your window:
- Start by opening the window completely so that you have unobstructed access to the window frame.
- Using a tape measure, measure the width of the inside of the window frame from one side to the other. Take note of the measurement.
- Next, measure the height of the inside of the window frame from the top to the bottom. Again, take note of the measurement.
- It’s a good idea to measure the window at multiple points to account for any slight variations. Record the smallest measurement for the width and height.
Once you have the accurate measurements, you can proceed to select the appropriate size of Hampton Bay blinds for your window. Keep in mind that the blinds should be slightly smaller than the window frame to ensure a proper fit and allow for smooth operation.
If you’re unsure about the measurements or need assistance, don’t hesitate to consult the Hampton Bay blinds installation guide or reach out to their customer support for guidance. Having accurate measurements will ensure a hassle-free installation process and help you achieve a professional-looking result.
Step 2: Choose the Blind Mounting Style
When it comes to installing Hampton Bay blinds, you have a few different mounting options to choose from. The mounting style you select will depend on your window frame and personal preference. Here are the most common blind mounting styles:
- Inside Mount: This mounting style involves installing the blinds inside the window frame. It provides a sleek and minimalist look, as the blinds fit snugly within the frame. To determine if your window is suitable for an inside mount, make sure there is enough depth and clearance within the frame for the blinds to fit properly.
- Outside Mount: In an outside mount, the blinds are mounted on the wall or above the window frame. This is a good option if your window lacks sufficient depth for an inside mount, or if you prefer a more dramatic and layered look. Outside mounts also allow for better light control and privacy, as the blinds can completely cover the window.
- Ceiling Mount: Ceiling mounts are ideal if you have large windows or windows that extend to the ceiling. The blinds are mounted to the ceiling above the window, creating a clean and seamless appearance. This mounting style is great for achieving maximum light coverage and privacy.
Consider the size and design of your window, as well as the overall aesthetic you want to achieve, when choosing the mounting style. It’s also important to consult the installation guide provided with your Hampton Bay blinds kit, as it may have specific recommendations for each mounting style.
Once you’ve determined the mounting style, you’re ready to move on to the next step: assembling the Hampton Bay blinds.
Step 3: Assemble the Hampton Bay Blinds
Now that you have chosen the mounting style for your Hampton Bay blinds, it’s time to assemble the blinds before installation. Follow these steps to ensure proper assembly:
- Unbox the Hampton Bay blinds kit and lay out all the components on a flat surface.
- Identify the headrail, slats, and any additional hardware included in the kit.
- Depending on the type of blinds you have, you may need to attach the slats to the headrail. Follow the manufacturer’s instructions provided with your specific blinds to complete this step.
- Ensure that all the slats are properly aligned and securely attached to the headrail.
- Double-check that all the necessary hardware, such as tilt mechanisms or cord guides, are in place and functioning correctly.
- Take a moment to familiarize yourself with the blinds’ operation, including how to open, close, and adjust the slats.
By carefully assembling the Hampton Bay blinds beforehand, you’ll be well-prepared for the installation process. Take your time to ensure that all the components are in order and functioning correctly. This will make the installation smoother and help you achieve the best results.
With the blinds assembled, we can now move on to the next step: mounting the brackets onto the window frame.
Read more: How To Remove Hampton Bay Ceiling Fan
Step 4: Mount the Brackets
Mounting the brackets properly is crucial for a secure and stable installation of your Hampton Bay blinds. Follow these steps to mount the brackets onto the window frame:
- Start by placing the headrail against the top of the window frame, following the chosen mounting style (inside, outside, or ceiling mount).
- Using a pencil, mark the positions where the brackets will be installed. Make sure the marks are aligned and evenly spaced.
- Hold one bracket in place against the marked position and use a screwdriver to insert the screws into the pre-drilled holes. If there are no pre-drilled holes, you may need to use a drill to create pilot holes before inserting the screws.
- Tighten the screws securely, but be careful not to overtighten and strip the holes or damage the brackets.
- Repeat the process to mount the remaining brackets, ensuring they are level and evenly spaced.
It’s important to refer to the installation instructions provided with your Hampton Bay blinds kit for specific bracket installation guidelines. Different blinds may have different bracket designs and installation methods.
Before moving on to the next step, give the brackets a gentle tug to make sure they are securely attached to the window frame. If any bracket feels loose, tighten the screws further or double-check the alignment. A secure bracket installation is essential for the stability and functionality of your blinds.
Now that the brackets are in place, we can proceed to the next step: installing the blind headrail.
When installing Hampton Bay blinds, make sure to measure your window accurately before purchasing the blinds to ensure a proper fit. Follow the manufacturer’s instructions carefully for a smooth installation process.
Step 5: Install the Blind Headrail
With the brackets securely mounted, it’s time to install the blind headrail. The headrail is the top part of the blinds that houses the slats and operates the opening and closing mechanism. Follow these steps to install the blind headrail:
- Hold the blind headrail at an angle and insert one end into the bracket on one side of the window. The headrail should fit snugly into the bracket.
- Gently pivot the other end of the headrail upward and insert it into the bracket on the opposite side of the window. Ensure that the headrail is level and straight.
- Slide the headrail back and forth to check if it moves smoothly within the brackets without any obstructions.
- Once you’re satisfied with the fit, engage any locking mechanisms or clips provided with your blinds to secure the headrail in place.
- Give the headrail a slight tug to ensure that it is securely installed and won’t come loose.
It’s worth noting that the installation process may vary depending on the specific style and design of your Hampton Bay blinds. Always refer to the manufacturer’s instructions for any additional steps or guidelines specific to your blinds.
With the headrail securely installed, we can now move on to the next step: attaching the blinds to the headrail.
Step 6: Attach the Blinds to the Headrail
Now that the headrail is securely in place, it’s time to attach the blinds to the headrail. Follow these steps to ensure a proper attachment:
- First, make sure all the blinds are in the fully open position.
- Locate the small grooves or notches on the headrail where the blinds will slide into.
- Starting at one end of the headrail, carefully insert the notch on the top of the blind into the corresponding groove on the headrail. Push the blind firmly until it clicks or locks into place.
- Repeat the process for each individual blind, ensuring they are evenly spaced and aligned.
- Give the blinds a gentle tug to make sure they are securely attached to the headrail and won’t come loose.
It’s important to handle the blinds with care during this step to avoid any damage or misalignment. Take your time and double-check that each blind is properly attached before moving on to the next one.
Once all the blinds are attached to the headrail, you can test their operation by opening and closing them. Ensure that they move smoothly and without any issues. If you encounter any difficulties, check for any obstructions or misalignment and make any necessary adjustments.
With the blinds attached and functioning correctly, we can now move forward to the next step: testing the blinds.
Step 7: Test the Blinds
After completing the installation and attaching the blinds to the headrail, it’s crucial to test their functionality to ensure they operate smoothly. Follow these steps to test your Hampton Bay blinds:
- For horizontal blinds, use the tilt mechanism to adjust the angle of the slats. Confirm that they move freely and smoothly in both the open and closed positions.
- If your blinds have a lifting mechanism, such as a cord or wand, test its operation to raise and lower the blinds. Make sure they can be easily lifted and lowered without any resistance or sticking points.
- For vertical blinds, check that the slats smoothly rotate and slide along the track by operating the tilt control chain or wand.
- Open and close the blinds completely to ensure that they function properly and cover the window entirely when closed.
- If any issues arise during the testing process, such as slats not tilting correctly or blinds not raising and lowering smoothly, refer to the manufacturer’s instructions for troubleshooting guidelines.
By thoroughly testing your blinds, you can identify and address any issues or malfunctions before completing the installation process. This step is essential in ensuring your Hampton Bay blinds provide the functionality and light control you desire.
Once you are satisfied with the blinds’ performance, we can move on to the final step: adjusting and finishing the installation.
Read more: How To Program A Hampton Bay Fan Remote
Step 8: Adjust and Finish Installation
In the final step of installing your Hampton Bay blinds, you’ll make any necessary adjustments and complete the finishing touches. Follow these steps to ensure a polished and professional installation:
- Check the alignment of the blinds and make any adjustments needed. If the blinds are not level or evenly spaced, gently manipulate them to achieve the desired positioning.
- Trim any excess cord length to achieve a neat and tidy appearance. Be careful not to cut the cords too short, as you’ll need enough length to operate the blinds effectively.
- Secure any cord safety devices or cord cleats provided with your blinds to keep the cords out of the reach of children or pets.
- Clean the blinds with a soft cloth or duster to remove any dust or debris accumulated during the installation process.
- Inspect the installation for any visible issues or loose elements. Tighten any screws or brackets if necessary.
- Step back and admire your newly installed Hampton Bay blinds, appreciating the enhanced aesthetics and functionality they bring to your space.
With the finishing touches complete, you’ve successfully installed your Hampton Bay blinds! Take a moment to ensure that everything is in order and functioning correctly.
Remember that proper maintenance and care will help your blinds last longer and continue to provide the desired level of light control and privacy. Regularly dusting and cleaning your blinds will keep them looking their best and ensure their smooth operation.
Congratulations on a job well done! You can now enjoy the beauty, versatility, and functionality of your Hampton Bay blinds in your home.
By following this step-by-step installation guide, you’ve achieved a professional-looking result while adding a stylish touch to your windows.
Thank you for choosing Hampton Bay blinds and trusting us to guide you through the installation process. If you have any further questions or need assistance, don’t hesitate to consult the manufacturer’s instructions or reach out to their customer support.
Happy decorating!
Conclusion
Installing Hampton Bay blinds is a rewarding and relatively simple process that can elevate the look and functionality of your windows. By following the steps outlined in this guide, you can confidently and successfully install your blinds with ease.
From measuring your window to choosing the mounting style, assembling the blinds, and mounting the brackets and headrail, each step contributes to a seamless installation. Through careful testing and adjustment, you can ensure that your blinds operate smoothly and provide optimal light control and privacy.
Remember to consult the manufacturer’s instructions provided with your specific Hampton Bay blinds kit for any additional guidelines or troubleshooting tips that may apply to your blinds.
With properly installed Hampton Bay blinds, you can transform the ambiance of your space while enjoying enhanced privacy and light management. These stylish and versatile blinds add a touch of elegance to any room, whether it’s your living room, bedroom, kitchen, or office.
Maintaining your blinds by regularly cleaning and dusting them will help preserve their appearance and ensure their longevity. By following a simple maintenance routine, you can enjoy the benefits of your Hampton Bay blinds for years to come.
Thank you for choosing Hampton Bay blinds for your window coverings. We hope this installation guide has been helpful in making the installation process smooth and enjoyable. If you have any further questions or need assistance, feel free to consult the manufacturer’s instructions or reach out to their customer support.
Now, sit back, relax, and enjoy the beauty and functionality of your newly installed Hampton Bay blinds!
Frequently Asked Questions about How To Install Hampton Bay Blinds
Was this page helpful?
At Storables.com, we guarantee accurate and reliable information. Our content, validated by Expert Board Contributors, is crafted following stringent Editorial Policies. We're committed to providing you with well-researched, expert-backed insights for all your informational needs.


0 thoughts on “How To Install Hampton Bay Blinds”