Articles
How To Put Blinds In A Bay Window
Modified: October 19, 2024
Learn how to properly install blinds in a bay window with these helpful articles. Discover tips and tricks to ensure a seamless and stylish window treatment installation.
(Many of the links in this article redirect to a specific reviewed product. Your purchase of these products through affiliate links helps to generate commission for Storables.com, at no extra cost. Learn more)
Introduction
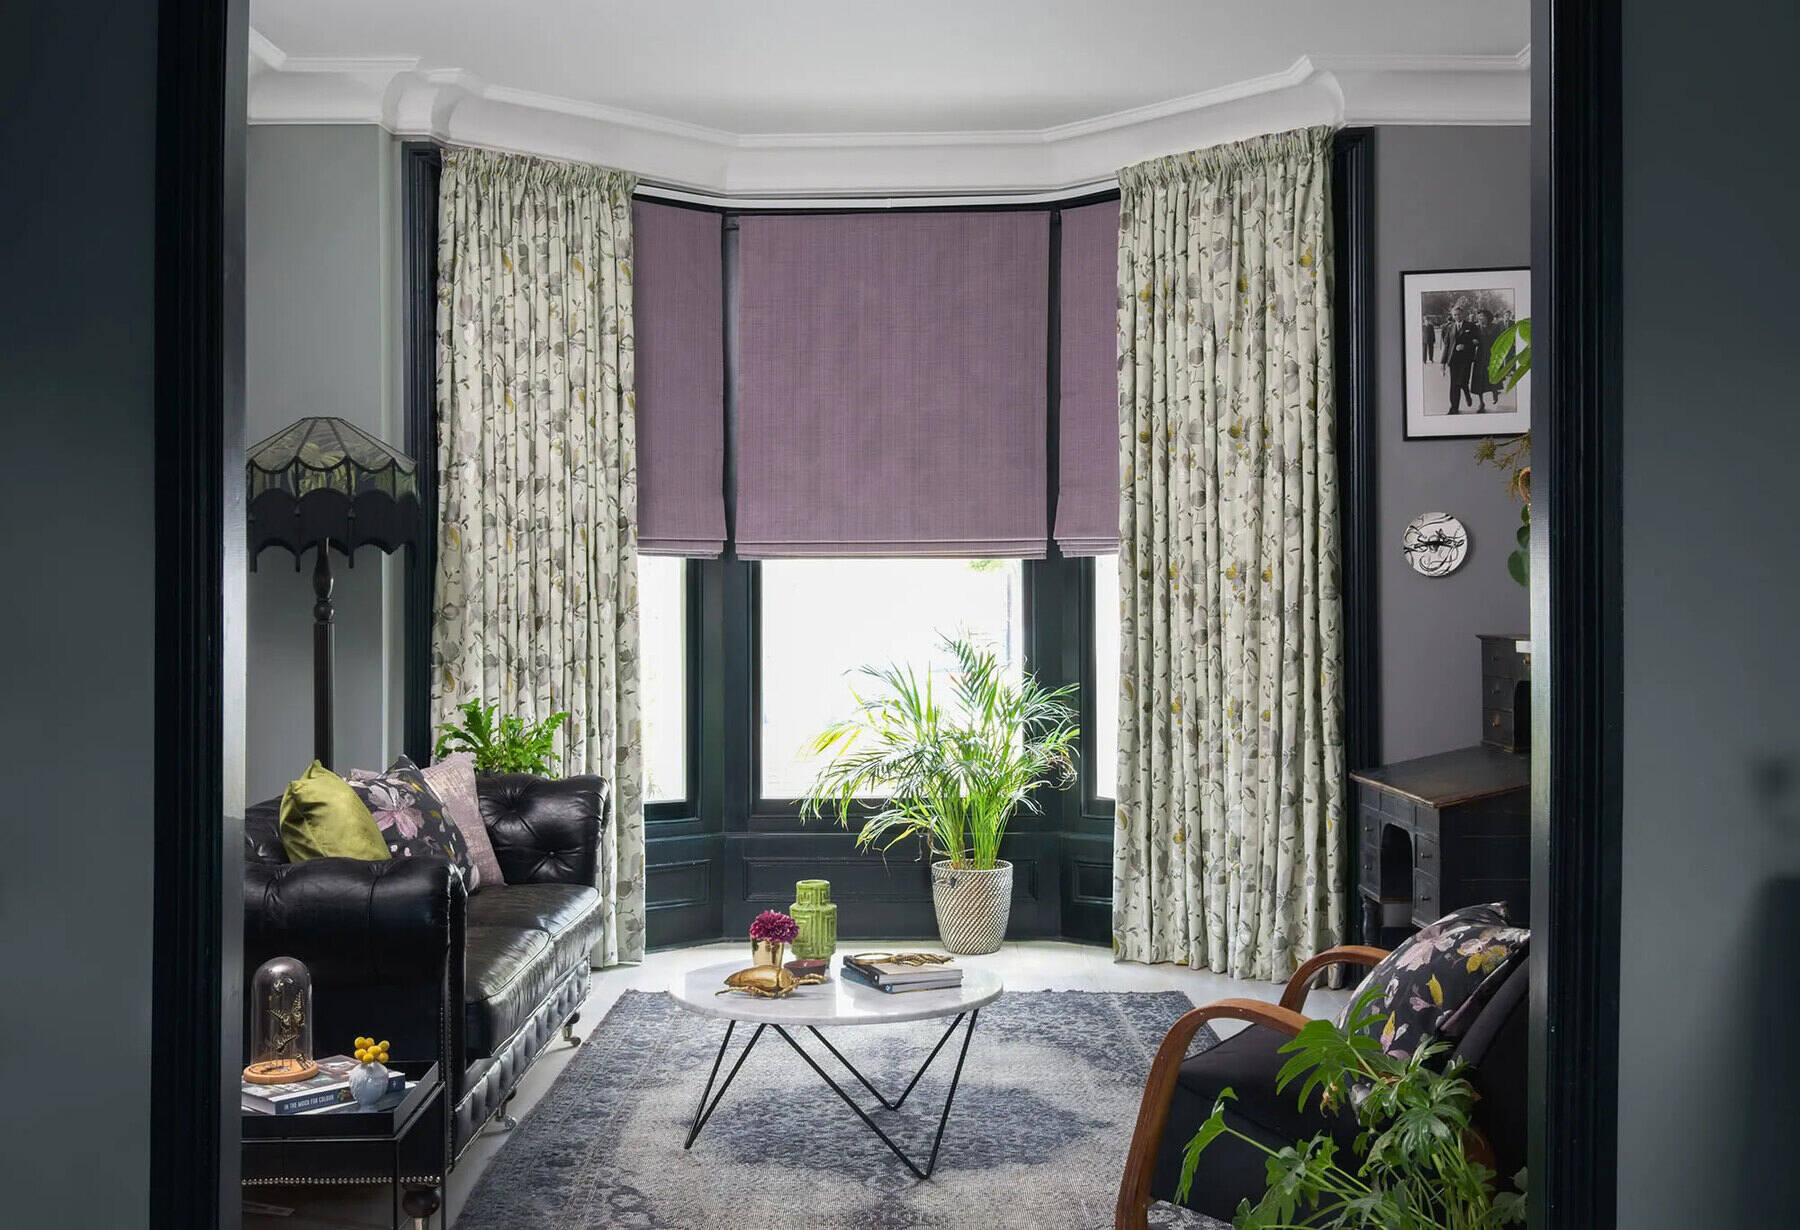
When it comes to dressing up a bay window, blinds are a popular and practical choice. They provide privacy, control light, and add a touch of elegance to any space. However, installing blinds in a bay window can be a bit trickier than in a regular window due to the unique angles and curves.
In this article, we will guide you through the process of putting blinds in a bay window, step by step. From measuring the window to selecting the right blinds and installing them properly, we’ll cover all the essential information you need to know.
Whether you’re a seasoned DIY enthusiast or a beginner looking to tackle a new project, this guide will help you achieve professional-looking results and transform your bay window into a stunning focal point of your home.
Before we dive into the details, let’s quickly go over the materials you will need for this project.
Key Takeaways:
- Transform your bay window with elegance and functionality by following our step-by-step guide to installing blinds. Achieve professional results and elevate your living space with style and privacy.
- From measuring to mounting and adjusting, our comprehensive guide empowers you to confidently install blinds in your bay window. Enjoy the beauty and versatility of your new blinds with ease.
Read more: How To Measure Bay Windows For Blinds
Materials Needed
Before you begin the installation process, make sure you have the following materials on hand:
- Measuring tape
- Blinds of your choice
- Mounting brackets
- Screws
- Drill
- Screwdriver
- Pencil
- Level
These materials are essential for a successful installation and will ensure that your blinds fit properly and are securely mounted.
Now that you have gathered all the necessary materials, let’s move on to the first step of the installation process: measuring the bay window.
Step 1: Measure the Window
Before you can choose the perfect blinds for your bay window, you need to accurately measure the window opening. This step is crucial to ensure that your blinds fit properly and function smoothly.
Here’s how to measure your bay window:
- Start by measuring the width of each individual window within the bay. Measure from the inside of the window frame on one side to the inside of the frame on the opposite side. Write down the measurements for each window.
- Next, measure the height of each window. Measure from the top of the frame to the bottom of the frame for each window. Again, jot down the measurements for each window.
- Take additional measurements at different points along each window to account for any irregularities in size. This will help you ensure a precise fit for your blinds.
- Finally, measure the depth of the window recess or the wall space available for the blinds. This measurement will determine the size of the blinds you can install.
It’s essential to be as precise as possible when measuring your bay window to avoid complications during the installation process. Double-check your measurements to ensure accuracy.
Once you have your measurements ready, you can move on to the next step: choosing the blinds that best match your style and needs.
Step 2: Choose the Blinds
Now that you have measured your bay window, it’s time to select the blinds that will enhance its beauty and functionality. With a wide variety of options available, you can find blinds that suit your style, budget, and specific requirements.
Consider the following factors when choosing blinds for your bay window:
- Material: Blinds come in different materials, such as wood, faux wood, aluminum, or fabric. Each material has its own unique aesthetic and durability. Choose a material that complements your interior design and fits the functionality you desire.
- Style: Depending on your preference, you can choose from various blind styles, including vertical blinds, horizontal blinds, or even cellular shades. Consider the style that best aligns with the overall look of your home.
- Light control: Decide how much light control you want in your bay window. Some blinds provide complete blackout, while others allow diffused light to enter the room. Think about your privacy and light preferences.
- Ease of operation: Consider the mechanism of operating the blinds. Corded blinds provide traditional operation, while cordless or motorized options offer convenience and child-safety features.
- Budget: Set a budget for your blinds project to help narrow down your options. Remember to consider the quality and longevity of the blinds to ensure a worthwhile investment.
Take your time to research and explore different blind options. Look for inspiration online or visit a local store to see samples in person. Once you have decided on the blinds, it’s time to move on to the next step: mounting options.
Step 3: Mounting Options
Before you install the blinds, you need to consider the mounting options for your bay window. The mounting option you choose will depend on the type of blinds and the structure of your bay window.
Here are the common mounting options for bay windows:
- Inside Mount: This mounting option involves installing the blinds within the window recess. It provides a clean and streamlined look, but keep in mind that the depth of your recess must be sufficient to accommodate the blinds.
- Outside Mount: With this option, the blinds are mounted outside the window recess, covering a larger area. It is ideal when the depth of the recess is limited or when you want to block more light.
- Combination Mount: In some cases, a combination of inside and outside mounts may be necessary for bay windows. This involves installing inside mounts for the smaller windows and outside mounts for the larger center window.
Consider the size, style, and functionality of your blinds when choosing the mounting option. Measure the available space and determine which option will work best for your bay window.
Once you have decided on the mounting option, you can proceed to the next step: installing the brackets.
When installing blinds in a bay window, measure each section individually for a precise fit. Use inside mount blinds for a clean and streamlined look.
Read more: How To Put Drapes On A Bay Window
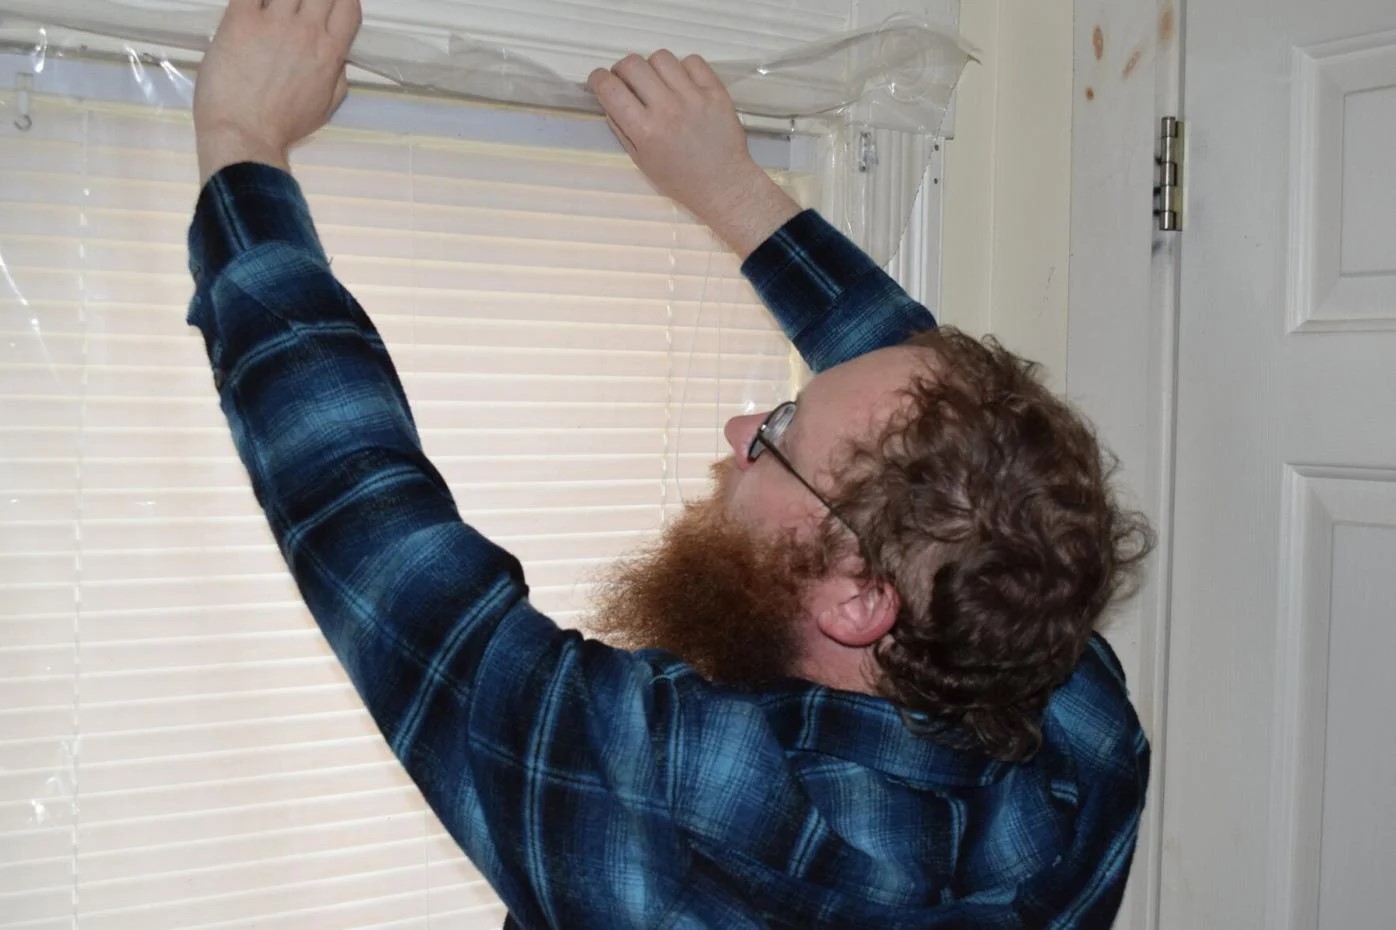
Step 4: Install the Brackets
Now that you have chosen the mounting option for your blinds, it’s time to install the brackets that will hold them securely in place.
- Start by positioning the brackets at the predetermined location according to your chosen mounting option. Use a pencil to mark the screw holes on the wall or window frame.
- Using a drill, create pilot holes for the screws at the marked locations. Make sure to use an appropriate drill bit size to match the screw diameter.
- Secure the brackets to the wall or window frame by driving the screws into the pilot holes. Use a screwdriver or a drill with a screwdriver bit to tighten the screws, ensuring that the brackets are firmly attached.
- Double-check the alignment and levelness of the brackets using a level. Making sure the brackets are level will contribute to the smooth operation of your blinds.
- If you are using multiple brackets, repeat the process for each bracket, ensuring equal spacing between them.
Installing the brackets accurately is crucial for the stability and functionality of your blinds. Take your time during this step to ensure that the brackets are securely mounted.
Once the brackets are installed, it’s time to move on to the next step: attaching the headrail.
Step 5: Attach the Headrail
Now that the brackets are securely installed, it’s time to attach the headrail of the blinds to the brackets. The headrail is the top part of the blinds that holds all the slats or panels together.
- Hold the headrail up to the brackets and align it with the screw holes on the brackets.
- Insert the headrail into the brackets, making sure it fits snugly. Some brackets may have a locking mechanism to hold the headrail in place.
- If necessary, adjust the brackets or the headrail to ensure proper alignment and fit.
- Once the headrail is inserted into the brackets, secure it by tightening any locking mechanisms or using additional screws if provided.
Make sure the headrail is level and properly attached to the brackets. This step is crucial for the smooth operation and stability of your blinds.
With the headrail securely attached, it’s time to move on to the next step: hanging the blinds.
Step 6: Hang the Blinds
With the headrail securely attached to the brackets, it’s time to hang the blinds in your bay window. This step involves attaching the blinds to the headrail and ensuring they are properly aligned.
- Start by pulling the lift cords or operating mechanism to fully extend the blinds.
- Position the blinds in front of the window, aligning them with the headrail.
- For horizontal blinds, insert the hinged edges of the blinds into the corresponding openings on the headrail. Make sure they click or lock into place.
- If you have vertical blinds, carefully hang the individual vane carriers onto the track of the headrail. Ensure that each carrier is securely attached and slides smoothly along the track.
- Once the blinds are hung, gently tug on the lift cords to raise and lower the blinds. Test the functionality and ensure they operate smoothly.
Take your time during this step to ensure that the blinds are properly hung and aligned. Adjust as needed to achieve the desired appearance and functionality.
Now that the blinds are hung, it’s time to move on to the final step: adjusting and securing.
Step 7: Adjust and Secure
With the blinds hung in your bay window, the final step is to adjust them and ensure they are properly secured. This will help optimize their functionality and enhance the overall appearance of your window.
- If your blinds have slats, adjust their angle by using the tilt wand or cords. This allows you to control the amount of light and privacy in the room.
- Ensure that the blinds are hanging evenly and are straight. Make any necessary adjustments to the alignment of the slats or vanes.
- If your blinds have cords or chains, consider using cord cleats or tension devices to secure them out of reach of children or pets. This helps minimize the risk of entanglement.
- Test the blinds’ operation by raising and lowering them multiple times to ensure smooth and effortless movement. Make any necessary adjustments to the brackets or headrail if needed.
- Once you are satisfied with the adjustment and functionality of your blinds, give them a final check for any loose screws or connections. Tighten them if necessary to ensure the blinds are securely in place.
By adjusting and securing the blinds properly, you can enjoy optimal light control, privacy, and functionality in your bay window.
With the blinds successfully installed, adjusted, and secured, you have completed the process of putting blinds in your bay window. Sit back, relax, and enjoy the beautiful transformation of your window space!
By following these steps and considering the unique characteristics of your bay window, you can achieve professional-looking results and elevate the style and functionality of your living space.
Remember, if you ever feel unsure or uncomfortable with any step of the installation process, it’s always a good idea to consult a professional for assistance.
Now go ahead and enjoy the benefits of your newly installed blinds in your bay window!
Read more: How To Put Blinds On A Window
Conclusion
Installing blinds in a bay window can be a fulfilling and rewarding project that adds both style and functionality to your space. By following the step-by-step guide outlined in this article, you can successfully put blinds in your bay window and achieve professional-looking results.
Remember to start by accurately measuring your window, considering the mounting options, and selecting blinds that align with your style and needs. Installing the brackets securely and attaching the headrail properly are essential for the stability of your blinds. Hanging the blinds and making necessary adjustments ensure they are aligned and operate smoothly. Lastly, don’t forget to adjust and secure the blinds, providing you with optimal light control and peace of mind.
Throughout the installation process, it’s important to maintain a balance between form and function. Choose blinds that complement your interior design while also meeting your privacy and light control requirements. Take your time during each step and consult professional assistance if needed.
With the blinds successfully installed, your bay window will become a focal point of your home, providing an elegant and functional feature that enhances your living space. Sit back, relax, and enjoy the beauty and versatility of your new blinds.
Remember, taking proper care of your blinds by regularly cleaning and maintaining them will help prolong their lifespan and ensure they continue to add value to your home for years to come.
Now, armed with the knowledge and guidance from this article, you are ready to embark on your journey of putting blinds in a bay window. Good luck and enjoy the rewarding process of transforming your bay window with stylish and functional blinds!
Frequently Asked Questions about How To Put Blinds In A Bay Window
Was this page helpful?
At Storables.com, we guarantee accurate and reliable information. Our content, validated by Expert Board Contributors, is crafted following stringent Editorial Policies. We're committed to providing you with well-researched, expert-backed insights for all your informational needs.