Home>Articles>How To Install A Dishwasher Where There Wasnt One Before

Articles
How To Install A Dishwasher Where There Wasnt One Before
Modified: October 20, 2024
Learn how to easily install a dishwasher in a space where there wasn't one before with our helpful articles. Simplify your kitchen renovation with step-by-step instructions and expert tips.
(Many of the links in this article redirect to a specific reviewed product. Your purchase of these products through affiliate links helps to generate commission for Storables.com, at no extra cost. Learn more)
Introduction
Installing a dishwasher in a kitchen where there wasn’t one before can be a daunting task. However, with the right tools, materials, and a step-by-step guide, you can successfully add this convenient appliance to your kitchen. Whether you’re upgrading your kitchen or simply want to make your life easier, installing a dishwasher can be a rewarding project.
In this article, we will walk you through the process of installing a dishwasher in a space where there wasn’t one before. We’ll cover everything from assessing the space to testing the dishwasher once installed. So, let’s dive in and transform your kitchen into a more efficient and modern space!
Before you begin the installation process, it’s essential to note that while this guide can provide general instructions, it’s always best to consult the manufacturer’s instructions specific to your dishwasher model. These instructions will help ensure a proper and safe installation. Additionally, if you’re uncomfortable with any step of the process or encounter any difficulties, don’t hesitate to seek professional assistance.
Now, let’s get started with assessing the space.
Key Takeaways:
- Installing a dishwasher involves assessing the space, gathering tools, preparing the area, connecting water and drainage, wiring for power, securing the appliance, and thorough testing. Following these steps ensures a successful installation.
- Proper preparation, attention to detail, and careful execution are essential for installing a dishwasher where there wasn’t one before. From assessing space to testing the appliance, each step contributes to a convenient and efficient kitchen upgrade.
Read more: How To Install A Samsung Dishwasher
Step 1: Assessing the Space
Before you begin installing a dishwasher, it’s crucial to assess the available space in your kitchen. Take a close look at your kitchen layout and identify a suitable location for the dishwasher. Consider the following factors:
- Proximity to the sink: The dishwasher should ideally be located near the sink for easy access to water and drainage connections.
- Cabinet space: Check if there is enough space in your existing cabinets to accommodate the dishwasher. You may need to remove a cabinet or make modifications to create adequate space.
- Electrical outlet: Ensure there is a nearby electrical outlet to power the dishwasher. If not, you may need to install one or hire a professional electrician.
- Flooring: Assess the flooring under the intended dishwasher location. It should be able to support the weight of the appliance and be level to prevent any instability.
Measure the dimensions of the available space, including the height, width, and depth. This information will help you choose the right dishwasher size that fits perfectly into your kitchen. Keep in mind that dishwashers typically come in standard sizes, so selecting one that suits your space should not be an issue.
Additionally, check if there is a water supply line and drainage system nearby. The plumbing connections will play a significant role in the installation process, and it’s important to confirm if they are easily accessible or if any modifications are required.
Once you have thoroughly assessed the space and considered these factors, you’ll have a better understanding of whether or not your kitchen is suitable for installing a dishwasher. If everything looks good, it’s time to gather the necessary tools and materials for the installation process.
Step 2: Gathering the Necessary Tools and Materials
Before you can begin installing a dishwasher, it’s essential to gather all the necessary tools and materials. Ensuring you have everything you need ahead of time will help streamline the installation process. Here’s a checklist of the tools and materials you’ll likely need:
- Adjustable wrench
- Screwdriver (flathead and Phillips)
- Drill
- Hole saw
- Pliers
- Teflon tape
- Level
- Measuring tape
- Electrical wire nuts
- Wire stripper
- Circuit tester
- Pipe cutter or PVC saw
- Plumber’s putty
- Dishwasher installation kit (includes mounting brackets, screws, and fittings)
It’s crucial to have the correct tools and materials to ensure a smooth and successful installation. Gathering these beforehand will save you time and any frustration that may arise from not having the proper equipment during the process. Additionally, it’s always a good idea to have safety equipment handy, such as gloves and safety goggles, to protect yourself during the installation.
If you’re unsure about any specific tools or materials required for your dishwasher model, refer to the manufacturer’s instructions or consult with a professional. They will be able to provide guidance on any additional tools or materials specific to your dishwasher installation.
With all the necessary tools and materials gathered, you’re now ready to move on to the next step – preparing the space for the dishwasher installation.
Step 3: Preparing the Space
Preparing the space for the dishwasher installation is a critical step that ensures a smooth and successful process. This step involves clearing out the designated area, making any necessary modifications, and ensuring the space is clean and ready for the new appliance.
Here are the key steps to follow when preparing the space:
1. Remove any obstacles
Clear out the area where the dishwasher will be installed. Remove any objects, utensils, or other items from the cabinets or countertops surrounding the space. This will provide you with a clear area to work in and prevent any potential damage or interference during the installation.
Read more: Dishwasher Salt Where To Buy
2. Modify cabinets, if needed
If your existing cabinets do not have enough space to accommodate the dishwasher, you may need to make modifications. This could involve removing a cabinet or adjusting the shelf height to create enough room. Follow the manufacturer’s instructions or consult with a professional if you are unsure how to make these modifications.
3. Check the flooring and level the area
Inspect the flooring where the dishwasher will be installed. Ensure that it is sturdy enough to support the weight of the appliance. If the floor is uneven, use a level to adjust the area and make it level. This will help prevent any instability once the dishwasher is in place.
4. Clean the area
Before installing the dishwasher, clean the area thoroughly. Remove any debris, dust, or dirt from the floor and surrounding cabinets. This will help create a clean and hygienic environment for the new appliance.
5. Make necessary electrical and plumbing preparations
If you haven’t done so already, ensure that there is an electrical outlet near the installation area. If not, you may need to hire a professional electrician to install one. Similarly, ensure that the water supply line and drainage system are easily accessible and in good condition. If any repairs or modifications are necessary, address them before proceeding with the installation.
By following these steps and preparing the space properly, you’ll be ready to move on to the next steps in the dishwasher installation process, which involve connecting the water supply line and installing the drainage system.
Read more: How To Install Frigidaire Dishwasher
Step 4: Installing the Water Supply Line
Now that you have prepared the space for the dishwasher installation, it’s time to move on to connecting the water supply line. This step involves ensuring a proper water supply connection to the dishwasher to ensure it functions efficiently. Follow these steps to install the water supply line:
1. Locate the water supply valve
Locate the water supply valve under the sink or in the basement. This valve is responsible for controlling the water flow to the dishwasher. Ensure that the valve is in the closed position before proceeding with the installation.
2. Measure and cut the copper or plastic tubing
Measure the distance from the water supply valve to the location where the dishwasher will be installed. Cut a length of copper or plastic tubing according to this measurement. Use a pipe cutter or PVC saw to achieve a clean, straight cut.
3. Attach the compression fitting and elbow
Slide a compression fitting onto one end of the tubing, followed by an elbow fitting. Tighten the compression fitting securely using pliers or an adjustable wrench. The elbow fitting will allow the tubing to be properly connected to the dishwasher.
Read more: Where To Put Detergent In Dishwasher
4. Connect the tubing to the water supply valve
Attach the other end of the tubing to the water supply valve. Slide the compression fitting onto the valve and secure it tightly using pliers or an adjustable wrench. Ensure that the connection is tight to prevent any leaks.
5. Route the tubing to the dishwasher
Carefully route the tubing from the water supply valve to the dishwasher installation location. Ensure that the tubing is not crimped or bent excessively, as this can restrict water flow. Use clips or straps to secure the tubing along the way and prevent it from hanging loose or interfering with other components.
6. Connect the tubing to the dishwasher
At the dishwasher location, connect the tubing to the water inlet valve on the back of the dishwasher. Ensure that the connection is secure and tight to prevent leaks. Refer to the manufacturer’s instructions for any specific requirements or guidelines regarding the connection.
7. Turn on the water supply
Once the water supply line is properly connected, open the water supply valve slowly to allow water to flow into the dishwasher. Check for any signs of leaks around the connections. If you notice any leaks, tighten the fittings further or apply Teflon tape to create a better seal.
With the water supply line successfully installed, you can move on to the next step, which involves installing the drainage system for the dishwasher.
Read more: Where To Buy A Dishwasher
Step 5: Installing the Drainage System
Installing the drainage system is a crucial step in the dishwasher installation process. A proper drainage system will ensure that wastewater from the dishwasher is effectively removed from your kitchen. Follow these steps to install the drainage system:
1. Locate the dishwasher drain hose
Locate the dishwasher drain hose, which is typically located at the back of the appliance. Ensure that the hose is free from any kinks or bends that may obstruct the flow of wastewater.
2. Determine the routing of the drain hose
Determine the optimal routing for the drain hose to connect it to your home’s plumbing system. The most common options are to connect it to the sink’s drainpipe, garbage disposal, or a dedicated dishwasher drain pipe. Choose the method that suits your kitchen setup and availability of connections.
3. Connect the drain hose to the sink’s drainpipe or garbage disposal
If you choose to connect the drain hose to the sink’s drainpipe or garbage disposal, you’ll need to create a drain connection. Use a hose clamp and attach the drain hose securely to the chosen connection point. Ensure that the connection is tight to prevent leaks or disconnecting during use.
Read more: Where Is The Filter In A Dishwasher
4. Route the drain hose to the connection point
Carefully route the drain hose from the dishwasher to the chosen connection point. Avoid any sharp bends or kinks that can impede the flow of wastewater. Use clips or straps to secure the hose along the way and prevent it from dragging on the floor or interfering with other components.
5. Connect the drain hose to a dedicated dishwasher drain pipe (if applicable)
If your kitchen has a dedicated dishwasher drain pipe, follow the manufacturer’s instructions to properly connect the drain hose. Typically, you’ll need to remove the knockout plug from the dishwasher drain connection on the dedicated pipe and attach the drain hose securely using a hose clamp or compression fitting.
6. Test the drainage system
Once the drain hose is properly connected, run a test cycle on the dishwasher to ensure that the wastewater is effectively draining. Check for any leaks or blockages in the drainage system. If you encounter any issues, double-check the connections and make necessary adjustments.
With the drainage system successfully installed, you’re one step closer to completing the dishwasher installation process. In the next step, we’ll cover the important task of wiring the dishwasher for electrical power.
Step 6: Wiring the Dishwasher
Wiring the dishwasher for electrical power is a crucial step in the installation process. It is important to ensure that the dishwasher is properly connected to a reliable power source to avoid any electrical hazards. Follow these steps to wire the dishwasher:
Read more: Where Is The Dishwasher Drain
1. Turn off the power
Prior to working on the wiring, make sure to turn off the power supply to the kitchen at the circuit breaker. This will prevent any potential accidents while working with electrical connections.
2. Locate the electrical junction box
Locate the electrical junction box on the dishwasher. It is typically located at the front or back of the appliance behind a removable panel. Remove the panel to access the wiring connections.
3. Prepare the electrical wiring
Prepare the electrical wiring by stripping approximately half an inch of insulation from the end of each wire. Make sure to use the appropriate wire stripper tool for this task.
4. Connect the wires
Connect the wires from the dishwasher to the corresponding wires in your kitchen’s electrical supply. The most common color-coding is as follows:
- Black or red wire: Connect this wire to the hot wire (usually black) in your electrical supply.
- White wire: Connect this wire to the neutral wire (usually white) in your electrical supply.
- Green or copper wire: This is the grounding wire. Connect it to the grounding wire (usually green or copper) in your electrical supply or to the metal junction box if present.
Secure the wire connections using wire nuts, making sure that they are tight and properly insulated to prevent any electrical shorts or loose connections.
Read more: How To Install A Whirlpool Dishwasher
5. Secure the wiring in the junction box
Once the wires are connected, carefully fold and secure them in the junction box. Make sure that the wires are not pinched or damaged during this process.
6. Replace the junction box cover
After securing the wiring, replace the junction box cover on the dishwasher to protect the connections. Ensure that the cover is properly in place and securely fastened.
7. Turn on the power
After completing the wiring, turn on the power supply to the kitchen at the circuit breaker. Test the dishwasher to ensure that it is receiving power and functioning properly. If there are any issues, double-check the connections and consult the dishwasher’s manual or a professional electrician if needed.
With the dishwasher now properly wired, you’re ready for the next step – securing the dishwasher in place.
Step 7: Securing the Dishwasher in Place
Securing the dishwasher in place is an important step to ensure its stability and prevent any movement or damage during operation. Follow these steps to securely install the dishwasher:
Read more: How To Install Ge Dishwasher
1. Adjust the dishwasher feet
Before securing the dishwasher, adjust the feet to ensure that it is level and stable. Use a level to check for any unevenness and adjust the feet accordingly. This will help prevent the dishwasher from rocking or vibrating during use.
2. Position the mounting brackets
Most dishwashers come with mounting brackets that help secure them to the adjacent cabinets or countertop. Position the brackets on the sides of the dishwasher, ensuring they align with the corresponding areas on the cabinets or countertop.
3. Drill pilot holes
Using a drill with a suitable bit, drill pilot holes into the cabinets or countertop where the mounting brackets will be attached. The size and number of pilot holes will depend on the specific instructions provided by the dishwasher manufacturer.
4. Attach the mounting brackets
Attach the mounting brackets to the cabinets or countertop using screws. Ensure they are securely fastened, but be careful not to overtighten and damage the wood or countertop surface.
Read more: How To Install Maytag Dishwasher
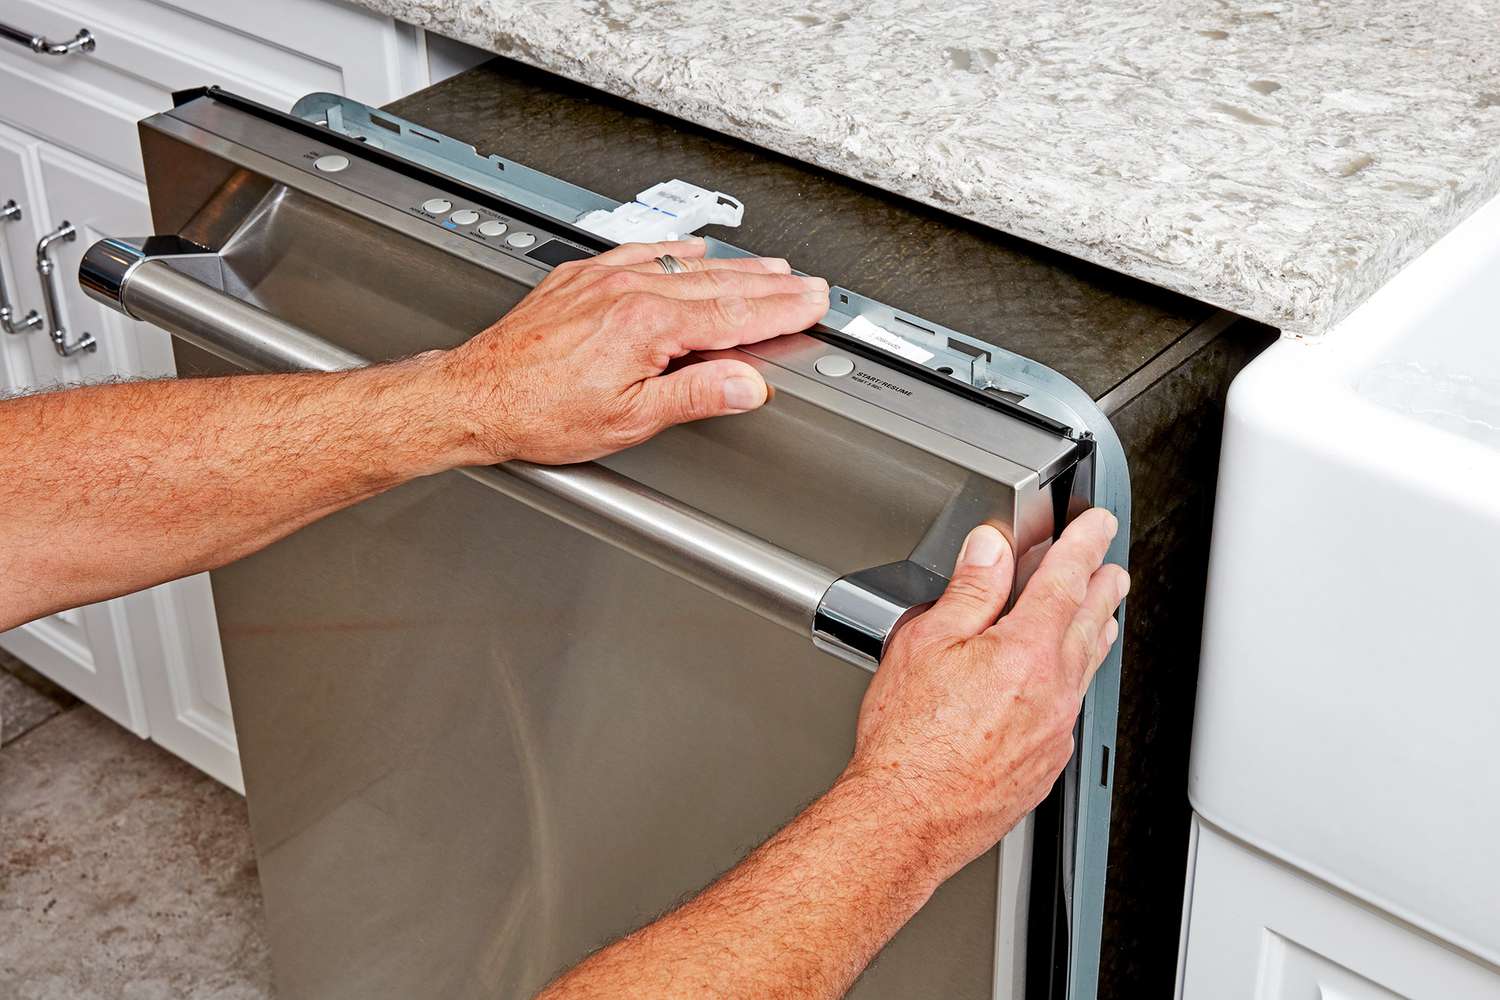
5. Slide the dishwasher into place
Carefully slide the dishwasher into the designated space, ensuring that it aligns with the mounting brackets. Take caution not to damage the water supply and drainage connections or the electrical wiring while moving the dishwasher.
6. Secure the dishwasher to the mounting brackets
Once the dishwasher is in position, carefully lift it slightly and push it firmly against the cabinets or countertop. Align the mounting brackets with the corresponding holes on the dishwasher’s sides and secure them tightly using screws.
7. Test for stability
After securing the dishwasher, gently nudge and shake it to check for any movement. If it feels stable and does not move excessively, it is securely in place. If there is any instability, double-check the mounting brackets and make necessary adjustments.
With the dishwasher properly secured, you’re now ready for the final step – testing the dishwasher to ensure it is functioning correctly.
Step 8: Testing the Dishwasher
After successfully installing and securing the dishwasher, it’s important to perform a thorough test to ensure that it is functioning correctly. This final step will help identify any issues or adjustments that may be needed before regular use. Follow these steps to test the dishwasher:
Read more: How To Install An Lg Dishwasher
1. Complete the dishwasher setup
Ensure that the dishwasher is properly connected to the water supply and drainage system. Double-check all the connections, ensuring there are no leaks or loose fittings. Also, make sure the dishwasher is properly wired and securely in place.
2. Load the dishwasher
Load the dishwasher with a small load of dishes, following the manufacturer’s instructions for proper loading. It’s best to start with a small load for the initial test to observe how the dishwasher operates.
3. Add detergent
Add the appropriate amount of dishwasher detergent to the designated compartment. Refer to the dishwasher’s user manual for specific guidelines on the detergent type and amount to use.
4. Set the dishwasher cycle
Select the desired dishwasher cycle and any additional settings based on your preferences and the type of dishes being washed. Common options include normal, heavy-duty, and quick wash cycles. Ensure that the dishwasher is set to the correct settings before starting the test.
5. Start the dishwasher
Close the dishwasher door securely and press the start button to begin the cycle. Observe the dishwasher during the cycle to ensure that it is filling with water, circulating properly, and draining without any issues or leaks.
6. Monitor the dishwasher’s performance
Throughout the cycle, keep an eye on the dishwasher’s performance. Check for any unusual noises, vibrations, or error messages. Also, observe if the dishes are being cleaned effectively and there are no water leaks around the dishwasher or in the surrounding area.
7. Check for proper drying
At the end of the cycle, open the dishwasher and check if the dishes are clean and dry. If there are any spots or excessive moisture, refer to the dishwasher’s manual for recommendations on improving the drying performance.
8. Repeat test if necessary
If you notice any issues or concerns during the test, it may be necessary to repeat the test cycle or make adjustments to the dishwasher’s settings. Refer to the user manual or consult a professional if you need assistance in troubleshooting any problems.
By thoroughly testing the dishwasher, you can ensure that it is functioning correctly and ready for regular use. Make any necessary adjustments or repairs before using it regularly to maintain optimal performance and efficiency.
Congratulations! You have successfully installed, tested, and now have a fully functional dishwasher in your kitchen. Enjoy the convenience and time-saving benefits that it brings to your daily life.
Remember, if you ever encounter any issues or are unsure about any aspect of your dishwasher’s maintenance or operation, consult the manufacturer’s instructions or contact a professional for assistance.
Read more: How To Install A Kitchenaid Dishwasher
Conclusion
Installing a dishwasher in a space where there wasn’t one before can be a challenging task, but with the right tools, materials, and a step-by-step guide, it is entirely achievable. By following the steps outlined in this article, you can successfully add this convenient appliance to your kitchen, making your daily routines more efficient.
We started by assessing the space, ensuring that key factors such as proximity to the sink, cabinet space, electrical outlet availability, and flooring condition were taken into consideration. Next, we gathered the necessary tools and materials, ensuring that we had everything needed for a smooth installation process.
Preparing the space was the next crucial step, where we cleared any obstacles, made necessary modifications to the cabinets, checked the flooring, and ensured the area was clean and ready for the dishwasher installation.
We then moved on to installing the water supply line, connecting the dishwasher to a reliable water source. Following the correct measurements, cutting the tubing, and connecting it to the water supply valve and dishwasher ensured that a proper water supply was established.
Installing the drainage system was equally important to ensure the proper removal of wastewater. We determined the routing of the drain hose, connected it to the sink’s drainpipe or a dedicated dishwasher drain pipe, and made sure it was properly secured to prevent leaks or blockages.
Wiring the dishwasher for electrical power was the next step, where we turned off the power, located the electrical junction box, connected the wires, and secured them in the box. Finally, we tested the dishwasher to ensure it was functioning correctly, loaded it with dishes, added detergent, set the cycle, and monitored its performance.
With each step completed successfully, you now have a fully functional dishwasher in your kitchen – making your life more convenient and efficient. Remember to follow the manufacturer’s instructions for regular maintenance and cleaning to prolong the lifespan of your dishwasher.
If you face any difficulties during the installation process or encounter any issues with your dishwasher, do not hesitate to seek the help of a professional. They can offer expert guidance and assistance to ensure a safe and proper installation.
Congratulations on successfully installing your dishwasher, and enjoy the convenience and time-saving benefits it brings to your kitchen!
Frequently Asked Questions about How To Install A Dishwasher Where There Wasnt One Before
Was this page helpful?
At Storables.com, we guarantee accurate and reliable information. Our content, validated by Expert Board Contributors, is crafted following stringent Editorial Policies. We're committed to providing you with well-researched, expert-backed insights for all your informational needs.

0 thoughts on “How To Install A Dishwasher Where There Wasnt One Before”