Home>Articles>How To Install Door And Window Flashing To Prevent Leaks
Articles
How To Install Door And Window Flashing To Prevent Leaks
Modified: December 7, 2023
Learn how to install door and window flashing to prevent leaks with our informative articles. Protect your home from water damage for years to come.
(Many of the links in this article redirect to a specific reviewed product. Your purchase of these products through affiliate links helps to generate commission for Storables.com, at no extra cost. Learn more)
Introduction
When it comes to ensuring the longevity and integrity of your doors and windows, proper installation of flashing is crucial. Flashing serves as a protective barrier against water infiltration, preventing leaks and potential damage to your home’s interior. In this article, we will guide you through the process of installing door and window flashing, step by step.
Flashing is a thin, waterproof material that is installed around the edges of doors and windows to create a tight seal between the frame and the surrounding walls. It acts as a barrier against water, preventing moisture from seeping in and causing rot, mold, or other moisture-related issues. Without proper flashing, water can penetrate the gaps between the door or window frame and the wall, leading to costly repairs and potentially compromising the structure of your home.
Installing door and window flashing may seem like a daunting task, but with the right tools and materials, it is a relatively straightforward process. By following these steps, you can ensure a watertight seal around your doors and windows, providing added protection against leaks and preserving the integrity of your home.
Key Takeaways:
- Proper installation of door and window flashing is crucial for protecting your home from water damage, preserving its structural integrity, preventing air leakage, and improving energy efficiency.
- By following the step-by-step process outlined in this article, you can ensure a watertight seal and optimal protection for your doors and windows against moisture infiltration.
What is Door and Window Flashing?
Door and window flashing is a crucial component of the building envelope that helps protect doors and windows from moisture infiltration. It is a thin, flexible material made from materials like aluminum, galvanized steel, vinyl, or rubberized asphalt, and is installed around the openings of doors and windows to create a watertight seal.
The primary function of flashing is to redirect water away from the vulnerable areas of doors and windows, preventing it from seeping into the building structure. It acts as a barrier, stopping water from infiltrating the gaps between the door or window frame and the surrounding walls. This helps to prevent water damage, such as rot, mold, and mildew growth, which can compromise the structural integrity of the building.
There are different types of flashing available for doors and windows, including drip cap flashing, sill pan flashing, and jamb flashing. Drip cap flashing, also known as head flashing, is installed horizontally over the top of doors and windows to divert water away from the openings. Sill pan flashing, on the other hand, is installed underneath the doors or windows to collect and redirect any water that manages to get past the other layers of protection. Jamb flashing is installed on the sides of the openings to prevent water infiltration through the gaps between the frame and the walls.
The choice of flashing material depends on various factors, including the climate, building design, and personal preferences. Aluminum and galvanized steel flashing are commonly used due to their durability, flexibility, and resistance to corrosion. Vinyl flashing is lightweight, easy to work with, and offers good water resistance. Rubberized asphalt flashing provides excellent waterproofing properties and can conform to irregular surfaces, making it suitable for challenging installations.
In addition to protecting against water infiltration, door and window flashing also helps to prevent air leakage. It acts as an air barrier, reducing drafts and improving energy efficiency in the building. By sealing the gaps around doors and windows, flashing helps to maintain a comfortable indoor environment and reduce heating and cooling costs.
Overall, door and window flashing is an essential component in preventing water damage and maintaining the structural integrity of the building. Proper installation of flashing is crucial to ensure its effectiveness and longevity, which we will discuss in detail in the following sections.
Why is Door and Window Flashing Important?
Door and window flashing play a vital role in protecting your home from moisture damage. Here are some reasons why door and window flashing are important:
- Prevents Water Infiltration: The primary function of flashing is to create a barrier against water infiltration. With continuous exposure to rain, snow, and other moisture sources, doors and windows are susceptible to water penetration. Flashing helps redirect water away from vulnerable areas, ensuring that it does not seep into the building structure. Without proper flashing, water can enter through the gaps between the frame and the surrounding walls, causing damage to the interior, such as rot, mold, mildew, and staining.
- Preserves Building Integrity: Water infiltration can have severe consequences on the structural integrity of your home. Moisture can weaken the wood framing, leading to decay, warping, and compromising the stability of the structure. Over time, this can result in costly repairs and even structural failure. By installing flashing, you create a protective barrier that helps preserve the integrity of your building and maintain its longevity.
- Prevents Air Leakage: In addition to water infiltration, flashing also helps prevent air leakage. Gaps and cracks around doors and windows can allow drafts to enter your home, causing discomfort and increasing energy bills. By sealing these gaps with flashing, you create an effective air barrier that reduces drafts, improves energy efficiency, and enhances the overall comfort of your living space.
- Protects against Mold and Mildew: Moisture infiltration can create a favorable environment for mold and mildew growth. These fungi not only have a detrimental effect on the aesthetics of your home but also pose health risks to you and your family. By preventing water penetration through proper flashing installation, you minimize the risk of mold and mildew growth, ensuring a healthier indoor environment.
- Enhances Energy Efficiency: Doors and windows are common areas for energy loss in a home. By properly sealing them with flashing, you can improve the energy efficiency of your home. The barrier created by flashing helps to reduce air leakage and maintain a consistent indoor temperature, resulting in lower heating and cooling costs.
Overall, door and window flashing are crucial for protecting your home from water damage, preserving its structural integrity, preventing air leakage, and improving energy efficiency. By ensuring the proper installation and maintenance of flashing, you can safeguard your home and enjoy a comfortable and durable living space for years to come.
Tools and Materials Needed for Installation
Before you begin installing door and window flashing, it’s important to gather all the necessary tools and materials to ensure a smooth and successful installation process. Here are the key items you will need:
Tools:
- Utility knife or tin snips: These tools are essential for cutting the flashing material to the desired length and shape.
- Tape measure: You’ll need a tape measure to accurately measure the dimensions of your doors and windows and cut the flashing accordingly.
- Caulking gun: A caulking gun is necessary for applying sealant onto the flashing and creating a strong bond with the door or window frame.
- Screwdriver: Depending on the type of flashing and installation method, you may need a screwdriver to secure the flashing in place.
- Hammer: A hammer might be required to gently tap the flashing into position, especially if it needs to be aligned with nails or staples.
- Ladder: If you are installing flashing on windows or doors at a height, a sturdy ladder will be necessary to safely access the installation area.
- Protective gear: Wear gloves and safety glasses to protect yourself while handling sharp tools and working with sealants.
Read more: How To Install Dormer Flashing
Materials:
- Flashing material: There are several types of flashing materials available, including aluminum, galvanized steel, vinyl, and rubberized asphalt. Choose the material that best suits your needs and the climate in your area.
- Sealant: You will need a high-quality sealant compatible with the flashing material and suitable for exterior use. It should provide a waterproof and durable seal.
- Screws or nails: Depending on the flashing material and the specific installation requirements, you may need screws or nails to secure the flashing in place. Make sure to choose corrosion-resistant fasteners.
- Weather-resistant tape: It’s a good idea to have weather-resistant tape on hand to further reinforce the seal and provide additional protection against water infiltration.
- Caulk: Caulk is used to seal any gaps or joints between the flashing and the surrounding surfaces, ensuring a watertight seal.
- Primer (if required): Some flashing materials, such as PVC or vinyl, may require the use of a primer to enhance adhesion between the flashing and the surface it’s being applied to. Check the manufacturer’s instructions for specific requirements.
By gathering these tools and materials before you start the installation process, you’ll be well-prepared to tackle the project efficiently and effectively.
Step 1: Prepare the Work Area
Before you begin the installation of door and window flashing, it’s important to prepare the work area to ensure a smooth and successful process. Here are the steps to follow:
- Clean the Surface: Start by cleaning the area around the doors and windows where the flashing will be installed. Remove any dirt, debris, or old caulking using a stiff brush or scraper. This will ensure a clean surface for proper adhesion of the flashing and sealant.
- Inspect the Existing Flashing: If there is already flashing in place, carefully inspect its condition. Look for signs of damage or deterioration, such as cracks, gaps, or rust. If the existing flashing is in poor condition, it’s recommended to remove it and install new flashing for optimal performance.
- Assess the Surface Condition: Examine the surface around the doors and windows where the flashing will be applied. Check for any signs of damage, decay, or rot. It’s important to repair and replace any damaged wood or other materials before proceeding with the installation to ensure a sturdy and stable foundation for the flashing.
- Measure and Mark: Measure the dimensions of the doors and windows to determine the length and width of the flashing needed. Use a tape measure to accurately measure the width of the openings and add a few inches to allow for overlapping and a proper seal.
- Plan the Flashing Layout: Plan the layout of the flashing, considering the specific requirements for each opening. Depending on the design and placement of doors and windows, you may need to cut and shape the flashing accordingly to ensure a proper fit and seal.
- Ensure Proper Slope: Examine the slope of the area where the flashing will be installed. It’s crucial to ensure that the flashing slopes away from the opening to direct water away from the door or window. Use a level or other measuring tool to verify that the flashing will be installed at the correct angle.
By taking the time to properly prepare the work area, you’ll set the foundation for a successful installation of door and window flashing. This initial step will help ensure a clean, structurally sound, and well-planned installation process that will provide effective protection against water infiltration and prolong the longevity of your doors and windows.
Step 2: Measure and Cut the Flashing
Once you have prepared the work area for installing door and window flashing, the next step is to measure and cut the flashing material. Proper measurements and accurate cuts are essential to ensure a snug fit and effective water protection. Follow these steps:
- Measure the Length: Use a tape measure to measure the length of the opening where the flashing will be installed. Start from one end of the opening and measure to the other, adding a few inches for overlapping and a secure seal.
- Mark the Flashing: Transfer the measurements onto the flashing material using a pencil or marker. Use a straight edge or ruler to draw straight lines across the flashing material, ensuring accurate cuts.
- Cut the Flashing: Using tin snips or a utility knife, carefully cut along the marked lines to shape the flashing to the correct length. Take your time to ensure clean, precise cuts, as they will directly impact the effectiveness of the flashing.
- Shape the Flashing: If needed, shape the flashing to fit the contours of the opening. Some doors and windows may have curved or irregular shapes that require the flashing to be cut or bent accordingly. Use the appropriate tools to achieve the desired shape without compromising the integrity of the flashing.
- Create Overlapping Joints: If the opening is wider than the width of the flashing, you may need to cut multiple pieces of flashing and create overlapping joints for a secure and watertight seal. Ensure that the overlapping sections are sufficient to prevent water from seeping through the joints.
- Label the Flashing: To keep track of the flashing pieces and their corresponding placements, label each piece with a marker or label maker. This will make the installation process smoother and prevent confusion later on.
Remember to double-check your measurements and ensure that the flashing is cut accurately before proceeding with the installation. Precise cuts will help create a tight seal and optimize the effectiveness of the flashing in protecting against water infiltration.
Step 3: Apply Sealant to the Flashing
After you have measured and cut the door and window flashing, the next step is to apply sealant. Sealant helps create a watertight seal between the flashing and the door or window frame, further enhancing its effectiveness in preventing water infiltration. Here’s how to apply sealant to the flashing:
- Choose the Right Sealant: Select a high-quality sealant that is suitable for exterior use and compatible with the flashing material you are working with. Ensure that the sealant offers excellent adhesion and waterproofing properties. Silicone or polyurethane-based sealants are commonly used for this purpose.
- Clean the Flashing: Before applying the sealant, make sure the surface of the flashing is clean and free from dust, dirt, and debris. Use a clean cloth or a soft brush to remove any contaminants from the flashing.
- Load the Sealant into the Caulking Gun: Load the selected sealant into a caulking gun according to the manufacturer’s instructions. Cut the tip of the sealant tube to the desired size, typically at a 45-degree angle, for effective application.
- Apply the Sealant: Starting at one end of the flashing, apply a steady and even bead of sealant along the length of the flashing. Make sure to get complete coverage along the edges of the flashing, as well as any overlapping joints if applicable.
- Smooth the Sealant: Use a caulking tool or your finger to smooth the applied sealant. This ensures an even seal and helps improve the aesthetic appearance of the flashing. Smooth out any bumps or excess sealant while maintaining a consistent application thickness.
- Check for Gaps or Incomplete Coverage: Inspect the applied sealant to ensure there are no gaps or areas with incomplete coverage. Pay close attention to the corners and edges of the flashing, as these are critical areas for water protection. If any gaps or incomplete coverage are detected, apply additional sealant to fill in the spaces.
- Allow the Sealant to Cure: Follow the manufacturer’s instructions regarding the curing time for the sealant. Allow enough time for the sealant to fully dry and cure before proceeding with the installation of the flashing.
Applying sealant to the door and window flashing helps create a strong, waterproof seal that further enhances the effectiveness of the flashing in preventing water infiltration. Take the time to apply the sealant carefully and ensure complete coverage for optimal protection against moisture.
When installing door and window flashing, make sure to properly overlap the pieces to create a continuous barrier against water infiltration. Use a high-quality flashing tape to ensure a tight seal.
Read more: How To Prevent Frost On Car Windows
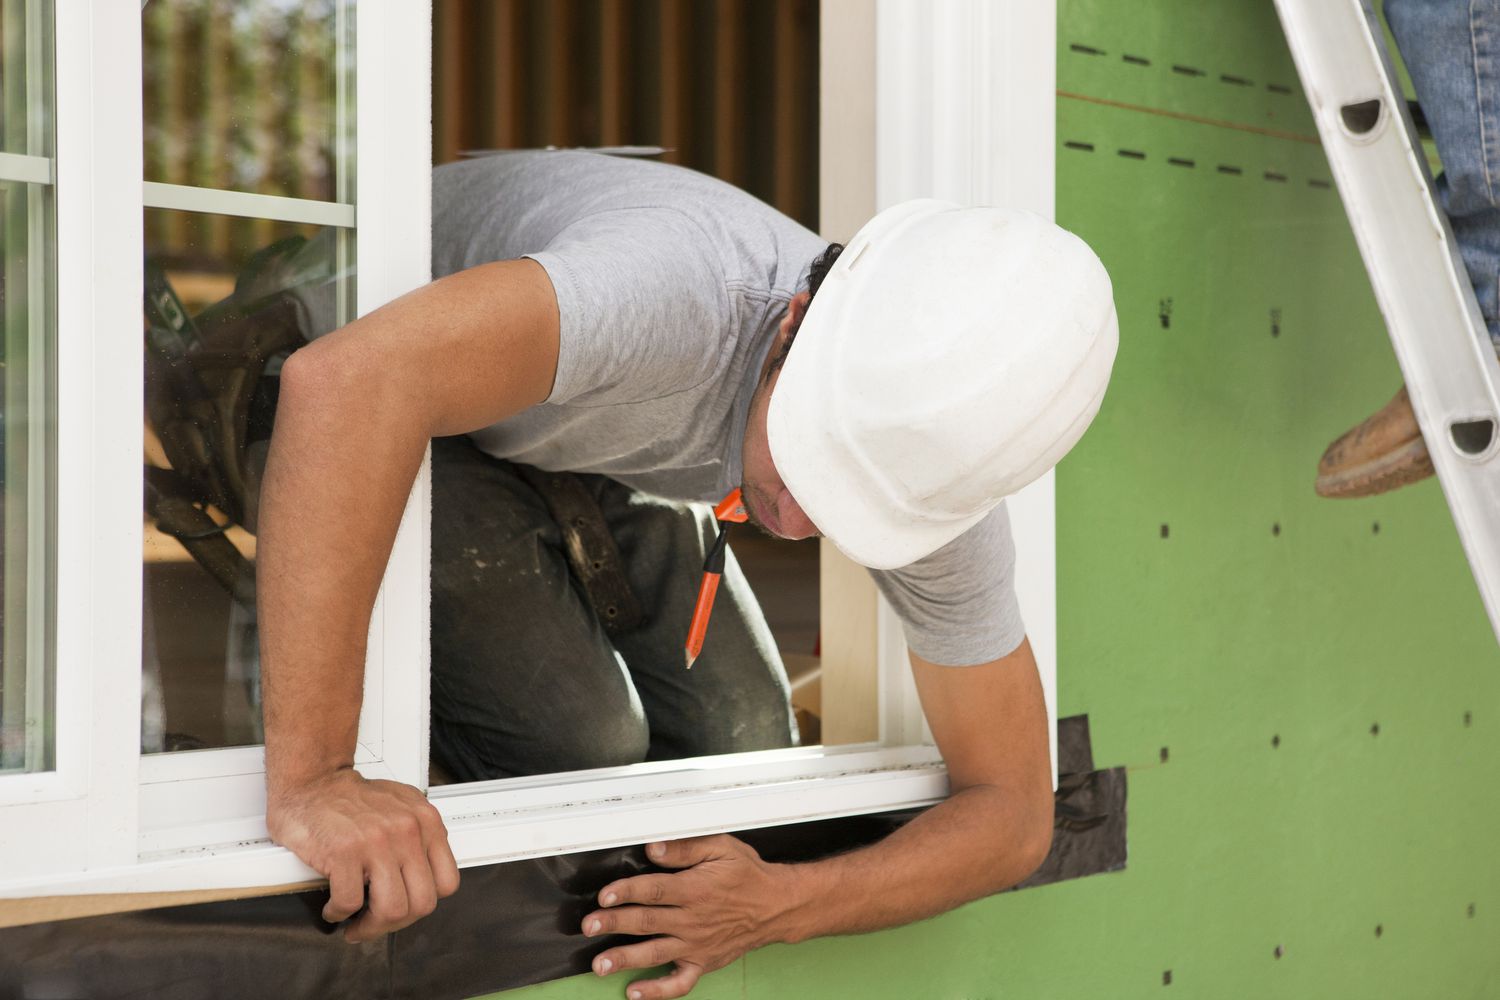
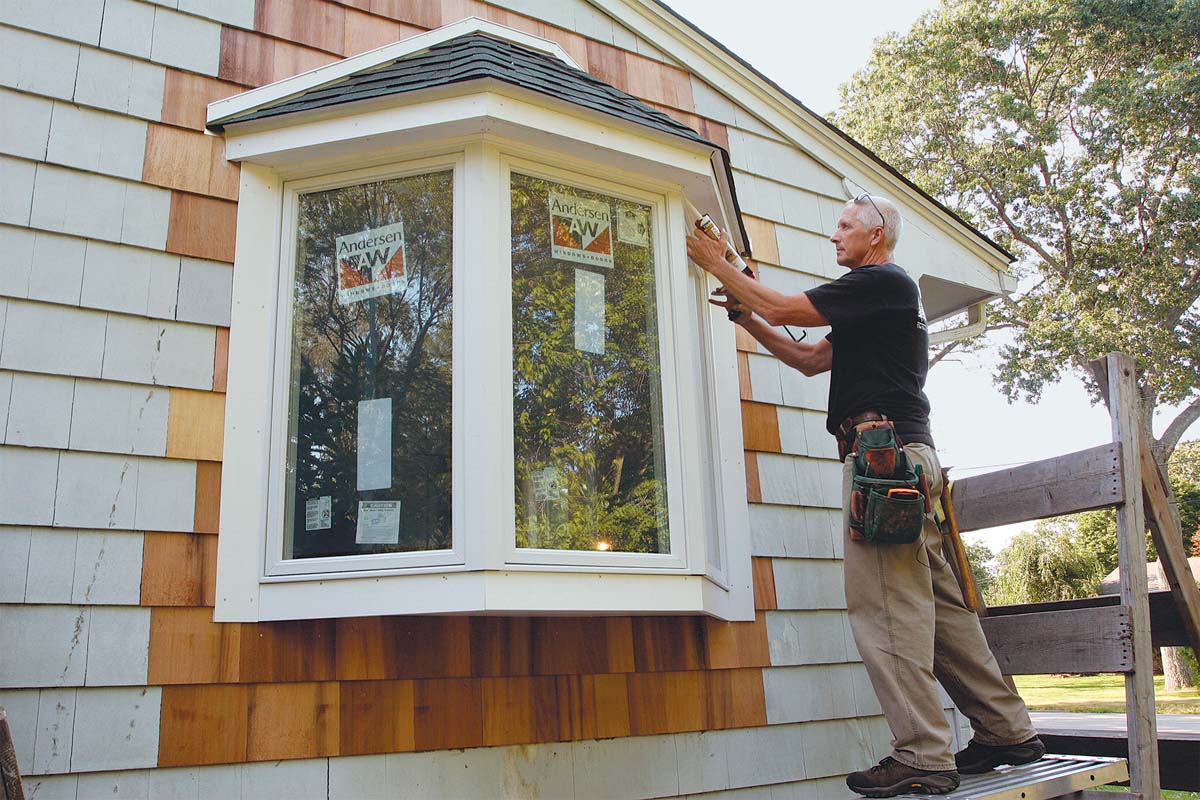
Step 4: Install Flashing on the Door or Window
Now that you have prepared the work area and applied sealant to the flashing, it’s time to install the flashing on the door or window. This step is crucial for creating a watertight barrier and protecting against water infiltration. Follow these steps to install the flashing:
- Position the Flashing: Begin by positioning the first piece of flashing at the bottom of the door or window opening. Ensure that it is aligned with the edge of the frame and covers any exposed gaps or joints.
- Secure the Flashing: Depending on the type of flashing and manufacturer’s instructions, use nails, screws, or staples to secure the flashing in place. Ensure that the fasteners are placed at regular intervals to provide a secure attachment. It’s important to avoid over-tightening the fasteners, as it may damage the flashing material.
- Overlap the Flashing: If you have multiple pieces of flashing, overlap them to create a continuous barrier. Position the next piece of flashing over the previous one, ensuring a minimum overlap of inches. This overlap helps prevent water from seeping through the junction between the flashing pieces.
- Apply Pressure: Gently press down on the flashing to ensure a snug fit and proper adhesion with the sealant and the door or window frame. This helps create a strong and watertight seal.
- Trim Excess Flashing: If there is any excess flashing extending beyond the edges of the door or window frame, use a utility knife or tin snips to trim it to the desired length. This ensures a neat and clean finish.
- Repeat the Process: If you have more openings to cover, repeat these steps for each door or window, ensuring proper alignment, secure fastening, and overlapping of the flashing where necessary.
During the installation process, it’s important to be mindful of the flashing’s position and ensure that it is properly aligned with the door or window frame. Take your time to secure the flashing in place and make necessary adjustments as needed. This step is crucial for creating a reliable barrier against water infiltration and protecting the integrity of your doors and windows.
Step 5: Secure Flashing in Place
Once the flashing is installed on the door or window, the next step is to secure it in place to ensure it remains firmly attached and provides optimal protection against water infiltration. By properly securing the flashing, you can prevent it from shifting or becoming loose over time. Follow these steps to secure the flashing in place:
- Inspect the Placement: Before securing the flashing, carefully inspect its position and alignment. Make sure it covers the gaps and joints around the door or window adequately.
- Use Fasteners: Depending on the type of flashing and the recommendations from the manufacturer, use appropriate fasteners to secure the flashing in place. Common options include nails, screws, or staples.
- Fasten at Regular Intervals: Secure the flashing by placing the fasteners at regular intervals along its length. The specific spacing will depend on the flashing material and the instructions provided by the manufacturer. Be careful not to over tighten the fasteners, as it may damage the flashing or compromise its effectiveness.
- Avoid Overlapping Fasteners: When placing the fasteners, be mindful of the overlapping joints in the flashing, if applicable. Avoid placing fasteners directly on top of the overlapping joints to prevent potential water leakage through the fastener holes.
- Check for Secure Attachment: After securing the flashing, give it a gentle tug to ensure it is firmly attached and does not shift or come loose. If any sections feel loose or unsecured, add additional fasteners as needed.
- Trim Exposed Fasteners: If there are any fastener heads that remain exposed, use a hammer or a suitable tool to gently tap them below the surface of the flashing. This ensures a clean and flush finish and prevents potential water pooling on the fastener heads.
By properly securing the flashing in place, you ensure that it remains intact and provides effective protection against water infiltration. Take the time to inspect the placement, use the appropriate fasteners, and check for secure attachment to ensure the flashing stays in place and performs its intended function.
Step 6: Check for Proper Installation
After completing the installation of door and window flashing, it is important to perform a thorough check to ensure that the flashing has been installed correctly and will provide optimal protection against water infiltration. Here are key steps to follow in the final inspection:
- Inspect the Seals: Check the seams and joints between the flashing and the door or window frame. Ensure that the sealant has formed a continuous and secure seal. Look for any gaps, cracks, or areas of incomplete coverage.
- Check for Secure Attachment: Examine the fasteners that were used to secure the flashing. Make sure they are firmly in place and have not come loose. Ensure that the flashing itself is securely attached to the door or window frame, without any signs of shifting or movement.
- Examine Overlapping Joints: If you have overlapping joints between multiple pieces of flashing, inspect them closely. Ensure that the overlapping sections are properly aligned and tightly sealed, without any gaps or separations.
- Verify Proper Slope: Check the slope of the flashing to ensure that it is angled away from the door or window opening. This will help redirect water and prevent it from pooling or seeping into the structure.
- Inspect for Protective Coverage: Ensure that the flashing fully covers the vulnerable areas of the door or window, including any gaps or joints that could potentially allow water infiltration. Pay close attention to the corners, edges, and areas of irregularity.
- Test for Water Resistance: Perform a water spray test by gently spraying water onto the flashing and the surrounding areas. Observe if water beads up and rolls away from the door or window, indicating a proper seal and effective water resistance.
- Check for Aesthetic Finish: Assess the overall appearance of the installed flashing. Ensure that it has a clean and visually pleasing finish. Trim any excess flashing, if necessary, to achieve a neat and professional look.
By conducting a thorough inspection, you can confirm that the door and window flashing has been properly installed and will provide the necessary protection against water infiltration. Any issues or deficiencies discovered during the inspection should be addressed promptly to prevent potential water damage and maintain the integrity of your doors and windows.
Conclusion
Proper installation of door and window flashing plays a crucial role in maintaining the integrity of your home and protecting it from water damage. By following the step-by-step process outlined in this article, you can ensure a watertight seal and optimal protection for your doors and windows against moisture infiltration.
Door and window flashing act as a barrier, redirecting water away from vulnerable areas and preventing it from seeping into the building structure. This helps to prevent issues such as rot, mold, and mildew growth, which can compromise the structural integrity of your home and create potential health hazards.
Throughout the installation process, it is important to be thorough and meticulous. From preparing the work area to measuring and cutting the flashing, applying sealant, securing the flashing in place, and performing a final inspection, each step contributes to the effectiveness and durability of the flashing.
By gathering the necessary tools and materials, selecting high-quality sealants and flashing materials, and ensuring proper alignment, secure attachment, and thorough sealing, you can confidently protect your home from water infiltration and enjoy a safe and comfortable living space.
Regular maintenance and inspections are also essential to ensure the continued effectiveness of the flashing. Periodically check for any signs of damage or deterioration and address them promptly to maintain the integrity and functionality of the flashing.
In conclusion, door and window flashing are vital components in safeguarding your home against water infiltration. By paying attention to the installation process and following the steps outlined in this article, you can protect your doors and windows from water damage, extend their lifespan, and maintain the beauty and value of your home for years to come.
Frequently Asked Questions about How To Install Door And Window Flashing To Prevent Leaks
Was this page helpful?
At Storables.com, we guarantee accurate and reliable information. Our content, validated by Expert Board Contributors, is crafted following stringent Editorial Policies. We're committed to providing you with well-researched, expert-backed insights for all your informational needs.


0 thoughts on “How To Install Door And Window Flashing To Prevent Leaks”