Home>Articles>How To Install Beadboard To Add Instant Character To Your Walls
Articles
How To Install Beadboard To Add Instant Character To Your Walls
Modified: January 8, 2024
Learn how to easily install beadboard to give your walls a charming and character-filled look. Step-by-step articles guide you through the process with exceptional detail.
(Many of the links in this article redirect to a specific reviewed product. Your purchase of these products through affiliate links helps to generate commission for Storables.com, at no extra cost. Learn more)
Introduction
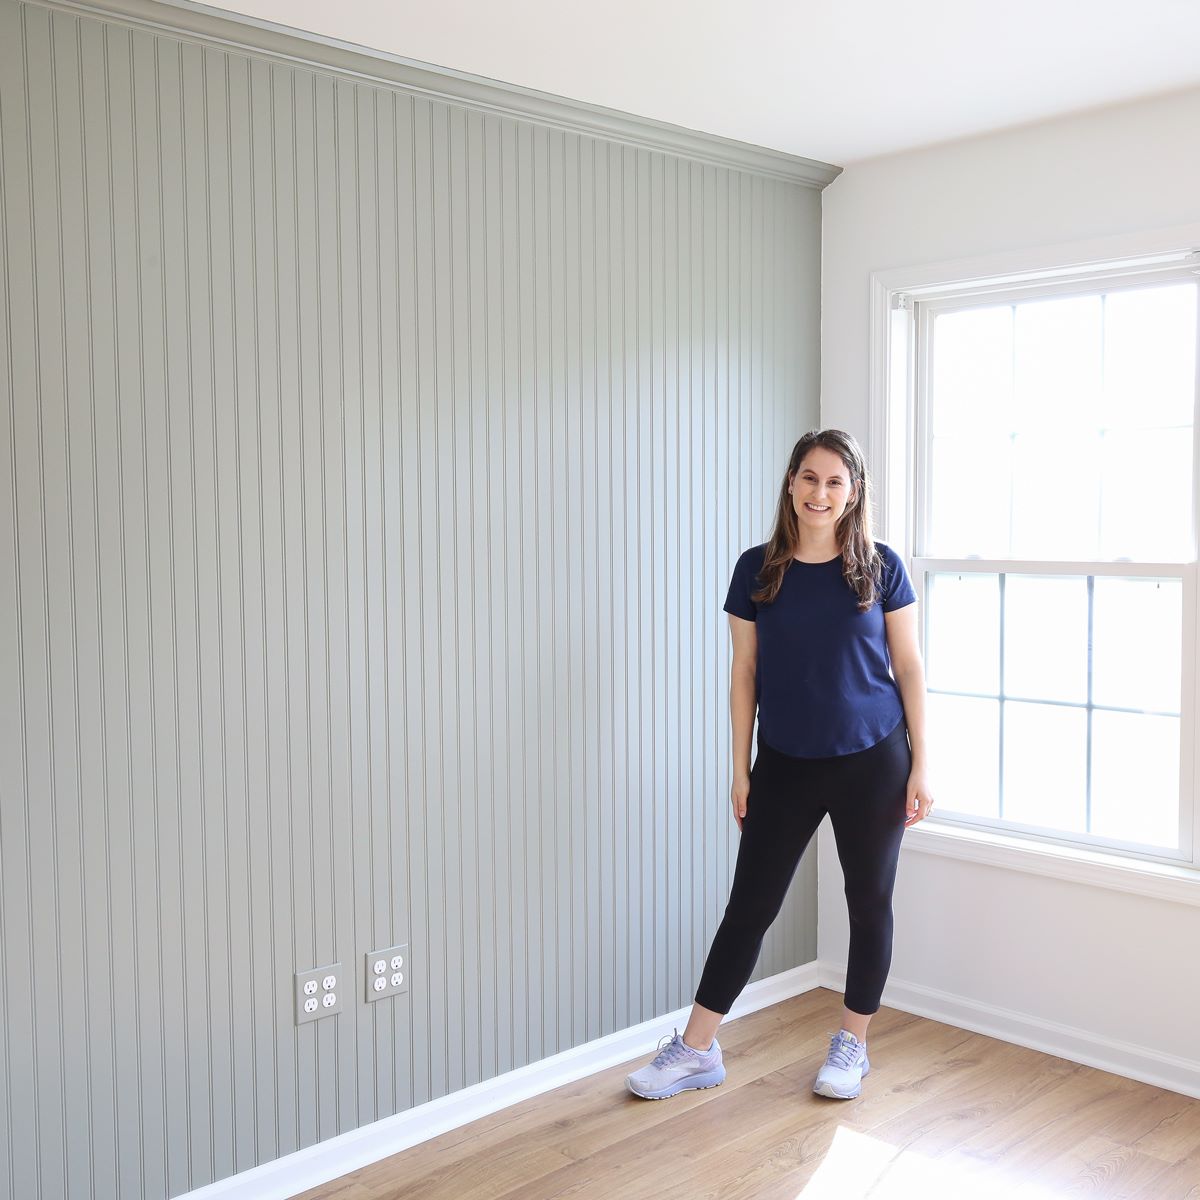
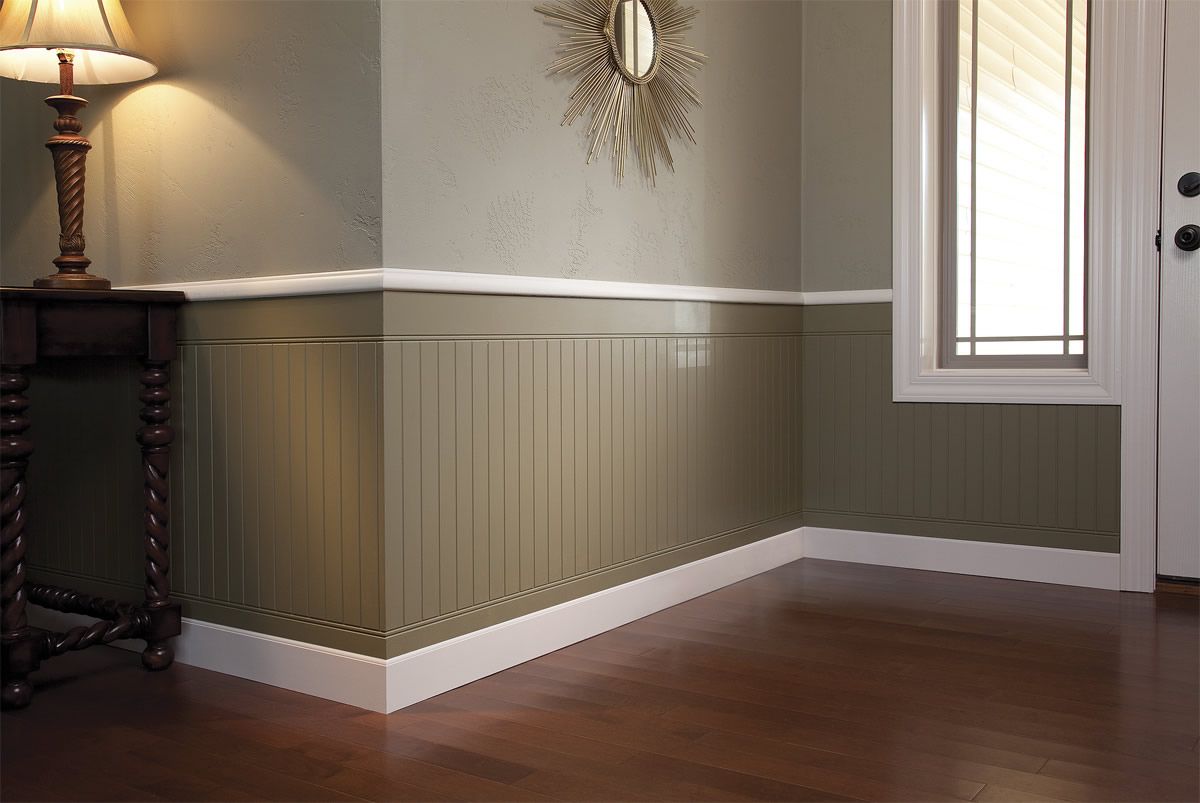
Welcome to our comprehensive guide on how to install beadboard to add instant character to your walls. Beadboard is a type of decorative paneling that features narrow, vertical planks with rounded edges and indented grooves in between. It adds charm and visual interest to any space and can transform a plain, boring wall into a stunning focal point.
Whether you’re looking to create a cozy cottage feel or add a touch of vintage elegance, beadboard is a versatile and cost-effective option. In this article, we will take you through the step-by-step process of installing beadboard, from preparing the walls to priming and painting the final result.
Before we get started, let’s go over the materials you will need for this project:
- Beadboard panels
- Construction adhesive
- Nails or screws
- Primer
- Paint
- Measuring tape
- Saw
- Level
- Sanding block
- Putty knife
- Paintbrushes
Now that you have all the necessary materials, let’s dive into the installation process! But first, make sure to prepare the walls by removing any existing wallpaper, filling in cracks or holes, and giving them a thorough cleaning.
Key Takeaways:
- Transform plain walls into stunning focal points with beadboard, adding charm and character to any space. Follow the step-by-step guide for a professional-looking result.
- Embrace creativity and enjoy the process of installing and painting beadboard to achieve a fresh, elegant look that complements your personal style.
Materials Needed
Before you begin the installation process, it’s important to gather all the necessary materials. Here’s a list of what you’ll need:
- Beadboard panels: These can be purchased at your local home improvement store or online. Be sure to measure your walls beforehand to determine how many panels you’ll need.
- Construction adhesive: This will be used to attach the beadboard panels to the walls. Look for an adhesive that is compatible with your wall material.
- Nails or screws: These will be used to secure the beadboard panels to the walls. Choose nails or screws that are appropriate for the thickness of your panels and the type of wall you have.
- Primer: A good quality primer will help ensure a smooth and long-lasting finish. Look for a primer that is suitable for your chosen paint type.
- Paint: Select a paint color that suits your desired aesthetic. It’s important to choose a paint that is appropriate for the material of your beadboard panels.
- Measuring tape: This will be used to measure the dimensions of your walls and the beadboard panels.
- Saw: A saw is necessary for cutting the beadboard panels to the correct size. A circular saw or a table saw can be used for this purpose.
- Level: Use a level to ensure that the beadboard panels are installed straight and level.
- Sanding block: This will be used to smooth out any rough edges or imperfections on the beadboard panels.
- Putty knife: A putty knife is handy for filling in any nail holes or gaps between the panels.
- Paintbrushes: Choose high-quality paintbrushes for a smooth and even application of primer and paint.
Having all these materials on hand before you begin will make the installation process much smoother and more efficient. Now that you’re prepared, let’s move on to the next step: preparing the walls.
Step 1: Prepare the Walls
Before installing the beadboard panels, it’s crucial to properly prepare the walls. Follow these steps to ensure a clean and smooth surface:
- Remove any existing wallpaper or wall coverings: Use a wallpaper removal solution or a steamer to strip off any wallpaper or other wall coverings. Scrape off any remaining adhesive residue and clean the walls thoroughly with a damp sponge or cloth.
- Inspect the walls: Look for any cracks, holes, or uneven patches on the walls. Use a spackling compound to fill in any imperfections, smoothing it out with a putty knife. Allow the compound to dry completely and sand it down until it is smooth and flush with the wall surface.
- Clean the walls: Once the spackling compound is dry, wipe down the walls with a damp cloth or sponge to remove any dust or debris. This will ensure proper adhesion of the beadboard panels.
- Measure and mark the wall: Use a measuring tape to determine the height and width of the area where you will be installing the beadboard. Mark these measurements on the wall using a pencil and a level, ensuring that the lines are straight and level.
- Protect the surrounding area: Cover the floors and nearby furniture with drop cloths or plastic sheets to protect them from dust and any potential paint splatters or adhesive spills.
By thoroughly preparing the walls, you’ll create a clean and even surface for the beadboard installation. This will help ensure a professional-looking finished result. With the walls prepped and ready, it’s time to move on to the next step: measuring and cutting the beadboard panels.
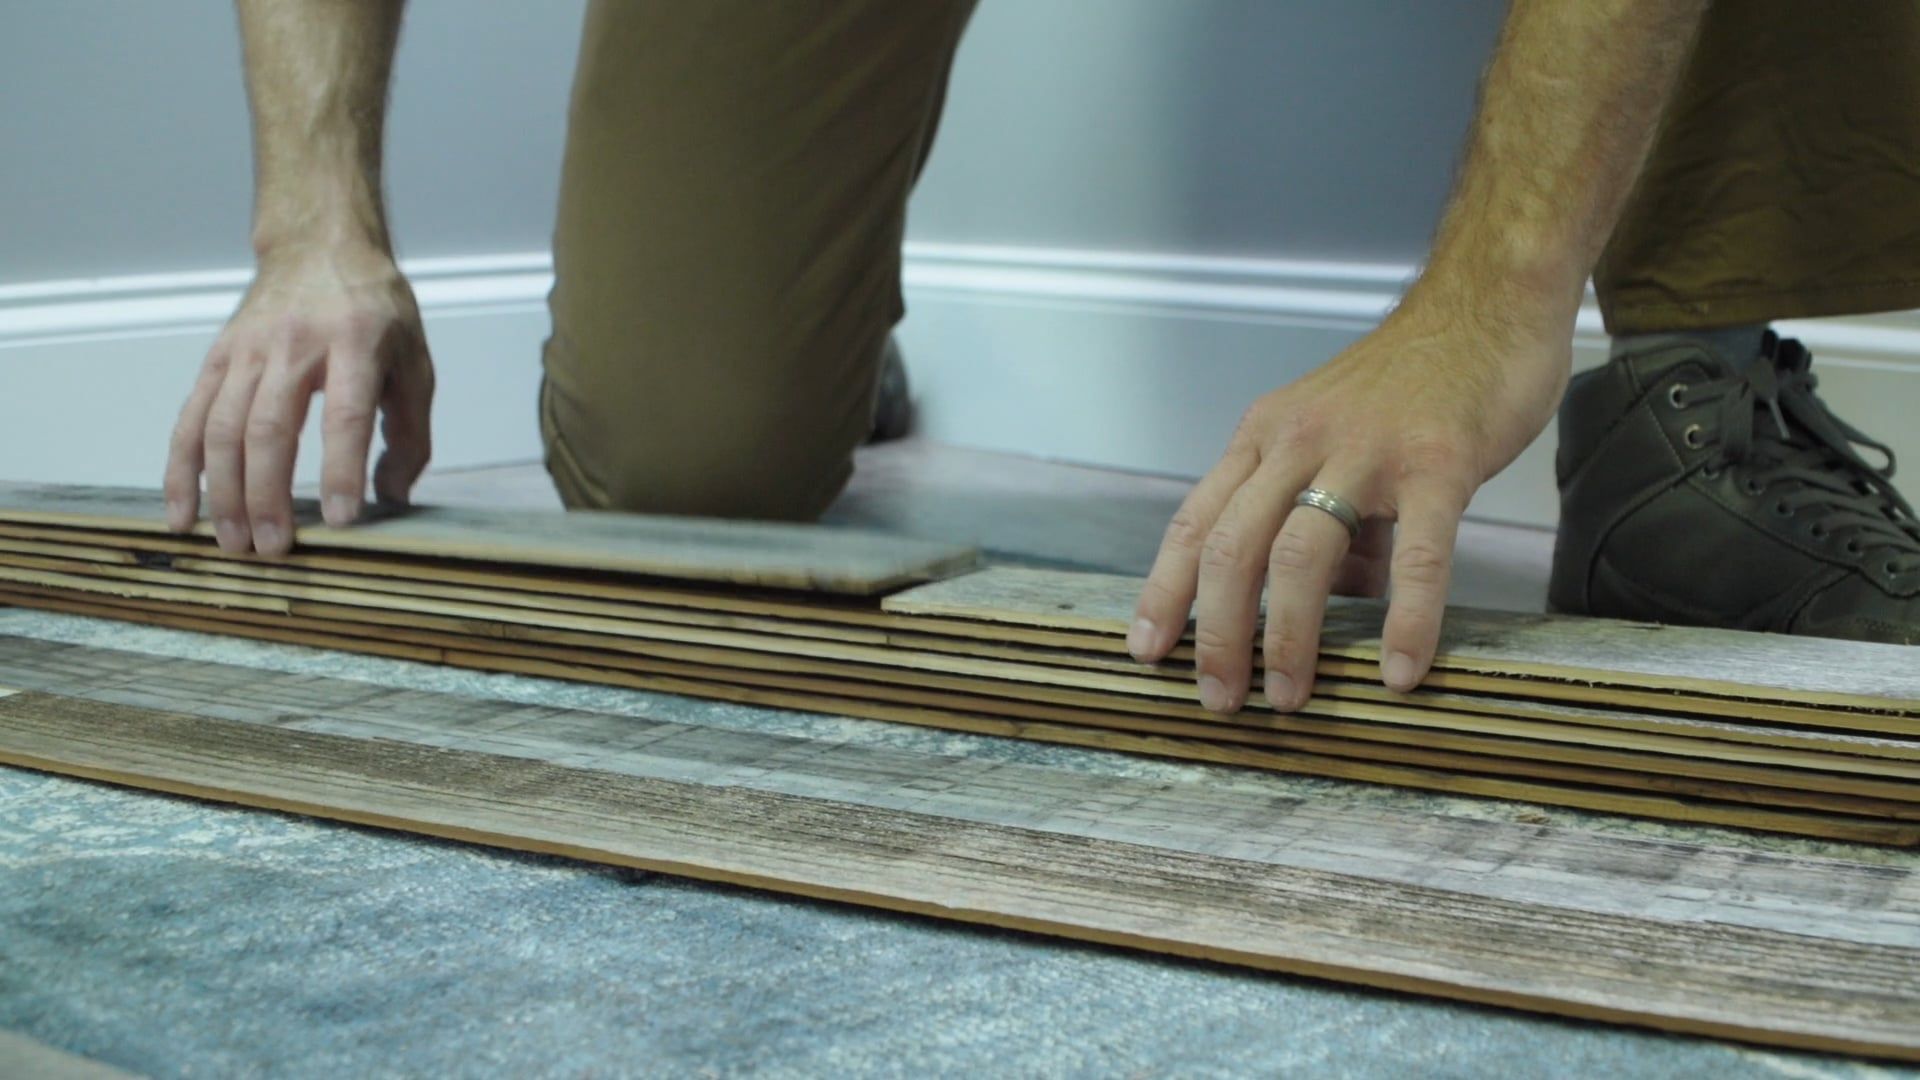
Step 2: Measure and Cut Beadboard
With the walls prepared, it’s time to measure and cut the beadboard panels to fit the designated area. Follow these steps to ensure accurate sizing:
- Measure the height and width: Using a measuring tape, measure the height and width of the area where you’ll be installing the beadboard panels. Subtract about 1/8 inch from each measurement to allow for expansion and contraction.
- Transfer the measurements to the beadboard panels: Use a pencil and a straight edge to transfer the measurements from the wall onto the beadboard panels. Double-check your measurements to ensure accuracy.
- Cut the beadboard panels: Use a saw (such as a circular saw or a table saw) to cut the beadboard panels along the marked lines. Take caution and follow safety guidelines when using power tools.
- Make notches for outlets or switches: If there are electrical outlets or switches on the wall, use a jigsaw or a utility knife to cut notches in the beadboard panels to accommodate them. Measure and mark the location of the outlets or switches before making any cuts.
It’s important to take accurate measurements and make precise cuts to ensure that the beadboard panels fit perfectly in the designated area. Remember to wear appropriate safety gear, such as goggles and gloves, when cutting the panels.
Once the panels are cut to the correct size, you’re ready to move on to the next step: applying adhesive to the walls.
Step 3: Apply Adhesive
Now that you have the beadboard panels cut to size, it’s time to apply adhesive to the walls. The adhesive will provide a strong bond between the panel and the wall surface. Follow these steps to ensure proper application:
- Choose the appropriate adhesive: Select a construction adhesive that is suitable for your wall surface. Read the manufacturer’s instructions to ensure you’re using the correct adhesive for the material of your walls.
- Prepare the adhesive: Follow the manufacturer’s instructions to prepare the adhesive for application. Some adhesives may require stirring or mixing before use.
- Apply the adhesive: Using a caulk gun or a trowel, apply the adhesive to the backside of the beadboard panels in a zigzag pattern. Ensure that the adhesive is applied evenly, covering the entire surface of the panel.
- Press the panels onto the wall: Carefully press the beadboard panels onto the wall, aligning them with the previously marked lines. Apply firm pressure to ensure proper adhesion. Use a level to check that the panels are straight and level.
- Allow the adhesive to dry: Follow the manufacturer’s instructions regarding the drying time of the adhesive. It’s important to allow sufficient drying time to ensure a strong bond between the panels and the wall.
Remember to work in small sections, applying the adhesive and pressing the panels onto the wall one at a time. This will prevent the adhesive from drying out before you’re able to attach the panels.
With the beadboard panels securely in place, we can move on to the next step: installing nails or screws to further secure the panels to the wall.
When installing beadboard, make sure to measure and cut the panels accurately to ensure a seamless and professional-looking installation. Use a level to ensure the panels are straight and evenly spaced for a polished finish.
Step 4: Install the Beadboard Panels
Once the beadboard panels are securely adhered to the walls, the next step is to install the panels. This will further ensure their stability and give your walls a seamless and professional look. Follow these steps to properly install the beadboard panels:
- Prepare the nails or screws: If you’re using nails, make sure they are long enough to penetrate through the beadboard panels and into the wall. If you prefer screws, choose ones that are appropriate for the material of your panels and the type of wall you have.
- Position the panels: Starting from one corner of the room, position the first beadboard panel against the wall, ensuring it aligns with the marked lines and any adjacent panels.
- Secure the panels: Use a nail gun or a drill to insert nails or screws through the beadboard panels and into the wall. Place the fasteners along the edges and on the tongue of the panels to ensure a secure fit. Continue securing the panels at regular intervals, such as every 12 inches or as recommended by the manufacturer.
- Check for levelness: As you install each panel, use a level to ensure that they are straight and level. Make any necessary adjustments before securing the panels completely.
- Continue installing the remaining panels: Repeat the process of positioning and securing the panels until all the beadboard panels are installed, working your way around the room.
Take your time during this step to ensure that the beadboard panels are installed properly and securely. Double-check the alignment and levelness of each panel before moving on to the next one. With all the panels installed, we can move on to the next step: securing the beadboard with nails or screws.
Step 5: Secure Beadboard with Nails or Screws
After installing the beadboard panels on the walls, it’s important to secure them further by using nails or screws. This step will provide additional stability and ensure that the panels remain securely in place. Follow these steps to properly secure the beadboard:
- Gather your nails or screws: Choose nails or screws that are long enough to penetrate through the beadboard panels and into the wall. Consider the thickness of the panels and the type of wall you have to determine the appropriate length and type of fasteners.
- Locate the joists or studs: Use a stud finder or tap on the wall to locate the joists or studs behind the beadboard panels. This will provide a solid anchoring point for securing the panels.
- Mark the locations: Mark the locations of the joists or studs along the beadboard panels using a pencil. This will guide you in driving the nails or screws into the correct spots.
- Start securing the panels: Beginning from one corner of the room, use a hammer or a drill to drive nails or screws through the beadboard panels and into the joists or studs. Place the fasteners along the marked locations, ensuring they are driven in securely but not too tightly to avoid damaging the panels.
- Continue securing the panels: Work your way along the panels, securing them to the joists or studs at regular intervals. Aim to have at least two fasteners per panel, evenly spaced apart.
Securing the beadboard panels with nails or screws will provide added durability and ensure that they remain firmly in place. Always exercise caution when using power tools and follow safety guidelines.
With the beadboard panels securely fastened, we can move on to the next step: filling in nail holes and sanding the surface.
Step 6: Fill Nail Holes and Sand
Now that the beadboard panels are securely installed and fastened to the walls, it’s time to give them a finished and polished look by filling in any nail holes and sanding the surface. Follow these steps to complete this step:
- Gather your materials: Prepare a ready-to-use wood filler or putty, a putty knife, and a sanding block or sandpaper.
- Inspect the beadboard panels: Carefully inspect the surface of the panels and locate any visible nail holes or imperfections.
- Fill the nail holes: Take a small amount of wood filler or putty on the tip of the putty knife and press it into the nail holes. Make sure to fill the holes completely and leave a smooth and even surface.
- Scrape off excess filler: Use the edge of the putty knife to scrape off any excess filler from the surface, leaving it flush with the surrounding beadboard.
- Allow the filler to dry: Follow the manufacturer’s instructions on the wood filler or putty container to determine the drying time. It’s important to allow sufficient time for the filler to dry and harden.
- Sand the panels: Once the filler is dry, use a sanding block or sandpaper to smooth out the patched nail holes and any rough areas on the beadboard surface. Sand gently in a circular motion until the surface feels smooth to the touch.
- Clean the panels: After sanding, use a damp cloth or sponge to wipe away any dust or debris left from the sanding process. This will ensure a clean and ready-to-paint surface.
Filling in the nail holes and sanding the beadboard panels will give them a seamless and polished appearance. Smooth out any imperfections and ensure a clean surface before moving on to the final step: priming and painting the beadboard.
Step 7: Prime and Paint Beadboard
With the beadboard panels installed, secured, and prepared, it’s time to give them the final touch by priming and painting. The primer will create a smooth and even surface for the paint, while the paint will add color and enhance the overall look of the beadboard. Follow these steps to prime and paint the beadboard:
- Gather your materials: Prepare a high-quality primer, paint of your choice, paintbrushes, and a paint tray.
- Apply the primer: Pour the primer into a paint tray and load a quality paintbrush with the primer. Begin by priming the edges and corners, and then proceed to cover the entire surface of the beadboard panels. Apply thin and even coats, following the direction of the panels, and let the primer dry according to the manufacturer’s instructions.
- Sand the primed surface: Once the primer is dry, lightly sand the surface using a fine-grit sandpaper or sanding block. This will ensure a smooth and paint-ready surface, free from any imperfections or brush marks.
- Clean the surface: Use a damp cloth or sponge to remove any dust or debris from sanding, ensuring a clean surface for painting.
- Apply the paint: Pour the paint into a clean paint tray and use a fresh paintbrush to apply thin and even coats of paint. Start from the edges and corners, and work your way towards the center of the beadboard panels. Apply additional coats as needed, allowing each coat to dry before applying the next. Follow the manufacturer’s instructions regarding the drying time between coats.
- Inspect the painted surface: After the final coat of paint, inspect the beadboard panels for any drips, uneven coverage, or imperfections. Touch up any areas as necessary and let the paint fully dry.
Priming and painting the beadboard panels will add color, depth, and protection to your walls. Choose a paint color that complements your overall design scheme and personal preferences.
Once the paint is dry, step back and admire the transformation. Your beadboard walls now exude charm, character, and a fresh new look!
Remember to clean your paintbrushes and properly dispose of any unused paint or painting supplies according to local regulations.
Congratulations! You have successfully installed and painted beadboard to add instant character to your walls. Enjoy the beauty and elegance that beadboard brings to your space.
Conclusion
Installing beadboard is a fantastic way to enhance your walls and add instant character to any space. By following the step-by-step guide outlined in this article, you can achieve a professional-looking result that is sure to impress.
From preparing the walls to measuring and cutting the beadboard panels, each step is crucial in ensuring a smooth and successful installation. Applying adhesive, securing the panels with nails or screws, filling nail holes, and sanding the surface all contribute to a seamless finish.
Finally, priming and painting the beadboard panels add the finishing touch, allowing you to customize the look to suit your personal style and create a cohesive design scheme.
Whether you’re aiming for a cozy cottage feel, a rustic farmhouse look, or a touch of timeless elegance, beadboard can transform plain walls into stunning focal points that enhance the overall aesthetics of your space.
Remember to gather all the necessary materials, follow safety precautions, and work diligently and patiently throughout the installation process. Take your time to ensure accuracy, measure twice, and make precise cuts to achieve a professional result.
With this comprehensive guide, you have the knowledge and information needed to confidently install beadboard and turn your walls into beautiful features. Embrace your creativity, enjoy the process, and revel in the transformation of your space.
Now it’s time to put your skills to the test and see how beadboard can add character and charm to your walls. Happy installing!
Frequently Asked Questions about How To Install Beadboard To Add Instant Character To Your Walls
Was this page helpful?
At Storables.com, we guarantee accurate and reliable information. Our content, validated by Expert Board Contributors, is crafted following stringent Editorial Policies. We're committed to providing you with well-researched, expert-backed insights for all your informational needs.


0 thoughts on “How To Install Beadboard To Add Instant Character To Your Walls”