Articles
How To Add Insulation To Your Attic
Modified: April 22, 2024
Learn how to add insulation to your attic with these helpful articles. Find out the best methods and materials to keep your home comfortable and energy-efficient.
(Many of the links in this article redirect to a specific reviewed product. Your purchase of these products through affiliate links helps to generate commission for Storables.com, at no extra cost. Learn more)
Introduction
Do you find your home constantly feeling too hot in the summer and too cold in the winter? Are your energy bills skyrocketing due to the inefficient insulation in your attic? If so, adding insulation to your attic can be a cost-effective and energy-efficient solution. Proper insulation in the attic helps to regulate the temperature inside your home and reduces the strain on your heating and cooling systems.
In this article, we will guide you through the process of adding insulation to your attic. From assessing your attic to choosing the right insulation material and installing it properly, we’ll cover all the necessary steps to ensure a successful insulation project.
Before you begin, it’s important to note that adding insulation to your attic is a relatively straightforward DIY project. However, if you’re not confident in your abilities or you have a large attic space, it may be best to hire a professional to ensure the job is done correctly.
Now, let’s dive into the steps needed to add insulation to your attic and create a more comfortable and energy-efficient home.
Key Takeaways:
- Properly assessing your attic’s insulation needs and choosing the right insulation material are crucial steps in creating a more energy-efficient and comfortable home. Consult with experts and prioritize safety throughout the installation process.
- Insulating the attic floor, hatch, and addressing air leaks are essential for optimizing insulation performance. Consider additional insulation options for the attic walls and roof to further enhance energy efficiency and comfort.
Read more: How To Add Insulation In Attic
Step 1: Assess Your Attic
The first step in adding insulation to your attic is to assess the current condition of the space. This will help you determine if there is already insulation present, the type of insulation used, and its effectiveness. Here are a few key things to look for when assessing your attic:
- Check for existing insulation: Start by looking to see if there is any insulation in your attic. Common types of insulation include fiberglass batts, blown-in cellulose, or spray foam. Insulation is typically found on the attic floor, but it can also be installed on the walls and roof.
- Measure the current insulation level: Determine the thickness or R-value of the existing insulation. R-value measures the insulation’s effectiveness in resisting heat flow. The higher the R-value, the better the insulation performance.
- Identify any gaps or air leaks: Inspect the attic for any gaps, cracks, or openings that can allow air to escape or enter. These gaps can contribute to heat loss or gain, reducing the efficiency of your insulation.
- Check for signs of moisture or damage: Look for any signs of water leaks, moisture buildup, or damage in the attic. Addressing these issues before adding insulation is crucial to prevent further problems.
Assessing your attic will help you determine the insulation needs specific to your home. It will also provide a baseline to compare the effectiveness of the insulation you plan to install.
If your attic is lacking insulation or has insufficient insulation, it may be time to add more to improve energy efficiency and comfort in your home. Proceed to the next step to learn how to choose the right insulation material for your attic.
Step 2: Choose the Right Insulation Material
Choosing the right insulation material for your attic is crucial to achieve optimal energy efficiency and comfort in your home. There are several insulation options available, each with its own advantages and considerations. Here are some common types of insulation materials:
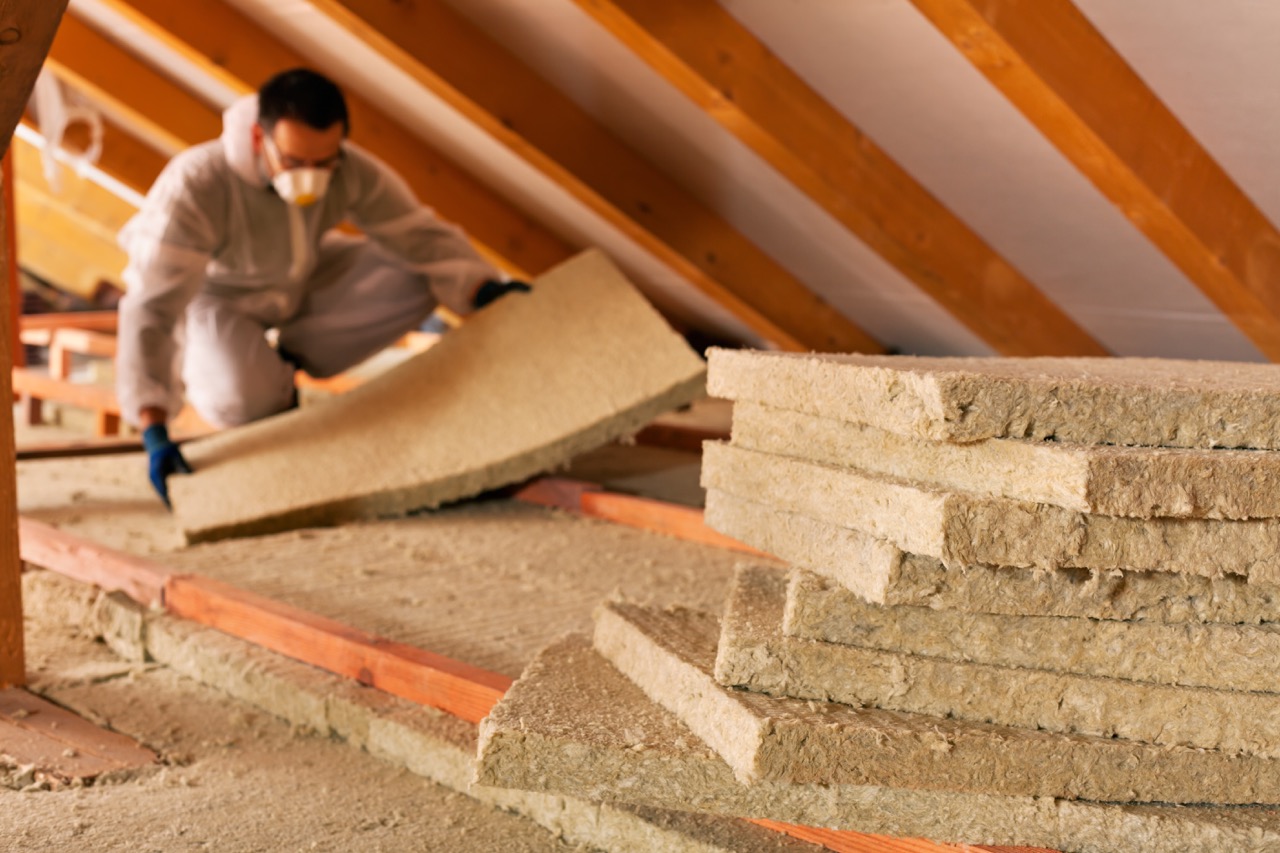
- Fiberglass: Fiberglass insulation is made of tiny glass fibers and is one of the most commonly used insulation materials. It comes in batts or rolls that can be easily installed between attic joists.
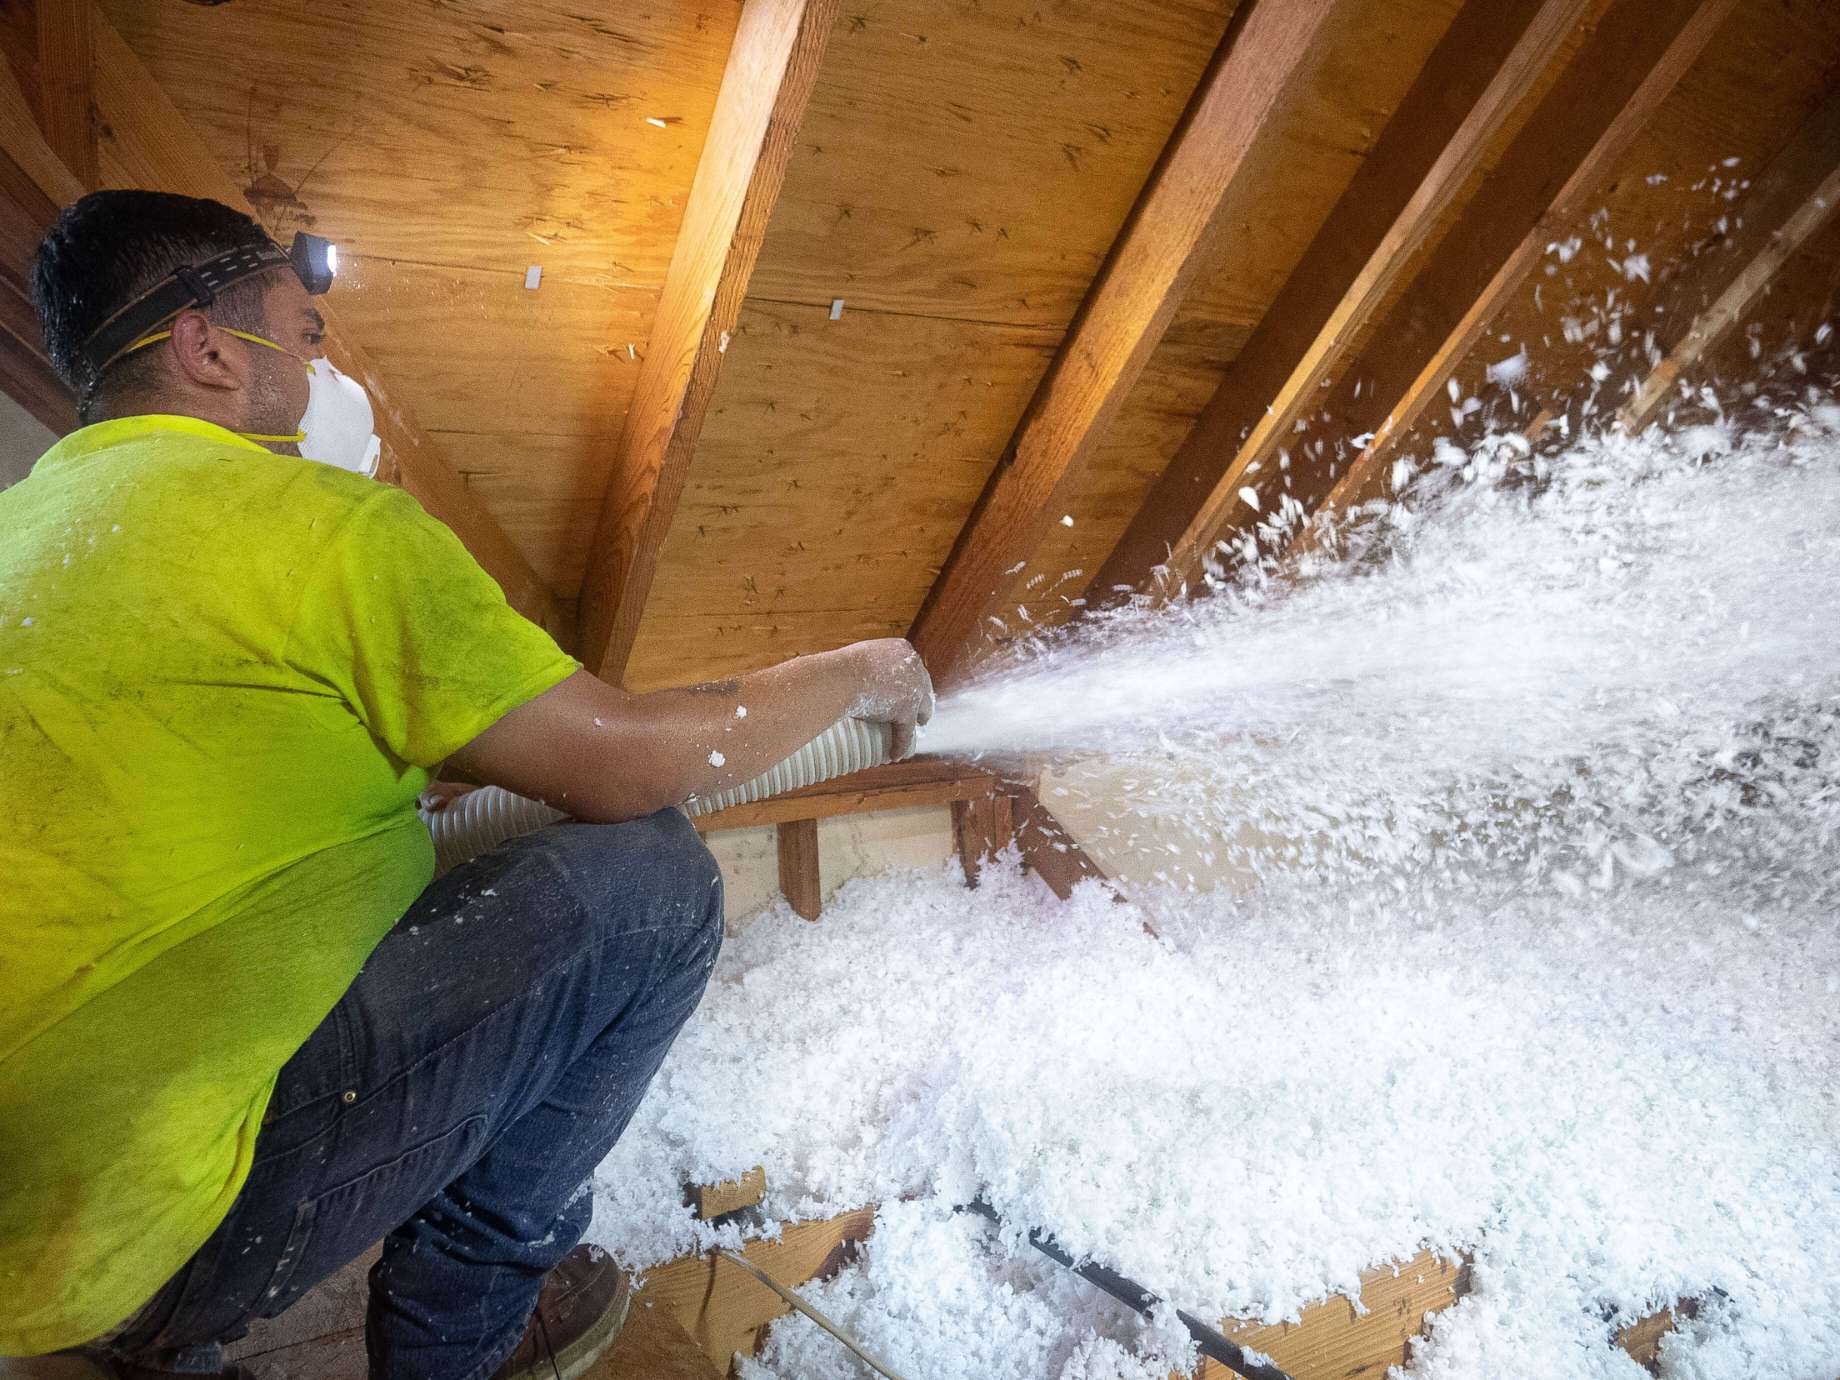
- Cellulose: Cellulose insulation is made from recycled paper fibers treated with fire retardants. It is often blown into the attic using special equipment, providing excellent coverage and reducing air leakage.
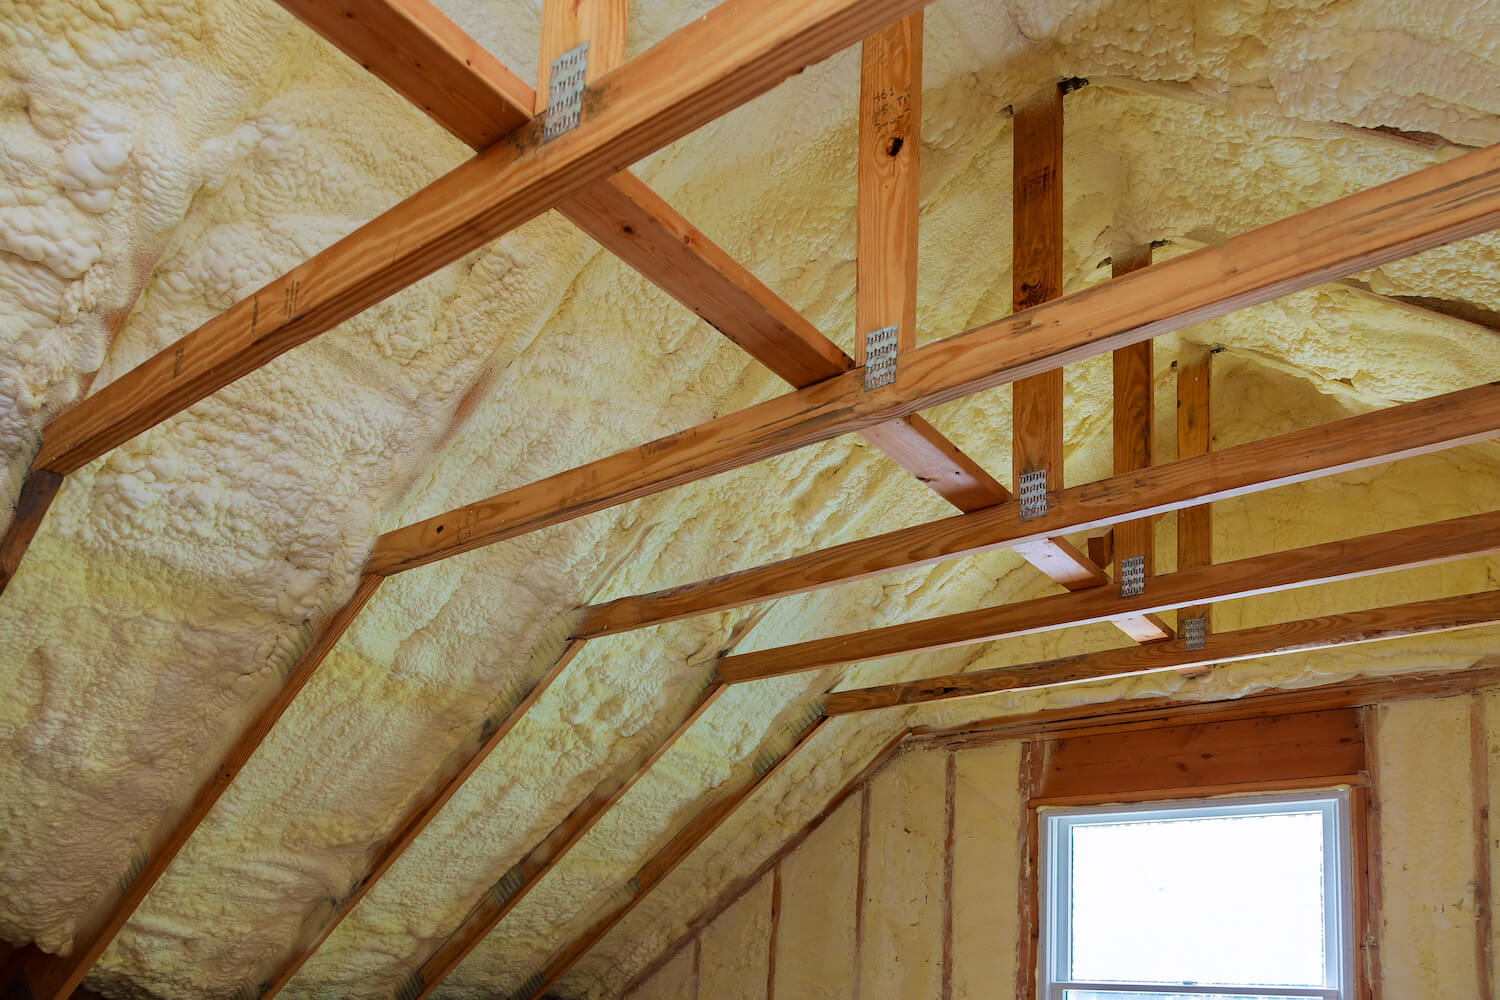
- Spray Foam: Spray foam insulation expands after application, creating a seamless and airtight barrier. It is ideal for sealing cracks and gaps and is commonly used in hard-to-reach areas.
- Rigid Foam: Rigid foam insulation boards are made of polystyrene or polyisocyanurate. They offer high insulation value and can be installed on attic walls and roof decking for superior thermal performance.
When choosing insulation, consider factors such as the desired R-value, local climate conditions, budget, and any specific requirements or regulations in your area. It’s also important to consider any potential health concerns or allergies you may have, as some insulation materials can cause skin irritation or respiratory issues.
Consult with local experts or insulation suppliers to get recommendations on the best insulation material for your specific needs. Additionally, research and compare the pros and cons of each type of insulation to make an informed decision.
Once you have selected the insulation material, ensure that you purchase the appropriate amount to effectively cover your attic space. It’s always a good idea to buy a bit more than you think you’ll need to account for any gaps or variations in installation.
With the right insulation material in hand, you’re ready to move on to the next step: gathering the necessary tools and equipment for the installation process.
Step 3: Gather the Necessary Tools and Equipment
Before you begin installing insulation in your attic, it’s important to gather all the necessary tools and equipment. Having the right tools on hand will make the installation process smoother and more efficient. Here are some essential tools and equipment you’ll need:
- Utility knife: A sharp utility knife is crucial for cutting insulation materials to size.
- Tape measure: You’ll need a tape measure to accurately measure the dimensions of your attic space and the insulation material.
- Safety goggles and gloves: Protect your eyes and hands from potential irritants by wearing safety goggles and gloves.
- Dust mask: Depending on the type of insulation, wearing a dust mask may be necessary to prevent inhaling any airborne particles.
- Staple gun or insulation supports: If you’re using insulation batts, a staple gun or insulation supports will help secure the insulation in place.
- Caulking gun and sealant: Use a caulking gun and appropriate sealant to seal air leaks and gaps in the attic.
- Foam rod or backer rod: These materials are useful for filling larger gaps and cracks before sealing them.
- Ladder or scaffolding: A sturdy ladder or scaffolding may be required to access the attic safely.
Make sure to have all these tools and equipment ready before you start the installation process. It’s also a good idea to have a clear workspace in the attic, allowing for easy movement and accessibility.
In addition to the tools, ensure that you have the required safety equipment, such as a hard hat and non-slip footwear, to protect yourself during the installation process.
By gathering all the necessary tools and equipment beforehand, you can work efficiently and avoid any unnecessary interruptions during the insulation installation in your attic.
Step 4: Prepare Your Attic for Insulation Installation
Before you begin installing insulation in your attic, it’s important to prepare the space for the installation process. Proper preparation ensures a smooth and effective installation and helps maximize the insulation’s performance. Here are some steps to prepare your attic:
- Clear out any debris: Remove any stored items, debris, or clutter from the attic to create a clean and open workspace. This will allow for easy access and maneuverability during the installation process.
- Inspect for pests: Check for signs of pests, such as rodents or insects, in your attic. If you notice any infestations, address the issue before proceeding with the insulation installation.
- Seal air leaks and gaps: Use caulk or foam sealant to seal any air leaks, gaps, or cracks in the attic. Common areas to check include around pipes, vents, electrical wires, and ceiling fixtures. This step helps prevent air leakage and ensures optimal insulation efficiency.
- Protect electrical fixtures: If there are any electrical fixtures in the attic, such as recessed lighting or electrical wiring, be sure to take precautions to protect them. Use insulation baffles or covers to maintain clearance and prevent insulation from coming into direct contact with these fixtures.
- Check ventilation: Make sure that your attic has proper ventilation to allow air circulation. Adequate ventilation helps prevent moisture buildup and extends the lifespan of your insulation.
- Address any structural issues: Before adding insulation, inspect the attic for any structural issues or signs of damage, such as sagging roof decking or wet insulation. It’s important to address these issues before proceeding with the installation.
By taking the time to prepare your attic properly, you can ensure a clean and suitable environment for insulation installation. This step sets the foundation for a successful insulation project and enhances the overall effectiveness of your insulation.
Read more: How To Insulate Your Attic Roof
Step 5: Install Insulation in the Attic Floor
Once you have assessed your attic, chosen the right insulation material, gathered the necessary tools, and prepared the space, it’s time to start installing insulation in the attic. The attic floor is the primary area where insulation is typically installed to prevent heat transfer between the attic and the living space below. Follow these steps to install insulation in the attic floor:
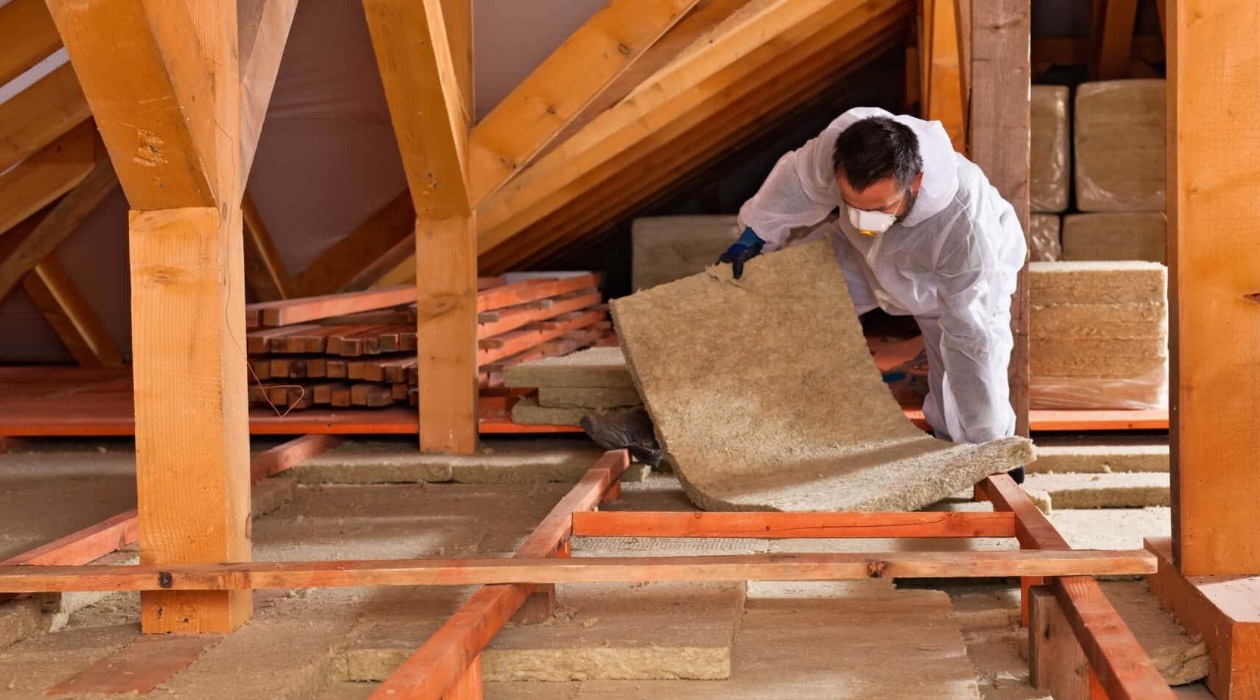
- Wear protective gear: Before you begin, make sure to put on the appropriate safety gear, including gloves, safety goggles, and a dust mask, to protect yourself from any potential irritants.
- Measure and cut the insulation: Measure the length and width of the space between the joists in your attic. Use a utility knife to cut the insulation material to fit these dimensions. It’s important to leave a small gap around the edges to allow for proper ventilation.
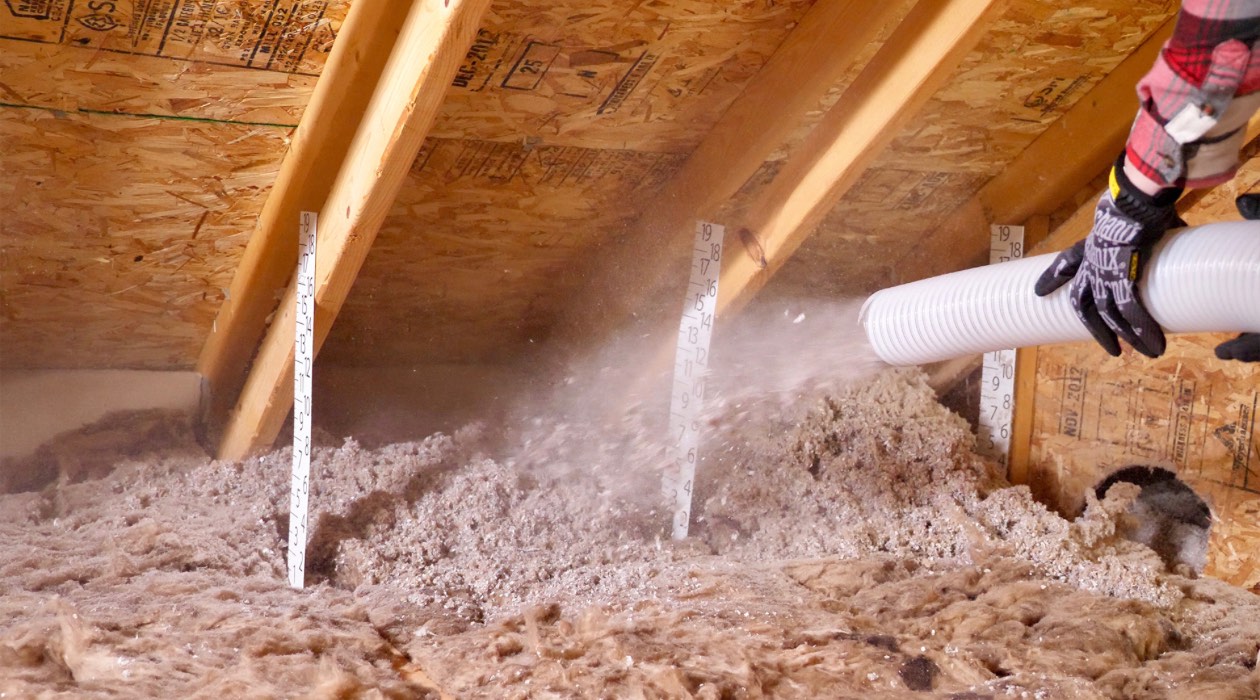
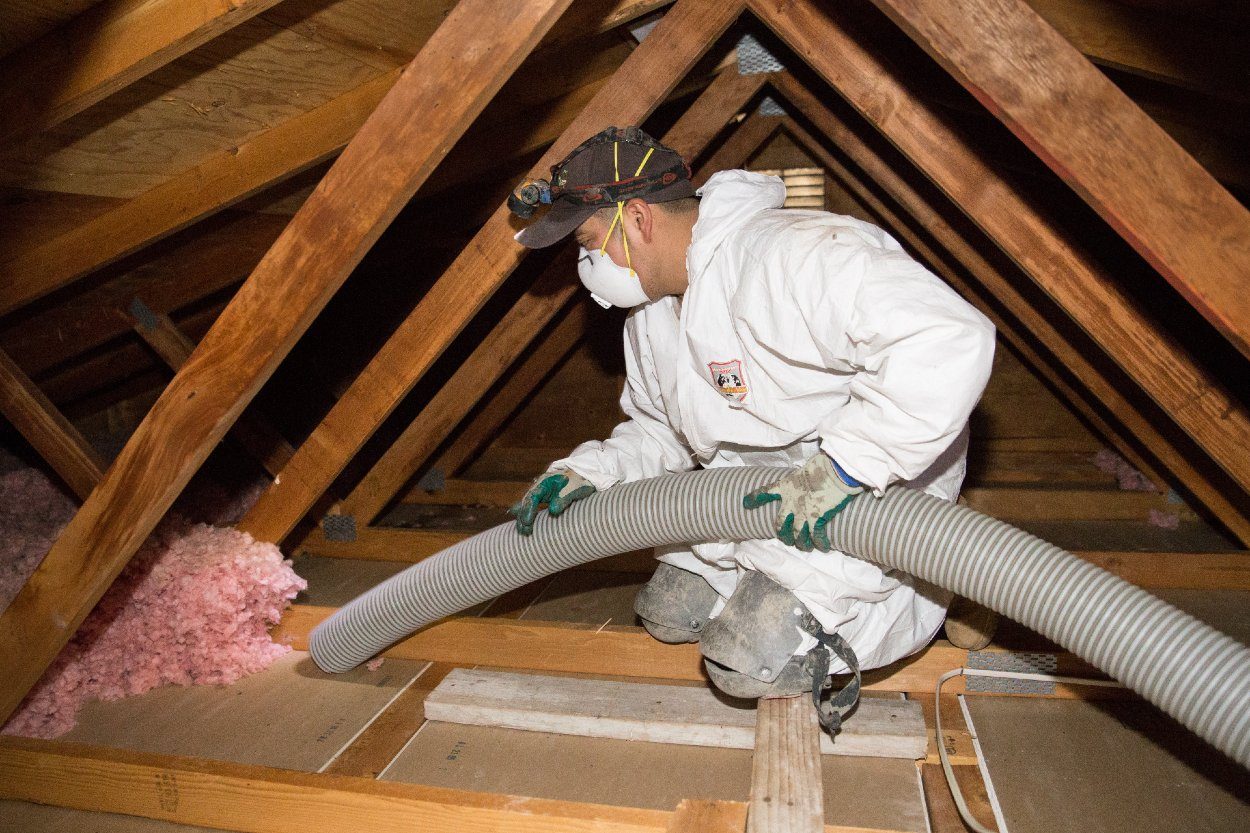
- Install the insulation: Place the insulation between the attic joists, ensuring a snug fit. If using fiberglass batts, face the paper or foil vapor retarder towards the conditioned living space below. For blown-in insulation, use a blower machine to evenly distribute the insulation material.
- Secure the insulation (if needed): If you’re using insulation batts, use a staple gun or insulation supports to secure the insulation in place. Be careful not to compress the insulation, as this can reduce its effectiveness.
- Avoid blocking vents: Make sure the insulation does not cover any vents or soffit vents in the attic. These vents are crucial for proper air circulation and ventilation.
- Continue installing insulation: Repeat the process to cover the entire attic floor, working in sections until the entire space is insulated. Take care to maintain uniform coverage and avoid gaps or overlaps.
Remember to follow the manufacturer’s instructions and guidelines specific to the insulation material you are using. This will help ensure proper installation and maximum insulation efficiency.
Installing insulation in the attic floor helps create a thermal barrier, reducing heat transfer between the attic and the living space below. This step is essential for improving energy efficiency and maintaining a comfortable indoor environment.
Consider using blown-in insulation for your attic, as it can easily fill in gaps and hard-to-reach areas, providing better coverage and energy efficiency.
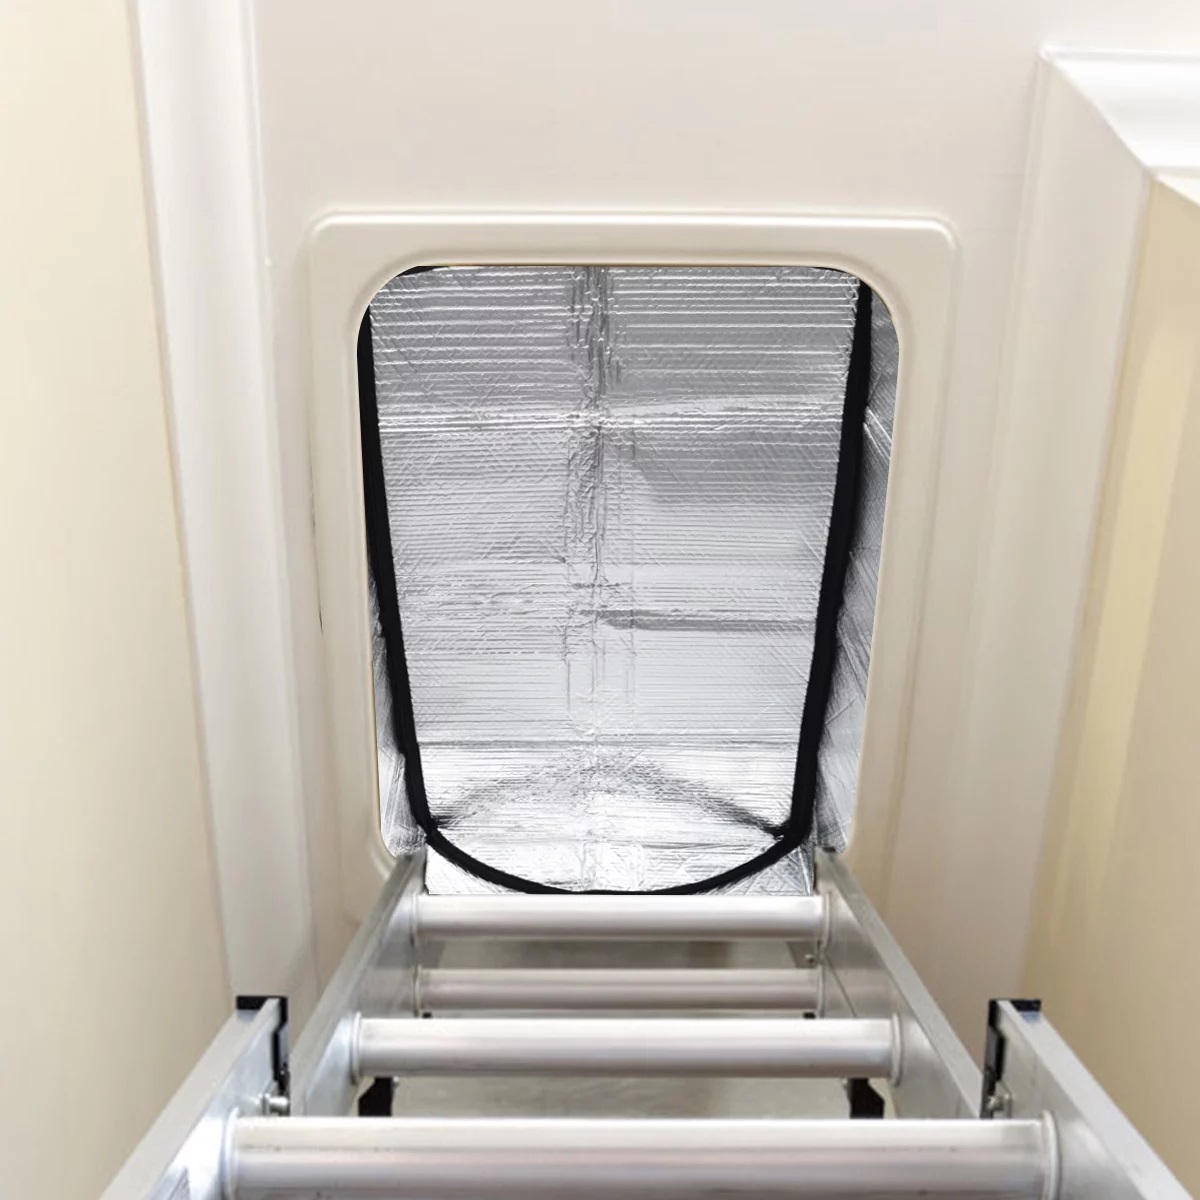
Step 6: Insulate the Attic Hatch or Access Door
Insulating the attic hatch or access door is an often overlooked but crucial step when adding insulation to your attic. The attic hatch is a common area where air can leak, compromising the effectiveness of your insulation efforts. Here’s how to properly insulate the attic hatch or access door:
- Measure the hatch or door: Measure the dimensions of the attic hatch or access door. This will help you determine the amount of insulation material you’ll need.
- Select the insulation material: Choose an appropriate insulation material for the hatch or door. An insulation board or a piece of rigid foam insulation works well for this purpose.
- Cut the insulation material: Using a utility knife, cut the insulation material to fit the dimensions of the hatch or door. It should fit snugly into place without restricting the opening and closing of the hatch.
- Attach weatherstripping: Apply weatherstripping along the edges of the hatch or door to create a tight seal. This will prevent air leakage and enhance insulation performance.
- Install the insulation: Place the cut piece of insulation material on top of the hatch or door. It should cover the entire surface area and sit securely in place.
- Secure and seal the insulation: Use adhesive, tape, or fasteners to secure the insulation in place. Make sure there are no gaps or openings where air can escape.
- Create a removable cover (optional): If you prefer easy access to the attic, you can create a removable cover for the insulated hatch or door. This allows you to easily remove and replace the cover as needed without compromising insulation efficiency.
Insulating the attic hatch or access door helps maintain a consistent temperature barrier between the attic and the conditioned living space. It prevents air leakage and improves the overall energy efficiency of your home.
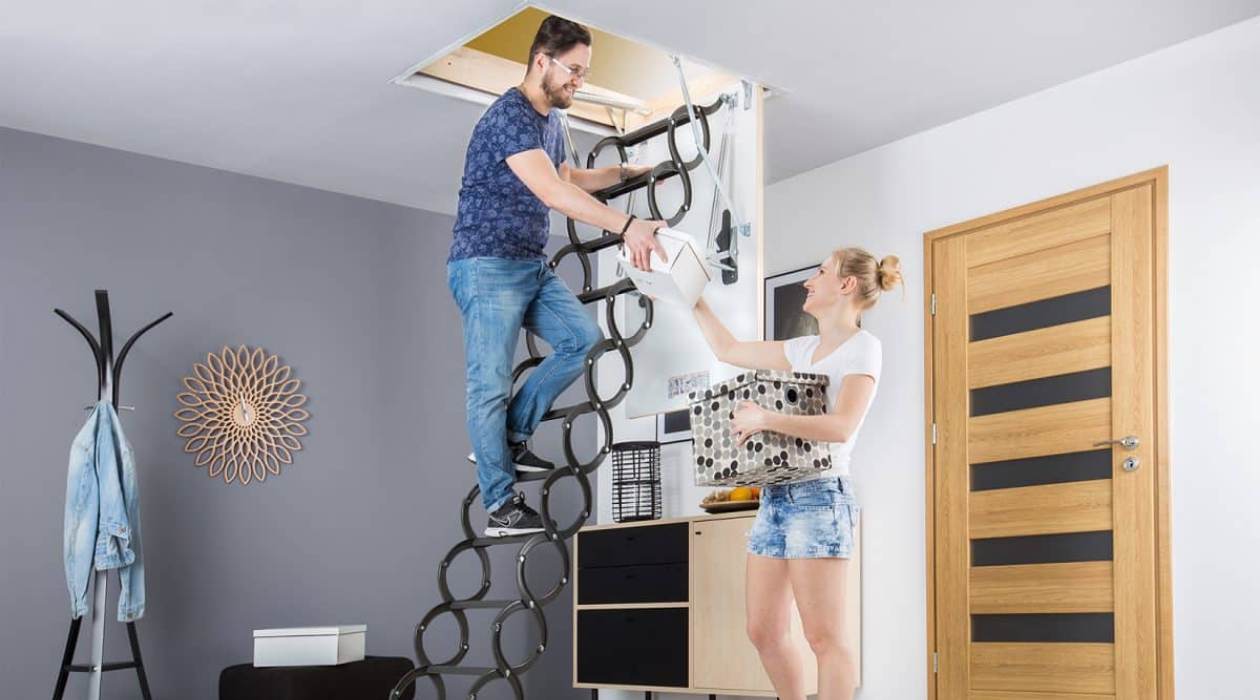
Don’t forget to insulate any other access points in the attic, such as pull-down stairs or knee wall doors, using the same principles and techniques mentioned above.
Step 7: Seal Air Leaks and Gaps in the Attic
Sealing air leaks and gaps in the attic is a crucial step to enhance the overall effectiveness of your insulation and improve energy efficiency. Air leaks can allow heated or cooled air to escape and outside air to enter, compromising the insulation’s performance. Here’s how to effectively seal air leaks and gaps in the attic:
- Identify air leakage points: Look for common areas where air leaks may occur, such as around pipes, wires, electrical outlets, recessed lights, and gaps between walls and the attic floor. Use a flashlight or smoke pencil to help locate airflow and potential leak points.
- Use caulk or foam sealant: Apply caulk or foam sealant to seal small gaps and cracks. Use caulk for stationary items like pipes and wires, and foam sealant for larger gaps between walls and the attic floor. Make sure to choose the appropriate type of caulk or sealant based on the material you’re sealing.
- Seal around electrical outlets and fixtures: Remove outlet cover plates and apply foam gaskets or sealant around the perimeter of the electrical boxes. This helps to prevent air leakage through the outlets.
- Insulate and seal ducts: If there are ducts in the attic, ensure they are properly insulated and sealed. Use insulation sleeves or duct wrap to cover and insulate the ductwork. Seal any gaps or joints with foil-backed tape or mastic sealant.
- Install weatherstripping: Apply weatherstripping around attic doors, windows, and any other movable components to create an airtight seal. This prevents air leakage and enhances insulation performance.
- Insulate attic knee walls: If your attic has knee walls, ensure they are properly insulated and sealed. Install insulation batts or rigid foam insulation on the knee walls and seal any gaps or openings.
- Consider a blower door test: If you’re unsure about the location of air leaks or the overall air tightness of your attic, consider hiring a professional to conduct a blower door test. This test can help identify specific areas of air leakage and guide you in sealing them effectively.
By sealing air leaks and gaps in the attic, you can optimize the performance of your insulation, reduce energy waste, and increase comfort in your home. This step is vital in creating a well-insulated and energy-efficient attic space.
Step 8: Consider Additional Insulation Options for Attic Walls and Roof
While insulating the attic floor is a crucial step, it’s also important to consider additional insulation options for the attic walls and roof. Insulating these areas can further enhance energy efficiency and provide better thermal performance. Here are some additional insulation options to consider:
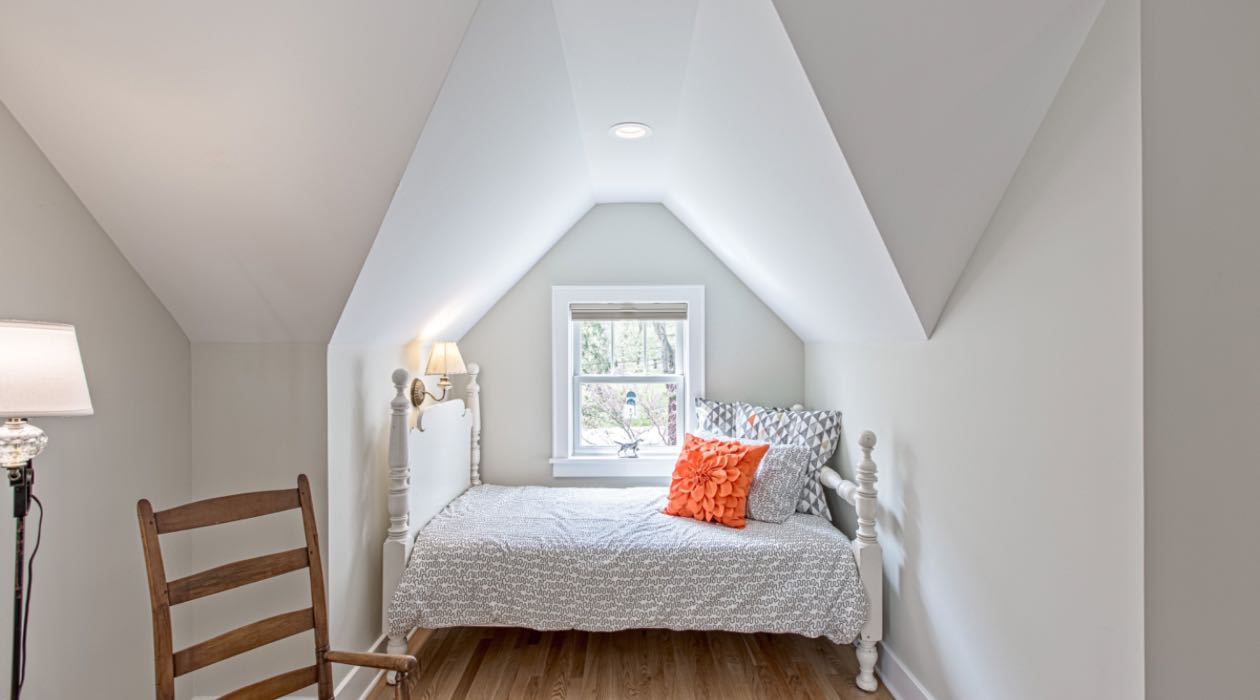
- Attic Walls: If your attic has finished walls, or if you plan to use the attic as a living space, insulating the walls is essential. Depending on the construction of the walls, you can choose to use insulation batts or rigid foam boards. Installing insulation in the attic walls helps to create a continuous thermal barrier and improve comfort.
- Roof Deck: Insulating the roof deck, also known as the “hot roof” method, can be an effective insulation option. This involves placing insulation directly under the roof sheathing, creating a conditioned attic space. The benefits of this method include better temperature control, reduced risk of ice damming, and potential energy savings. However, it’s important to consult with a professional to ensure proper installation and consider any local building code requirements.
- Rafter Vents: If you choose to insulate the roof deck, it’s important to install rafter vents to ensure proper air circulation and ventilation. Rafter vents are designed to maintain an air gap between the insulation and the roof sheathing, allowing for ventilation and preventing moisture buildup.
- Radiant Barrier: Installing a radiant barrier, such as reflective foil insulation, can help reduce radiant heat transfer in the attic. This is especially beneficial in hot climates where heat gain through the roof is a concern. The reflective barrier reflects radiant heat, helping to keep the attic space cooler and reducing the load on your cooling system.
When considering additional insulation options for the attic walls and roof, it’s important to assess the specific needs of your home and consult with insulation professionals or contractors. They can provide guidance on the most suitable insulation materials and methods based on your climate, budget, and building specifications.
Adding insulation to the attic walls and roof completes the insulation system, providing comprehensive thermal protection for your home. It contributes to improved energy efficiency, enhanced comfort, and potential energy savings over the long term.
Step 9: Practice Safety Measures During the Installation Process
Ensuring safety during the insulation installation process is of utmost importance. Working in the attic can present various hazards, so it’s crucial to follow safety measures to protect yourself and others involved. Here are some key safety tips to keep in mind:
- Wear appropriate protective gear: Before starting, always wear safety goggles, gloves, and a dust mask to protect yourself from potentially harmful particles and irritants.
- Use proper ventilation: Attics can be hot and stuffy, especially during warmer months. Ensure there is sufficient ventilation in the attic space to allow for fresh air circulation.
- Maintain a clear workspace: Clear any clutter, debris, or stored items from the attic to create a safe and unobstructed workspace. This helps prevent accidents and allows for easy movement.
- Secure the attic access: Ensure that the ladder or stairs used to access the attic are stable and secure. Use safety barriers or gates to prevent accidental falls.
- Use proper lifting techniques: Insulation materials can be heavy, so use proper lifting techniques to avoid strain or injury. Lift with your legs, not your back, and ask for assistance if needed.
- Be cautious of electrical hazards: When working with insulation near electrical fixtures or wiring, take extra caution. Avoid contact with live electrical components and ensure the power is turned off in the area you’re working in.
- Be mindful of sharp objects: Insulation materials and tools used during the installation process can have sharp edges. Handle them with care to avoid injuries.
- Stay properly hydrated: Attics can become hot and humid, so stay hydrated by drinking plenty of water during the installation process.
- Take breaks when needed: Attic work can be physically demanding. Take regular breaks to rest and prevent overexertion.
- Follow safety guidelines: Familiarize yourself with and follow the manufacturer’s instructions and safety guidelines specific to the insulation material being used.
By practicing safety measures, you can minimize the risk of accidents and injuries while working in the attic. Prioritizing safety ensures a smooth and successful insulation installation process.
Conclusion
Adding insulation to your attic is a valuable investment that can greatly improve the comfort and energy efficiency of your home. By following the steps outlined in this guide, you can successfully add insulation to your attic and reap the benefits for years to come.
Remember to start by assessing your attic’s current condition and determining the type and thickness of insulation already present. Choose the right insulation material based on your needs, climate, and budget. Gather all the necessary tools and equipment, and prepare the attic for installation by clearing out debris, sealing air leaks, and addressing any structural issues.
When installing insulation, pay attention to the attic floor, ensuring proper coverage and securing the insulation in place. Don’t forget to insulate the attic hatch or access door to prevent air leakage. Additionally, consider insulating the attic walls and roof for enhanced energy efficiency.
Throughout the installation process, prioritize safety by wearing protective gear, maintaining a clear workspace, and following proper lifting techniques. Be mindful of electrical hazards and sharp objects, and take breaks when needed.
By implementing these steps and practicing careful attention to detail, you can create a well-insulated attic that helps regulate temperature, reduces energy consumption, and enhances overall comfort in your home.
For larger or complex attic spaces, it’s recommended to consult with a professional insulation contractor who can provide expert guidance and ensure proper installation.
So, don’t wait any longer. Take the initiative to add insulation to your attic and enjoy the benefits of a more energy-efficient and comfortable home.
Frequently Asked Questions about How To Add Insulation To Your Attic
Was this page helpful?
At Storables.com, we guarantee accurate and reliable information. Our content, validated by Expert Board Contributors, is crafted following stringent Editorial Policies. We're committed to providing you with well-researched, expert-backed insights for all your informational needs.


0 thoughts on “How To Add Insulation To Your Attic”