Articles
How To Add Wall Insulation To Existing Walls
Modified: October 28, 2024
Discover effective methods for adding wall insulation to existing walls with our informative articles. Improve energy efficiency and reduce heating costs today.
(Many of the links in this article redirect to a specific reviewed product. Your purchase of these products through affiliate links helps to generate commission for Storables.com, at no extra cost. Learn more)
Introduction
When it comes to home insulation, most people tend to focus on insulating their attics and crawlspaces. However, one area that often goes overlooked is the existing walls in a home. Adding wall insulation can significantly improve energy efficiency, reduce utility bills, and enhance overall comfort. In this article, we will explore the importance of wall insulation, how to assess existing walls for insulation, choosing the right type of insulation, gathering the necessary tools and materials, preparing the walls for insulation, installing insulation in the existing walls, sealing and finishing the insulation installation, and testing the effectiveness of the added wall insulation.
Understanding the importance of wall insulation is crucial. Walls are a major source of heat transfer in homes, allowing warm air to escape in the winter and hot air to enter in the summer. This not only leads to discomfort but also increases energy consumption and utility costs. By properly insulating your walls, you can create a thermal barrier that prevents the exchange of heat, keeping your home comfortable and reducing the reliance on heating and cooling systems.
Before adding insulation to existing walls, it is essential to assess the current insulation levels. Older homes may have little to no insulation, while newer homes may have some insulation but need an upgrade to meet current energy efficiency standards. Assessing the existing walls will help determine the type and amount of insulation required for optimal results.
Choosing the right type of insulation is a crucial step. There are various options available, including fiberglass batts, cellulose, foam boards, and spray foam. Each option offers different levels of thermal resistance, installation convenience, and cost. It’s important to consider factors such as the climate, budget, and personal preferences when deciding on the best insulation type for your existing walls.
Once you have chosen the insulation type, gathering the necessary tools and materials is the next step. Common tools such as a utility knife, tape measure, staple gun, and safety equipment are usually required. Additionally, insulation materials like rolls or batts, vapor barriers, and sealants will be needed for the installation process.
Preparing the walls for insulation is an important step to ensure proper adhesion and insulation effectiveness. This may involve removing any existing wall coverings, such as wallpaper or drywall, and addressing any moisture or mold issues. Proper preparation will create a suitable environment for installing the insulation and maximize its performance.
Key Takeaways:
- Adding insulation to existing walls improves energy efficiency, reduces utility bills, enhances comfort, and increases home value. It’s a smart investment for creating a sustainable and cost-effective living environment.
- Properly assessing, choosing, installing, and testing wall insulation is crucial for creating a well-insulated living space. It helps minimize heat transfer, reduce energy consumption, and ensure long-term effectiveness.
Read more: How To Add Onto An Existing Shed
Understanding the Importance of Wall Insulation
When it comes to creating a more energy-efficient and comfortable home, wall insulation plays a crucial role. Walls are a major source of heat transfer, allowing warm air to escape during the winter and hot air to infiltrate the home in the summer. By adding insulation to your existing walls, you can create a thermal barrier that reduces heat exchange, resulting in a more consistent indoor temperature and lower energy consumption.
One of the primary benefits of wall insulation is improved energy efficiency. Insulated walls act as a buffer, preventing the heat from escaping or infiltrating the home. This means your heating and cooling systems don’t have to work as hard to maintain a comfortable temperature, resulting in significant energy savings. In fact, studies have shown that properly insulated walls can reduce energy bills by up to 25%.
Aside from reducing energy consumption, wall insulation also contributes to a more comfortable living environment. By minimizing heat transfer, insulation helps to maintain a consistent and comfortable indoor temperature throughout the year. This means you won’t feel those cold drafts in the winter or hot spots in the summer. Insulation also dampens noise transmission, blocking external sounds and creating a quieter home.
Another benefit of wall insulation is moisture control. Insulation acts as a barrier to prevent moisture from penetrating the walls. This helps to reduce the risk of mold and mildew growth, which can not only damage the structural integrity of the home but also pose health risks. By keeping moisture at bay, insulation can contribute to a healthier and safer living environment.
In addition to the energy and comfort benefits, wall insulation also adds value to your home. Insulated walls are a desirable feature for potential buyers, as they offer improved energy efficiency and a more comfortable living space. Investing in wall insulation can significantly enhance the resale value of your property and make it more appealing on the real estate market.
Moreover, adding wall insulation is a sustainable choice. By reducing energy consumption, insulation helps to decrease greenhouse gas emissions associated with heating and cooling systems. It also contributes to a smaller carbon footprint, promoting a more environmentally friendly lifestyle.
Overall, wall insulation is a wise investment for homeowners. It not only lowers energy bills and enhances comfort but also improves the overall value and environmental sustainability of your home. So, if you’re looking to create a more energy-efficient and comfortable living space, adding insulation to your existing walls is a step in the right direction.
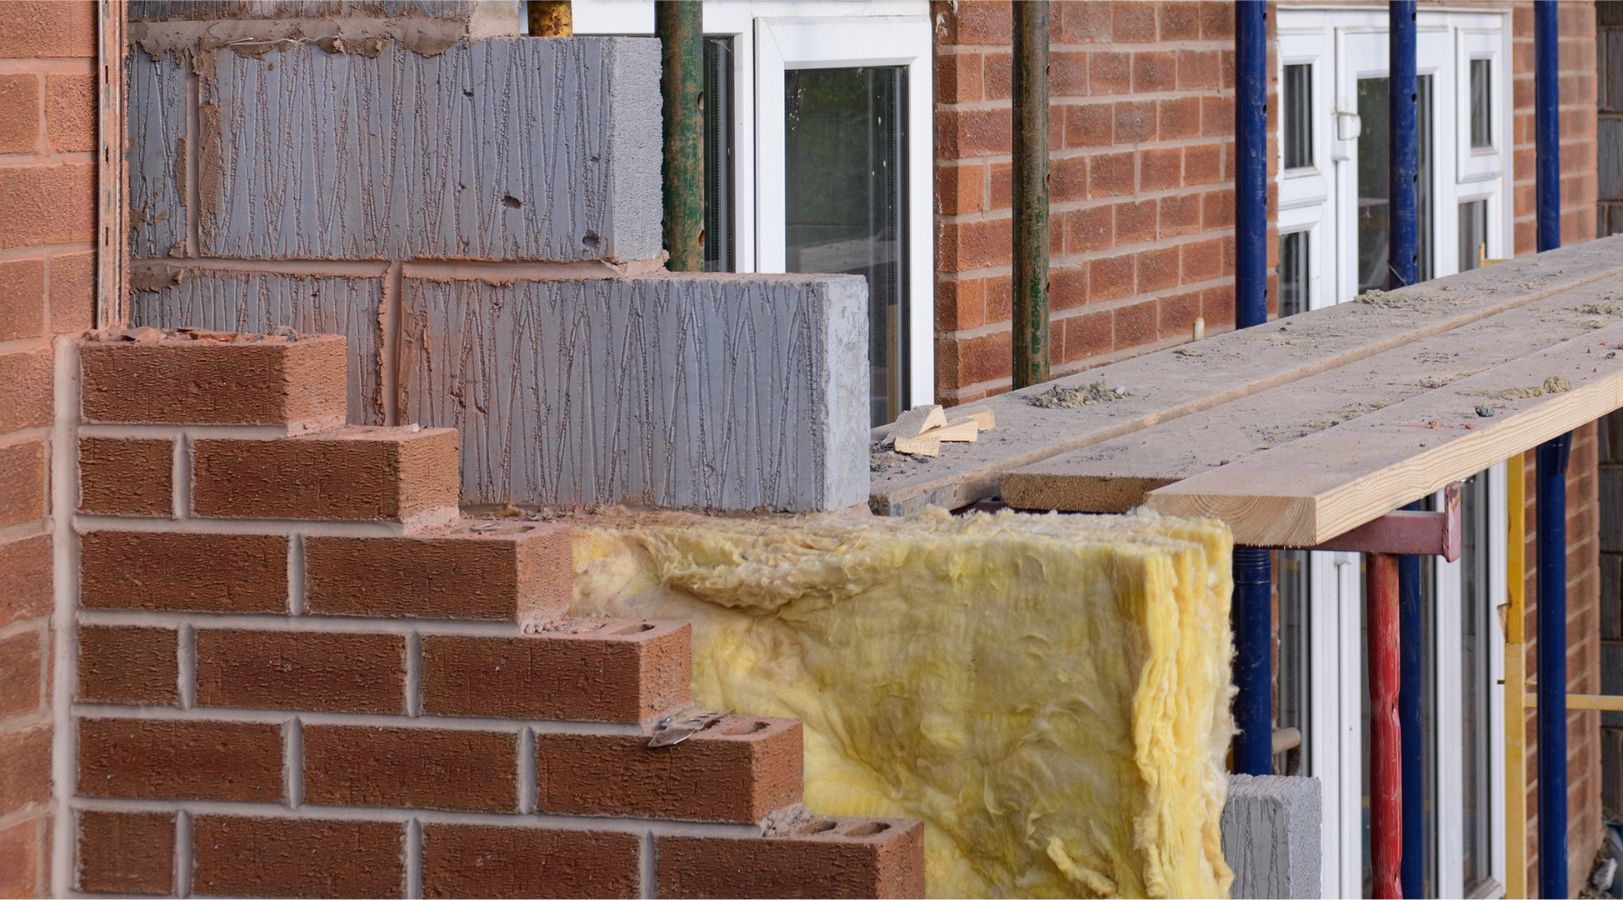
Assessing the Existing Walls for Insulation
Before embarking on the process of adding insulation to your existing walls, it’s crucial to assess the current insulation levels and the condition of the walls. This assessment will help determine whether insulation is needed, the type of insulation to use, and the amount required for optimal results.
The first step in assessing your walls for insulation is to determine if there is any existing insulation present. This can be done by inspecting the wall cavities, which are typically located between the interior and exterior walls of your home. Look for any signs of insulation such as fiberglass batts, cellulose, or foam. Keep in mind that older homes may have little to no insulation, while newer homes may have some insulation that needs upgrading.
In addition to determining the presence of insulation, it’s important to assess its condition. Insulation can deteriorate over time due to factors such as moisture, pests, or inappropriate installation. Look out for signs of damage, such as mold, mildew, or pest infestation. Damaged insulation should be removed and replaced before adding new insulation to ensure optimal performance.
Another aspect to consider when assessing your walls for insulation is the level of insulation. Most homes have a minimum recommended R-value, which measures the insulation’s thermal resistance. The higher the R-value, the better the insulation’s performance. Evaluate whether the current insulation meets the recommended R-value for your region’s climate conditions. If the existing insulation falls below the recommended level, it may be necessary to add more insulation to achieve adequate thermal resistance.
Furthermore, it’s essential to check for any moisture issues in the walls. Moisture can compromise the integrity and effectiveness of insulation. Look for signs of water damage, such as discoloration, dampness, or a musty odor. If there are any signs of moisture, it’s important to address the underlying issue before adding insulation. This may involve fixing leaks, improving ventilation, or addressing any structural issues contributing to the moisture problem.
Lastly, consider the accessibility of your walls. Some walls may be easier to access than others, depending on the layout of your home and any existing wall coverings. Accessible walls can make the insulation installation process more straightforward, while walls concealed by materials like drywall may require more extensive preparation or professional assistance.
By thoroughly assessing your existing walls for insulation, you can determine the appropriate steps to take in adding insulation to your home. Whether it’s adding insulation to bare walls, replacing damaged insulation, or upgrading the existing insulation, a comprehensive assessment will ensure that you achieve optimal energy efficiency and comfort in your living space.
Choosing the Right Type of Insulation
Choosing the right type of insulation for your existing walls is essential for maximizing energy efficiency and comfort. There are several insulation options available, each with its own set of benefits and considerations. By understanding the different types of insulation and their characteristics, you can make an informed decision that suits your specific needs and budget.
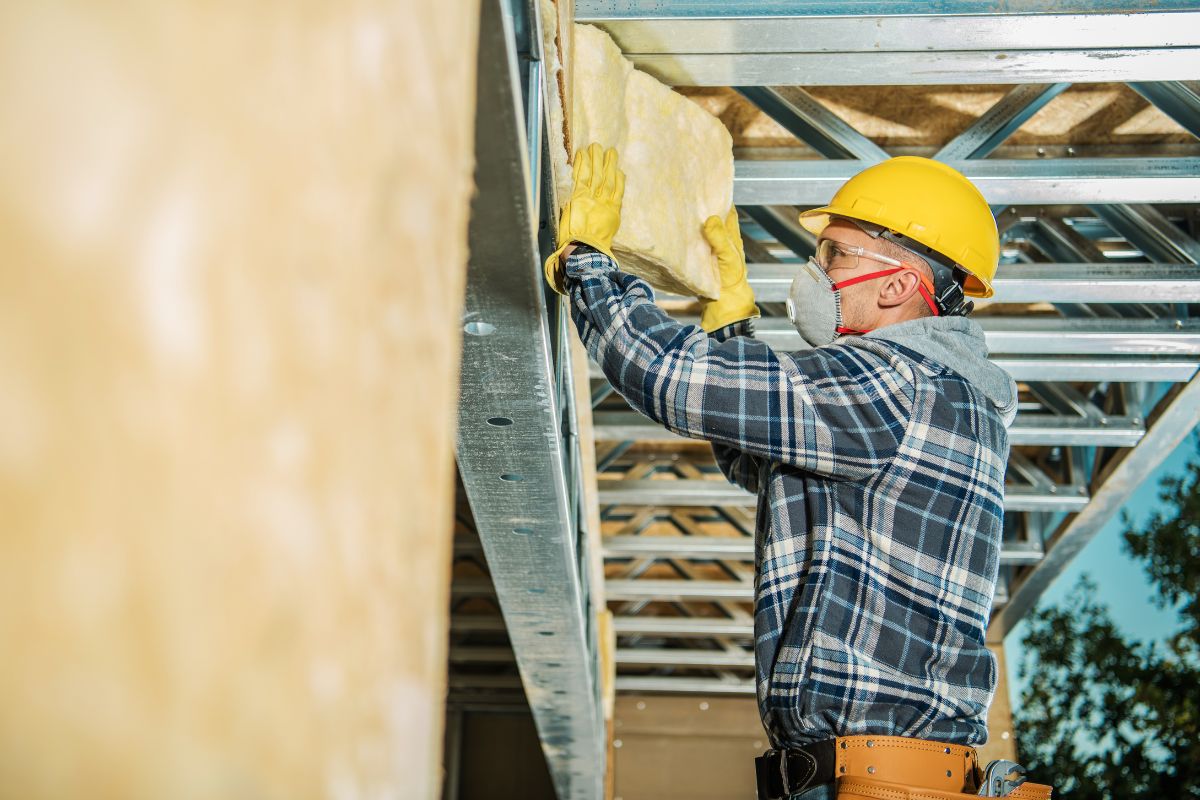
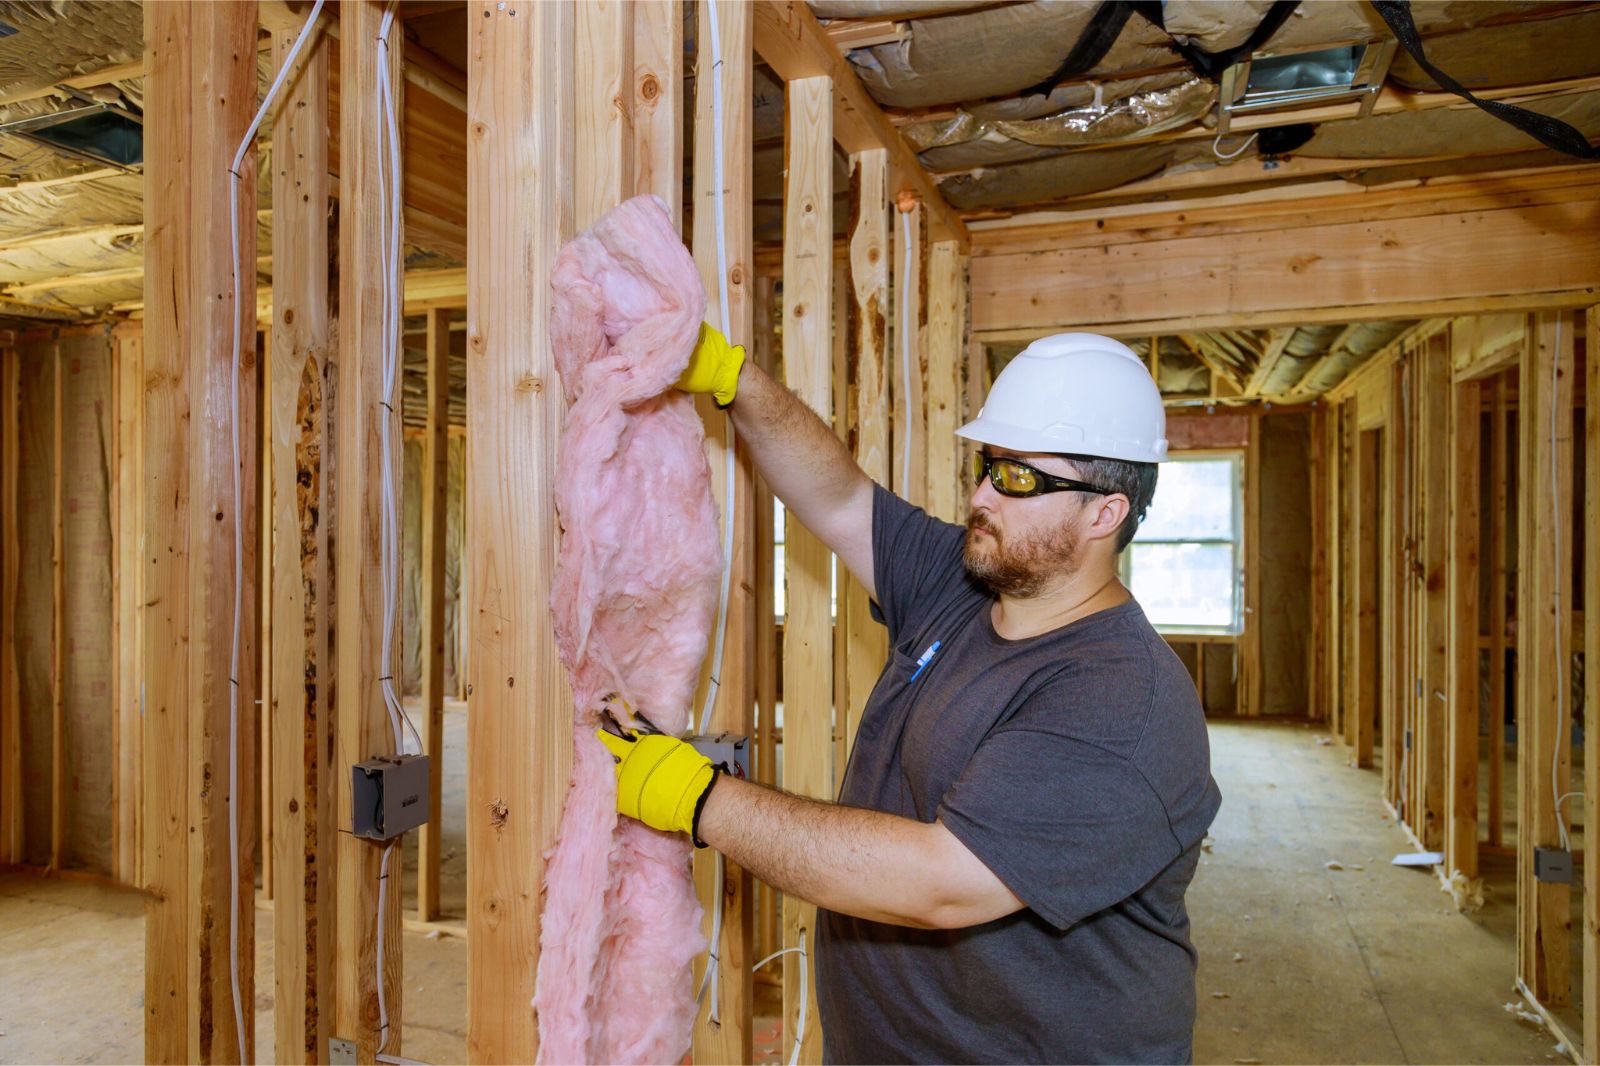
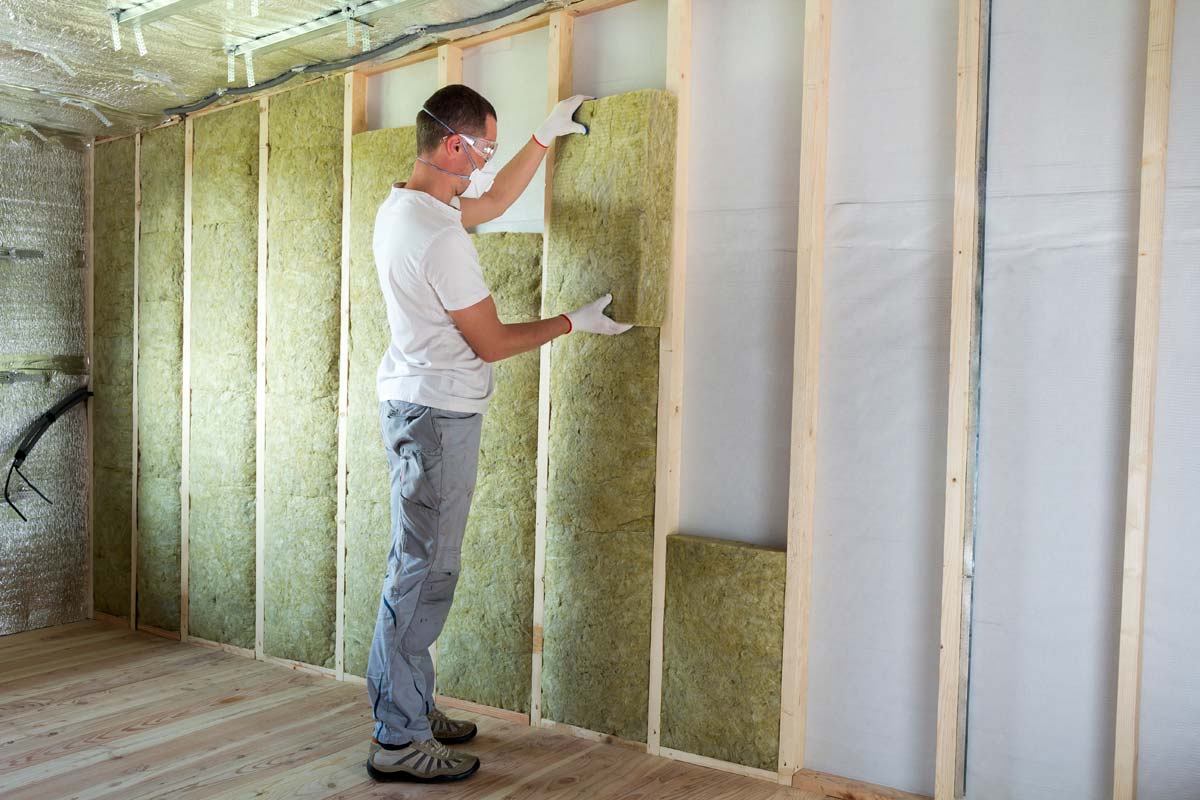
1. Fiberglass Batt Insulation: Fiberglass batts are a popular and cost-effective choice for wall insulation. These pre-cut panels of insulation are made from glass fibers and are available in various thicknesses and widths to fit standard wall cavities. Fiberglass batts provide good thermal resistance and are relatively easy to install. However, it’s crucial to ensure proper installation without any gaps or compression, as this can impact their performance.
2. Cellulose Insulation: Made from recycled materials like newspapers and treated with fire retardants, cellulose insulation is an environmentally friendly option. It is typically blown into wall cavities using specialized equipment, ensuring complete coverage and reducing the risk of gaps or compression. Cellulose insulation offers excellent thermal resistance and soundproofing qualities. However, it may require professional installation due to the specialized equipment needed.
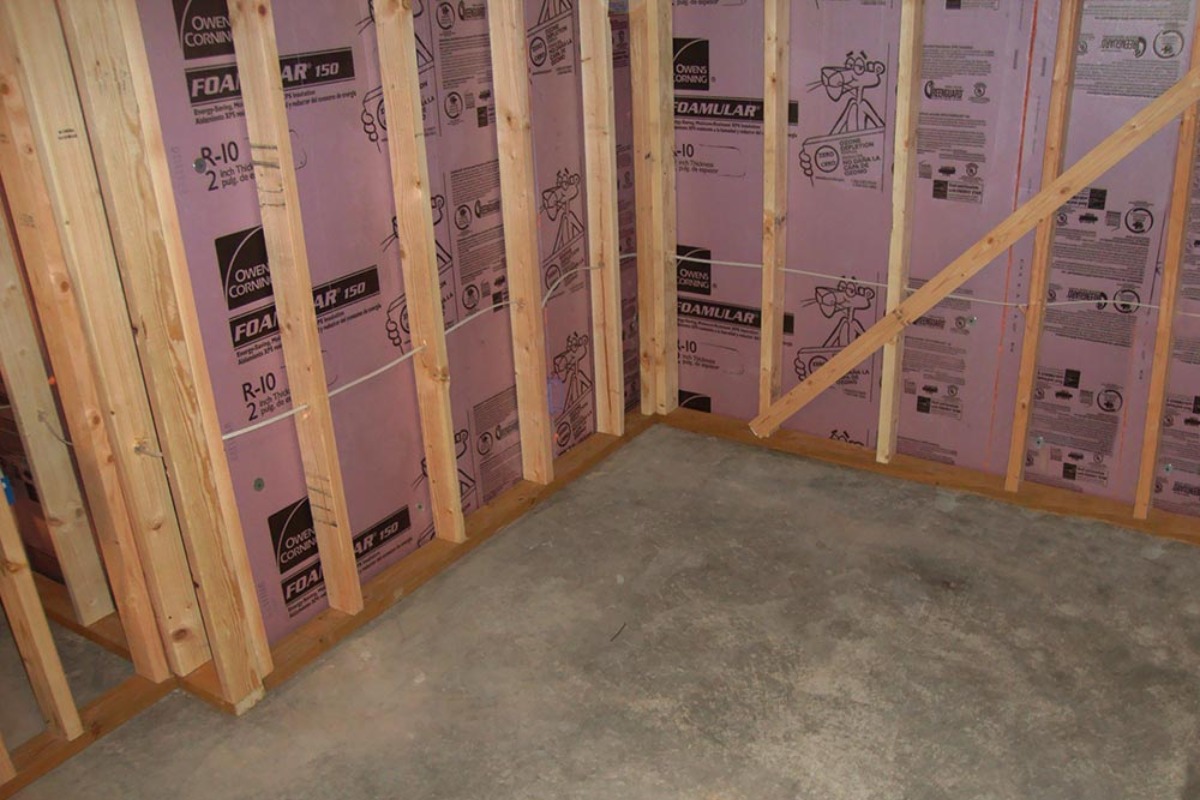
3. Foam Board Insulation: Foam boards, also known as rigid foam insulation, are solid panels made from materials like polystyrene or polyisocyanurate. They provide excellent thermal resistance, moisture resistance, and soundproofing qualities. Foam boards are ideal for insulating exterior walls and can be easily cut to fit the desired dimensions. They are generally more expensive than other insulation options and may require additional measures to achieve an air-tight seal.
4. Spray Foam Insulation: Spray foam insulation is a versatile option that expands and hardens upon application, creating a solid barrier. It offers superior thermal resistance, air sealing properties, and moisture resistance. Spray foam insulation effectively fills in small gaps and voids, providing excellent coverage and reducing the risk of air leaks. However, professional installation is typically required, as it involves specialized equipment and expertise.
When choosing the right type of insulation, it’s important to consider factors such as climate, budget, and installation requirements. Take into account the climate conditions in your area and select an insulation type that offers adequate thermal resistance for optimal energy efficiency. Consider your budget and weigh the initial cost against long-term savings in energy bills. Additionally, evaluate whether you have the skills and resources to install the insulation yourself or if professional installation is necessary.
By carefully considering these factors and understanding the characteristics of different insulation types, you can make an informed decision that aligns with your specific needs and goals. Remember to also comply with local building codes and regulations when selecting and installing insulation in your existing walls.
Gathering the Necessary Tools and Materials
Before you begin the process of adding insulation to your existing walls, it’s important to gather all the necessary tools and materials. Having everything ready beforehand will not only make the installation process more efficient but also ensure that you have everything you need to complete the job properly.
Here are the essential tools and materials you’ll need:
1. Utility Knife: A sharp utility knife is essential for cutting insulation batts or foam boards to the desired size. Make sure the knife has a retractable blade for safety purposes.
2. Tape Measure: Accurate measurements are crucial when cutting the insulation. A tape measure will help you ensure you have the right dimensions for a proper fit.
3. Staple Gun: A staple gun is necessary for securing the insulation in place. It allows you to quickly and securely attach the insulation to the wall surfaces.
4. Safety Equipment: Insulation materials may produce small particles or fibers that can irritate the skin and eyes. Make sure to wear protective gloves, safety glasses, and a dust mask to protect yourself during the installation process.
5. Insulation Materials: Depending on the insulation type you’ve chosen, you’ll need the appropriate materials. This may include fiberglass batts, cellulose insulation, foam boards, or spray foam insulation. Ensure you have enough insulation to cover the entire wall area.
6. Vapor Barrier: In some cases, you may need to install a vapor barrier to prevent moisture from penetrating the walls. This is typically a plastic sheet that is placed on the warm side of the insulation.
7. Sealant: A sealant is used to seal any gaps, cracks, or openings in the walls to prevent air leakage. Choose a sealant that is compatible with the insulation material you’re using.
8. Ladder or Step Stool: Depending on the height of your walls, you may need a ladder or step stool to reach the upper areas during the installation process.
9. Drop Cloth: To protect your flooring or furniture from any potential debris or mess, lay down a drop cloth or old sheet before starting the installation.
10. Flashlight: A flashlight will come in handy if you need to access dark or cramped spaces during the installation process.
Make sure to gather all these tools and materials before you start adding insulation to your existing walls. This will ensure a smoother and more efficient installation process, saving you time and ensuring that you have everything you need to complete the job properly.
Consider using blown-in insulation as a cost-effective and efficient way to add insulation to existing walls. It can be installed through small holes drilled in the wall, minimizing disruption to the existing structure.
Read more: How To Add A Dormer To An Existing Roof
Preparing the Walls for Insulation
Before you can begin adding insulation to your existing walls, it’s important to properly prepare the walls to ensure optimal adhesion and insulation effectiveness. The preparation process may vary depending on the condition of your walls and any existing wall coverings. Follow these steps to prepare the walls for insulation:
1. Remove Wall Coverings: If your walls are covered with wallpaper, paneling, or any other type of wall covering, it’s best to remove them before adding insulation. Use a scraper or putty knife to gently peel off the wall covering, ensuring not to damage the underlying wall surface.
2. Address Moisture Issues: Before installing insulation, it’s crucial to identify and address any existing moisture issues. Insulation is most effective when installed in dry conditions. Look out for signs of water damage, such as stains, discoloration, or mold growth. If you detect any moisture-related issues, it’s essential to fix the underlying problem and allow the walls to dry thoroughly before proceeding.
3. Patch and Repair: Inspect the walls for any cracks, holes, or other damages that may impact the insulation installation. Use a suitable patching compound or spackling paste to fill in any gaps or imperfections. Smooth out the patched areas and allow them to dry according to the manufacturer’s instructions.
4. Address Pest Infestations: If you notice any signs of pests or previous pest activity in your walls, it’s important to address the issue before adding insulation. Consult with a pest control professional to eliminate the pests and ensure that your walls are pest-free.
5. Electrical and Plumbing Considerations: If there are electrical or plumbing components running through your walls, take precautions to ensure their safety and accessibility. Consult with a professional if you need to make any modifications or adjustments to accommodate the insulation installation.
6. Clean the Walls: Before installing insulation, it’s a good idea to clean the walls to remove any dust, dirt, or debris. Use a vacuum cleaner or a damp cloth to wipe down the wall surfaces. A clean surface will promote better adhesion and help the insulation perform optimally.
7. Consider Vapor Barriers: Depending on your insulation selection and local building codes, you may need to install a vapor barrier. A vapor barrier helps to prevent moisture from seeping through the walls and causing damage. Ensure that the vapor barrier is properly installed and sealed to create an effective barrier.
By thoroughly preparing your walls for insulation, you can ensure a successful installation and maximize the performance of your insulation. Take the time to address any existing issues, repair damages, and create a clean and suitable surface for the insulation material to adhere to. Proper preparation sets the foundation for an effective and long-lasting insulation solution in your existing walls.
Installing Insulation in the Existing Walls
Now that you have assessed your walls, chosen the right insulation type, and prepared the walls, it’s time to proceed with the installation process. Here is a step-by-step guide to help you install insulation in your existing walls:
1. Start by carefully measuring the dimensions of the wall cavities. Cut the insulation material to fit the measurements, ensuring a snug and proper fit. Use a sharp utility knife to make clean cuts.
2. Place the insulation into the wall cavities, ensuring that it completely fills the space without being overly compressed. Insulation should fit tightly against the studs and not hang loose or obstruct any electrical or plumbing components.
3. For fiberglass batt insulation, position the batts between the wall studs. If necessary, use a staple gun to attach the edges of the insulation material to the studs and secure it in place. Avoid compressing the fibers, as this can reduce its thermal performance.
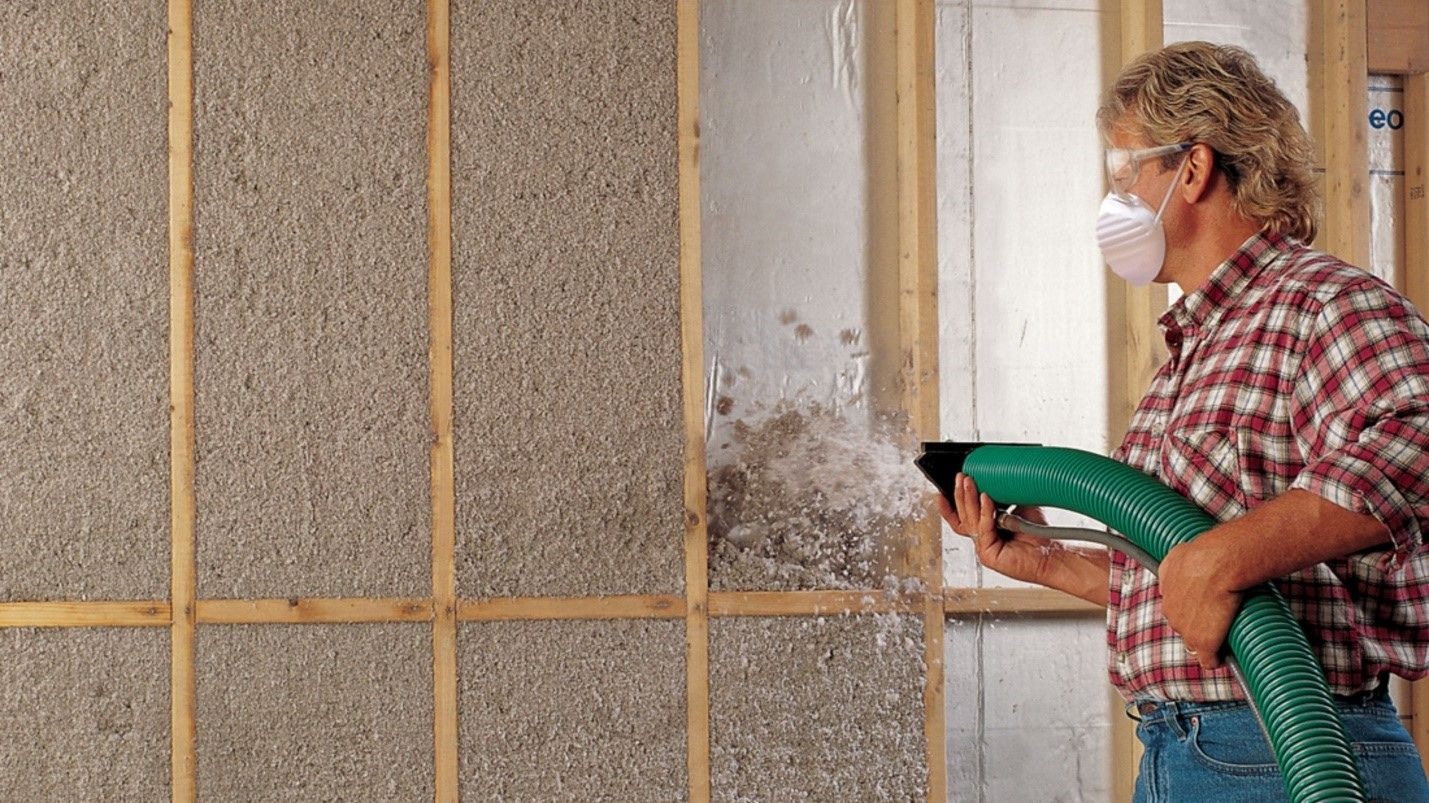
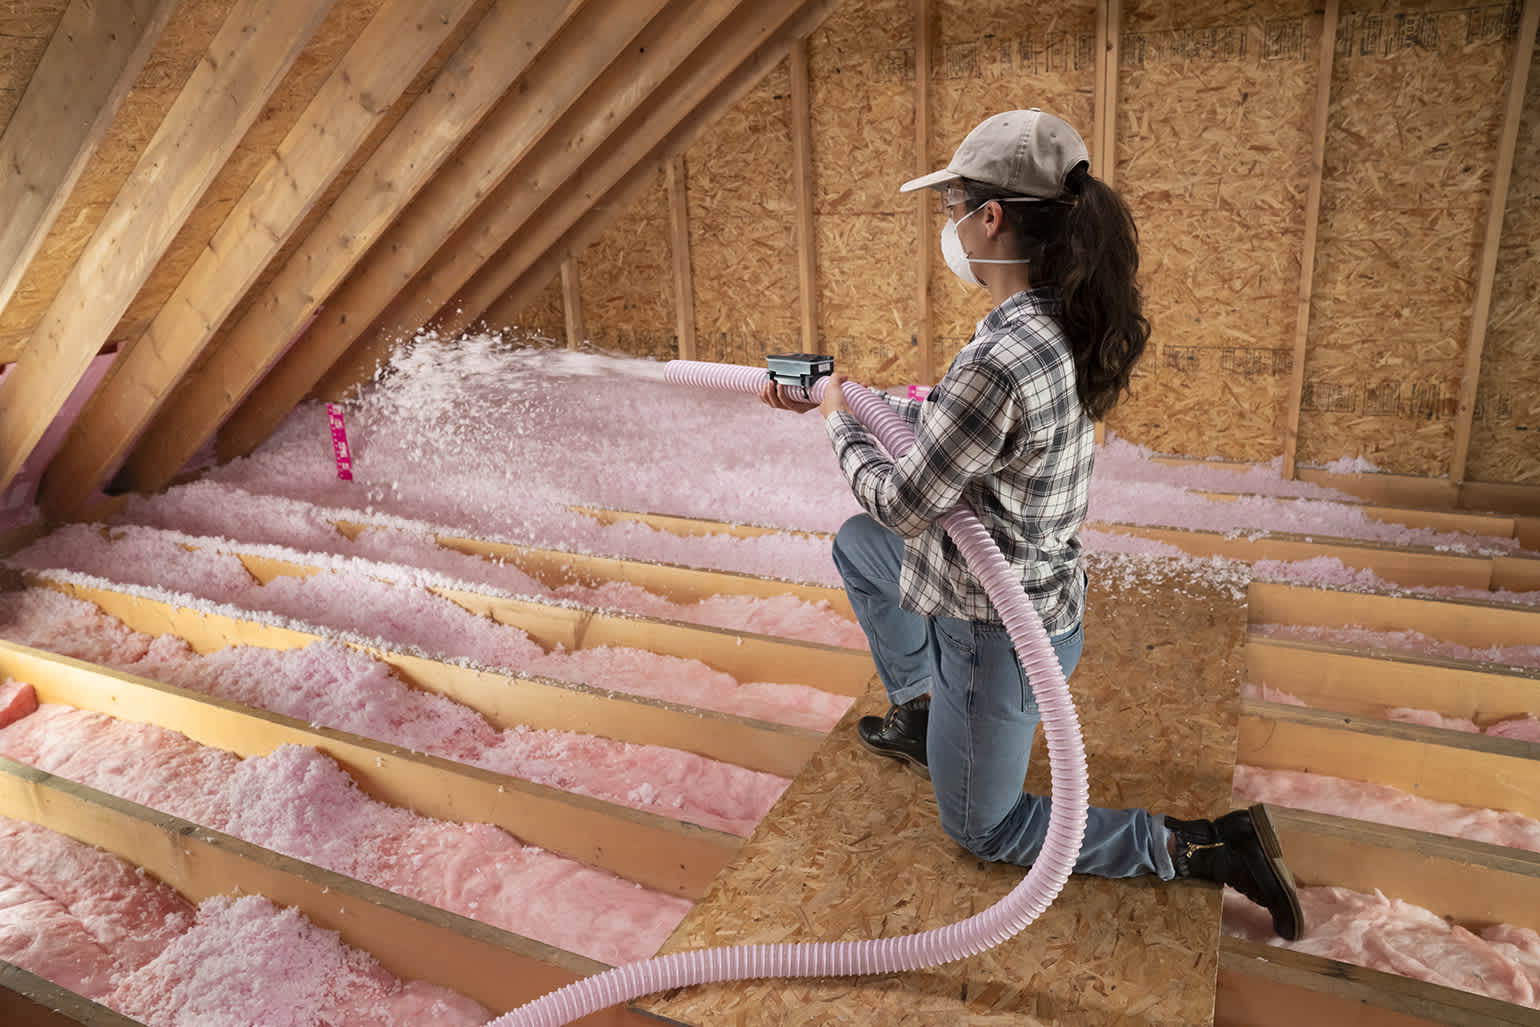
4. If you are using loose-fill insulation like cellulose, use a blower machine to evenly distribute the insulation material into the wall cavities. This process should be done carefully to ensure that the cavities are fully filled without any gaps or voids.
5. When using foam board insulation, cut the boards to fit the dimensions of the wall cavities. Apply an adhesive recommended by the manufacturer on one side of the foam board and press it firmly against the wall. Hold it in place for a few seconds to allow the adhesive to adhere properly.
6. If you are using spray foam insulation, hire a professional or follow the manufacturer’s instructions for application. Spray the foam into the wall cavities, ensuring complete coverage and filling any gaps or voids. The foam will expand and harden, creating an airtight seal.
7. Repeat the installation process for each wall cavity, working your way around the room or house. Take your time to ensure that each cavity is properly insulated and that there are no gaps or areas of inadequate coverage.
8. If you encounter obstacles such as electrical outlets or switches, carefully cut around them to fit the insulation, ensuring that there is proper clearance and no compression of the insulation material.
9. For walls with multiple levels, work from the bottom up, installing the insulation in each wall cavity before moving on to the next level.
10. Once all the insulation is installed, double-check that all the wall cavities are properly filled and that there are no areas of inadequate coverage. Make any necessary adjustments before moving on to the next step.
Remember, it’s important to handle insulation materials with care and follow all safety guidelines during installation. Additionally, if you are unsure about the installation process, it’s best to consult with a professional to ensure proper installation and avoid any potential issues.
By following these steps and taking the necessary precautions, you can successfully install insulation in your existing walls, enhancing energy efficiency and comfort in your home.
Sealing and Finishing the Insulation Installation
After successfully installing insulation in your existing walls, it’s important to focus on sealing and finishing the installation to optimize its effectiveness. Sealing and finishing will help create an airtight and insulated barrier, ensuring maximum energy efficiency and comfort. Here are the steps to seal and finish the insulation installation:
1. Seal Gaps and Cracks: Inspect the walls carefully for any gaps, cracks, or openings that may compromise the insulation’s effectiveness. Use a suitable sealant, such as caulk or foam, to seal these gaps and create an airtight seal. Pay close attention to areas around windows, doors, electrical outlets, and plumbing penetrations.
2. Apply Vapor Barrier: If required, install a vapor barrier over the insulation. The vapor barrier helps to prevent moisture from entering the walls, protecting the insulation and preventing any potential damage. Ensure the vapor barrier covers the entire insulated area and is properly sealed around its edges.
3. Inspect for Air Leaks: Conduct a thorough inspection to identify any potential air leaks that may compromise the insulation’s effectiveness. Use a lit candle or incense stick near windows, doors, and other areas prone to air infiltration. If you notice the flame flickering or the smoke being drawn in, it indicates the presence of an air leak. Seal these leaks with weatherstripping or caulking to create an airtight seal.
4. Install Outlet Gaskets: Electrical outlets and switches can be a source of air leakage. Install outlet gaskets behind electrical outlet and switch plate covers to create a tight seal. Outlet gaskets are inexpensive and readily available at hardware stores. Simply remove the cover, place the gasket over the outlet, and reattach the cover.
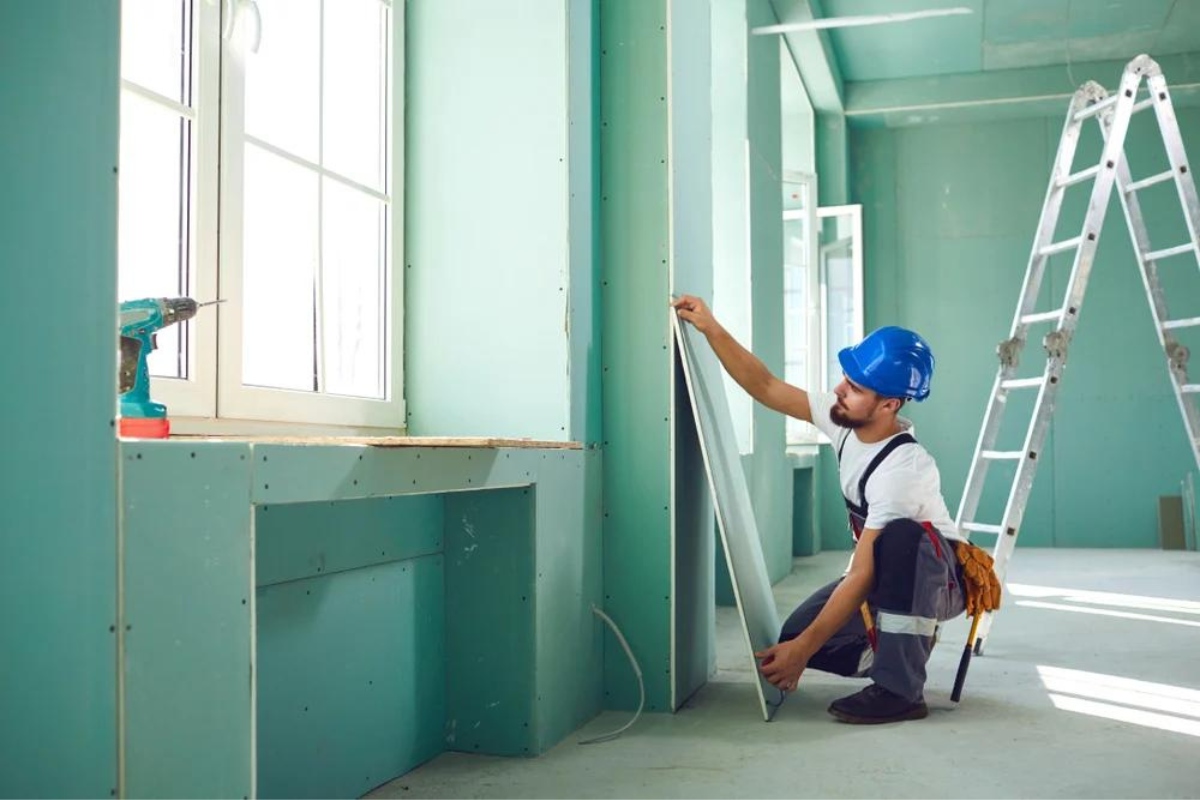
5. Replace Wall Coverings: If you removed any wall coverings, such as wallpaper or paneling, during the insulation installation process, it’s time to replace them. Choose wall coverings that suit your aesthetic preferences and ensure they are properly installed, providing a finished look to your walls.
6. Paint or Wallpaper: Consider giving your walls a fresh coat of paint or applying wallpaper as a finishing touch. This not only enhances the visual appeal but also provides an additional layer of protection to the walls and insulation. Choose paint or wallpaper that complements your home’s interior design.
7. Clean Up: Lastly, clean up any debris or mess that may have accumulated during the insulation installation process. Vacuum the room to remove any insulation fibers or dust particles. Dispose of any waste materials properly, following local guidelines.
By sealing gaps and cracks, applying a vapor barrier, and addressing air leaks, you can create a well-insulated and airtight barrier in your walls. Replacing or installing wall coverings and adding a fresh coat of paint or wallpaper will give your walls a polished and finished look, completing the insulation installation process.
Remember to ensure safety measures and follow any specific manufacturer instructions when applying sealant, installing outlets, or other finishing tasks. If you are unsure about any aspect of the sealing and finishing process, it’s advisable to consult with a professional to ensure proper installation and achieve optimal insulation performance.
Testing the Effectiveness of the Added Wall Insulation
Once you have completed the installation of insulation in your existing walls, it’s important to test its effectiveness to ensure optimal energy efficiency and comfort in your home. Testing the insulation will help identify any areas that may need further attention or improvement. Here are some methods to test the effectiveness of the added wall insulation:
1. Thermal Imaging: Thermal imaging cameras are a useful tool to detect temperature variations and insulation gaps. Use a thermal imaging camera to scan the walls and identify any areas where heat is escaping or infiltrating. Cold spots or temperature differences could indicate areas with inadequate insulation or air leaks.
2. Infrared Thermometer: An infrared thermometer can be used to measure the surface temperature of the walls. Take temperature readings at various points on the walls to determine if there are any significant temperature variations. Ideally, the temperature should be consistent throughout the insulated walls, indicating effective insulation coverage.
3. Energy Audit: Consider scheduling an energy audit conducted by a professional. An energy auditor will assess your home’s energy efficiency, including the insulation in the walls. They may conduct blower door tests, infrared scans, and other diagnostics to identify air leaks and areas with inadequate insulation. An energy audit will provide valuable insights and recommendations for improving your home’s energy efficiency.
4. Utility Bill Analysis: Monitor your utility bills before and after the insulation installation. Compare energy consumption and costs to note any significant changes. If you notice a noticeable reduction in energy usage and lower utility bills, it indicates that the added wall insulation is improving energy efficiency.
5. Comfort Assessment: Assess the overall comfort of your home after the insulation installation. Pay attention to temperature consistency, reduced drafts, and improved indoor comfort. If you notice a more comfortable living environment with fewer hot or cold spots, it suggests that the insulation is effectively regulating the indoor temperature.
6. Professional Assistance: If you have concerns about the insulation’s effectiveness or lack access to specialized testing equipment, consider consulting with a professional. They can evaluate the insulation, conduct tests, and provide recommendations for optimizing energy efficiency and comfort in your home.
By testing the effectiveness of the added wall insulation, you can identify any areas that may require additional insulation or sealing. If deficiencies are found, take necessary steps to address them promptly to maximize the insulation’s performance. Regular testing and maintenance will help ensure that your insulation continues to provide optimal energy efficiency and comfort in the long run.
Remember that testing the insulation should be done periodically, especially after any significant changes or renovations in your home, to ensure its continued effectiveness and energy savings.
Read more: How To Add Showerhead To An Existing Tub
Conclusion
Adding insulation to your existing walls is a smart and effective way to improve energy efficiency, reduce utility bills, and enhance overall comfort in your home. By understanding the importance of wall insulation, assessing your walls, choosing the right type of insulation, gathering the necessary tools and materials, preparing the walls, installing the insulation, sealing and finishing the installation, and testing its effectiveness, you can create a well-insulated living space that promotes energy efficiency, comfort, and cost savings.
Wall insulation helps to reduce heat transfer, keeping your home warm in the winter and cool in the summer. It minimizes energy consumption and lowers utility bills, allowing you to create a more sustainable and cost-effective living environment. Insulated walls also reduce noise transmission, provide moisture control, and add value to your home.
When choosing the right type of insulation for your existing walls, consider factors such as climate, budget, and installation requirements. Fiberglass batts, cellulose, foam boards, and spray foam are popular options, each with its own benefits and considerations. Carefully assess your walls for insulation, ensuring there are no existing moisture issues or damage. Properly prepare the walls by removing coverings, addressing repairs, and cleaning the surfaces.
During the installation process, be thorough in filling the wall cavities with insulation material, whether it’s rolls, batts, loose-fill, or foam. Ensure the insulation is properly secured and covers the entire wall area, without any gaps or compression. Seal any gaps, cracks, or openings in the walls with appropriate sealants to prevent air leakage and maximize energy efficiency.
Finish the insulation installation by applying vapor barriers if needed, replacing wall coverings, and adding a fresh coat of paint or wallpaper for a polished appearance. Test the effectiveness of the added insulation through methods such as thermal imaging, infrared thermometers, energy audits, utility bill analysis, and comfort assessments.
In conclusion, adding insulation to your existing walls is a worthwhile investment that can significantly improve energy efficiency, reduce utility bills, enhance comfort, and increase the value of your home. By taking the necessary steps to assess, prepare, install, and test the insulation, you can create a well-insulated living space that offers long-term benefits for you and the environment.
Frequently Asked Questions about How To Add Wall Insulation To Existing Walls
Was this page helpful?
At Storables.com, we guarantee accurate and reliable information. Our content, validated by Expert Board Contributors, is crafted following stringent Editorial Policies. We're committed to providing you with well-researched, expert-backed insights for all your informational needs.


0 thoughts on “How To Add Wall Insulation To Existing Walls”