Articles
How To Install Faced Insulation In Walls
Modified: December 7, 2023
Learn how to properly install faced insulation in walls with this informative article. Perfect for homeowners and DIY enthusiasts looking to improve energy efficiency.
(Many of the links in this article redirect to a specific reviewed product. Your purchase of these products through affiliate links helps to generate commission for Storables.com, at no extra cost. Learn more)
Introduction
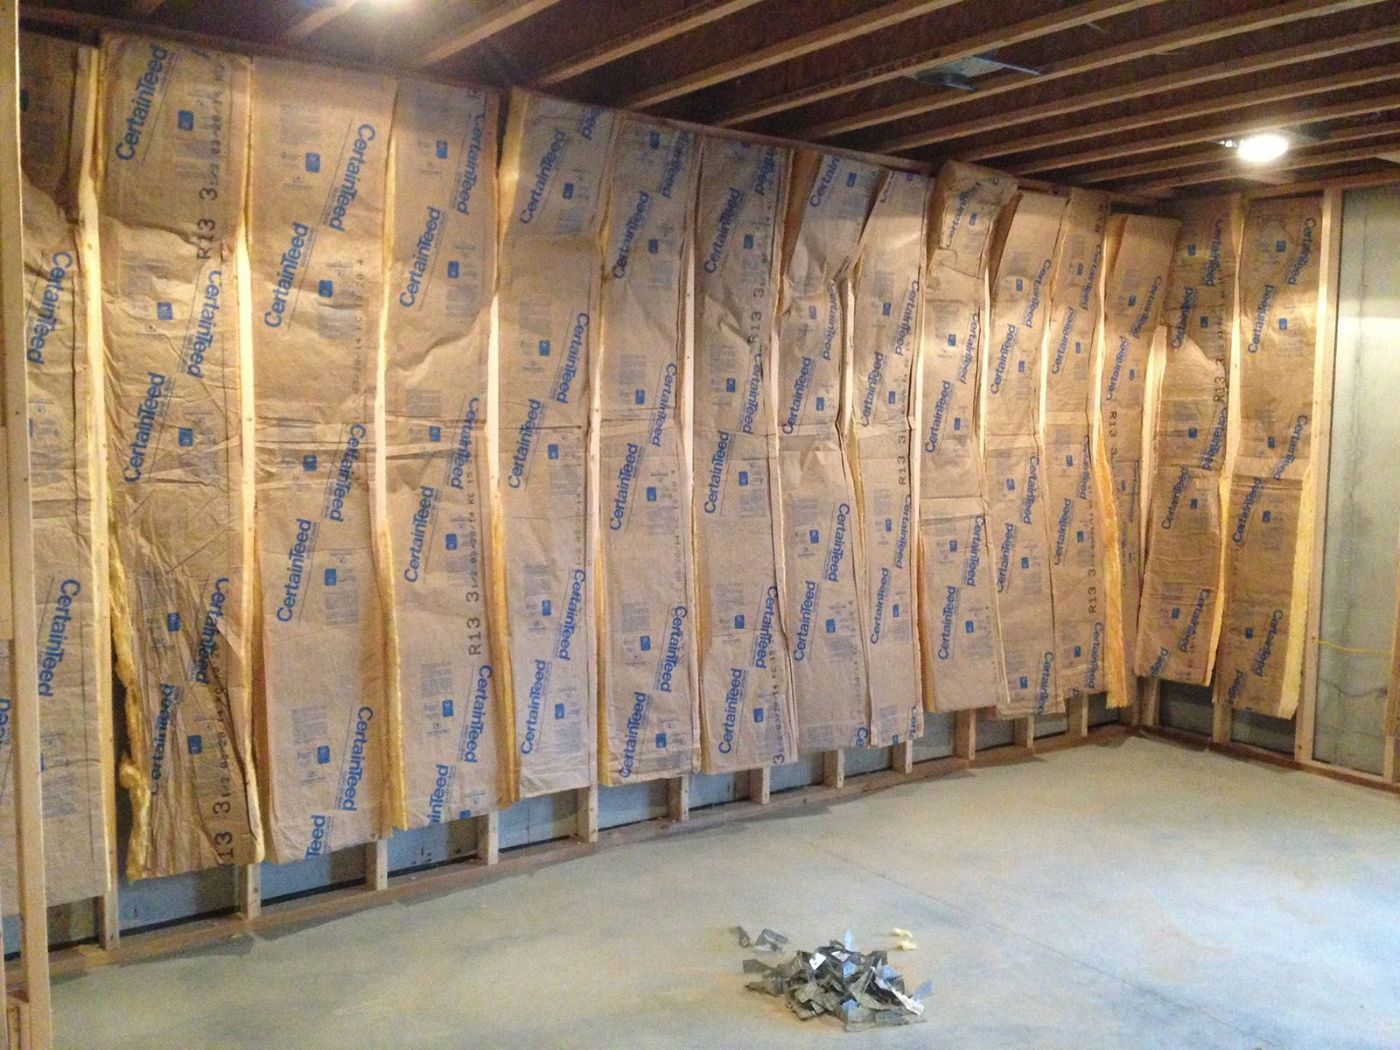
Installing faced insulation in walls is a crucial step when it comes to improving the energy efficiency and comfort of your home. Faced insulation, also known as kraft-faced insulation, is designed to have a vapor retarder or barrier on one side, which helps to prevent moisture from moving through the insulation and into the wall cavity. This not only helps in reducing the risk of mold and mildew growth, but it also helps to maintain a consistent indoor temperature and reduce energy consumption.
In this article, we will guide you through the step-by-step process of installing faced insulation in walls. Before we get started, let’s go over the tools and materials you will need for this project.
Key Takeaways:
- Properly installing faced insulation in walls involves thorough preparation, precise measurement, and effective sealing to create a thermal barrier, reduce energy consumption, and enhance indoor comfort while preventing moisture infiltration and mold growth.
- Regular evaluation of the insulation installation is crucial for identifying and addressing any issues, ensuring optimal performance, and contributing to a greener, more sustainable environment by reducing energy consumption and minimizing the carbon footprint.
Tools and Materials Needed
Before you begin installing faced insulation in walls, gather the following tools and materials:
- Tape measure
- Utility knife
- Straight edge or square
- Caulking gun
- Vapor barrier tape
- Staple gun
- Staples
- Safety glasses
- Gloves
- Protective clothing
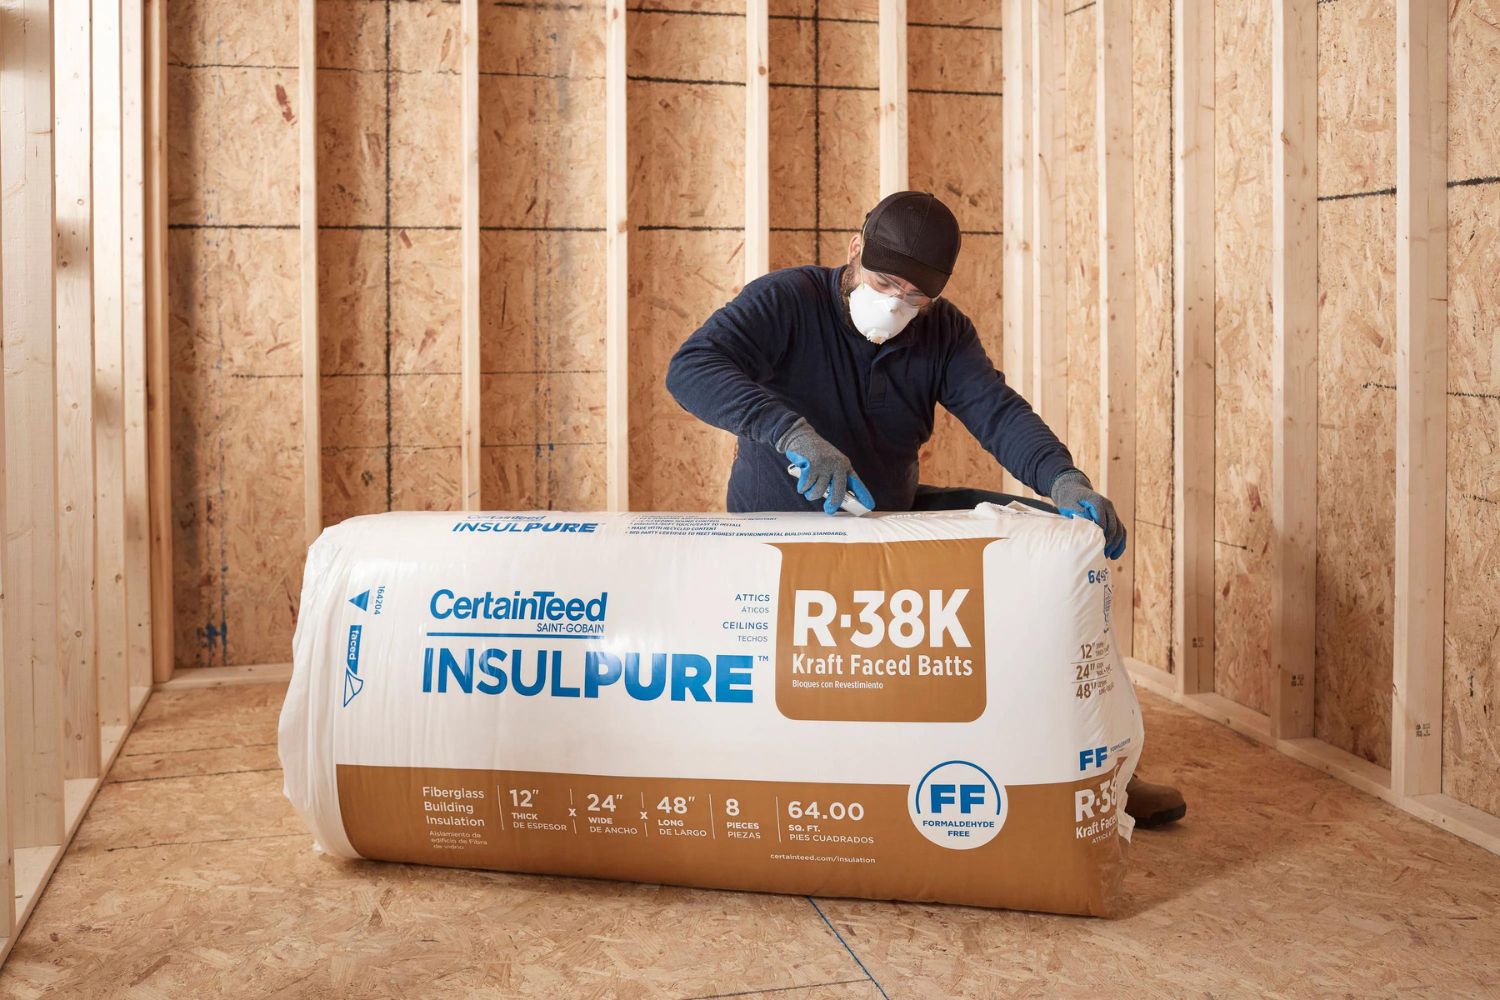
- Faced insulation batts
- Vapor barrier
It is important to wear the appropriate safety gear, such as safety glasses and gloves, to protect yourself during the installation process. Additionally, make sure you have the correct amount of faced insulation batts and vapor barrier for your project. Measure the square footage of the walls to determine the amount of insulation material needed.
Now that you have gathered all the necessary tools and materials, let’s proceed to the next step of preparing the walls before installing faced insulation.
Step 1: Prepare the Walls
Before you can install faced insulation in your walls, it is essential to prepare the walls properly. Follow these steps to ensure a smooth installation process:
- Clean the walls: Remove any debris, dust, or loose material from the walls using a broom or vacuum cleaner. This will provide a clean surface for the insulation to adhere to.
- Seal air leaks: Inspect the walls for any gaps or cracks where air can leak through. Use caulk or foam sealant to fill these gaps and create an airtight seal. This will help improve the insulation’s effectiveness and prevent drafts.
- Ensure dry conditions: Ensure that the walls are dry before installing faced insulation. If there is any moisture present, it can compromise the insulation’s performance and promote mold growth. Address any moisture issues before proceeding with the installation.
- Remove obstacles: Clear the wall area of any obstacles such as furniture, artwork, or electrical outlets. This will make it easier to install the insulation and ensure proper coverage.
By properly preparing the walls, you create a suitable environment for the faced insulation and enhance its overall effectiveness. Once the walls are clean and sealed, you are ready to move on to the next step of measuring and cutting the insulation.
Step 2: Measure and Cut the Insulation
Accurate measurement and cutting of the insulation batts is crucial to ensure a proper fit and optimum insulation performance. Follow these steps to measure and cut the faced insulation:
- Measure the wall cavity: Use a tape measure to measure the height and width of the wall cavity. Take multiple measurements at different points to account for any variations.
- Transfer the measurements: Transfer the measurements onto the insulation batts. Use a straight edge or square to ensure precise and straight lines.
- Cut the insulation: Carefully cut the insulation batts using a utility knife. Make sure to use a sharp blade to achieve clean cuts. Take your time and be cautious to avoid any accidents or injuries.
- Double-check the measurements: Before installing the insulation, double-check the measurements to ensure they match the dimensions of the wall cavity. Adjust and recut if necessary for a proper fit.
It is vital to make accurate cuts and have the insulation batts fit snugly in the wall cavity. Gaps or spaces can diminish the effectiveness of the insulation and allow air infiltration. Take your time during this step to achieve precise cuts and ensure maximum insulation coverage.
Once you have measured and cut the insulation batts, you can proceed to the next step of installing a vapor barrier.
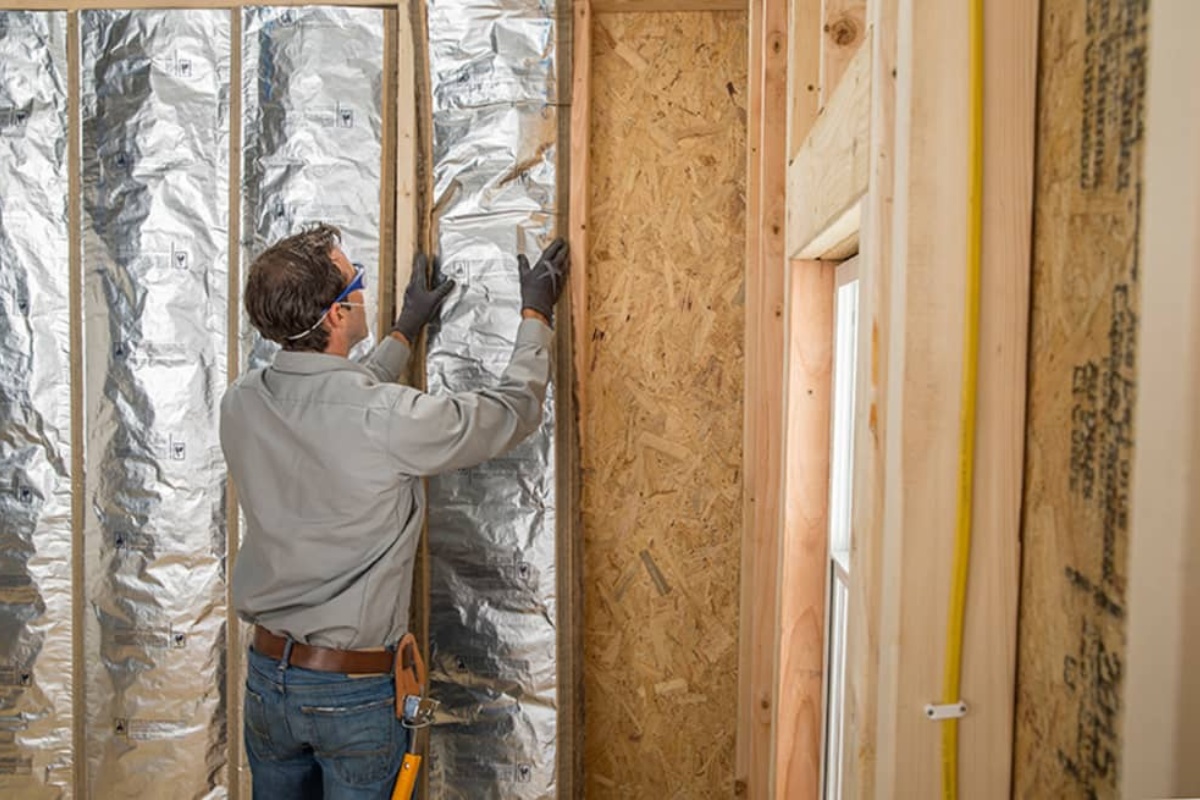
Step 3: Install Vapor Barrier
The vapor barrier is a crucial component of installing faced insulation in walls. It helps to prevent moisture from seeping into the wall cavity, which can lead to mold, rot, and other issues. Follow these steps to properly install the vapor barrier:
- Cut the vapor barrier: Measure and cut the vapor barrier to match the dimensions of the wall cavity. Leave some extra material to overlap seams and edges for a better seal.
- Position the vapor barrier: Start at the bottom of the wall and position the vapor barrier with the facing side facing into the room. Make sure it covers the entire wall surface, extending from the floor to the ceiling.
- Secure the vapor barrier: Use a staple gun or adhesive to secure the vapor barrier to the studs or wall framing. Space the staples or adhesive application about 12 inches apart along the edges and within the field.
- Overlap seams and edges: For better protection against moisture, overlap the seams of the vapor barrier by at least 6 inches. Additionally, overlap the vapor barrier with the adjoining walls, ceiling, and floor.
- Seal the seams: Apply vapor barrier tape to seal the seams of the vapor barrier. This will further enhance its effectiveness in preventing moisture penetration.
By properly installing the vapor barrier, you create a barrier that helps to keep moisture out of the wall cavity and maintain the integrity of the insulation. Once the vapor barrier is in place, you can proceed to the next step of installing the insulation batts.
Read more: How To Install Foil Faced Insulation Sheets
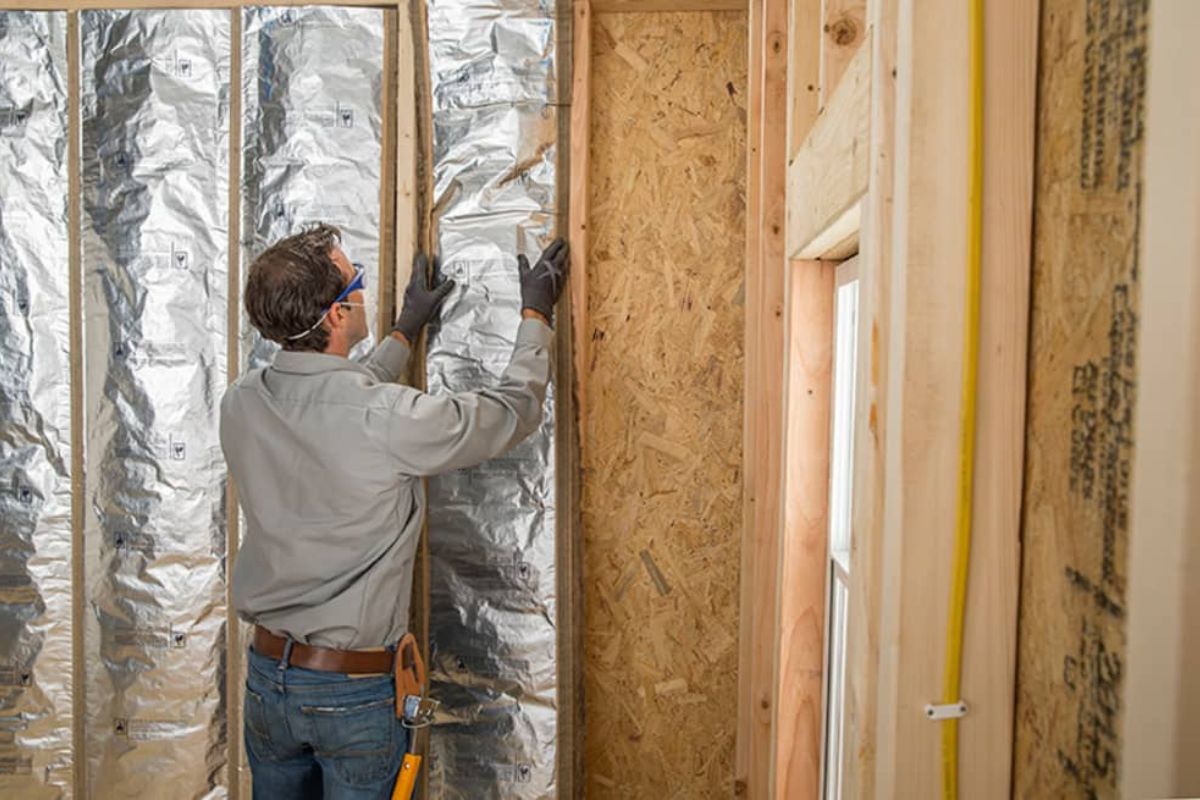
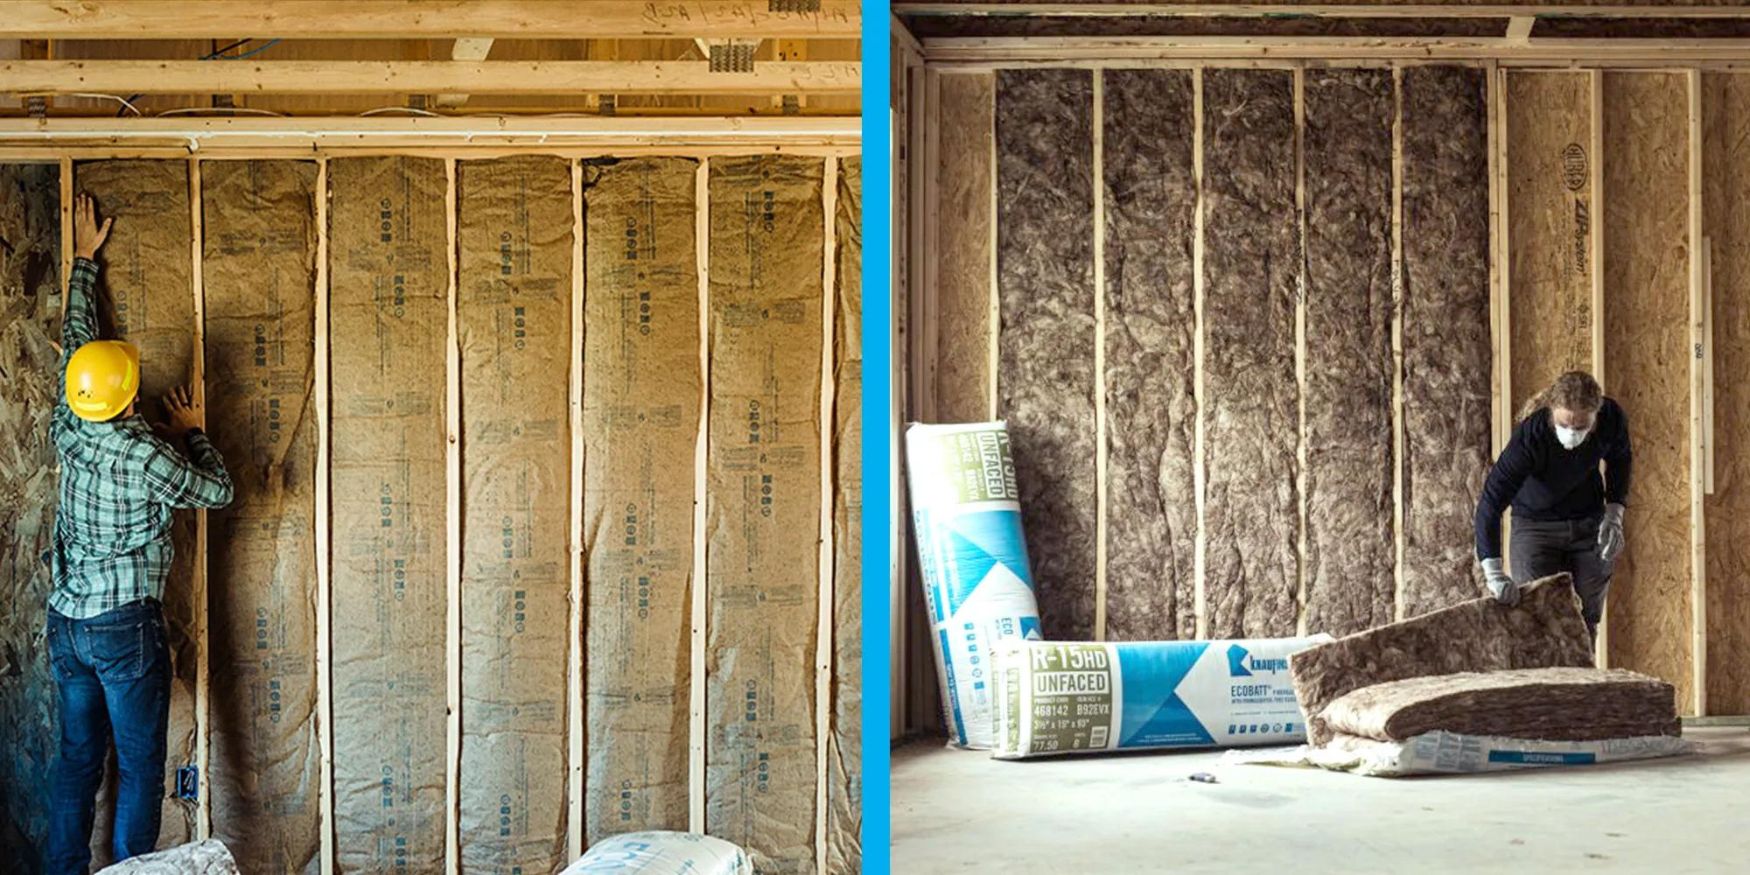
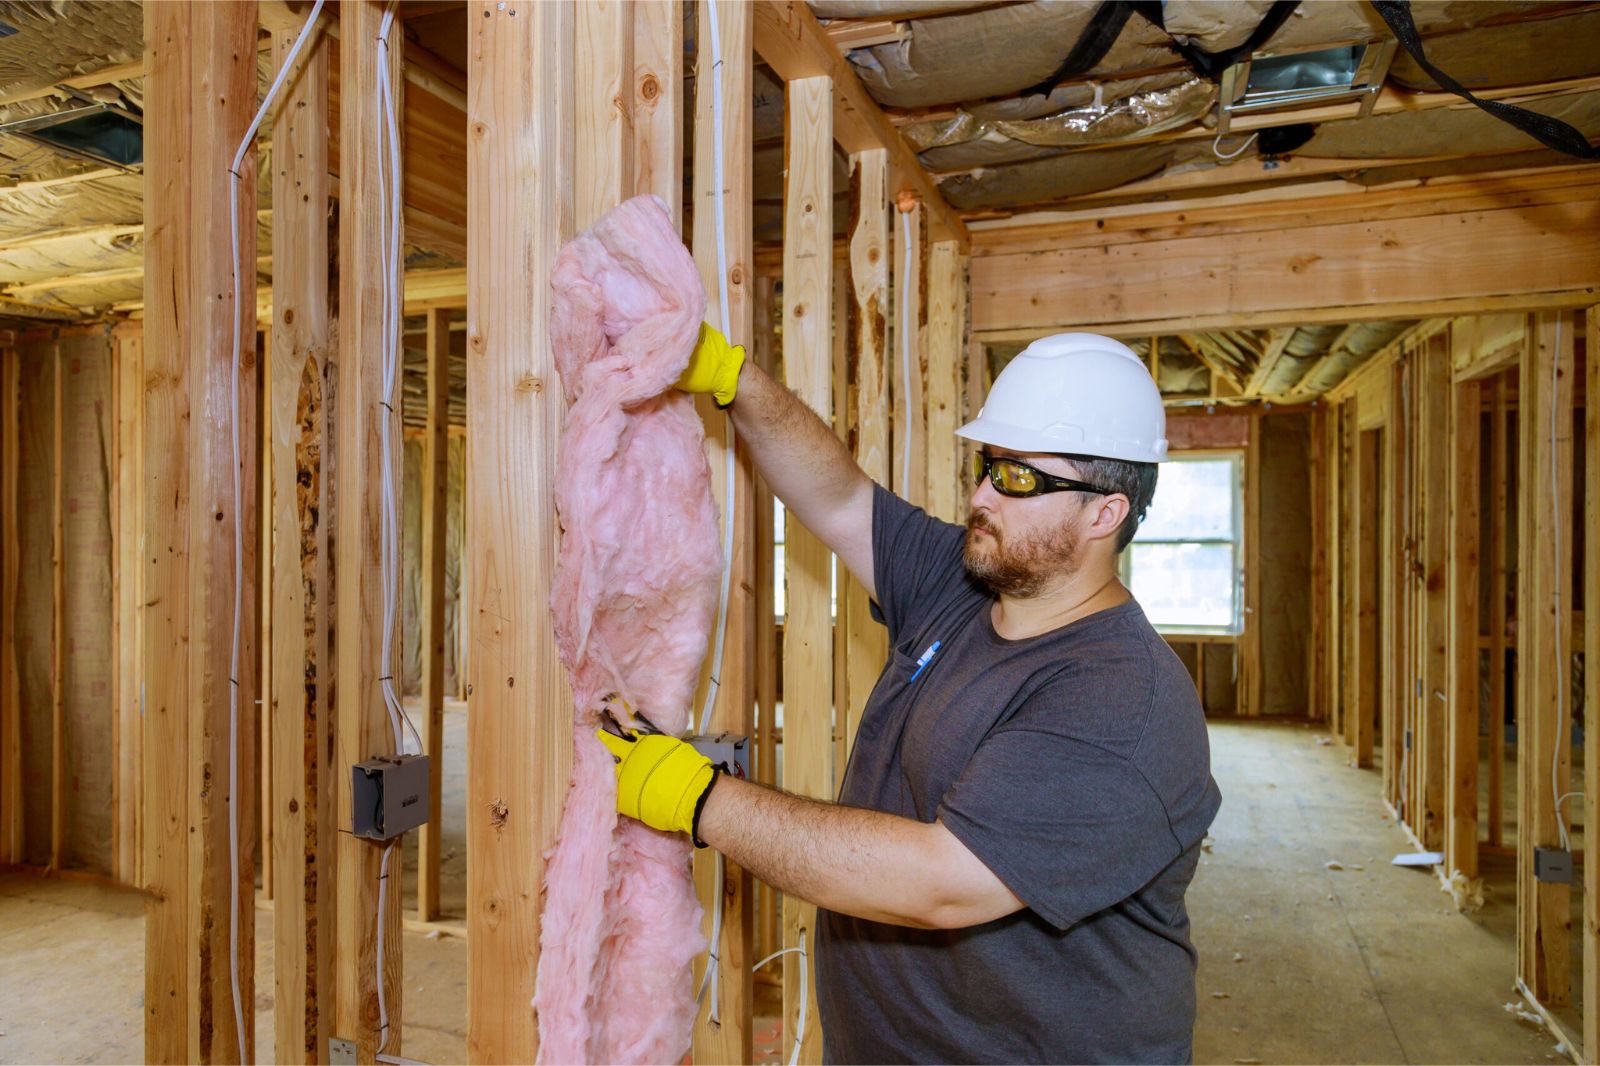
Step 4: Install Insulation Batts
With the vapor barrier in place, it’s time to install the insulation batts. Follow these steps to correctly install the faced insulation:
- Start at the bottom: Begin installing the insulation batts at the bottom of the wall cavity. Place the batt with the facing side against the vapor barrier.
- Press and fit the insulation: Press the insulation batt firmly against the wall, ensuring it fits snugly within the cavity. The friction between the insulation and the wall will help hold it in place.
- Work your way up: Continue installing the insulation batts from the bottom to the top of the wall. Butt the edges of each batt tightly against each other to eliminate any gaps.
- Trim for obstacles: If there are obstacles such as electrical outlets or pipes, carefully trim the insulation batts to fit around them. Ensure there is proper coverage without compressing the insulation.
- Check for full coverage: Once all the insulation batts are installed, visually inspect the wall to ensure there are no gaps or areas of insufficient coverage. Fill any gaps with additional cut pieces of insulation.
It’s essential to pay attention to detail during the installation process to achieve optimal insulation performance. Properly installed insulation batts will help create a thermal barrier and prevent heat loss or gain from the walls. Once you’ve installed the insulation batts, move on to the next step of fitting insulation around obstacles.
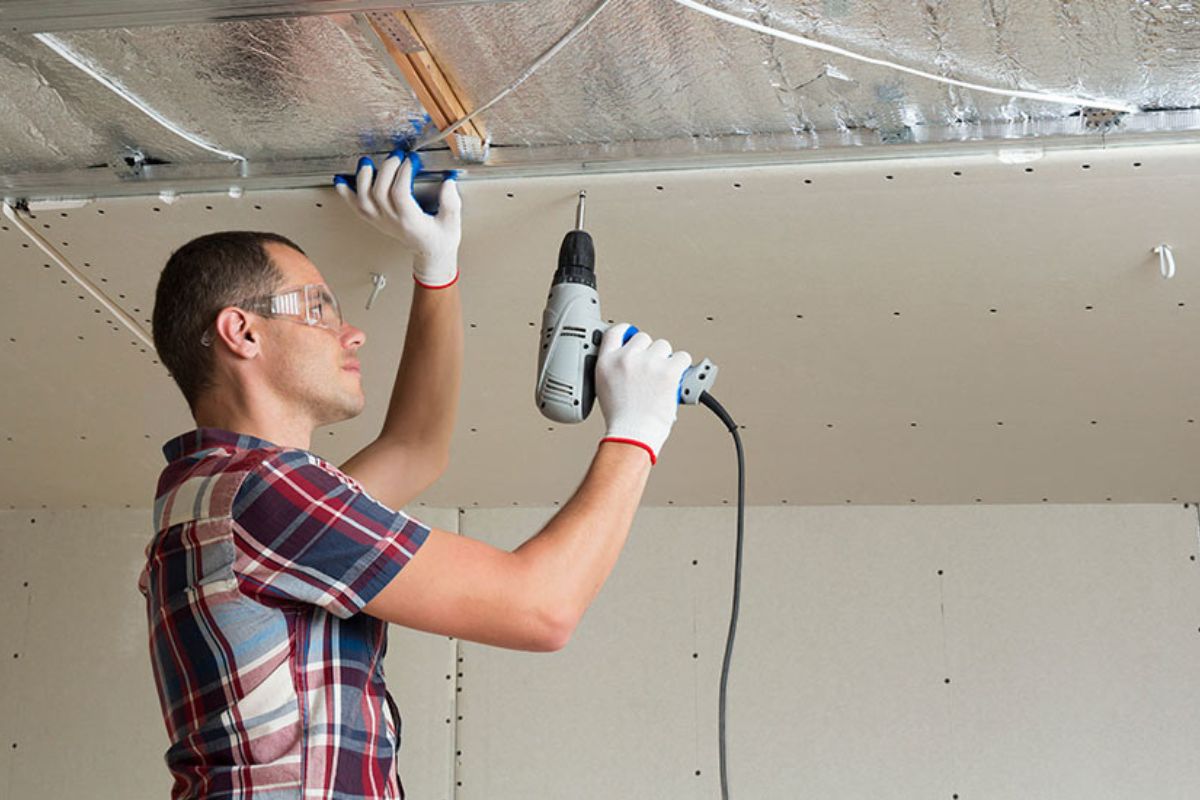
When installing faced insulation in walls, make sure the vapor barrier is facing the interior of the building to prevent moisture buildup. Use a staple gun to secure the insulation in place, and be sure to cut it to fit around any obstacles like electrical outlets or pipes.
Step 5: Fit Insulation Around Obstacles
When installing faced insulation in walls, it’s important to properly fit the insulation around obstacles such as electrical outlets, plumbing pipes, and other obstructions. Follow these steps to ensure a proper fit:
- Identify the obstacles: Identify any electrical outlets, switches, or pipes that protrude from the walls. Take note of their locations and dimensions.
- Measure and mark: Measure the dimensions of the obstacle and transfer them onto the insulation batt. Use a pencil or marker to mark the areas that need to be cut.
- Cut the insulation: Using a utility knife, carefully cut out the marked areas on the insulation batt to accommodate the obstacles. Take your time to achieve clean and accurate cuts.
- Fit the insulation: Position the insulation around the obstacles, ensuring a snug fit. The facing side should still be facing into the room.
- Secure the insulation: Secure the insulation around the obstacles using staples or adhesive. Ensure that the insulation is firmly in place and fits tightly against the surrounding walls.
By fitting the insulation properly around obstacles, you ensure that there are no gaps or areas of insufficient coverage. This prevents the loss of insulation effectiveness and helps maintain a consistent thermal barrier in your walls. Once you’ve fitted the insulation around obstacles, proceed to the next step of securing the insulation in place.
Step 6: Secure Insulation in Place
Securing the faced insulation in place is essential to ensure that it remains in position and provides optimal insulation performance. Follow these steps to securely fasten the insulation:
- Use a staple gun: Use a staple gun to secure the insulation to the studs or wall framing. Place staples approximately every 12 inches along the edges of the insulation batts.
- Avoid compressing the insulation: Be careful not to compress the insulation too tightly when stapling. Compressed insulation can lose its effectiveness and reduce its R-value.
- Ensure a snug fit: Check that the insulation is snugly fitted within the wall cavity. It should fill the cavity completely without any gaps or sagging.
- Trim excess insulation: Trim any excess insulation that extends beyond the wall studs or framing. This will help create a clean and neat finish.
Properly securing the insulation in place helps maintain its integrity and ensures that it remains in optimal position for thermal insulation. Be mindful of not over-stapling or compressing the insulation, as this can affect its overall performance. Once you have securely fastened the insulation, proceed to the next step of sealing the insulation.
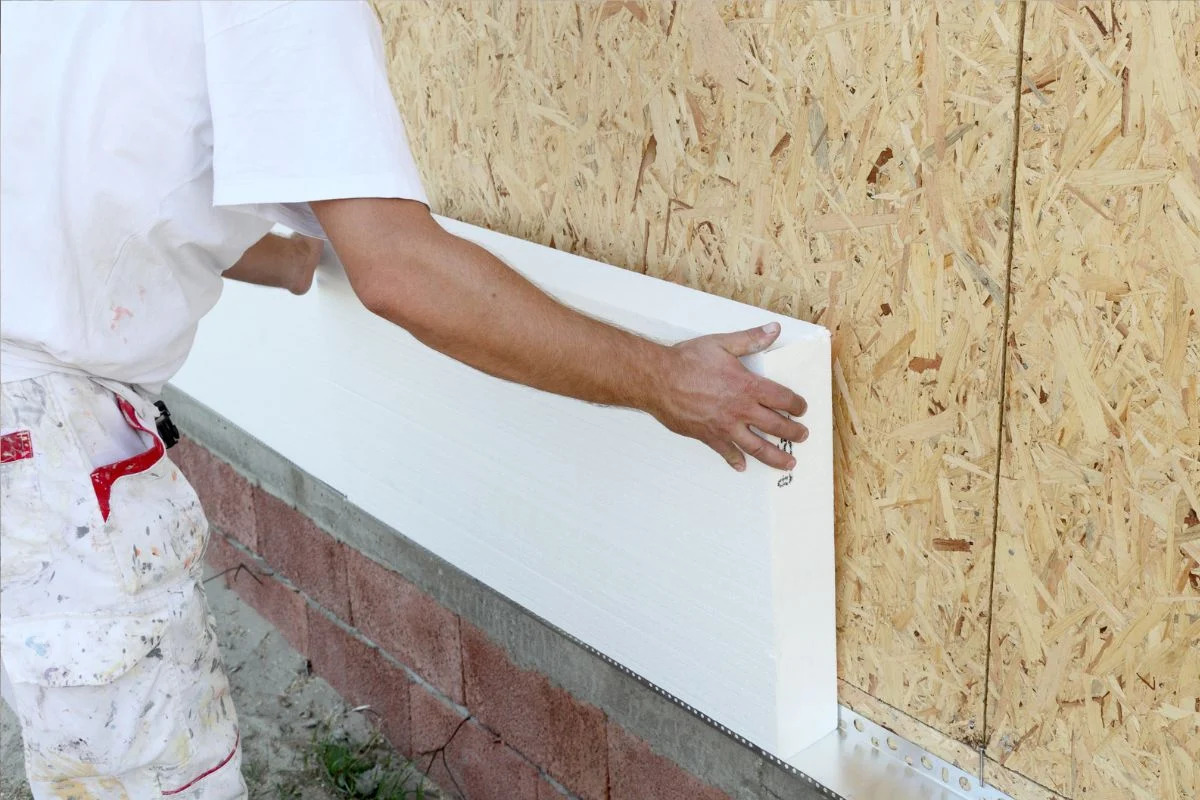
Step 7: Seal the Insulation
Sealing the insulation is an important step to enhance its performance and prevent air leakage. Follow these steps to effectively seal the faced insulation:
- Check for gaps and seams: Inspect the insulation for any gaps, seams, or openings. Pay close attention to corners, edges, and areas where different insulation batts meet.
- Use caulk or foam sealant: Apply caulk or foam sealant to seal any gaps or openings in the insulation. Be thorough and ensure that all gaps are properly sealed to prevent air infiltration.
- Seal around electrical outlets and switches: Use foam gaskets or caulk to seal around electrical outlets and switches. This will help prevent air leakage at these points.
- Apply weatherstripping: Install weatherstripping around doors and windows to create a tight seal. This will further enhance the insulation performance and reduce energy loss.
- Insulate any remaining gaps: If there are any remaining gaps or spaces in the wall cavity, fill them with additional insulation material. This will ensure complete coverage and maximum energy efficiency.
By effectively sealing the faced insulation, you eliminate air leaks and create a more airtight and energy-efficient barrier. This helps to maintain a consistent indoor temperature, reduce heating and cooling costs, and improve overall comfort. Once you have sealed the insulation, it’s time to move on to the final step of evaluating your installation.
Read more: How Do You Install Insulation In Walls
Step 8: Evaluate the Installation
After completing the installation of faced insulation in your walls, it is crucial to evaluate the quality of your work. This step allows you to identify any potential issues and ensure that the insulation is properly installed. Follow these steps to evaluate the installation:
- Inspect the walls: Carefully examine the walls to ensure that the insulation is evenly distributed and fully covers the wall cavity. Look for any visible gaps, sagging, or areas of insufficient coverage.
- Check for air leakage: Perform a thorough inspection to check for any signs of air leakage around the insulation. Pay attention to potential problem areas such as corners, edges, and electrical outlets. Use a smoke pencil or incense stick to detect any draft or air movement.
- Assess thermal performance: Monitor the indoor temperature and energy consumption to assess the thermal performance of the insulation. Note any significant changes in heating or cooling efficiency after the installation.
- Address any issues: If you identify any issues during the evaluation, take the necessary steps to address them. This may include adding more insulation, sealing gaps, or improving the air sealing.
Regularly evaluating the installation ensures that the faced insulation is functioning effectively and meeting your energy efficiency goals. It allows you to make any necessary adjustments or improvements to maximize insulation performance. By taking the time to evaluate the installation, you can ensure that your home is properly insulated and energy-efficient.
Congratulations! You have successfully completed the installation of faced insulation in your walls. You can now enjoy the benefits of improved energy efficiency, reduced energy costs, and enhanced comfort in your home.
Conclusion
Installing faced insulation in walls is a valuable investment that can greatly improve the energy efficiency and comfort of your home. By following the step-by-step process outlined in this article, you can ensure a successful installation and reap the benefits of a well-insulated living space.
Throughout the installation process, we discussed the importance of preparing the walls, measuring and cutting the insulation, installing a vapor barrier, fitting insulation around obstacles, securing the insulation in place, sealing any gaps, and evaluating the installation. Each step plays a crucial role in ensuring that the faced insulation performs optimally and provides the desired energy-saving benefits.
Properly installed faced insulation helps to create a thermal barrier, preventing heat transfer and air leakage. It enhances the comfort of your home by maintaining a consistent indoor temperature and reducing energy consumption. Additionally, faced insulation with a vapor barrier helps to prevent moisture infiltration, reducing the risk of mold and improving the overall indoor air quality.
Remember to regularly evaluate the insulation to address any issues promptly and ensure its continued effectiveness. By inspecting for gaps, air leakage, and assessing thermal performance, you can make any necessary adjustments and maintain a high level of insulation efficiency.
With the installation of faced insulation, you are not only improving the energy efficiency of your home, but you are also contributing to a greener and more sustainable environment. By reducing energy consumption, you help to minimize your carbon footprint and conserve our natural resources.
In conclusion, installing faced insulation in walls is a worthwhile home improvement project that brings numerous benefits. Take the time to properly prepare, measure, install, and evaluate the insulation to ensure optimal performance and long-lasting efficiency. Enjoy the comfort, energy savings, and environmental impact of a well-insulated home!
Frequently Asked Questions about How To Install Faced Insulation In Walls
Was this page helpful?
At Storables.com, we guarantee accurate and reliable information. Our content, validated by Expert Board Contributors, is crafted following stringent Editorial Policies. We're committed to providing you with well-researched, expert-backed insights for all your informational needs.

0 thoughts on “How To Install Faced Insulation In Walls”