Articles
How Do You Install Insulation In Walls
Modified: October 20, 2024
Looking for articles on how to install insulation in walls? Find step-by-step guides and expert tips for a successful insulation installation project.
(Many of the links in this article redirect to a specific reviewed product. Your purchase of these products through affiliate links helps to generate commission for Storables.com, at no extra cost. Learn more)
Introduction
Installing insulation in the walls of your home is a crucial step in creating an energy-efficient and comfortable living space. Proper insulation helps to regulate indoor temperature, reduce energy consumption, and minimize noise transmission from outside. Whether you are starting a new construction project or upgrading the insulation in an existing home, knowing how to install insulation in walls is essential.
In this article, we will guide you through the process of installing insulation in walls, providing step-by-step instructions and tips to ensure a successful installation. We will also discuss the materials and tools you will need, common mistakes to avoid, and different insulation options available for exterior walls. So let’s dive in and learn how to effectively insulate your walls!
Key Takeaways:
- Properly preparing walls, measuring and cutting insulation, and securing it in place are crucial steps in effectively installing insulation. Attention to detail and safety precautions are key for a successful insulation project.
- Choosing the right insulation material for your exterior walls and avoiding common installation mistakes are essential for maximizing energy efficiency and creating a comfortable living space. Prioritize safety and thorough preparation for optimal results.
Read more: How Do You Insulate Knee Walls In An Attic
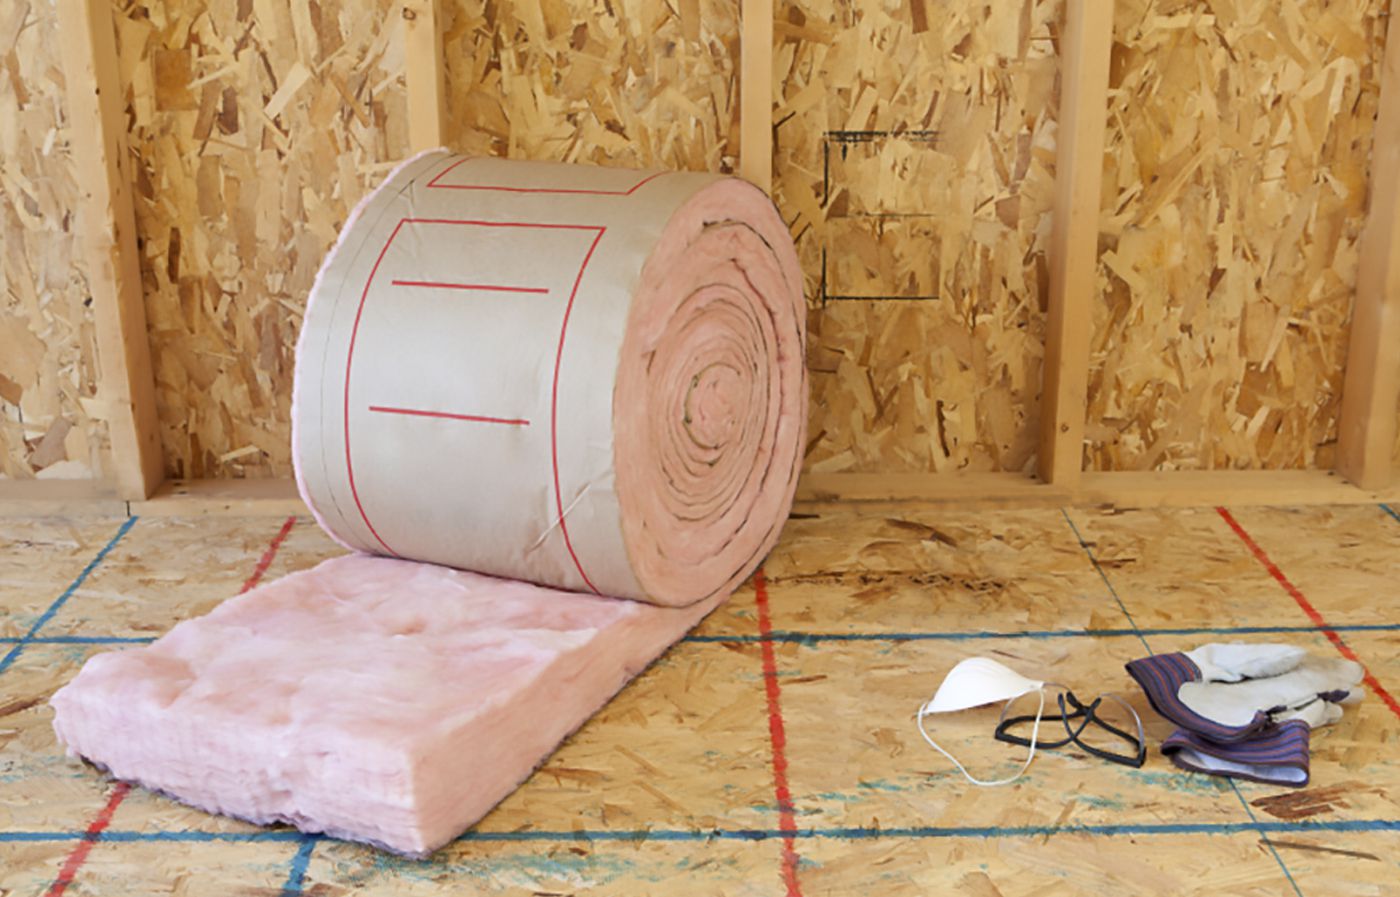
Materials and Tools Needed
Before you start the insulation installation process, gather the following materials and tools:
Materials:
- Insulation material (such as fiberglass, mineral wool, or cellulose)
- Vapor barrier (if needed)
- Insulation hangers or supports
- Foam sealant or caulking
Tools:
- Tape measure
- Utility knife
- Safety goggles
- Dust mask
- Protective gloves
- Stapler or insulation stapler
- Staples or nails
- Hammer
- Screwdriver
- Sealant gun
- Level
Ensure that you have all the necessary materials and tools before you begin the insulation installation process. Having everything prepared will streamline the process and prevent any delays or interruptions.
Step 1: Preparing the Walls
Before installing insulation in your walls, it is essential to prepare the walls properly. Follow these steps to ensure a smooth installation:
- Start by removing any obstacles or obstructions from the wall, such as pictures, shelves, or electrical outlets covers. This will provide you with a clear and open area to work with.
- If required, cover windows and doors with plastic sheeting or temporary barriers to protect them from dust and debris.
- Inspect the walls for any signs of moisture or water damage. Ensure that any leaks or issues are addressed before proceeding with the insulation installation.
- Seal any gaps or cracks in the walls using foam sealant or caulking. This will help to create an airtight barrier and enhance the insulation’s effectiveness.
- Remove any existing insulation if necessary. Older or damaged insulation may need to be replaced before installing the new insulation.
- Clean the walls thoroughly to remove any dust, dirt, or debris. This will ensure proper adhesion of the insulation material and improve its performance.
By taking the time to properly prepare the walls, you can ensure that the insulation installation process goes smoothly and that your walls are ready to receive the insulation material. It is essential to create a clean and sealed surface to maximize the insulation’s effectiveness and energy-saving benefits.
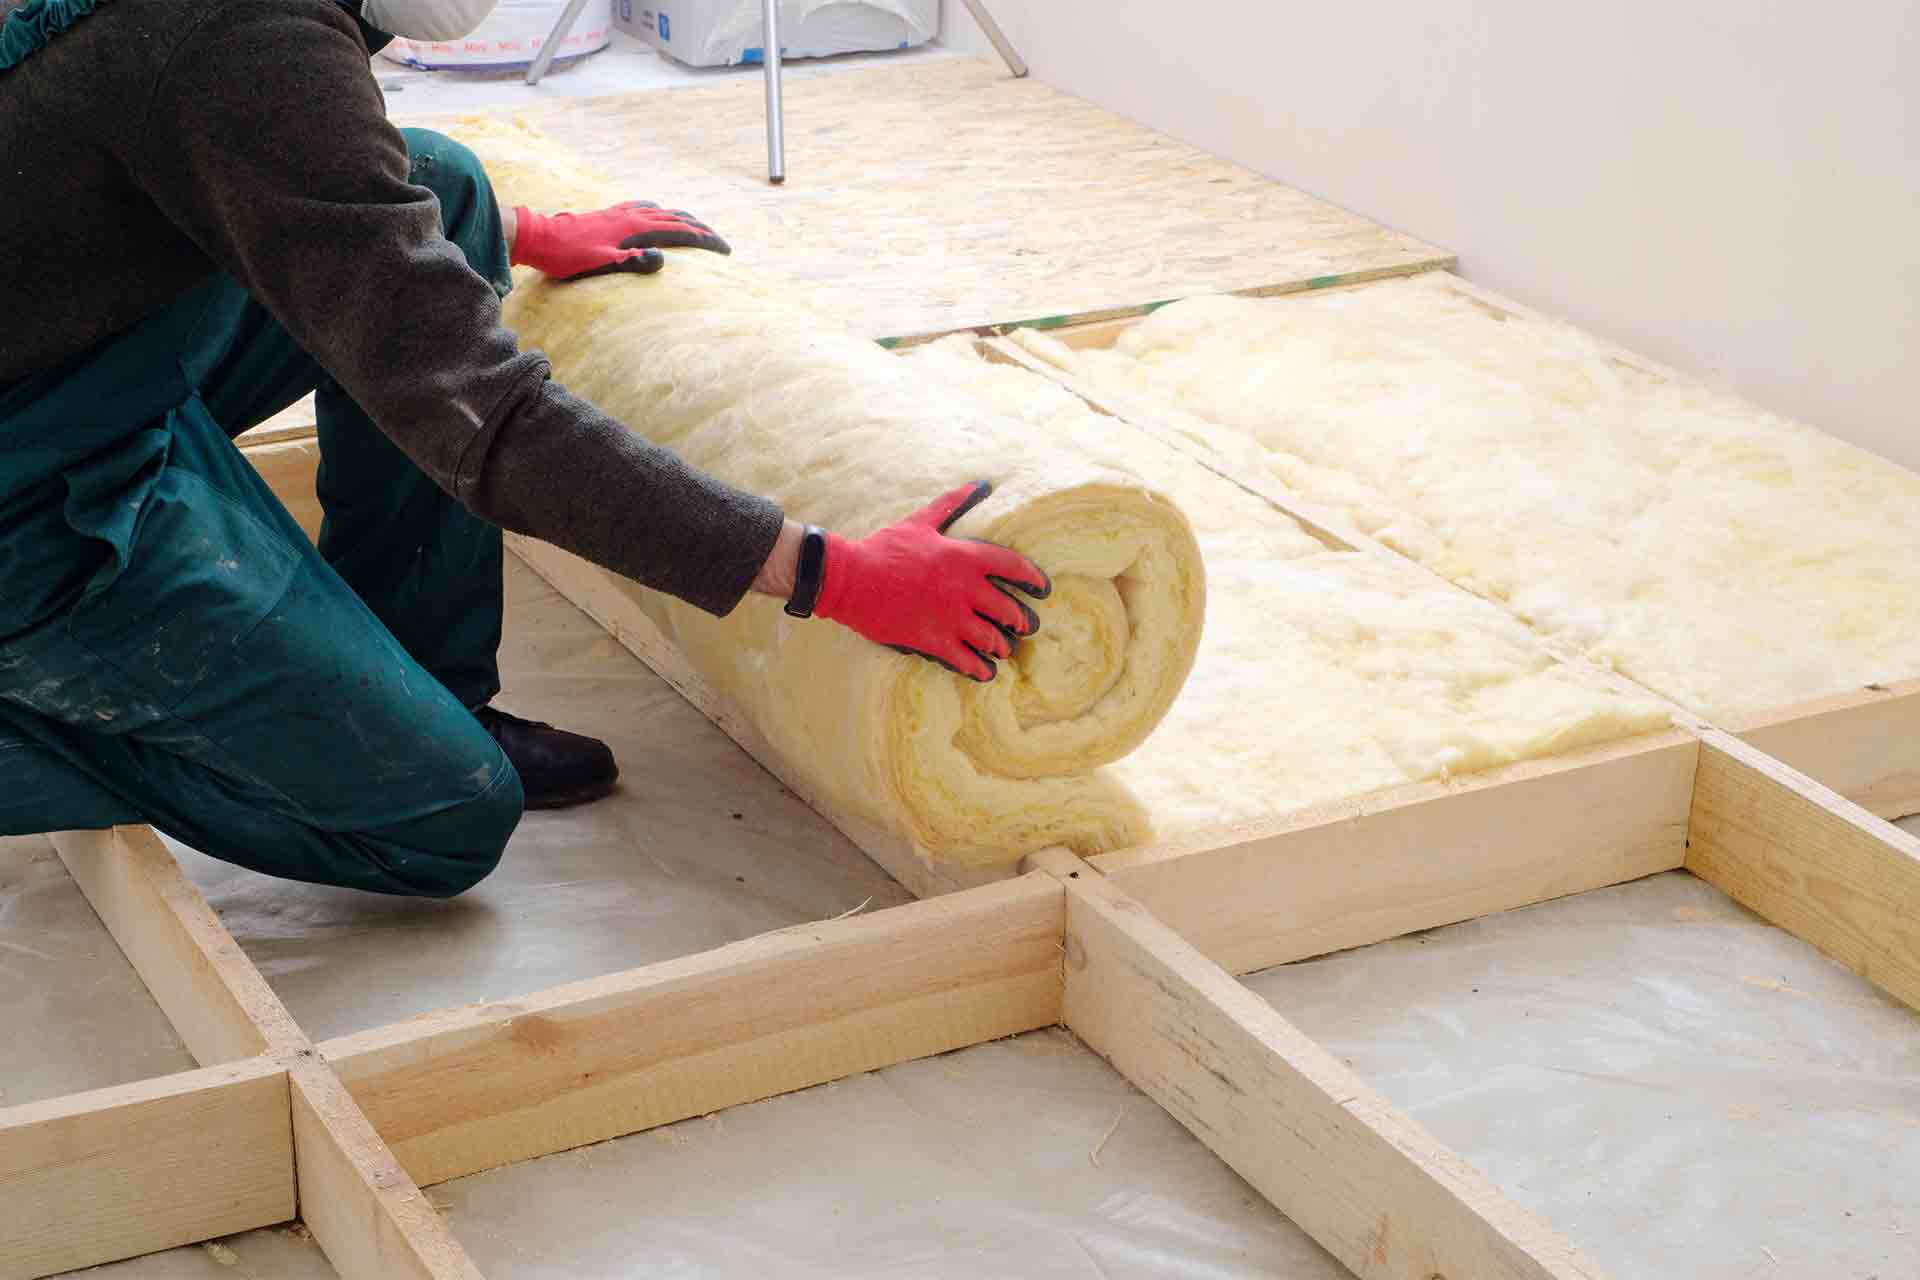
Step 2: Measuring and Cutting the Insulation
Accurate measurements and properly cut insulation are crucial for a successful installation. Follow these steps to measure and cut the insulation:
- Start by measuring the height and width of each wall cavity that needs insulation. Use a tape measure to ensure precise measurements.
- Transfer the measurements onto the insulation material using a pencil or marker. Make sure to account for any obstacles like electrical outlets, switches, or windows, and cut corresponding openings in the insulation.
- Before cutting the insulation, remember to wear safety goggles, a dust mask, and protective gloves to protect yourself from loose fibers.
- Carefully cut the insulation material along the marked lines using a utility knife. Ensure smooth and clean cuts without damaging the surrounding material.
- If using fiberglass insulation, avoid compressing it during the cutting process. Compression can reduce its thermal resistance and overall effectiveness.
Once you have measured and cut the insulation, it is ready to be installed in the wall cavities. Proper measurements and precise cuts will ensure a snug fit and improve the insulation’s performance by eliminating gaps and air leakage.
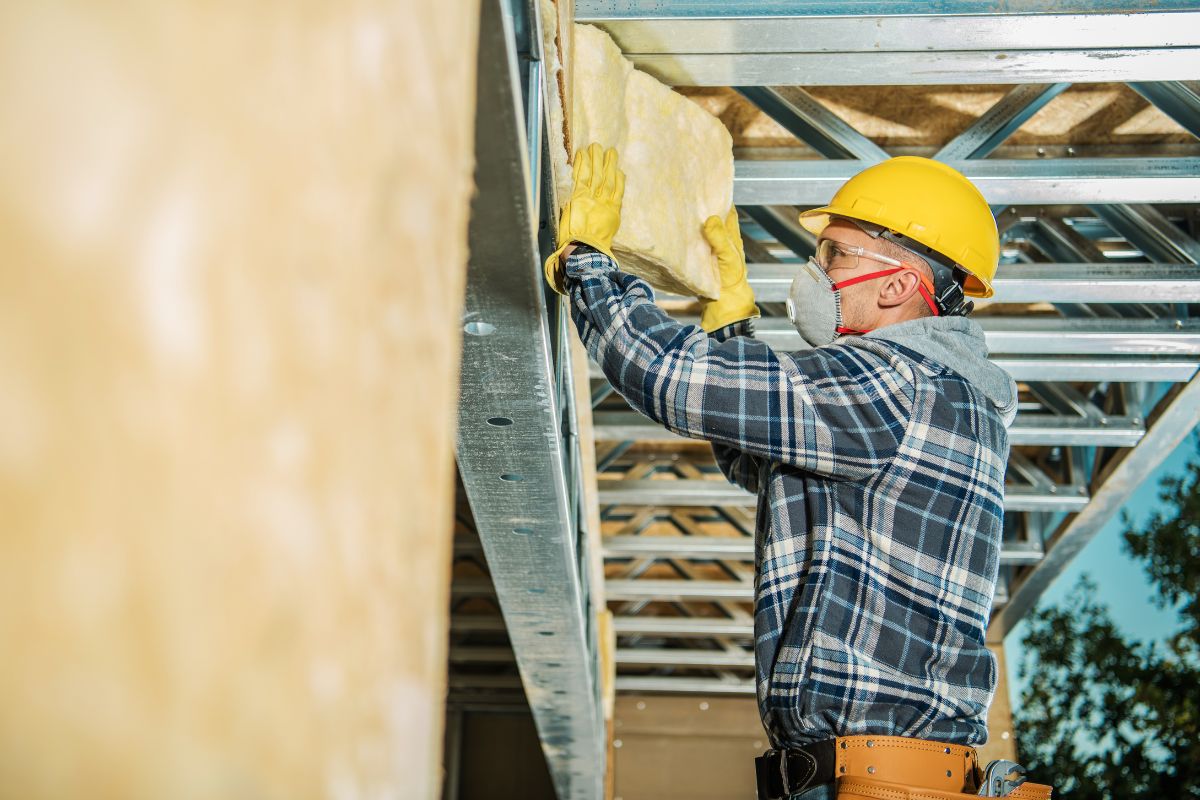
Step 3: Installing the Insulation
With the wall cavities prepared and insulation cut to size, it’s time to install the insulation. Follow these steps to properly install the insulation in your walls:
- Start with the first wall cavity. Position the cut insulation inside the cavity, making sure it fits snugly from top to bottom and side to side. Use caution when inserting the insulation to avoid tearing or compressing the material.
- Continue installing the insulation in the remaining wall cavities, repeating the same process. Take care to maintain a tight and secure fit without leaving any gaps or spaces.
- For vertical wall cavities, it’s best to start from the top and work your way down. This prevents the insulation from sagging or becoming misaligned as you install it.
- If you encounter obstacles such as electrical outlets or switches, carefully cut openings in the insulation to accommodate them. Ensure a good fit around these elements without compromising the insulation’s coverage.
- If using a vapor barrier, it should be installed on the warm side of the insulation, facing the interior of the room. Secure the vapor barrier in place using staples or insulation hangers.
Remember to work methodically and take your time during the insulation installation process. Properly installed insulation will provide optimal thermal and acoustic performance, creating a more comfortable and energy-efficient living space.
Step 4: Securing the Insulation
Securing the insulation in place is essential to prevent it from shifting or falling out of the wall cavities. Follow these steps to securely fasten the insulation:
- Use insulation hangers or supports to hold the insulation in position. These can be installed by pushing them through the insulation and into the wall studs. Place hangers or supports at regular intervals to provide adequate support.
- For fiberglass or mineral wool insulation, you can also use staples to secure the insulation. Using a staple gun or insulation stapler, insert staples along the edges of the insulation, making sure they penetrate the studs or other structural elements.
- Avoid over-compressing the insulation or using excessive force when securing it. Maintain a snug fit without damaging the material.
- Ensure that all exposed edges or seams are properly sealed using foam sealant or caulking. This will help prevent air leakage and enhance the insulation’s effectiveness.
By properly securing the insulation, you can keep it in place for the long term, ensuring its optimum performance and maintaining consistent thermal and acoustic insulation in your walls.
Step 5: Insulating Around Windows and Doors
Properly insulating around windows and doors is crucial to prevent air leakage and maintain energy efficiency. Follow these steps to effectively insulate these areas:
- Inspect the gaps between the window or door frames and the surrounding walls. Identify any areas that may allow air to infiltrate.
- Apply foam sealant or caulking to seal these gaps. Ensure that the sealant is compatible with the materials used and follow the manufacturer’s instructions for application.
- For windows, consider using window insulating film or weatherstripping to provide an extra layer of insulation. Apply the film according to the manufacturer’s instructions, and use weatherstripping to seal any gaps around the perimeter of the window.
- For doors, install weatherstripping along the edges to create a tight seal. Use a door sweep at the bottom to prevent drafts and maintain insulation.
- Inspect the insulation around windows and doors periodically and reapply sealant or weatherstripping as needed. Over time, these materials may deteriorate or become damaged, compromising their effectiveness.
Properly insulating around windows and doors is essential to minimize drafts, improve energy efficiency, and create a more comfortable living environment. Taking the time to seal these areas will ensure that your insulation efforts are maximized.
Read more: How Do You Dispose Of Insulation
Step 6: Insulating Electrical Outlets and Switches
Insulating electrical outlets and switches is often overlooked but is crucial for maintaining insulation integrity and preventing air leakage. Follow these steps to effectively insulate these areas:
- Turn off the power to the electrical outlet or switch at the circuit breaker to ensure safety during the insulation process.
- Remove the cover plate from the electrical outlet or switch using a screwdriver. Set it aside for reinstallation later.
- Inspect the area around the electrical box for any gaps or openings. These gaps can allow air to leak in or out of the wall.
- Apply foam sealant or caulking around the edges of the electrical box to seal any gaps. Be careful not to get sealant inside the box or on the electrical connections.
- Consider using foam gaskets designed specifically for electrical outlets and switches. These gaskets fit behind the cover plate and provide an additional layer of insulation.
- Reinstall the cover plate securely using the screws to ensure a tight seal around the electrical outlet or switch.
By insulating electrical outlets and switches, you can prevent air leakage and improve the overall insulation performance of your walls. It is a small but significant step in creating an energy-efficient home.
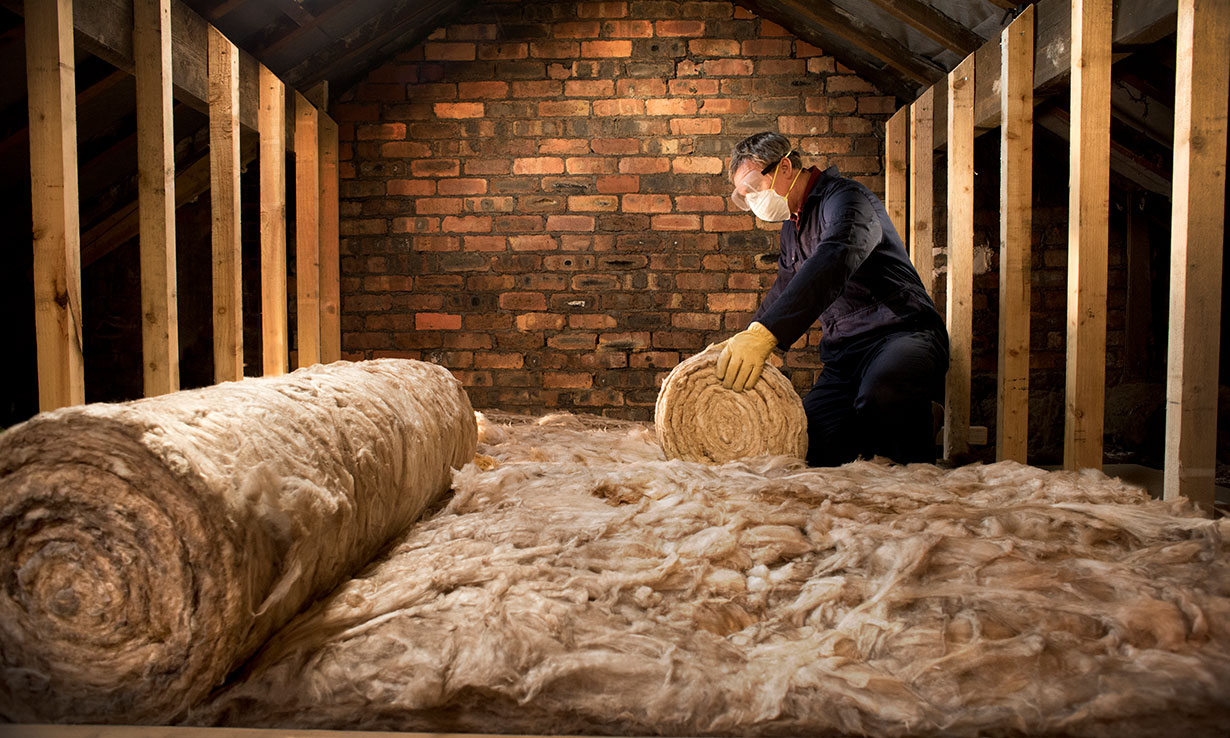
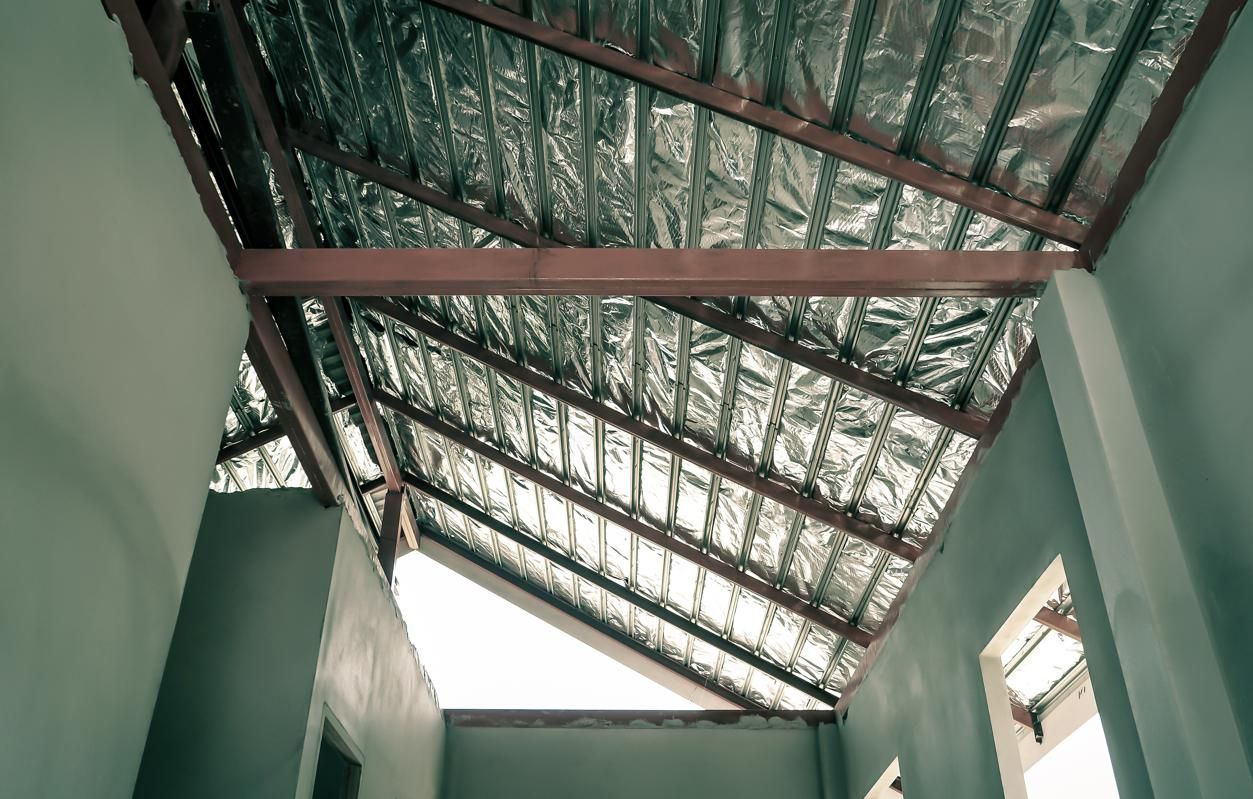
Step 7: Insulation Options for Exterior Walls
When it comes to insulating exterior walls, there are various options to consider based on the specific needs of your home. Here are some common insulation options for exterior walls:
Fiberglass Insulation:
Fiberglass insulation is one of the most popular and widely used insulation materials. It comes in batts or rolls and is known for its cost-effectiveness and ease of installation. Fiberglass insulation is made of fine glass fibers and is available in different R-values to suit varying insulation requirements.
Mineral Wool Insulation:
Mineral wool insulation, often referred to as rock wool or stone wool, is made from natural minerals like basalt and recycled slag. It offers excellent fire resistance and soundproofing properties. Mineral wool insulation comes in batts or loose-fill form and is suitable for both new construction and retrofit projects.
Cellulose Insulation:
Cellulose insulation is made from recycled paper fibers treated with fire retardant chemicals. It is an eco-friendly option and provides good thermal and sound insulation. Cellulose insulation is typically installed as loose-fill and is blown into wall cavities using specialized equipment.
Spray Foam Insulation:
Spray foam insulation is a versatile option that can create an airtight seal in wall cavities. It expands upon application, filling gaps and crevices completely. Spray foam insulation has excellent insulating properties and can provide superior energy efficiency. However, professional installation is generally recommended due to its specialized application process.
It’s important to choose the insulation option that best suits your budget, energy efficiency goals, and installation requirements. Consult with a professional or conduct thorough research to determine the most suitable insulation material for your exterior walls.
Step 8: Common Mistakes to Avoid
When installing insulation in walls, it’s important to be aware of common mistakes that can compromise the effectiveness and performance of the insulation. Here are some mistakes to avoid:
Inadequate Insulation:
One common mistake is not installing enough insulation. Insufficient insulation can lead to energy loss and reduced thermal efficiency. Be sure to follow the recommended R-value guidelines for your region to ensure proper insulation levels.
Compression of Insulation:
Avoid compressing insulation material, especially fiberglass insulation. Compression reduces its ability to trap air and hampers its insulating properties. Install insulation in a way that allows it to fully expand and fill the wall cavity without compression.
Leaving Gaps and Gaps:
Leaving gaps and voids in the insulation can result in air leakage and reduced effectiveness. Take care to properly fit and secure the insulation, ensuring a tight seal. Use foam sealant or caulking to seal any gaps or cracks in the walls before installing the insulation.
Not Sealing Around Windows and Doors:
Neglecting to properly insulate around windows and doors can lead to drafts and energy loss. Use appropriate sealants, weatherstripping, or insulating film to ensure a tight seal and prevent air leakage.
Skipping Safety Precautions:
Always prioritize safety when working with insulation. Wear protective gear such as safety goggles, a dust mask, and gloves to prevent irritation or exposure to insulation fibers. Additionally, ensure the work area is well-ventilated and follow proper precautions when working with insulation materials.
By being aware of these common mistakes and avoiding them, you can ensure a successful insulation installation that maximizes energy efficiency and thermal performance in your walls.
Conclusion
Installing insulation in walls is a vital step in creating a comfortable, energy-efficient home. By properly insulating your walls, you can regulate indoor temperatures, reduce energy consumption, and enhance noise reduction. Following a systematic process and avoiding common mistakes will help ensure a successful insulation installation.
Start by preparing the walls, removing obstacles, and sealing any gaps or cracks. Take accurate measurements and carefully cut the insulation to fit the wall cavities. Install the insulation securely, ensuring a snug fit and avoiding compression. Pay attention to insulating around windows, doors, and electrical outlets to prevent air leakage.
When choosing insulation materials, consider factors such as energy efficiency, fire resistance, and environmental impact. Options like fiberglass, mineral wool, cellulose, and spray foam offer unique advantages to suit different needs and preferences.
Throughout the process, prioritizing safety is essential. Wear protective gear and adhere to proper safety precautions when handling insulation materials.
Ultimately, a well-insulated home not only provides comfort but also reduces energy costs and supports sustainability. By insulating your walls effectively, you can create a cozy living environment while minimizing your carbon footprint.
Now that you have a comprehensive understanding of how to install insulation in walls, you can embark on this important home improvement project with confidence. Enjoy the benefits of a well-insulated home and reap the rewards of energy efficiency and comfort for years to come.
Frequently Asked Questions about How Do You Install Insulation In Walls
Was this page helpful?
At Storables.com, we guarantee accurate and reliable information. Our content, validated by Expert Board Contributors, is crafted following stringent Editorial Policies. We're committed to providing you with well-researched, expert-backed insights for all your informational needs.


0 thoughts on “How Do You Install Insulation In Walls”