Articles
How To Install Insulation In A Shed
Modified: December 7, 2023
Learn how to properly install insulation in your shed with our informative articles. Improve energy efficiency and protect your belongings with these step-by-step guides.
(Many of the links in this article redirect to a specific reviewed product. Your purchase of these products through affiliate links helps to generate commission for Storables.com, at no extra cost. Learn more)
Introduction
Welcome to our guide on how to install insulation in a shed. Whether you’re using your shed as a workspace, storage area, or even as an extra living space, proper insulation is essential for maintaining a comfortable environment and preventing heat loss or condensation. With the right materials and techniques, you can easily install insulation in your shed and enjoy the benefits of a well-insulated space.
Before we dive into the step-by-step process, it’s important to understand the importance of insulation. Insulation acts as a barrier that helps to regulate the temperature inside your shed, keeping it warm in the winter and cool in the summer. It also helps to reduce noise transmission and minimize the occurrence of condensation, which can lead to mold and moisture damage. By insulating your shed, you can create a more energy-efficient space and improve its overall functionality.
Now, let’s move on to the first step in the insulation installation process: gathering the necessary materials.
Key Takeaways:
- Proper insulation in a shed is crucial for maintaining a comfortable environment, preventing heat loss, reducing noise transmission, and minimizing condensation, ultimately creating a more energy-efficient and functional space.
- By following the step-by-step process of gathering materials, preparing the shed, measuring and cutting insulation, installing the panels, and sealing any gaps, you can successfully insulate your shed and enjoy the benefits of a well-insulated space.
Read more: How To Insulate The Floor Of A Shed
Step 1: Gather the necessary materials
Before you begin the insulation installation process, it’s important to gather all the materials you’ll need. This will ensure a smooth and efficient installation process. Here are the materials you’ll need:
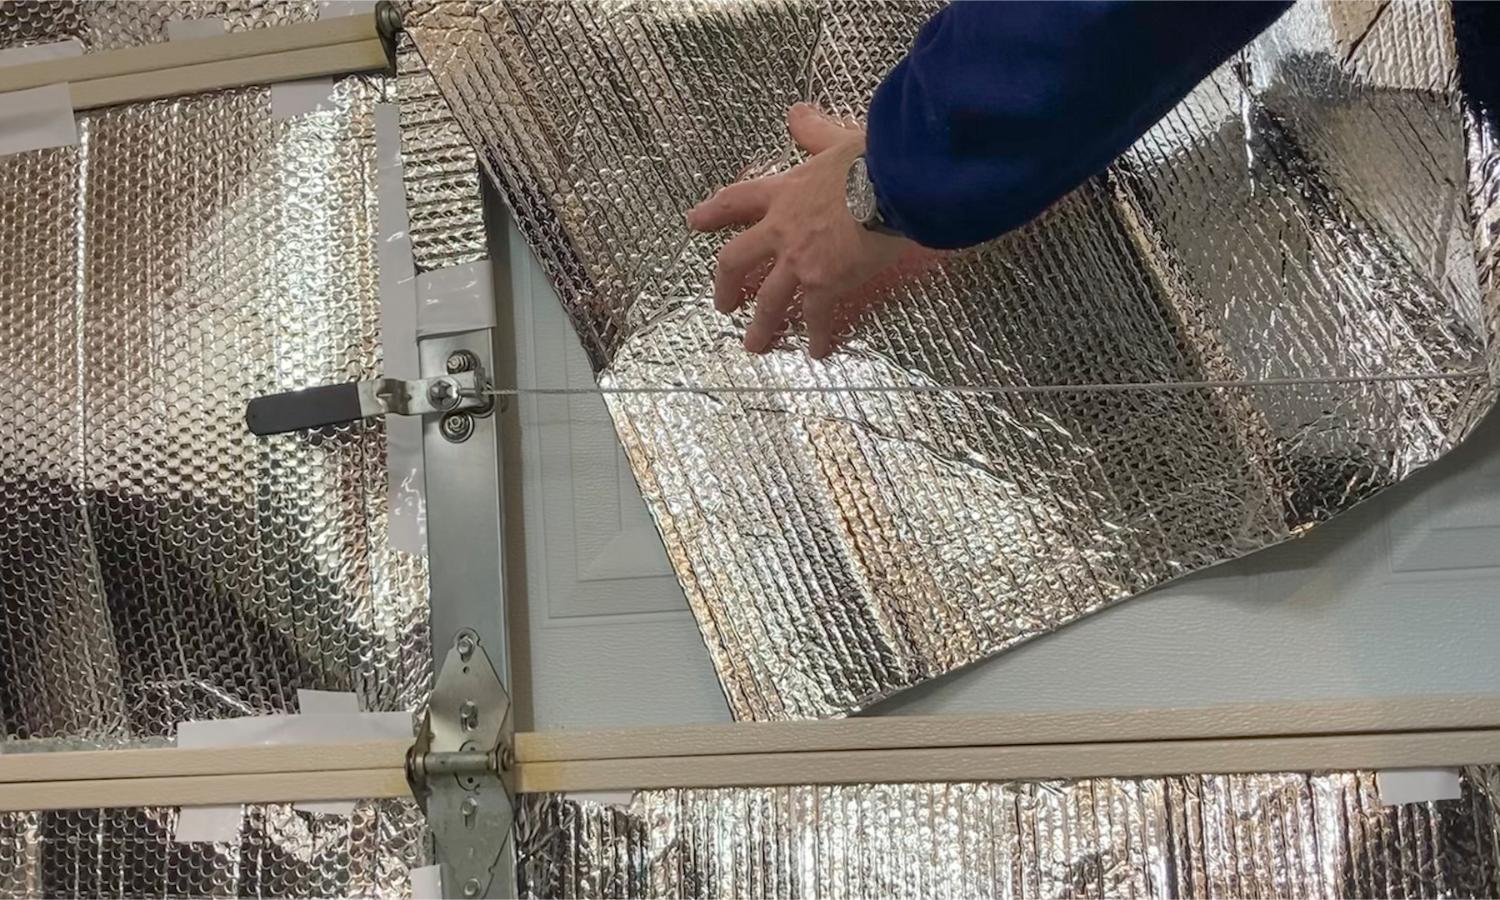
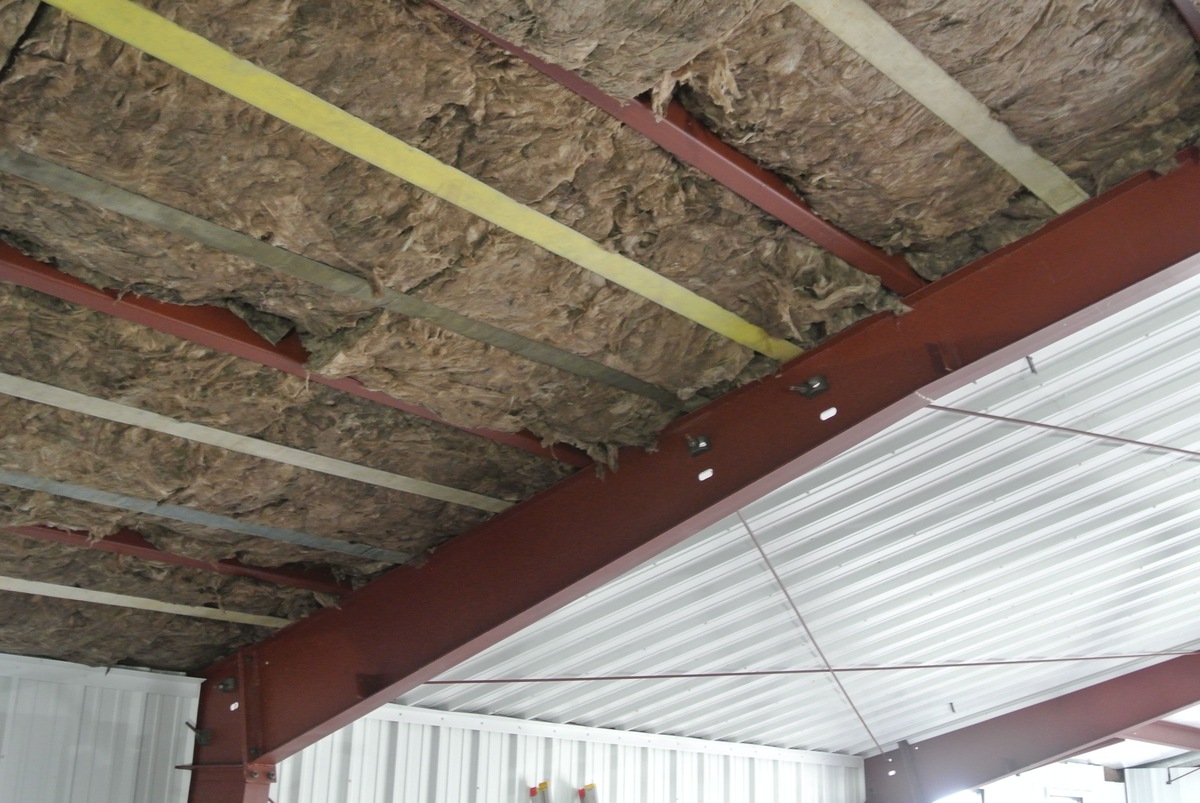
- Insulation material: There are various types of insulation materials available, such as fiberglass batts, foam boards, or reflective foil. Choose the one that best suits your needs and budget.
- Tape measure: A tape measure will be essential for measuring the dimensions of your shed walls and insulation panels.
- Utility knife: A utility knife will come in handy for cutting the insulation panels to the correct size.
- Protective gear: Insulation installation can be messy, so make sure to wear gloves, a dust mask, and safety goggles to protect yourself.
- Adhesive or fasteners: Depending on the type of insulation material you choose, you may need adhesive or fasteners to secure the insulation panels to the shed walls.
- Caulk or sealant: To seal any gaps or joints in the insulation panels, you’ll need caulk or sealant.
- Foam board insulation tape: This tape is specifically designed to create a seal between foam board insulation panels.
- Ladder: If your shed has high walls or a ceiling, you’ll need a ladder to reach those areas during the insulation installation.
Once you have gathered all these materials, you’ll be ready to move on to the next step: preparing the shed for insulation installation.
Step 2: Prepare the shed
Before you can begin installing the insulation in your shed, it’s important to prepare the space properly. This involves cleaning the shed, ensuring it is free from any debris, and sealing any existing air leaks. Here are the key steps to prepare your shed:
- Clean the shed: Remove any items or clutter from the shed to create a clear workspace. Sweep or vacuum the floors to remove any dust or debris that may interfere with the installation process.
- Inspect for air leaks: Check the shed walls, windows, doors, and any other openings for air leaks. Use weatherstripping or caulk to seal any gaps or cracks that could allow air to escape or enter.
- Repair any damage: If you notice any damage to the shed walls or roof, such as holes or cracks, make the necessary repairs before proceeding with the insulation installation.
- Consider vapor barriers: Depending on your climate and the insulation material you’re using, you may need to install a vapor barrier to prevent moisture from accumulating within the insulation. Consult the insulation manufacturer’s guidelines for more information.
By properly preparing your shed, you’ll create a clean and well-sealed environment for the insulation installation. This will ensure optimal performance and longevity of the insulation material.
Now that your shed is prepared, it’s time to move on to the next step: measuring and cutting the insulation panels.
Step 3: Measure and cut the insulation
Now that your shed is prepared, it’s time to measure and cut the insulation panels to fit the walls and ceiling. Proper measurement and cutting are crucial for achieving a snug fit and optimal insulation. Here’s how to do it:
- Measure the dimensions: Use a tape measure to measure the height and width of each wall and the ceiling. Be sure to measure accurately to ensure the insulation panels fit properly.
- Transfer the measurements: Transfer the measurements onto the insulation material, marking the dimensions using a pencil or marker. Double-check the measurements before proceeding to the next step.
- Cut the insulation: Using a utility knife, carefully cut the insulation panels along the marked lines. Take your time and make sure to cut straight and even lines to ensure a proper fit.
- Trim as required: If any panels are slightly larger than the measured dimensions, trim them down until they fit snugly into the desired area. Remember to leave a small gap for expansion, especially if you’re using foam board insulation.
It’s important to note that different insulation materials require different cutting techniques. For example, fiberglass batts can be easily cut with a utility knife, while foam boards may require a saw or serrated knife. Refer to the manufacturer’s instructions for specific cutting guidelines.
Once you have measured and cut the insulation panels, you’re ready to move on to the next step: installing the insulation.
When installing insulation in a shed, make sure to wear protective gear such as gloves, a mask, and safety glasses to avoid any irritation from the insulation materials.
Step 4: Install the insulation panels
With the insulation panels properly measured and cut, it’s time to start installing them in your shed. Follow these steps to ensure a smooth and effective installation process:
- Start with the walls: Begin by installing the insulation panels on the walls of your shed. If you’re using adhesive, apply it to the back of the panel and press it firmly against the wall. If using fasteners, securely attach the panels in place, making sure they fit tightly.
- Continue to the ceiling: Once the walls are insulated, move on to the ceiling if applicable. Lift the insulation panels into place, ensuring they align properly and cover the entire ceiling surface. Use adhesive or fasteners to secure them in place.
- Overlap and seal joints: If using multiple insulation panels, make sure to overlap the edges to create a tight seal. Use foam board insulation tape or sealant to seal any gaps or joints between the panels.
- Trim for fixtures: If there are any electrical outlets, switches, or light fixtures on the walls or ceiling, carefully cut around them to accommodate the fixtures. Take safety precautions and turn off the power before making any electrical modifications.
When installing the insulation, it’s important to handle the panels with care and avoid compressing them too much. Compressed insulation may lose its effectiveness and compromise its insulating properties.
Once you have installed the insulation panels, you’re ready for the final step: sealing any gaps or joints.
Read more: How To Insulate A Tin Shed
Step 5: Seal any gaps or joints
After installing the insulation panels in your shed, it’s crucial to seal any gaps or joints to maximize the effectiveness of the insulation. This step will help prevent air leakage and ensure a well-insulated space. Follow these steps to seal any gaps or joints:
- Inspect for gaps: Carefully examine the installed insulation panels, paying close attention to the corners, edges, and seams. Look for any visible gaps or areas where the insulation doesn’t fit snugly against the walls or ceiling.
- Use caulk or sealant: If you spot any gaps, use caulk or sealant specifically designed for insulation to fill them in. Apply the caulk or sealant evenly, ensuring a complete seal between the insulation and the surface.
- Consider weatherstripping: Additionally, you may want to install weatherstripping around doors and windows to further seal any potential air leaks. This will help improve the overall energy efficiency of your shed.
- Double-check the insulation: Once you have sealed any gaps or joints, take a final look at the insulation installation to ensure everything is secure and properly sealed. Make any necessary adjustments or additions if needed.
By sealing any gaps or joints, you will enhance the insulation’s performance and prevent any potential energy loss. It will create a tight seal, keeping your shed well-insulated and protected from external elements.
With the insulation installation and sealing completed, your shed is now properly insulated and ready for use. Enjoy the benefits of a comfortable and energy-efficient space!
If you have any specific questions or concerns regarding the insulation installation in your shed, it’s always recommended to consult with a professional to ensure you get the best results.
Conclusion
Congratulations! You have successfully learned how to install insulation in a shed. By following the steps outlined in this guide and using the proper materials and techniques, you have created a well-insulated space that is comfortable and energy-efficient.
Insulating your shed offers a range of benefits, including regulating the temperature, reducing noise transmission, and preventing condensation. Whether you’re using your shed as a workspace, storage area, or even as a living space, insulation is essential for creating a comfortable environment.
Remember to start by gathering all the necessary materials, including insulation material, tape measure, utility knife, protective gear, adhesive or fasteners, caulk or sealant, foam board insulation tape, and a ladder if needed. Proper preparation of the shed is crucial, including cleaning the space and sealing any air leaks.
Next, measure and cut the insulation panels, ensuring accurate dimensions and a snug fit. Take your time and follow the manufacturer’s instructions for cutting techniques specific to the insulation material you’re using.
Once the insulation panels are ready, install them on the walls and ceiling of your shed. Use adhesive or fasteners to secure them in place, ensuring a tight and secure fit. Overlap the panels and seal any gaps or joints with foam board insulation tape or sealant for added effectiveness.
Finally, inspect the installation for any gaps or joints that may need to be sealed with caulk or additional weatherstripping. Taking this step will further improve the insulation’s performance and energy efficiency.
Now that your shed is properly insulated, you can enjoy a comfortable space all year round. Whether you’re working on projects, storing valuable items, or simply seeking a cozy retreat, the insulation will help regulate the temperature and create a more inviting atmosphere.
Remember, if you have any specific questions or concerns about the insulation installation process or need guidance for your unique shed, consider consulting with a professional for expert advice.
Thank you for following this guide on how to install insulation in a shed. We hope your newly insulated shed provides you with enhanced comfort and functionality for years to come!
Frequently Asked Questions about How To Install Insulation In A Shed
Was this page helpful?
At Storables.com, we guarantee accurate and reliable information. Our content, validated by Expert Board Contributors, is crafted following stringent Editorial Policies. We're committed to providing you with well-researched, expert-backed insights for all your informational needs.


0 thoughts on “How To Install Insulation In A Shed”