Articles
How To Install Vanity Light Junction Box
Modified: October 20, 2024
Learn how to install a vanity light junction box with step-by-step instructions and helpful tips. Read our informative articles to ensure a successful installation.
(Many of the links in this article redirect to a specific reviewed product. Your purchase of these products through affiliate links helps to generate commission for Storables.com, at no extra cost. Learn more)
Introduction
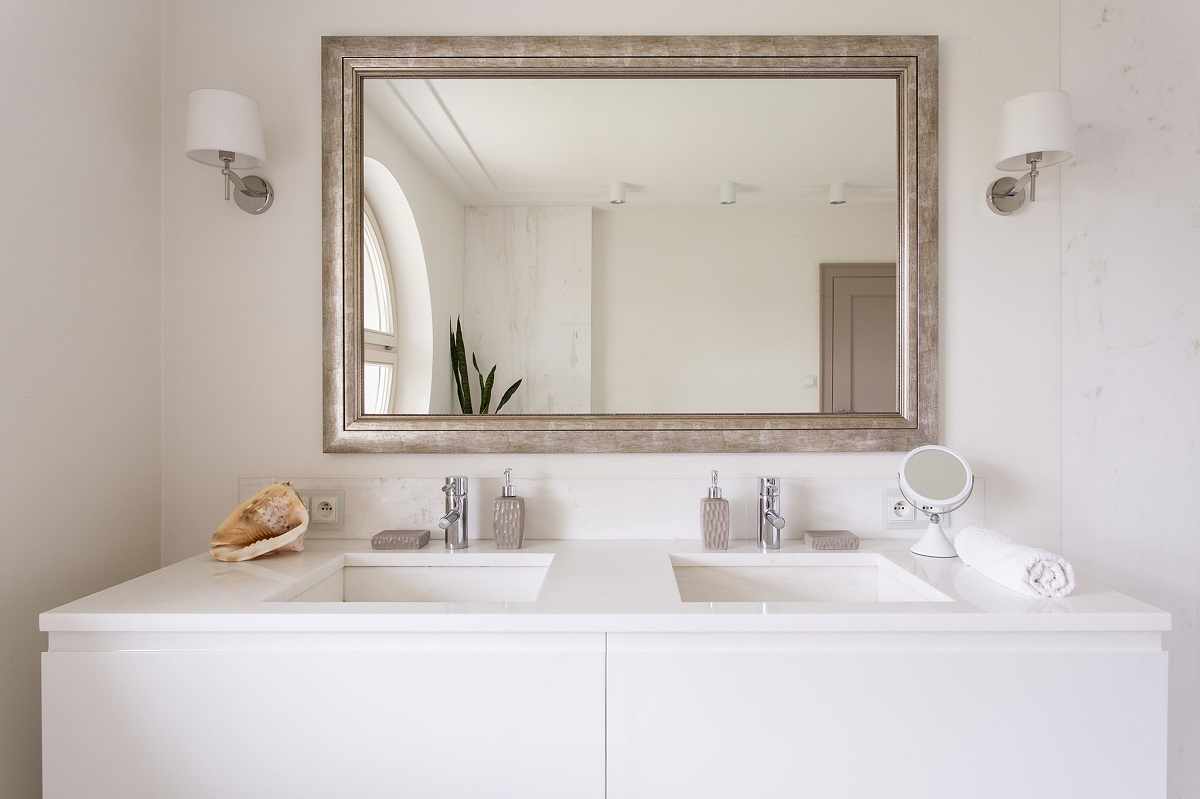
Welcome to the world of vanity lights! Whether you’re looking to revamp your bathroom or add a touch of elegance to any other room in your home, installing a vanity light junction box is a great way to achieve that desired ambiance. Vanity lights not only provide functional lighting, but they also serve as a stylish and decorative element in any space.
In this article, we will guide you step-by-step on how to install a vanity light junction box. We will walk you through the process and provide you with the necessary tools and materials you will need to successfully complete the installation.
Before we proceed, it’s important to emphasize the importance of safety. Always ensure that the power is turned off before working on any electrical components. If you’re not confident in your electrical skills, it’s best to consult a professional electrician to carry out the installation.
Now, let’s gather our tools and materials and get started on installing your vanity light junction box!
Key Takeaways:
- Transform the ambiance of any space by installing a vanity light junction box with the right tools and materials, and careful attention to safety.
- Enjoy the benefits of a beautifully illuminated room by following the detailed step-by-step guide and prioritizing safety throughout the installation process.
Tools and Materials Needed
Before you begin the installation process, it’s important to gather all the necessary tools and materials. Here’s a list of what you’ll need:
- Screwdriver (flathead and Phillips)
- Wire stripper
- Needle-nose pliers
- Electrical tape
- Vanity light fixture
- Mounting bracket
- Junction box
- Wire connectors
- Wire nuts
- Electrical screws
It’s always a good idea to have these tools and materials readily available before starting the installation process. This will ensure a smooth and efficient installation without any interruptions.
If you’re unsure about what type of vanity light fixture or mounting bracket to choose, consider the style and size of your space. Make sure to measure the length and width of the area where you plan to install the vanity light to ensure you choose the right size fixture. Additionally, consider the desired lighting effect and the ambiance you want to create in the room.
Once you have gathered all the required tools and materials, you’re ready to move on to the next steps in the installation process.
Step 1: Turn off the Power
Safety should always be the first priority when working with electricity. Before you begin the installation process, it’s crucial to turn off the power to the area you will be working on.
Locate the circuit breaker box in your home. It is usually found in the basement, utility room, or garage. Open the panel door to reveal the circuit breakers.
Identify the breaker that corresponds to the room where you will be installing the vanity light. Flip the switch to the “Off” position to disconnect the power supply to that area. It’s a good practice to use a non-contact voltage tester to double-check that the power is indeed turned off before proceeding.
Once you have verified that the power is off, place a piece of masking tape over the breaker switch to prevent anyone from accidentally turning it back on while you’re working.
Turning off the power ensures your safety and reduces the risk of electric shock. It is important to always follow proper safety procedures when working with electricity.
Now that you have safely turned off the power, you can proceed to the next step of removing the old light fixture.
Step 2: Remove Old Light Fixture
Now that the power is turned off, it’s time to remove the old light fixture. Follow these steps:
- Start by removing the light bulb(s) from the fixture. Set them aside in a safe place.
- Next, use a screwdriver to remove any screws or mounting brackets that are securing the fixture to the wall or ceiling.
- Gently pull the fixture away from the wall or ceiling to expose the wiring connections.
- Using a wire stripper or a pair of wire cutters, carefully remove the wire connectors that are connecting the fixture’s wires to the house wiring.
- Once the wires are disconnected, set the old fixture aside, and inspect the junction box.
- If the junction box is damaged or not suitable for your new vanity light, this would be a good time to replace it with a new one.
Removing the old light fixture can vary depending on the specific design and hardware of the fixture. Always refer to the manufacturer’s instructions for detailed guidance if needed.
Once the old fixture is removed and the junction box is inspected or replaced if necessary, you’re ready to move on to the next step of installing the mounting bracket.
Step 3: Install Mounting Bracket
Now that the old light fixture is removed, it’s time to install the mounting bracket for your new vanity light. Follow these steps:
- Begin by unpacking the mounting bracket and ensuring that all necessary hardware is included.
- Hold the mounting bracket up to the junction box and align the screw holes. The holes on the mounting bracket should line up with the holes on the junction box.
- Use a screwdriver and the provided screws to securely attach the mounting bracket to the junction box. Make sure the bracket is level and tightly fastened.
It’s important to note that the specific instructions for installing the mounting bracket may vary depending on the model and manufacturer. Be sure to read and follow the instructions provided with your specific vanity light fixture.
Once the mounting bracket is securely installed, you’re ready to proceed to the next step of connecting the wires to the junction box.
Read more: How To Connect Flex Conduit To Junction Box
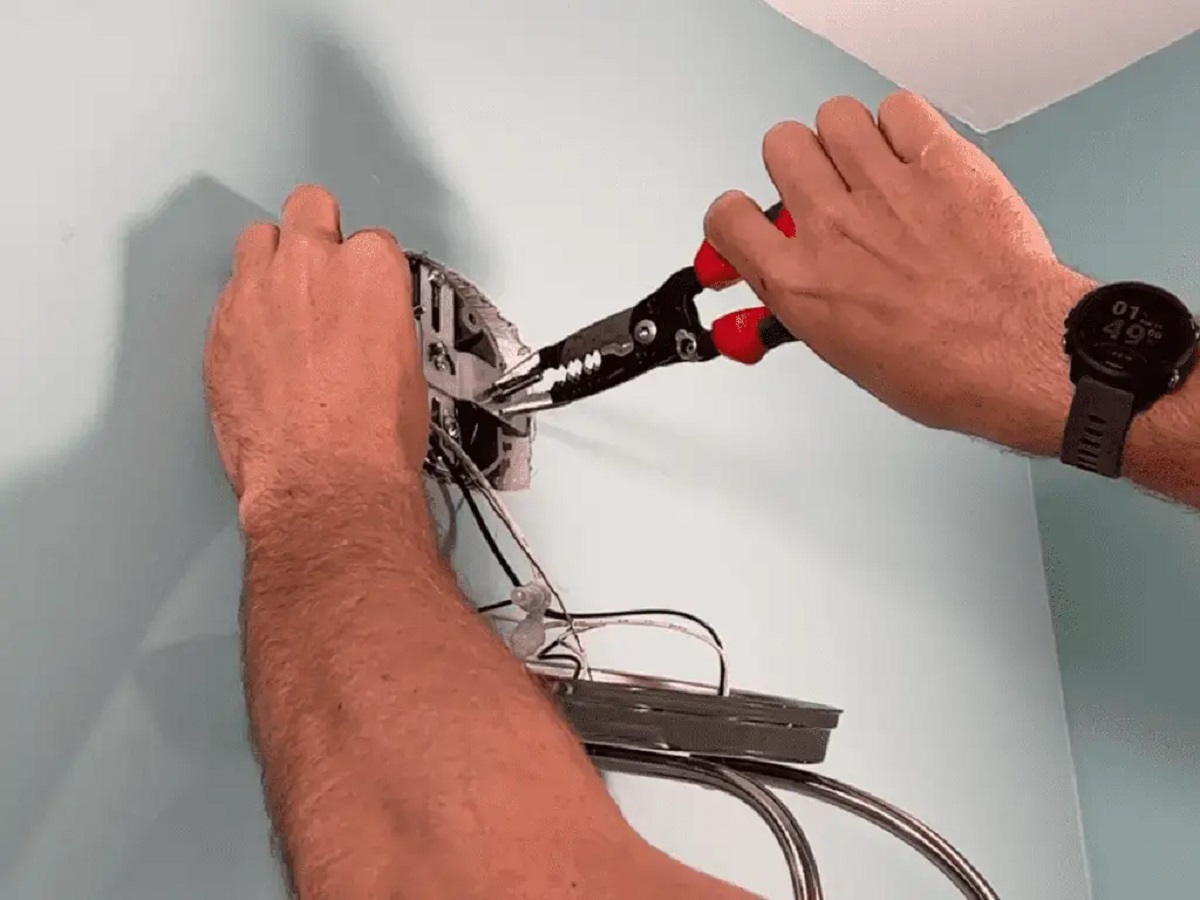
Step 4: Connect Wires to Junction Box
Now that the mounting bracket is in place, it’s time to connect the wires from the vanity light fixture to the junction box. Follow these steps:
- Start by identifying the wires coming from the junction box. Typically, you will have a black (hot) wire, a white (neutral) wire, and a green or copper (ground) wire.
- Next, identify the corresponding wires on your vanity light fixture. The wires may be labeled or color-coded to indicate their purpose.
- Using wire connectors, match each wire from the vanity light fixture with its corresponding wire from the junction box. Connect the black wire to the black wire, the white wire to the white wire, and the green or copper wire to the ground wire.
- Twist the ends of the wires together and secure them with wire nuts. Make sure the connections are tight and secure.
- After connecting the wires, gently push them back into the junction box and ensure they are neatly arranged. Avoid overcrowding the box to allow for proper airflow and to prevent any pinched or damaged wires.
It’s important to note that if you are unsure about which wires to connect or if you have any doubts about your electrical skills, it’s best to consult a licensed electrician for assistance.
Once the wires are properly connected, you’re ready to move on to the next step of attaching the vanity light to the mounting bracket.
When installing a vanity light junction box, make sure to turn off the power at the circuit breaker before beginning any work. This will ensure your safety while working with electrical components.
Step 5: Attach Vanity Light to Mounting Bracket
With the wires securely connected to the junction box, it’s time to attach the vanity light fixture to the mounting bracket. Follow these steps:
- Position the vanity light fixture so that the mounting holes on the back align with the screws on the mounting bracket.
- Hold the fixture in place and use a screwdriver to insert and tighten the screws, securing the fixture to the mounting bracket.
- Ensure that the fixture is level and centered, making any necessary adjustments.
Once the vanity light fixture is securely attached to the mounting bracket, give it a gentle tug or shake to confirm it is stable.
It’s important to note that the specific instructions for attaching the vanity light fixture may vary depending on the model and manufacturer. Always refer to the instructions provided with your specific fixture for the most accurate guidance.
With the vanity light fixture now securely in place, it’s time to move on to the next step: testing the light.
Step 6: Test the Light
After attaching the vanity light fixture, it’s crucial to test the light before proceeding. Follow these steps:
- Turn the power back on at the circuit breaker by flipping the corresponding switch to the “On” position.
- Flip the light switch associated with the vanity light to the “On” position.
- Observe the vanity light to ensure that it illuminates properly and there are no flickering or unusual behavior.
- If the light does not turn on or if there are any issues, immediately turn off the power again and check the wiring connections. Ensure that all connections are secure and properly connected.
It’s important to check for any potential electrical problems or issues with the vanity light before proceeding with the installation process.
If everything appears to be working correctly and the light is functioning as expected, you can move on to the next step: securing the vanity light.
However, if you encounter any problems, it’s recommended to consult a licensed electrician to assess and resolve the issue to ensure safety and proper functionality.
Step 7: Secure the Vanity Light
Once you have successfully tested the vanity light and ensured proper functionality, it’s time to secure it in place. Follow these steps to securely fasten the vanity light:
- Double-check that all wiring connections are still tight and secure.
- Inspect the mounting screws or brackets that secure the vanity light to the mounting bracket. Ensure that they are securely fastened and tightened.
- If necessary, use a screwdriver to adjust and tighten any loose screws or mounting brackets.
- Gently push any excess wiring back into the junction box, but be careful not to pinch or damage the wires.
- Ensure that the vanity light is level and aligned correctly. Make any necessary adjustments to the positioning if needed.
By properly securing the vanity light, you ensure that it remains firmly in place and reduces the risk of it becoming loose or falling.
Once you have secured the vanity light, step back and visually inspect it to ensure it is centered, level, and aesthetically pleasing.
With the vanity light securely in place, it’s time to move on to the final step: restoring power.
Read more: How To Install A Ceiling Light Fixture Box
Step 8: Restore Power
After completing all the necessary installations and ensuring that the vanity light is securely in place, it’s time to restore power and enjoy the newly installed fixture. Follow these steps to restore power:
- Return to the circuit breaker box and locate the breaker switch that corresponds to the room or area where the vanity light is installed.
- Remove the masking tape that was placed over the breaker switch earlier.
- Flip the breaker switch back to the “On” position to restore power to the area.
- Allow a few moments for the power to fully stabilize.
- Head back to the vanity light and test the switch once again to ensure that it is functioning properly with the power restored.
Always remember to handle electrical components with caution and prioritize safety throughout the installation process.
If at any point during the power restoration process, you notice any issues such as the light not turning on or any other electrical malfunctions, immediately turn off the power again and troubleshoot the issue. It may be necessary to recheck the wiring connections or consult a licensed electrician if necessary.
Once you have restored power and confirmed that the vanity light is functioning correctly, congratulations! You have successfully installed a vanity light junction box and can now enjoy the beautiful illumination it provides.
Remember to periodically check the vanity light for any signs of wear or damage and perform regular maintenance to ensure its longevity and optimal performance.
Enjoy the ambiance and functionality of your newly installed vanity light!
Conclusion
Installing a vanity light junction box is a rewarding project that can transform the look and feel of any space. With the right tools, materials, and careful attention to safety, you can easily carry out this installation process and enjoy the benefits of a beautifully illuminated room.
Throughout this article, we have provided a detailed step-by-step guide on how to install a vanity light junction box. From turning off the power to securing the vanity light in place, each step is essential to ensure a safe and successful installation.
Remember to always prioritize safety by turning off the power before beginning any electrical work and consulting a licensed electrician if you have any doubts or concerns about your abilities.
By following the outlined steps and utilizing the suggested tools and materials, you can confidently install a vanity light junction box and bring a touch of elegance and functionality to your home.
So, go ahead and embrace the beauty of well-illuminated spaces by installing your own vanity light junction box. Enjoy the ambiance, style, and functionality it adds to your room, and bask in the warm glow of your new vanity light fixture!
Finished setting up your vanity light junction box? Great job! But if you're looking to tackle more home projects, why stop there? Maybe your garage could use some sprucing up with new electrical wiring. Our guide on how to run overhead wiring to your garage offers clear, easy steps that'll help you power up your space safely. And if a bigger challenge sounds enticing, consider updating your bathroom. Our detailed breakdown on the duration of bathroom renovations will help you plan effectively, ensuring you know what to expect every step of the way.
Frequently Asked Questions about How To Install Vanity Light Junction Box
Was this page helpful?
At Storables.com, we guarantee accurate and reliable information. Our content, validated by Expert Board Contributors, is crafted following stringent Editorial Policies. We're committed to providing you with well-researched, expert-backed insights for all your informational needs.


0 thoughts on “How To Install Vanity Light Junction Box”