Home>Home Appliances>Lighting Appliances>How To Install A Ceiling Light Fixture Box
Lighting Appliances
How To Install A Ceiling Light Fixture Box
Modified: October 18, 2024
Learn how to install a ceiling light fixture box with our step-by-step guide. Upgrade your lighting appliances easily and safely.
(Many of the links in this article redirect to a specific reviewed product. Your purchase of these products through affiliate links helps to generate commission for Storables.com, at no extra cost. Learn more)
Introduction
Installing a ceiling light fixture box is a rewarding and practical home improvement project that can enhance the ambiance and functionality of any room. Whether you're upgrading an existing fixture or adding a new one, this process can be accomplished with the right tools, materials, and a basic understanding of electrical work. By following a systematic approach and adhering to safety precautions, you can successfully install a ceiling light fixture box and illuminate your space with a touch of personal style.
In this comprehensive guide, we will walk you through the step-by-step process of installing a ceiling light fixture box. From turning off the power to testing the light, each stage is crucial for ensuring a safe and effective installation. By the end of this tutorial, you will have the knowledge and confidence to tackle this project with ease.
Before diving into the installation process, it's essential to gather the necessary tools and materials. You will need a voltage tester, a screwdriver, wire strippers, electrical tape, a pencil, a drywall saw, and, of course, the light fixture itself. Additionally, it's important to have a basic understanding of your home's electrical system and to follow all local building codes and regulations.
As you embark on this project, keep in mind that safety should always be the top priority. Working with electricity requires caution and attention to detail. Before starting the installation, be sure to turn off the power to the area where you'll be working. This can typically be done by switching off the circuit breaker or removing the fuse that controls the light fixture's circuit. Always use a voltage tester to confirm that the power is off before proceeding with any electrical work.
With the right mindset, preparation, and guidance, you can transform the lighting in your home and create a warm, inviting atmosphere. Let's begin the journey of installing a ceiling light fixture box, and illuminate your space with brilliance and style.
Key Takeaways:
- Safety First!
Before installing a ceiling light fixture box, always turn off the power and use a voltage tester to ensure it’s safe to work with electricity. This crucial step minimizes the risk of electrical accidents. - Choose Wisely
Selecting the right location for the fixture is key. Consider the room’s layout, existing wiring, natural light sources, and aesthetic elements to achieve the ideal lighting and ambiance.
Read more: How To Replace Ceiling Light Fixture
Step 1: Turn off the power
Turning off the power is the crucial first step in installing a ceiling light fixture box. Safety should always be the top priority when working with electricity. Before beginning any electrical work, it's essential to ensure that the power to the area where you'll be working is completely shut off. This step helps prevent the risk of electrical shock and ensures a safe environment for the installation process.
To turn off the power, locate the circuit breaker or fuse box in your home. Identify the circuit that controls the light fixture you'll be working on. In most cases, circuits are labeled to indicate which areas or fixtures they control. If the circuit is not labeled, you may need to test the light switch to determine which circuit it's connected to.
Once you've identified the correct circuit, switch off the corresponding breaker or remove the fuse. It's important to use a voltage tester to verify that the power is indeed off before proceeding with any electrical work. A voltage tester is a handheld device that can detect the presence of electrical current. By using the tester to check the wires and connections, you can ensure that it's safe to continue with the installation.
After confirming that the power is off, it's a good practice to tape a note or sign over the circuit breaker or fuse box to alert others that work is being done on the electrical system. This simple precaution can help prevent someone from accidentally turning the power back on while you're working on the light fixture.
By diligently following the steps to turn off the power, you create a safe working environment and minimize the risk of electrical accidents. This foundational step sets the stage for a successful and secure installation process, allowing you to proceed with confidence and peace of mind.
With the power safely turned off, you're now ready to move on to the next step in the installation process: choosing the location for the ceiling light fixture box. This decision will impact the overall lighting and aesthetic of the room, making it an important consideration as you embark on this home improvement project.
Step 2: Choose the location
Selecting the ideal location for your ceiling light fixture box is a pivotal decision that can significantly influence the overall lighting and ambiance of the room. Whether you're replacing an existing fixture or installing a new one, thoughtful consideration of the location is essential for achieving the desired illumination and aesthetic appeal.
Begin by assessing the room's layout and functionality. Identify the primary purpose of the space and the areas that require adequate lighting. For example, in a living room, you may want the ceiling light fixture to provide general illumination for the entire area, while in a kitchen, focused task lighting over the countertops and work areas might be a priority. Understanding the specific lighting needs of the room will guide you in choosing the most suitable location for the fixture.
Consider the room's existing electrical wiring and ceiling structure. It's important to select a location where the ceiling can support the weight of the light fixture and where access to electrical wiring is feasible. If you're replacing an old fixture, the existing wiring may limit your options for the new location. However, if you're installing a new fixture, you have more flexibility in choosing the ideal spot.
Take into account the room's aesthetic and design elements. The placement of the ceiling light fixture should complement the room's decor and architectural features. Whether you opt for a centrally located fixture for balanced illumination or a strategically positioned fixture to highlight specific areas, the location should enhance the room's visual appeal while fulfilling its practical lighting function.
Factor in the natural light sources within the room. Consider how natural light enters the space throughout the day and how it interacts with the artificial lighting from the ceiling fixture. By strategically positioning the fixture in relation to windows and other natural light sources, you can create a harmonious balance between natural and artificial lighting, enhancing the overall atmosphere of the room.
Once you've carefully evaluated these considerations, mark the chosen location on the ceiling using a pencil. This mark will serve as a guide for the subsequent steps in the installation process, ensuring precision and alignment. By thoughtfully selecting the location for the ceiling light fixture box, you lay the foundation for a well-lit and visually appealing space, setting the stage for the next stages of the installation process.
Step 3: Mark and cut the hole
After choosing the ideal location for your ceiling light fixture box, the next crucial step is to mark and cut the hole in the ceiling where the box will be installed. This process requires precision and careful attention to detail to ensure a seamless and secure fit for the fixture.
To begin, gather the necessary tools for marking and cutting the hole. You will need a pencil, a measuring tape, and a drywall saw. With these tools in hand, climb a ladder to reach the chosen location on the ceiling. Use the pencil and measuring tape to mark the exact dimensions of the hole that will accommodate the electrical box. The dimensions should align with the specifications provided for the box, ensuring a proper fit.
Once the hole's dimensions are marked, it's time to cut through the ceiling material to create the opening. Using a drywall saw, carefully follow the marked lines to cut out the designated area. Exercise caution and precision during this step to achieve clean and accurate cuts. It's important to work slowly and steadily, allowing the saw to do the work while maintaining control over the cutting process.
As you cut through the ceiling material, be mindful of any electrical wiring or structural components that may be present in the ceiling. Take care to avoid damaging any existing wiring or support structures during the cutting process. If you encounter any obstacles or unexpected obstructions, pause and reassess the situation before proceeding to ensure a safe and effective outcome.
Once the hole is cut to the specified dimensions, inspect the opening to ensure that it is clean and free of any debris or protruding materials. The edges of the hole should be smooth and even to facilitate a secure and flush fit for the electrical box.
By marking and cutting the hole with precision and attention to detail, you create the necessary opening for installing the ceiling light fixture box. This step sets the stage for seamlessly integrating the electrical components and fixture into the ceiling, bringing you one step closer to illuminating your space with a stylish and functional lighting solution.
When installing a ceiling light fixture box, make sure to turn off the power at the circuit breaker before starting. Use a voltage tester to double-check that the power is off before proceeding with the installation.
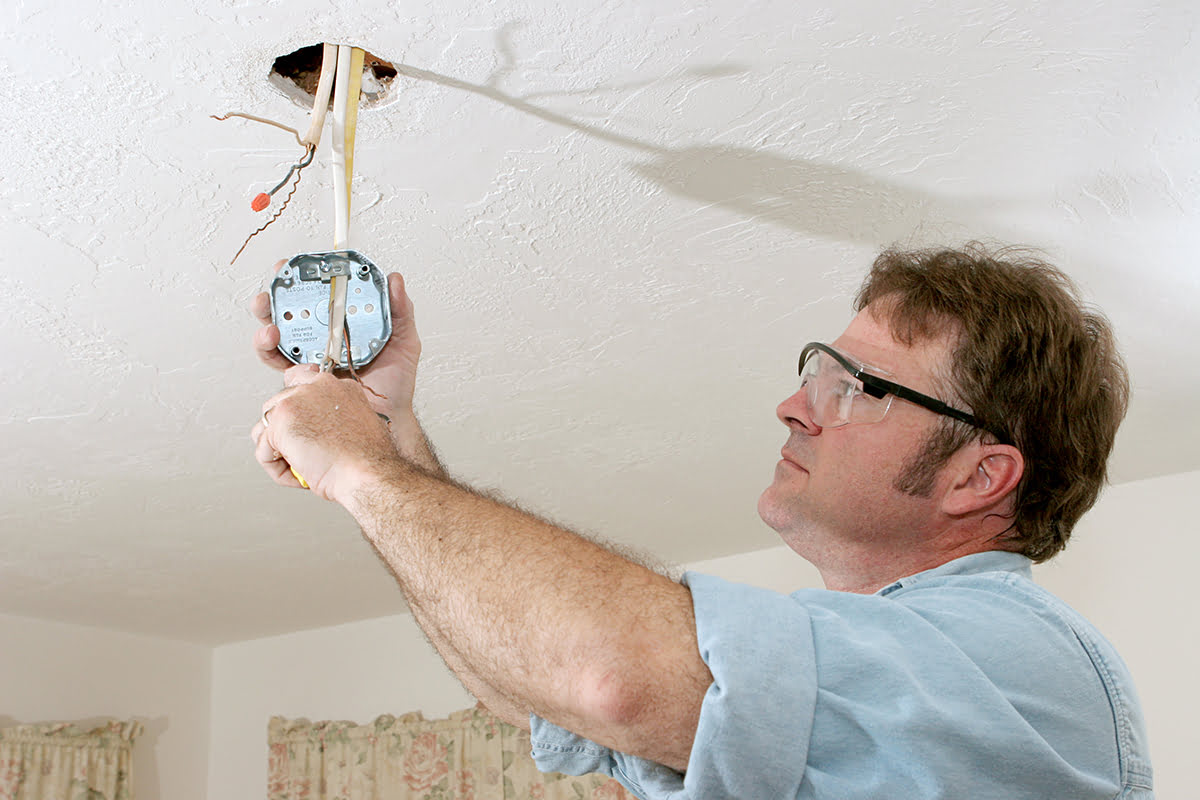
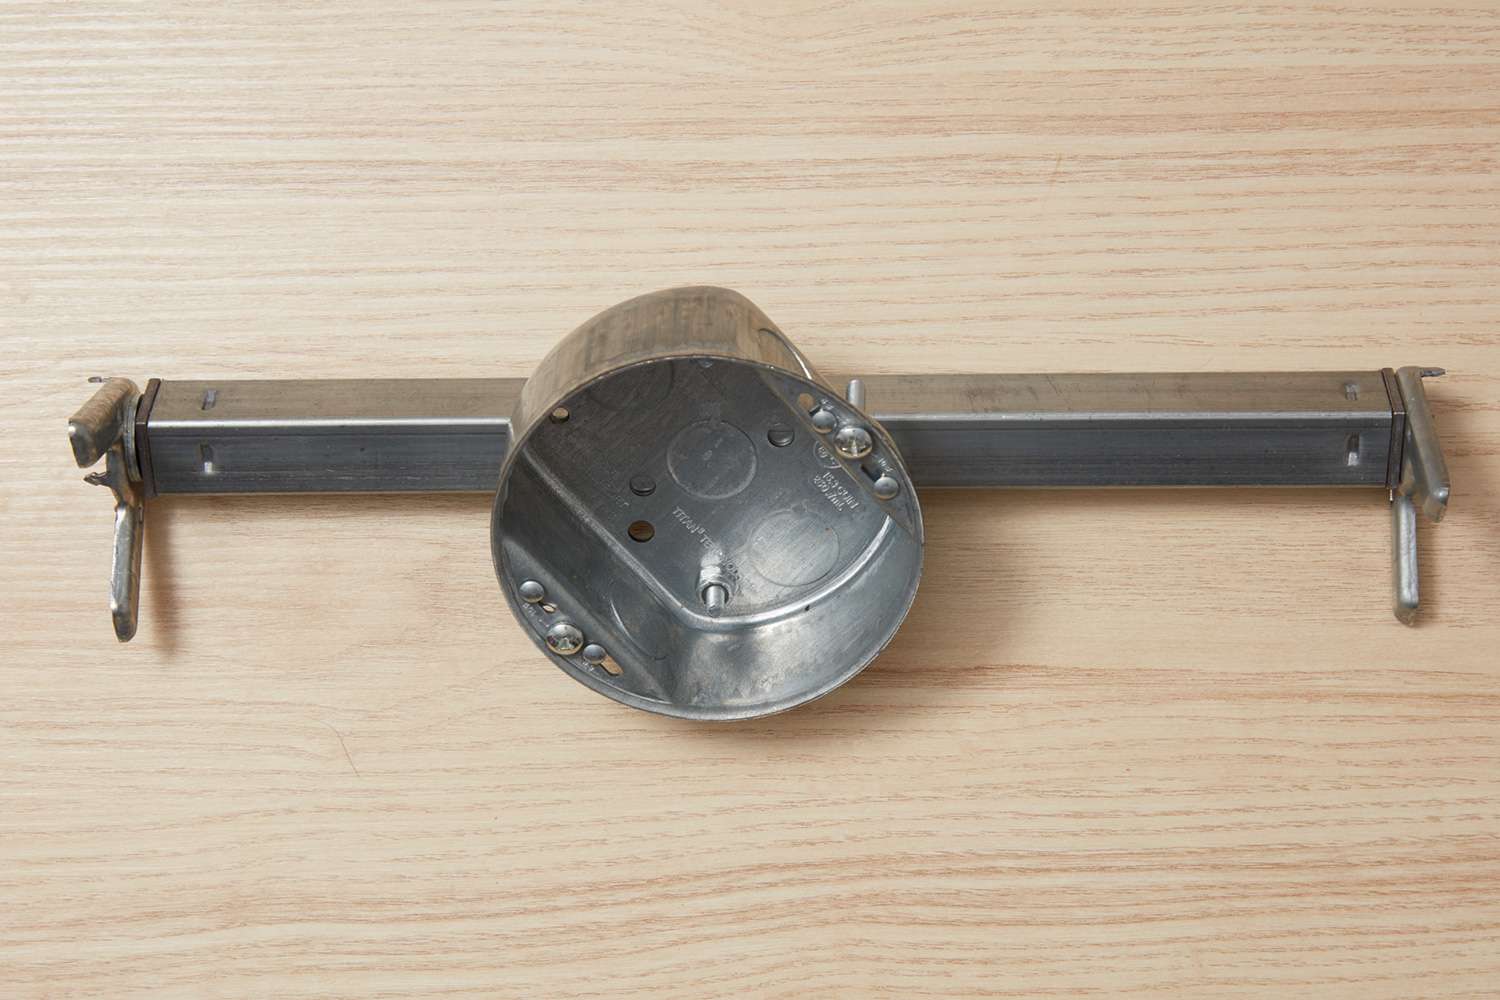
Step 4: Install the electrical box
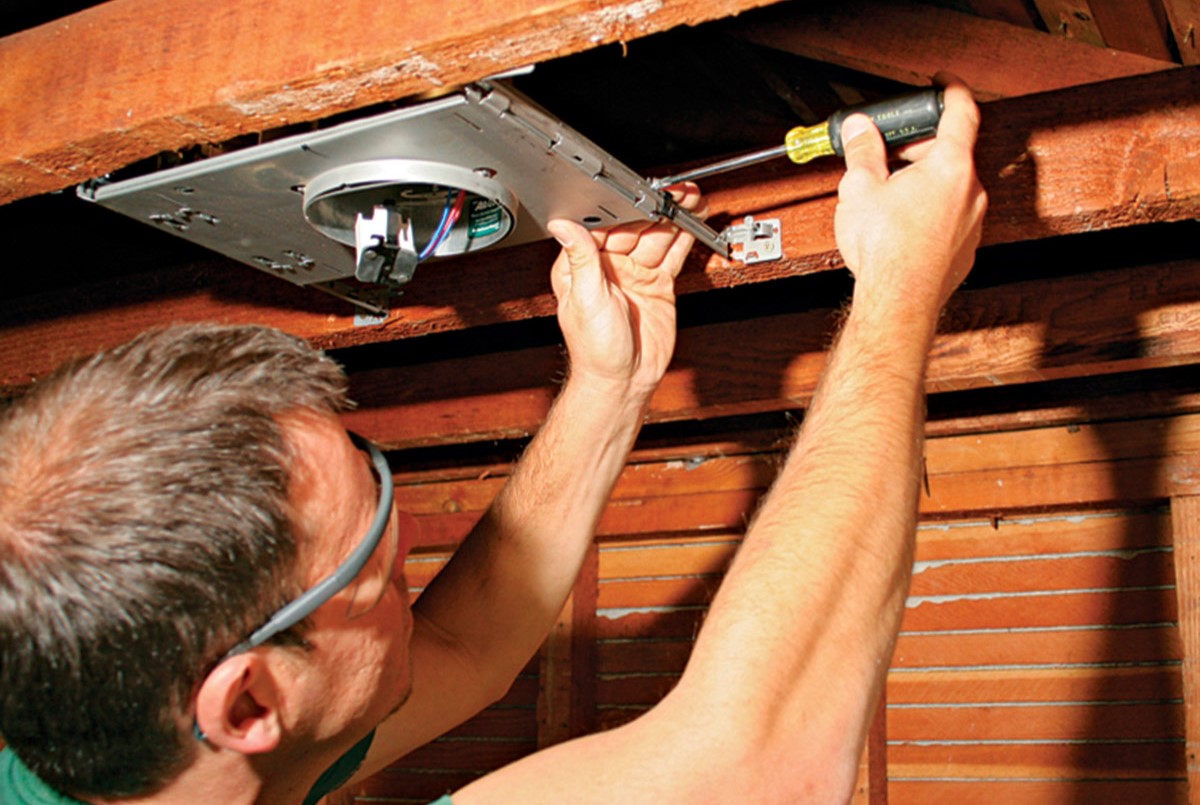
With the hole cut to the specified dimensions, the next critical step in installing a ceiling light fixture box is to secure the electrical box within the opening. The electrical box serves as the housing for the wiring connections and provides a stable mounting point for the light fixture. Proper installation of the electrical box is essential for ensuring the safety and functionality of the entire lighting system.
Begin by selecting the appropriate type of electrical box for your specific installation. The choice of box will depend on various factors, including the fixture's weight, the ceiling material, and the wiring configuration. For standard ceiling light fixtures, a round or octagonal electrical box is commonly used. Ensure that the selected box is compatible with the fixture and meets the requirements outlined in local building codes.
Position the electrical box within the cutout hole, aligning it with the opening to ensure a snug and secure fit. If the box is equipped with adjustable mounting brackets, extend them to reach the ceiling material and hold the box in place. Use a screwdriver to tighten the mounting brackets, securing the box firmly against the ceiling. It's important to verify that the box is level and flush with the ceiling surface to facilitate a seamless installation of the light fixture.
Next, assess the wiring connections within the electrical box. Carefully feed the electrical wires through the box's knockout openings, ensuring that an adequate length of wire extends into the box for making the necessary connections. If the box includes built-in cable clamps, use them to secure the wires in place, preventing any strain or tension on the connections.
Once the wiring is properly positioned within the box, secure the box to the ceiling material using screws or nails, depending on the box's design. Drive the fasteners through the designated mounting holes in the box, anchoring it securely to the ceiling. Confirm that the box is firmly attached and does not wobble or shift when pressure is applied.
By installing the electrical box with precision and attention to detail, you establish a stable and reliable foundation for the ceiling light fixture. This step ensures that the wiring connections are housed securely and that the fixture can be safely mounted to the ceiling. With the electrical box in place, you are now prepared to proceed with the crucial task of connecting the wiring and integrating the light fixture into the installation.
Read more: How To Change A Ceiling Light Fixture
Step 5: Connect the wiring
Connecting the wiring is a pivotal stage in the installation of a ceiling light fixture box, as it establishes the electrical connections necessary for powering the fixture. This step requires meticulous attention to detail and adherence to safety protocols to ensure the proper functioning of the lighting system.
Begin by identifying the electrical wires within the electrical box. Typically, you will encounter three wires: a black (hot) wire, a white (neutral) wire, and a bare or green (ground) wire. If the wiring includes a bare or green wire, it is essential to connect it to the grounding screw inside the electrical box to provide a path for electrical safety in the event of a fault.
Next, carefully strip the insulation from the ends of the black and white wires, exposing a sufficient length of wire for making secure connections. Use wire strippers to remove the insulation, taking care not to damage the conductors within the wires. Once the wires are stripped, twist the exposed strands to ensure a clean and uniform appearance, facilitating reliable connections.
With the wires prepared, proceed to connect them to the corresponding wires from the light fixture. Most light fixtures will include a black wire, a white wire, and a bare or green wire for grounding. Match the black wire from the electrical box to the black wire from the fixture, and the white wire to the white wire. If the fixture includes a grounding wire, connect it to the bare or green wire from the electrical box.
To secure the connections, use wire connectors or wire nuts designed for the specific wire gauge being used. Twist the connectors onto the paired wires, ensuring a tight and secure fit. It's important to tug gently on each wire to confirm that the connections are secure and that no wires pull loose. Additionally, wrap electrical tape around the base of each wire connector to provide an extra layer of protection and to prevent the wires from coming loose over time.
After the wiring connections are made, carefully tuck the connected wires into the electrical box, ensuring that they are neatly arranged and do not interfere with the installation of the light fixture. Position any excess wire within the box, taking care to avoid overcrowding or pinching the wires, which could lead to potential hazards.
By meticulously connecting the wiring with precision and attention to detail, you establish the essential electrical links required for powering the ceiling light fixture. This step sets the stage for integrating the fixture into the installation and moving closer to the final stages of illuminating your space with a stylish and functional lighting solution.
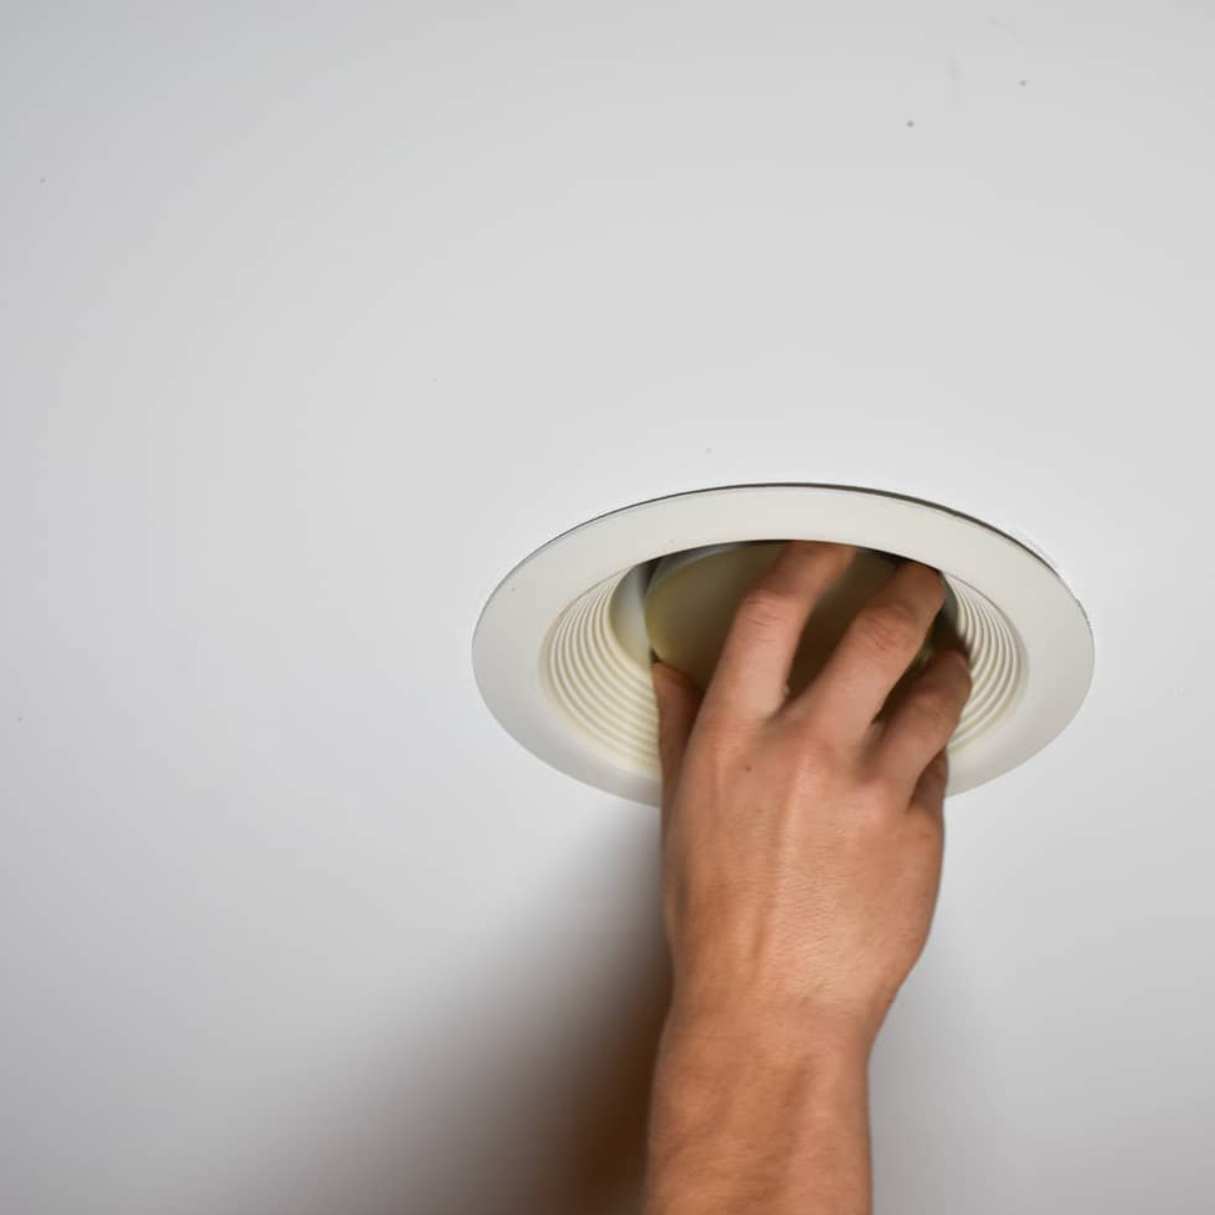
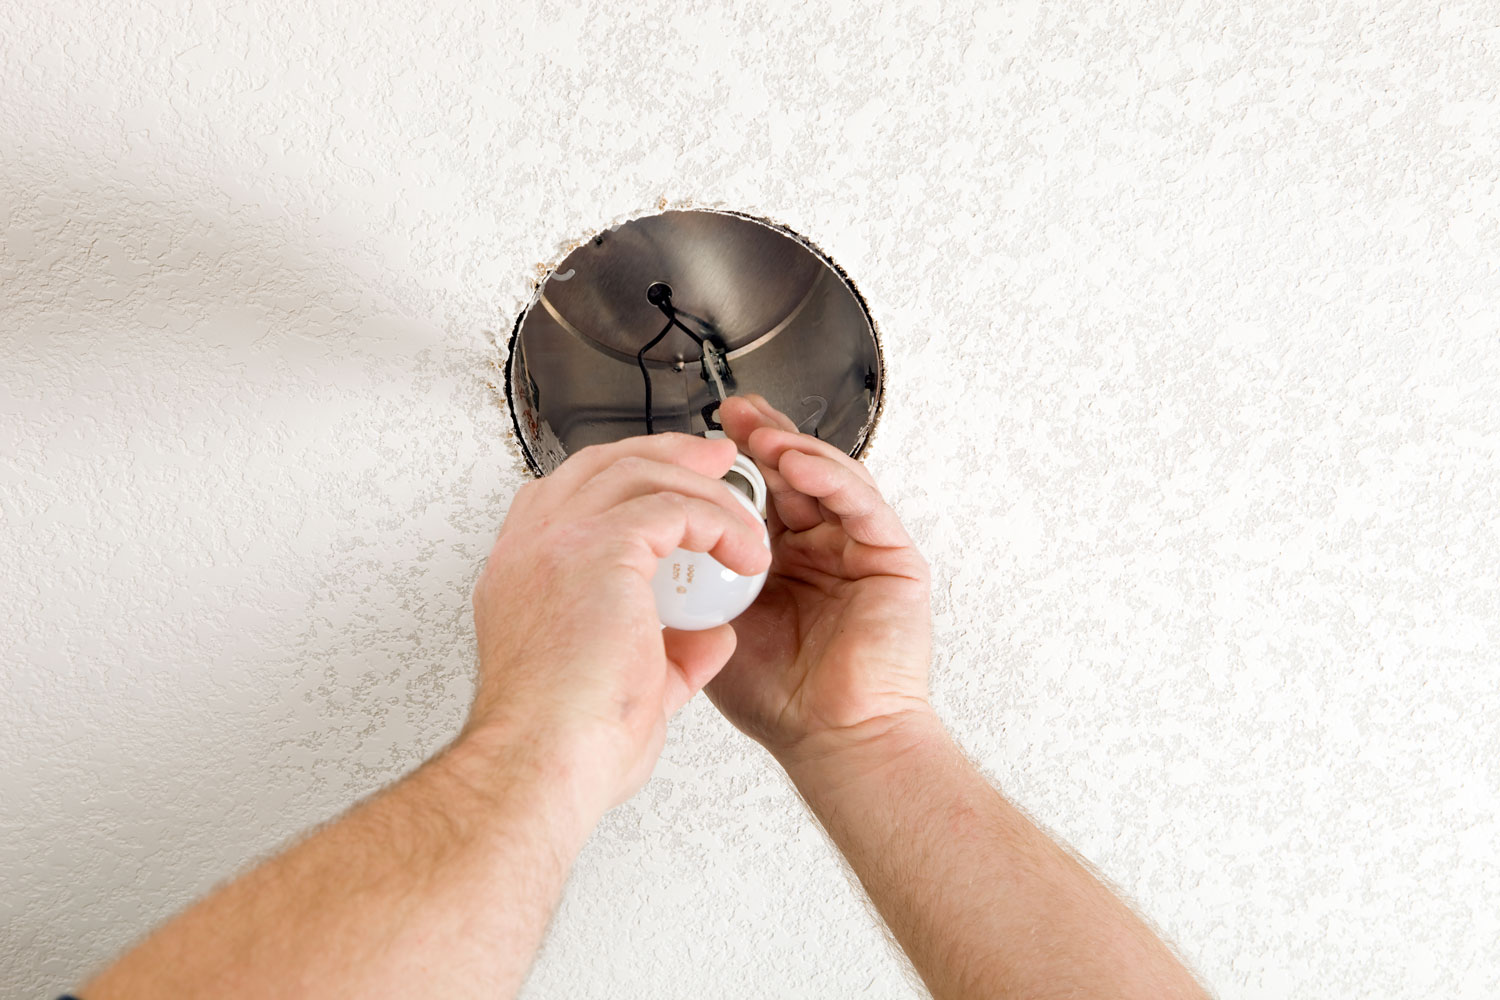
Step 6: Attach the light fixture
Attaching the light fixture is a pivotal stage in the installation process, marking the transition from preparing the electrical components to integrating the fixture into the ceiling. This step requires precision and attention to detail to ensure a secure and visually appealing mounting of the fixture.
Begin by unpacking the light fixture and familiarizing yourself with its components. Most fixtures will include a mounting bracket, a canopy or decorative cover, and the fixture itself. Carefully inspect the fixture to ensure that all parts are present and undamaged, and refer to the manufacturer's instructions for specific guidance on the installation process.
Next, position the mounting bracket onto the electrical box, aligning it with the screw holes in the box. Secure the bracket in place using the provided screws, ensuring that it is firmly attached and level. The mounting bracket serves as the anchor for the fixture and provides stability for the installation.
Once the mounting bracket is in place, it's time to connect the fixture to the electrical wiring. Depending on the fixture's design, this may involve attaching the fixture's wires to the corresponding wires in the electrical box or connecting a mounting strap to the bracket and securing the fixture to the strap. Follow the manufacturer's instructions carefully to ensure the correct method for your specific fixture.
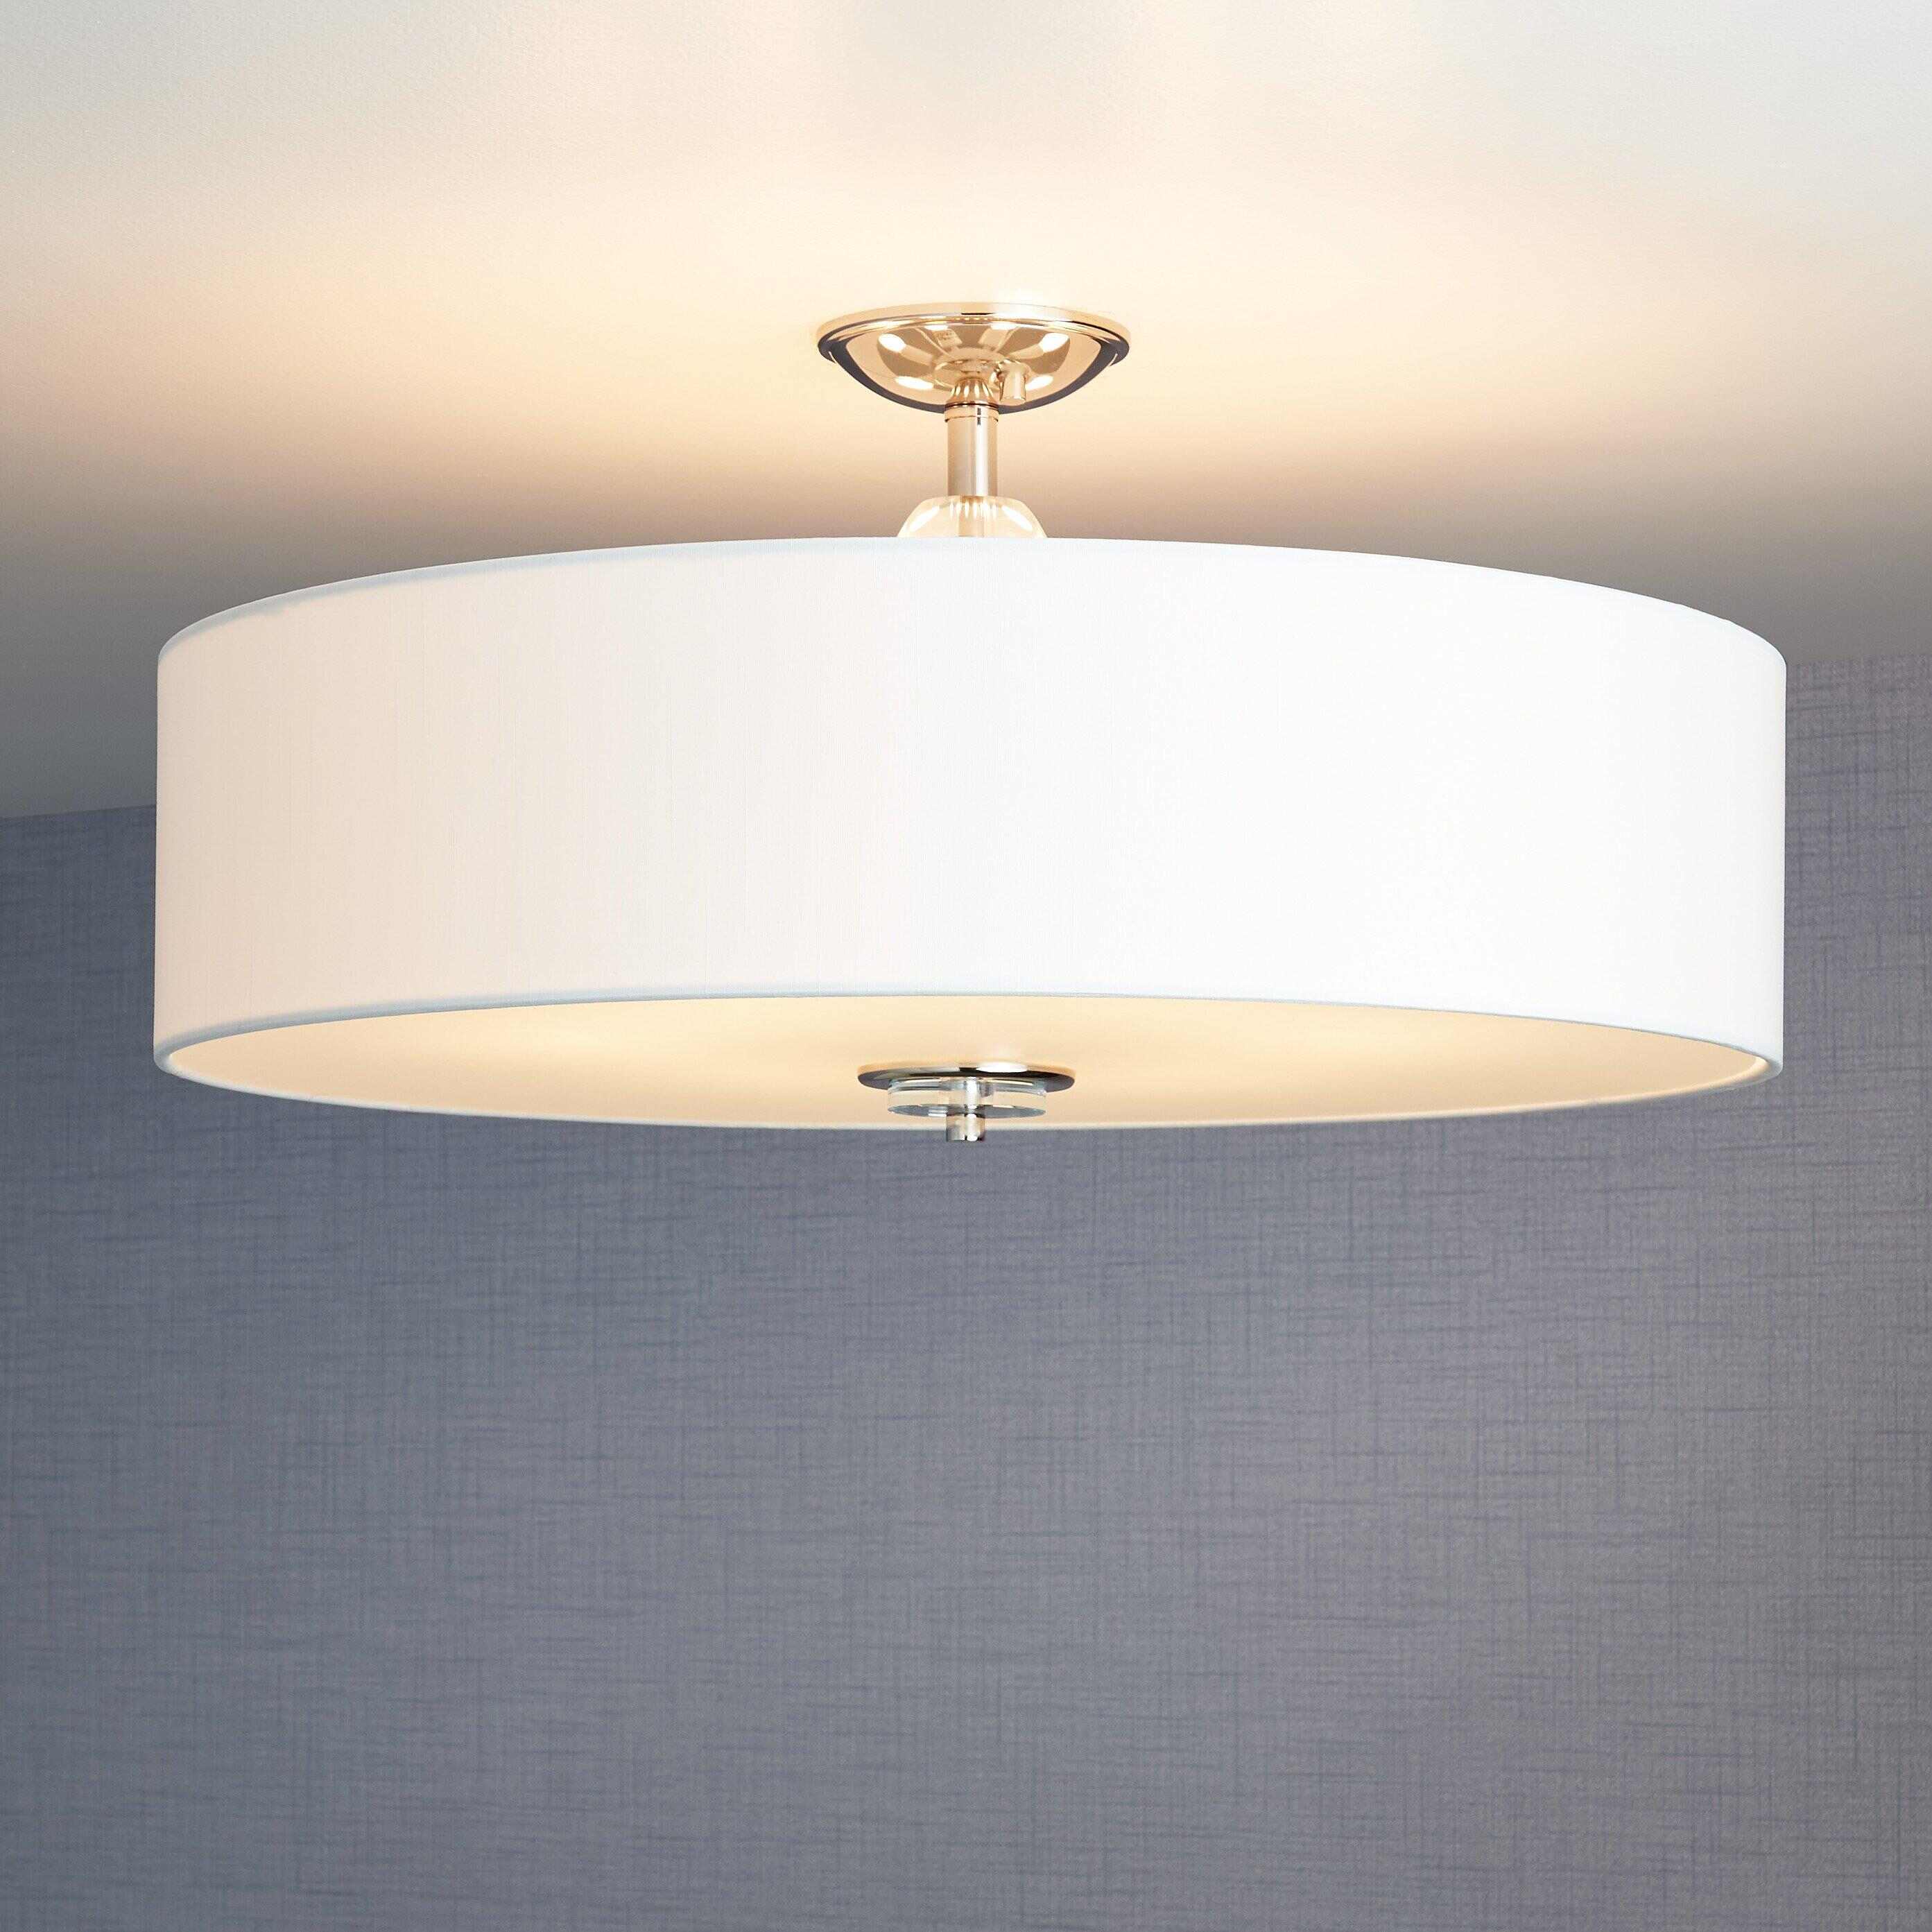
With the wiring connections made, carefully lift the fixture and align it with the mounting bracket. Secure the fixture to the bracket using the provided screws or hardware, ensuring that it is level and flush with the ceiling. Take care to avoid over-tightening the screws, as this could damage the fixture or compromise its stability.
After the fixture is securely mounted, attach the canopy or decorative cover to conceal the wiring and mounting hardware. Depending on the fixture's design, this may involve securing the canopy with screws or a decorative nut. Ensure that the canopy is aligned and seated properly, creating a polished and finished look for the installed fixture.
By attaching the light fixture with precision and attention to detail, you bring the installation process to its culmination, transforming the electrical components and wiring connections into a fully integrated and visually striking lighting solution. With the fixture securely in place, you are now prepared to proceed with the final step in the installation process: turning on the power and testing the light.
Step 7: Turn on the power and test the light
After completing the installation of the ceiling light fixture box and ensuring that all connections are secure, the final step is to turn on the power and test the light. This critical stage allows you to verify that the fixture is functioning as intended and that the installation has been executed successfully.
Before restoring power to the circuit, take a moment to conduct a final visual inspection of the installed fixture. Ensure that all components are securely fastened, the wiring is neatly arranged within the electrical box, and the canopy or decorative cover is properly aligned and seated. This visual check ensures that the fixture is in optimal condition for testing.
With the visual inspection complete, return to the circuit breaker or fuse box and switch on the power to the circuit that controls the newly installed ceiling light fixture. As the power is restored, observe the fixture closely to confirm that it illuminates as expected. Take note of any flickering, dimming, or irregular behavior, as these may indicate underlying issues with the wiring or connections.
If the fixture fails to light up or exhibits any abnormal behavior, immediately turn off the power to the circuit and reassess the wiring and connections. Check for any loose or improperly secured wires, damaged components, or other potential issues that may be affecting the fixture's operation. Address any identified issues before proceeding with further testing.
Assuming that the fixture illuminates as intended and operates without any issues, take a moment to evaluate the quality and distribution of the light. Assess whether the fixture provides the desired level of illumination and whether it effectively fulfills the lighting requirements of the room. Additionally, observe the fixture from different angles to ensure that the light is evenly distributed and free from any flickering or inconsistencies.
As a final test, consider operating any switches or dimmers that control the fixture, if applicable. Verify that the fixture responds appropriately to the controls and that the lighting output adjusts as expected. This step ensures that the fixture is fully integrated into the room's lighting system and that it functions harmoniously with other lighting elements.
By turning on the power and testing the light, you confirm the successful installation of the ceiling light fixture box and validate the functionality of the newly installed fixture. This final step provides assurance that the lighting system is operational and ready to enhance the ambiance and functionality of the space, marking the culmination of the installation process.
Frequently Asked Questions about How To Install A Ceiling Light Fixture Box
Was this page helpful?
At Storables.com, we guarantee accurate and reliable information. Our content, validated by Expert Board Contributors, is crafted following stringent Editorial Policies. We're committed to providing you with well-researched, expert-backed insights for all your informational needs.


0 thoughts on “How To Install A Ceiling Light Fixture Box”