Home>Furniture & Design>Interior Design Trends>How To Clean Glass Light Fixtures
Interior Design Trends
How To Clean Glass Light Fixtures
Modified: October 19, 2024
Learn the latest interior design trends for cleaning glass light fixtures. Discover expert tips and techniques to keep your fixtures sparkling and stylish. Elevate your home decor with these maintenance insights.
(Many of the links in this article redirect to a specific reviewed product. Your purchase of these products through affiliate links helps to generate commission for Storables.com, at no extra cost. Learn more)
Introduction
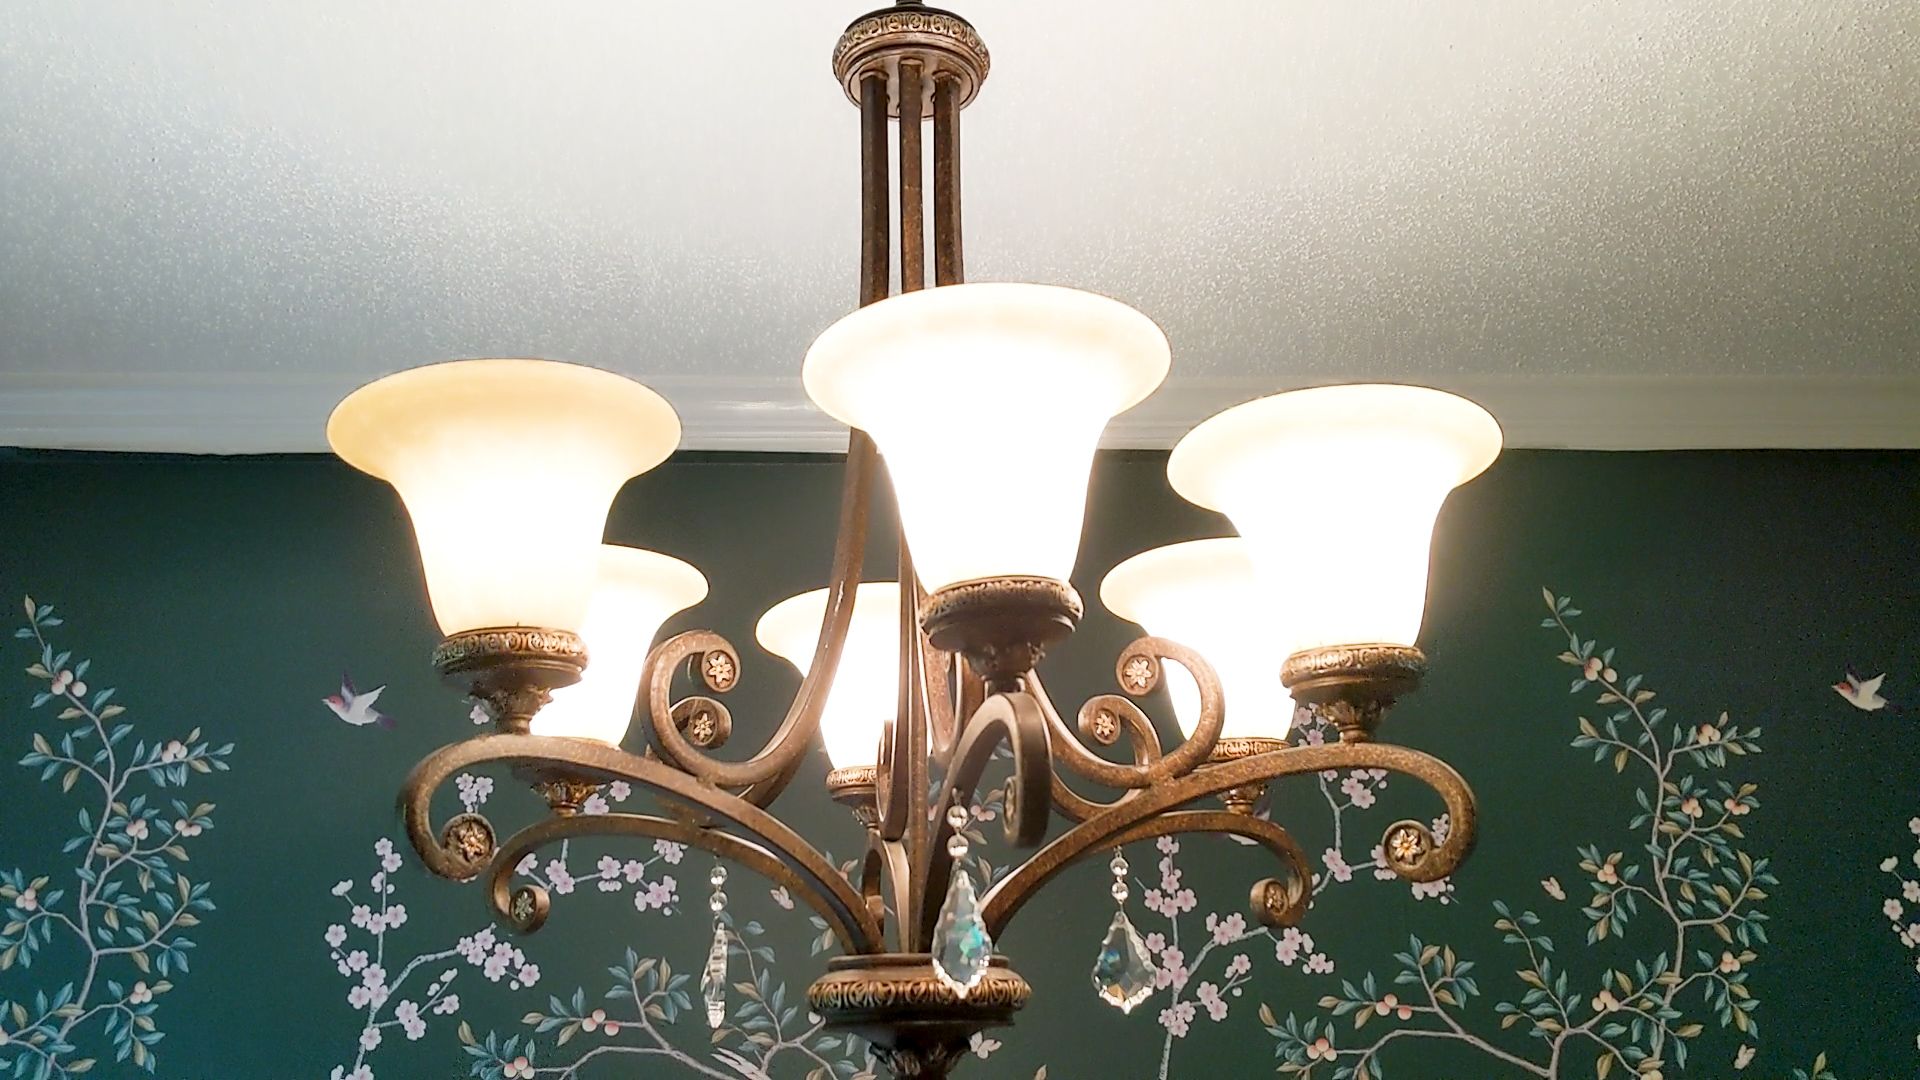
Cleaning glass light fixtures is an essential yet often overlooked aspect of home maintenance. Over time, dust, grime, and other airborne particles can accumulate on these fixtures, diminishing their luminosity and aesthetic appeal. Whether you have a stunning chandelier, a sleek pendant light, or an elegant wall sconce, regular cleaning is crucial to ensure that your fixtures continue to illuminate your space with brilliance.
In this comprehensive guide, we will walk you through the step-by-step process of cleaning your glass light fixtures effectively. By following these simple yet effective techniques, you can restore the sparkle and clarity of your fixtures, revitalizing the ambiance of your living spaces. From gathering the necessary supplies to safely removing and cleaning the glass and fixture base, we will cover every aspect of the cleaning process, empowering you to maintain the beauty and functionality of your lighting elements.
As you embark on this cleaning journey, it's important to approach the task with patience and attention to detail. While the process may seem daunting at first, the satisfaction of witnessing your fixtures regain their original luster will make the effort worthwhile. By investing time and effort into cleaning your glass light fixtures, you not only enhance the visual appeal of your home but also prolong the lifespan of these valuable assets.
So, roll up your sleeves, gather your cleaning supplies, and let's delve into the art of rejuvenating your glass light fixtures. With our expert guidance, you'll soon discover that maintaining the radiance of your lighting features is a gratifying endeavor that contributes to the overall charm and allure of your living space.
Key Takeaways:
- Regularly cleaning glass light fixtures with a gentle solution and soft cloth restores their sparkle, creating a brighter and more inviting living space.
- Safely removing, cleaning, and reassembling light fixtures not only enhances their visual appeal but also prolongs their lifespan, contributing to a timeless charm in your home.
Read more: How To Remove Glass Globe From Light Fixture
Step 1: Gather Your Supplies
Before embarking on the task of cleaning your glass light fixtures, it's essential to assemble the necessary supplies. By ensuring that you have the right tools at your disposal, you can streamline the cleaning process and achieve optimal results. Here's a comprehensive list of supplies that you'll need:
-
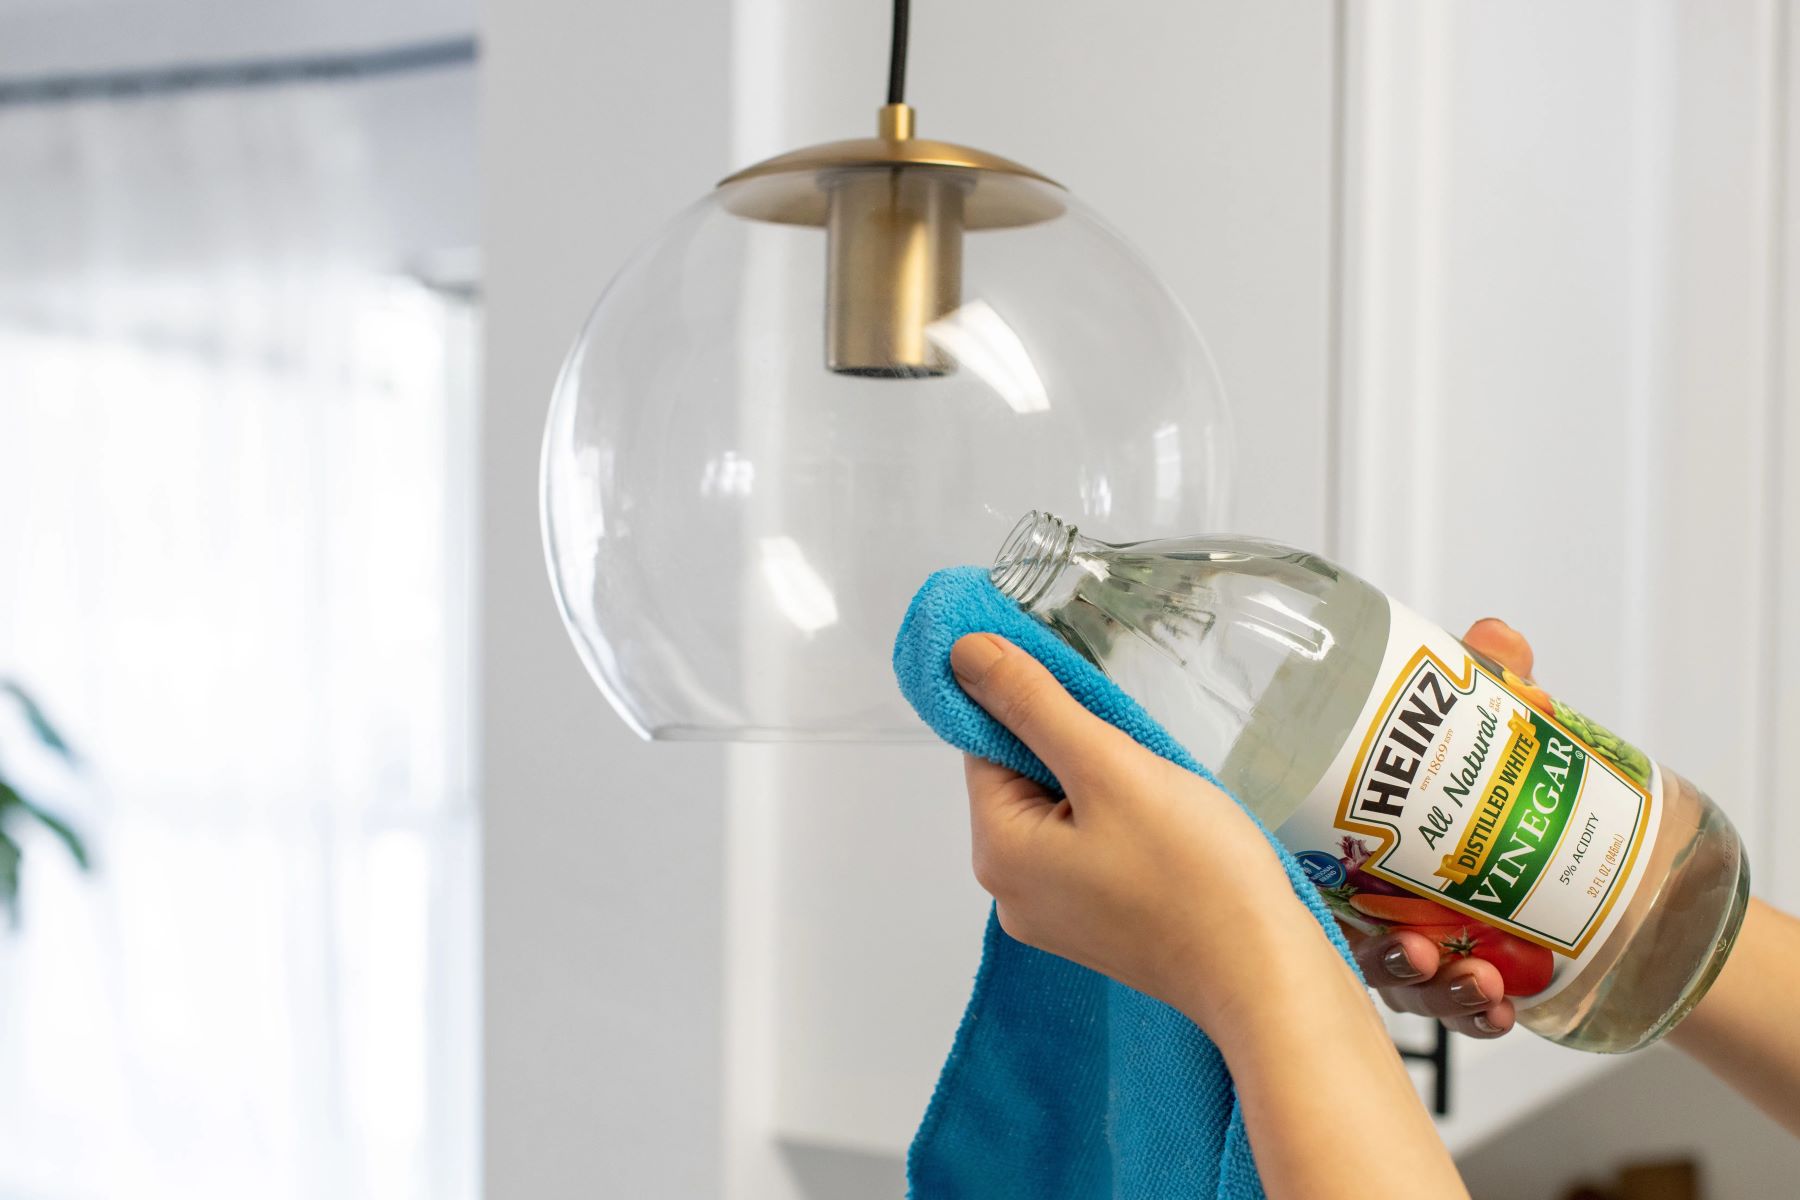
Cleaning Solution: Select a gentle, non-abrasive cleaning solution suitable for glass surfaces. Avoid using harsh chemicals that may damage the glass or its finish. A simple yet effective homemade solution can be created by mixing equal parts of water and white vinegar in a spray bottle.
-
Soft Microfiber Cloth: Opt for a soft, lint-free microfiber cloth to prevent streaking and scratching on the glass surface. The fine fibers of a microfiber cloth are adept at capturing dust and grime without leaving behind residue.
-
Rubbing Alcohol: This versatile cleaning agent is excellent for tackling stubborn stains and smudges on glass surfaces. Ensure that the rubbing alcohol is diluted with water to prevent any potential damage to the glass.
-
Gloves: Protect your hands with a pair of rubber or latex gloves to shield your skin from the cleaning solution and any accumulated dirt or dust.
-
Step Stool or Ladder: Depending on the height of your light fixtures, a step stool or ladder may be necessary to safely access and clean the fixtures.
-
Protective Covering: Lay down a protective covering, such as a drop cloth or old towels, to safeguard the surrounding area from drips and spills during the cleaning process.
-
Screwdriver or Wrench: If your light fixture requires disassembly for thorough cleaning, have the appropriate screwdriver or wrench on hand to facilitate the removal of components.
-
Safety Glasses: As a precautionary measure, consider wearing safety glasses to shield your eyes from any debris or cleaning solution splashes.
By gathering these essential supplies, you'll be well-equipped to commence the cleaning process with confidence and efficiency. With the right tools at your disposal, you can ensure that your glass light fixtures receive the meticulous care they deserve, ultimately contributing to a brighter and more inviting living environment.
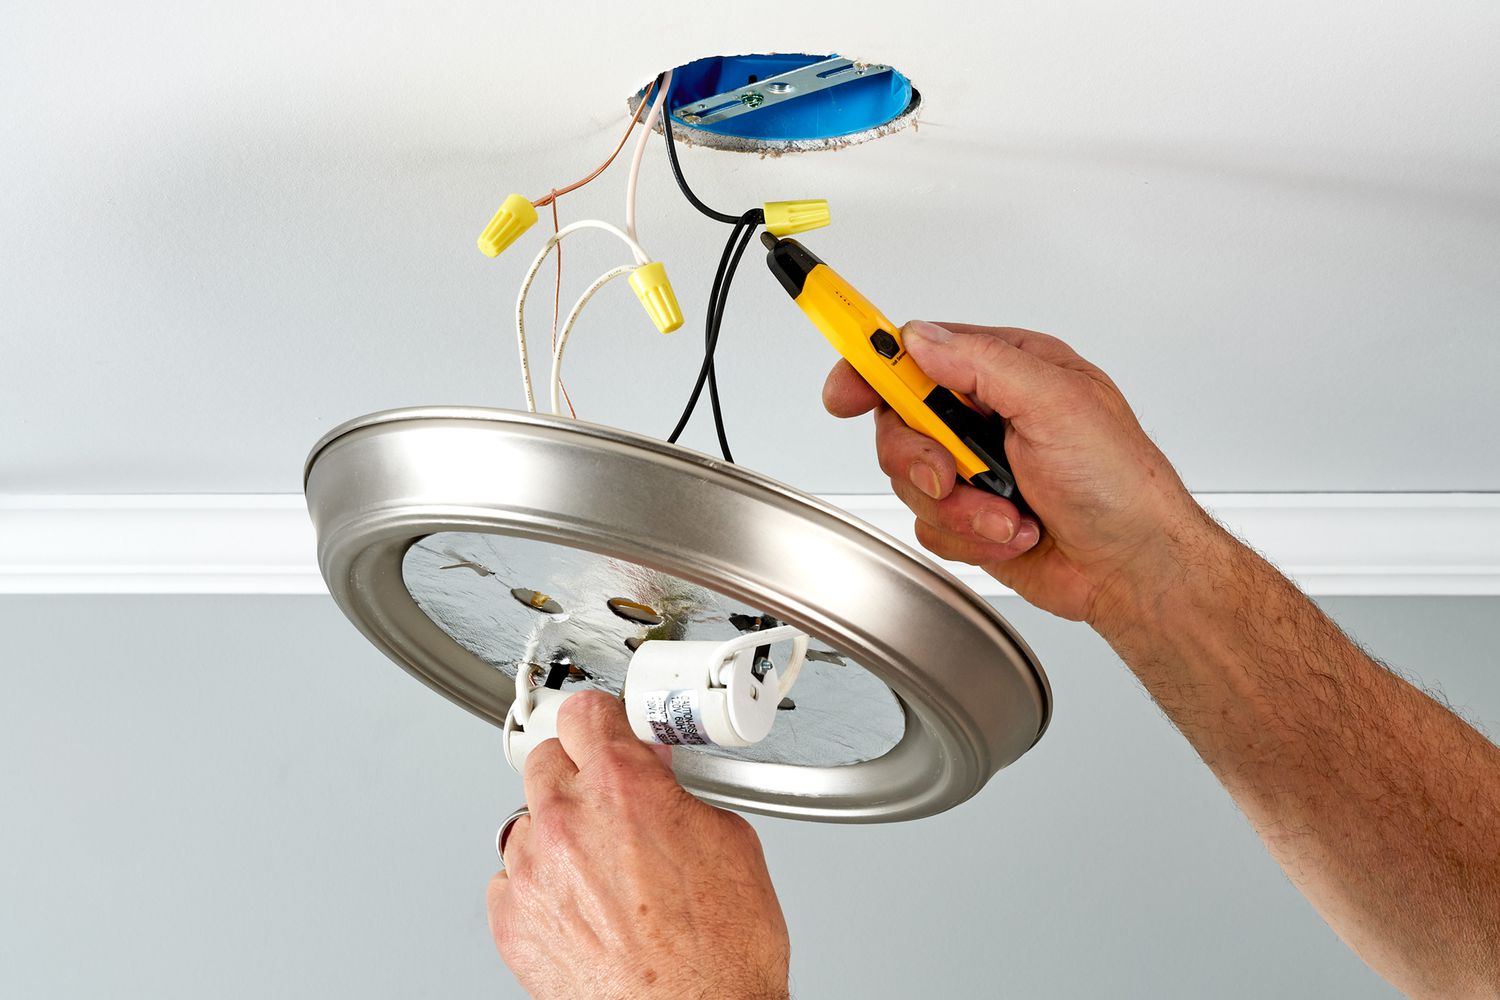
Step 2: Turn Off the Power
Before initiating the cleaning process, it is imperative to prioritize safety by turning off the power supply to the light fixture. This precautionary measure is crucial to prevent the risk of electrical shock or injury during the cleaning procedure. By adhering to the following steps, you can ensure a safe and secure environment while working on your glass light fixtures.
-
Locate the Circuit Breaker: Begin by identifying the circuit breaker or fuse box that controls the electrical supply to the specific light fixture you intend to clean. In most residential settings, the circuit breakers are labeled to indicate the areas they correspond to, facilitating easy identification.
-
Switch Off the Power: Once you have located the appropriate circuit breaker, switch it off to cut off the electricity supply to the light fixture. Confirm that the power has been successfully turned off by testing the fixture's switch to ensure that it no longer illuminates.
-
Use a Voltage Tester (Optional): For added reassurance, consider using a voltage tester to verify that the power has been effectively disconnected. This handheld device can detect the presence of electrical current, providing an extra layer of safety before proceeding with the cleaning process.
By diligently following these steps to deactivate the power supply, you mitigate the potential hazards associated with working on electrical fixtures. This proactive approach not only safeguards your well-being but also minimizes the risk of accidental damage to the fixture or surrounding components. With the power safely turned off, you can proceed to the subsequent steps of removing and cleaning the glass light fixture with confidence and peace of mind.
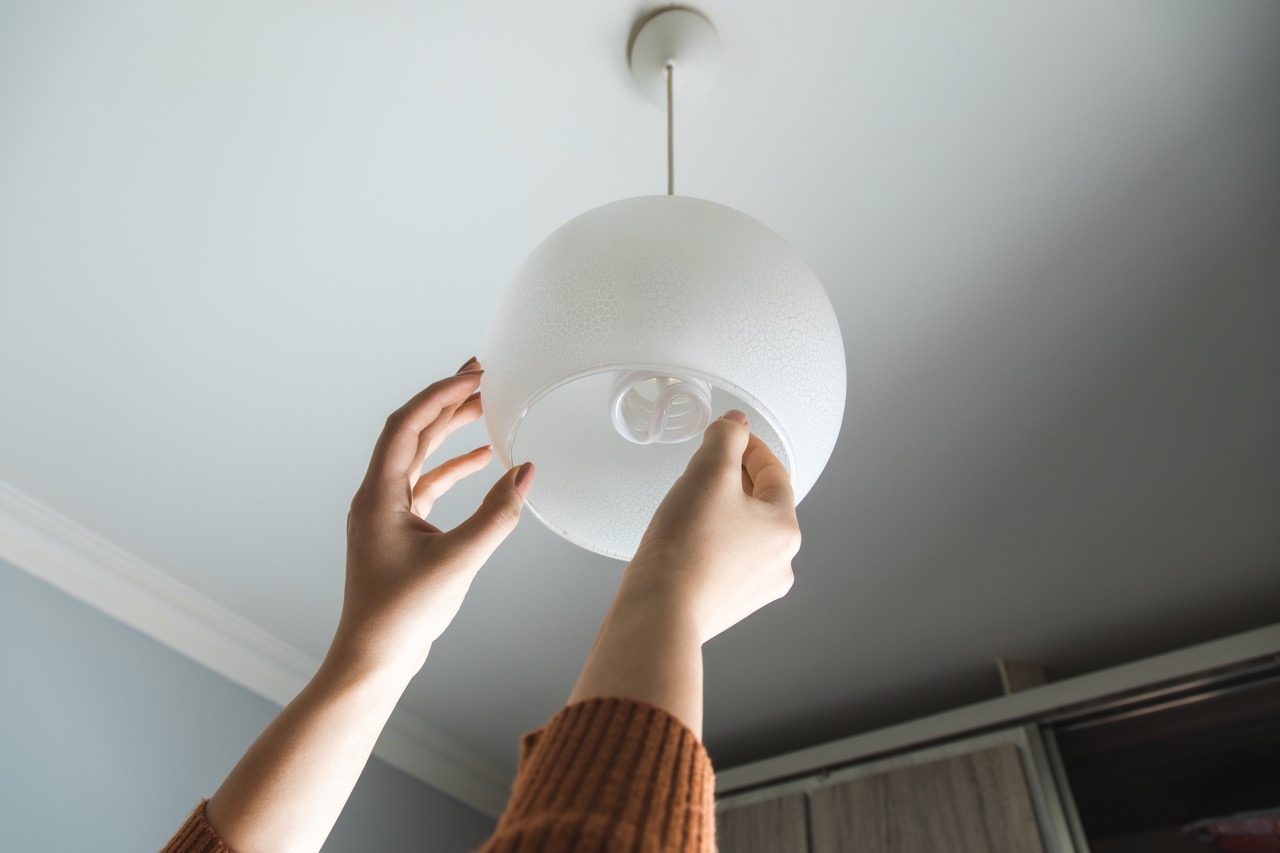
Step 3: Remove the Light Fixture
Removing the light fixture is a crucial step in the cleaning process, allowing for thorough access to the glass and fixture base. Before proceeding, ensure that the power supply to the fixture has been safely turned off as per the instructions in Step 2. Once the power is disconnected, follow these detailed steps to remove the light fixture:
-
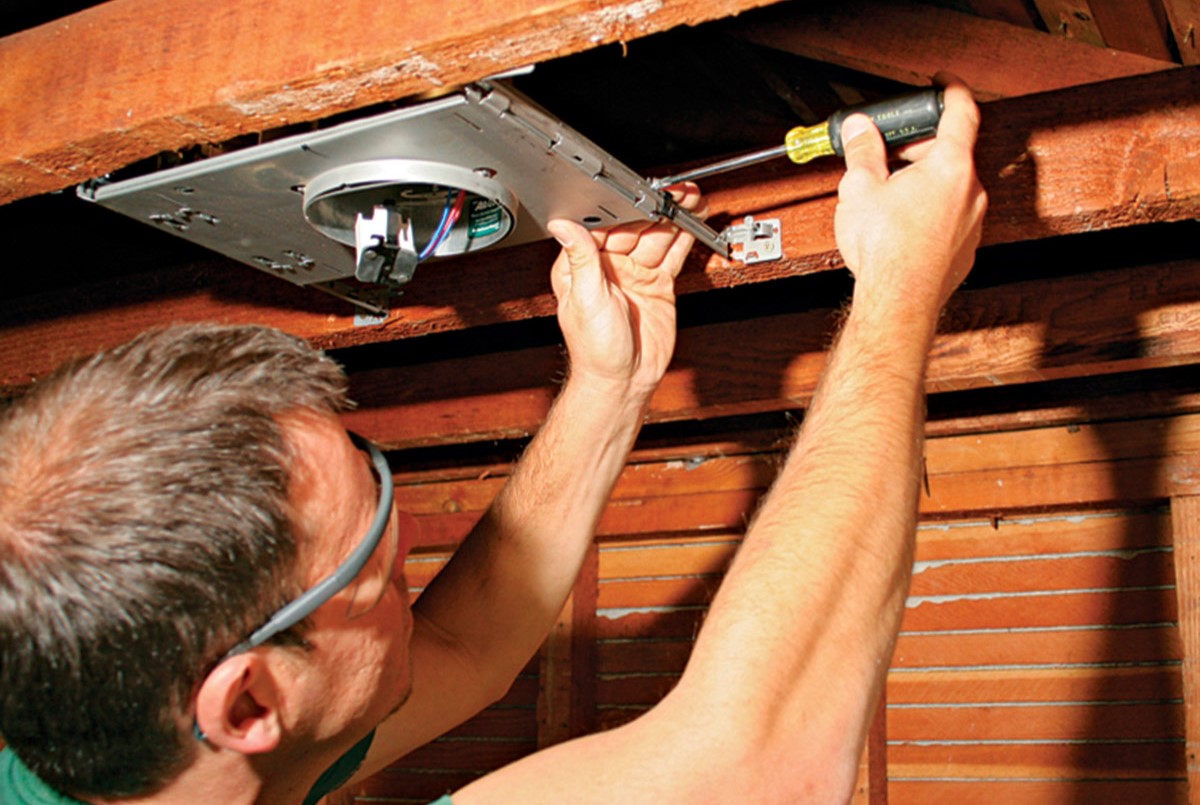
Unscrew the Fasteners: Using the appropriate screwdriver or wrench, carefully loosen and remove the fasteners securing the light fixture to the mounting bracket or electrical box. These fasteners may be in the form of screws or bolts, depending on the type of fixture and its installation.
-
Support the Fixture: As you detach the fasteners, be prepared to support the weight of the fixture to prevent it from falling. Some fixtures may have additional support mechanisms, such as chains or cables, which should be carefully managed during the removal process.
-
Disconnect the Wiring: With the fixture now detached from its mounting, gently lower it to access the wiring connections. Identify the wire nuts or connectors joining the fixture's wires to the house wiring. Carefully disconnect these connections, taking note of the wire colors and their respective positions for reassembly.
-
Secure the Wires: After disconnecting the wiring, it is advisable to secure the loose wires with electrical tape or wire connectors to prevent accidental contact or entanglement during the cleaning process.
-
Set Aside the Fixture: Once the wiring is safely secured, set the light fixture aside in a designated area, ensuring that it is placed on a soft surface to prevent scratches or damage to its exterior.
By meticulously following these steps, you can safely remove the light fixture, preparing it for thorough cleaning without compromising its structural integrity or electrical components. With the fixture successfully detached, you are now ready to proceed to the next steps of cleaning the glass and the fixture base, as outlined in the subsequent sections.
Step 4: Clean the Glass
Cleaning the glass components of your light fixture is a pivotal step in revitalizing its luminosity and visual appeal. Over time, dust, fingerprints, and airborne particles can obscure the clarity of the glass, diminishing the fixture's ability to emit light effectively. By following these meticulous cleaning techniques, you can restore the brilliance of the glass, enhancing the overall ambiance of your living space.
Read more: What To Do With Old Glass Light Fixtures
Substep 4.1: Dusting and Preparing the Glass
Begin the glass cleaning process by gently dusting the surface using a soft, dry microfiber cloth. This initial step helps remove loose particles and debris, preparing the glass for more thorough cleaning. By delicately wiping the glass with the microfiber cloth, you can minimize the risk of scratching or smudging the surface, laying the foundation for a pristine cleaning outcome.
Substep 4.2: Applying the Cleaning Solution
Once the glass is free of loose debris, it's time to apply the cleaning solution. If using a commercial glass cleaner, spritz the solution onto the glass surface, ensuring even coverage. Alternatively, a homemade cleaning solution comprising equal parts water and white vinegar can be applied using a spray bottle. This gentle yet effective solution helps dissolve grime and smudges without compromising the integrity of the glass.
Substep 4.3: Wiping and Polishing the Glass
With the cleaning solution applied, use a fresh microfiber cloth to gently wipe the glass in circular motions, focusing on areas with visible smudges or buildup. For stubborn stains or residue, dampen a corner of the cloth with diluted rubbing alcohol and carefully target the affected areas. This method helps lift persistent stains without exerting excessive pressure on the glass surface.
Substep 4.4: Drying and Inspecting the Glass
After thoroughly wiping the glass, allow it to air-dry naturally or use a clean, dry microfiber cloth to gently pat the surface dry. Inspect the glass from various angles to ensure that it is free of streaks and blemishes, making any necessary touch-ups with the cleaning solution and cloth. This meticulous approach guarantees a gleaming, streak-free finish, maximizing the glass's light-transmitting properties.
By meticulously following these substeps, you can effectively clean the glass components of your light fixture, rejuvenating their clarity and radiance. With the glass now sparkling and free of blemishes, you are ready to proceed to the subsequent step of cleaning the fixture base, ensuring that every aspect of your light fixture exudes brilliance and allure.
Step 5: Clean the Fixture Base
Cleaning the fixture base is a crucial aspect of maintaining the overall allure and functionality of your light fixture. Over time, the fixture base can accumulate dust, grime, and residue, detracting from its visual appeal and potentially affecting its structural integrity. By following these meticulous cleaning techniques, you can ensure that the fixture base regains its original luster, complementing the pristine glass components and contributing to a captivating lighting ensemble.
Substep 5.1: Dusting and Surface Preparation
Commence the cleaning process by dusting the fixture base using a soft, dry microfiber cloth. Gently wipe the surface to remove loose particles and debris, preparing the base for more thorough cleaning. Pay particular attention to intricate details, crevices, and decorative elements that may harbor hidden dust and grime. By meticulously dusting the fixture base, you create a clean canvas for the subsequent cleaning stages, ensuring that the base is primed for a comprehensive rejuvenation.
Substep 5.2: Applying the Cleaning Solution
Once the fixture base is free of loose debris, it's time to apply the cleaning solution. Depending on the material of the fixture base, select an appropriate cleaning agent that is compatible with its surface. For metal bases, a mild solution of dish soap and water can effectively dissolve accumulated grime. Similarly, for wooden or painted bases, a gentle wood cleaner or diluted white vinegar solution can be applied using a soft cloth. Ensure that the cleaning solution is sparingly applied to prevent oversaturation and potential damage to the base's finish.
Substep 5.3: Gentle Scrubbing and Detailing
Using a soft-bristled brush or a clean, damp cloth, delicately scrub the fixture base to dislodge stubborn grime and residue. Exercise caution to avoid abrasive scrubbing, especially on delicate or intricate designs, to prevent surface damage. Pay attention to ornate details and decorative embellishments, ensuring that every aspect of the base receives meticulous cleaning. For intricate designs or hard-to-reach areas, a cotton swab or soft toothbrush can be employed to achieve precise detailing without compromising the base's integrity.
Read more: How To Clean Glass Pendant Lights
Substep 5.4: Drying and Inspection
After gently scrubbing the fixture base, allow it to air-dry naturally or use a clean, dry cloth to pat the surface dry. Inspect the base from various angles to ensure that it is free of residual grime and streaks, making any necessary touch-ups with the cleaning solution and cloth. This thorough inspection guarantees that the fixture base exudes a renewed radiance, enhancing its visual impact and seamlessly complementing the pristine glass components.
By meticulously following these substeps, you can effectively clean the fixture base, ensuring that it regains its original splendor and contributes to the overall allure of your light fixture. With both the glass components and the fixture base now revitalized, you are poised to reassemble the light fixture, basking in the renewed brilliance and charm it brings to your living space.
Step 6: Reassemble the Light Fixture
With the glass components and fixture base meticulously cleaned and rejuvenated, the final step in the cleaning process involves reassembling the light fixture to restore its functionality and aesthetic allure. This pivotal stage requires attention to detail and precision to ensure that the fixture is securely reinstalled, ready to illuminate your living space with renewed radiance.
Substep 6.1: Wiring Reconnection
Begin by carefully reconnecting the wiring of the light fixture to the house wiring. Refer to any notes or photographs taken during the disassembly process to identify the appropriate wire connections. Securely fasten the wires using wire nuts or connectors, ensuring that each connection is snug and insulated to prevent any potential electrical hazards.
Substep 6.2: Fixture Mounting
Once the wiring is reconnected, proceed to mount the light fixture back onto its designated position. Align the fixture with the mounting bracket or electrical box, ensuring that it is securely positioned before reattaching the fasteners. Employ the appropriate screwdriver or wrench to tighten the fasteners, stabilizing the fixture in place to prevent any wobbling or instability.
Read more: How To Seal Outdoor Light Fixture
Substep 6.3: Final Adjustments
After securing the fixture, conduct a thorough inspection to verify that all components are properly reassembled. Double-check the alignment of the fixture and the stability of the mounting, making any necessary adjustments to ensure a seamless and secure installation. Test the fixture by switching on the power to confirm that it illuminates as expected, indicating successful reassembly.
Substep 6.4: Cleaning Touch-Ups
As a finishing touch, conduct any necessary cleaning touch-ups to ensure that the reassembled fixture exudes a pristine appearance. Use a clean, dry microfiber cloth to gently wipe the exterior of the fixture, removing any residual fingerprints or smudges that may have accumulated during the reassembly process. This meticulous attention to detail guarantees that the fixture not only shines brightly but also boasts a polished exterior.
By diligently following these substeps, you can successfully reassemble the light fixture, culminating in a revitalized and fully functional lighting element. With the fixture securely reinstated and gleaming with renewed brilliance, you can bask in the gratifying outcome of your efforts, knowing that your living space is adorned with a captivating and impeccably maintained lighting feature.
Conclusion
In conclusion, the process of cleaning glass light fixtures is not only a practical maintenance task but also an opportunity to rejuvenate the ambiance and visual allure of your living space. By following the comprehensive steps outlined in this guide, you have embarked on a journey to restore the radiance and functionality of your light fixtures, ensuring that they continue to illuminate your home with brilliance and charm.
Through meticulous dusting, gentle cleaning, and precise reassembly, you have effectively revitalized both the glass components and the fixture base, transforming them from dull and grimy to gleaming and captivating. The attention to detail and the use of appropriate cleaning solutions and tools have resulted in fixtures that not only shine brightly but also exude a renewed sense of elegance and allure.
As you stand back and admire the revitalized light fixtures, you can take pride in the transformative impact of your efforts. The once-diminished luminosity has been replaced by a radiant glow, casting a warm and inviting ambiance throughout your living space. Furthermore, the meticulous cleaning process has not only enhanced the visual appeal of the fixtures but also contributed to their longevity and sustained functionality.
It's important to recognize that the benefits of cleaning your glass light fixtures extend beyond mere aesthetics. By maintaining these fixtures in optimal condition, you are preserving their structural integrity and safeguarding them against premature wear and deterioration. This proactive approach ensures that your lighting elements continue to enrich your home environment for years to come, serving as beacons of beauty and functionality.
In essence, the act of cleaning glass light fixtures transcends a routine chore; it is a transformative endeavor that elevates the overall appeal and ambiance of your living space. As you revel in the revitalized radiance of your fixtures, you can take pride in the knowledge that your home is adorned with meticulously maintained lighting features that exude timeless charm and allure.
So, as you bask in the renewed brilliance of your light fixtures, remember that the effort and attention invested in their cleaning have not only revitalized their appearance but also enriched the very essence of your home, infusing it with a captivating luminosity that reflects your dedication to maintaining a space of enduring beauty and warmth.
Frequently Asked Questions about How To Clean Glass Light Fixtures
Was this page helpful?
At Storables.com, we guarantee accurate and reliable information. Our content, validated by Expert Board Contributors, is crafted following stringent Editorial Policies. We're committed to providing you with well-researched, expert-backed insights for all your informational needs.


0 thoughts on “How To Clean Glass Light Fixtures”