Articles
How To Make A Patchwork Quilt
Modified: February 24, 2024
Learn how to make a patchwork quilt with our informative and step-by-step articles. Discover the joy of creating your very own unique masterpiece.
(Many of the links in this article redirect to a specific reviewed product. Your purchase of these products through affiliate links helps to generate commission for Storables.com, at no extra cost. Learn more)
Introduction
Welcome to the wonderful world of patchwork quilting! Creating a handmade patchwork quilt allows you to express your creativity while also achieving a beautifully crafted and functional piece of art. Whether you’re a beginner or a seasoned quilter, this guide will take you through each step of the process, from choosing fabric to finishing the edges.
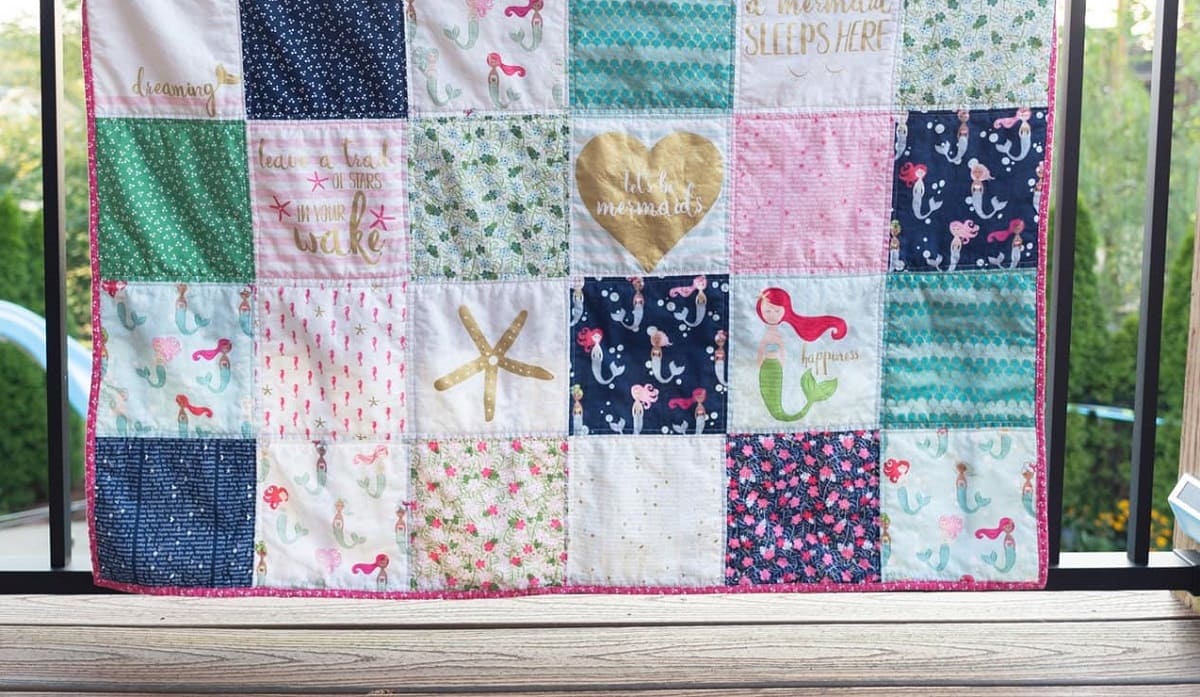
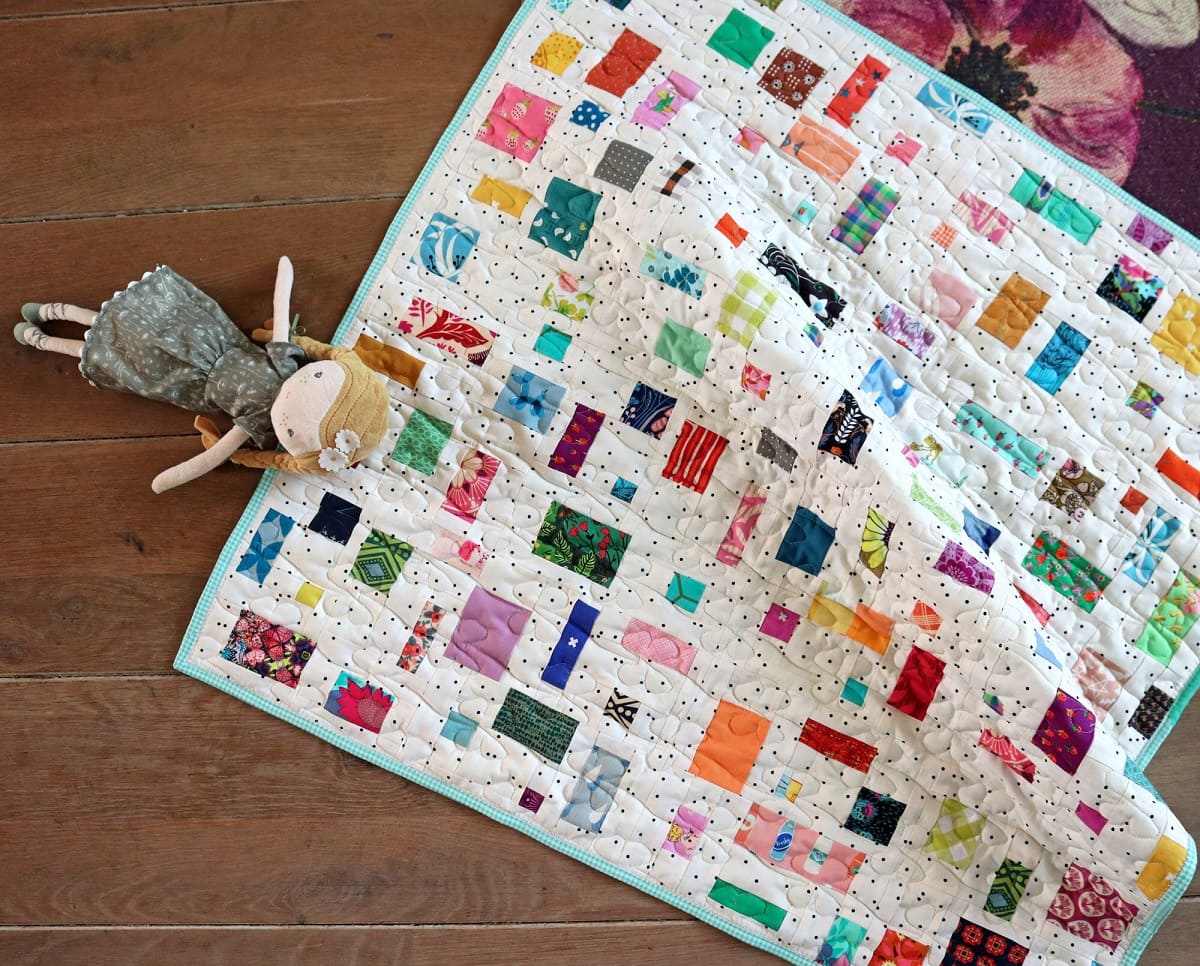
A patchwork quilt is made up of various fabric squares sewn together in a visually pleasing pattern. This technique dates back centuries and has evolved into an art form that is cherished by many. The finished quilt not only provides warmth and comfort but also serves as a testament to the time and effort invested in its creation.
Gathering the necessary materials is the first step in your patchwork quilting journey. You’ll need a sewing machine, fabric scissors, a cutting mat, a rotary cutter, quilting rulers, quilting pins, a quilting needle, and thread. Additionally, you’ll need a selection of fabrics for the quilt top, backing fabric, and batting (the layer of material that goes between the quilt top and backing).
The fabric you choose plays a vital role in the overall design and feel of your patchwork quilt. Quilting cotton is a popular choice as it is versatile, durable, and comes in a wide range of colors and prints. However, don’t limit yourself to just quilting cotton; explore different textures and prints to add depth and interest to your quilt.
Before you start cutting fabric squares, take some time to plan your quilt’s design. Sketch out different patterns and arrangements, considering factors such as color placement and block sizes. This pre-planning stage will help you create a cohesive and visually appealing quilt.
Once you’ve settled on a design, it’s time to start cutting the fabric squares. Use a cutting mat, a rotary cutter, and quilting rulers to ensure accurate and uniform squares. Measure and cut each fabric piece according to your chosen pattern.
With your fabric squares ready, it’s time to start sewing them together. Lay out your squares in the desired pattern, ensuring that they are aligned correctly. Sew them together using a ¼ inch seam allowance, pressing the seams open or to the side as per your preference. Take your time to ensure accurate stitching, as this is the foundation of a well-made patchwork quilt.
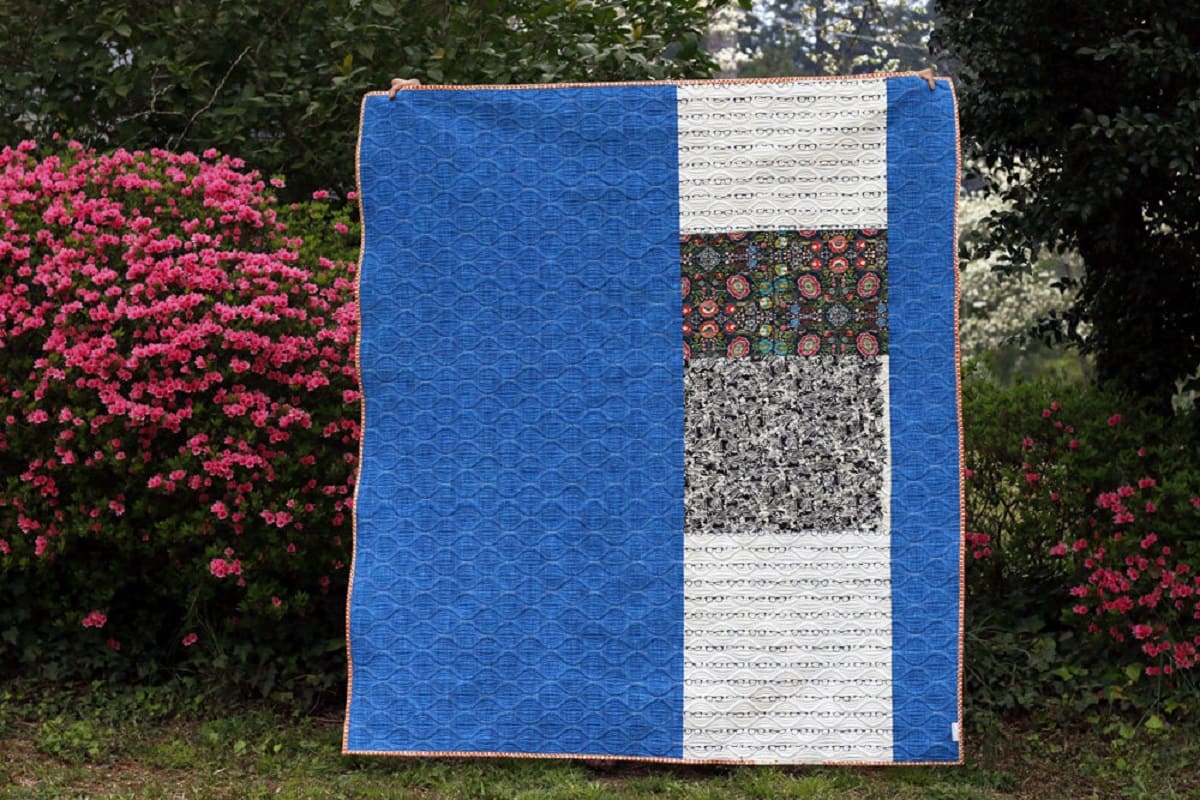
Adding borders to your quilt can enhance its overall design and provide a finished look. Measure and cut fabric strips for the quilt’s borders, ensuring they are the desired width and length. Sew the border strips to the quilt top, mitering the corners for a neat and professional look.
Key Takeaways:
- Creating a patchwork quilt involves gathering materials, choosing fabric, cutting squares, designing patterns, sewing, adding borders, quilting layers, and finishing edges. Each step contributes to a personalized and beautiful masterpiece.
- Quilting is a timeless art form that allows for self-expression and creativity. The process of designing, sewing, and finishing a quilt reflects dedication, craftsmanship, and the joy of creating something truly unique.
Read more: What Is A Patchwork Quilt?
Gathering Materials
Before you embark on your patchwork quilting journey, it’s essential to gather all the necessary materials. Having the right tools and supplies on hand will make the process smoother and more enjoyable.
The following is a list of materials you will need for your patchwork quilt:
- Sewing Machine: A reliable sewing machine is a must-have for patchwork quilting. Look for a machine that has a straight stitch and zigzag stitch capabilities.
- Fabric Scissors: Invest in a good pair of fabric scissors that are sharp and comfortable to use. These will come in handy for cutting fabric squares and trimming threads.
- Cutting Mat: A self-healing cutting mat is essential for accurate fabric cutting. Choose a mat that is large enough to accommodate the size of your fabric pieces.
- Rotary Cutter: A rotary cutter is a convenient tool for cutting fabric squares with precision. Make sure to use a sharp blade and exercise caution when using the cutter.
- Quilting Rulers: Quilting rulers are used to measure and cut fabric squares. Invest in a set of clear acrylic rulers with different sizes for versatility.
- Quilting Pins: Pins are used to hold fabric pieces together while sewing. Look for flat-headed pins that won’t snag the fabric.
- Quilting Needle: A quilting needle has a small eye and sharp point, making it ideal for hand sewing and quilting. Choose a needle size that works well with the thickness of your fabric and thread.
- Thread: Opt for a high-quality cotton thread that is suitable for quilting. The thread color should complement your fabric choices.
- Fabric: Select a variety of fabrics for your patchwork quilt. Quilting cotton is a popular choice for its versatility and wide range of colors and prints. Consider using complementary solids, patterns, and textures to add visual interest to your quilt.
- Backing Fabric: The backing fabric is the fabric that will be on the backside of your quilt. Choose a fabric that complements the quilt top and is wide enough to cover the entire quilt.
- Batting: Batting is the layer of material placed between the quilt top and backing to provide warmth and loft. Look for a batting that suits your desired level of warmth and loftiness.
Once you have gathered all the necessary materials, you’re ready to dive into the exciting world of patchwork quilting. The materials listed above will not only make the process smoother but also ensure that your finished quilt is durable, beautiful, and of high quality. Happy quilting!
Choosing Fabric
One of the most enjoyable aspects of patchwork quilting is choosing the fabric for your project. The fabric you select sets the tone for your quilt and plays a crucial role in its overall design and aesthetic appeal. Here are some tips to help you choose the perfect fabric for your patchwork quilt:
Consider the Purpose: Before diving into fabric selection, consider the purpose of your quilt. Will it be a decorative piece or one that is used daily for warmth? Understanding the purpose will help you choose the appropriate fabric weight and durability.
Explore Fabric Stores: Visit your local fabric stores or explore online options to browse a wide range of fabric choices. Touch and feel the fabrics to assess their texture and quality. Look for fabrics that are soft, tightly woven, and have a smooth finish.
Quilting Cotton: Quilting cotton is a popular choice for patchwork quilts. It is lightweight, easy to work with, and comes in a vast array of colors and prints. Look for high-quality quilters cotton that is 100% cotton for best results.
Consider Texture: Don’t limit yourself to just quilting cotton. Adding fabrics with different textures, such as linen, flannel, or even silk, can add depth and visual interest to your quilt. Mix and match fabrics with different textures to create a unique and eye-catching design.
Color Palette: Determine the color palette you want for your quilt. Consider the overall mood or theme you want to convey. Will it be bright and bold, or soft and soothing? Create a cohesive color scheme by selecting fabrics in complementary or analogous colors. Don’t be afraid to experiment with different color combinations to achieve the desired effect.
Pattern and Print: Selecting fabrics with different patterns and prints is a fun way to add visual interest to your patchwork quilt. You can opt for fabrics with small-scale prints, large-scale prints, or even solids. Mixing prints with varying scales creates a dynamic and visually appealing design.
Fussy Cut: Fussy cutting involves strategically cutting fabric to display a specific design element or motif within the fabric. This technique can add a unique touch to your quilt and highlight certain fabrics or prints.
Think Longevity: When choosing fabric, consider its long-term durability. Select fabrics that will withstand repeated washing and usage. Avoid fabrics that are overly delicate or prone to fraying.
Trust Your Intuition: Finally, trust your instincts and choose fabrics that speak to you. Quilting is a creative and personal endeavor, so select fabrics that resonate with your style and preferences.
Choosing fabric for your patchwork quilt is a delightful process that allows you to express your creativity. Keep these tips in mind and enjoy the process of curating a fabric collection that will make your quilt truly special and unique.
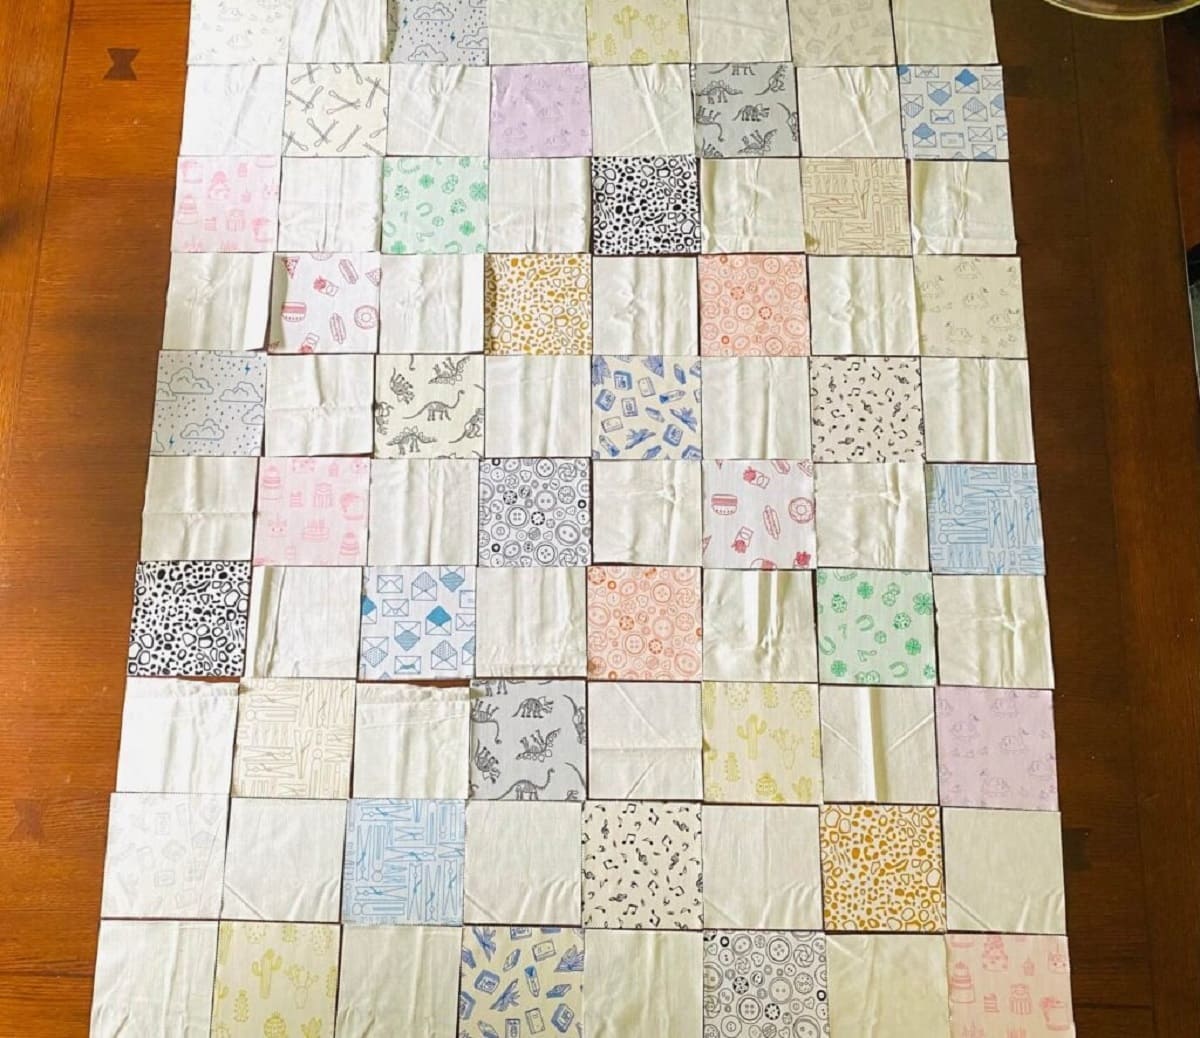
Cutting Fabric Squares
Now that you have chosen your fabrics, it’s time to start cutting the fabric squares for your patchwork quilt. Accurate and uniform cutting is crucial for achieving a well-made quilt. Here’s a step-by-step guide to cutting fabric squares:
Gather Your Supplies: Before you begin, gather all your cutting supplies. You will need a cutting mat, a rotary cutter, and quilting rulers. Make sure your rotary cutter has a sharp blade and that your rulers are clear and easy to read.
Pre-Wash Your Fabric: It’s a good idea to pre-wash your fabric before cutting to remove any sizing or chemicals and to account for any potential shrinkage. Follow the washing instructions for your fabric, and iron it to remove any wrinkles before cutting.
Prepare Your Cutting Area: Find a clean, flat surface to work on, preferably a large table or an ironing board. Lay your cutting mat on the surface, ensuring it is stable and secure. This will provide a smooth and safe cutting surface.
Measure and Align: Begin by measuring and aligning your fabric. If your fabric has a printed pattern, make sure the pattern is straight and aligned before cutting. Depending on your quilt design, determine the size of the fabric squares you need to cut.
Use Quilting Rulers and a Rotary Cutter: Place your fabric on the cutting mat, ensuring it is flat and wrinkle-free. Line up one edge of the fabric with the measurement guidelines on your ruler. Hold the ruler firmly in place and use the rotary cutter to cut along the edge of the ruler, making a clean and straight cut.
Repeat the Process: Continue measuring, aligning, and cutting fabric squares according to your desired size and quantity. Use the ruler and rotary cutter consistently to ensure accuracy and uniformity. Take your time with each cut, and double-check your measurements and alignment before making any cuts.
Trim Excess Fabric: Once you have cut all the required fabric squares, trim any excess fabric and threads to tidy up the edges. This will ensure that your fabric squares are neat and ready to be sewn together in your quilt.
Organize and Label: As you cut the fabric squares, it’s helpful to organize and label them to keep track of your design and layout. You can use small sticky notes or fabric labels to mark each square with its intended placement in the quilt.
Remember, accuracy and precision in cutting fabric squares are key to achieving a well-constructed patchwork quilt. Take your time, work methodically, and enjoy the process of transforming your chosen fabrics into perfectly cut squares ready for assembly.
Designing the Patchwork Pattern
Designing the patchwork pattern for your quilt is an exciting and creative step in the quilting process. This is where you can showcase your personal style and create a unique arrangement of fabric squares that will make your quilt visually appealing. Here are some steps to help you design your patchwork pattern:
Plan and Sketch: Before you start arranging fabric squares, take some time to plan and sketch out your design. Consider factors such as block size, color placement, and overall layout. This will give you a clear vision of how your quilt will come together.
Explore Quilt Pattern Ideas: Look for inspiration in quilt pattern books, magazines, or online resources. There are countless traditional and modern quilt patterns to choose from, such as patchwork squares, star patterns, or even intricate geometric designs. Adapt these patterns or create your own unique combination.
Color Placement: Determine how you want to arrange the colors in your quilt. You can opt for a random arrangement, a gradient effect, or a controlled color scheme with specific color placements. Experiment with different color combinations to see what appeals to you.
Consider Block Variation: You can add visual interest to your quilt by incorporating different block variations within the overall pattern. For example, alternate between solid fabric squares and squares with prints, or use different block sizes to create a dynamic effect.
Balance and Symmetry: Aim for a balanced and symmetrical arrangement of fabric squares, unless intentionally going for an asymmetrical design. This will help create a cohesive and pleasing visual impact. Use a design wall, a large foam board, or even the floor to lay out your fabric squares and play with different arrangements.
Focus on Proportions: Pay attention to the proportions of your quilt design. Make sure the size of your fabric squares and the overall quilt layout are visually harmonious. Consider scaling down or enlarging the pattern to fit your desired measurements.
Get Feedback: Don’t hesitate to seek feedback from fellow quilters, friends, or family. Show them your design sketches or ask for their opinions on how the fabric squares are coming together. Sometimes an outside perspective can offer valuable insights and fresh ideas.
Experiment and Have Fun: Remember that designing the patchwork pattern is an opportunity to unleash your creativity and have fun. Feel free to experiment with different layouts, try new combinations, and let your intuition guide you. This is your chance to create a quilt that reflects your unique style and personality.
By following these steps, you can design a patchwork pattern that is not only visually appealing but also showcases your artistic vision and craftsmanship. Embrace the process of designing your quilt, and enjoy the satisfaction of watching your vision come to life as you sew together the fabric squares.
When making a patchwork quilt, be sure to use a consistent seam allowance to ensure all your pieces fit together properly and your finished quilt lays flat.
Read also: 14 Amazing Patchwork Quilt for 2024
Sewing the Fabric Squares Together
Now that you have designed your patchwork pattern and arranged the fabric squares to your satisfaction, it’s time to sew them together. Proper sewing techniques and attention to detail will ensure that your quilt comes together seamlessly. Here’s a step-by-step guide to sewing the fabric squares together:
Prepare Your Sewing Machine: Thread your sewing machine with a suitable thread and adjust the tension and stitch length according to the fabric you are working with. It’s a good idea to test the settings on a scrap piece of fabric before starting.
Align and Pin: Take your first two fabric squares and align their edges with right sides facing each other. Use quilting pins to secure the edges together, ensuring they are aligned and the corners match.
Start Sewing: Place the fabric squares under the presser foot, making sure to leave a ¼ inch seam allowance. Lower the presser foot and begin sewing along the edge, removing the pins as you go. Backstitch at the beginning and end to secure the seam.
Press the Seam: After sewing each seam, press it open or to one side using an iron. This will help reduce bulk and create a flat surface for the next row of fabric squares. Repeat this process for each seam as you sew the fabric squares together.
Continue Sewing Rows: Once you have sewn together a row of fabric squares, repeat the process to sew additional rows. Align the squares, pin, sew, and press the seams. Take your time to ensure accuracy and consistency throughout the quilt top.
Nesting Seams: To achieve crisp and precise intersections between fabric squares, consider nesting your seams. This involves pressing the seams in opposite directions for adjacent rows, allowing the seams to interlock. Pin the intersections before sewing to keep them aligned while stitching.
Check for Accuracy: As you sew the fabric squares together, periodically check for accuracy by measuring your sewn units against your desired block size. This will help ensure that your quilt top remains consistent in size and shape.
Press the Quilt Top: Once you have sewn all the fabric squares together, press the quilt top, both from the front and the back. This final pressing will help set the seams and create a smooth surface for the next steps of quilting.
Inspect and Make Corrections: Take the time to inspect your sewn fabric squares and make any necessary corrections. Trim any excess threads, check for missed stitches, and adjust any misaligned seams or corners.
By following these steps, you can confidently sew your fabric squares together and create a well-constructed quilt top. Taking care with each seam and ensuring accuracy will result in a beautiful and professionally finished patchwork quilt.
Adding Borders
After sewing together the fabric squares and creating the quilt top, it’s time to enhance the design and give your quilt a finished look by adding borders. Borders not only frame the quilt but also provide an opportunity to introduce complementary colors and patterns. Here is a step-by-step guide to adding borders to your quilt:
Measure and Calculate: Begin by measuring the length and width of your quilt top. This will help you determine the size of the borders you need. Consider how wide you want your borders to be; typically, they can range from 2 to 6 inches or more, depending on your design aesthetic.
Prepare the Border Fabric: Cut fabric strips for the borders that are the appropriate length and width. Depending on the size of your quilt top, you may need to sew multiple strips together to achieve the desired length. Make sure to align the fabric strips and sew them with a ¼ inch seam allowance.
Attach the Borders: Lay your quilt top flat and place the first border strip along one side, aligning the raw edges with the edge of the quilt top. Pin the border strip in place, ensuring it is evenly distributed and not stretched or puckered. Sew the border strip to the quilt top, using a ¼ inch seam allowance. Repeat this process for the remaining sides of the quilt top.
Miter the Corners: To create neat and professional corners, miter them. Sew the border strips to the quilt top, stopping with the needle in the down position when you reach the corner. Lift the presser foot and pivot the fabric to sew along the adjacent side, aligning the raw edges of the border strip with the next side of the quilt top. Repeat this process for each corner.
Press the Borders: After sewing the borders, press them away from the quilt top, either towards the outer border or towards the center of the quilt. Use an iron to flatten the seams and ensure a crisp and clean finish.
Repeat for Additional Borders: If you desire multiple borders, repeat the process for each border, ensuring the measurements and alignment are accurate. Take your time to sew and press each border, maintaining the overall symmetry and balance of the quilt.
Square up the Quilt: Once you have added all the borders, square up the quilt by trimming any excess fabric edges. Use a ruler and rotary cutter to make sure all sides are straight and even.
Press the Quilt Top: Before moving on to the next steps of quilting, give the entire quilt top a final press. Iron gently, being careful not to distort the seams or the integrity of the quilt top design.
By adding borders to your quilt, you bring depth and visual interest to the overall design. Borders can tie the quilt together, highlight certain colors or patterns, and provide a cohesive finish. Take your time, measure accurately, and enjoy the process of enhancing your quilt top with beautifully chosen borders.
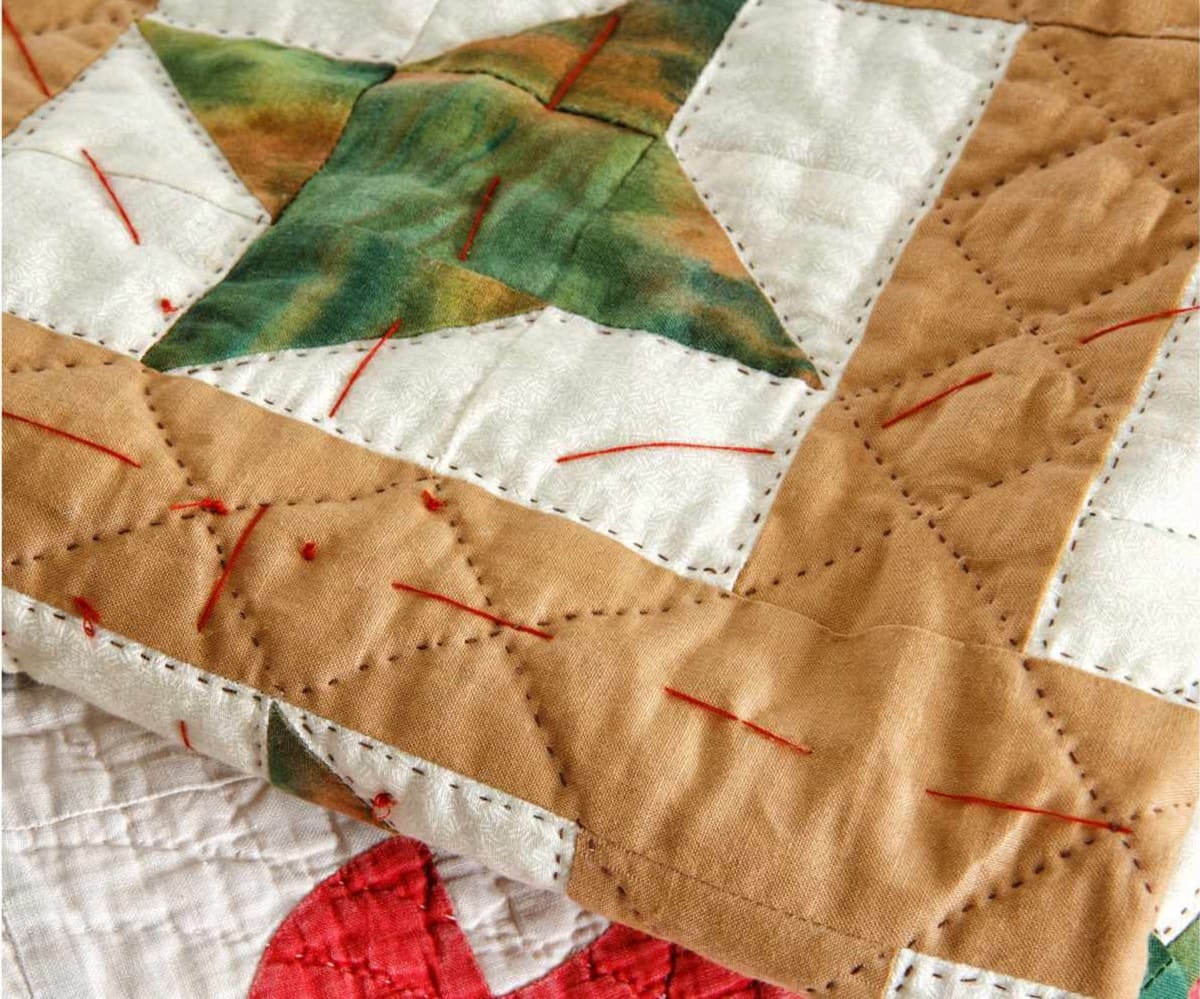
Quilting the Layers Together
Quilting is the process of stitching together the three layers of a quilt: the quilt top, batting (the middle layer), and the backing fabric. This step not only secures the layers together but also adds texture and enhances the overall design of the quilt. Here’s a step-by-step guide to quilting the layers together:
Prepare Your Quilting Workspace: Find a large, flat surface to lay out your quilt layers. Make sure it’s clean and free from any debris that could interfere with your quilting process. A large table, an expanded cutting mat, or even the floor can serve as your workspace.
Lay the Backing Fabric: Begin by laying your backing fabric, right side down, on your quilting workspace. Smooth out any wrinkles or creases and secure the fabric to the surface, ensuring it remains taut throughout the quilting process. Use masking tape, quilt basting spray, or pins to hold it in place.
Add the Batting: Lay the batting on top of the backing fabric, smoothing out any wrinkles or folds. Make sure the batting extends beyond the edges of the quilt top to ensure it will be adequately covered once the layers are quilted together.
Layer the Quilt Top: Place your quilt top on the batting, aligning the edges and ensuring it is centered. Smooth out any wrinkles or creases in the quilt top, taking care not to stretch or distort the layers underneath.
Baste the Layers Together: Basting is the process of temporarily securing the layers together to prevent shifting during quilting. There are several methods you can use, such as hand basting with large stitches, using safety pins, or employing spray basting. Choose the method that works best for you and carefully baste the layers at various points across the quilt.
Choose Your Quilting Design: Select the type of quilting design you want to use. This can be anything from straight lines or grid patterns to more intricate free-motion designs. Consider the overall aesthetic of your quilt and the level of complexity you are comfortable with.
Marking and Planning Your Quilting: If you plan to quilt in a specific pattern, mark the lines or shapes on the quilt top using chalk, washable markers, or a hera marker. These guidelines will help you stay on track as you quilt the layers together.
Quilt the Layers: Begin quilting by starting in the center of the quilt and working your way out. If you’re using a domestic sewing machine, use the walking foot attachment to help feed the layers smoothly. Follow your marked lines or quilt free-motion, taking care to maintain consistent stitch length and tension.
Take Breaks and Rotate the Quilt: Quilting can be a time-consuming process, so remember to take breaks to rest your hands and eyes. Additionally, periodically rotate the quilt to ensure even wear and prevent strain on specific areas.
Secure and Finish: Once you have quilted the layers together, secure the stitching at the beginning and end of each line of quilting. You can use backstitching or knotting techniques to anchor the thread. Trim any loose threads and inspect the quilt for any loose or missed stitching.
By quilting the layers together, you not only create a durable and long-lasting quilt but also add another layer of artistry to your creation. Take your time, enjoy the process, and appreciate the transformation of your quilt top into a beautiful and functional piece of textile art.
Finishing the Edges
Finishing the edges of your quilt is the final step in the quilting process. This step not only provides a polished and professional look but also ensures that the layers of your quilt are securely bound together. Here’s a step-by-step guide to finishing the edges of your quilt:
Trim the Excess: Start by trimming the excess batting and backing fabric so that they are aligned with the edges of the quilt top. Use a ruler and rotary cutter for precision, ensuring straight and even edges.
Square up the Quilt: Check that all four corners of your quilt are at 90-degree angles. Use a ruler or square to trim any uneven edges, ensuring your quilt is square and symmetrical.
Choose a Binding Fabric: Select a fabric for the binding that complements your quilt’s design. Quilting cotton is a popular choice, but you can also consider using a contrasting fabric or creating a scrappy binding using leftover fabric from your quilt top.
Cut Binding Strips: Calculate the number of binding strips you need by measuring the perimeter of your quilt and adding a few extra inches for seam allowances and mitered corners. Cut the binding fabric into strips that are the desired width, typically 2.5 to 3 inches, and long enough to cover the perimeter of your quilt.
Join Binding Strips: If your binding strips are not long enough to cover the entire perimeter, join them together by sewing diagonally across the ends. This will create a continuous strip of binding fabric.
Press the Binding: Fold the binding strip in half lengthwise, wrong sides together, and press it with an iron. This will create a clean and crisp edge for the binding.
Attach the Binding: Starting in the middle of one side of your quilt, align the raw edge of the binding with the raw edge of the quilt. Pin or clip the binding in place, leaving a tail of a few inches. Sew the binding to the quilt using a ¼ inch seam allowance, backstitching at the beginning and end.
Miter the Corners: When you reach a corner, stop sewing ¼ inch away from the edge, and backstitch. Fold the binding strip up, away from the quilt, creating a 45-degree angle. Fold it back down, aligning it with the next side of the quilt. Continue sewing, starting from the folded edge and continuing along the next side. Repeat this process for all four corners.
Finishing the Binding: Sew the binding until you are a few inches away from the starting point. Trim the binding, leaving a tail of a few inches. Overlap the tails and trim them to fit, allowing for a ½ inch overlap. Fold the ends under and sew them together to create a neat and seamless finish.
Secure the Binding: Fold the binding over the raw edge of the quilt to the backside, encasing the raw edges. Pin or clip the binding in place. Hand stitch the binding to the back of the quilt using a blind stitch or a whip stitch, ensuring your stitches are invisible from the front. Remove any pins or clips as you go.
Final Pressing: Give your quilt a final press with an iron, being mindful of the fabric and batting. This will help set the stitches and create a smooth and professional look.
Finishing the edges of your quilt not only provides a clean and polished look but also ensures that the layers are securely bound together. By following these steps, you can achieve a beautifully finished quilt that is ready to be enjoyed for years to come.
Read more: How To Make A Quilt
Conclusion
Congratulations on completing your patchwork quilt! Throughout this journey, you have learned valuable skills and techniques to create a beautiful and personalized masterpiece. From gathering materials and choosing fabric to cutting, designing, sewing, quilting, and finishing, each step has contributed to the creation of a quilt that is a reflection of your creativity and dedication.
Quilting is a timeless art form that not only provides warmth and comfort but also serves as a form of self-expression. As you worked with fabric squares, carefully selecting patterns, colors, and textures, you let your imagination guide you in crafting a quilt that tells your unique story.
The process of designing a patchwork pattern allowed you to explore different arrangements, color placements, and variations, resulting in a visually appealing and well-balanced quilt design. Sewing the fabric squares together with precision and attention to detail ensured that your quilt top is sturdy and well-constructed.
Adding borders provided the finishing touch, framing your quilt and adding an extra element of design. Quilting the layers together not only secured the three layers but also added a beautiful texture and dimension to your quilt.
Finally, finishing the edges with a carefully chosen binding created a professional and polished look, making your quilt ready for use or display. The dedication and craftsmanship you put into every step of the process are evident in the final product – a quilt that will be cherished for years to come.
As you complete this quilt, remember to take a moment to admire your work and celebrate your achievement. The skills and knowledge you have gained can be applied to future quilting projects, allowing you to continue honing your craft and creating more stunning quilts.
Whether this is your first quilt or one of many, the joy and satisfaction of quilting will always be there. Your quilts hold the stories of your creativity, patience, and dedication. Share them with loved ones, use them to adorn your home, or perhaps even gift them to those special to you.
Thank you for embarking on this quilting adventure. May your future quilting projects be filled with joy, inspiration, and endless possibilities. Happy quilting!
Frequently Asked Questions about How To Make A Patchwork Quilt
Was this page helpful?
At Storables.com, we guarantee accurate and reliable information. Our content, validated by Expert Board Contributors, is crafted following stringent Editorial Policies. We're committed to providing you with well-researched, expert-backed insights for all your informational needs.


0 thoughts on “How To Make A Patchwork Quilt”