

Articles
How To Make A Quilt With Photos
Modified: February 24, 2024
Learn how to create a beautiful quilt using your favorite photos with our step-by-step articles. Enhance your quilting skills and preserve cherished memories.
(Many of the links in this article redirect to a specific reviewed product. Your purchase of these products through affiliate links helps to generate commission for Storables.com, at no extra cost. Learn more)
Introduction
Quilts are a beautiful way to preserve memories and create cherished keepsakes. Traditionally, quilts have been made using fabric pieces and patterns. However, with modern technology, it is now possible to create a quilt using photos. This unique approach adds a personal touch and allows you to showcase your favorite memories in a cozy and creative way.
In this article, we will guide you through the process of making a quilt with photos. By following these steps, you will be able to turn your cherished photographs into a stunning quilt that will wow your family and friends. Whether you’re a seasoned quilter or just starting out, this project is a great way to combine your love for quilting and photography.
Before we delve into the steps, let’s take a moment to gather the necessary supplies. Here’s what you’ll need:
- Fabric for the quilt
- Photographs printed on fabric
- Scissors or rotary cutter
- Sewing machine
- Quilt batting
- Backing fabric
- Quilting thread
- Binding fabric
- Iron
- Pins
Once you have gathered these supplies, you’re ready to begin the exciting journey of making your photo quilt. So, let’s dive in and bring your memories to life!
Key Takeaways:
- Transform your cherished memories into a tangible and beautiful keepsake by creating a photo quilt. Each stitch represents a story, connection, and piece of your history, making it a treasured heirloom.
- The process of creating a photo quilt is a journey of joy, creativity, and craftsmanship. It’s not just about the end result, but also about the artistry and love woven into every step.
Read more: How To Make A Memory Quilt Using Photos
Step 1: Gather Supplies
Before you start creating your photo quilt, it’s important to gather all the necessary supplies. This will ensure that you have everything you need to complete the project smoothly. Here’s a detailed list of the supplies you’ll need:
- Fabric for the quilt: Choose a fabric that complements the theme or color scheme of your photos. Opt for high-quality cotton or a fabric blend that is suitable for quilting.
- Photographs printed on fabric: In order to incorporate your photos into the quilt, you’ll need to print them onto fabric. There are various options available, including printable fabric sheets that can be used with an inkjet printer. Make sure to select a printable fabric that is compatible with your printer.
- Scissors or rotary cutter: You’ll need a sharp pair of fabric scissors or a rotary cutter to cut your fabric and trim any excess.
- Sewing machine: A sewing machine will make the quilting process much faster and easier. Ensure that your machine is in good working condition and has a quilting foot or a walking foot attachment.
- Quilt batting: The quilt batting is the middle layer that provides warmth and thickness to the quilt. Choose a batting that suits your preferences in terms of thickness and insulation.
- Backing fabric: The backing fabric is the fabric that will be on the back of the quilt. It should be slightly larger than the quilt top to allow for seam allowances. Choose a fabric that complements the front of the quilt.
- Quilting thread: Select a thread color that matches or complements the colors in your quilt. Opt for a high-quality quilting thread that is strong and durable.
- Binding fabric: The binding fabric is used to finish the edges of the quilt. Choose a fabric that coordinates with the quilt top or allows for a contrasting border.
- Iron: An iron is necessary for pressing your fabric and achieving crisp seams. Make sure you have a functioning iron and a ironing board or pressing surface.
- Pins: Use pins to secure your fabric layers together while quilting. Opt for quilting pins or stainless steel pins that won’t rust.
Now that you have gathered all the necessary supplies, you’re ready to move on to the next step: choosing and editing your photos. So, let’s get started!
Step 2: Choose and Edit Photos
Now that you have gathered all the necessary supplies, it’s time to choose and edit the photos that will be incorporated into your quilt. This step is crucial as it will determine the overall look and feel of your quilt. Here’s how you can select and prepare your photos:
- Select your photos: First, go through your collection of photographs and choose the ones that hold special meaning or evoke strong emotions. Consider the theme or story you want your quilt to tell and select photos that align with that vision.
- Edit your photos: Once you have chosen your photos, it’s time to edit them if needed. You can use photo editing software or apps to enhance the colors, crop the images, or apply filters. However, keep in mind that the size and resolution of the photos will impact the final quality of the quilt, so avoid extreme editing that may reduce clarity.
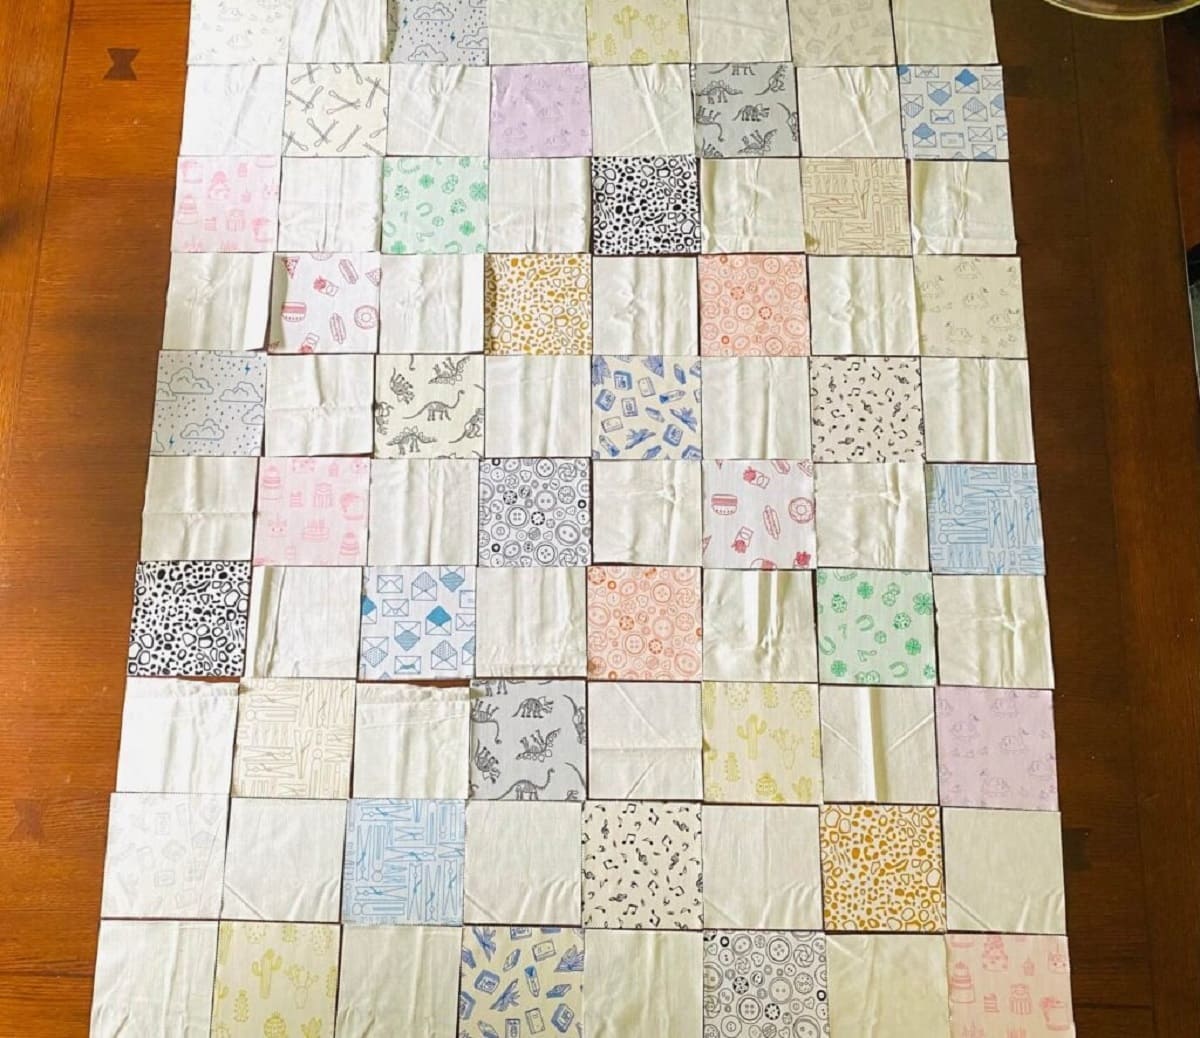
- Arrange the photos: Lay out your printed photos on a flat surface and experiment with different arrangements. Consider the size, orientation, and colors of each photo to create a visually appealing composition. You can also play with the placement of photos to create a balanced and cohesive design.
- Consider additional elements: Depending on your creative vision, you can add extra elements to your quilt. This could include borders, frames, or text labels. Just make sure that these elements enhance the photos without overpowering them.
- Plan the quilt layout: Once you are satisfied with your photo arrangement, take a photo or make a sketch of the layout. This will serve as a reference when sewing the panels together.
Remember, the photos you choose for your quilt should evoke happy memories and reflect your personal style. Take your time in this step to ensure that you create a quilt that truly speaks to you and your loved ones.
Now that you have selected and edited your photos, it’s time to move on to the next step: selecting the fabric and design for your quilt. Stay tuned!
Step 3: Select Fabric and Design
With your photos chosen and edited, it’s time to move on to selecting the fabric and design for your photo quilt. This step will determine the backdrop and overall aesthetic of your quilt. Here’s what you need to consider:
- Choose coordinating fabrics: Select fabrics that complement the colors, themes, and tones of your photos. Consider the mood or story you want your quilt to convey and choose fabrics that enhance that vision. You can opt for solid colors, prints, or a combination of both.
- Consider the scale and pattern: Pay attention to the scale of the prints on your chosen fabrics. If your photos have intricate details, you may want to select fabrics with smaller prints or solids to avoid overwhelming the design. In contrast, if your photos have simple compositions, you can choose fabrics with larger prints or more complex patterns to add visual interest.
- Experiment with layout: Lay out your chosen fabrics next to your photos and see how they interact with each other. Arrange them in different combinations to find a layout that enhances your photos and creates a cohesive look. Don’t be afraid to mix prints and colors for added visual appeal.
- Consider the quilt design: Think about the overall design of your quilt. Will you opt for a traditional quilt pattern, such as a simple square or a more intricate design? Or will you create a more modern or abstract design that complements your photos? Take some time to explore various quilt block patterns or consult quilting books and websites for inspiration.
- Sketch the quilt design: Once you have decided on the fabric and design, make a rough sketch of your quilt. This will help you visualize how the fabrics and photos will come together in the final quilt. It will also serve as a guide when cutting and arranging the fabric panels.
Remember, the fabric and design you choose should enhance and showcase your photos, creating a harmonious visual composition. Take your time in this step to ensure that your photo quilt reflects your personal style and captures the essence of your memories.
Now that you have selected the fabric and design for your quilt, it’s time to move on to the next step: printing your photos onto fabric. Stay tuned!
Step 4: Print Photos onto Fabric
Now that you have selected the fabric and design for your photo quilt, it’s time to transfer your edited photos onto fabric. Printing your photos onto fabric will give them a more permanent and professional look. Follow these steps to ensure successful printing:
- Choose the right type of fabric: Look for specifically designed fabric sheets that are printable. There are various options available, such as cotton or linen fabric sheets. Make sure to select a fabric that is compatible with your printer type (inkjet or laser).
- Prepare your printer: Before printing, read the instructions of your fabric sheets and ensure that your printer is set up correctly. Adjust the printer settings to ensure the best print quality and follow any specific instructions provided by the manufacturer.
- Prepare your photos for printing: If your photo editing software allows, resize your photos to the desired dimensions for your quilt. This will help ensure that they fit well onto the fabric sheets. Save your edited photos in a high-resolution format for better clarity.
- Test print on regular paper: Before printing on the fabric sheets, do a test print on regular paper. This will help you verify the layout, colors, and size of your photos before using the fabric sheets. Make any necessary adjustments to your photos or printer settings as needed.
- Print your photos: Once you are satisfied with the test print, load the fabric sheets into your printer according to the manufacturer’s instructions. Print one photo at a time to ensure accuracy. Allow the ink to dry completely before handling to avoid any smudging or smearing.
- Trim the printed fabric: After printing, carefully trim around each photo, leaving a small border or a clean edge. Use sharp fabric scissors or a rotary cutter for clean, precise cuts. Take your time and be cautious to avoid any accidental damage to the printed photos.
By printing your photos onto fabric, you are transforming them into tangible memories that will be an integral part of your quilt. This step adds a personal touch to your project and brings your photos to life in a unique and artistic way.
Now that your photos are printed and trimmed, it’s time to move on to the next step: cutting the fabric panels for your quilt. Stay tuned!
Read more: How To Make A Quilt
Step 5: Cut Fabric Panels
With your photos printed and ready, it’s time to cut the fabric panels for your photo quilt. By cutting the fabric panels, you’ll be preparing the foundation for assembling your quilt. Follow these steps for precise and accurate cutting:
- Measure your photos: Measure the dimensions of your printed photos. Take note of the height and width of each photo. These measurements will be used to determine the size of the fabric panels.
- Add seam allowances: To ensure that your photos are centered within the fabric panels, add a seam allowance around each photo. Typically, a ¼-inch to ½-inch seam allowance is sufficient. This extra fabric will be used for sewing the panels together.
- Cut fabric panels: Using your measurements, mark the dimensions of each fabric panel on your chosen fabrics. Use a fabric marker or pins to ensure accuracy. Carefully cut along the marks, using fabric scissors or a rotary cutter. Take your time and make clean, straight cuts.
- Label your fabric panels: As you cut each fabric panel, it’s helpful to label them to keep track of the photo placement. You can use a fabric marker or attach small labels to the panels. Labeling will make it easier to arrange and sew the panels later in the process.
- Organize the fabric panels: Once you have cut all the fabric panels, organize them according to your quilt layout. Use your sketch from earlier as a guide, ensuring that the photos are positioned correctly within each panel. This step will help you visualize how the quilt will come together.
Cutting the fabric panels is a crucial step in ensuring that your quilt design is accurate and well-structured. Taking the time to measure, add seam allowances, and cut with precision will result in a quilt that showcases your photos beautifully.
Now that your fabric panels are cut and organized, it’s time to move on to the next step: arranging and sewing the panels together. Stay tuned!
When making a quilt with photos, be sure to use high-quality, colorfast fabric and ink for printing the photos. This will ensure that the images remain vibrant and intact over time.
Step 6: Arrange and Sew Panels
Now that you have your fabric panels cut and organized, it’s time to arrange them and sew them together to bring your photo quilt to life. This step requires careful planning and precision to ensure that your quilt design is cohesive and visually appealing. Follow these steps to arrange and sew the panels:
- Refer to your quilt layout: Use your sketch or reference photo of the quilt layout to guide you in arranging the fabric panels. Place the panels in the desired order, making sure the photos align properly and the overall design flows seamlessly.
- Consider seam allowances: Keep in mind the seam allowances you added when cutting the fabric panels. Ensure that the panels are positioned with the seam allowances facing the correct direction to allow for easy sewing and accurate alignment.
- Pin the panels together: Once you have arranged the panels, use pins to secure them together. Insert the pins along the edges, making sure to align the edges and corners. This will hold the panels in place while you sew them together.
- Sew the panels: Set up your sewing machine with a matching thread color and a quilting foot or a walking foot attachment. Starting at one end, sew along the pinned edges of the panels using a ¼-inch seam allowance. Backstitch at the beginning and end of each seam for added durability.
- Press the seams: After sewing each seam, press the fabric panels open with an iron to create crisp seams. Pressing ensures that the quilt top lays flat and the seams are neat. Take care not to stretch or distort the fabric while pressing.
- Continue sewing the remaining panels: Repeat the process of pinning, sewing, and pressing for the remaining fabric panels, until all the panels are sewn together to create the quilt top.
Arranging and sewing the fabric panels requires patience and attention to detail to ensure a visually pleasing and well-constructed quilt top. Take your time in this step to ensure that the panels are aligned and sewn accurately.
Now that your fabric panels are arranged and sewn together, it’s time to move on to the next step: adding batting and backing to your quilt. Stay tuned!
Step 7: Add Batting and Backing
With the fabric panels sewn together to create your quilt top, it’s time to add batting and backing to complete the layering of your photo quilt. The batting provides warmth and loft, while the backing adds stability and a finished look. Follow these steps to add batting and backing to your quilt:
- Prepare the batting: Select a quilt batting that suits your desired thickness and warmth level. Ensure that the batting is slightly larger than your quilt top to allow for trimming and folding. Lay the batting on a flat surface, smoothing out any wrinkles or creases.
- Place the quilt top on the batting: Carefully place your quilt top on top of the batting, ensuring that it is centered and aligned properly. Smooth out any wrinkles or bubbles in the fabric, working from the center outward.
- Secure the layers: To temporarily secure the layers together, use safety pins or quilting pins to make small stitches at regular intervals. Start from the center and work your way to the edges, spacing the stitches a few inches apart. This will prevent the layers from shifting during the quilting process.
- Prepare the backing fabric: Select a fabric for the backing that coordinates with your quilt top. Ensure that the backing fabric is larger than your quilt top, allowing for seam allowances and trimming. Lay the backing fabric right side down on a clean, flat surface.
- Place the quilt sandwich: Lay the quilt sandwich (quilt top, batting, and pinning) on top of the backing fabric, aligning the edges. Smooth out any wrinkles or bubbles, ensuring that all layers are flat and even.
- Secure the layers together: Starting from the center and working outward, use pins to secure all layers together. Place the pins a few inches apart, ensuring that they penetrate all three layers of the quilt sandwich.
Adding batting and backing is an important step to give your quilt structure and durability. The batting provides insulation and loft, while the backing fabric adds a clean and finished look to the quilt.
Now that your quilt sandwich is ready, it’s time to move on to the next step: quilting the layers together. Stay tuned!
Step 8: Quilt the Layers
With the layers of your photo quilt securely held together, it’s time to move on to the step of quilting. Quilting is the process of stitching through all the layers to create decorative patterns, secure the layers, and add texture to your quilt. Follow these steps to quilt your photo quilt:
- Select a quilting design: Decide on the quilting design you want to incorporate into your quilt. This could be simple straight lines, free-motion quilting, or a more intricate design. Consider the design elements of your quilt top and choose a quilting pattern that complements them.
- Set up your sewing machine: Ensure that you have the appropriate quilting foot or walking foot installed on your sewing machine. Choose a thread color that matches or complements your quilt top or opt for a contrasting color for a bold look.
- Start quilting: Begin quilting from the center of your quilt top, working your way towards the edges. You can either follow the lines of your quilt top’s design or create your own quilting pattern. Take your time and keep your stitches consistent.
- Secure loose threads: After completing each quilting line or design, secure the loose threads by backstitching or tying them off. Trim any excess thread for a neater appearance.
- Continue quilting the entire quilt: Work your way across the quilt, quilting in sections until the entire quilt is quilted. Take breaks as needed to prevent fatigue and maintain accuracy in your quilting.
- Consider additional quilting: If desired, you can add additional quilting elements such as echo quilting, stippling, or appliqué to enhance the overall design of your photo quilt.
Quilting adds depth and character to your photo quilt, transforming it from a sandwich of fabric layers into a beautiful and functional work of art. Take your time and enjoy the process as you quilt your layers.
Now that your quilt is quilted, it’s time to move on to the next step: binding the edges. Stay tuned!
Read more: How To Make Placemats From Photos
Step 9: Bind the Edges
After quilting your photo quilt, the next step is to bind the edges. Binding not only gives your quilt a clean and polished look, but it also provides a finished edge that helps to secure the layers together. Follow these steps to bind the edges of your photo quilt:
- Prepare the binding fabric: Choose a fabric for the binding that complements your quilt. Cut strips of binding fabric that are 2.5 to 3 inches wide, ensuring that the length is enough to cover all four sides of your quilt.
- Join the binding strips: Join the binding strips together to create one continuous strip by sewing the ends at a 45-degree angle. Press the seams open for a smooth finish.
- Attach the binding to the quilt: Starting from one end of a side, align the raw edge of the binding strip with the raw edge of the quilt top. Leave a few inches of binding unstitched at the beginning. Sew through all layers using a ¼-inch seam allowance, attaching the binding to the quilt.
- Miter the corners: When you reach a corner, stop sewing about ¼-inch away from the edge. Fold the binding strip up, away from the quilt top, creating a 45-degree fold. Then, fold the binding strip back down, aligning it with the next side of the quilt. Continue sewing along the next side, repeating the process for each corner.
- Finish attaching the binding: Sew along all four sides of the quilt, mitring the corners as you go. Stop sewing a few inches away from where you started, leaving a gap.
- Join the binding ends: Trim the excess binding, leaving a ¼-inch overlap. Fold the ends of the binding strip to create a clean finish and join them together. Sew the ends of the binding together using a straight stitch, matching the fold lines and creating an invisible join.
- Complete the binding: Finish sewing the binding to the quilt, closing the gap. Press the binding away from the quilt top, ensuring that it covers the raw edge. Then, fold the binding over the raw edge of the quilt, folding it to the back, and hand stitch it in place using a blind stitch or ladder stitch.
Binding is the final step in completing your photo quilt, giving it a professional and finished appearance. Ensure that your binding is secure and that the corners are neatly mitred for a polished look.
Congratulations! You are almost done with your photo quilt. The final step is to add some finishing touches. Stay tuned!
Step 10: Finishing Touches
You’ve reached the final step of creating your photo quilt – the finishing touches. This step allows you to add those extra details that will make your quilt truly unique and special. Here are some ideas for adding the final touches to your photo quilt:
- Embellishments: Consider adding embellishments to enhance the visual appeal of your quilt. This could include buttons, ribbons, lace, or embroidery. Choose elements that complement the theme of your quilt and securely attach them to the quilt top or the binding.
- Label your quilt: Preserve the story behind your photo quilt by creating a fabric label. Include your name, the date, and any other relevant details such as the occasion or the people featured in the photos. Attach the label securely to the back of the quilt.
- Quilt label design: Get creative with designing your quilt label. You can print the information on fabric and sew it onto the quilt or utilize fabric markers or embroidery to write the details onto a fabric label. Choose a design that matches the overall style of your quilt.
- Add a sleeve for hanging: If you plan to hang your photo quilt, consider adding a fabric sleeve to the back. This will allow you to insert a rod or dowel for easy hanging. Ensure that the sleeve is securely stitched to prevent it from tearing under the weight of the quilt.
- Document your process: Take photos or keep a journal throughout the process of creating your photo quilt. This will serve as a cherished memento and a record of your creative journey. Capture the memories associated with making the quilt and include them along with the finished quilt for an added sentimental touch.
- Display and enjoy: Once the finishing touches are complete, find the perfect spot to display your photo quilt. Whether it’s draped over a couch, hung on the wall, or given as a thoughtful gift, remember to enjoy the beauty and memories captured within your creation.
Adding these final touches will make your photo quilt even more personal and meaningful. It’s your opportunity to infuse your own creativity and personal touch into the quilt, making it a true work of art.
Congratulations on completing your photo quilt! Your hard work, creativity, and attention to detail have resulted in a unique and cherished masterpiece that will be treasured for years to come. Well done!
If you’re interested in more quilting projects or want to explore other creative endeavors, feel free to check out our other articles and resources. Happy quilting!
Conclusion
Congratulations on completing your journey of creating a photo quilt! Through careful selection, editing, and printing of your photos, along with the meticulous process of choosing fabric, cutting panels, and quilting the layers together, you have transformed your precious memories into a tangible and beautiful keepsake.
A photo quilt is not only a work of art but also a testament to the love and dedication you’ve put into preserving your cherished moments. Each stitch represents a story, a connection, and a piece of your history. Whether you made the quilt for yourself, a loved one, or as a gift, it holds deep sentimental value and will bring warmth and comfort for years to come.
As you embarked on this creative journey, you learned about the importance of gathering the right supplies, selecting and editing your photos with care, choosing coordinating fabric and design, printing the photos onto fabric, cutting and arranging fabric panels, and quilting the layers together. You meticulously added binding and final touches, making your photo quilt a unique and personalized masterpiece.
Remember, the process of creating a photo quilt is not just about the end result but also about the joy and creativity that comes with each step. The memories and stories woven into your quilt make it more than just a decorative item—it’s a treasured heirloom that captures the essence of the moments you hold dear.
Now that you’ve completed this project, take a moment to reflect on your journey and appreciate the artistry and craftsmanship you’ve achieved. Your photo quilt stands as a testament to your creativity, patience, and love for those you hold dear.
Whether you continue to explore the world of quilting or venture into other creative endeavors, remember the joy that comes from bringing ideas to life. Every project is a chance to express yourself, create something meaningful, and leave a lasting legacy for future generations to enjoy.
Thank you for joining us on this adventure of creating a photo quilt. We hope you enjoyed the process and that your quilt brings you countless moments of comfort, joy, and nostalgia. Happy quilting!
Frequently Asked Questions about How To Make A Quilt With Photos
Was this page helpful?
At Storables.com, we guarantee accurate and reliable information. Our content, validated by Expert Board Contributors, is crafted following stringent Editorial Policies. We're committed to providing you with well-researched, expert-backed insights for all your informational needs.





0 thoughts on “How To Make A Quilt With Photos”