Articles
How To Make A Quilt For A Baby
Modified: October 20, 2024
Learn how to make a quilt for a baby with our informative articles. Discover step-by-step instructions, helpful tips, and creative ideas for your next quilting project.
(Many of the links in this article redirect to a specific reviewed product. Your purchase of these products through affiliate links helps to generate commission for Storables.com, at no extra cost. Learn more)
Introduction
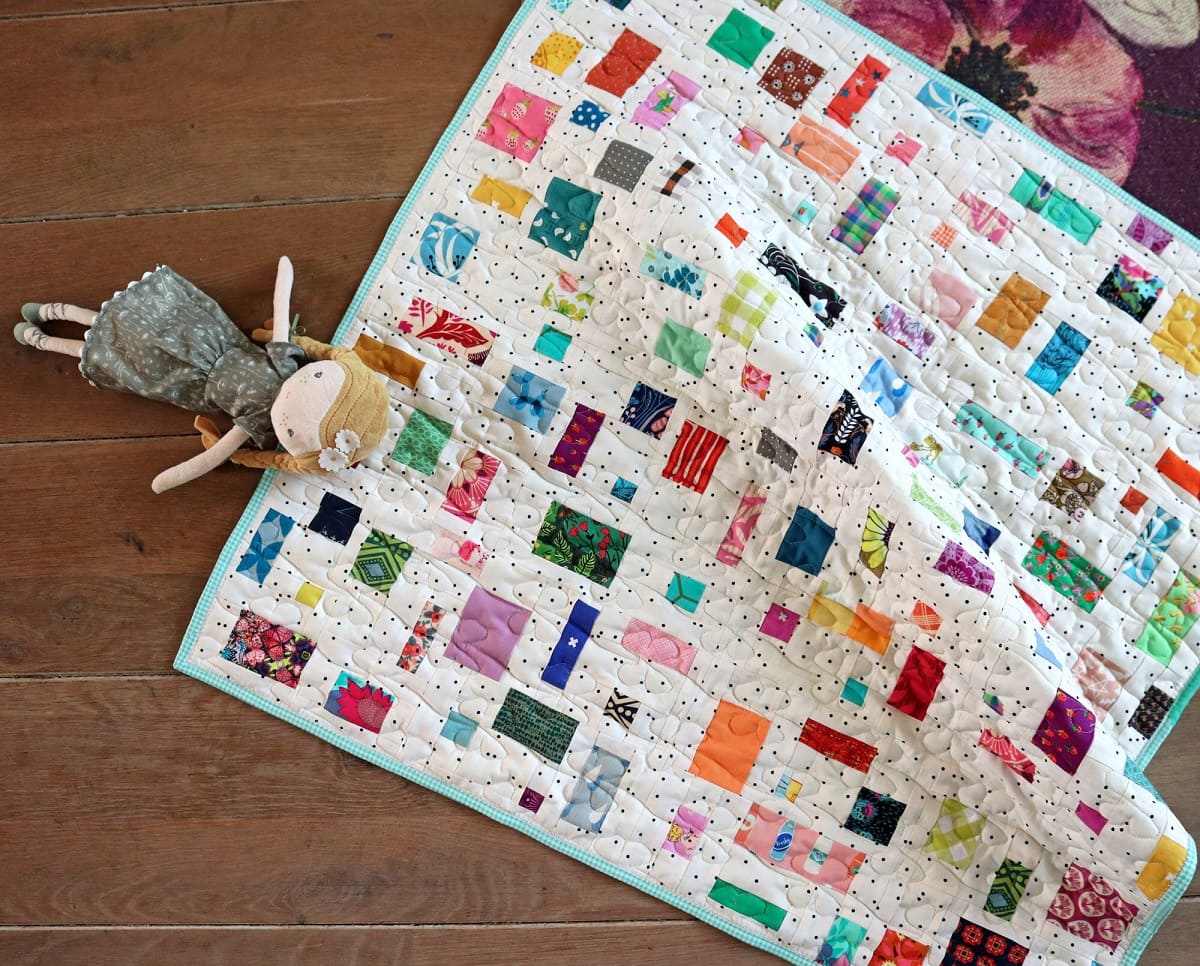
Creating a quilt for a baby is not only a heartwarming project but also a keepsake that can be treasured for years to come. A handcrafted baby quilt is a thoughtful gift that carries love, care, and personal touch. Whether you are a seasoned quilter or a beginner, this guide will walk you through the step-by-step process of making a beautiful quilt for a baby.
Quilting has a rich history dating back centuries, where fabrics were stitched together to provide warmth and comfort. Today, quilting has evolved into an art form, allowing creators to express their creativity through design, color, and pattern. Making a quilt for a baby adds an extra layer of joy, as it becomes a cherished symbol of love and protection.
In this article, you will learn how to choose the right fabrics, gather the necessary materials, prepare the fabric, cut the fabric pieces, arrange the quilt blocks, sew the quilt top, add the quilt batting, layer the quilt, quilt the layers together, add the binding, and complete the final touches to finish the quilt.
Whether you have a specific theme in mind or want to create a quilt that reflects the baby’s personality or nursery decor, rest assured that this guide will provide you with the essential steps to bring your quilt to life. Let’s dive in and embark on this beautiful journey of making a quilt for a baby.
Key Takeaways:
- Creating a baby quilt is a heartwarming journey that combines love, creativity, and craftsmanship. From choosing fabrics to adding the final touches, each step adds a personal touch to a cherished keepsake.
- Quilting for a baby involves attention to detail, patience, and the joy of creating something unique. The process not only results in a functional item but also symbolizes love and care.
Read more: How Many Fat Quarters To Make A Baby Quilt
Choosing the Right Fabrics
When it comes to making a baby quilt, selecting the right fabrics is essential. You want to choose fabrics that are not only soft and gentle against the baby’s skin but also durable enough to withstand regular use and washing. Here are some factors to consider when choosing fabrics for your baby quilt:
- Quality: Opt for high-quality fabrics that are made from natural fibers such as cotton or flannel. These fabrics are breathable, hypoallergenic, and gentle on the baby’s delicate skin.
- Texture: Look for fabrics with a soft and smooth texture. Avoid fabrics with rough textures or embellishments that could potentially irritate the baby’s skin.
- Prints and Patterns: Consider the baby’s nursery decor or a theme you want to incorporate into the quilt. Choose prints and patterns that are visually appealing, such as cute animals, playful geometric shapes, or whimsical objects.
- Color Palette: Opt for a color palette that is soothing and calming. Soft pastel shades or gender-neutral tones like mint green, light gray, or pale yellow are popular choices for baby quilts.
- Coordinating Fabrics: Select a variety of coordinating fabrics to create visual interest and depth in your quilt. Mix and match different patterns, colors, and scales to achieve a cohesive yet playful look.
- Washability: Babies are prone to spills and messes, so it’s important to choose fabrics that are easy to clean. Ensure that the fabrics are machine-washable and can withstand regular laundering without losing color or shape.
It’s important to consider the safety aspects of the fabrics as well. Avoid using fabrics that contain harmful chemicals or dyes that could potentially be harmful to the baby. Look for fabrics that are labeled as child-safe or meet safety standards.
Once you have chosen your fabrics, it’s a good idea to prewash them before cutting and sewing. Prewashing helps remove any chemicals, shrinkage, or excess dye from the fabric, ensuring that your quilt remains beautiful and soft even after multiple washes.
Now that you have an understanding of how to choose the right fabrics for your baby quilt, let’s move on to gathering the necessary materials.
Gathering the Necessary Materials
Before you begin making a baby quilt, it’s important to gather all the necessary materials and tools. Having everything on hand will ensure a smooth and efficient quilting process. Here are the essential materials you will need:
- Fabric: Select the fabrics you have chosen for the quilt top, backing, and binding. Remember to choose high-quality, soft fabrics that are appropriate for babies.
- Quilt Batting: Quilt batting is the layer that provides warmth and thickness to the quilt. Choose a batting that is specifically designed for baby quilts, such as cotton or bamboo batting.
- Thread: Opt for a good quality thread that matches or complements the color of your fabrics. It’s important to choose a thread that is strong and durable.
- Ruler and Cutting Tools: You will need a rotary cutter, a cutting mat, and a ruler for accurate and precise fabric cutting.
- Pins or Clips: Use pins or clips to hold the fabric pieces together while sewing, ensuring they stay in place.
- Quilting Needle: Choose a quilting needle that is suitable for the thickness of your fabrics and batting.
- Sewing Machine: A sewing machine makes the quilting process faster and more efficient. Ensure that your machine is in good working condition and that you have the necessary accessories, such as a quilting foot or walking foot.
- Iron and Ironing Board: An iron and ironing board are essential for pressing and setting the fabric seams as you sew.
- Quilting Templates or Stencils: If you want to add unique quilting designs to your quilt, consider using quilting templates or stencils to guide your stitching.
- Scissors and Thread Snips: Have a good pair of scissors for cutting fabric and thread snips for trimming excess threads.
- Quilting Marking Tools: Depending on your quilting designs and preferences, you might need marking tools such as washable fabric pens or chalk for marking your quilt top.
- Optional Embellishments: If desired, you can include embellishments such as ribbons, lace, or appliques to add a personalized touch to your baby quilt.
Make sure you have all the necessary materials before you start working on your baby quilt. It’s also a good idea to have a clean and dedicated workspace where you can lay out your fabrics, cut, sew, and press without any distractions.
Now that you have gathered all the essential materials, let’s move on to preparing the fabric for your baby quilt.
Preparing the Fabric
Before you start cutting and sewing the fabric for your baby quilt, it’s important to prepare the fabric to ensure a smooth and successful quilting process. Here are the steps to follow when preparing the fabric:
- Prewashing: Begin by prewashing your fabric to remove any chemicals, excess dye, or shrinkage. Follow the manufacturer’s instructions for washing and drying the fabric. Once dried, iron the fabric to remove any wrinkles or creases.
- Squaring the Fabric: Lay your fabric flat on the cutting mat, aligning the selvage edges. Using a ruler, trim off the edges to ensure that the fabric is square and straight. This step is crucial for accurate fabric cutting.
- Pressing: Use an iron set to the appropriate temperature for your fabric type to press and smooth out any creases or wrinkles. Pressing the fabric will make it easier to work with and ensure accurate cutting and sewing.
- Backing Fabric: If you are using a separate fabric for the backing of your quilt, determine the desired size and cut the fabric accordingly. You may need to sew multiple pieces together to achieve the desired size.
- Basting the Backing Fabric: Lay the backing fabric on a clean, flat surface with the wrong side facing up. Smooth it out to remove any wrinkles or folds. Use masking tape or quilt basting spray to secure the backing fabric to the surface, ensuring it remains taut and flat.
- Preparing the Quilt Top: If you have a specific design or pattern in mind for your quilt top, lay out the fabric pieces according to your design. Make sure they are clean, pressed, and aligned accurately. This will help speed up the sewing process and ensure a visually pleasing final result.
By properly preparing the fabric, you are setting the foundation for a successful quilting project. Taking the time to prewash, square, press, and baste the fabric will result in a professionally finished baby quilt.
Now that your fabric is prepared, it’s time to move on to cutting the fabric pieces for your baby quilt. Stay tuned for the next section!
Cutting the Fabric Pieces
Now that your fabric is prepared and ready to go, it’s time to start cutting the fabric pieces for your baby quilt. Precise cutting is crucial for ensuring accurate piecing and achieving a visually pleasing quilt design. Here’s how to cut the fabric pieces:
- Referencing the Quilt Design: If you have a quilt design or pattern in mind, refer to it as a guide for cutting the fabric pieces. Note the dimensions and shapes of the required fabric pieces.
- Using a Rotary Cutter: Use a sharp rotary cutter along with a cutting mat to achieve precise cuts. Place the fabric on the cutting mat, ensuring it is smooth and wrinkle-free. Align the ruler with the cutting marks on your quilt pattern, and carefully cut the fabric with the rotary cutter.
- Labeling the Fabric Pieces: As you cut each fabric piece, it’s helpful to label them with a fabric marker or attach sticky notes to keep track of the pieces. This will prevent any confusion or mix-ups during the piecing process.
- Cutting Borders and Binding: If your baby quilt design includes borders or binding, measure and cut the fabric pieces for those as well. Borders add a finished look to the quilt, while binding helps to enclose the raw edges of the quilt.
- Trimming Excess Fabric: After cutting the fabric pieces for your quilt, carefully trim any excess fabric around the edges to ensure clean and straight lines.
When cutting the fabric pieces, make sure to double-check your measurements and use a ruler or straightedge to ensure accuracy. Take your time and focus on cutting each piece with precision.
Once all the fabric pieces are cut, arrange them according to your quilt design or layout. This will give you a visual representation of how the quilt will come together and allow you to make any necessary adjustments before sewing.
Now that your fabric pieces are ready, it’s time to move on to arranging the quilt blocks. Stay tuned for the next section!
Read more: What Batting To Use For A Baby Quilt
Arranging the Quilt Blocks
Arranging the quilt blocks is an exciting process where you get to see your baby quilt design come to life. This step allows you to experiment with different layouts and create a visually appealing pattern. Here’s how to arrange the quilt blocks:
- Lay Out the Blocks: Spread out your quilt blocks on a clean, flat surface, such as a design wall or floor. Take a step back and assess the overall look of the blocks. This will help you visualize how the quilt will appear once it’s sewn together.
- Experiment with Layouts: Play around with different arrangements to find the one that you like best. You can try a traditional block arrangement, such as a grid or a diagonal pattern, or get creative with asymmetrical or scattered layouts. Take photos or sketches of the different arrangements to compare and determine which one you prefer.
- Consider Color and Contrast: Pay attention to the colors and patterns of your quilt blocks. Ensure that they are distributed evenly and create a pleasing visual balance. The placement of blocks with contrasting colors or patterns can add interest and depth to your quilt design.
- Take Note of Block Orientation: Pay attention to the orientation of the blocks as you arrange them. This is especially important if your blocks have a directional pattern or a specific design that needs to be aligned in a particular way.
- Get Feedback: If you’re unsure about your arrangement, seek a second opinion from a fellow quilter or a friend with an eye for design. They might offer new perspectives or suggest adjustments that hadn’t crossed your mind.
- Take Your Time: Don’t rush the arranging process. It’s important to take your time and experiment until you are completely satisfied with the layout. Remember, this is your chance to express your creativity and create a unique design.
Once you’ve settled on a final arrangement, carefully stack or gather the blocks while maintaining their orientation. Take a photo or make a sketch of the layout for reference as you move on to the next steps.
With the quilt blocks arranged, it’s time to sew them together to create the quilt top. Stay tuned for the next section!
Sewing the Quilt Top
Now that you have arranged the quilt blocks to your liking, it’s time to sew them together to create the quilt top. Sewing the quilt top is an important step where you will bring your design to life and create a cohesive and beautiful piece. Here’s how to sew the quilt top:
- Prepare the Sewing Machine: Ensure that your sewing machine is in good working condition and threaded with a suitable thread color. Attach a quarter-inch quilting foot or a walking foot for accurate seam allowances.
- Organize the Blocks: Keep the blocks in the desired arrangement nearby to ensure accuracy while sewing. You can refer to your photo or sketch for guidance.
- Sewing the Blocks: Take the first two blocks in the row and place them right sides together, aligning the raw edges. Sew them together using a quarter-inch seam allowance, backstitching at the beginning and end to secure the seam. Repeat this step for each row until all the blocks are sewn together.
- Press the Seams: After sewing each row, press the seam allowances using an iron. Press the seams open or to one side according to your preference. Pressing the seams ensures a flat and professional-looking quilt top.
- Joining the Rows: Once all the rows are sewn together, place them right sides together, aligning the seams. Pin or clip the rows together to keep them in place. Sew the rows together using the same quarter-inch seam allowance, backstitching at the beginning and end to secure the seams.
- Pressing the Quilt Top: After joining the rows, press the seam allowances using an iron. Press the seams open or to one side, alternating the direction with each row. This will help the seams nestle together and create a flatter and more even quilt top.
Take your time while sewing the quilt top and ensure that each seam is sewn accurately. Check for any inconsistencies or alignment issues and make any necessary adjustments before proceeding. Precision in this step will result in a neat and visually appealing quilt top.
With the quilt top sewn together, you’re ready to move on to the next step: adding the quilt batting. Stay tuned for the following section!
When making a quilt for a baby, be sure to use soft, baby-friendly fabrics and consider using a simple design to avoid any potential choking hazards.
Adding the Quilt Batting
Adding the quilt batting is an important step in the quilt-making process as it provides warmth, loft, and the softness characteristic of quilts. The choice of quilt batting will depend on personal preference and the desired effect for your baby quilt. Here’s how to add the quilt batting:
- Choose the Right Batting: Select a batting that is suitable for a baby quilt, such as cotton or bamboo batting, which are lightweight, breathable, and soft. Consider the warmth and loft you want to achieve.
- Measure and Cut the Batting: Lay out your quilt backing fabric on a clean, flat surface with the right side facing down. Place the quilt batting on top of the backing fabric, ensuring it is centered and aligned with the edges. Use scissors or a rotary cutter to trim the batting to the size of the quilt top.
- Layer the Quilt: Lay the quilt top over the quilt batting, right side facing up. Smooth out any wrinkles or folds and ensure that all layers are properly aligned and centered.
- Pin or Baste the Layers: To secure the layers together during the quilting process, you have a few options. You can use safety pins to pin the layers at regular intervals, or you can opt to baste the layers using long hand stitches or a basting spray. Ensure that the layers are taut and smooth.
- Check for Smoothness: Once the layers are pinned or basted, take a moment to check for any wrinkles or puckering. Smooth out any irregularities and ensure that the layers lay flat and even.
Adding the quilt batting is a crucial step in creating a comfortable, cozy, and functional baby quilt. Take your time to ensure that the layers are aligned and smooth before moving on to the next step: layering the quilt. Stay tuned!
Layering the Quilt
Layering the quilt is an essential part of the quilting process that involves assembling the quilt top, batting, and backing fabric into a sandwich-like structure. This step prepares the quilt for the quilting stitches that will hold the layers together. Here’s how to layer the quilt:
- Prepare the Work Area: Clear and clean a large, flat surface such as a table or floor where you can lay out the quilt layers. Make sure the area is free from dust and debris.
- Place the Backing Fabric: Start by laying out the quilt backing fabric with the wrong side facing up. Smooth it out, ensuring there are no wrinkles or folds. Use masking tape or quilt basting spray to secure the backing fabric to the work surface, ensuring it remains taut.
- Position the Batting: Place the quilt batting over the backing fabric, ensuring it is centered and aligned with the edges. Smooth out any wrinkles or uneven areas. The batting should be slightly larger than the quilt top to ensure full coverage.
- Layer the Quilt Top: Carefully position the quilt top over the batting, ensuring it is centered and aligned with the edges. Smooth out any wrinkles or folds. Take a moment to double-check the orientation of any directional patterns or designs on the quilt top.
- Pin or Baste the Layers: To secure the layers together during the quilting process, you can use safety pins or baste the layers with long hand stitches or a basting spray. Start in the center and work your way outward, ensuring that the layers remain smooth and flat.
Layering the quilt properly is crucial to ensure that the layers stay in place during the quilting process. Take your time to ensure that the layers are properly aligned and smooth before moving on to the next step: quilting the layers together.
By following these steps, you are one step closer to completing your beautiful baby quilt. Next, let’s explore how to quilt the layers together for a stunning finished product.
Read more: How To Make A Quilt
Quilting the Layers Together
Quilting the layers together is the process of stitching through the quilt top, batting, and backing fabric to create both decorative and functional elements. This step not only secures the layers but also adds texture and design to your baby quilt. Here’s how to quilt the layers together:
- Choose Your Quilting Method: Decide on the quilting technique you want to use for your baby quilt. You can opt for hand quilting, machine quilting, or a combination of both. Consider your comfort level and the desired outcome for your quilt.
- Mark Your Quilting Design: If you have a specific quilting design or pattern in mind, use washable fabric pens or quilting stencils to mark the design onto the quilt top. Take your time and ensure accuracy in your markings.
- Select Your Quilting Thread: Choose a thread color that complements your quilt top and enhances the overall design. Consider using a quilting-specific thread that is strong and durable to withstand the wear and tear of the quilt.
- Begin Quilting: If you are hand quilting, thread a quilting needle and make small running stitches through all layers, following your marked design or creating freeform stitches. Take care to evenly space your stitches for a consistent and balanced look. If you are machine quilting, attach a walking foot or quilting foot and lower the feed dogs for smoother movement. Stitch along your marked design or create meandering stitches as desired.
- Continue Quilting: Work your way across the quilt, quilting one section at a time. Take breaks as needed and pay attention to your stitching tension, ensuring it is consistent throughout the quilt. As you go, remove any pins or tacking stitches that may be in your way.
- Backstitch or Knot: When you reach the end of a quilting section, backstitch or create a secure knot to anchor your stitching before moving on to the next section.
- Finishing the Quilting: Once you have finished quilting all the sections, trim any excess thread tails and inspect your quilting stitches. Make any necessary touch-ups or repairs to ensure a polished and evenly quilted look.
Quilting the layers together is a labor of love that adds personality, depth, and durability to your baby quilt. Take your time and enjoy the process, as each stitch brings you closer to completing your masterpiece.
Next, we’ll move on to the final steps of adding the binding and putting the finishing touches on your baby quilt. Stay tuned!
Adding the Binding
Adding the binding is the final step in completing your baby quilt. The binding not only provides a finished look to the edges of the quilt but also serves to protect and reinforce the quilt. Here’s how to add the binding:
- Select Your Binding Fabric: Choose a fabric that complements your quilt design and matches the overall aesthetic. You can opt for a contrasting or coordinating fabric to create a visually appealing border.
- Calculate the Binding Length: Measure the perimeter of your quilt to determine the amount of binding needed. Add extra length to account for corners and overlap. A typical binding width is 2.5 inches, but you can adjust the width according to your preference.
- Cut the Binding Strips: Using a rotary cutter and ruler, cut the binding fabric into strips according to the calculated length and desired width. Remove any selvage edges and join the strips together using diagonal seams to create one long continuous strip.
- Press and Fold the Binding: Fold the binding strip in half lengthwise, wrong sides together, and press it with an iron. This creates a clean and even folded edge.
- Attach the Binding: Starting in the middle of one side of the quilt, align the raw edges of the binding strip with the raw edges of the quilt, right sides together. Leave a few inches of binding unstitched as a starting point.
- Sew the Binding: Using a quarter-inch seam allowance, sew along the edge of the quilt, securing the binding to all layers. Take care when sewing around corners, folding the binding to create mitered corners to ensure a neat finish.
- Join the Ends of the Binding: When you approach the starting point, leave a few inches of the binding unstitched. Trim the excess binding fabric, leaving a bit of overlap. Open the binding and join the ends with a diagonal seam. Trim the excess fabric and press the seam open or to one side.
- Finish the Binding: Fold the binding over the raw edge of the quilt, encasing all layers. Pin or clip the binding in place. Using a needle and thread or a sewing machine, stitch in the ditch or sew close to the folded edge of the binding, ensuring that all layers are secured.
- Final Touches: Give the entire quilt a final press to ensure it looks polished and tidy. Trim any loose threads and inspect the quilt for any necessary repairs or adjustments.
Adding the binding not only completes the look of your baby quilt but also adds durability and reinforces the edges. Take your time and pay attention to detail to achieve a professional and well-finished result.
Congratulations! You’ve reached the final steps of creating your baby quilt. In the next section, we’ll cover the finishing touches and celebrate the completion of your handmade masterpiece.
Final Touches and Finishing the Quilt
After all your hard work and creativity, it’s time to put the final touches on your baby quilt and prepare it for use or gifting. This includes giving it a final inspection, cleaning, and adding any additional embellishments. Here’s how to complete the final touches and finish your quilt:
- Inspect the Quilt: Take a close look at the entire quilt, checking for any loose threads, missed stitches, or imperfections. Make any necessary repairs or adjustments so that the quilt looks clean and well-crafted.
- Clean the Quilt: If you haven’t done so already, give your baby quilt a gentle wash to remove any markings, dirt, or dust. Follow the fabric manufacturer’s care instructions to protect the quilt’s integrity and colors. Once washed, allow the quilt to air dry or tumble dry on a low setting.
- Add Embellishments (optional): If desired, you can add extra embellishments to personalize your baby quilt. Consider adding decorative embroidery, appliques, or even a personalized label. Be sure to securely stitch any embellishments to ensure they stay in place during use and washing.
- Give it a Final Press: Once the quilt is clean and dry, give it a final press with an iron set to the appropriate temperature for the fabrics used. Pressing will help to smoothen out any wrinkles and give your quilt a polished finish.
- Enjoy or Gift: Your baby quilt is now ready to be enjoyed or gifted with pride. Whether you’re keeping it for your little one or presenting it to someone special, the love and effort put into creating the quilt will surely be appreciated.
Congratulations on completing your beautiful baby quilt! This handmade piece is not only a functional and cozy item but also a symbol of love and care. It’s a heirloom that can be cherished for years to come.
Remember, quilting is a skill that can always be improved with practice, so don’t be hesitant to experiment with new techniques, designs, and patterns. The more you quilt, the more you will develop your own unique style and expertise.
Now, it’s time to celebrate your accomplishment and enjoy the warmth and beauty of your handmade baby quilt. Well done!
Conclusion
Congratulations on completing your journey of making a beautiful quilt for a baby! This comprehensive guide has provided you with the knowledge and step-by-step instructions to create a unique and heartfelt quilt that is sure to be cherished for years to come.
From choosing the right fabrics and gathering the necessary materials to preparing the fabric, cutting the pieces, arranging the quilt blocks, sewing the quilt top, adding the quilt batting, layering the quilt, quilting the layers together, adding the binding, and finally, giving the quilt its finishing touches, you have learned the essential elements of quilt-making.
Throughout the process, your personal touch and creativity have undoubtedly shone through, making each stitch a manifestation of love and care. Your choice of fabrics, color combinations, and design layouts have resulted in a unique and personalized baby quilt that will be treasured by its recipient.
Remember, the art of quilting is an ongoing journey of learning and experimentation. As you gain more experience, you may explore new quilting techniques, experiment with different designs, and develop your own signature style. The possibilities are endless, and each quilt you create will be a reflection of your creativity and growth as a quilter.
Whether you have made this quilt for your own child, a family member, or a friend, your handmade creation will undoubtedly bring warmth, comfort, and joy. It is a testament to the love and care you put into every stitch. The gift of a handmade quilt is a symbol of thoughtfulness and a lasting reminder of the special bond between you and the recipient.
Now, it’s time to sit back, admire your work, and revel in the satisfaction of completing a beautiful baby quilt. Take a moment to appreciate the craftsmanship and the love that went into creating this precious heirloom. Your quilt is ready to be treasured, snuggled under, and passed down through generations.
Embrace the joy that comes with the art of quilting and continue to explore new projects, techniques, and designs. Each quilt you create is a testament to your creativity and brings comfort to those who receive them.
Congratulations once again on your remarkable achievement, and may your passion for quilting continue to flourish. Happy quilting!
Frequently Asked Questions about How To Make A Quilt For A Baby
Was this page helpful?
At Storables.com, we guarantee accurate and reliable information. Our content, validated by Expert Board Contributors, is crafted following stringent Editorial Policies. We're committed to providing you with well-researched, expert-backed insights for all your informational needs.


0 thoughts on “How To Make A Quilt For A Baby”