
Articles
How To Make A Fidget Quilt
Modified: August 22, 2024
Looking for articles on how to make a fidget quilt? Discover step-by-step instructions, tips, and ideas to create your own sensory-friendly quilt.
(Many of the links in this article redirect to a specific reviewed product. Your purchase of these products through affiliate links helps to generate commission for Storables.com, at no extra cost. Learn more)
Introduction
Are you looking for a fun and engaging activity that can provide sensory stimulation and relaxation? Look no further than a fidget quilt! Fidget quilts, also known as sensory or busy quilts, are a creative and therapeutic way to satisfy the tactile and visual needs of individuals of all ages, including those with autism, dementia, or simply anyone who enjoys fidgeting.
In this article, we will guide you through the process of creating your very own fidget quilt. From gathering materials to designing and assembling the quilt, we will provide step-by-step instructions to ensure a successful and rewarding project.
A fidget quilt typically consists of a variety of textures, such as fabric, ribbons, zippers, and buttons, sewn onto a base fabric with pockets and flaps for additional sensory experiences. The quilt can be customized to suit individual preferences and needs, making it a truly personal and meaningful creation.
So, let’s dive in and discover how to make a fidget quilt that is not only visually appealing but also provides hours of tactile exploration and relaxation for yourself or your loved ones.
Key Takeaways:
- Creating a fidget quilt is a rewarding and therapeutic experience that combines creativity, compassion, and sensory stimulation. It offers a range of benefits for individuals of all ages, making it a meaningful and impactful project.
- By embracing the process of making a fidget quilt, you can bring joy and comfort to others while exploring the power of tactile stimulation and relaxation. Let your creativity shine and make a real difference in someone’s life.
Read more: How To Make A Quilt
Step 1: Gather Materials
Before embarking on your fidget quilt journey, it’s essential to gather all the necessary materials. Here’s a list of items you’ll need:
- Fabric: Choose a variety of fabrics in different colors and patterns. Opt for fabrics with various textures, such as fleece, flannel, or corduroy, as they provide a sensory experience.
- Batting: This is the layer of padding that gives the quilt its thickness and softness. You can use polyester batting or even repurpose an old blanket or quilt.
- Assorted textures: Look for materials with interesting textures, such as faux fur, felt, lace, or even bubble wrap. These textures will engage the senses and make the quilt more enticing.
- Ribbons: Choose ribbons of various widths, colors, and patterns. They can be sewn onto the quilt as loops or tags for additional tactile exploration.
- Buttons: Collect a range of buttons in different sizes, shapes, and colors. Buttons can be sewn onto the quilt or used as fasteners for pockets or flaps.
- Zippers: Zippers provide a delightful tactile experience. Choose zippers of different lengths and colors to add a touch of visual interest to your quilt.
- Velcro: Velcro strips or dots can be used as closures for pockets, allowing items to be securely tucked away and easily accessed.
- Sewing machine: While it is possible to hand sew a fidget quilt, a sewing machine will make the process faster and more efficient. If you don’t have one, consider borrowing or renting one for this project.
Having these materials ready will ensure a smooth and enjoyable quilting experience. Remember, you can always modify the materials based on your preferences and creativity, so don’t be afraid to experiment and add your personal touch to the fidget quilt.
Step 2: Design the Quilt
Now that you have gathered your materials, it’s time to design your fidget quilt. Here are the key steps to follow:
- Choosing a size: Decide on the dimensions of your quilt. It can be a lap quilt, a small mat, or any size that suits your needs. Consider the intended recipient and their preferences when determining the size.
- Sketching the design: Take a sheet of paper and sketch out the layout of your quilt. You can divide it into sections or pockets and decide on the placement of various elements like zippers, buttons, and ribbons. This sketch will serve as a blueprint for creating the quilt.
- Selecting fabrics and textures: Refer to your sketch and choose fabrics and textures that fit each section of the quilt. Consider the sensory experience you want to provide and match the fabrics accordingly. For example, use soft fleece for a cozy feel, or incorporate bumpy textures for tactile stimulation.
As you design your quilt, remember that the goal is to create a visually appealing and engaging sensory experience. Think about the color schemes, patterns, and textures that will capture attention and inspire exploration. Don’t hesitate to mix and match fabrics to create contrast and variety.
If you feel overwhelmed or unsure about your design choices, browse online for inspiration or look at pre-made fidget quilts. These can provide ideas and help you visualize how different elements can be combined to create a stunning and functional quilt.
Once you have settled on a design and selected your fabrics and textures, you are ready to move on to the next step: cutting and preparing the pieces.
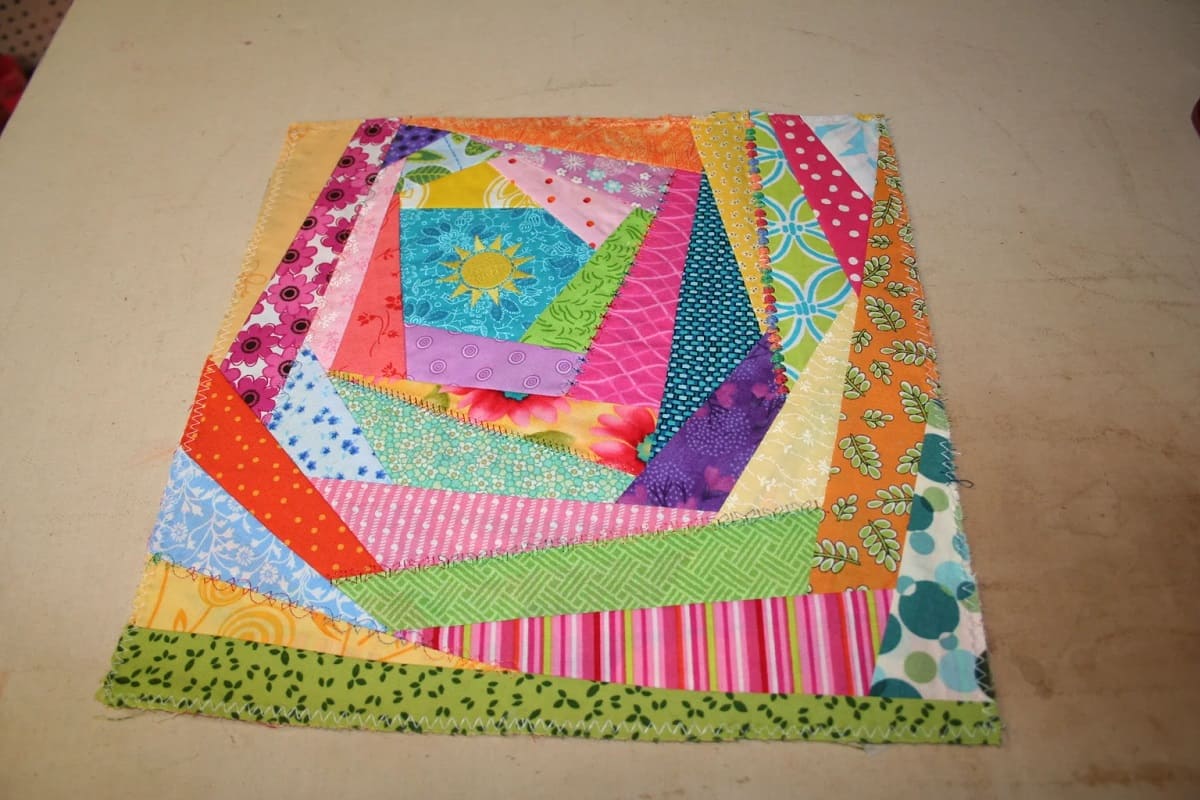
Step 3: Cutting and Preparing the Pieces
With your design finalized, it’s time to turn your attention to cutting and preparing the various pieces of your fidget quilt. Follow these steps to ensure precise and organized preparation:
- Measuring and cutting the fabric: Using the measurements from your design sketch, measure and cut the base fabric for your quilt. This will be the foundation on which you will attach all the textures and embellishments. Ensure that you have enough fabric to accommodate your design, leaving room for seams.
- Preparing the textures and embellishments: Take the assorted textures and embellishments you gathered earlier and cut them into suitable shapes and sizes. For example, cut pieces of fleece, felt, or faux fur into squares, circles, or other shapes. Trim ribbons to desired lengths.
- Creating pockets and flaps: If your design includes pockets or flaps, cut additional pieces of fabric to create these features. Measure and cut the fabric to the desired size and shape, ensuring that it fits well within the quilt’s overall layout. You can also attach zippers or Velcro to these pieces to enhance their functionality.
As you cut and prepare the pieces, it’s helpful to label and organize them according to your design sketch. This will make it easier to assemble the quilt later on. Consider using small sticky notes or fabric markers to indicate the placement of each texture or embellishment.
During the preparation process, you may also want to experiment with different arrangements of the pieces on the base fabric. Play around with the placement to create a visually appealing and balanced design. Remember, the goal is to engage the senses, so consider how different textures and colors complement each other.
Once you have prepared all the necessary pieces, you are ready for the next step: assembling the quilt.
When making a fidget quilt, be sure to include a variety of textures and activities to engage the senses, such as zippers, buttons, and ribbons. This will provide tactile stimulation for the user.
Step 4: Assembling the Quilt
With your pieces cut and prepared, it’s time to bring them together and assemble your fidget quilt. Follow these steps to ensure a successful assembly:
- Layering the fabrics and batting: Begin by laying your base fabric flat on a clean, spacious surface. Next, place the batting on top, ensuring it covers the entire quilt. Finally, arrange your cut textures, embellishments, and prepared pockets and flaps on top of the batting, following your design sketch.
- Sewing the pieces together: Use a sewing machine to secure the layers together. Start by sewing around the edges of each texture and embellishment, attaching them securely to the base fabric and batting. You can use a straight stitch or even experiment with decorative stitches for added visual interest.
- Attaching zippers, buttons, and ribbons: After securing the textures and embellishments, it’s time to attach zippers, buttons, and ribbons. Sew the zippers onto the fabric, following the instructions provided with the zipper. Attach the buttons by sewing them directly onto the fabric or create buttonholes for functional closures. Finally, sew the ribbons in place, ensuring they are securely attached.
Throughout the assembly process, refer to your design sketch to ensure you are placing each element in its intended location. Take your time and sew carefully to create a durable and visually appealing quilt.
Feel free to get creative during this step. You can add additional elements like crinkly fabrics, small bells, or even small mirrors for visual stimulation. Remember to consider the size and safety of the elements you choose to incorporate into the quilt.
Once you have completed the assembly process, you are ready for the final step: adding the finishing touches.
Read more: How To Make A Quilt Larger
Step 5: Finishing Touches
Congratulations! You’re in the final step of creating your fidget quilt. Pay attention to these finishing touches to add those special details:
- Trimming excess fabric: Use fabric scissors to carefully trim any excess fabric or batting that extends beyond the borders of your quilt. This step helps give your quilt a neat and polished appearance.
- Sewing on Velcro closures: If you have created pockets or flaps, you can add Velcro closures to secure them. Sew one side of the Velcro to the fabric and the matching side to the pocket or flap, ensuring they align properly when closed.
- Adding decorative stitching: To enhance the visual appeal of your quilt, consider adding decorative stitching. Use a sewing machine with decorative stitch options or hand-stitch using embroidery thread. You can create patterns, lines, or any design of your choice to make the quilt more visually interesting.
When adding decorative stitching, consider using contrasting thread to make the stitching stand out. You can also experiment with different stitch patterns and techniques to add texture and complexity to the quilt’s appearance.
As you complete these finishing touches, take a step back and admire your creation. Your fidget quilt is now ready to be enjoyed and provide hours of sensory exploration and relaxation.
Remember, fidget quilts make thoughtful and meaningful gifts for friends, family members, or individuals in the community who could benefit from sensory stimulation. Consider donating your fidget quilts to local hospitals, nursing homes, or schools to bring joy to others.
So go ahead and revel in the satisfaction of completing your very own fidget quilt. Enjoy the process, experiment with different textures, and let your creativity shine. Happy quilting!
Conclusion
Congratulations on completing your fidget quilt! By following the steps outlined in this article, you have not only created a visually appealing and engaging quilt but also provided a therapeutic and sensory experience for yourself or someone in need of tactile stimulation.
A fidget quilt is not just a simple sewing project; it’s a labor of love that combines creativity, craftsmanship, and compassion. The textures, fabrics, and embellishments you have carefully selected will offer a range of sensory experiences, from soft and comforting textures to zippers and buttons that promote fine motor skills and dexterity.
As you use your fidget quilt or share it with others, remember the impact it can have. Fidget quilts can help calm anxiety, reduce stress, improve focus, and provide a sense of comfort and security. They can be used by individuals of all ages, from children to seniors, and can be particularly beneficial for individuals with sensory processing disorders, autism, dementia, or any condition that benefits from tactile stimulation.
Consider making more fidget quilts and gifting them to those in need. Donate them to local hospitals, nursing homes, therapy centers, or schools to bring joy and comfort to others. Your efforts and creativity can make a real difference in someone’s life.
So, whether you find enjoyment in creating fidget quilts as a hobby or you are using them for therapeutic purposes, embrace the process and let your creativity flow. Experiment with different textures, embellishments, and designs to make each fidget quilt unique and tailored to the individual preferences and needs of the recipient.
Thank you for joining us on this journey to learn how to make a fidget quilt. Embrace the power of sensory exploration, relaxation, and creativity, and enjoy the wonderful benefits that a fidget quilt provides. Happy quilting!
Frequently Asked Questions about How To Make A Fidget Quilt
Was this page helpful?
At Storables.com, we guarantee accurate and reliable information. Our content, validated by Expert Board Contributors, is crafted following stringent Editorial Policies. We're committed to providing you with well-researched, expert-backed insights for all your informational needs.


0 thoughts on “How To Make A Fidget Quilt”