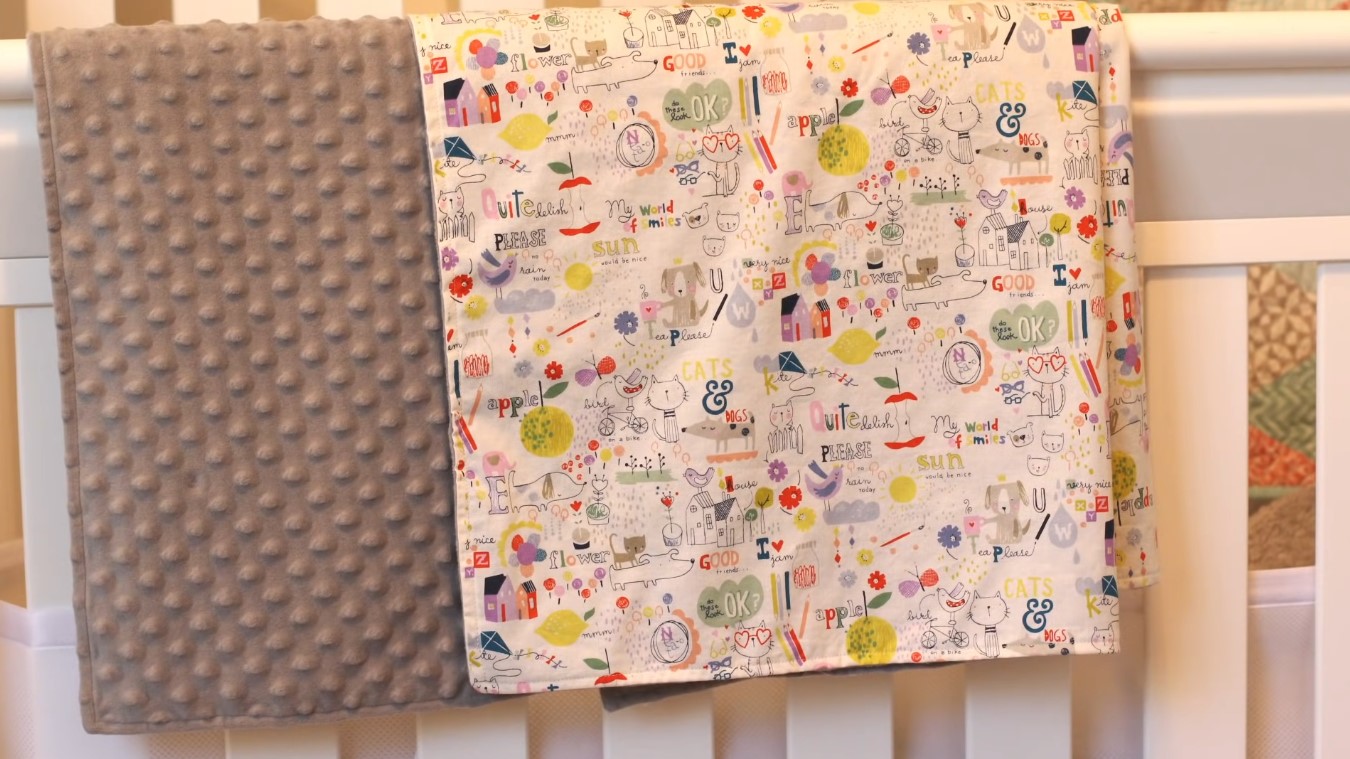

Articles
How To Make A Quilted Baby Blanket
Modified: February 24, 2024
Discover helpful articles on how to make a beautiful quilted baby blanket. Step-by-step guides, tips, and techniques for beginners to create a cozy masterpiece.
(Many of the links in this article redirect to a specific reviewed product. Your purchase of these products through affiliate links helps to generate commission for Storables.com, at no extra cost. Learn more)
Introduction
Welcome to the world of quilting! Making a quilted baby blanket is not only a fulfilling project but also a perfect way to showcase your creativity. Whether you’re a seasoned quilter or a beginner, this article will guide you through the process of making a beautiful and cozy quilted baby blanket.
A quilted baby blanket is a special gift that can be cherished for years to come. It provides warmth, comfort, and brings a personal touch to the nursery. The best part is that you can customize the blanket to match any nursery theme or personal style.
In this article, we will explore the essential materials you’ll need, how to choose the perfect fabric, and the step-by-step process of creating your own quilted baby blanket. So, grab your sewing machine, gather your fabrics, and let’s get started!
Key Takeaways:
- Creating a quilted baby blanket is a rewarding and creative process that involves choosing the perfect fabric, designing a unique pattern, and adding personalized touches. The end result is a cherished and cozy handmade treasure.
- From selecting high-quality materials to adding final embellishments, the journey of making a quilted baby blanket is a labor of love. Each step contributes to a beautiful and meaningful gift that will be cherished for years to come.
Read more: How To Make A Quilt For A Baby
Materials Needed
Before you begin making your quilted baby blanket, it’s important to gather all the necessary materials. Here’s a list of the items you’ll need:
- Fabric: Choose high-quality cotton or flannel fabric for the blanket top. You’ll also need fabric for the backing and the binding.
- Quilt Batting: This is the middle layer of the blanket that provides warmth and padding. Opt for a lightweight and soft batting specifically designed for baby blankets.
- Thread: Select a durable thread that matches the color of your fabric.
- Ruler and Rotary Cutter: These tools are essential for accurate cutting of fabric squares.
- Pins and Needles: Use pins to hold the fabric layers together and needles for hand-sewing.
- Sewing Machine: A sewing machine will make the process faster and more efficient, but you can also sew by hand if you prefer.
- Iron and Ironing Board: These will help you press the fabric for a neat and professional look.
- Scissors: Sharp scissors will come in handy for trimming fabric and thread.
- Marking Tools: Use washable fabric markers or chalk for marking quilt patterns on the fabric.
- Quilting Ruler: A quilting ruler with various measurements will help you create precise cuts and shapes.
Having all the materials ready before you start will ensure a smooth and uninterrupted quilting process. You can find these items at your local fabric store or online quilting supply retailers.
Once you have gathered all the necessary materials, you’ll be ready to move on to the next step: choosing the fabric for your quilted baby blanket.
Choosing the Fabric
When it comes to choosing the fabric for your quilted baby blanket, you have a wide range of options to consider. The key is to select fabrics that are soft, durable, and safe for your little one. Here are some tips to help you make the right choice:
1. Opt for 100% Cotton: Cotton is a popular choice for baby blankets as it is soft, breathable, and gentle on a baby’s sensitive skin. Look for high-quality cotton fabrics that will withstand frequent washing and maintain their vibrant colors.
2. Consider Flannel: Flannel fabric is another excellent option for a cozy and warm baby blanket. It has a soft and fuzzy texture that provides extra comfort for your little one. Flannel is particularly great for colder climates or winter seasons.
3. Check for Safety Standards: Ensure that the fabric you choose meets the appropriate safety standards, especially if you are using it for a baby blanket. Look for fabrics labeled as “baby-safe” or “meets safety standards” to ensure they are free from harmful chemicals or substances.
4. Reflect the Theme or Style: Consider the overall theme or style you want to achieve with the baby blanket. You can choose fabrics in a variety of colors, patterns, and motifs that suit the nursery décor or reflect the parent’s personal taste. Consider prints with cute animals, floral designs, or simple geometric patterns.
5. Coordinate the Colors: Select a color palette that complements the nursery or matches the baby’s personality. Soft pastels, gender-neutral tones, or vibrant colors can all create a visually appealing and harmonious baby blanket. Mixing different shades and patterns can add visual interest to your quilted design.
6. Pre-Wash the Fabric: Before you begin cutting and sewing your fabric, it’s a good idea to pre-wash it to remove any chemicals or dyes and to pre-shrink the fabric. This helps to prevent any possible fabric shrinkage or color bleeding when the blanket is washed later.
By keeping these factors in mind, you’ll be able to choose the perfect fabric that not only looks beautiful but is also safe and comfortable for the baby. Now that you’ve chosen your fabric, it’s time to prepare it for the quilting process.
Preparing the Fabric
Before you start cutting and sewing the fabric for your quilted baby blanket, it’s important to properly prepare it to ensure a professional and polished final product. Here are some steps to follow when preparing your fabric:
1. Wash and Dry: Begin by washing your fabric using a mild detergent. This will remove any dirt, chemicals, or residues that may be present. Follow the fabric manufacturer’s instructions for washing and drying. Be sure to separate dark and light colors to prevent any color bleeding.
2. Iron the Fabric: Once the fabric is dry, iron it to remove any wrinkles or creases. A smooth and flat surface is essential for accurate cutting and sewing. Make sure the fabric is completely flat and wrinkle-free before moving on to the next step.
3. Square off the Edges: Trim off any uneven or frayed edges of the fabric to ensure that you have straight and neat edges. This step is important for achieving precise and uniform fabric squares.
4. Press Fold Lines: Fold the fabric in half lengthwise and press along the fold line with an iron. This will create a clear reference line when cutting the fabric squares later.
5. Align Selvages: If your fabric has selvage edges, ensure that they are aligned and straight. The selvages are the tightly woven edges of the fabric that prevent it from fraying. Aligning them will help maintain the integrity of the fabric as you work on your quilt.
6. Consider Pattern Placement: If your fabric has a specific pattern or design, take a moment to consider how you want it to appear on the finished blanket. Arrange the fabric squares accordingly to showcase the patterns in a visually pleasing way.
By taking the time to properly prepare your fabric, you’ll ensure that you’re working with clean, flat, and well-aligned fabric pieces. This will contribute to the overall quality and appearance of the quilted baby blanket. Now that your fabric is ready, it’s time to move on to the next step: cutting the fabric squares.
Cutting the Fabric Squares
Now that you have prepared your fabric, it’s time to cut the fabric squares for your quilted baby blanket. Follow these steps to achieve precise and uniform squares:
1. Measure and Mark: Using a ruler or quilting ruler, measure and mark the desired size of your fabric squares. Common sizes for baby blankets are 5 inches or 6 inches square, but you can choose any size that suits your preference.
2. Cut with a Rotary Cutter: Place the fabric flat on your cutting mat and align the ruler with the marked measurements. Hold the ruler firmly in place and use a rotary cutter to cut along the edge of the ruler. Be sure to apply even pressure and make a clean, steady cut.
3. Repeat the Process: Continue measuring, marking, and cutting the fabric squares until you have enough to cover the desired size of your baby blanket. Remember to measure and cut with precision to ensure that all the squares are identical in size.
4. Trim the Selvages: Once you have cut the fabric squares, check for any remaining selvages along the edges. Trim them to ensure that all the edges of the fabric squares are clean and free from excess fabric.
5. Organize the Squares: As you cut the fabric squares, it’s a good idea to organize them and lay them out in the desired pattern or design for your quilt. This will help you visualize how the final blanket will look and make it easier to sew the squares together in the next step.
Remember to take your time and be careful when cutting the fabric squares. Accuracy and consistency are key to achieving a professional and polished look for your quilted baby blanket. With the fabric squares ready, you’re now ready to move on to designing the quilt pattern.
Read more: How To Make A Baby Blanket
Designing the Quilt Pattern
Designing the quilt pattern is an exciting step in the process of making a quilted baby blanket. This is where you get to unleash your creativity and create a unique design that reflects your personal style. Here are some tips to help you design a beautiful quilt pattern:
1. Explore Quilt Patterns: Look for inspiration by browsing through quilt pattern books, magazines, or online resources. Take note of patterns that catch your eye and consider how they might translate into a baby blanket design. Popular quilt patterns for baby blankets include patchwork, chevron, star, or simple squares.
2. Sketch it Out: Start by sketching your quilt pattern on a piece of paper. This will give you a visual representation of how the squares will be arranged and stitched together. Experiment with different layouts and placements until you find a design that you love.
3. Consider Color Placement: Color placement plays a crucial role in the overall design of your quilt. Consider which fabric squares should be placed next to each other to create a visually appealing contrast or harmony. Play with different color combinations until you find the perfect balance.
4. Play with Block Sizes: You can create visual interest in your quilt by incorporating different block sizes. Varying the size of the fabric squares or adding larger solid squares within the design can make your quilt pattern more dynamic and unique.
5. Keep it Simple: If you’re a beginner or prefer a more minimalist look, opt for a simple quilt pattern. Basic patterns, such as a straight set or a simple patchwork design, can still create a stunning baby blanket without overwhelming the design.
6. Align your Seams: Pay attention to how the seams of the fabric squares align when designing your quilt pattern. Ensuring that the seams match or create a continuous flow will give your quilt a polished and professional look.
Remember, designing the quilt pattern should be a fun and creative process. Take your time to experiment and explore different possibilities, and don’t be afraid to let your imagination run wild. Once you’re satisfied with the design, it’s time to sew the fabric squares together and bring your pattern to life.
When making a quilted baby blanket, pre-wash all fabric to prevent shrinkage and use a walking foot on your sewing machine to help keep the layers together evenly.
Sewing the Fabric Squares Together
Now that you have designed your quilt pattern, it’s time to sew the fabric squares together to create the quilt top for your baby blanket. Follow these steps to ensure accurate and sturdy seam connections:
1. Arrange the Squares: Lay out your fabric squares in the desired pattern. This will make it easier to sew them together in the correct order. Check the design and make any adjustments before proceeding.
2. Align and Pin: Take the first two fabric squares that need to be sewn together. With the right sides facing each other, align the edges and use pins to secure the squares in place. Repeat this process for each pair of squares.
3. Sew with a ¼-inch Seam Allowance: Using a sewing machine or a needle and thread, sew along the pinned edge with a ¼-inch seam allowance. Backstitch at the beginning and end of the seam to secure it. Repeat this step to sew all the pairs of squares together.
4. Press the Seams: After sewing each seam, press it open with an iron. This will create a flat and smooth surface and help the quilt lay flat. Take care not to stretch or distort the fabric while pressing.
5. Continue Sewing Rows: Once all the pairs of squares are sewn together, sew the rows together by aligning the edges and using pins. Sew along the pinned edges with a ¼-inch seam allowance, backstitching at the beginning and end of each seam. Press the seams open as you go.
6. Check for Accuracy: Check the quilt top periodically to ensure that the squares are aligned correctly and the seams are straight. Adjust any misaligned squares or uneven seams before moving on to the next row.
By following these steps, you will gradually sew all the fabric squares together to create a cohesive and beautiful quilt top. Take your time and work in a methodical manner to achieve accurate seam connections. Once the fabric squares are securely sewn together, it’s time to move on to the next step: adding the quilt batting.
Adding the Quilt Batting
The quilt batting is an essential component of your quilted baby blanket. It provides warmth, loft, and a soft layer between the quilt top and backing. Follow these steps to add the quilt batting to your baby blanket:
1. Choose the Right Batting: Select a lightweight and soft quilt batting specifically designed for baby blankets. Polyester or cotton battings are popular choices. Ensure that the batting is at least the size of your quilt top, with some extra allowance for trimming.
2. Layer the Quilt: Lay the quilt backing fabric right side down on a flat surface. Smooth out any wrinkles or creases. Place the quilt batting on top, aligning the edges with the backing fabric. Finally, lay the quilt top right side up on top of the batting, aligning all the edges.
3. Pin or Baste the Layers: To hold the layers together, you can either pin or baste them. If you choose to pin, use safety pins or quilting pins to secure the layers in place. Insert the pins at regular intervals, ensuring that all layers are flat and smooth. Alternatively, you can baste the layers together using a long-running stitch.
4. Smooth and Adjust: Smooth out any wrinkles or bubbles that may have formed between the layers. Adjust the fabrics as necessary to ensure they are even and aligned properly. Take your time with this step to create a neat and uniform appearance.
5. Trim the Excess: Once the layers are secure and smooth, trim off the excess batting and backing fabric, leaving a small border around the edges of the quilt top. This will make it easier to add the binding in the later steps.
Adding the quilt batting is a crucial step as it provides the plushness and comfort to your baby blanket. By following these steps, you’ll ensure that the layers are well-aligned and securely held together. Now that your layers are ready, it’s time to move on to the next step: quilting the layers together.
Quilting the Layers Together
Quilting is the process of stitching the layers of your quilted baby blanket together. This not only adds durability but also gives the blanket a decorative and textured look. Here’s how you can quilt the layers together:
1. Select a Quilting Technique: There are various methods you can choose from to quilt your baby blanket. Some popular techniques include hand quilting, machine quilting, or even tying the layers together with yarn or embroidery floss. Choose a technique that suits your skill level and desired outcome.
2. Plan Your Quilting Design: Before you start quilting, plan out your quilting design. You can go for simple straight lines or experiment with more intricate patterns. Draw your design on the quilt top using a washable fabric marker or use quilting stencils for guidance.
3. Quilt in Sections: To make quilting easier, break your quilt into manageable sections. Start quilting from the center and work your way outwards. This ensures that the layers remain smooth and prevents distortion. Secure the layers with safety pins or use a temporary adhesive spray to hold them in place.
4. Hand Quilting: If you prefer hand quilting, use a quilting needle and a thread that matches your fabric or provides a decorative contrast. Start by knotting the thread and inserting the needle through all layers from the back. Bring the needle back up through the layers a short distance away and continue stitching in the desired pattern.
5. Machine Quilting: For machine quilting, use a walking foot to ensure even feed of the layers. Experiment with different stitch patterns like straight lines, free-motion quilting, or decorative stitches. Take your time, guide the quilt gently, and keep the stitches consistent.
6. Tie Quilting: If you prefer a simpler quilting technique, tie quilting can be a great option. Thread a large-eyed needle with embroidery floss or yarn and bring it through all layers at a designated point. Tie a secure knot on the top side, leaving a small tail. Repeat this process at regular intervals throughout the quilt.
7. Remove Markings: Once you’ve finished quilting, remove any visible markings or stencils using a fabric eraser or by gently washing the quilt according to fabric instructions.
Quilting the layers together is an opportunity to add unique texture and personality to your baby blanket. Whether you choose to hand quilt, machine quilt, or tie quilt, take your time and enjoy the quilting process. Once your quilted layers are ready, it’s time to move on to the final steps: binding the edges.
Read more: How To Make A Quilt Blanket
Binding the Edges
Binding is the final step in creating your quilted baby blanket – it not only gives the blanket a polished and finished look but also provides durability to the edges. Follow these steps to bind the edges of your baby blanket:
1. Prepare the Binding Strips: Cut fabric strips for the binding, making sure they are long enough to cover the entire perimeter of the quilt. The width of the strips should be around 2.5 to 3 inches. You can use a single fabric or create a contrasting or coordinating look by piecing together multiple strips.
2. Sew the Binding Strips Together: If you need to join multiple fabric strips, sew them together at a 45-degree angle to create a diagonal seam. Trim the excess fabric and press the seam open. This will ensure a continuous and smooth binding strip.
3. Sew the Binding to the Quilt: Start by folding the binding strip in half lengthwise, wrong sides together, and press it to create a crease. Align the raw edges of the binding with the raw edges of the quilted layers, starting in the middle of one side. Leave a 6-inch tail of binding fabric for later.
4. Sew the Binding in Place: Using a ¼-inch seam allowance, sew the binding to the quilt, backstitching at the beginning and end. Continue sewing all around the quilt, mitering the corners as you go. Use clips or pins to hold the binding in place and smooth out any wrinkles or puckers.
5. Join the Ends of the Binding: When you reach the starting point, leave a 1-inch overlap of the binding. Open up the binding and place the ending tail on top of the overlap, aligning the raw edges. Sew on the diagonal line where the two ends meet, trim the excess, and press the seam open.
6. Finish the Binding: Fold the binding over the raw edges of the quilt and secure it with binding clips or pins. On the front side of the quilt, use a blind stitch or a decorative stitch to hand sew the binding in place. Take care to catch only the folded edge of the binding and not go through all layers.
7. Final Touches: Once the binding is secure, give the quilted baby blanket a final press with an iron to smooth out any creases or wrinkles. Inspect the quilt for any loose threads or imperfections and trim them as needed.
By following these steps, you’ll achieve a clean, professional-looking finish to your quilted baby blanket. The binding not only adds a decorative touch but also keeps the edges of the quilt secure and durable. With the binding completed, your beautiful quilted baby blanket is now ready for its final reveal!
Adding Final Touches
Adding the final touches to your quilted baby blanket allows you to personalize and enhance its overall appearance. These finishing touches will make your baby blanket even more special. Here are some ideas to consider:
1. Embellishments: Consider adding embellishments, such as appliques, embroidery, or fabric patches, to make your baby blanket unique. You can use small fabric shapes like hearts, stars, or animals to add a playful touch. Secure them with hand stitching or fabric glue.
2. Monogramming or Personalization: Personalize the baby blanket with the baby’s name or initials. You can use embroidery techniques or fabric markers to add a personal touch. This makes the blanket a cherished keepsake and a thoughtful gift.
3. Quilt Label: Create a quilt label to attach to the back of the blanket. Include your name, the date the blanket was completed, and any other relevant details. It’s a lovely way to document the time and effort you put into creating the quilt.
4. Additional Embroidery: Consider adding some extra embroidery stitches to enhance the quilt design. Embroidery can add texture, depth, and detail to your quilted baby blanket. You can experiment with different stitch patterns and thread colors to create a unique look.
5. Quilt Care Instructions: Include a small note or tag with care instructions for the baby blanket. This will help the recipient take proper care of the quilt, ensuring its longevity. Include information on washing, drying, and storing the blanket to maintain its quality.
6. Trim or Edging: If you want to add a decorative edge to your quilt, consider attaching a trim or edging. You can use lace, ribbon, or bias tape to create a beautiful border around the edges of the blanket. This adds an extra touch of elegance and can complement the overall design.
Remember to take your time with the final touches, as they contribute to the overall aesthetics and sentimental value of the baby blanket. Enjoy the creative process and let your imagination guide you. With the final touches complete, your quilted baby blanket is now ready to be cherished and enjoyed for years to come.
Conclusion
Congratulations on completing your quilted baby blanket! By following the steps outlined in this article, you have created a beautiful and personalized blanket that will bring warmth and comfort to the little one who will receive it. The process of making a quilted baby blanket is not only rewarding but also allows you to showcase your creativity and sewing skills.
From choosing the fabric and preparing it, to cutting the fabric squares and designing the quilt pattern, you have embarked on a journey of creating something handmade and meaningful. As you sewed the fabric squares together, added the quilt batting, quilted the layers, and bound the edges, you transformed a collection of individual pieces into a cohesive and cozy blanket.
Throughout this process, you have made thoughtful decisions regarding color, pattern, and design, resulting in a unique and personalized baby blanket. The final touches you added, whether through embellishments, monogramming, or a quilt label, have made the blanket even more special and memorable.
As you complete this project, take a moment to appreciate the time and effort you have invested in creating a handmade treasure. The quilted baby blanket you have made will not only provide warmth and comfort but also serve as a beautiful keepsake for years to come.
Remember, the journey of quilting doesn’t end here. You can continue to explore new patterns, techniques, and designs as you build upon your quilting skills. Whether you’re making quilts for loved ones, creating custom pieces for sale, or simply enjoying the art of quilting, each project will bring its own joy and fulfillment.
So, as you wrap up this project and present your quilted baby blanket to its recipient, take pride in your accomplishment. Your handmade creation is a reflection of your dedication, creativity, and love. May it bring warmth and joy to the lucky baby who gets to snuggle up with this special quilt.
Frequently Asked Questions about How To Make A Quilted Baby Blanket
Was this page helpful?
At Storables.com, we guarantee accurate and reliable information. Our content, validated by Expert Board Contributors, is crafted following stringent Editorial Policies. We're committed to providing you with well-researched, expert-backed insights for all your informational needs.


0 thoughts on “How To Make A Quilted Baby Blanket”