Articles
How To Make A Quilt Blanket
Modified: February 24, 2024
Learn how to make a beautiful quilt blanket with our informative articles. Gain valuable insights and tips from experienced quilters. Start your quilting journey today!
(Many of the links in this article redirect to a specific reviewed product. Your purchase of these products through affiliate links helps to generate commission for Storables.com, at no extra cost. Learn more)
Introduction
Welcome to the world of quilting! Making a quilt blanket is an incredibly rewarding craft that allows you to showcase your creativity while creating a cozy and personalized piece. Whether you’re a beginner or an experienced quilter, this article will guide you through the step-by-step process of making a beautiful quilt blanket.
Quilting has a rich history that dates back centuries. Traditionally, quilts were made by hand, using scraps of fabric to create warm and functional blankets. Nowadays, quilting enthusiasts have access to a wide range of fabrics, patterns, and techniques, making it easier than ever to design unique and visually stunning quilts.
Creating a quilt blanket involves several stages, from choosing the right fabrics and designs to sewing the pieces together and adding the finishing touches. It’s a journey that can be both relaxing and challenging, but the end result is always worth the effort.
In this article, we’ll walk you through the entire process of making a quilt blanket, covering important details such as selecting fabrics, arranging quilt blocks, sewing techniques, quilting layers, binding the edges, and adding those final finishing touches. Whether you’re a beginner or looking to expand your quilting skills, this comprehensive guide will provide you with all the information you need to create a quilt that you’ll be proud to showcase.
So, gather your supplies, clear your workspace, and get ready to dive into the wonderful world of quilting. Let’s get started on your journey to creating a beautiful and cozy quilt blanket that will be cherished for years to come.
Key Takeaways:
- Choosing the right fabrics, arranging quilt blocks, and sewing techniques are crucial for creating a visually stunning and durable quilt. Take your time to explore options and let your creativity shine.
- Adding borders, quilting the layers, and binding the edges are the final steps that give your quilt a polished finish. These details add both beauty and durability to your creation.
Read more: How To Make A Quilted Baby Blanket
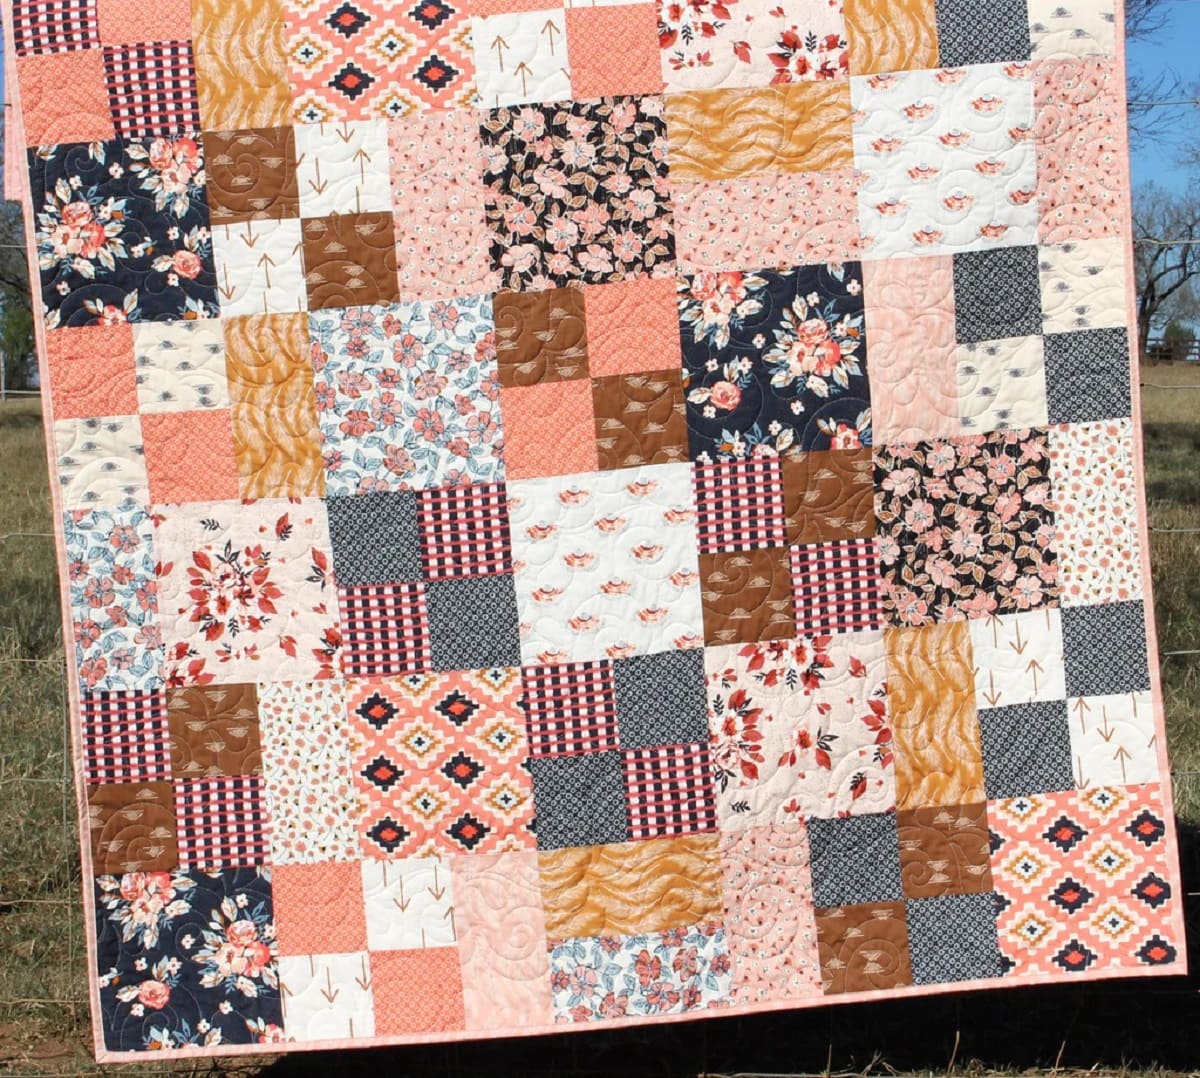
Choosing the Right Fabrics
When it comes to creating a quilt blanket, choosing the right fabrics is essential. The fabrics you select will determine the overall look, feel, and durability of your quilt. Here are some key factors to consider when making your fabric choices:
- Quality: Opt for high-quality fabrics that are durable and will withstand the test of time. Quilts are meant to be used and loved, so investing in good-quality materials will ensure that your quilt lasts for years to come.
- Cotton: Cotton is the most popular fabric choice for quilting. It’s soft, breathable, and easy to work with. Look for 100% cotton fabrics, as they will provide the best results. Consider using different cotton prints and solids to add visual interest and variety to your quilt.
- Color and Pattern: Think about the color palette and overall theme you want for your quilt. Consider the recipient’s preferences or the room where the quilt will be displayed. Choose colors and patterns that complement each other and create a cohesive look. You can go for bold and vibrant shades or opt for softer, more muted tones, depending on the desired aesthetic.
- Scale and Proportion: Pay attention to the scale of the fabric prints and how they work together. Mix smaller-scale prints with larger-scale prints to create visual interest and balance. Consider using a variety of patterns, such as florals, geometrics, or stripes, to add depth and texture to your quilt.
- Contrast: Achieving contrast in your fabric choices is important for creating visual impact. Mix light and dark fabrics, as well as prints and solids, to create a dynamic look. Contrast will help the quilt blocks and design elements stand out.
- Texture: Explore different fabric textures to add dimension to your quilt. Consider incorporating fabrics with textures like flannel, linen, or minky for added tactile interest.
- Pre-Washing: It’s recommended to pre-wash your fabrics before starting your quilt project. This helps to remove any excess dye and shrinkage, ensuring that your quilt will retain its shape after washing.
Remember, the fabric choices you make will have a direct impact on the final outcome of your quilt. Take your time exploring different options, and don’t be afraid to mix and match fabrics to create a unique and personalized look. By choosing the right fabrics, you’ll set a solid foundation for your quilt project and ensure a visually stunning and durable finished product.
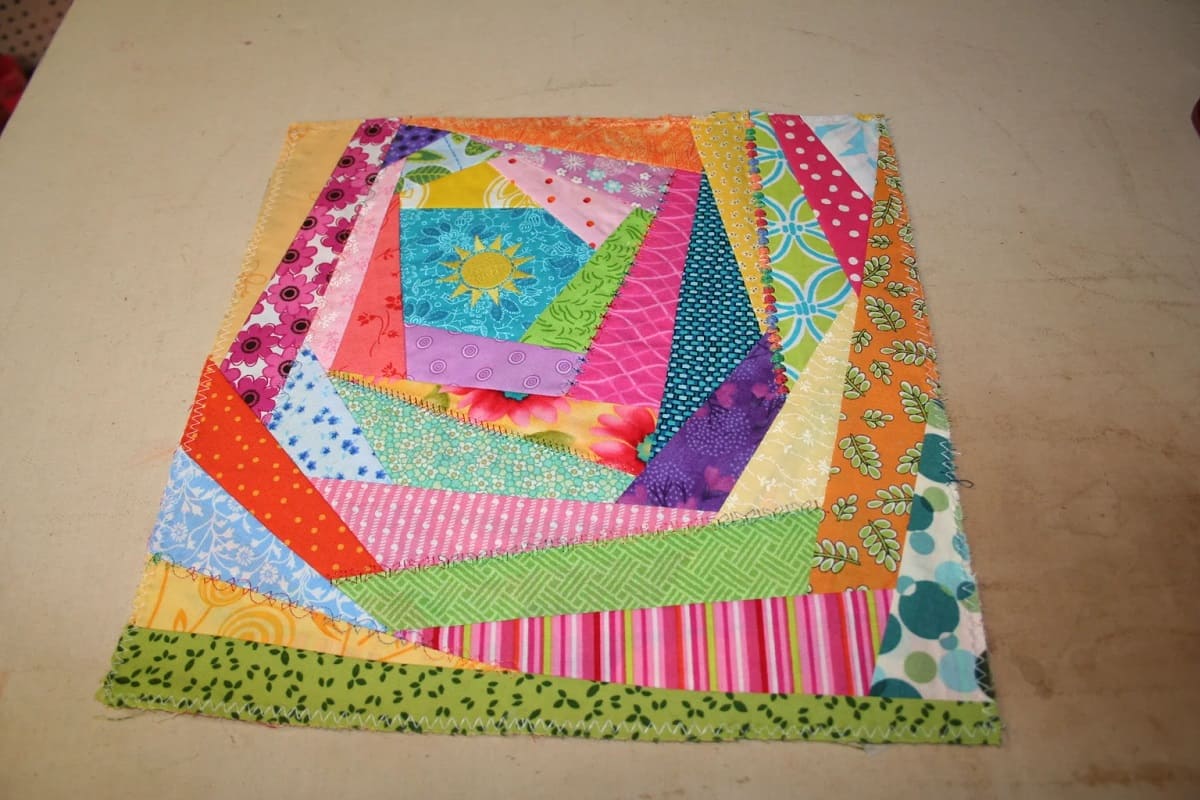
Deciding on a Quilt Design
Once you have selected your fabrics, the next step in creating a quilt blanket is deciding on a quilt design. The design you choose will determine the layout and arrangement of your quilt blocks, and it will set the overall visual impact of your finished quilt. Here are some considerations to help you decide on a quilt design:
- Simplicity vs. Complexity: Determine the level of complexity you want for your quilt design. Some quilters prefer simple and straightforward designs, while others enjoy more intricate and detailed patterns. Consider your skill level and the amount of time you are willing to invest in your project.
- Block Patterns: Quilt blocks are the individual units that make up the quilt design. There are countless block patterns to choose from, ranging from traditional to modern. Browse through quilting books, magazines, and online resources to gather inspiration and find block patterns that resonate with you.
- Layout Options: Experiment with different layout options to find the one that best showcases your chosen block patterns. Common layout options include straight set, diagonal set, medallion, and sashing. Consider how the colors and patterns in your quilt blocks interact with each other and how the layout can enhance the overall design.
- Borders and Borders: Decide whether you want to include borders or borders in your quilt design. Borders are fabric strips that surround the quilt center, while borders are thin fabric strips used to separate blocks or create a frame. Borders and borders can add visual interest and help tie the design elements together.
- Theme or Story: Consider if you want to incorporate a specific theme or tell a story through your quilt design. This could be inspired by a particular event, a favorite hobby, or simply the colors and patterns that resonate with you. A theme can add a personal touch and make your quilt more meaningful.
- Quilting Style: Think about the type of quilting style you want to apply to your quilt design. This includes the type of quilting stitches, thread color, and density of quilting. Quilting not only adds visual interest but also holds the layers of the quilt together. Popular quilting styles include straight-line quilting, free-motion quilting, and hand quilting.
- Software or Templates: If you prefer a more structured approach to designing your quilt, consider using design software or templates. These tools can help you visualize different quilt blocks, layouts, and color combinations before you start cutting fabric.
Remember, choosing a quilt design is a personal decision. Take the time to explore different options, gather inspiration, and let your creativity guide you. Don’t be afraid to mix and match elements or modify existing quilt designs to create something truly unique. The design phase is where your imagination can shine, so embrace the opportunity to create a quilt that reflects your personal style and vision.
Gathering the Necessary Supplies
Before you can start making your quilt blanket, it’s important to gather all the necessary supplies. Having everything readily available will ensure a smooth and efficient quilting process. Here are the essential supplies you’ll need:
- Fabric: Gather the fabrics you have chosen for your quilt. Make sure you have enough yardage for the quilt top, backing, and binding. Consider buying extra fabric to account for any mistakes or changes in the design.
- Cutting Tools: Invest in good-quality cutting tools, such as a rotary cutter, cutting mat, and acrylic rulers. These tools will make the process of cutting fabric squares and strips more accurate and efficient. It’s also a good idea to have fabric scissors for smaller cutting tasks.
- Needles and Thread: Stock up on quilting needles and matching thread. Choose a thread that is strong and blends well with your fabric colors. It’s also helpful to have different thread weights for piecing and quilting.
- Sewing Machine: If you have a sewing machine, make sure it’s in good working condition. Get familiar with its settings and features, as you’ll be using it extensively for piecing and quilting. Don’t forget to have extra sewing machine needles and bobbins on hand.
- Pins and Clips: Use quilting pins to hold your fabric pieces together while sewing. Alternatively, you can use quilting clips or wonder clips, which are especially useful for handling thicker fabrics or multiple layers.
- Marking Tools: Have marking tools, such as fabric pencils or washable fabric markers, to mark your fabric for cutting, piecing, and quilting. Test the marking tool on a fabric scrap to ensure it washes out or disappears completely.
- Ruler and Measuring Tools: A clear quilting ruler is indispensable for measuring and cutting fabric accurately. Also, have a measuring tape or a retractable tape measure for larger measurements.
- Batting: Batting is the inner layer of the quilt that provides warmth and loft. Choose a batting that suits your desired level of warmth and quilt loft. Common types include cotton, polyester, and bamboo batting.
- Iron and Ironing Board: A reliable iron and ironing board are essential for pressing seams and ensuring accurate piecing. Keep a spray bottle of water nearby to help remove any stubborn wrinkles.
- Quilt Basting Supplies: Basting is the process of securing the quilt layers together before quilting. You’ll need safety pins, basting spray, or quilting tacks to hold the layers in place.
- Quilting Gloves: Quilting gloves with grippy fingertips can help with maneuvering the quilt layers while quilting, ensuring smooth and even stitches.
- Binding Materials: Don’t forget to gather binding materials, such as bias tape or fabric strips, to finish the edges of your quilt. You may also need a binding tool to join the ends of the binding strips.
- Quilting Patterns and References: Lastly, have quilting patterns and references on hand for inspiration and guidance. This can include quilting books, magazines, online tutorials, or even quilt blocks and designs you’ve sketched or printed out.
Gathering all these supplies beforehand will save you time and frustration during the quilting process. Having everything within reach will allow you to fully immerse yourself in the creative journey without unnecessary interruptions. So, double-check your checklist and make sure you have all the necessary supplies to embark on your quilt-making adventure!
Cutting Fabric Squares
Now that you have all your supplies ready, it’s time to start cutting fabric squares for your quilt. Fabric squares are the building blocks of your quilt design, and precise cutting is essential for achieving accurate and consistent results. Here is a step-by-step guide on cutting fabric squares:
- Prepare Your Workspace: Find a large, flat surface like a cutting mat or a clean table to work on. Make sure the area is well-lit and free from any distractions or clutter. This will allow you to work safely and accurately.
- Iron the Fabric: Before cutting, iron your fabric to remove any wrinkles or creases. Smooth fabric ensures more precise cutting and helps maintain accuracy throughout the quilting process.
- Decide on Square Size: Determine the desired size for your fabric squares. Common sizes range from 4 inches to 10 inches. Keep in mind that the finished size of your squares may be slightly smaller due to seam allowances.
- Measure and Mark: Use your quilting ruler to measure and mark the fabric according to the desired square size. Align the ruler’s edge with the fabric edge and use the rotary cutter to cut along the ruler, ensuring a straight and even cut.
- Repeat and Stack: Repeat the measuring, marking, and cutting process for each fabric piece needed. As you cut each square, stack them neatly in separate piles based on color or fabric type. This will make it easier to organize your squares during the quilt assembly stage.
- Label or Sort Squares: If you have a specific layout or design planned for your quilt, consider labeling or sorting your fabric squares accordingly. This will help you stay organized and ensure the right fabric squares are used in the right places.
- Trimming Excess Threads: While cutting, you may notice loose threads on your fabric squares. Trim these excess threads to ensure a clean and professional finish in your quilt blocks.
- Store Extra Fabric: If you have leftover fabric from cutting, be sure to store it properly. Keep it folded neatly and labeled for future use or as a backup in case you need to make adjustments or repairs to your quilt.
Remember, precision is key when cutting fabric squares for your quilt. Take your time to measure, mark, and cut accurately, ensuring that all your squares are the same size. Consistent-sized fabric squares will make the piecing process smoother and result in a visually pleasing finished quilt. Make sure to handle the rotary cutter with care and keep it out of reach from children or pets.
Now that you’ve mastered the art of cutting fabric squares, you’re one step closer to creating your dream quilt blanket. With your neatly stacked fabric squares ready, it’s time to move on to the exciting next phase: arranging the quilt blocks!
Read more: How To Wash A Quilt Blanket
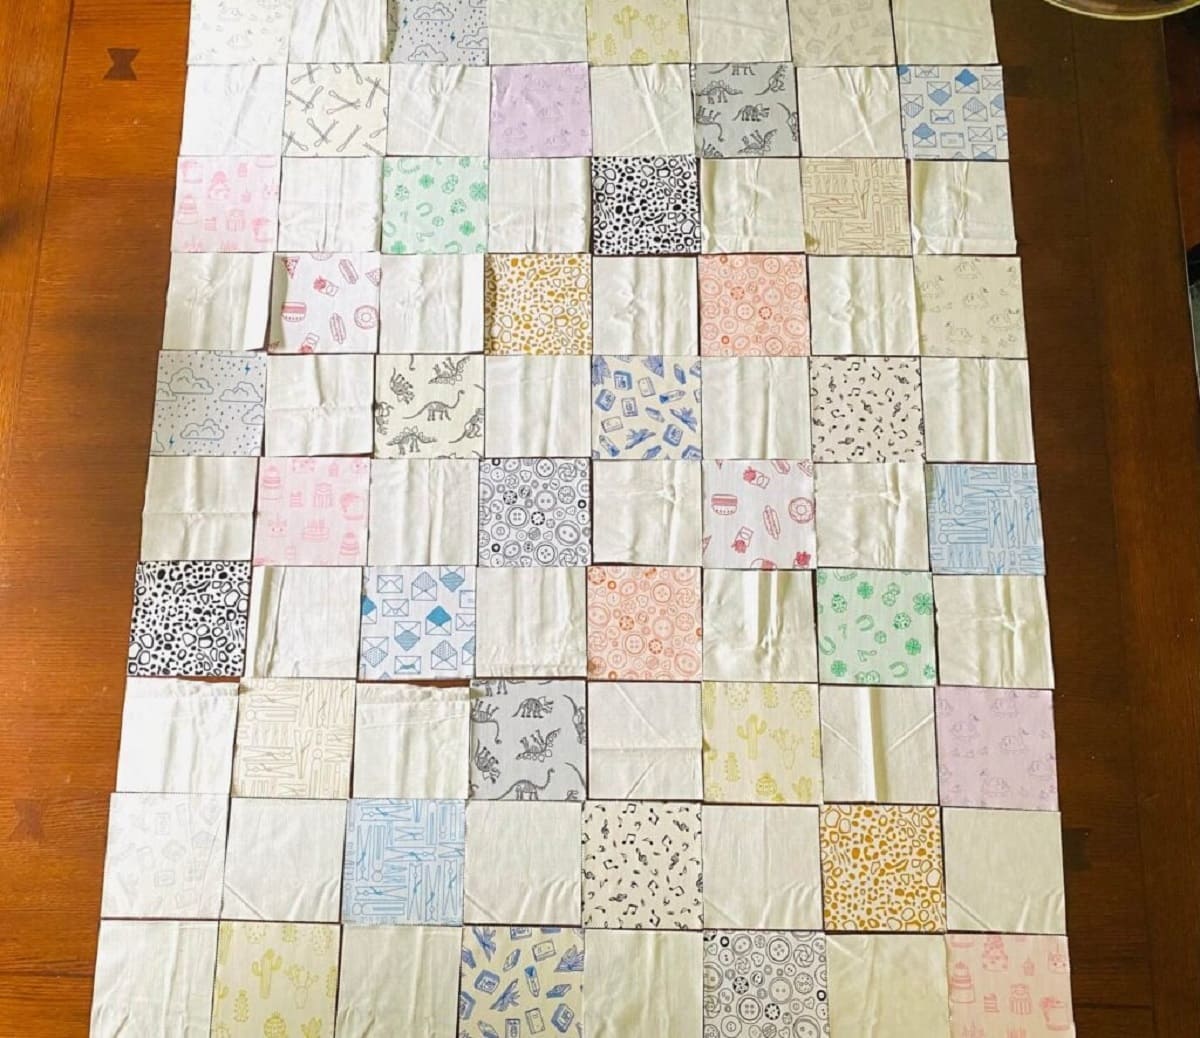
Arranging the Quilt Blocks
Now that you have your fabric squares cut and organized, it’s time to arrange them into quilt blocks. The arrangement of your quilt blocks will determine the overall design and visual impact of your quilt. Here are some tips to help you with arranging your quilt blocks:
- Design Wall or Floor Space: Find a large design wall or clear floor space where you can lay out your fabric squares. This will allow you to step back and get a better perspective on the overall arrangement.
- Color and Contrast: Pay attention to the color and contrast between the fabric squares. Consider how different color combinations and patterns interact with each other. Think about balancing light and dark colors for visual interest.
- Focal Point: Determine if you want a specific fabric square or a group of squares to serve as a focal point in your quilt. This can create a focal point and draw the viewer’s eye to a particular area.
- Block Orientation: Experiment with different orientations of the fabric squares. Try rotating some squares or arranging them in different patterns to create variation and movement in the quilt design.
- Theme or Story: Consider if you want to tell a story or incorporate a theme through the arrangement of your quilt blocks. You can create patterns or images that depict something meaningful to you or the recipient of the quilt.
- Balance and Symmetry: Think about achieving balance and symmetry in your quilt block arrangement. Arrange the fabric squares in a way that creates a visually pleasing and harmonious composition.
- Take Photos: Take photos of different arrangements to help you visualize how the final quilt will look. Sometimes seeing the blocks through a photograph can reveal patterns or imbalances that are not immediately apparent in person.
- Get Feedback: If you’re unsure about your quilt block arrangement, seek feedback from fellow quilters or friends. They may offer fresh perspectives or suggestions on how to improve the design.
- Play and Evolve: Don’t be afraid to play with different arrangements and make adjustments as needed. Quilting is a creative process, and your arrangement can evolve as you go along. Trust your intuition and have fun with it!
Remember, arranging your quilt blocks is an opportunity to showcase your individual style and creativity. Take your time to experiment and find an arrangement that brings your vision to life. Once you’re satisfied with the layout, you’re ready to start sewing the blocks together to create your quilt top.
With the quilt blocks arranged, the beauty of your quilt design will start to emerge. The next step is to bring those fabric squares together by sewing them into a stunning quilt top. Get ready to thread your needle and dive into the exciting world of quilting!
When making a quilt blanket, be sure to prewash and iron your fabric to prevent shrinkage and ensure a smooth, even finish. This will help your quilt to maintain its shape and appearance over time.
Sewing the Quilt Blocks Together
With your fabric squares arranged and the design of your quilt taking shape, it’s time to sew the quilt blocks together to create the quilt top. This step is where the individual elements of your quilt come together to form a cohesive and beautiful whole. Here’s a step-by-step guide on sewing the quilt blocks together:
- Lay Out the Blocks: Start by laying out your arranged quilt blocks in the intended order. This will ensure that you sew them together correctly and maintain the desired design.
- Prepare Sewing Machine: Thread your sewing machine with a coordinating thread color and select the appropriate stitch length for piecing. Test the stitch on a fabric scrap to ensure it’s the desired tension and length.
- Align and Pin: Take the first two blocks to be sewn together and align them right sides together, matching the raw edges. Pin them in place to secure them for sewing.
- Sew with a Seam Allowance: Start sewing from the edge, using the designated seam allowance (usually ¼ inch). Sew with steady, even stitches, backstitching at the beginning and end of the seam to secure it.
- Press Open the Seams: After sewing each seam, press it open with an iron. This will help flatten the seams and create a smooth and professional finish. Continue pressing open the seams as you sew the blocks together.
- Continue Sewing Blocks: Repeat the process of aligning, pinning, sewing, and pressing open the seams for each adjacent pair of blocks until all the blocks are sewn together in rows.
- Join Rows: Once all the rows are complete, it’s time to join the rows together. Align the rows right sides together and pin them in place. Take care to match the seams and corners of each block for a seamless transition between rows.
- Sew Rows Together: Sew the rows together, following the same process as before. Remember to press open the seams after sewing each seam to maintain a flat and professional appearance.
- Trim Excess Threads: As you sew, trim any excess threads from the seams to keep your quilt top neat and tidy.
As you sew the quilt blocks together, take your time to ensure accurate alignment and even stitching. Maintaining a consistent seam allowance is crucial for the overall structural integrity of your quilt top. Pressing open the seams at each step will create a cleaner and flatter quilt top, making it easier to quilt and adding a polished touch to your finished piece.
Remember, sewing the quilt blocks together is an important step in bringing your quilt design to life. Take pride in each stitch and enjoy the process of transforming your fabric squares into a cohesive and visually stunning quilt top.
With the quilt blocks sewn together, the foundation of your quilt is complete. The next step is to add borders to your quilt to frame and enhance its overall design. Get ready to showcase your creativity and take your quilt to the next level!
Adding Borders to the Quilt
Adding borders to your quilt serves both a functional and aesthetic purpose. Borders can frame your quilt, provide stability, and enhance its overall design. Here’s a step-by-step guide on adding borders to your quilt:
- Measure Quilt Top: Start by measuring the width and length of your quilt top. This will help determine the length and width of your borders.
- Cut Border Strips: Cut fabric strips for your borders based on the desired width and length. Ensure that the strips are long enough to cover the corresponding sides of your quilt top.
- Pin Borders: Take one border strip and align it with one edge of the quilt top, right sides together. Pin the border strip in place, ensuring it extends beyond the edges of the quilt top by the seam allowance width.
- Sew Borders: Sew the border strip to the quilt top, using the designated seam allowance (usually ¼ inch). Start at one end and sew towards the other, backstitching at the beginning and end to secure the seam. Repeat this process for each border strip.
- Press Borders: After sewing each seam, press the borders away from the quilt top, using an iron. This will help the borders lie flat and create a professional finish.
- Measure and Cut Remaining Borders: Measure the width and length of your quilt top with the first set of borders attached. Cut additional border strips to match these measurements.
- Pin and Sew Remaining Borders: Align and pin the remaining border strips to the corresponding sides of the quilt top, right sides together. Sew the border strips to the quilt top using the same process as before.
- Press and Trim: Press the borders away from the quilt top and trim any excess fabric or threads for a neat appearance.
As you add borders to your quilt, ensure that they are aligned and sewn with precision. Take care to maintain consistent seam allowances and press the borders open for a flat and professional look. Accuracy in sewing and pressing will result in a well-structured quilt with visually pleasing borders.
Borders not only add a finishing touch but also provide a visual frame for your quilt design. Carefully selecting the border fabric, color, and pattern will further enhance the overall aesthetic of your quilt. Consider contrasting or complementary fabrics to make your quilt stand out or use a border fabric that coordinates with the colors and patterns in your quilt top.
With the borders added, your quilt top is now complete. The next step is to layer and secure the quilt top, batting, and backing together through a process called quilting. Get ready to unleash your creativity as you embark on this exciting stage of the quilting process!
Quilting the Layers Together
Quilting is the process of sewing the quilt top, batting, and backing together to create a cohesive and durable quilt. This step not only adds decorative stitching but also ensures that the layers stay securely in place. Here’s a step-by-step guide on quilting the layers together:
- Prepare the Quilt Sandwich: Lay your quilt backing fabric flat on a large surface, wrong side facing up. Smooth out any wrinkles or creases. Next, place the batting on top of the backing, ensuring it is centered and evenly distributed. Finally, lay the quilt top on top, right side facing up. Smooth out any wrinkles once again.
- Baste the Layers: To hold the layers together, you’ll need to baste them. There are several basting methods you can choose from, including pins, basting spray, or hand basting with thread. Choose the method that works best for you and baste the layers together, starting from the center and working your way out towards the edges.
- Select the Quilting Technique: Decide on the quilting technique you want to use to stitch the layers together. There are various options, such as straight-line quilting, free-motion quilting, or using a quilting machine. Consider the design of your quilt and choose a technique that will complement it.
- Mark the Quilting Lines: If you’re planning on quilting specific patterns, use fabric markers or specialty marking tools to mark the quilting lines on the quilt top. Take your time and be precise with your markings.
- Start Quilting: Set up your sewing machine or quilting machine with the appropriate needle and thread. Begin quilting along the marked lines or create your own free-motion quilting design. Take it one section at a time, and be patient and consistent as you stitch through the layers.
- Continue Quilting: As you quilt, remove the basting stitches or pins as you come across them. Take breaks as needed to adjust the fabric and reposition the quilt as you move along.
- Secure Loose Threads: Trim any loose threads as you go to keep the quilt looking clean and professional. This will also prevent tangling while quilting.
- Finish Quilting: Once you have quilted the entire quilt top, take a step back and evaluate your work. Make any necessary adjustments or touch-ups before moving on to the next step.
Quilting the layers together requires patience and precision. Take your time and focus on maintaining even stitching and tension throughout the process. The quilting stitches not only secure the layers but also add depth and texture to your quilt, enhancing its overall aesthetic appeal.
Remember, quilting is an opportunity to showcase your creativity and personal touch. Don’t be afraid to experiment with different quilting designs and techniques. Whether you choose simple straight-line quilting or intricate free-motion designs, make sure to quilt with confidence and enjoy the journey!
With the quilting complete, the layers of your quilt are securely joined together. The next step is to finish the raw edges by binding them, giving your quilt a polished look and enhancing its durability. Get ready to add the final touches to your quilt with the binding process.
Read more: How To Store Quilts And Blankets
Binding the Quilt Edges
Binding is the final step in completing your quilt, where you wrap and secure the raw edges with a fabric strip. The binding not only gives your quilt a polished and professional finish but also helps to protect the edges and provide stability. Here’s a step-by-step guide on binding the quilt edges:
- Prepare the Binding: Measure the perimeter of your quilt to determine the length of the binding strip needed. Cut fabric strips, usually 2.5 inches wide, and sew them together using diagonal seams to create one continuous binding strip. Press the seams open for a flat finish.
- Prepare the Quilt Edges: Trim the excess batting and backing fabric so that they align with the quilt top. Ensure that the edges are straight and even. If desired, use a ruler and marking tool to mark a stitching line along the edge of the quilt top to guide the binding placement.
- Attach the Binding: Starting in the middle of one side of the quilt, align the raw edges of the binding strip with the raw edges of the quilt. Leave a tail of binding strip extending beyond the edge of the quilt.
- Pin or Clip in Place: Secure the binding strip to the quilt by using binding clips or pins. Continue pinning or clipping the binding strip around the perimeter of the quilt, easing the fabric around the corners smoothly.
- Machine or Hand Stitch: Determine whether you want to sew the binding by machine or hand. If machine stitching, use a walking foot or a binding foot attachment to ensure even stitching. If hand stitching, use a blind stitch or a whipstitch to invisibly stitch the binding to the back of the quilt.
- Mitred Corners: When reaching the corners, fold and press the binding strip to create a neat, mitered corner. This can be achieved by folding the binding strip diagonally at a 45-degree angle and then folding it back down to align with the next edge of the quilt.
- Joining the Binding: When you reach the starting point, overlap the binding strip with the tail you left at the beginning. Cut the excess binding strip, leaving a small overlap. Unfold the ends and sew them together with a diagonal seam. Trim any excess fabric and press the seam open.
- Complete the Stitching: Finish stitching the binding to the back of the quilt, ensuring that the stitches catch the folded edge of the binding on the back. Take care to make the stitching neat and even, securing the binding securely.
- Press the Binding: After stitching, press the binding away from the quilt front. Fold it over to the back, covering the raw edges of the quilt. Press the folded edge and use clips or pins to hold it in place.
- Secure the Binding: Complete the binding process by either hand stitching the folded edge of the binding to the back of the quilt using a slip stitch or by machine stitching close to the folded edge. Ensure that the stitching is even and invisible from the front.
Binding the quilt edges is the final touch that adds both beauty and durability to your quilt. Take your time to sew the binding carefully, paying attention to the corners and ensuring even stitching. Pressing the binding nicely and securing it firmly will give your quilt a professional finish.
With the binding in place, your quilt is now complete! Take a moment to admire your hard work and the beautiful quilt you have created. Whether you choose a simple or decorative binding technique, remember that it’s the finishing details that make your quilt truly special.
Now, it’s time to enjoy your quilt, wrap yourself in its warmth, or share it with a loved one. Quilts hold not only the fabric and stitches but also the care and creativity from the quilter’s hands. Congratulations on completing your quilt-making journey!
Finishing Touches
With your quilt complete, there are a few final touches you can add to enhance its overall appearance and make it truly special. These finishing touches will add personalization and a sense of craftsmanship to your quilt. Here are some ideas to consider:
- Labeling: Add a label to the back of your quilt to identify the maker, date, and any special notes. This adds a personal touch and creates a record of your hard work for future generations to appreciate.
- Quilt Sleeves: If you plan to hang your quilt, consider adding a quilt sleeve to the back. This creates a convenient way to display your quilt on a rod or quilt hanger.
- Quilting Embellishments: Embellish your quilt with embroidery, appliqué, or additional quilted designs. These extra touches can add dimension and interest to your quilt and allow you to express your creativity further.
- Quilt Label: Create a unique quilt label that reflects the theme, occasion, or sentiment behind your quilt. Handwrite or embroider the label, and sew it onto the back of the quilt for a personal and meaningful addition.
- Quilt Care Instructions: Include a note or card with quilt care instructions for the recipient to ensure that your quilt remains in good condition for years to come. This can include washing instructions, storage tips, and any other relevant care information.
- Quilt Display: Find a special place to display your quilt, whether it’s draped over a couch, showcased on a quilt rack, or hung on a wall. Displaying your quilt allows you to appreciate and share your hard work and creativity with others.
- Photograph Your Quilt: Take high-quality photographs of your finished quilt to document your accomplishment. Share these images with others, post them on social media, or create an album to showcase your quilting journey.
- Gift or Donate: Consider gifting your quilt to someone special or donating it to a charitable organization. Quilts make heartfelt and cherished gifts, and by donating, you can bring warmth and comfort to those in need.
- Reflect and Celebrate: Take a moment to reflect on the time, effort, and creativity you put into making your quilt. Celebrate your accomplishment and the joy it brings to your life and the lives of others.
These finishing touches will add a personal and meaningful element to your quilt, making it a cherished item for years to come. Remember that your quilt is a reflection of your passion, skill, and creativity, and these final details will amplify those qualities.
Now, wrap yourself in the warmth of your quilt or share it with someone special. Admire the stitches, colors, and design that make your quilt unique. Quilting is not just a craft; it’s an art form that allows you to express yourself and create something truly extraordinary.
Congratulations on completing your quilt and enjoy the satisfaction and pride that come with a finished creation!
Frequently Asked Questions about How To Make A Quilt Blanket
Was this page helpful?
At Storables.com, we guarantee accurate and reliable information. Our content, validated by Expert Board Contributors, is crafted following stringent Editorial Policies. We're committed to providing you with well-researched, expert-backed insights for all your informational needs.


0 thoughts on “How To Make A Quilt Blanket”