Articles
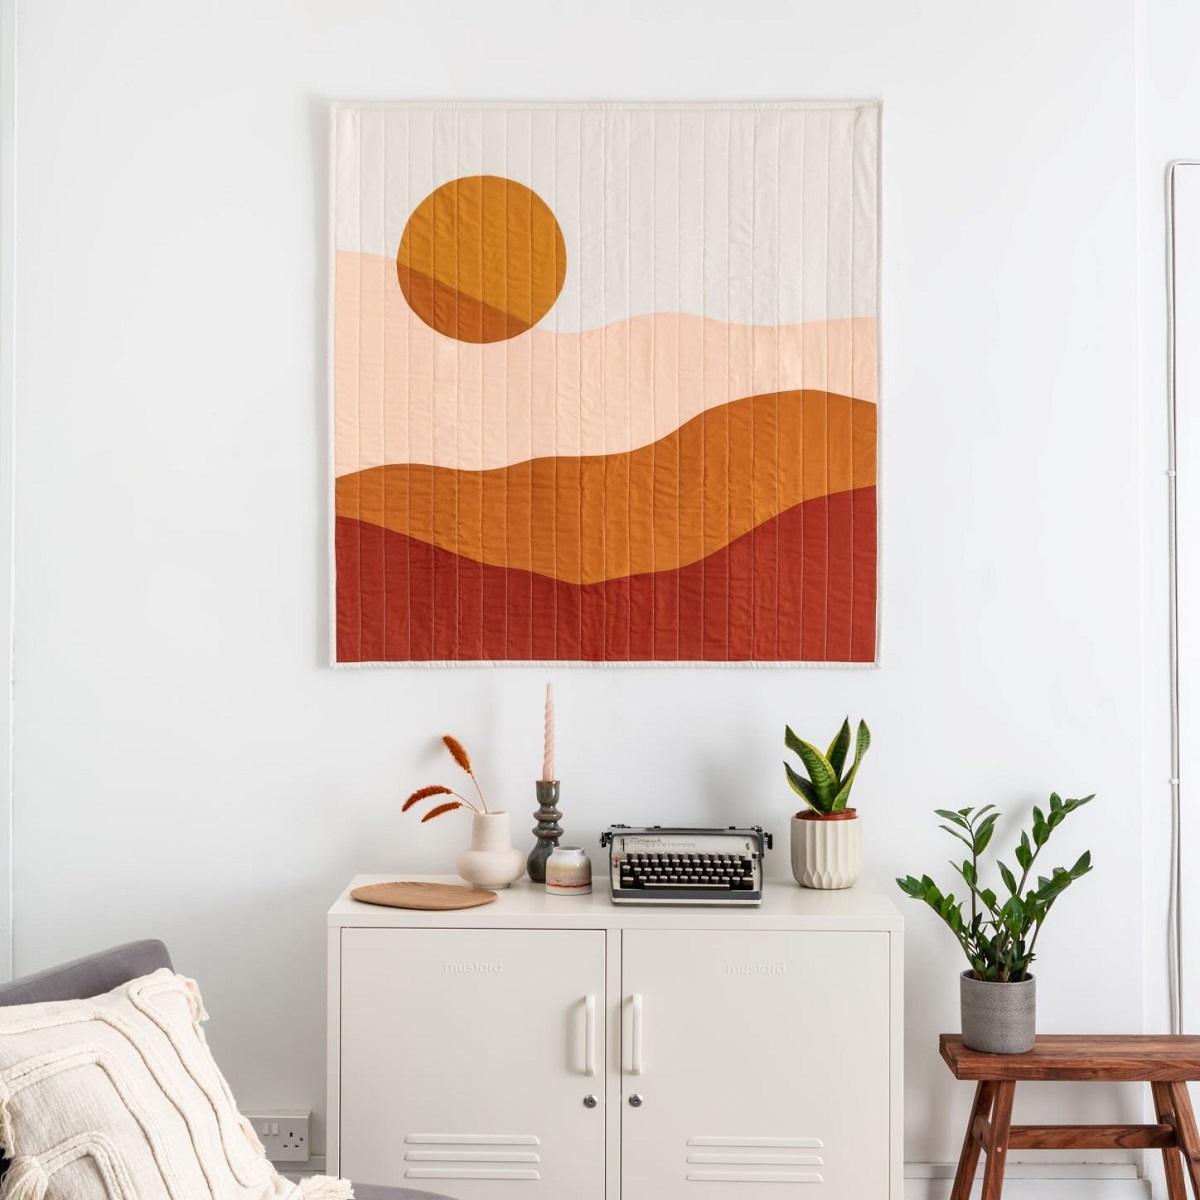
How To Make A Wall Hanging Quilt
Modified: October 20, 2024
Learn how to create beautiful wall hanging quilts with our informative articles. Perfect for beginners and experienced quilters alike.
(Many of the links in this article redirect to a specific reviewed product. Your purchase of these products through affiliate links helps to generate commission for Storables.com, at no extra cost. Learn more)
Introduction
Welcome to the world of quilt making! Making a wall hanging quilt is a creative and fulfilling project that allows you to showcase your personality, add a touch of warmth to your living space, and express your artistic abilities. Whether you’re a beginner or an experienced quilter, this article will guide you through the process of creating a beautiful and unique wall hanging quilt.
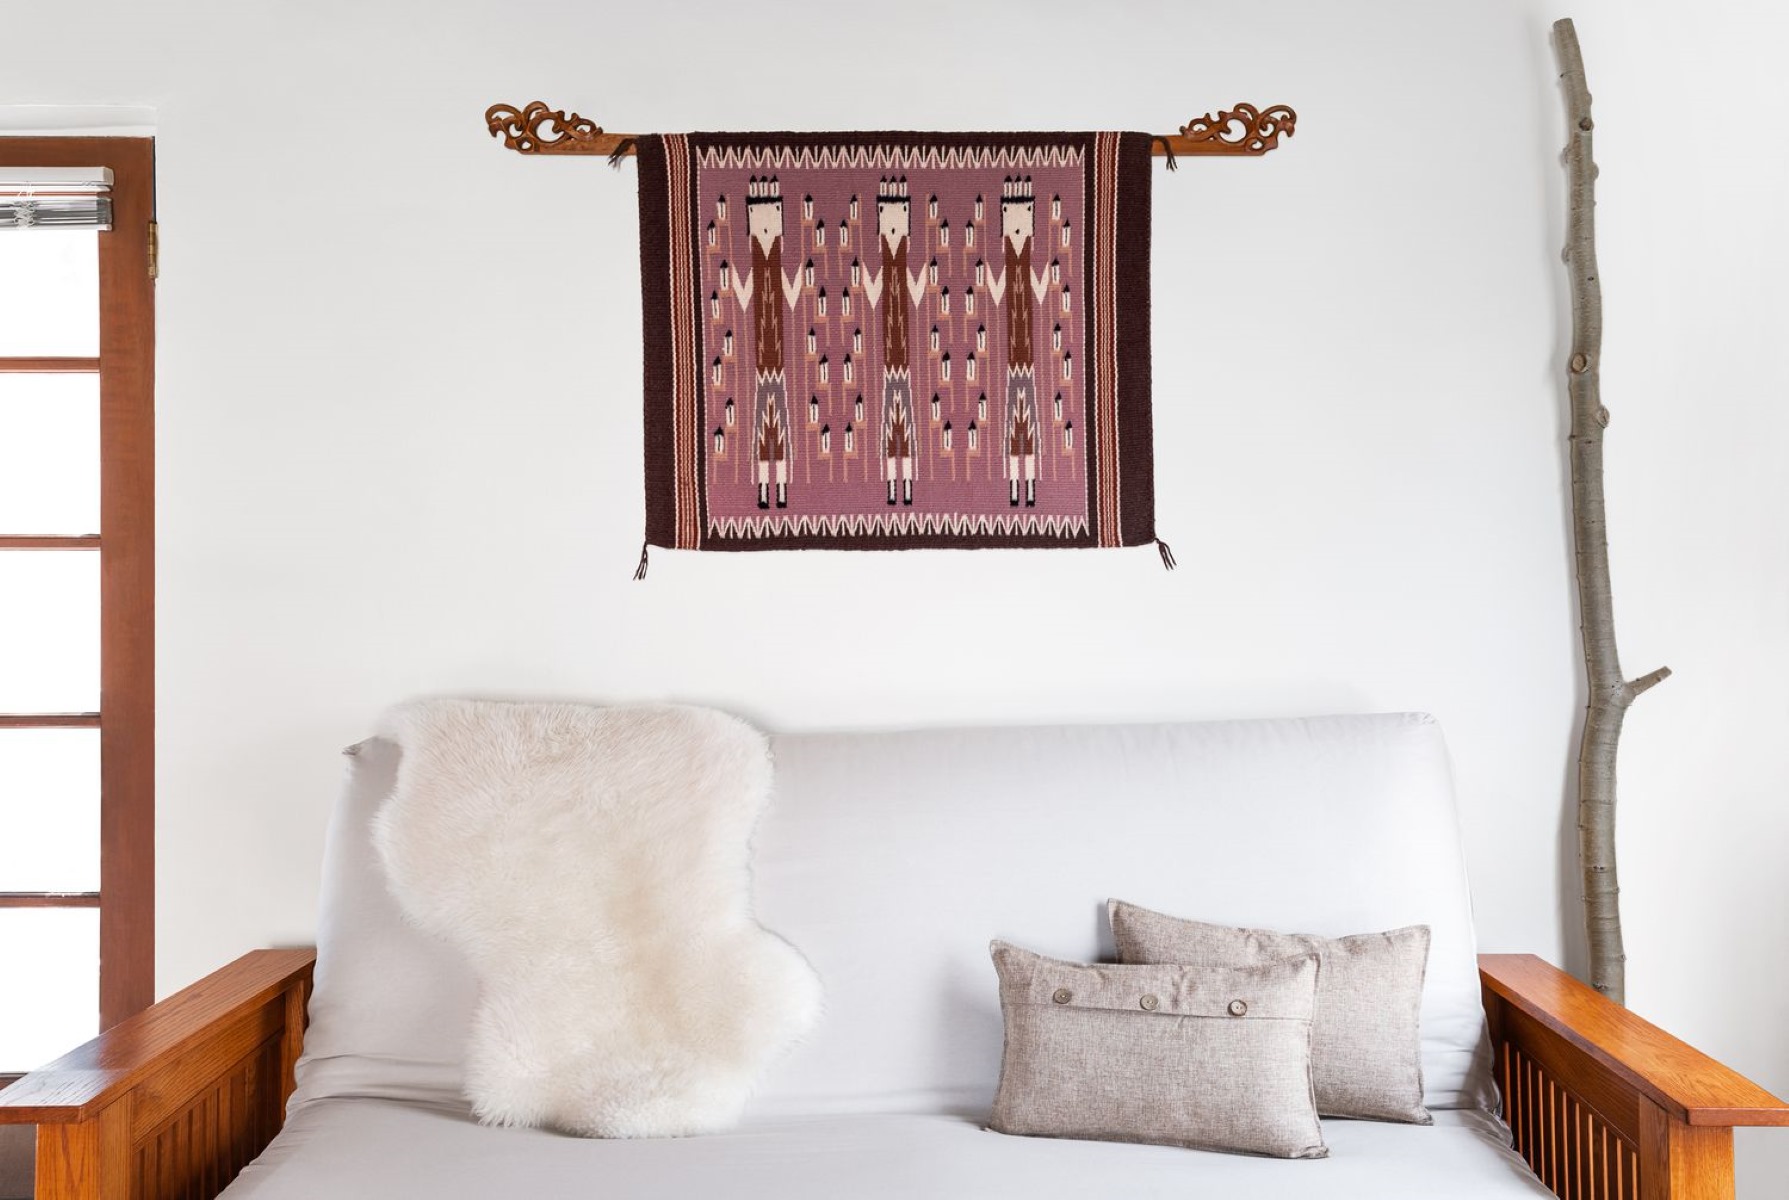
Quilting is a traditional textile art that involves sewing together layers of fabric to create a padded and decorative surface. A wall hanging quilt is a smaller-sized quilt that is designed to be displayed on a wall, adding charm and character to any room. The process of making a wall hanging quilt involves choosing a pattern, selecting fabric, cutting and sewing pieces together, adding layers, and finishing touches.
Not only is making a wall hanging quilt a fun and enjoyable hobby, but it also allows you to create a personalized piece of art that reflects your style and preferences. From selecting vibrant fabrics to trying out different patterns, you have the creative freedom to make a quilt that is truly one-of-a-kind.
In this article, we’ll walk you through the step-by-step process of making a wall hanging quilt, providing you with useful tips and insights along the way. So grab your fabric, thread, and sewing machine, and let’s get started on this exciting quilting adventure!
Key Takeaways:
- Making a wall hanging quilt is a creative and fulfilling endeavor that allows you to express your unique style and passion for sewing. From choosing the perfect pattern to adding finishing touches, each step contributes to the transformation of fabric into a work of art.
- The process of creating a wall hanging quilt involves careful selection of materials, precise cutting and sewing, and adding personal touches. Enjoy the journey of quilting, and remember that each quilt reflects your creativity and dedication.
Materials Needed
Before you dive into making a wall hanging quilt, it’s essential to gather all the necessary materials. Here’s a list of what you’ll need:
- Fabric: Choose fabrics that coordinate well together, ensuring a cohesive look for your quilt. You’ll need both a main fabric and accent fabrics for added visual interest.
- Batting: This is the layer of material that provides thickness and insulation to your quilt. Opt for batting made specifically for wall hangings, as it is lightweight and easier to manage.
- Backing fabric: This fabric will be used for the backside of your quilt. Make sure it complements the front fabric and is wide enough to cover the entire quilt.
- Thread: Select a high-quality thread in a color that matches or complements your fabric choices.
- Quilting ruler: This tool will help you accurately measure and cut your fabric pieces.
- Rotary cutter: Use a rotary cutter along with a cutting mat to easily and precisely cut your fabric.
- Pins or clips: These will be used to hold your fabric pieces together during the sewing process.
- Sewing machine: A sewing machine will make the quilt-making process faster and more efficient.
- Iron and ironing board: Pressing your fabric at various stages of the quilting process will result in neat and professional-looking seams.
- Quilting needles: These needles have a larger eye and a sharp point, making it easier to stitch through multiple layers of fabric.
- Quilting hoop or frame: Optional but helpful tools for holding your quilt layers taut while quilting.
Having all these materials at hand will ensure a smooth and enjoyable quilting experience. It’s always a good idea to gather everything you need before you start, so you don’t have to pause your project to search for missing items.
Now that you have your materials ready, it’s time to move on to the next step: choosing a pattern.
Choosing a Pattern
Choosing a pattern is an exciting part of the quilt-making process. It’s an opportunity to let your creativity shine and decide on a design that best reflects your personal style. Here are a few tips to help you choose the perfect pattern for your wall hanging quilt:
- Consider the size: Since a wall hanging quilt is meant to be displayed on a wall, you’ll want to choose a pattern that fits comfortably within the available space. Determine the dimensions you want for your quilt and look for patterns that can be easily adapted to those measurements.
- Think about the theme: Quilts can convey different moods and themes. Consider the room where you plan to hang your quilt and think about the overall aesthetic you want to achieve. Whether it’s a vibrant and cheerful design or a more subtle and calming one, choose a pattern that aligns with the desired theme.
- Explore different styles: Quilting offers a wide range of styles, from traditional to modern, and everything in between. Take some time to explore different patterns and styles to find one that resonates with you. Browse through quilting books, magazines, and online resources for inspiration.
- Think about difficulty level: Consider your quilting experience and skills when choosing a pattern. If you’re a beginner, start with a simpler pattern that involves basic shapes and techniques. As you gain more confidence, you can take on more intricate designs.
- Personalize and modify: Don’t be afraid to add your personal touch to a pattern. You can modify the colors, adjust the size, or even combine elements from different patterns to create a unique design that truly reflects your personality.
Remember, the most important thing when choosing a pattern is to have fun and enjoy the process. Trust your instincts and go with a design that excites you and sparks your creativity. Once you’ve chosen a pattern, it’s time to move on to selecting the fabric for your wall hanging quilt.
Selecting Fabric
When it comes to selecting fabric for your wall hanging quilt, the possibilities are endless. The fabric you choose will greatly influence the overall look and feel of your quilt, so it’s important to give it some careful thought. Here are some tips to help you in the process:
- Consider the color scheme: Think about the color palette you want for your quilt. Do you prefer bold and vibrant colors, or a more subtle and monochromatic look? Look for fabrics that complement each other and create a cohesive color scheme.
- Think about the theme: If your wall hanging quilt has a specific theme or motif, choose fabrics that align with it. For example, if you’re making a quilt with a nature theme, consider fabrics with floral or leaf patterns.
- Consider the scale of the print: Fabrics come in various print sizes, from small and intricate to large and bold. Think about the scale of the print you want for your quilt and choose fabrics that have a mix of different print sizes to add visual interest.
- Texture and fabric type: Consider the texture of the fabrics you choose. Some fabrics have a smooth and silky feel, while others have more texture and depth. Consider how the different fabric textures will work together in your quilt. Additionally, pay attention to the fabric type, such as cotton, flannel, or batik, and choose fabrics that suit your preferences and the desired look of your quilt.
- Coordinate and contrast: Look for fabrics that coordinate well together and create a harmonious color scheme. Additionally, consider adding fabrics that provide contrast and create visual impact within your quilt. This will add depth and dimension to your wall hanging.
- Consider the intended use: Think about where you plan to hang your quilt and the overall style and ambiance of the room. Choose fabrics that will complement the existing decor and enhance the space. For example, if the room has a more traditional style, opt for fabrics with classic patterns and motifs.
It’s a good idea to gather fabric swatches or create a color scheme board to visualize how the fabrics will look together. This will help you make an informed decision and ensure that you’re happy with your fabric choices before you start cutting and sewing. Once you’ve selected your fabrics, it’s time to prepare them for the quilting process.
Preparing the Fabric
Before you can start cutting and sewing your fabric for your wall hanging quilt, it’s important to prepare the fabric to ensure optimal results. Here are the steps to follow for preparing your fabric:
- Wash and press: Begin by washing your fabric in cold water to remove any impurities or chemicals. This step will also pre-shrink the fabric to prevent any shrinking or warping after the quilt is completed. After washing, press the fabric with an iron to remove any wrinkles and create a smooth surface for cutting.
- Square off the edges: Align the selvage edges of your fabric and use a quilting ruler and rotary cutter to ensure that they are perfectly squared off. This will ensure that your fabric pieces are cut accurately and that your quilt turns out square and even.
- Check for straight grain: Fold your fabric in half lengthwise and align the selvage edges. Take a look at the fold line to make sure it is straight and parallel to the selvage edges. Adjust the fabric as needed to ensure it is on grain.
- Prewash if necessary: Some fabrics, such as bright or dark colors, may bleed during the washing process. If you are concerned about color bleeding or if your fabric is prone to shrinking, prewash it separately before incorporating it into your quilt.
- Trim loose threads: Inspect your fabric for any loose threads or stray fibers and trim them carefully with a pair of scissors. This will help prevent any unruly threads from getting caught in your seams during the quilting process.
By taking the time to properly prepare your fabric, you’ll ensure that it is clean, wrinkle-free, and ready for cutting and sewing. This step is essential for achieving accurate measurements and a professional-looking finished quilt.
Now that your fabric is prepped and ready to go, it’s time to move on to the next step: cutting the fabric pieces for your wall hanging quilt.
Read more: How To Hang A Barn Quilt
Cutting the Fabric
Cutting the fabric accurately is a crucial step in creating a well-constructed wall hanging quilt. Here’s a step-by-step guide to help you cut your fabric pieces with precision:
- Refer to the pattern: Take a close look at the pattern you’ve chosen for your wall hanging quilt. Pay attention to the cutting instructions provided, including the dimensions and shapes of the fabric pieces you need to cut.
- Gather the necessary tools: Make sure you have all the necessary tools on hand, such as a rotary cutter, cutting mat, and quilting ruler. These tools will ensure clean and precise cuts.
- Measure and mark: Use your quilting ruler to measure and mark the dimensions of the fabric pieces on the wrong side of the fabric. Double-check your measurements to ensure accuracy.
- Cut carefully: Place your fabric on a cutting mat and use the rotary cutter to cut along the marked lines. Apply gentle and even pressure as you cut through the fabric. Take your time and cut steadily to achieve clean and accurate cuts.
- Label the pieces: As you cut the fabric pieces, it’s helpful to label them with a sticky note or piece of tape. Write the corresponding piece number or letter from your pattern on the label. This will make it easier to assemble your quilt later on.
- Repeat for all fabric pieces: Continue measuring, marking, and cutting each fabric piece according to your pattern instructions. Be diligent and precise in your cutting to ensure that all pieces fit together perfectly.
It’s important to note that accuracy in cutting is crucial for a successful quilt. Even small discrepancies in measurements can affect the overall look and fit of your quilt. Taking your time and using the proper tools will help you achieve precise cuts and create a beautifully crafted wall hanging quilt.
Now that you have all your fabric pieces cut, it’s time to move on to the next step: sewing the pieces together to create your quilt top.
When making a wall hanging quilt, be sure to use a sturdy hanging sleeve on the back to easily display it on a rod. This will help keep the quilt straight and secure on the wall.
Sewing the Pieces Together
Now that you have your fabric pieces cut and ready, it’s time to sew them together to create the quilt top. Follow these steps to sew the pieces together:
- Refer to the pattern: Review the pattern instructions carefully to ensure you understand how the fabric pieces should be arranged and sewn together. Pay attention to the seam allowances specified in the pattern.
- Arrange the fabric pieces: Lay out your fabric pieces according to the pattern, taking into consideration the design and placement of each piece. This will help you visualize how the quilt top will look once it’s assembled.
- Sew with a ¼ inch seam allowance: Set your sewing machine to a ¼ inch seam allowance, unless the pattern specifies otherwise. Sew the fabric pieces together, aligning the edges and maintaining an even seam allowance.
- Press the seams: After sewing each seam, press the seams open or to one side, depending on the pattern instructions. Use an iron set to the appropriate temperature for your fabric to create flat and neat seams.
- Continue sewing the pieces together: Repeat the sewing process for each section or row of your quilt top, following the pattern instructions and maintaining consistent seam allowances.
- Join the sections together: Once you have sewn all the pieces in each section or row, it’s time to join them together. Match the seams and edges accurately and sew them together, following the pattern instructions.
- Press the quilt top: After sewing all the sections together, press the entire quilt top to create a smooth and even surface. Check for any missed seams or puckers and correct them before proceeding.
Remember to take your time and sew with precision to achieve a well-constructed quilt top. It’s also a good idea to review and test fit your pieces before sewing them together to ensure that everything aligns properly. With each seam you sew, the quilt top will take shape, and you’ll be one step closer to completing your wall hanging quilt.
Once the quilt top is sewn together, the next step is to quilt the layers to create a sturdy and visually appealing finished piece.
Quilting the Layers
Quilting is the process of stitching the three layers of a quilt together to create a durable and decorative finished product. Follow these steps to quilt the layers of your wall hanging quilt:
- Prepare the backing fabric: Lay out your backing fabric, wrong side up, on a flat surface. Smooth out any wrinkles or creases. Ensure that the backing fabric is larger than the quilt top, allowing for a few inches of overhang on all sides.
- Layer the batting and quilt top: Place the batting on top of the backing fabric, aligning the edges. Smooth out any wrinkles. Then, carefully place your quilt top on the batting, right side up, aligning the edges with the backing and batting layers.
- Baste the layers together: Use safety pins, basting spray, or long straight pins to temporarily hold the layers together. Work from the center outwards, placing pins or basting at regular intervals to prevent shifting during quilting.
- Select a quilting method: Decide on the quilting method you want to use for your wall hanging quilt. This can include hand quilting, machine quilting, or a combination of both. Choose a method that suits your skills and desired aesthetic.
- Start quilting: Begin quilting from the center of your quilt and work your way outward. Follow the lines of the quilt pattern or create your own quilting design. Take your time and stitch accurately, ensuring that your stitches penetrate all layers of fabric.
- Secure loose threads: As you quilt, periodically stop and secure loose threads by tying them off or backstitching. This will prevent any unraveling or knots from appearing on the quilt’s surface.
- Continue quilting: Quilt the entire surface of your wall hanging quilt until you have covered the desired area. Take breaks as needed, but try to maintain a consistent quilting rhythm to keep your stitches even.
- Trim excess batting and backing: Once you have finished quilting, trim away any excess batting and backing fabric, leaving a clean and neat edge.
Quilting not only holds the layers of your wall hanging quilt together but also adds texture, depth, and visual interest to the finished piece. Experiment with different quilting techniques and designs to achieve the desired effect for your quilt.
Once you have completed quilting the layers, the next step is to add a border to frame your wall hanging quilt and give it a polished look.
Adding a Border
Adding a border is a fantastic way to frame and enhance the design of your wall hanging quilt. Here’s how you can add a border to your quilt:
- Measure and plan: Start by measuring the dimensions of your quilt top. Determine the desired width of your border and calculate how much fabric you’ll need to achieve that width. Consider the overall size of your quilt and the proportions you want to achieve.
- Cut the border fabric: Cut strips of fabric for your border, making sure they are the appropriate length and width. If your border strips are strips shorter than the length of your quilt top, cut multiple strips and join them together to achieve the desired length.
- Pin and sew: Place the border fabric strip right sides together along one edge of your quilt top. Pin the border in place, easing any necessary fullness, and sew along the edge using a ¼ inch seam allowance. Repeat this process for each edge of your quilt top.
- Press the seam: After sewing each border strip, press the seam allowances away from the quilt top. This will create a flat, professional-looking border.
- Repeat for additional borders: If you plan to add multiple borders to your quilt, repeat the process for each additional border. Measure and cut the fabric strips to the desired width and attach them one at a time, ensuring that each border is sewn securely and pressed flat.
- Measure and trim excess fabric: Once all the borders are sewn on, measure the sides and top of your quilt to ensure they are equal in length. Trim any excess fabric if necessary to create straight and aligned edges.
Adding a border not only adds visual appeal but also provides a finished look to your wall hanging quilt. When choosing border fabric, consider complementary or contrasting colors and patterns that enhance the overall design.
After adding the border, you’re almost done! The next step is to attach a hanging sleeve to the back of your quilt to make it ready for display.
Read more: How To Make A Quilt
Attaching a Hanging Sleeve
Attaching a hanging sleeve to the back of your wall hanging quilt allows you to easily display it on a wall. Follow these steps to attach a hanging sleeve:
- Measure and cut the fabric: Measure the width of your quilt and add a few inches for the sleeve width. Cut a fabric strip that is approximately twice the length of your quilt’s width and wide enough to accommodate a rod or dowel.
- Fold and press: Fold the fabric strip in half lengthwise, with the right sides together. Press along the fold to create a crisp crease.
- Sew the seam: Using a ¼ inch seam allowance, sew the length of the fabric strip, creating a long tube. Leave both ends open.
- Turn the tube right side out: Reach inside each end of the tube and carefully pull it through, turning the fabric right side out. Use a blunt tool, such as a chopstick, to push out the corners and create a neat shape.
- Press the sleeve: Press the hanging sleeve flat, ensuring that the seam is centered on the back. The folded edge will be the top of the sleeve where the rod or dowel will slide through.
- Attach the sleeve to the quilt: Position the hanging sleeve on the back of your quilt, aligning it with the top edge. Pin or hand baste the top edge of the sleeve to the back of your quilt, ensuring that it is centered and securely attached.
- Stitch the sleeve: Stitch along the top edge of the sleeve, close to the folded edge, using a straight machine stitch or hand stitch. This will secure the sleeve to the quilt.
- Optional: Add additional stitching across the width of the sleeve to prevent sagging or bunching when the quilt is hung.
With the hanging sleeve attached, your wall hanging quilt is now ready to be displayed. Simply slide a rod or dowel through the sleeve, and hang it on a wall using nails, hooks, or other appropriate hardware.
Congratulations! You’ve made it through the major steps of creating a wall hanging quilt. All that’s left is to add the finishing touches.
Finishing Touches
Once you have completed the main construction of your wall hanging quilt, it’s time to add the finishing touches that will truly make it shine. Here are a few optional but impactful steps you can take to enhance the overall look and longevity of your quilt:
- Bind the edges: Binding is the process of covering the raw edges of your quilt to create a clean and polished finish. Cut strips of fabric, fold them in half lengthwise, and sew them to the edges of your quilt using a binding method of your choice. This will encase the edges and provide a durable and attractive border.
- Label your quilt: Adding a label to your quilt is a wonderful way to document your work and leave a personal touch. Include your name, the date, and any other relevant information such as the quilt’s pattern or recipient’s name. You can hand-stitch or use a fabric pen to add the label to the back of your quilt.
- Quilt embellishments: If desired, you can further enhance your quilt by adding embellishments such as embroidery, appliqué, or fabric paint. These decorative touches can provide added texture, dimension, and personalization to your wall hanging quilt.
- Block and square up the quilt: Lay your quilt flat on a surface and check for any irregularities or sagging. Gently adjust and block the quilt by smoothing out any visible wrinkles or puckers. Use a ruler or square to ensure that the corners are square and aligned.
- Inspect and secure loose threads: Carefully inspect your quilt for any loose threads and trim them with scissors. Securing loose threads will prevent them from unraveling or poking through the quilt over time.
- Give it a final press: After completing all the finishing touches, give your quilt a final press. Use an iron set to the appropriate temperature for your fabric to smooth out any wrinkles and create a pristine appearance.
By giving attention to these finishing touches, you will add a professional and polished look to your wall hanging quilt. Each step contributes to the overall durability, appeal, and personalization of your quilt, making it a true piece of art.
Congratulations on completing your wall hanging quilt! Now you can proudly display it in your home or even give it as a thoughtful gift to someone special. Enjoy the satisfaction of your hard work and creativity each time you admire your beautiful handmade quilt.
Happy quilting!
Conclusion
Congratulations on completing your journey of creating a stunning wall hanging quilt! Through careful selection of materials, choosing the perfect pattern, cutting and sewing fabric pieces together, quilting the layers, adding a border, attaching a hanging sleeve, and adding the finishing touches, you have transformed ordinary fabric into a work of art that reflects your creativity and personal style.
Making a wall hanging quilt is a rewarding and fulfilling endeavor that allows you to express your passion for sewing, design, and craftsmanship. As you embark on future quilting projects, you will continue to refine your skills and develop your own unique quilting style.
Remember to enjoy the process and not get too caught up in perfection. Quilting is an art form that can be enjoyed at any skill level, and each quilt you make is a testament to your creativity and dedication.
Whether you’re using your wall hanging quilt to add warmth and color to your own living space or gifting it to a loved one, it is sure to be treasured for years to come. The beauty and artistry of your quilt will be admired, and the love and care you put into creating it will be felt by all who see it.
So, take pride in your accomplishment and continue to explore the world of quilting. With each project, you will hone your skills and create more stunning quilts that bring joy and beauty to the world.
Happy quilting!
Frequently Asked Questions about How To Make A Wall Hanging Quilt
Was this page helpful?
At Storables.com, we guarantee accurate and reliable information. Our content, validated by Expert Board Contributors, is crafted following stringent Editorial Policies. We're committed to providing you with well-researched, expert-backed insights for all your informational needs.


0 thoughts on “How To Make A Wall Hanging Quilt”