Articles
How To Make Butter With Food Processor
Modified: August 23, 2024
Learn how to make butter with a food processor using our informative articles. Discover easy step-by-step instructions and enjoy homemade butter at home.
(Many of the links in this article redirect to a specific reviewed product. Your purchase of these products through affiliate links helps to generate commission for Storables.com, at no extra cost. Learn more)
Introduction
Welcome to the world of homemade butter! Making butter from scratch may seem like a daunting task, but with the help of a trusty food processor, it becomes a breeze. Not only is homemade butter rich in flavor, but it also allows you to control the ingredients and customize it to your preferences. Whether you’re a culinary enthusiast or simply want to add a personal touch to your meals, learning how to make butter with a food processor is a skill worth mastering.
In this guide, we will take you through a step-by-step process of creating silky, creamy butter using a food processor. From preparing the cream to storing the final product, we’ve got you covered. So let’s roll up our sleeves, put on our aprons, and embark on this delightful butter-making journey together.
Before we dive into the nitty-gritty details, let’s gather the ingredients you’ll need for this delicious adventure.
Key Takeaways:
- Master the art of homemade butter with a food processor. Control ingredients, customize flavors, and enjoy the rich, creamy goodness of freshly made butter in just a few simple steps.
- Elevate your culinary skills by creating personalized, flavorful butter variations. Experiment with herbs, spices, and honey to savor the delightful results of your homemade butter-making journey.
Read more: How To Make Garlic Paste In Food Processor
Ingredients
To make butter with a food processor, you’ll only need two simple ingredients:
- Heavy Cream: Look for high-quality heavy cream, preferably with a fat content of 35% or higher. This will ensure a rich and creamy final product.
- Salt (optional): This ingredient is optional, but it can enhance the flavor of your butter. Use a pinch of salt to suit your taste preferences.
That’s it! Just two ingredients are all you need to transform ordinary cream into glorious homemade butter.
Now that we have our ingredients ready, let’s move on to the step-by-step process of making butter with a food processor.
Step 1: Preparing the Cream
Before we can start making butter, we need to prepare the cream. Here’s what you need to do:
- Ensure that your food processor and all utensils are clean and dry. Any residual moisture or impurities can affect the quality of the butter.
- Pour the heavy cream into the food processor bowl. The amount of cream you use depends on how much butter you want to make.
- If desired, add a pinch of salt to the cream. This will help enhance the flavor of the butter.
- Secure the lid on the food processor and make sure it is properly locked.
- Place the bowl of the food processor in the refrigerator and chill the cream for about 30 minutes. The cold temperature will help expedite the separation process later on.
By following these steps, you are preparing the cream for the butter-making process. Now, let’s move on to the next step, where the magic happens: processing the cream into butter!
Step 2: Processing the Cream
With the cream prepared, it’s time to transform it into butter using your food processor. Follow these steps to process the cream:
- Take the chilled cream out of the refrigerator and place it in the food processor.
- Secure the lid tightly on the food processor.
- Turn on the food processor and start processing the cream. Depending on the power of your machine, this process may take anywhere from 5 to 10 minutes.
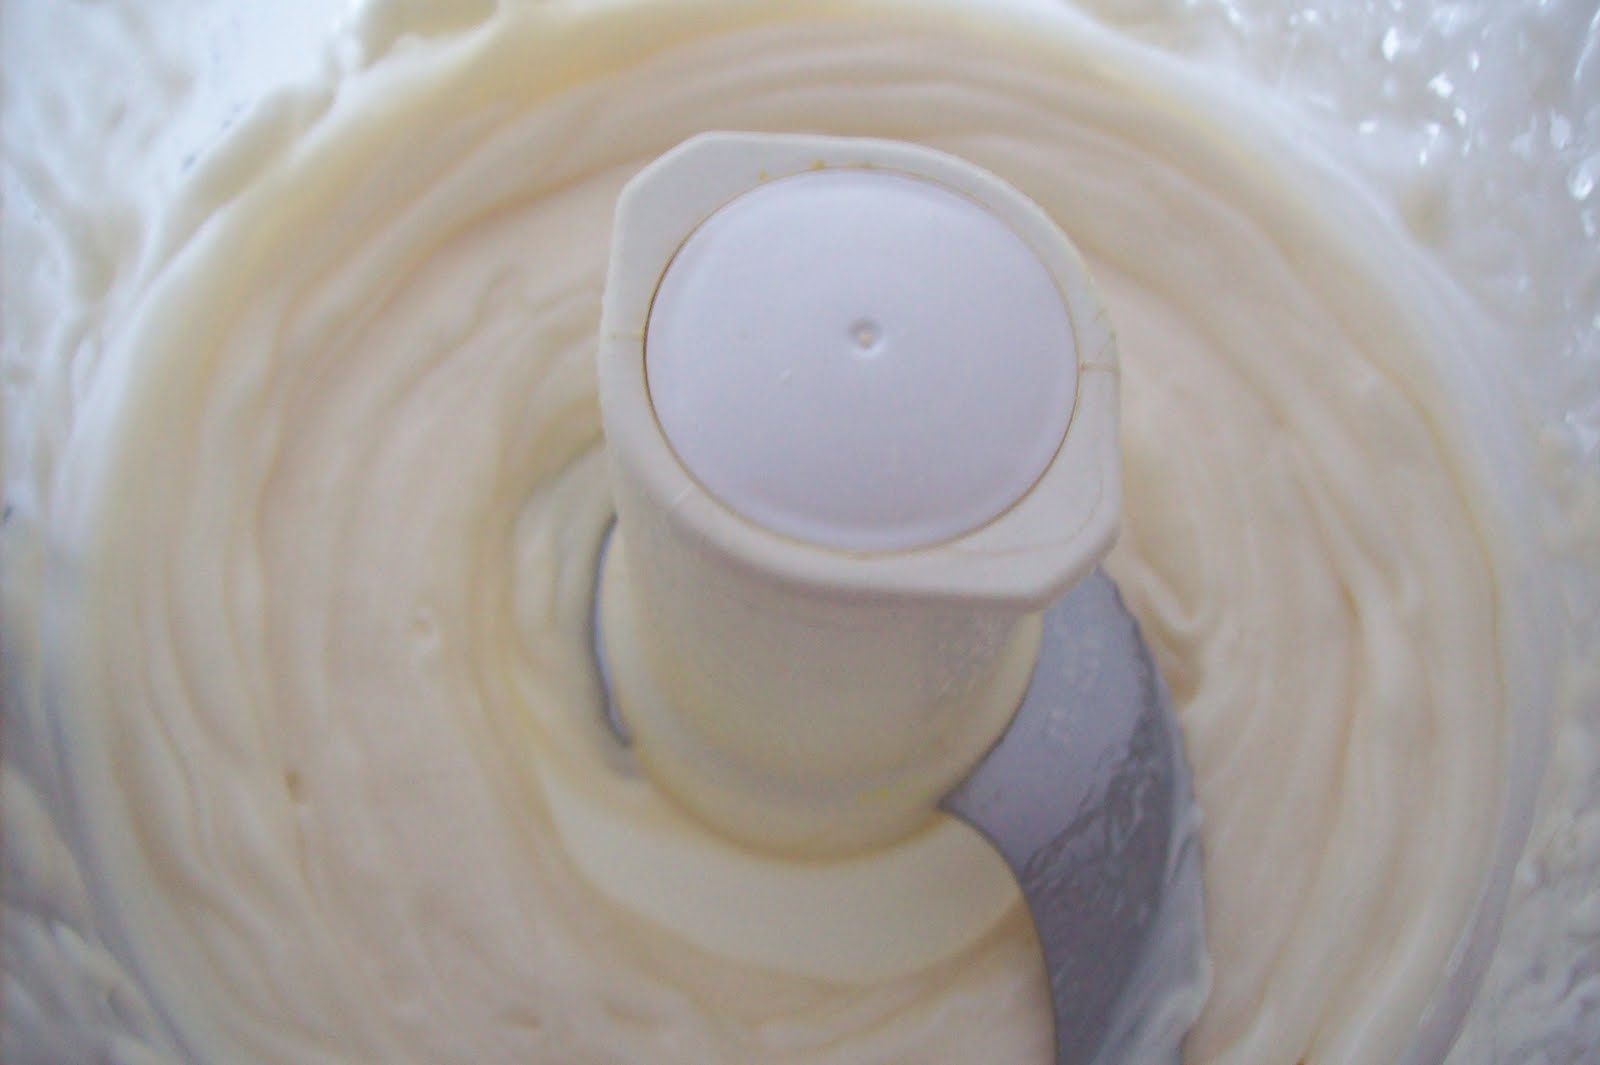
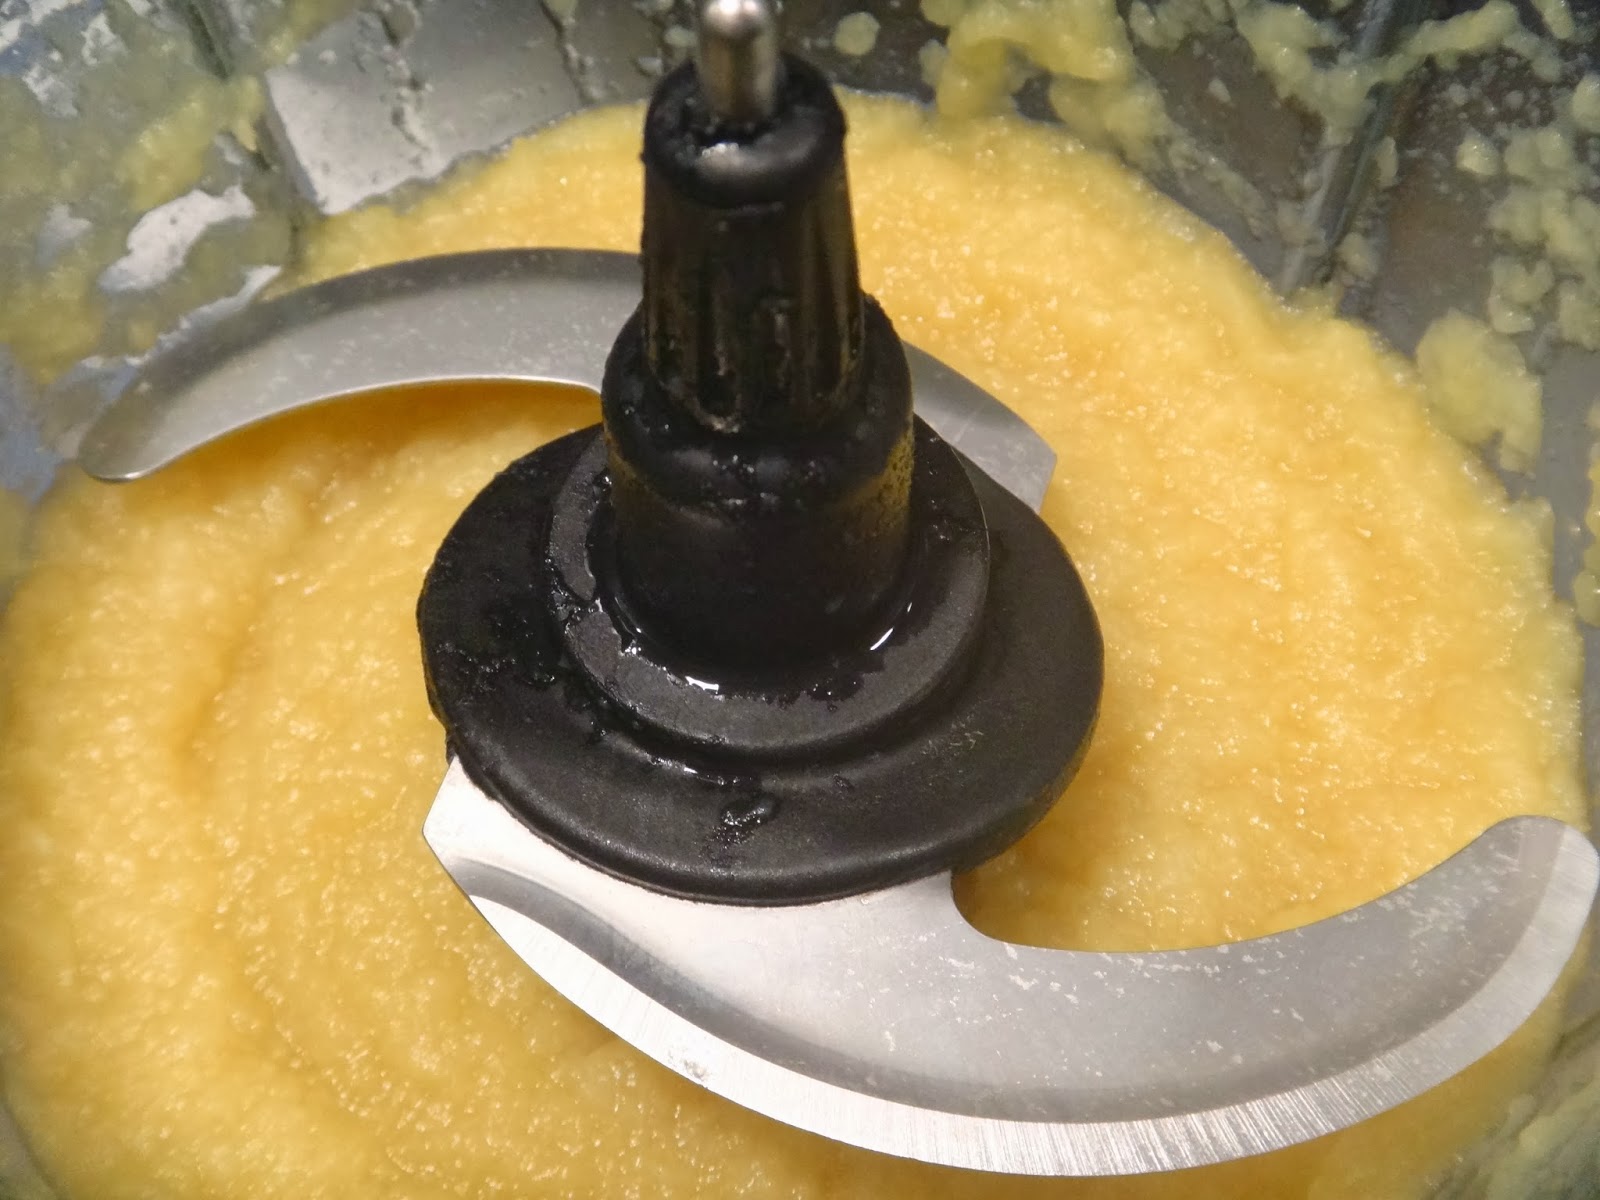
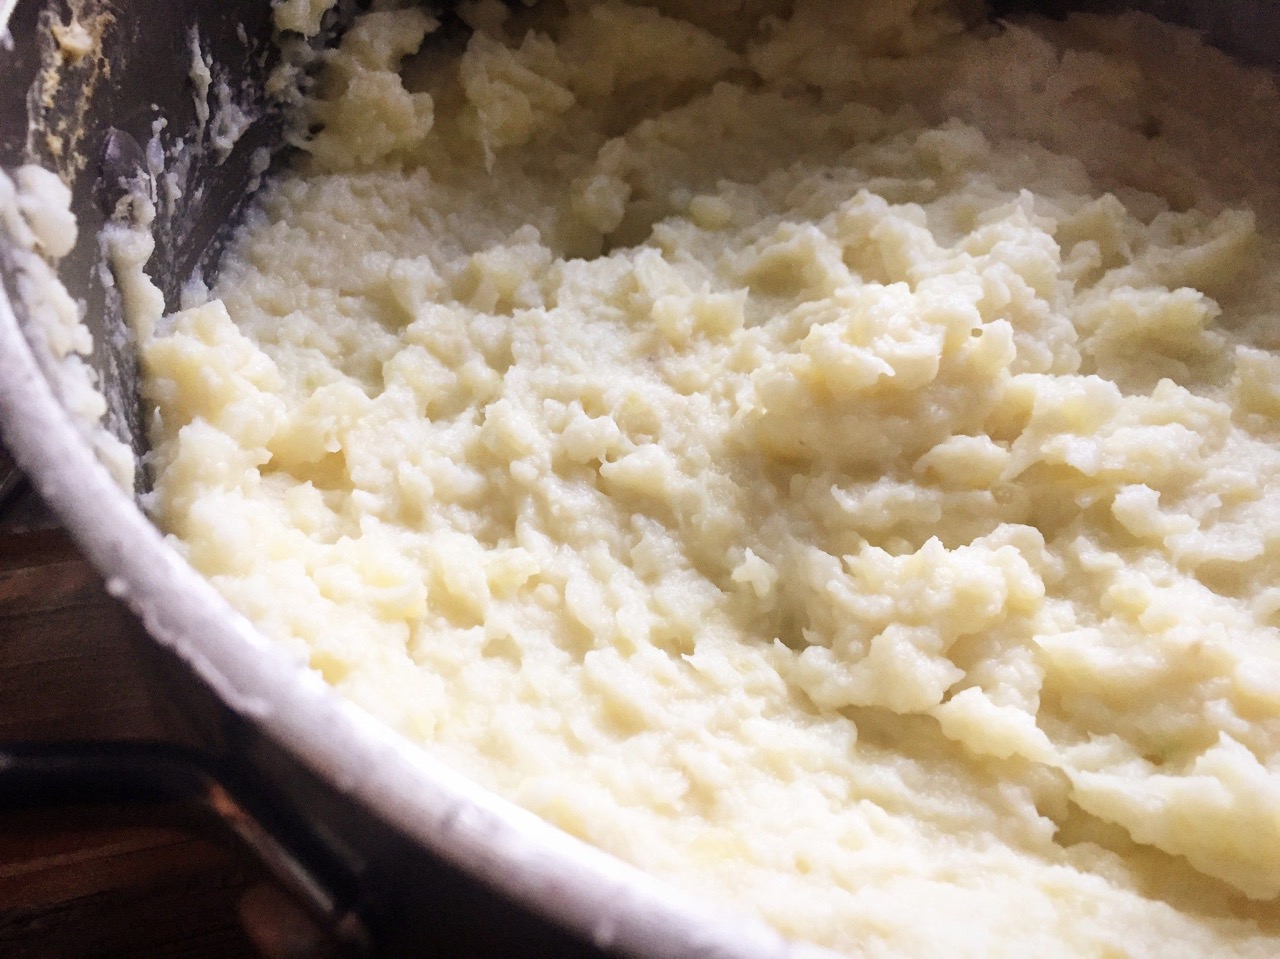
- As you process the cream, you’ll notice stages of transformation. At first, the cream will thicken and turn into whipped cream. Keep processing.
- After a few more minutes, the whipped cream will start to separate. You’ll see a thin, watery liquid (buttermilk) separating from the thick solids (butter).
- Continue processing until the butter clumps together and separates completely from the buttermilk.
It’s important to keep an eye on the cream as you process it. Overprocessing can turn the butter into a greasy consistency or even cause it to melt. So be attentive and stop processing once you see the butter has formed.
Once you’ve successfully processed the cream into butter, it’s time to move on to the next step: separating the butter from the buttermilk.
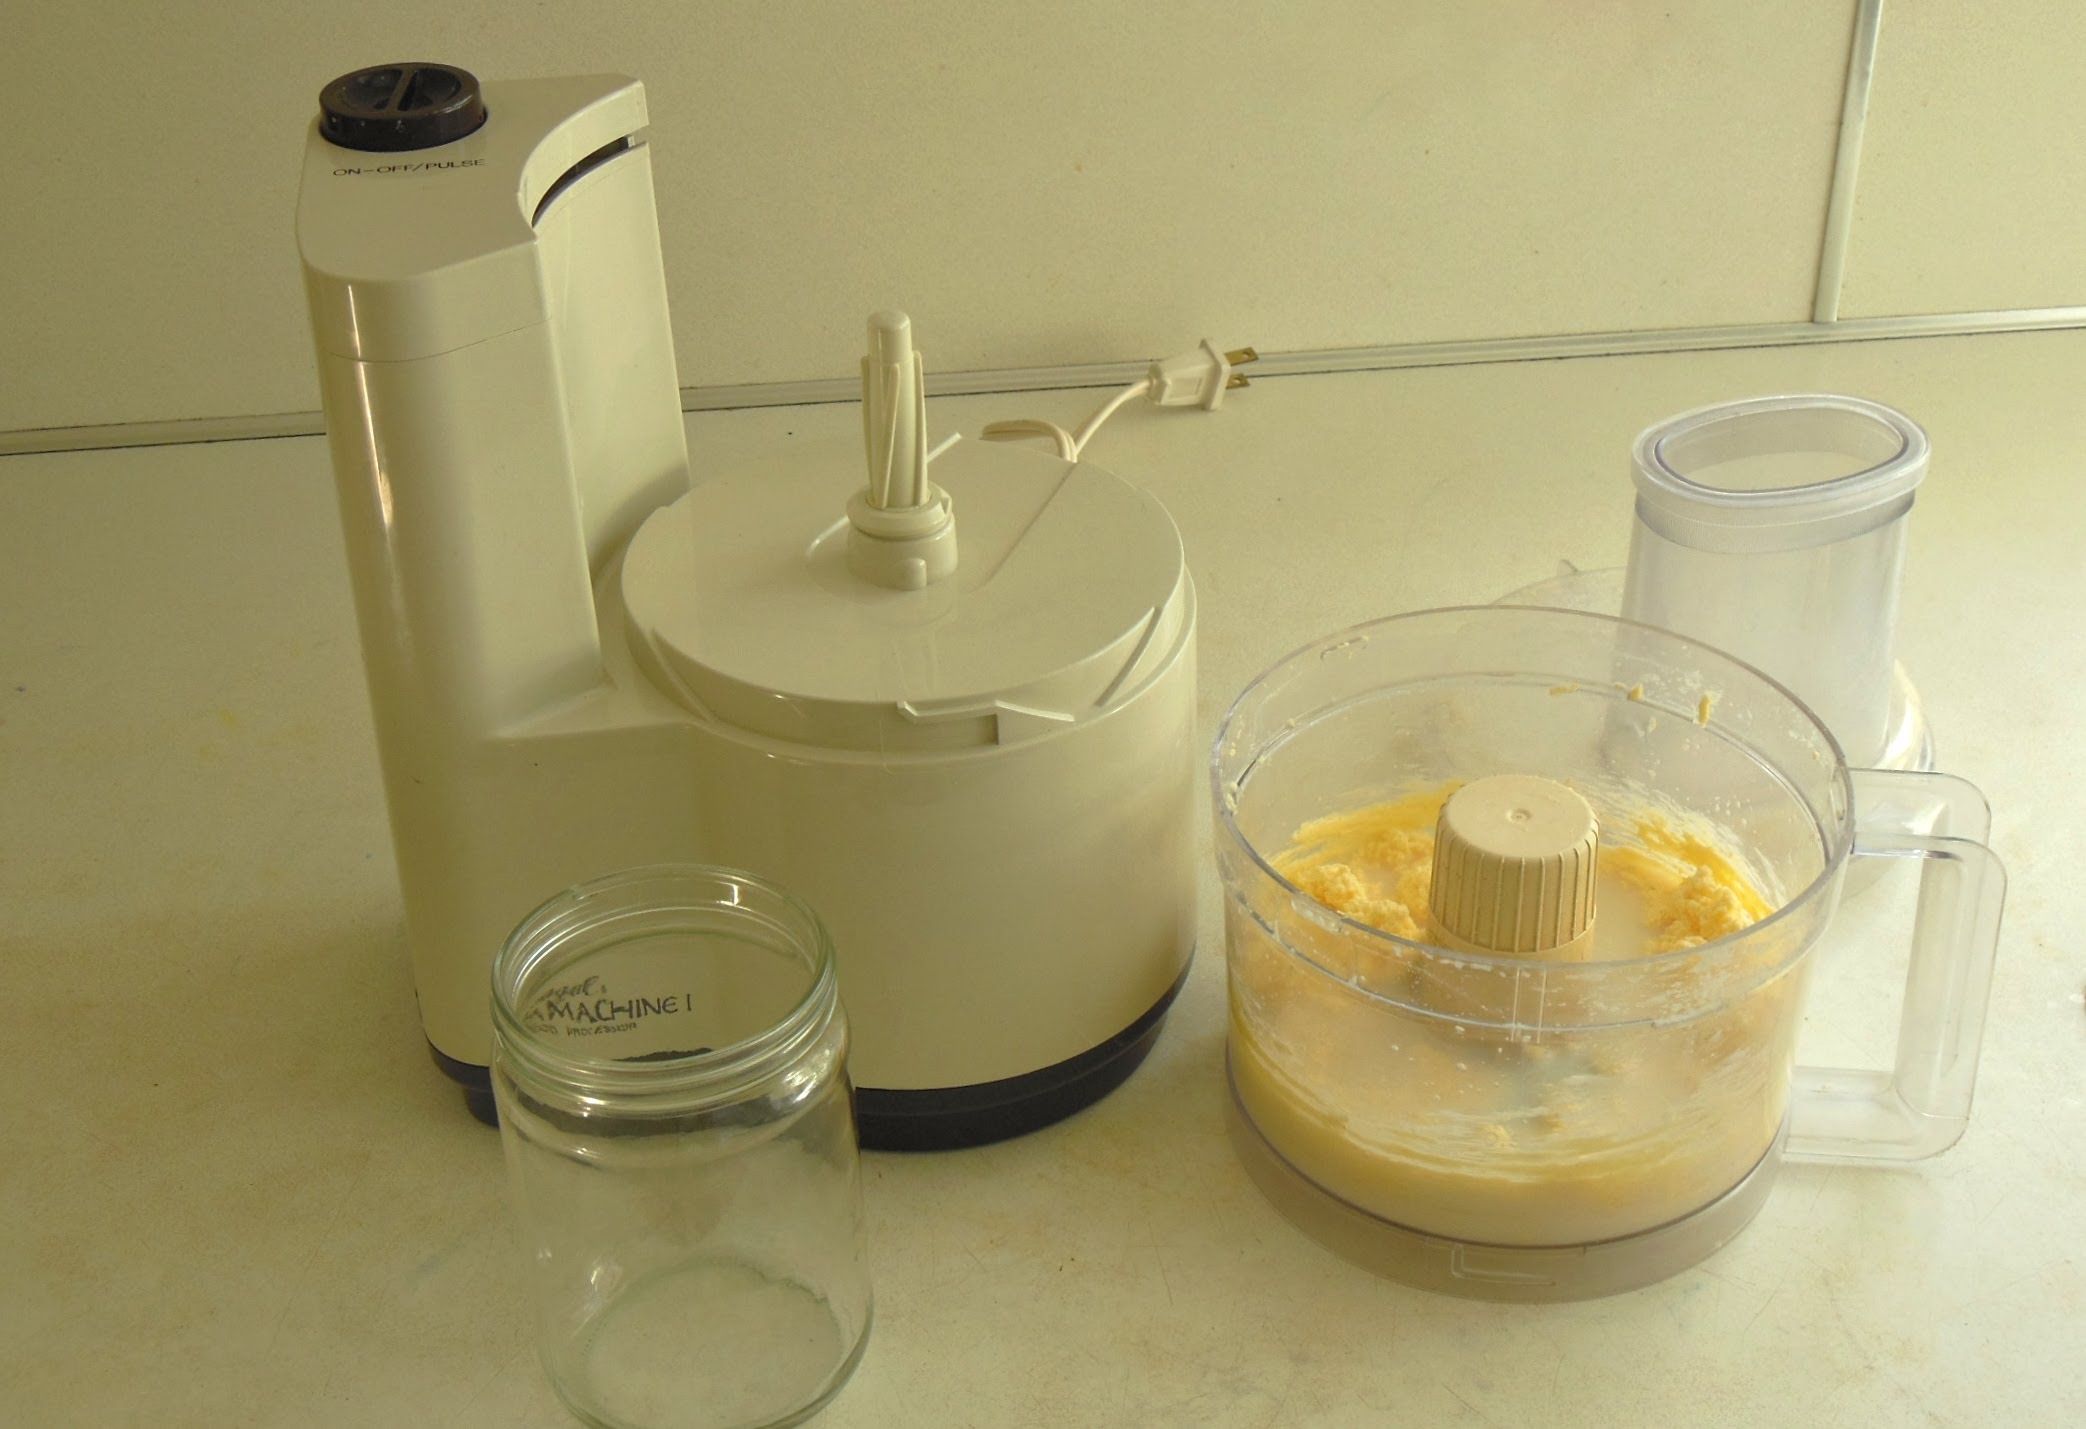
To make butter with a food processor, use heavy cream and process it until it separates into butter and buttermilk. Then, strain and rinse the butter to remove excess buttermilk.
Step 3: Separating the Butter
Now that you have your creamy butter, it’s time to separate it from the buttermilk. Follow these steps to separate the butter:
- Prepare a large bowl or basin and place a fine-mesh sieve or colander over it.
- Carefully pour the contents of the food processor into the sieve, allowing the buttermilk to drain into the bowl beneath.
- Gently press the clumps of butter with a spoon or spatula to help remove any excess buttermilk. This step is essential to prevent your butter from spoiling quickly.
- Once you’ve removed most of the buttermilk, transfer the butter to a clean work surface.
- Using your hands, gather the butter and gently squeeze out any remaining liquid. It’s important to remove as much liquid as possible to ensure the longevity of your butter.
There you have it! Your butter is now separated from the buttermilk and ready for the next step: washing.
Note: Don’t discard the buttermilk! It can be used in various recipes or enjoyed on its own.
Read more: How To Make Pesto Without A Food Processor
Step 4: Washing the Butter
Washing the butter is an important step in the butter-making process. It helps remove any remaining buttermilk and excess moisture, which can cause the butter to spoil faster. Follow these steps to wash the butter:
- Place the separated butter from the previous step in a bowl of ice-cold water.
- Gently knead and squeeze the butter in the water. This will help remove any trapped buttermilk and further solidify the butter.
- As you knead the butter, you’ll notice the water becoming cloudy. This is a sign that the buttermilk is being extracted from the butter.
- Drain the cloudy water and repeat the process with fresh ice-cold water. Continue rinsing and kneading the butter until the water runs clear.
- Once the water is clear, remove the butter from the bowl and gently pat it dry with a clean kitchen towel or paper towels.
By washing the butter, you’re ensuring its longevity and improving its overall flavor and texture. Now that your butter is clean and dry, it’s time for the final step: storing it properly.
Step 5: Storing the Butter
Proper storage is key to keeping your homemade butter fresh and delicious. Follow these steps to store your butter:
- Transfer the washed and dried butter to an airtight container or wrap it tightly in wax paper or parchment paper.
- Label the container with the date of preparation to keep track of its freshness.
- Store the butter in the refrigerator to keep it firm and prevent spoilage. It can last for about 2-3 weeks in the fridge.
- If you’d like to store your butter for a longer period, you can freeze it. Wrap it tightly in plastic wrap or place it in a freezer-safe container.
- When you’re ready to use the frozen butter, allow it to thaw in the refrigerator before using.
Remember to always use clean utensils or knives when handling the butter to prevent any contamination. Enjoy your homemade butter on toast, in baking recipes, or as a delightful addition to your favorite dishes!
Now that you’ve mastered the art of making butter with a food processor, you can impress your friends and family with your culinary skills. Get creative by adding herbs, spices, or even honey to your homemade butter for a personalized touch. Have fun experimenting and savor the delicious results!
Congratulations on your homemade butter-making journey! You now have the knowledge and skills to enjoy the rich and creamy goodness of freshly made butter whenever you desire.
Happy butter-making!
Conclusion
Making butter with a food processor is a rewarding and gratifying experience. By following the simple steps outlined in this guide, you can create delicious, homemade butter that is rich in flavor and customizable to your preferences.
From preparing the cream to processing it into butter, separating it from the buttermilk, washing it, and finally storing it properly, each step is crucial in achieving the perfect homemade butter. Taking the time to follow these steps will result in a high-quality butter that you can enjoy on its own or incorporate into your favorite recipes.
Not only does homemade butter taste exceptional, but it also allows you to have full control over the ingredients. You can choose high-quality cream with the desired fat content and even experiment with adding herbs, spices, or other flavor enhancements to create unique and personalized butter variations.
Whether you spread it on toast, use it in baking, or melt it over your favorite dishes, homemade butter adds a level of richness and decadence that is hard to beat. Plus, the satisfaction of creating something from scratch is incomparable.
So, why not give it a try? Grab your food processor, a carton of heavy cream, and embark on a butter-making adventure. The process may seem daunting at first, but with practice and a bit of patience, you’ll soon master the art of homemade butter.
Remember to enjoy the process and have fun along the way. Experiment with different techniques and flavors, and don’t be afraid to get creative. With each batch of butter you make, you’ll gain confidence and expertise, and soon enough, your homemade butter will rival any store-bought variety.
So go ahead, put your food processor to good use, and indulge in the delight of homemade butter. Your taste buds will thank you!
Frequently Asked Questions about How To Make Butter With Food Processor
Was this page helpful?
At Storables.com, we guarantee accurate and reliable information. Our content, validated by Expert Board Contributors, is crafted following stringent Editorial Policies. We're committed to providing you with well-researched, expert-backed insights for all your informational needs.

0 thoughts on “How To Make Butter With Food Processor”