Articles
How To Make Quartz Stairs
Modified: August 21, 2024
Discover the step-by-step process of creating beautiful quartz stairs with our informative articles. Master the art of making quartz stairs and elevate the aesthetics of your space.
(Many of the links in this article redirect to a specific reviewed product. Your purchase of these products through affiliate links helps to generate commission for Storables.com, at no extra cost. Learn more)
Introduction
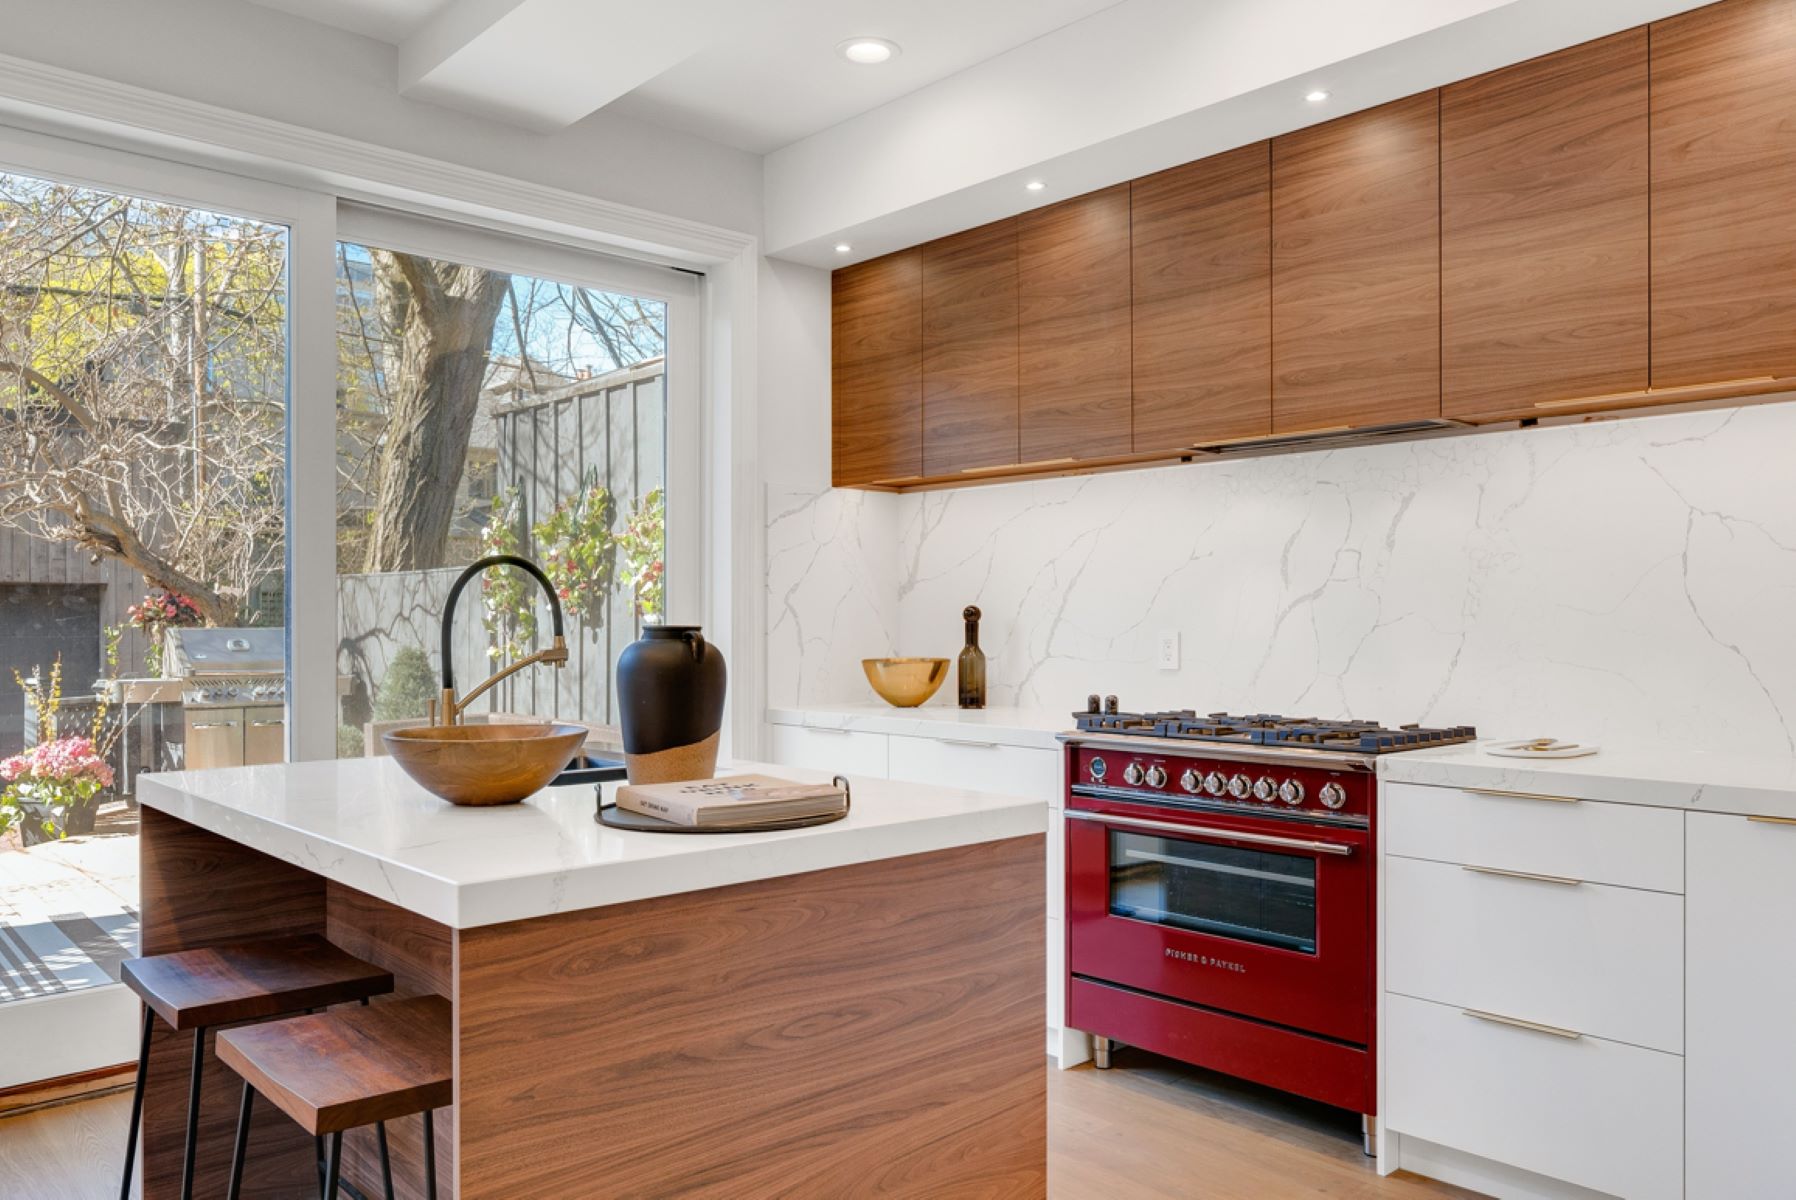
When it comes to home design and renovation, one key element that can add elegance and sophistication to any space is the use of quartz stairs. Quartz, with its durability, beauty, and versatility, is a popular choice for staircases in both residential and commercial settings. Whether you’re looking to upgrade your existing stairs or incorporate quartz into a new construction, this article will guide you through the process of making quartz stairs.
Quartz stairs offer numerous benefits over other materials. The natural strength and resilience of quartz make it resistant to scratches, stains, and impact, ensuring that your stairs will maintain their beauty for years to come. Additionally, quartz comes in a variety of colors and patterns, allowing you to customize your stairs to match your personal style and the overall aesthetic of your home.
Before diving into the process of making quartz stairs, it’s important to gather all the necessary materials and tools. You will need:
Key Takeaways:
- Elevate your home design with durable and elegant quartz stairs, offering a wide range of colors and patterns to match your personal style and enhance your living space.
- Transform your staircase into a stunning focal point by following a step-by-step guide to safely and efficiently make and install quartz stairs, ensuring a polished and professional outcome.
Read more: Who Makes The Best Quartz Countertops
Materials Needed
- Quartz slabs
- Measuring tape
- Safety goggles
- Dust mask
- Level
- Masonry saw or diamond blade
- Adhesive
- Trowel
- Clamps
- Screwdriver
- Screws
- Finishing nails
- Sanding block
- Caulk
- Paintbrush
- Paint
- Rag
Now that you have your materials ready, let’s move on to the step-by-step process of making quartz stairs.
Key Takeaways:
- Elevate your home design with durable and elegant quartz stairs, offering a wide range of colors and patterns to match your personal style and enhance your living space.
- Transform your staircase into a stunning focal point by following a step-by-step guide to safely and efficiently make and install quartz stairs, ensuring a polished and professional outcome.
Read more: Who Makes The Best Quartz Countertops
Materials Needed
Before embarking on the project of making quartz stairs, it’s important to gather all the necessary materials and tools. This will ensure that you have everything you need to complete the task efficiently and effectively. Here are the materials you will need:
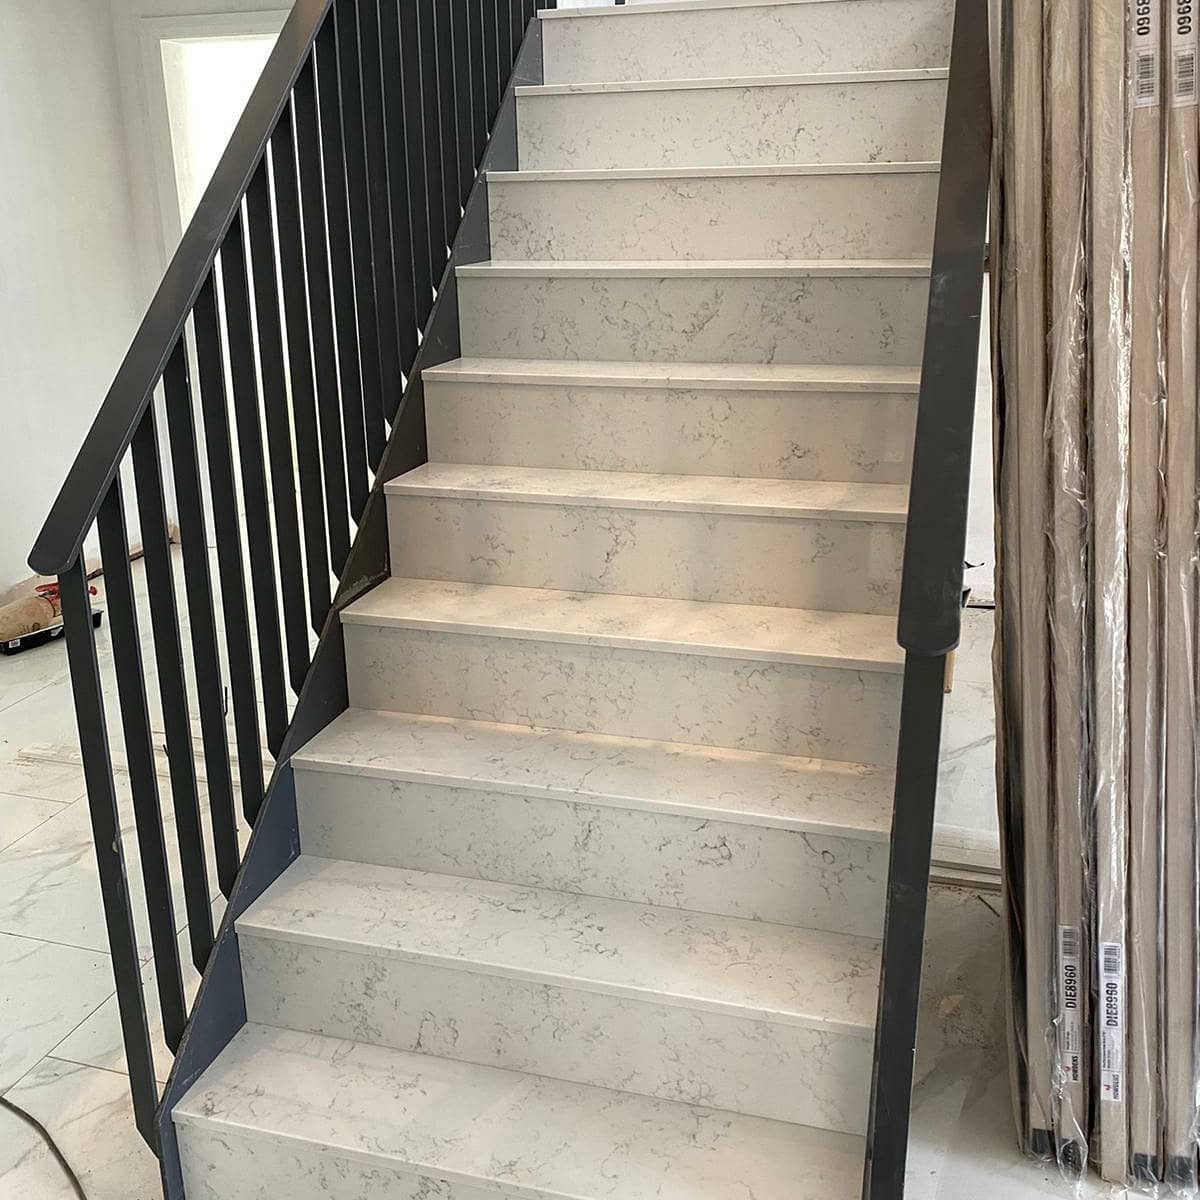
- Quartz Slabs: You will need enough quartz slabs to cover the surface area of your stairs. Consider the size and dimensions of your stairs to determine the quantity of slabs needed. Choose quartz slabs that match your desired color, pattern, and thickness to achieve the desired aesthetic.
- Measuring Tape: A measuring tape is an essential tool for accurately measuring the dimensions of your stairs. This will help you determine the correct size of quartz slabs to cut and install.
- Safety Goggles: Safety should always be a top priority when working with tools and materials. Wear safety goggles to protect your eyes from any potential debris or splinters during the cutting and installation process.
- Dust Mask: When cutting quartz slabs, it’s important to wear a dust mask to protect your respiratory system from inhaling any airborne particles. Quartz dust can be harmful to your health, so take the necessary precautions.
- Level: A level is crucial for ensuring that your stairs are properly aligned and balanced. This will prevent any unevenness or instability once the quartz slabs are installed.
- Masonry Saw or Diamond Blade: To cut the quartz slabs to the desired size and shape, you will need a masonry saw or a diamond blade. These tools are specifically designed to make clean and precise cuts on hard materials like quartz.
- Adhesive: Choose a high-quality adhesive that is suitable for bonding quartz to the surface of your stairs. Consult with a professional or the manufacturer’s guidelines to ensure you select the appropriate adhesive for your project.
- Trowel: A trowel is used to apply the adhesive evenly on the stairs and the back of the quartz slabs. This will ensure efficient bonding and a secure installation.
- Clamps: Clamps are handy for holding the quartz slabs in place as the adhesive sets. They provide stability and prevent the slabs from shifting or moving during the installation process.
- Screwdriver: Depending on your specific staircase design, you may need a screwdriver to secure the quartz slabs in place. This will ensure a secure and durable installation, especially if you are attaching the slabs to a wooden staircase.
- Screws: If using a screwdriver, you will also need screws to fasten the quartz slabs securely to the stairs. Choose screws that are appropriate for the material of your stairs.
- Finishing Nails: Finishing nails are used to secure the quartz stair risers in place. Make sure to choose nails that are long enough to penetrate both the risers and the stairs, ensuring a sturdy and professional finish.
- Sanding Block: A sanding block is essential for smoothing the edges and surfaces of the quartz slabs. This will give your stairs a polished and finished look.
- Caulk: Caulk is used to fill any gaps or seams between the quartz slabs and the surrounding surfaces. This ensures a clean and seamless appearance, as well as providing additional stability and protection against moisture.
- Paintbrush: If you have quartz stair risers that require painting, a paintbrush will be necessary. Choose a brush size based on the width of the risers and the type of paint being used.
- Paint: If you’re planning to paint the quartz stair risers, select a paint color that complements the overall aesthetic of your stairs and the surrounding area. Choose a paint specifically formulated for use on quartz or other hard surfaces.
- Rag: Have a rag or cloth handy for cleaning any excess adhesive, dust, or paint from the quartz stairs during and after the installation process.
Ensure you have all these materials ready before starting the project to avoid delays and interruptions. Having everything in place will help streamline the process and ensure a successful outcome for your quartz stairs.
Step 1: Gather the Required Tools and Safety Equipment
Before you begin making quartz stairs, it’s crucial to gather all the necessary tools and safety equipment. Having the right tools will ensure that the process goes smoothly and that you can work efficiently. Safety equipment is equally important to protect yourself from any potential hazards associated with working with quartz and tools. Here is a step-by-step guide on gathering the required tools and safety equipment:
- Create a Checklist: Start by creating a checklist of all the tools and safety equipment you will need. This will help you stay organized and ensure that you don’t miss any crucial items.
- Research: If you are unsure about the specific tools required for making quartz stairs, do some research or consult with professionals. Gathering information beforehand will ensure that you have the correct tools on hand.
- Measure and Plan: Take accurate measurements of your stairs and plan the design before gathering tools. This will help you determine the exact tools needed for your specific project.
- Quartz Slabs: Determine the quantity of quartz slabs required based on the measurements of your stairs. Ensure that the slabs are of high quality and match your desired color and pattern.
- Measuring Tape: Use a measuring tape to measure the dimensions of your stairs accurately. This will help you determine the sizes of the quartz slabs that need to be cut and installed.
- Safety Goggles and Dust Mask: Protect your eyes by wearing safety goggles and your respiratory system by wearing a dust mask. This is crucial when working with quartz, as dust particles can be harmful.
- Level: An essential tool for ensuring that your stairs are level and properly aligned. This will prevent any unevenness or instability once the quartz slabs are installed.
- Masonry Saw or Diamond Blade: Use a masonry saw or a diamond blade to cut the quartz slabs to the desired size and shape. Remember to follow safety guidelines and use proper techniques when operating these tools.
- Adhesive and Trowel: Choose an adhesive suitable for bonding quartz to the surface of your stairs, and use a trowel to apply it evenly. This will ensure a strong and secure installation.
- Clamps, Screwdriver, and Screws: Clamps will help hold the quartz slabs in place during installation. If needed, a screwdriver and appropriate screws may be necessary to secure the slabs to the stairs securely.
- Finishing Nails: If you plan to install quartz stair risers, gather finishing nails that are appropriate for securing them in place.
- Sanding Block: Use a sanding block to smooth the edges and surfaces of the quartz slabs, ensuring a polished and finished appearance.
- Caulk, Paintbrush, and Paint: Caulk is essential for filling any gaps or seams between the quartz slabs and the surrounding surfaces. If you plan to paint the stair risers, gather a paintbrush and suitable paint as well.
- Rag or Cloth: Keep a rag or cloth on hand for cleaning and wiping away any excess adhesive, dust, or paint during and after the installation process.
Once you have gathered all the necessary tools and safety equipment, you are ready to move on to the next step of making quartz stairs. Remember to always prioritize safety and follow best practices when working with tools and materials. With the right tools and equipment, you can achieve stunning and durable quartz stairs for your home.
Step 2: Measure and Plan the Stair Design
Before diving into the process of making quartz stairs, it is crucial to take accurate measurements and plan the stair design. This step ensures that the quartz slabs fit perfectly and that the final result is aesthetically pleasing. Here is a detailed guide on measuring and planning the stair design:
- Prepare the Work Area: Clear the stair area of any obstacles and ensure you have enough space to work comfortably. The work area should be clean and well-lit for accurate measurements and planning.
- Start with the Staircase Measurements: Measure the width and length of each stair tread and the height of each stair riser. Use a measuring tape to get precise measurements. Note down these measurements as they will be used to determine the size of the quartz slabs.
- Consider the Overhang: Take into account the desired overhang of the stair treads. This is the amount that the stair nose extends beyond the riser. Measure the distance from the back of the step to the front edge to determine the overhang length.
- Determine the Number of Quartz Slabs: Based on the measurements of each stair tread, calculate the number of quartz slabs required. Consider the width and length of the slabs to ensure they fit properly on each step.
- Select the Quartz Slab Thickness: Depending on the structure of your stairs, choose the appropriate thickness of quartz slabs. Thicker slabs may be required for larger, more heavily trafficked stairs for added durability.
- Plan the Stair Design: Visualize the stair design and consider the placement of the quartz slabs. Determine if you want to cover only the treads or both the treads and risers. This will influence the quantity of quartz slabs needed and the overall look of your stairs.
- Account for Safety: Ensure that the stair design meets safety standards and regulations. Check the local building codes for any specific requirements regarding stair dimensions and materials. Safety should always be a priority when planning the design.
- Make a Sketch: Create a sketch or diagram of the staircase and mark the dimensions, including the measurements of each tread and riser. This will serve as a reference during the installation process.
- Double-Check Measurements: Before proceeding to cut the quartz slabs, double-check all your measurements to make sure they are accurate. Any miscalculations can result in ill-fitting slabs and a compromised stair design.
By taking precise measurements and carefully planning the stair design, you will ensure a seamless and aesthetically pleasing installation of the quartz stairs. Preparation is key to achieving a professional-looking result that enhances the beauty and functionality of your staircase.
Read more: How To Make Paver Stairs
Step 3: Prepare the Work Area
Preparing the work area is an essential step before starting the installation of quartz stairs. A well-prepared work area will ensure a smooth and efficient process, minimizing the risk of accidents and ensuring a professional result. Here are the steps to prepare the work area:
- Clean the Staircase: Start by cleaning the staircase thoroughly. Remove any dust, debris, or loose materials from the steps and risers. This will provide a clean surface for the installation and help the adhesive bond properly.
- Remove Existing Flooring: If there is existing flooring on the stairs, such as carpet or laminate, remove it carefully. Use a utility knife or a pry bar to lift and detach the flooring from the stairs. Make sure to remove any adhesive residue as well.
- Check for Structural Issues: Inspect the staircase for any structural issues or damage. If you notice any loose or damaged steps, address the problem before proceeding with the installation. Reinforce or repair any weak areas for a sturdy foundation.
- Sand Uneven Surfaces: Use a sanding block to smooth out any rough or uneven surfaces on the steps and risers. This will ensure a flush installation of the quartz slabs and prevent any wobbling or instability.
- Fill Gaps and Cracks: If you come across any gaps or cracks on the stairs, fill them with a suitable filler or caulk. This will create a smooth and even surface for the quartz slabs and prevent any water or dirt from getting trapped underneath.
- Protect Surrounding Areas: Cover nearby surfaces, walls, and furniture with a drop cloth or plastic sheeting to protect them from dust, debris, and potential damage during the installation process. This will make the cleanup easier and prevent any accidental spills or marks.
- Ensure Proper Ventilation: Work in a well-ventilated area to ensure proper air circulation. Open windows and doors, or use fans or ventilation systems to minimize the buildup of dust and fumes from adhesives or other chemicals used in the installation process.
- Wear Protective Gear: Put on appropriate safety gear, including safety goggles, a dust mask, and gloves, to protect yourself during the installation process. These protective measures will minimize the risk of injuries and ensure a safe working environment.
By thoroughly preparing the work area, you will create an optimal environment for installing quartz stairs. Taking the time to clean, repair, and protect the surrounding areas will contribute to a successful and visually appealing installation. Now that the work area is fully prepped, you can move on to the next steps of cutting and installing the quartz slabs.
When making quartz stairs, be sure to use a diamond pickaxe to mine the quartz blocks. Place three quartz blocks in a row on a crafting table to create quartz stairs.
Step 4: Cut the Quartz Slabs for the Stair Treads
Once you have prepared the work area, it’s time to move on to cutting the quartz slabs for the stair treads. Properly cutting the slabs ensures a precise fit and a professional-looking installation. Here is a step-by-step guide on cutting the quartz slabs for the stair treads:
- Measure and Mark: Take accurate measurements of each stair tread using a measuring tape. Transfer these measurements onto the quartz slabs, marking where you need to cut. Use a pencil or a marker that can be easily removed later.
- Set Up a Cutting Area: Create a designated cutting area where you can safely cut the quartz slabs. Place a sturdy work table or platform that is large enough to accommodate the slabs. Ensure the cutting area is clean and free of any obstructions.
- Put on Safety Gear: Before starting the cutting process, put on safety goggles, a dust mask, and gloves to protect yourself from any potential hazards. Cutting quartz slabs produces dust particles that can be harmful if inhaled, so take appropriate precautions.
- Choose the Right Tool: Select a masonry saw or a diamond blade that is specifically designed for cutting hard materials like quartz. Ensure the saw is securely mounted on the work table and that the blade is properly installed.
- Cut the Quartz Slabs: Carefully position the marked quartz slab on the work table, taking care to align the cutting line with the saw blade. Start the saw and gently guide the slab along the marked line, applying even pressure to ensure a smooth and clean cut. Take your time and let the saw do the work.
- Make Straight Cuts: For straight cuts, use a guide or a straight edge to help maintain a consistent cutting line. This will ensure that all the stair treads have the same dimensions and fit together seamlessly.
- Smooth the Edges: After cutting the quartz slabs, use a sanding block to smooth the edges. This will remove any roughness or sharpness, creating a finished look and preventing any potential injuries during the installation process.
- Clean Up: Clean up the cutting area by removing any dust or debris. Dispose of the quartz scraps safely and sweep or vacuum the area to ensure it is clear of any residual particles.
Remember to practice caution and precision when cutting the quartz slabs. It is essential to follow safety guidelines and use the appropriate tools to achieve accurate cuts. By carefully cutting the quartz slabs, you will be one step closer to creating beautiful and functional stair treads.
Step 5: Install the Quartz Stair Treads
With the quartz slabs cut to the appropriate size, it’s time to move on to the installation process of the stair treads. Installing the quartz stair treads properly will ensure a secure, durable, and visually appealing result. Here is a step-by-step guide on installing the quartz stair treads:
- Prepare the Adhesive: Follow the manufacturer’s instructions to prepare the adhesive for bonding the quartz slabs to the stair treads. Mix the adhesive thoroughly and ensure it has the right consistency for easy application.
- Apply the Adhesive: Use a trowel to apply a layer of adhesive onto the surface of the stair tread. Ensure the entire surface is covered with an even layer of adhesive, taking care not to apply too much or too little. Follow the adhesive manufacturer’s guidelines for recommended coverage.
- Position the Quartz Slab: Carefully place the quartz slab onto the adhesive-covered stair tread. Align it with the edges and any reference marks you made during the planning stage. Press down firmly on the slab to ensure proper adhesion.
- Secure the Quartz Slab: If necessary, use clamps to hold the quartz slab in place until the adhesive sets. Place the clamps strategically along the edges of the slab, applying enough pressure to keep it securely bonded to the stair tread. Follow the adhesive manufacturer’s recommendations for the curing time.
- Double-Check Alignment: Once the quartz slab is secured, check its alignment and levelness. Use a level to ensure that the slab is properly positioned and that there are no significant discrepancies. Make any necessary adjustments while the adhesive is still wet.
- Repeat the Process: Repeat the above steps for each stair tread, working one at a time. Apply adhesive, position the quartz slab, secure it with clamps, and check the alignment. Take your time to ensure that each stair tread is installed accurately and consistently.
- Remove Excess Adhesive: While the adhesive is still wet, use a damp cloth or rag to remove any excess adhesive that may have squeezed out from under the quartz slabs. This will prevent the adhesive from drying and creating an unsightly appearance.
- Allow for Curing Time: Let the adhesive cure completely according to the manufacturer’s instructions. Avoid walking on the stair treads or applying any excessive weight until the adhesive has fully set. This will ensure a strong and secure bond.
- Clean the Quartz Stair Treads: Once the adhesive has cured, clean the quartz stair treads with a mild detergent and water mixture. Use a soft cloth or sponge to gently wipe away any dirt or debris, restoring the natural beauty of the quartz.
By following these steps, you will successfully install the quartz stair treads. Take your time and ensure each step is done correctly for a flawless and long-lasting finish. With the stair treads securely in place, you can now move on to installing the quartz stair risers if desired.
Step 6: Secure the Stair Treads in Place
After installing the quartz stair treads, it is important to take the necessary steps to secure them in place. This will ensure a stable and durable staircase that can withstand regular use. Here is a step-by-step guide on how to secure the stair treads:
- Remove the Clamps: If you used clamps to hold the quartz stair treads in place while the adhesive was curing, carefully remove them now that the adhesive is fully set and cured.
- Check for Stability: Before proceeding, verify that each stair tread is secure and does not wobble or move when pressure is applied. If any treads feel unstable, apply additional adhesive to reinforce the bond between the quartz slab and the stair tread.
- Pre-drill Holes (If Needed): Depending on the type of stairs and the specific installation method, you may need to pre-drill holes in the stair treads. This is recommended if you are using screws to further secure the treads to the stair structure.
- Secure with Screws (If Applicable): If screws are required or desired for added stability, position them in the pre-drilled holes and use a screwdriver to tighten them until they are snug. Be careful not to overtighten, as this can cause damage to the quartz slabs.
- Fill Screw Holes (If Necessary): If the screws leave visible holes in the quartz stair treads, use a suitable filler to fill the holes. Smooth the filler with a putty knife or a finger and allow it to dry before proceeding.
- Inspect the Stair Treads: Take a close look at each stair tread to ensure that it is securely fastened and that the surface is flush and level. Check for any gaps, loose areas, or signs of instability. Make any necessary adjustments or repairs before moving on to the next step.
- Recheck Alignment: Verify that all the stair treads are still properly aligned. Use a level to ensure that they are level and even, making any minor adjustments if needed.
- Clean the Stair Treads: Give the quartz stair treads a final cleaning to remove any dust or debris that may have accumulated during the installation process. Use a mild detergent and water mixture, along with a soft cloth or sponge, to gently clean the surface of the treads.
By following these steps, you will effectively secure the quartz stair treads, ensuring a stable and safe staircase. Take your time to double-check each tread and make any necessary adjustments. With the treads securely in place, you can now proceed to the installation of the quartz stair risers, if desired.
Read more: How To Make Dog Stairs
Step 7: Install the Quartz Stair Risers
Installing quartz stair risers can add a finishing touch to your staircase design. It helps create a cohesive and visually appealing look. Here are the steps to install quartz stair risers:
- Measure and Cut: Measure the height and width of each stair riser using a measuring tape. Transfer these measurements onto the quartz slabs for accurate cutting. Use a masonry saw or diamond blade to cut the quartz slabs according to the measurements you’ve taken.
- Precision Placement: Position the quartz riser on the stair step, ensuring that it fits snugly against the stair tread. Make sure it aligns with the edges and has a level surface.
- Apply Adhesive: Use a trowel to apply an even layer of adhesive onto the back of the quartz riser. The adhesive should cover the entire surface to ensure a strong bond.
- Attach the Risers: Carefully press the quartz riser against the stair step, firmly securing it in place. Make sure it is aligned with the edges of the stair and the adjacent risers for a seamless appearance. Apply even pressure to ensure proper adhesion.
- Secure with Finishing Nails: For added stability, use finishing nails to secure the quartz riser in place. Place the nails evenly along the edges, making sure they penetrate both the riser and the stair step beneath. This will provide a secure and professional installation.
- Repeat for Each Stair: Repeat the above steps for each stair riser, working one at a time. Double-check the alignment and levelness after installing each riser to maintain consistency throughout the staircase.
- Fill Gaps and Seams: Fill any gaps or seams between the quartz risers and the stair treads using caulk. This will create a seamless and polished finish and prevent dirt or debris from accumulating in the gaps.
- Clean and Inspect: Once all the quartz stair risers are installed, clean the stairs with a mild detergent and water mixture. Wipe away any residue or smudges from the surface of the quartz. Inspect each riser for any loose areas or imperfections and make adjustments accordingly.
By following these steps, you will successfully install quartz stair risers, enhancing the overall look and elegance of your staircase. Take your time to ensure precise measurements, alignment, and proper attachment. With the stair risers in place, you are ready to move on to the final steps of finishing touches and clean up.
Step 8: Finishing Touches and Clean Up
After completing the installation of quartz stairs, it’s time to add the finishing touches and perform the necessary clean up to achieve a polished and professional result. Follow these steps for the final touches and clean up:
- Inspect the Stairs: Carefully inspect the entire staircase, including the stair treads, risers, and any seams or joints. Look for any areas that may require additional attention or touch-ups.
- Touch Up the Seams: If there are any visible seams or gaps between the quartz slabs or risers, use a caulk that matches the color of the quartz to fill in these areas. Smooth out the caulk with a caulk smoother or a finger to create a seamless appearance.
- Apply Paint (If Desired): If you have chosen to paint the stair risers, apply the paint using a paintbrush in smooth and even strokes. Allow the paint to dry completely before using the stairs or applying any additional coats if necessary.
- Remove Protective Coverings: If you had placed protective coverings on nearby surfaces or furniture, carefully remove them to reveal the clean and finished stairs. Dispose of any debris or waste materials responsibly.
- Clean the Stairs: Give the quartz stairs a thorough cleaning to remove any dust, fingerprints, or marks from the installation process. Use a mild detergent and water solution, along with a soft cloth or sponge, to gently clean the surface of the quartz.
- Inspect for any Damage: Double-check the stairs for any signs of damage or imperfections that may have occurred during the installation process. Address any issues promptly to maintain the integrity of your quartz stairs.
- Finalize the Aesthetic: Evaluate the overall look and aesthetics of your newly installed quartz stairs. Make any final adjustments or additions, such as adding decorative elements or applying a protective sealant, if desired.
- Enjoy Your Beautiful Quartz Stairs: Once you have completed the finishing touches and clean up, step back and admire your newly installed quartz stairs. Take pride in the hard work and craftsmanship that went into creating a stunning and functional staircase.
By following these final steps, you will have successfully completed the installation of quartz stairs and achieved a professional and visually appealing result. Take the time to ensure proper cleanliness and address any necessary touch-ups. Now, enjoy your beautiful quartz stairs for years to come!
Conclusion
Congratulations on successfully making quartz stairs! By following the step-by-step guide in this article and utilizing the right tools and materials, you have transformed your staircase into a stunning focal point of your home. Quartz stairs offer durability, beauty, and versatility, making them an excellent choice for both residential and commercial spaces.
Throughout the process, you began by gathering all the necessary tools and safety equipment, ensuring a smooth and efficient installation process. Proper measurements and careful planning helped you create a well-designed staircase that perfectly fits your space. By cutting the quartz slabs accurately, installing them securely, and adding the finishing touches, you have achieved a polished and visually appealing result.
Remember to prioritize safety throughout the entire process, using appropriate safety gear and following best practices. Take your time during each step to ensure precision and accuracy, resulting in a professional outcome. Regularly inspect and maintain the quartz stairs to keep them looking their best and to prolong their lifespan.
Quartz stairs offer numerous benefits, including their resilience against scratches, stains, and impacts. The wide range of colors and patterns available allows you to customize your stairs to match your personal style and complement your home’s overall aesthetic.
Now that your quartz stairs are complete, take a moment to appreciate the beauty and functionality they bring to your living space. Enjoy the elegance and durability of quartz as you ascend and descend your stairs every day.
Thank you for embarking on this journey of making quartz stairs with us. We hope this article has provided you with valuable guidance and inspiration. With your newfound knowledge, you are equipped to create stunning quartz stairs that will make a lasting impression for years to come.
Frequently Asked Questions about How To Make Quartz Stairs
Was this page helpful?
At Storables.com, we guarantee accurate and reliable information. Our content, validated by Expert Board Contributors, is crafted following stringent Editorial Policies. We're committed to providing you with well-researched, expert-backed insights for all your informational needs.


0 thoughts on “How To Make Quartz Stairs”