Articles
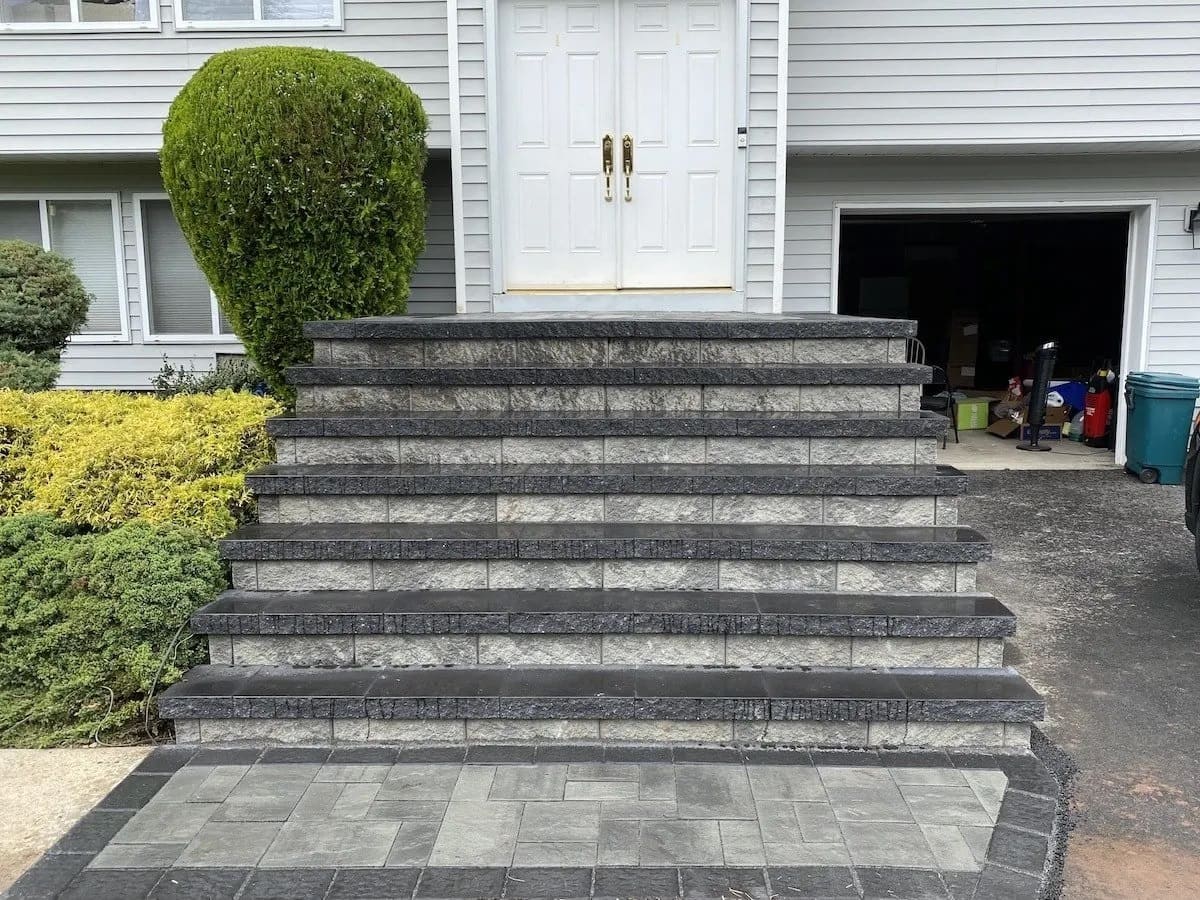
How To Make Paver Stairs
Modified: August 21, 2024
Learn how to make paver stairs with our informative articles. Get step-by-step instructions and expert tips for a successful DIY paver stair project.
(Many of the links in this article redirect to a specific reviewed product. Your purchase of these products through affiliate links helps to generate commission for Storables.com, at no extra cost. Learn more)
Introduction
Welcome to our comprehensive guide on how to make paver stairs. Whether you’re looking to update your outdoor space or add functionality to your landscape, paver stairs can be a great addition. Not only do they provide a beautiful and durable pathway, but they also add an element of elegance and sophistication to any outdoor design.
Creating paver stairs doesn’t have to be a daunting task. With careful planning, the right materials, and some basic construction know-how, you’ll be able to transform your outdoor space into a stunning and functional area in no time.
In this guide, we’ll take you through a step-by-step process to help you build your paver stairs. From planning and preparation to finishing touches, we’ll provide detailed instructions for each stage of the project. So, let’s get started!
Before we dive into the steps, let’s go over a few key points to keep in mind. First, it’s important to determine the purpose and location of your paver stairs. Are you looking to create a grand entrance to your backyard or simply connect different levels of your landscape? Understanding the intended use of the stairs will guide your design decisions.
Second, consider the style and aesthetic of your outdoor space. Paver stairs come in a variety of materials, colors, and finishes. Take some time to research and choose pavers that complement your existing landscape design or create a cohesive look for your new project.
Lastly, safety is paramount. Make sure to follow local building codes and regulations when constructing your stairs. Additionally, consider adding handrails or lighting to enhance safety, especially if your stairs are in a high-traffic area or are used in the evening.
Now that we’ve covered the basics, let’s move on to the first step: planning and preparation.
Key Takeaways:
- Planning and preparation are essential for successful paver stair construction. From measuring and marking the area to checking for utilities and obtaining permits, careful planning sets the stage for a smooth and efficient installation process.
- Attention to detail is crucial when laying the base, installing the paver stones, and adding finishing touches. Proper compaction, alignment, and securing of the stair treads ensure a visually appealing, durable, and safe set of paver stairs.
Read more: How To Build Patio Paver Stairs
Step 1: Planning and Preparation
Before you start any construction project, it’s important to have a solid plan in place. Planning and preparation are key to ensure a smooth and successful installation of your paver stairs. Here are the steps to follow:
- Measure and Mark: Begin by measuring the area where you want to install the stairs. Consider the width, height, and depth of each step. Use stakes and strings to mark the outline of the stairs, ensuring they are straight and level.
- Check for Utilities: Before digging, check for any underground utilities such as water pipes, gas lines, or electrical cables. It’s crucial to avoid damaging any existing infrastructure during the excavation process.
- Permission and Permits: Depending on your location, you may need to obtain permits or seek permission from local authorities before starting your project. Check with your municipality to ensure compliance with building regulations.
- Design Considerations: Decide on the overall design and style of your paver stairs. Consider factors such as the materials, color, texture, and pattern of the pavers. Take inspiration from your existing outdoor space or explore different design ideas to create a unique look.
- Budget and Materials: Determine your budget for the project and make a list of the materials you’ll need. This may include pavers, base material, edge restraints, adhesive or mortar, and any additional accessories such as handrails or lighting.
- Research and Seek Advice: Take the time to research different techniques and best practices for paver stair construction. Seek advice from professionals or visit local home improvement stores to gather valuable insights and recommendations.
By carefully planning and preparing for your paver stair project, you’ll be able to avoid potential pitfalls and execute the construction process efficiently. In the next step, we’ll discuss gathering the materials and tools you’ll need for the installation.
Step 2: Gathering Materials and Tools
Now that you have a clear plan in place, it’s time to gather the necessary materials and tools for your paver stair project. Here’s a list of what you’ll need:
- Pavers: Choose the type and style of pavers that best fit your design aesthetic and budget. Consider factors such as durability, color, texture, and size when making your selection.
- Base Material: The base layer of your paver stairs is crucial for stability and longevity. Common options for base materials include crushed stone, gravel, or sand. Make sure to choose a material that is suitable for your specific project requirements.
- Edge Restraints: Edge restraints are used to hold the pavers in place and prevent them from shifting over time. You can opt for pre-made edge restraints or use materials like landscape timbers, steel or aluminum edging, or even concrete curbs.
- Adhesive or Mortar: Depending on the design and style of your paver stairs, you may need adhesive or mortar to secure the pavers in place. Consult with your local supplier or a construction professional to determine the best type of adhesive or mortar for your project.
- Hand Tools: You’ll need a variety of hand tools for the installation process, including a shovel, rake, wheelbarrow, trowel, and a level. These tools will help you prepare the area, lay the base, and ensure that the pavers are properly aligned and level.
- Protective Gear: Safety should always be a priority when working on any construction project. Make sure to have safety goggles, gloves, and a dust mask to protect yourself from any potential hazards, particularly when handling base materials or adhesives.
- Optional Accessories: Consider any optional accessories you may want to include, such as handrails, lighting, or decorative elements to enhance the appearance and functionality of your paver stairs.
Once you have gathered all the required materials and tools, you’ll be well-equipped to move on to the next steps of excavating the stair area and laying the base. Stay tuned for step 3 in our guide!
Step 3: Excavating the Stair Area
Now that you have your materials and tools ready, it’s time to start the construction process by excavating the area where your paver stairs will be installed. Follow these steps for a successful excavation:
- Clear the Area: Begin by removing any plants, debris, or obstacles from the designated stair area. This will give you a clear space to work with.
- Mark the Depth: Use a measuring tape or a level to determine the desired depth of your stair treads. Mark this depth on the stakes or strings you used during the planning phase to ensure consistency.
- Dig the Trench: Start digging the trench for your stairs, following the markings you made. The depth of the trench should be equivalent to the height of one stair tread, with an additional 2-3 inches for the base material.
- Check for Level: As you excavate, regularly use a level to check the slope and ensure that the trench is even. This will help prevent any uneven or slanted stairs once the installation is complete.
- Remove Excess Soil: As you excavate, use a shovel or wheelbarrow to remove the excess soil from the trench. You can repurpose this soil elsewhere in your garden or dispose of it responsibly.
- Compact the Base: Once the trench is excavated and leveled, use a hand tamper or plate compactor to compact the soil. This will create a firm and stable base for your paver stairs.
This step is crucial for the long-term stability and durability of your stairs. By properly excavating the area and creating a solid base, you’ll ensure that your paver stairs have a strong foundation to withstand regular foot traffic and the elements.
With the excavation complete, you’re now ready to move on to the next step: laying the base material and compacting it properly. Stay tuned for step 4 in our guide!
Step 4: Laying the Base and Compacting
With the stair area excavated, it’s time to lay the base material and ensure proper compaction. This step is crucial for providing stability and preventing shifting or sinking of the paver stairs over time. Follow these steps for a successful base installation:
- Add the Base Material: Begin by evenly spreading the base material (such as crushed stone, gravel, or sand) into the excavated trench. Aim for a layer thickness of about 2-3 inches.
- Smooth and Level: Use a rake or shovel to spread the base material evenly and create a smooth and level surface. Ensure that the base is flat, with no bumps or depressions.
- Compact the Base: Next, use a plate compactor or hand tamper to compact the base material. Start from one side and work your way across, applying firm and even pressure to achieve proper compaction. Repeat this process multiple times until the base feels solid and stable.
- Check for Slope: While compacting, regularly check for the slope and ensure that it is consistent with your desired design. This will ensure proper drainage and prevent water pooling on your paver stairs.
- Leveling Sand: After compacting the base, add a thin layer of leveling sand on top. This will help facilitate the leveling of the paver stones and fill any gaps between them. Use a rake or trowel to spread the sand evenly.
- Smooth and Level Sand: Using a straight 2×4 and a level, smooth and level the sand layer by dragging the board across the surface. This will create a consistent and even surface for laying the paver stones.
Properly laying the base and compacting it ensures that your paver stairs have a strong and stable foundation. It helps prevent shifting, settling, and unevenness, ensuring that your stairs will remain intact and safe for years to come.
With the base laid and compacted, you’re now ready to move on to the next step: installing the first stair tread. Stay tuned for step 5 in our guide!
Read more: How To Make A Patio With Pavers
Step 5: Installing the First Stair Tread
With the base laid and compacted, it’s time to start laying the paver stones for your stairs. This step-by-step guide will walk you through the process of installing the first stair tread:
- Prepare the Base: Ensure that the leveling sand is smooth and even. Use a rubber mallet or the handle of a trowel to gently tap down any high spots and level out the sand if needed.
- Apply Adhesive or Mortar: If your design requires it, apply a layer of adhesive or mortar onto the prepared base. Follow the manufacturer’s instructions and use a trowel to spread the adhesive evenly.
- Place the Paver Stone: Carefully place the first paver stone onto the adhesive or mortar, aligning it with the string or guide you have in place. Press down firmly to ensure proper adhesion and stability.
- Check for Level: Use a level to ensure that the paver stone is perfectly level from front to back and side to side. Adjust the stone if needed by tapping gently with a rubber mallet to achieve a level position.
- Check for Alignment: Verify that the paver stone is aligned with the string or guide, ensuring that it is straight and in line with the rest of the stairs. Make any necessary adjustments before moving on.
- Settle the Stone: Tap the paver stone gently with a rubber mallet to help it settle into the adhesive or mortar and to create a solid bond.
- Check for Consistency: Verify that the first stair tread is consistent with the desired height and depth, ensuring that it matches the original design plan.
- Repeat the Process: Once you are satisfied with the first stair tread, proceed to install the remaining paver stones, repeating the same steps for each one.
Keep in mind that it’s crucial to work meticulously during this step, ensuring that each paver stone is properly aligned, level, and securely placed. Taking the time to do this accurately will result in a professional and visually pleasing stair installation.
With the first stair tread installed, you’re ready to move on to adding additional stair treads. This will continue the construction process and bring your paver stairs to life. Stay tuned for step 6 in our guide!
When building paver stairs, make sure to use a solid base of compacted gravel and sand to prevent shifting. Additionally, use a level to ensure each paver is evenly placed for a safe and stable staircase.
Step 6: Adding Additional Stair Treads
With the first stair tread in place, it’s time to continue building your paver stairs by adding additional stair treads. Follow these steps to ensure a seamless and visually appealing installation:
- Prepare the Base: Make sure the leveling sand is smooth and even, just as you did in Step 5 for the first stair tread.
- Apply Adhesive or Mortar: If your design requires it, apply a layer of adhesive or mortar onto the prepared base for the next stair tread. Use a trowel to spread the adhesive evenly across the surface.
- Place the Paver Stone: Carefully place the second paver stone onto the adhesive or mortar. Align it with the first stair tread, ensuring that it fits snugly against the previous step.
- Check for Level and Alignment: Use a level to verify that the second stair tread is level from front to back and side to side. Also, confirm that it is aligned with the string or guide, maintaining a straight and cohesive appearance.
- Settle the Stone: Gently tap the second paver stone with a rubber mallet to help it settle into the adhesive or mortar. This will ensure a strong bond and stability.
- Check for Consistency: Confirm that the second stair tread matches the desired height and depth, maintaining consistency with the rest of the stairs. Make any necessary adjustments before proceeding.
- Repeat the Process: Continue adding additional stair treads by following the same steps for each one. Take care to maintain a consistent level and alignment throughout the installation.
- Check the Rise and Run: Periodically measure the rise (height) and run (depth) of the stair treads to ensure they meet building code regulations and provide safe and comfortable steps.
By carefully adding each additional stair tread, you will create a sturdy and visually appealing staircase. Take the time to double-check the level, alignment, and consistency for each step, as this will contribute to the overall quality and longevity of your paver stairs.
With the installation of the additional stair treads complete, you’re now ready to move on to securing the stair treads in place. This will further enhance the durability and stability of your paver stairs. Stay tuned for step 7 in our guide!
Step 7: Securing the Stair Treads
After adding all the stair treads to your paver stairs, it’s important to secure them in place to ensure stability and prevent any shifting or movement over time. Follow these steps to properly secure the stair treads:
- Mix Mortar or Apply Adhesive: Depending on the design and materials used, mix mortar according to the manufacturer’s instructions or apply adhesive to the top of each stair tread. This will help bond the treads to the base and create a strong connection.
- Apply Mortar or Adhesive: Use a trowel to spread the mortar or adhesive evenly on the top surface of each stair tread. Make sure to cover the entire surface area to ensure proper adhesion.
- Press Down Firmly: Carefully place each stair tread back into its designated position, pressing down firmly to ensure full contact with the mortar or adhesive. This will help create a secure bond between the treads and the base.
- Check for Level and Alignment: Use a level to check that each stair tread is still level and aligned properly. Make any necessary adjustments by tapping gently with a rubber mallet until the desired level and alignment are achieved.
- Wipe Off Excess Mortar or Adhesive: Use a damp cloth or sponge to remove any excess mortar or adhesive that may have squeezed out during the installation process. This will help ensure a clean and polished appearance.
- Allow Time to Cure: Follow the manufacturer’s guidelines for proper curing time for the mortar or adhesive. This will typically range from a few hours to a day, depending on the specific product used.
- Avoid Foot Traffic: During the curing process, it’s important to avoid walking on the stair treads to allow the mortar or adhesive to fully set and create a strong bond.
- Inspect the Completed Work: Once the mortar or adhesive has cured, inspect the completed stair installation to ensure everything is secure and in place. Verify that the stair treads are level, aligned, and ready to be used.
By taking the time to properly secure the stair treads, you’ll ensure that your paver stairs are not only visually appealing but also safe and durable for regular use. The secure bond between the treads and the base will provide long-lasting stability for your stairs.
With the stair treads secured, you’re now ready to move on to the next step: installing edge restraints. These will provide a finishing touch and help prevent the paver stones from shifting or spreading. Stay tuned for step 8 in our guide!
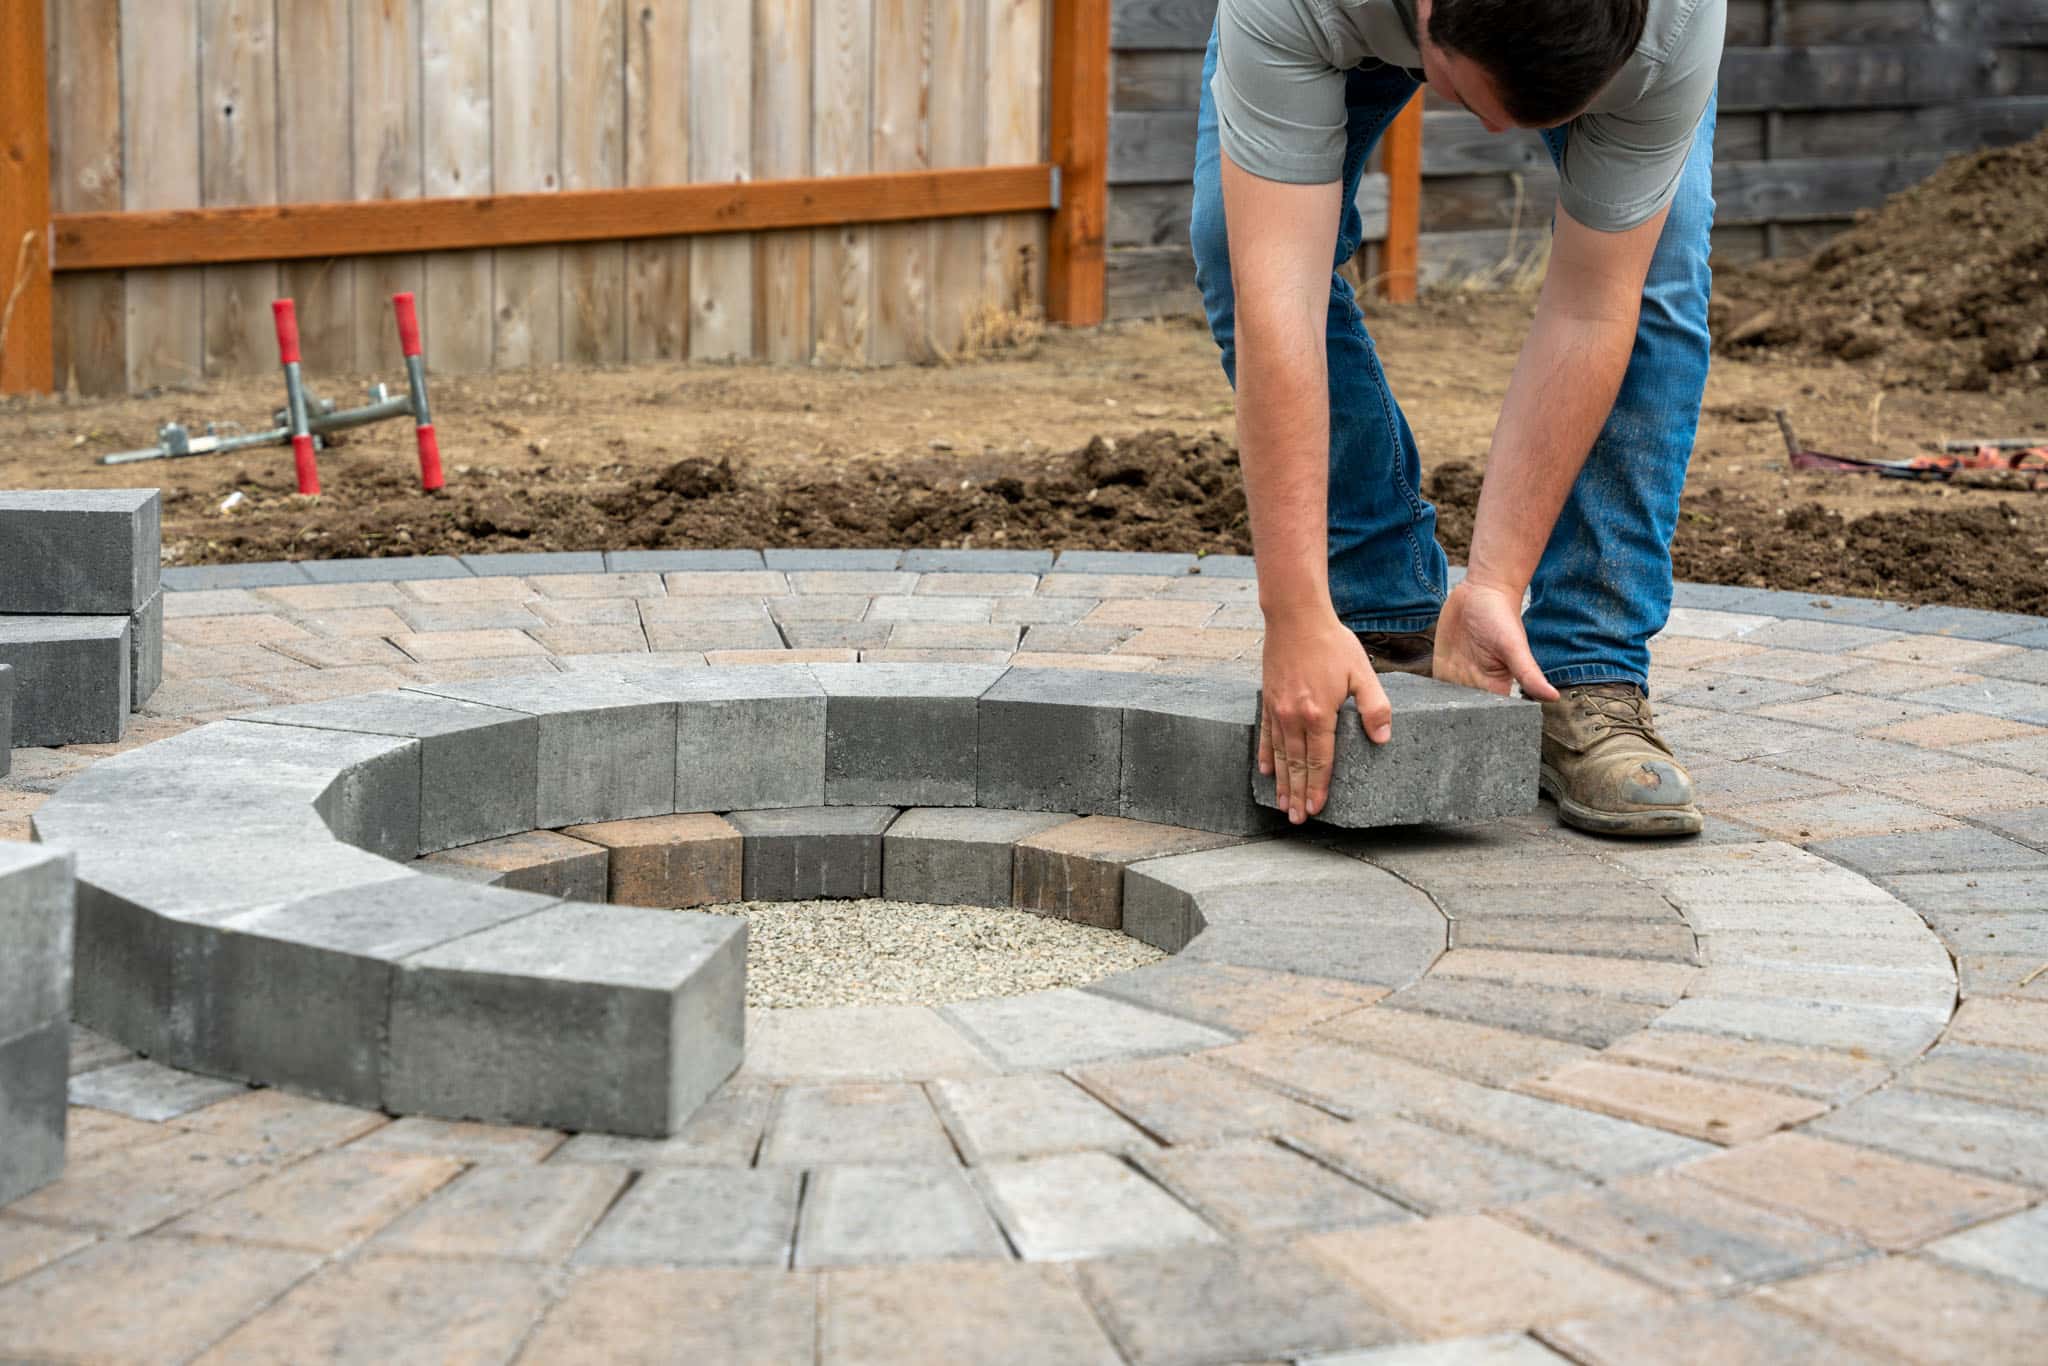
Step 8: Installing Edge Restraints
Installing edge restraints for your paver stairs is an important step to ensure that the paver stones are held securely in place and to prevent any shifting or spreading over time. Here’s how you can install edge restraints effectively:
- Choose the Right Edge Restraints: Select edge restraints that are suitable for your specific project needs. Options include pre-made edge restraints, such as concrete or plastic curbs, or materials like landscape timbers, steel or aluminum edging, or even natural stone.
- Measure and Cut: Measure the length of each edge where you will install the restraints. Use a saw or a suitable cutting tool to cut the edge restraints to the required size. Make sure to wear appropriate safety gear while cutting.
- Prepare the Base: Ensure that the base of the stair area is clean and free from debris. Use a shovel or rake to remove any loose material or dirt that may interfere with the installation of the edge restraints.
- Align the Edge Restraints: Position the edge restraints against the outer edges of the paver stairs, ensuring a snug fit. Pay close attention to the alignment and make any necessary adjustments to achieve a straight and even installation.
- Secure the Edge Restraints: Use stakes or anchors to secure the edge restraints into the base material. Drive the stakes into the ground at regular intervals along the length of the edge restraints to provide added stability and support.
- Check for Level and Alignment: Use a level to ensure that the edge restraints are level and aligned properly. Make any necessary adjustments by tapping gently with a rubber mallet until the desired level and alignment are achieved.
- Backfill and Compact: Carefully backfill the area behind the edge restraints with soil or gravel to provide additional support and stability. Use a hand tamper or plate compactor to compact the backfilled material, making sure it is firmly packed.
- Trim Excess Material: If needed, trim any excess edge restraint material that extends beyond the desired height or appearance. Use a saw or cutting tool to achieve a clean and professional finish.
By installing edge restraints, you’ll ensure that your paver stairs remain intact and well-defined over time. The edge restraints will help keep the paver stones in place, preventing potential shifting and creating a clean and polished look for your outdoor space.
With the edge restraints installed, you’re now ready for the final step: filling the gaps and adding finishing touches to complete your paver stairs. Stay tuned for step 9 in our guide!
Read more: How To Make A Circular Patio With Pavers
Step 9: Filling the Gaps and Finishing Touches
With your paver stairs almost complete, the final step involves filling the gaps between the paver stones and adding some finishing touches to enhance the overall appearance. Follow these steps to finish off your paver stairs:
- Clean the Surface: Start by sweeping off any debris or loose material from the surface of the paver stairs. Use a stiff-bristled broom or a leaf blower to ensure the surface is clean and ready for the next steps.
- Fill the Gaps: Depending on the design and personal preference, you can fill the gaps between the paver stones with polymeric sand, fine gravel, or a sand mixture. Pour the chosen material over the surface, ensuring it fills the gaps completely.
- Compact and Level: Use a broom or a brush to push the filling material into the gaps and ensure an even distribution. Then, gently tap the paver stones with a rubber mallet or tamper to compact the filling material and level the surface.
- Sweep off Excess Material: Sweep the surface of the paver stairs to remove any excess filling material or debris. This will help create a clean and polished finish.
- Seal the Paver Stones: Consider applying a sealer to your paver stones to enhance their appearance and protect them from stains and weathering. Choose a sealer suitable for the type of pavers you have and follow the manufacturer’s instructions for application.
- Add Finishing Touches: To enhance the aesthetic appeal and functionality of your paver stairs, consider adding some finishing touches. This might include installing handrails for safety, adding lighting fixtures for ambiance, or incorporating decorative elements that complement your outdoor space.
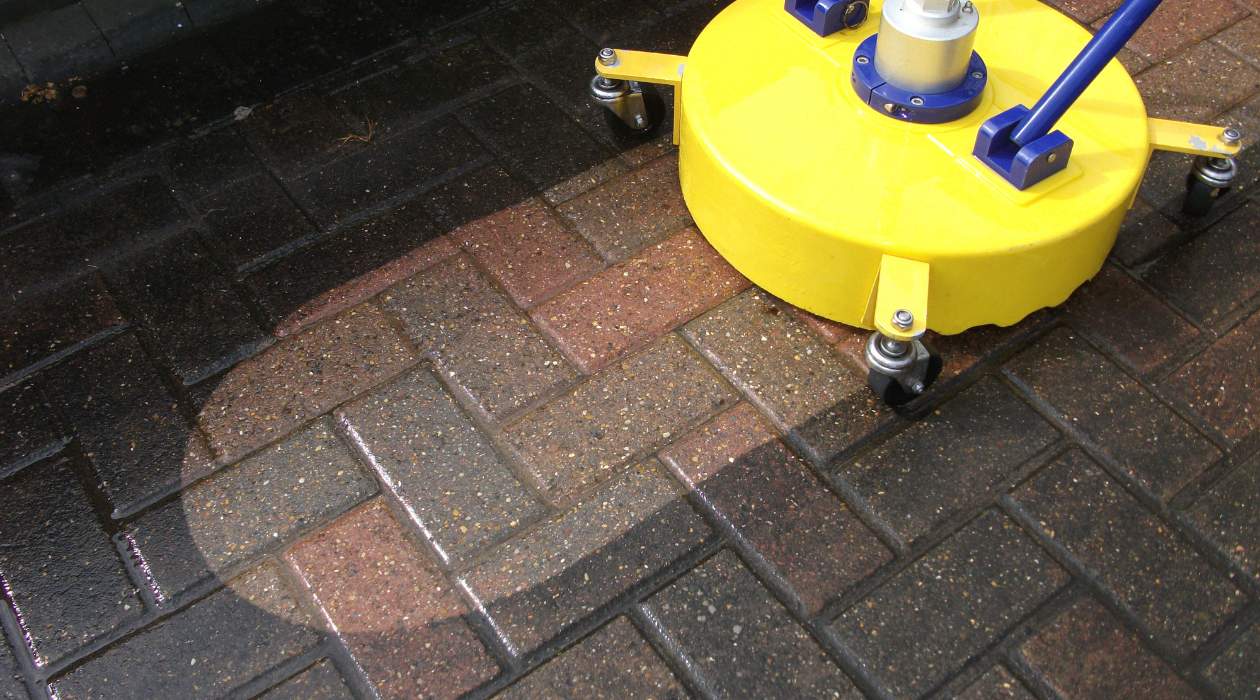
- Regular Maintenance: Keep your paver stairs looking their best by implementing regular maintenance. This may include sweeping off debris, power washing occasionally to remove stains or dirt, and reapplying sealer as necessary to protect the paver stones.
By filling the gaps and adding finishing touches, you’ll refine the appearance of your paver stairs and ensure that they are functional and visually appealing. With proper maintenance, your paver stairs will serve as a beautiful and durable feature in your outdoor space for years to come.
Congratulations! You have successfully completed all the steps involved in making paver stairs. Enjoy your newly constructed stairs and the beauty they bring to your outdoor area!
Conclusion
Congratulations on completing your journey in creating beautiful and functional paver stairs! By following the step-by-step process outlined in this guide, you have successfully transformed your outdoor space and added a touch of elegance and sophistication.
Throughout this guide, we covered the importance of planning and preparation, gathering materials and tools, excavating the stair area, laying the base and compacting it, installing the first stair tread, adding additional stair treads, securing the stair treads, installing edge restraints, and filling the gaps. Each step plays a crucial role in the construction process, ensuring the durability, stability, and aesthetic appeal of your paver stairs.
Remember, safety should always be a priority. Take the necessary precautions and follow building codes and regulations to ensure a safe and secure installation. Seek professional advice or assistance if needed, especially for larger or more complex projects.
With your paver stairs complete, take the time to admire your hard work and enjoy the transformed space. Your new stairs will serve as a beautiful pathway and a focal point, enhancing the overall look and functionality of your outdoor area.
Don’t forget the importance of regular maintenance. Keep your paver stairs clean by sweeping off debris and addressing any stains or dirt that may occur over time. Also, consider reapplying a sealer periodically to protect the paver stones and maintain their vibrant appearance.
Thank you for choosing our guide as your companion in creating paver stairs. We hope you found this information helpful and that you are pleased with the results of your construction project. Enjoy the beauty and functionality of your new paver stairs for many years to come!
Frequently Asked Questions about How To Make Paver Stairs
Was this page helpful?
At Storables.com, we guarantee accurate and reliable information. Our content, validated by Expert Board Contributors, is crafted following stringent Editorial Policies. We're committed to providing you with well-researched, expert-backed insights for all your informational needs.


0 thoughts on “How To Make Paver Stairs”