Articles
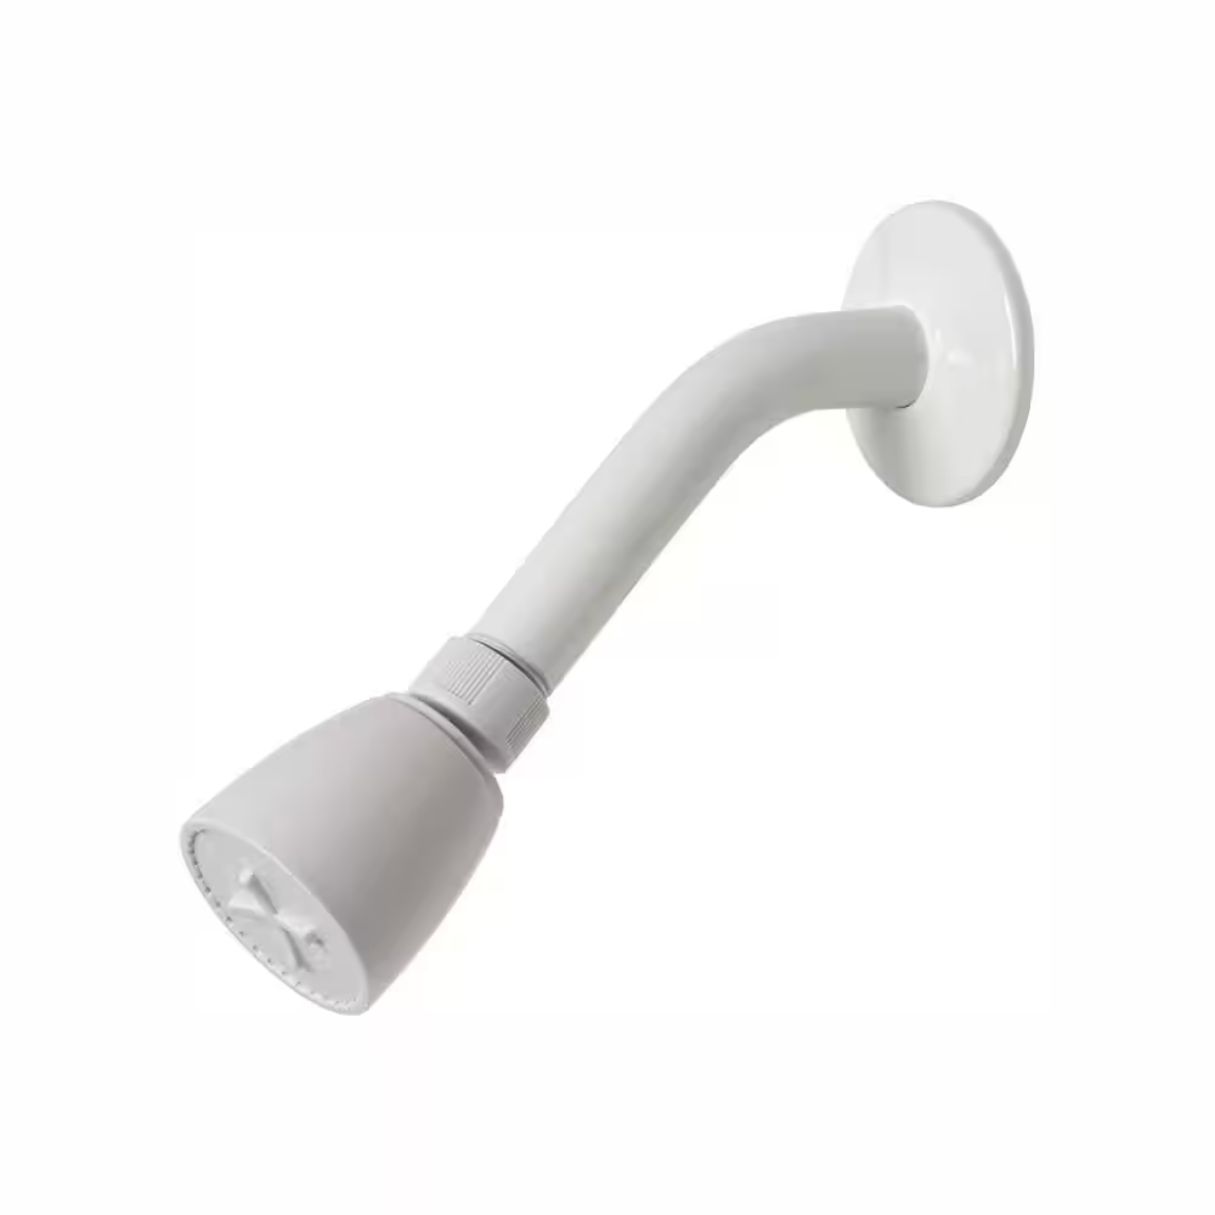
How To Open Earth Showerhead A112.18.1
Modified: August 27, 2024
Learn how to open the Earth Showerhead A112181 with our informative articles, providing step-by-step instructions and helpful tips.
(Many of the links in this article redirect to a specific reviewed product. Your purchase of these products through affiliate links helps to generate commission for Storables.com, at no extra cost. Learn more)
Introduction
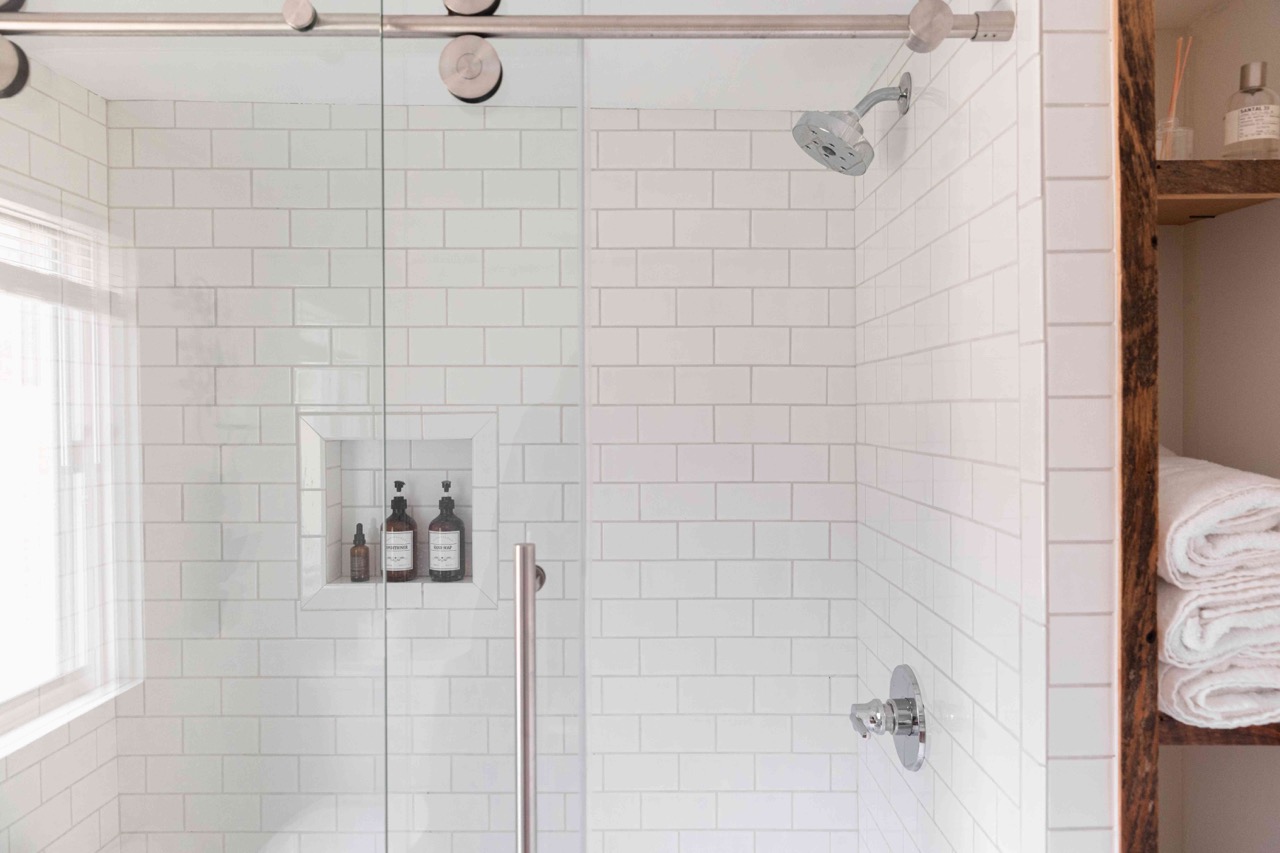
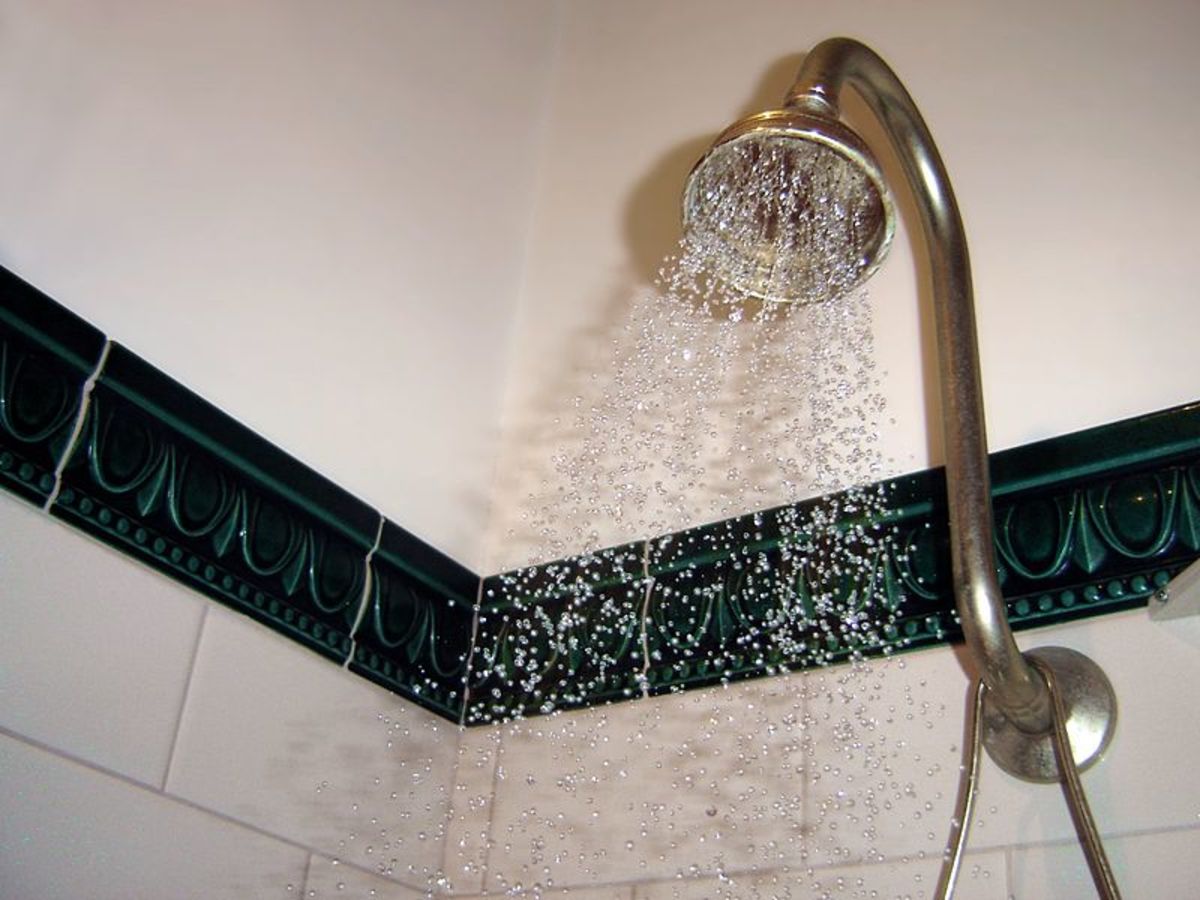
Welcome to our comprehensive guide on how to open an Earth Showerhead A112181. The Earth Showerhead A112181 is a popular choice among homeowners for its water-saving features and quality performance. However, like any showerhead, it may require occasional cleaning or maintenance. In this article, we will take you through a step-by-step process on how to open the Earth Showerhead A112181 and provide you with some essential tips to keep it in optimal condition.
Opening your Earth Showerhead A112181 can be a simple and straightforward process, as long as you have the right tools and follow the correct steps. By doing so, you can ensure that your showerhead continues to deliver a refreshing and satisfying shower experience while promoting water conservation.
In the following sections, we will walk you through each step of the process, from gathering the necessary tools and materials to reassembling the showerhead and restoring the water supply. So, let’s dive in and get started!
Key Takeaways:
- Keep your Earth Showerhead A112181 in optimal condition by following a step-by-step process to open, clean, and reassemble it, ensuring a refreshing and water-saving shower experience.
- Gather the necessary tools, turn off the water supply, remove, clean, and reattach your Earth Showerhead A112181 to maintain its performance and contribute to water conservation efforts.
Step 1: Gather the necessary tools and materials
Before you begin opening your Earth Showerhead A112181, it’s essential to gather all the necessary tools and materials to ensure a smooth and efficient process. Here are the items you’ll need:
- Adjustable wrench
- Plumber’s tape
- Soft cloth or sponge
- Vinegar or lime scale remover
- Bucket or basin
The adjustable wrench will help you remove the showerhead from the shower arm, while the plumber’s tape will help create a secure seal when reattaching the showerhead. The soft cloth or sponge will come in handy for cleaning and removing any debris or build-up. Vinegar or lime scale remover is recommended for descaling the showerhead components, effectively removing any mineral deposits that may have accumulated over time. Finally, you’ll need a bucket or basin to catch any water that may drip during the process.
Make sure to have all these tools and materials readily available before proceeding to the next step. It will save you time and allow for a seamless experience as you open and maintain your Earth Showerhead A112181.
Step 2: Turn off the water supply
Before you can begin removing the Earth Showerhead A112181, it’s crucial to turn off the water supply to prevent any water leakage or potential damage. Here’s how to do it:
- Locate the shut-off valve: The shut-off valve is usually located near the shower or bathroom. It may be a separate valve specifically for the shower or a main water shut-off for the entire house. If you’re unsure about the location of the shut-off valve, refer to your home’s plumbing system or consult a professional.
- Turn off the water supply: Once you’ve located the shut-off valve, turn it clockwise to shut off the water supply. Make sure to turn it completely to ensure no water is flowing to the showerhead.
- Test the water supply: To confirm that the water supply is indeed turned off, turn on the shower faucet and check if water is running. If no water comes out, then you have successfully shut off the water supply.
By turning off the water supply, you eliminate the risk of water leakage and make it safer to remove the showerhead without getting wet. It’s a crucial step in the process, so don’t skip it.
Once you’ve turned off the water supply, you can move on to the next step of removing the showerhead from the shower arm.
Step 3: Remove the showerhead from the shower arm
Now that you have turned off the water supply, it’s time to remove the Earth Showerhead A112181 from the shower arm. Follow these steps:
- Locate the shower arm: The shower arm is the pipe that extends from the wall and connects to the showerhead. It is usually visible and protruding from the wall just below the showerhead.
- Gently grasp the showerhead: Hold the showerhead firmly with one hand while using your other hand to hold the shower arm for stability.
- Turn counterclockwise: Using the adjustable wrench, carefully turn the showerhead counterclockwise to loosen it. Be cautious not to apply excessive force or twist the shower arm. Slow and steady is the key.
- Continue turning: Once the showerhead is loosened, you should be able to unscrew it by hand. Keep turning counterclockwise until it is completely separated from the shower arm.
It’s important to be careful when unscrewing the showerhead to avoid any damage to the shower arm or the showerhead itself. If you encounter resistance or the showerhead is difficult to remove, you may need to apply a bit more force with the wrench or seek professional assistance.
With the showerhead successfully removed, you can now proceed to the next step of identifying the type of showerhead connection, which will determine the appropriate method to unscrew the showerhead.
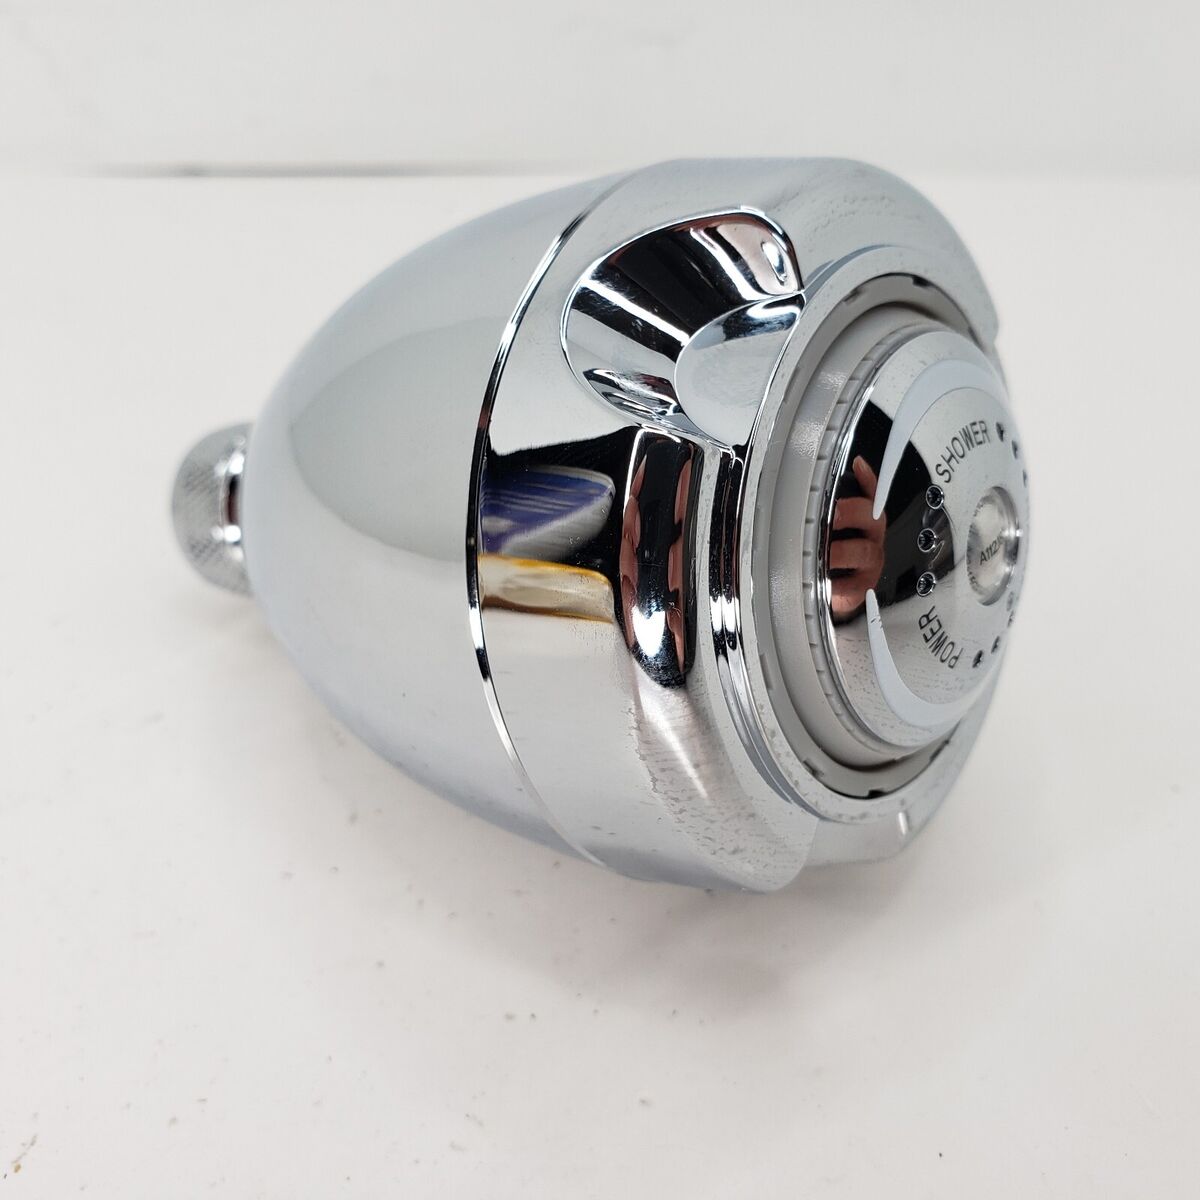
Step 4: Identify the type of showerhead connection
Before you can proceed with further disassembly of the Earth Showerhead A112181, it’s important to identify the type of showerhead connection you have. There are typically two types of connections: threaded and non-threaded.
Read more: How To Install A 4-Spray 2-In-1 Dual Showerhead And Handheld Showerhead In Champagne Bronze
Threaded connection:
If your showerhead has a threaded connection, it means that the showerhead is screwed onto the shower arm using threads. This is the most common type of connection and can be easily identified by the visible threads on both the showerhead and the shower arm.
Non-threaded connection:
In some cases, you may have a showerhead with a non-threaded connection. This type of connection does not involve any threads and usually relies on a clip or a locking mechanism to secure the showerhead in place. Non-threaded connections are more commonly found in handheld showers or specialized shower systems.
To determine the type of connection you have, visually inspect the showerhead and the shower arm. Look for any visible threads or clips that may indicate the type of connection. If you’re still unsure, consult the manufacturer’s instructions or contact customer support for clarification.
Identifying the type of showerhead connection is crucial as it will determine the appropriate method to unscrew the showerhead in the next step. Each type requires a specific approach to ensure a successful disassembly process.
Once you have determined the type of connection, you can move on to the next step, which will guide you through unscrewing the showerhead using the appropriate method.
Step 5: Unscrew the showerhead using the appropriate method
Now that you have identified the type of connection on your Earth Showerhead A112181, it’s time to unscrew it using the appropriate method based on the connection type. Follow the instructions below based on your specific scenario:
Read more: How To Install A 4-Spray 2-In-1 Dual Showerhead And Handheld Showerhead In Champagne Bronze
Threaded connection:
If your showerhead has a threaded connection, follow these steps to unscrew it:
- Wrap the shower arm with plumber’s tape: Before reattaching the showerhead, it’s a good practice to wrap the shower arm threads with plumber’s tape. This will help create a tight and secure seal.
- Hold the shower arm steady: Using a soft cloth or towel to protect the finish, securely hold the shower arm in place to prevent it from turning or getting damaged during the unscrewing process.
- Turn the showerhead counterclockwise: With the grip on the shower arm, use the adjustable wrench or your hand to turn the showerhead counterclockwise. Apply gentle and steady pressure until the showerhead is fully unscrewed from the shower arm.
Non-threaded connection:
If your showerhead has a non-threaded connection, typically involving a clip or a locking mechanism, follow these steps to unscrew it:
- Locate the release button or locking mechanism: Look for a release button or a locking mechanism near the base of the showerhead. It may be visible or hidden depending on the design.
- Press and hold the release button: If there’s a release button, press and hold it down firmly while twisting the showerhead counterclockwise. This action should disengage the locking mechanism and allow you to unscrew the showerhead.
- Unscrew the showerhead: While still holding the release button, turn the showerhead counterclockwise to unscrew it from the shower arm. Apply steady pressure until the showerhead is completely detached.
By following these instructions based on the type of connection, you will successfully unscrew the Earth Showerhead A112181 from the shower arm. Proceed to the next step to inspect and clean the showerhead components for proper maintenance and performance.
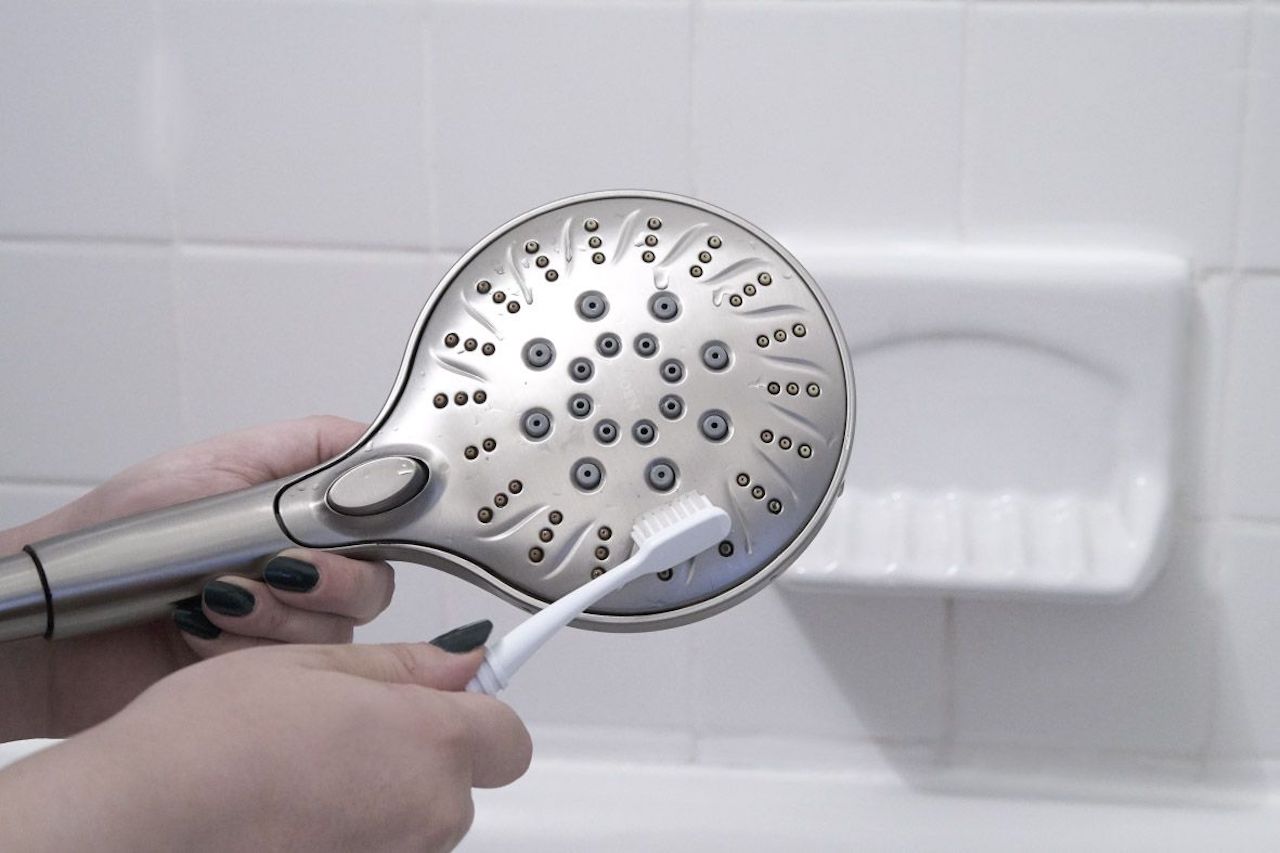
Step 6: Inspect and clean the showerhead components
Now that you have successfully removed the Earth Showerhead A112181 from the shower arm, it’s time to inspect and clean the components. Over time, mineral deposits and debris can accumulate inside the showerhead, affecting its performance and water flow. Follow these steps to inspect and clean the showerhead components:
- Examine the showerhead for any visible buildup: Take a close look at the showerhead openings and surfaces. Look for any mineral deposits, rust, or dirt that may have accumulated. Pay attention to the water nozzles for any clogs or blockages.
- Clean the showerhead with vinegar or lime scale remover: To effectively remove mineral deposits and restore the showerhead’s optimal performance, you can use vinegar or a lime scale remover. Fill a bowl or basin with an equal mixture of vinegar and water or follow the instructions on the lime scale remover bottle. Submerge the showerhead or use a cloth soaked in the solution to thoroughly clean the components.
- Remove stubborn buildup with a toothbrush or toothpick: For stubborn deposits, you can gently scrub the showerhead using a toothbrush or toothpick. Be careful not to damage the showerhead’s surface or water nozzles while doing this.
- Rinse the showerhead thoroughly: After cleaning, rinse the showerhead under running water to remove any residue or cleaning solution. Ensure that all the openings and nozzles are clear and free from blockages.
- Dry and reassemble the showerhead: Use a soft cloth or towel to dry the showerhead components completely. Once dry, you can proceed to reassemble the showerhead for reinstallation.
Inspecting and cleaning the showerhead components is crucial for maintaining optimal water flow and ensuring a refreshing shower experience. By removing mineral deposits and debris, you can extend the lifespan of your Earth Showerhead A112181 and keep it functioning at its best.
With the showerhead components clean and dry, you are now ready to reassemble the showerhead in the next step.
Step 7: Reassemble the showerhead
Now that you have inspected and cleaned the components of your Earth Showerhead A112181, it’s time to reassemble it for reinstallation. Follow these steps to ensure a proper reassembly:
- Apply plumber’s tape to the shower arm threads: Before reattaching the showerhead, wrap the threads of the shower arm with plumber’s tape. This will help create a tight and secure seal when reinstalling the showerhead.
- Screw the showerhead onto the shower arm: Take the cleaned and dried showerhead and align it with the shower arm. Begin screwing it clockwise onto the threaded connection. Use your hand to tighten it securely, being careful not to overtighten.
- Use an adjustable wrench if needed: If the showerhead is not tightening securely by hand, you can use an adjustable wrench to provide a bit more leverage. Wrap a cloth or towel around the showerhead to protect its finish and use the adjustable wrench to gently tighten it until snug.
It’s important not to overtighten the showerhead, as this could cause damage to the shower arm or the showerhead itself. Make sure it is securely tightened without excessive force.
With the showerhead successfully reassembled, you are almost done. The next step involves reattaching the showerhead to the shower arm for the final installation.
To open the Earth Showerhead A112181, start by removing the showerhead from the shower arm. Use a wrench to carefully unscrew the showerhead from the arm, then gently pull it off. This will allow you to access the inside of the showerhead for cleaning or maintenance.
Step 8: Reattach the showerhead to the shower arm
With the Earth Showerhead A112181 reassembled, it’s time to reattach it to the shower arm for the final installation. Follow these steps to ensure a secure and proper reattachment:
- Lift the showerhead towards the shower arm: Hold the reassembled showerhead and lift it towards the shower arm. Align the threads of the showerhead with the threads of the shower arm.
- Turn the showerhead clockwise: Begin turning the showerhead clockwise onto the shower arm. Use your hand to tighten it securely, ensuring a snug fit.
- Check for proper alignment: As you tighten the showerhead, make sure it is properly aligned with the shower arm. The showerhead should be straight and not at an angle or crooked.
- If necessary, use an adjustable wrench: If the showerhead is not tightening securely by hand or if you want that extra bit of leverage, you can use an adjustable wrench. Wrapping a cloth or towel around the showerhead to protect its finish, gently tighten it until it is snug and aligned.
It’s important to ensure that the showerhead is securely attached to the shower arm to prevent any leaks or potential damage during use. By following these steps, you can confidently reattach the Earth Showerhead A112181 and move on to the final step.
Before turning on the water supply, there is one more important step to consider, which involves checking for any leaks at the connection point.
Read more: Earth Tones: How To Create A Zen Home
Step 9: Turn on the water supply
Congratulations! You’re almost done with the installation of your Earth Showerhead A112181. The final step is to turn on the water supply and ensure that everything is in order. Here’s how to do it:
- Locate the shut-off valve: Remember the shut-off valve you turned off in Step 2? Now it’s time to turn it back on. Locate the shut-off valve, which is typically near the shower or bathroom, and turn it counterclockwise to restore the water supply. Make sure to turn it fully to allow water to flow to the showerhead.
- Check for leaks: Once you’ve turned on the water supply, carefully inspect the connection between the showerhead and the shower arm. Look for any signs of leaks or drips near the threads. If you notice any leaks, use the adjustable wrench to gently tighten the connection until the leak stops. Be careful not to overtighten.
- Test the water flow: Now it’s time to test your newly installed Earth Showerhead A112181. Turn on the shower faucet and let the water flow through the showerhead. Pay attention to the water flow and pressure. Ensure that the water is evenly distributed through the nozzles and that there are no blockages or restrictions.
- Make any necessary adjustments: If you encounter any issues with the water flow or pressure, you may need to make adjustments to the showerhead. Refer to the manufacturer’s instructions or consult a professional if needed.
By following these steps, you can confidently turn on the water supply and enjoy the refreshing experience of your Earth Showerhead A112181. Remember to monitor the showerhead for any signs of leaks or issues, and address them promptly if they arise.
With Step 9 completed, you have successfully opened, cleaned, and reinstalled your Earth Showerhead A112181. Enjoy the enhanced water-saving features and quality performance that the showerhead has to offer!
Conclusion
Congratulations on successfully opening and maintaining your Earth Showerhead A112181! By following the detailed steps outlined in this guide, you have learned how to gather the necessary tools, turn off the water supply, remove the showerhead, identify the connection type, unscrew the showerhead using the appropriate method, inspect and clean the components, reassemble the showerhead, reattach it to the shower arm, and finally, turn on the water supply. The process may have seemed daunting at first, but with the right guidance, it becomes a straightforward and rewarding task.
Opening and cleaning your showerhead is an essential part of proper maintenance. By removing mineral deposits and buildup, you not only improve water flow and efficiency, but you also prolong the lifespan of the showerhead. Regular maintenance ensures that you continue to experience a refreshing and satisfying shower while contributing to water conservation efforts.
Remember, it’s important to identify the type of connection before attempting to open the showerhead to avoid causing any damage. Take your time, follow the steps diligently, and if you encounter any difficulties or are unsure about any aspect of the process, it’s always advisable to consult a professional plumber.
We hope that this guide has equipped you with the knowledge and confidence to open and maintain your Earth Showerhead A112181. Enjoy the benefits of a clean and efficient showerhead as you indulge in a rejuvenating shower experience.
Thank you for reading, and happy showering!
Frequently Asked Questions about How To Open Earth Showerhead A112.18.1
Was this page helpful?
At Storables.com, we guarantee accurate and reliable information. Our content, validated by Expert Board Contributors, is crafted following stringent Editorial Policies. We're committed to providing you with well-researched, expert-backed insights for all your informational needs.


0 thoughts on “How To Open Earth Showerhead A112.18.1”