Home>Articles>How To Install A 4-Spray 2-In-1 Dual Showerhead And Handheld Showerhead In Champagne Bronze
Articles
How To Install A 4-Spray 2-In-1 Dual Showerhead And Handheld Showerhead In Champagne Bronze
Modified: February 22, 2024
Learn how to easily install a 4-Spray 2-In-1 Dual Showerhead and Handheld Showerhead in Champagne Bronze. Read our informative articles for step-by-step instructions.
(Many of the links in this article redirect to a specific reviewed product. Your purchase of these products through affiliate links helps to generate commission for Storables.com, at no extra cost. Learn more)
Introduction
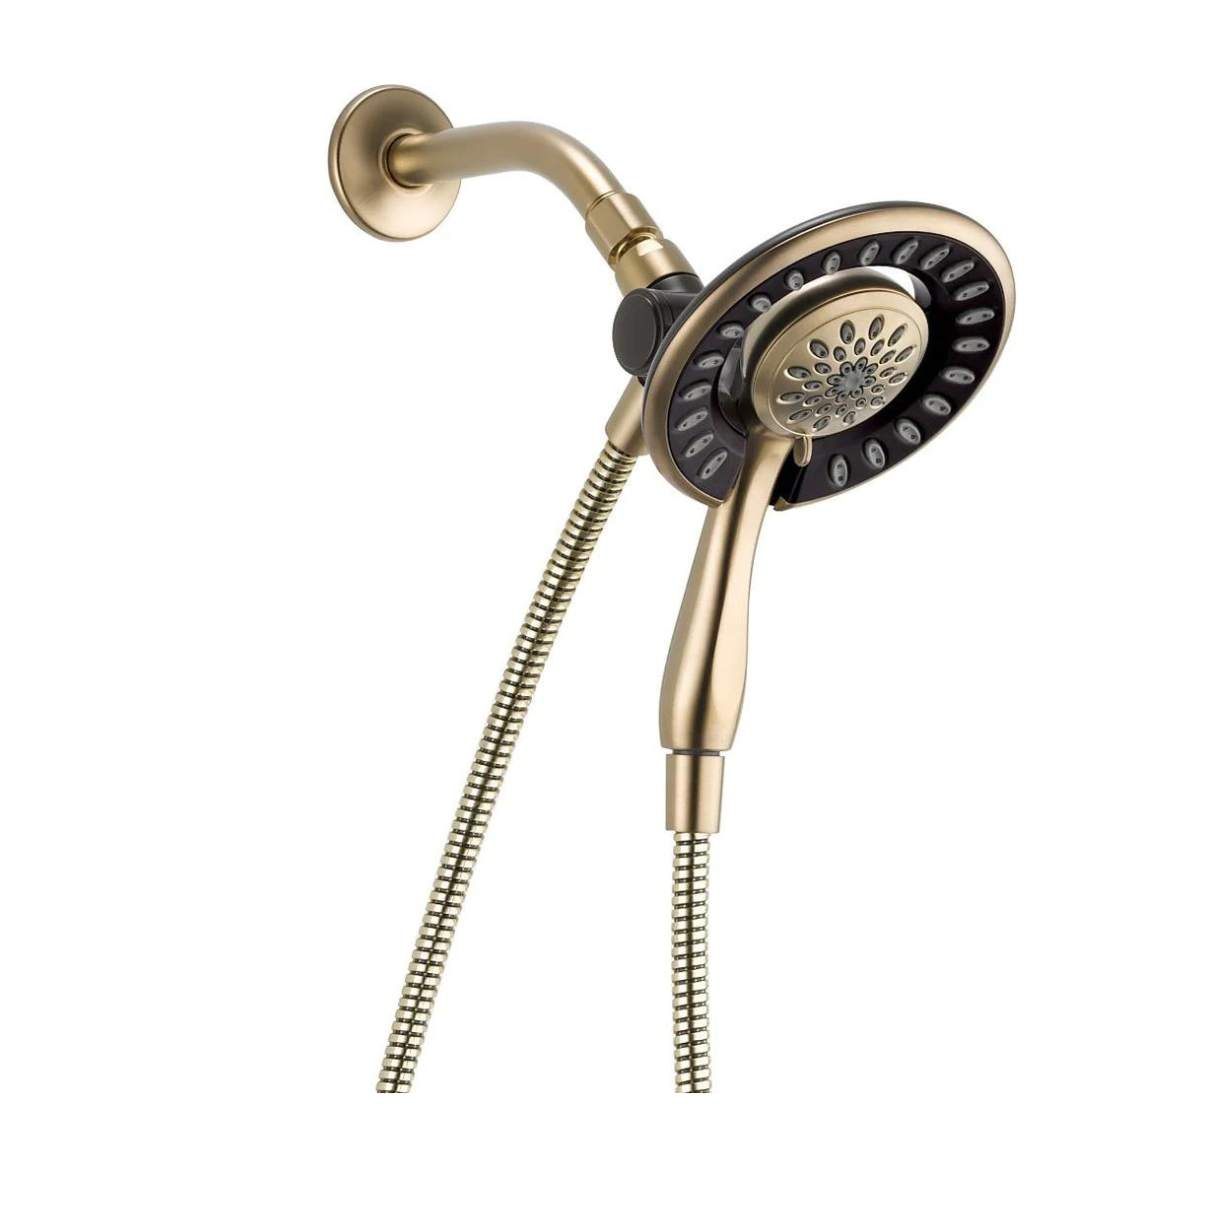
Welcome to our step-by-step guide on how to install a 4-spray 2-in-1 dual showerhead and handheld showerhead in Champagne Bronze! If you’re looking to upgrade your shower experience and add a touch of luxury to your bathroom, installing a dual showerhead is the way to go. With the ability to switch between a fixed showerhead and a handheld showerhead, you’ll have the best of both worlds, enjoying a variety of spray options for a truly customizable shower experience.
Before we dive into the installation process, it’s important to gather all the necessary tools and materials. Having everything on hand will make the process smoother and ensure you have everything you need to complete the job. You’ll also want to make sure you have a general understanding of how your shower is plumbed and any specific requirements or restrictions you may need to consider during installation.
Key Takeaways:
- Upgrade your shower experience with a 4-spray 2-in-1 dual showerhead and handheld showerhead in Champagne Bronze for a customizable and luxurious showering experience.
- Ensure a smooth installation process by gathering the necessary tools, turning off the water supply, and testing for leaks to enjoy a revitalizing shower experience every day.
Step 1: Gather the necessary tools and materials
Before you begin the installation process, it’s crucial to gather all the tools and materials you’ll need. Having everything ready will save you time and frustration during the installation. Here is a list of the essential tools and materials:
- Adjustable wrench
- Plumber’s tape
- Screwdriver
- Pliers
- Bucket or towel
- New dual showerhead and handheld showerhead set
Be sure to check the packaging of your new dual showerhead set to ensure that it includes all the necessary components and any additional tools or materials that may be required for installation. If anything is missing or if you’re unsure, consult the instruction manual or contact the manufacturer for clarification.
Once you have gathered all the necessary tools and materials, you’re ready to move on to the next step: turning off the water supply.
Step 2: Turn off the water supply
Before you start working on installing the dual showerhead, it’s important to turn off the water supply to ensure a smooth and safe installation process. Here’s how you can do it:
- Locate the main water shut-off valve for your home. This valve is typically located near your water meter or where the main water line enters your house.
- Turn the valve clockwise to shut off the water supply. You may need to use a wrench or pliers to turn the valve if it’s stiff or difficult to maneuver.
- Once the water supply is turned off, open a faucet in another part of your home to relieve any remaining water pressure. This will prevent any water from flowing out when you disconnect the showerhead later on.
- Place a bucket or towel underneath the showerhead to catch any residual water that may come out when you detach it.
By turning off the water supply, you minimize the risk of water damage and ensure a safer environment to work in. It’s always better to be safe than sorry when it comes to plumbing projects.
With the water supply turned off and any residual water drained, you’re now ready to proceed to the next step: removing the existing showerhead.
Step 3: Remove the existing showerhead
Now that you’ve turned off the water supply, it’s time to remove the existing showerhead. Follow these steps:
- Locate the connection point between the shower arm and the showerhead. The shower arm is the pipe that extends from the wall.
- Using an adjustable wrench, grip the flats on the shower arm tightly.
- With firm pressure, turn the showerhead counterclockwise to loosen it. If the showerhead is difficult to remove, you can try using pliers or a strap wrench for extra leverage.
- Once the showerhead is loose, continue unscrewing it by hand until it is fully removed.
- Take a moment to inspect the shower arm for any visible damage or corrosion. If necessary, clean or replace the shower arm before proceeding.
It’s important to be cautious when removing the showerhead to avoid damaging the shower arm or causing any leaks. If you encounter any difficulties during the process, consult a professional plumber for assistance.
With the existing showerhead successfully removed, you’re now ready to move on to the next step: applying plumber’s tape to the shower arm.
Step 4: Apply plumber’s tape to the shower arm
Now that you’ve removed the old showerhead, it’s time to prepare the shower arm for the installation of the new dual showerhead. To ensure a watertight seal, you’ll need to apply plumber’s tape (also known as Teflon tape) to the threads of the shower arm. Follow these steps:
- Locate the threaded end of the shower arm where the new showerhead will be attached.
- Clean any debris or old tape from the threads using a cloth or brush.
- Take the plumber’s tape and start wrapping it clockwise around the threads of the shower arm. Ensure that the tape is snugly applied and covers the entire threaded area.
- Continue wrapping the tape around the threads for about 3-4 times, overlapping each layer slightly.
- Once you have applied enough tape, tear or cut the tape from the roll.
- Press the end of the tape onto the threads to secure it in place.
The purpose of plumber’s tape is to create a tight seal that prevents water from leaking out of the connection between the shower arm and the new dual showerhead. It also helps to prevent any potential corrosion or rusting of the threaded connection.
With plumber’s tape applied, you’re ready to move on to the next step: installing the diverter mount.
Step 5: Install the diverter mount
The next step in installing your 4-spray 2-in-1 dual showerhead and handheld showerhead in Champagne Bronze is to install the diverter mount. The diverter mount allows you to switch between the fixed showerhead and the handheld showerhead. Follow these steps:
- Take the diverter mount and ensure all the necessary components are included. This typically includes the mounting bracket, screws, and any other attachments.
- Position the diverter mount at the desired height on the shower wall. It’s recommended to place it within easy reach for convenient access.
- Use a pencil or marker to mark the location of the screw holes on the wall.
- Hold the mounting bracket against the wall and align it with the marked screw holes.
- Using a screwdriver or drill, secure the mounting bracket to the wall by inserting the screws through the bracket and into the wall. Be sure to tighten the screws firmly.
- Double-check the stability and alignment of the diverter mount. Make any necessary adjustments before moving on.
Proper installation of the diverter mount is crucial for the functionality and stability of the dual showerhead system. Taking the time to securely attach the mount ensures that it will withstand regular use and provide a seamless switching mechanism between the showerhead options.
With the diverter mount successfully installed, you’re ready to proceed to the next step: attaching the handheld showerhead.
When installing a 4-spray 2-in-1 dual showerhead and handheld showerhead in Champagne Bronze, make sure to use plumber’s tape on the connections to prevent leaks and ensure a tight seal.
Step 6: Attach the handheld showerhead
In this step, we will guide you through the process of attaching the handheld showerhead to the diverter mount. Follow these steps for a successful installation:
- Take the handheld showerhead and ensure all necessary components are included, such as the shower hose and mounting bracket.
- Attach one end of the shower hose to the base of the handheld showerhead. Ensure it is securely connected by twisting it clockwise until it is tight.
- Locate the designated mounting bracket for the handheld showerhead on the diverter mount.
- Slide the other end of the shower hose onto the mounting bracket until it clicks into place. Make sure it is securely attached.
- Test the stability of the handheld showerhead by gently tugging on it. It should remain firmly in place without any wobbling or movement.
Attaching the handheld showerhead is an important step in the installation process as it allows for versatility and ease of use during your shower. The handheld showerhead provides flexibility in targeting different areas of your body and can be easily adjusted for height and angle.
Once the handheld showerhead is securely attached, you’re now ready for the exciting final step: connecting the dual showerhead.
Step 7: Connect the dual showerhead
Now that you have successfully attached the handheld showerhead, it’s time to connect the dual showerhead. This step will complete the installation process and provide you with the ultimate shower experience. Follow these steps:
- Take the dual showerhead and ensure all necessary components are included, including the shower arm and the connector.
- Hold the dual showerhead near the shower arm, aligning the connecting threads.
- Carefully thread the dual showerhead onto the shower arm by turning it clockwise. Ensure that it is securely attached, but avoid overtightening to prevent any damage to the threads.
- Double-check the alignment and stability of the dual showerhead. Make any necessary adjustments to achieve the desired positioning.
Connecting the dual showerhead not only completes the installation process but also provides you with the option to switch between the fixed showerhead and the handheld showerhead. This dual functionality allows you to customize your shower experience according to your preferences and needs.
With the dual showerhead successfully connected, you’re almost done! The next step is to turn on the water supply and test for any potential leaks.
Step 8: Turn on the water supply
Now that you have successfully connected the dual showerhead, it’s time to turn on the water supply and enjoy your new shower experience. Here’s how to do it:
- Locate the main water shut-off valve that you previously turned off during the installation process.
- Turn the valve counterclockwise to gradually restore the water supply. Take note that it may take a few moments for the water to fully flow.
- Once the water supply is restored, check for any visible leaks around the connections of the dual showerhead, handheld showerhead, and the diverter mount.
- If you notice any leaks, tighten the connections gently to ensure they are secure. If the leaks persist, you may need to disassemble and reassemble the connections, ensuring they are properly aligned and tightly attached.
- Allow the water to flow freely for a few minutes to flush out any debris that may have accumulated during the installation process.
Take this opportunity to test the functionality of the dual showerhead. Switch between the fixed showerhead and handheld showerhead to ensure that both options are working properly and delivering the water flow and sprays as desired.
If you encounter any issues or persistent leaks, it’s recommended to consult a professional plumber for assistance. They have the expertise to identify and resolve any plumbing concerns that may arise.
With the water supply turned on and any leaks addressed, you’re ready to move on to the final step: testing for leaks.
Step 9: Test for leaks
In this final step, you will test for any potential leaks in your newly installed 4-spray 2-in-1 dual showerhead and handheld showerhead in Champagne Bronze. This step is crucial to ensure the proper functionality and efficiency of your shower system. Follow these steps:
- Turn on the water supply and let the water flow through the showerhead.
- Observe all the connection points, including the shower arm, diverter mount, handheld showerhead, and the dual showerhead.
- Check for any signs of water leakage, such as dripping or pooling around the connections.
- If you notice any leaks, immediately turn off the water supply and take appropriate measures to resolve the issue.
- Inspect the connections for loose fittings or misalignment. Retighten or readjust them as necessary.
- If the leak persists, you may need to disassemble the connections, inspect the threads for any damage or debris, and reassemble them ensuring a proper seal.
- Repeat the testing process until you are confident that there are no leaks in the system.
It’s important to address any leaks promptly to prevent water damage and maintain the efficiency of your showers. Taking the time to test and ensure a watertight seal will give you peace of mind and a satisfying shower experience.
Once you have completed the leak testing and resolved any issues, congratulations! You have successfully installed your 4-spray 2-in-1 dual showerhead and handheld showerhead in Champagne Bronze.
Enjoy the luxury and versatility of your newly upgraded shower system and indulge in a revitalizing shower experience each day.
Remember to consult the manufacturer’s guidelines for any maintenance or cleaning instructions to prolong the lifespan of your showerhead and maintain its optimal performance.
Thank you for following our step-by-step guide, and we hope you enjoy your new showerhead!
Conclusion
Congratulations on successfully installing your 4-spray 2-in-1 dual showerhead and handheld showerhead in Champagne Bronze! You’ve taken a significant step towards enhancing your shower experience and bringing a touch of luxury to your bathroom. By following our step-by-step guide, you’ve learned how to gather the necessary tools and materials, turn off the water supply, remove the existing showerhead, apply plumber’s tape, install the diverter mount, attach the handheld showerhead, connect the dual showerhead, turn on the water supply, and test for leaks.
With your new dual showerhead system in place, you now have the ability to switch between a fixed showerhead and a handheld showerhead, offering you a variety of spray options and a customizable shower experience. Whether you prefer a relaxing rainfall spray or a targeted massage spray, your new showerhead provides versatility and functionality to meet your preferences.
Remember to regularly inspect and maintain your showerhead to ensure its long-lasting performance. Clean the nozzles and remove any mineral deposits that may affect water flow. Following the manufacturer’s guidelines for cleaning and maintenance will help keep your showerhead in optimal condition.
We hope that this step-by-step installation guide has been helpful and informative. By following each step carefully and paying attention to detail, you’ve successfully installed your 4-spray 2-in-1 dual showerhead and handheld showerhead in Champagne Bronze. Now, it’s time to enjoy the rejuvenating and invigorating showers that await you!
Thank you for choosing to upgrade your shower experience with a dual showerhead, and we wish you many blissful and relaxing showers ahead.
Frequently Asked Questions about How To Install A 4-Spray 2-In-1 Dual Showerhead And Handheld Showerhead In Champagne Bronze
Was this page helpful?
At Storables.com, we guarantee accurate and reliable information. Our content, validated by Expert Board Contributors, is crafted following stringent Editorial Policies. We're committed to providing you with well-researched, expert-backed insights for all your informational needs.


0 thoughts on “How To Install A 4-Spray 2-In-1 Dual Showerhead And Handheld Showerhead In Champagne Bronze”