Home>Articles>How To Install 1-Spray 2 In. Wall Mounted Fixed Showerhead In Polished Chrome
Articles
How To Install 1-Spray 2 In. Wall Mounted Fixed Showerhead In Polished Chrome
Modified: August 27, 2024
Learn how to easily install the 1-Spray 2 In. wall mounted fixed showerhead in polished chrome with our step-by-step guide. Find more helpful articles on DIY bathroom upgrades.
(Many of the links in this article redirect to a specific reviewed product. Your purchase of these products through affiliate links helps to generate commission for Storables.com, at no extra cost. Learn more)
Introduction
Welcome to our comprehensive guide on how to install the 1-Spray 2 In. Wall Mounted Fixed Showerhead in Polished Chrome. Adding a new showerhead can transform your showering experience and give your bathroom a refreshing upgrade. Whether you’re looking to replace an old showerhead or simply want to change the style, this step-by-step installation guide will help you complete the process effortlessly.
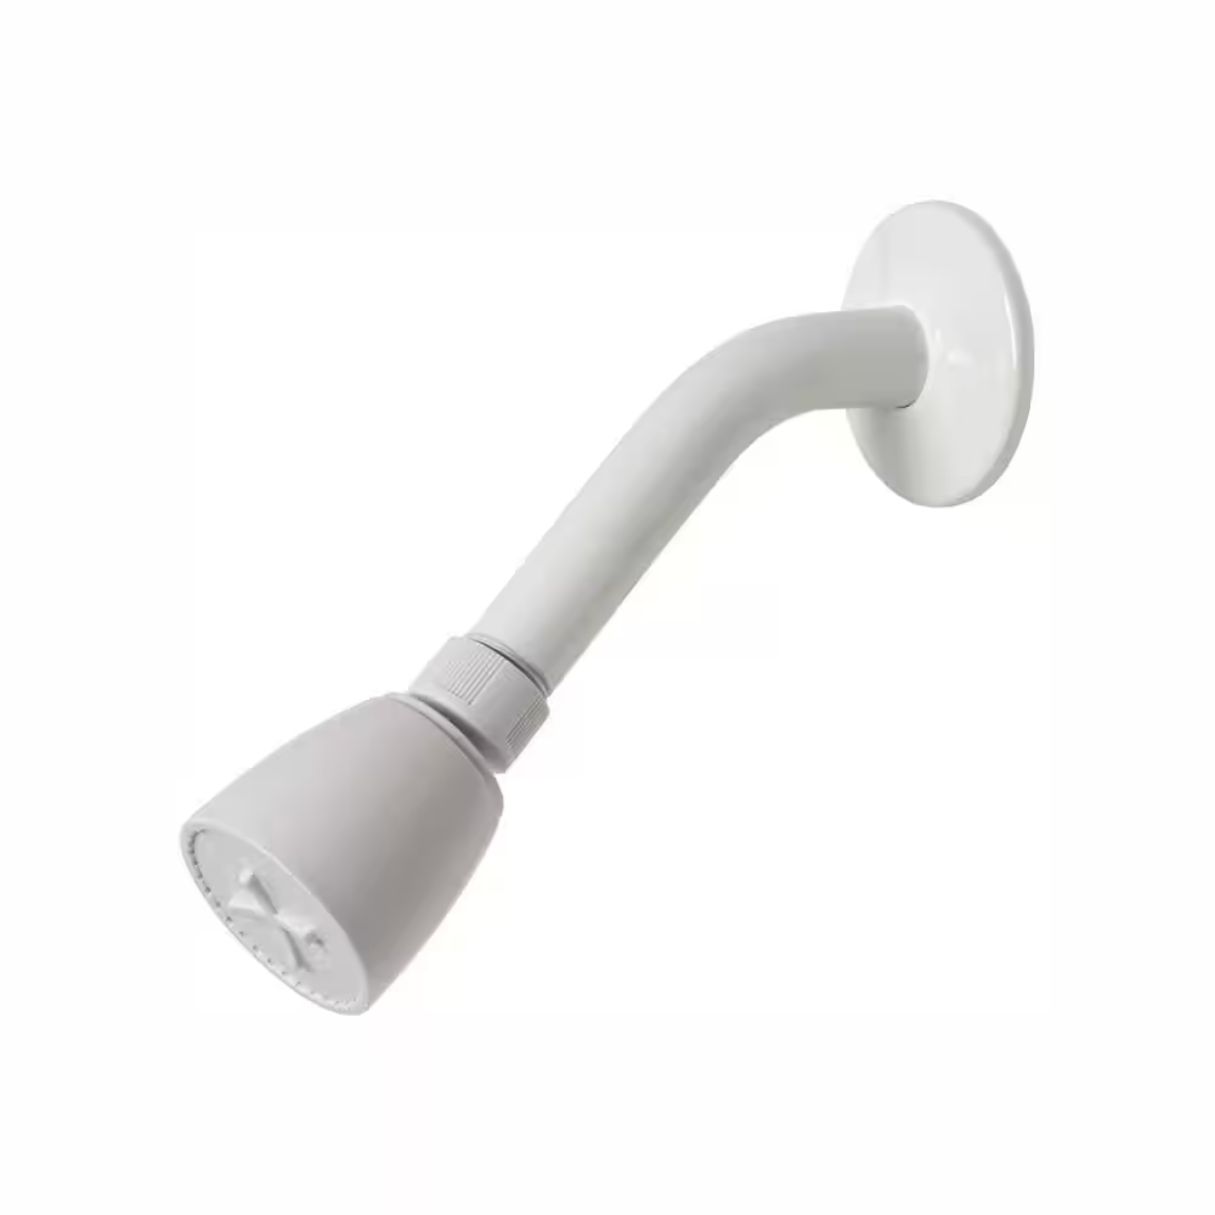
The 1-Spray 2 In. Wall Mounted Fixed Showerhead in Polished Chrome is a sleek and modern showerhead that offers a luxurious showering experience. With its polished chrome finish, it adds a touch of elegance to any bathroom decor. Plus, the 1-Spray feature ensures a powerful and invigorating shower experience every time. Before you begin the installation process, it’s important to gather all the necessary tools and materials to ensure a smooth and efficient installation.
So, let’s get started with the first step in our installation guide – gathering the necessary tools and materials.
Key Takeaways:
- Upgrade your shower experience and bathroom decor with the sleek and modern 1-Spray 2 In. Wall Mounted Fixed Showerhead in Polished Chrome. Follow our easy installation guide for a hassle-free process.
- Ensure a luxurious and invigorating shower experience by properly preparing the installation area, securely attaching the showerhead, and testing for leaks. Enjoy your new showerhead hassle-free!
Read more: How To Install A 4-Spray 2-In-1 Dual Showerhead And Handheld Showerhead In Champagne Bronze
Step 1: Gather necessary tools and materials
Before you begin the installation process, it is important to gather all the necessary tools and materials. Having everything you need at hand will help streamline the installation and prevent any unnecessary delays. Here is a list of the tools and materials you will need:
- 1-Spray 2 In. Wall Mounted Fixed Showerhead in Polished Chrome
- Adjustable wrench or pliers
- Plumber’s tape (Teflon tape)
- Screwdriver (if required)
- Rag or towel
- Bucket or container (to catch any water)
Ensure that you have all the mentioned tools and materials before proceeding with the installation. Once you have them ready, you can move on to the next step, which is preparing the installation area.
Step 2: Prepare the installation area
Before you begin installing the 1-Spray 2 In. Wall Mounted Fixed Showerhead in Polished Chrome, it’s important to prepare the installation area. This will help ensure a smooth and hassle-free installation process. Here are the steps to prepare the installation area:
- Turn off the water supply: Locate the main water shut-off valve in your bathroom or the specific valve that controls the water supply to the shower. Turn the valve clockwise to close it and shut off the water supply. This will prevent any water flow during the installation process.
- Clean the shower pipe: If there was a previous showerhead installed, carefully remove it using an adjustable wrench or pliers. Once removed, use a rag or towel to clean any debris or residue from the shower pipe. This will ensure a clean surface for the new showerhead installation.
- Apply plumber’s tape: Take the plumber’s tape (also known as Teflon tape) and wrap it around the threads of the shower pipe. This will create a watertight seal when the showerhead is installed and prevent any leaks.
By following these steps, you will have a properly prepared installation area for the 1-Spray 2 In. Wall Mounted Fixed Showerhead in Polished Chrome. Once you have completed these preparations, you can proceed to the next step, which is installing the shower arm.
Step 3: Install the shower arm
Now that you have prepared the installation area, it’s time to install the shower arm for the 1-Spray 2 In. Wall Mounted Fixed Showerhead in Polished Chrome. The shower arm is the pipe that extends from the wall and holds the showerhead in place. Follow these steps for a successful installation:
- Take the shower arm: Start by taking the shower arm out of the packaging. Make sure it is the correct size and matches the specifications of your showerhead.
- Apply plumber’s tape: Similar to step 2, apply plumber’s tape to the threads of the shower arm. This will create a secure seal and prevent any leaks.
- Attach the shower arm: Carefully screw the shower arm onto the shower pipe. Use an adjustable wrench or pliers to ensure a tight and secure connection. Be careful not to overtighten, as this may damage the threads.
Once the shower arm is securely attached to the shower pipe, you can move on to the next step – attaching the showerhead.
When installing a 1-Spray 2 In. Wall Mounted Fixed Showerhead in Polished Chrome, make sure to use thread seal tape on the shower arm to prevent any leaks. Tighten the showerhead securely but be careful not to over-tighten and damage the threads.
Step 4: Attach the showerhead
With the shower arm securely installed, it’s time to attach the 1-Spray 2 In. Wall Mounted Fixed Showerhead in Polished Chrome. Follow these steps to ensure a proper attachment:
- Take the showerhead: Remove the showerhead from its packaging and inspect it for any defects or damage. Make sure it is clean and ready for installation.
- Apply plumber’s tape: As with the previous steps, apply a few wraps of plumber’s tape to the threads of the shower arm. This will help create a watertight seal and prevent any leaks.
- Attach the showerhead: Carefully screw the showerhead onto the shower arm. Use your hand to tighten it initially and then use an adjustable wrench or pliers to give it a final snug fit. Be careful not to overtighten, as this may cause damage to the showerhead or the shower arm.
Once the showerhead is securely attached, you can move on to the final step – testing the installation.
Read more: How Well Is The Pressure Of A Hansgrohe Raindance 300 Air 1-Spray 12 Inch Showerhead In Chrome
Step 5: Test the installation
After successfully attaching the 1-Spray 2 In. Wall Mounted Fixed Showerhead in Polished Chrome, the final step is to test the installation to ensure everything is working properly. Follow these steps to test the installation:
- Turn on the water supply: Locate the main water shut-off valve or the specific valve that controls the water supply to the shower. Turn the valve counterclockwise to open it and allow the water to flow to the showerhead.
- Check for leaks: As the water flows through the showerhead, carefully inspect the connections for any signs of leaks. This includes the connection between the shower arm and the showerhead, as well as the shower arm and the shower pipe. If you notice any leaks, use an adjustable wrench or pliers to tighten the connections further.
- Adjust the spray pattern: Once you have confirmed that there are no leaks, test the spray pattern of the showerhead. Adjust the spray settings to your preferred intensity or pattern, if applicable. Ensure that the water flow is even and consistent.
If everything is functioning properly and there are no leaks or issues with the spray pattern, congratulations – you have successfully installed the 1-Spray 2 In. Wall Mounted Fixed Showerhead in Polished Chrome! Now you can enjoy a luxurious and invigorating shower experience.
It’s worth noting that it’s always a good idea to periodically check the connections and inspect for any signs of damage or leaks. Regular maintenance will help prolong the lifespan of your showerhead and ensure optimal performance.
We hope this installation guide has been helpful to you. Enjoy your new showerhead!
Conclusion
Installing the 1-Spray 2 In. Wall Mounted Fixed Showerhead in Polished Chrome is a relatively simple process that can enhance your showering experience and add a touch of elegance to your bathroom. By following this step-by-step installation guide, you can easily complete the installation without any hassle.
Throughout the installation process, we covered important steps such as gathering the necessary tools and materials, preparing the installation area, installing the shower arm, attaching the showerhead, and testing the installation. These steps ensure a proper and secure installation, allowing you to enjoy the benefits of your new showerhead.
Remember, safety should always be a priority when working with any plumbing installation. If you are unsure or uncomfortable with any step of the process, it’s always best to consult a professional plumber who can assist you.
Now that you have successfully installed the 1-Spray 2 In. Wall Mounted Fixed Showerhead in Polished Chrome, you can indulge in a rejuvenating shower experience every day. Enjoy the powerful and invigorating spray, the sleek and elegant design, and the added luxury it brings to your bathroom.
We hope this installation guide has been informative and helpful to you. If you have any further questions or need assistance, don’t hesitate to reach out to the manufacturer or a professional plumber.
Thank you for choosing the 1-Spray 2 In. Wall Mounted Fixed Showerhead in Polished Chrome. We wish you many enjoyable showers ahead!
Frequently Asked Questions about How To Install 1-Spray 2 In. Wall Mounted Fixed Showerhead In Polished Chrome
Was this page helpful?
At Storables.com, we guarantee accurate and reliable information. Our content, validated by Expert Board Contributors, is crafted following stringent Editorial Policies. We're committed to providing you with well-researched, expert-backed insights for all your informational needs.


0 thoughts on “How To Install 1-Spray 2 In. Wall Mounted Fixed Showerhead In Polished Chrome”