Home>Articles>How To Paint A Deck For A Fresh, Weather-Resistant Finish
Articles
How To Paint A Deck For A Fresh, Weather-Resistant Finish
Modified: November 1, 2024
Learn how to paint your deck with our expert tips and tricks. Our articles provide step-by-step instructions for achieving a fresh and weather-resistant finish.
(Many of the links in this article redirect to a specific reviewed product. Your purchase of these products through affiliate links helps to generate commission for Storables.com, at no extra cost. Learn more)
Introduction
Painting a deck is not only a great way to freshen up its appearance, but it also provides much-needed protection against the elements. Whether you have a wooden or composite deck, a fresh coat of paint can revitalize the space and make it more resilient to weather conditions.
However, painting a deck is not a task to be taken lightly. It requires careful preparation, proper techniques, and the right materials to ensure a long-lasting and weather-resistant finish. In this article, we will guide you through the step-by-step process of painting your deck to give it a fresh new look while ensuring its durability.
Before diving into the painting process, it’s important to mention that preparation is key. Just like any painting project, investing time and effort in prepping your deck will greatly contribute to the overall success of the job.
Now, let’s gather the supplies you will need to complete this project.
Key Takeaways:
- Proper preparation, including thorough cleaning, repairing damaged areas, and applying primer, is essential for achieving a durable and visually appealing painted deck. Choosing the right paint and applying multiple coats further enhances weather resistance and longevity.
- Adequate drying and curing time, along with regular maintenance practices, are crucial for preserving the beauty and resilience of a freshly painted deck. Following these steps ensures a vibrant and long-lasting outdoor space.
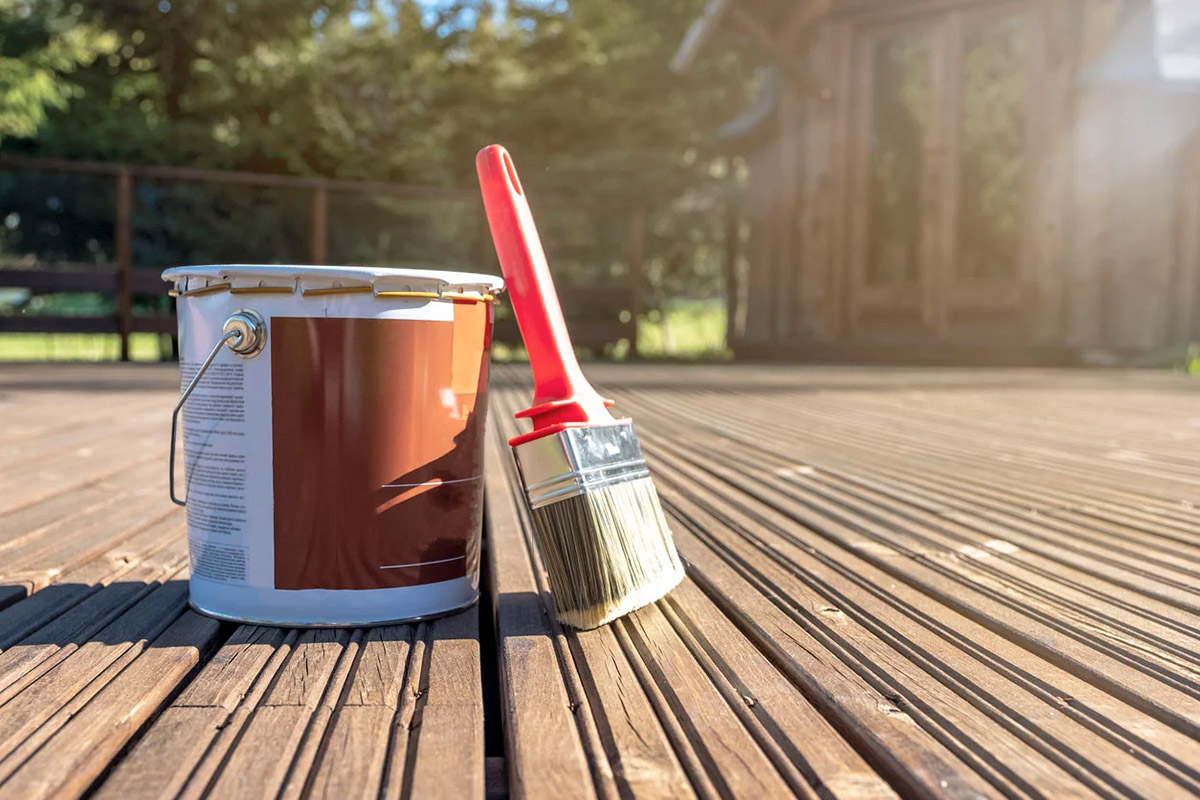
Gather Supplies
Before you begin painting your deck, it’s essential to gather all the necessary supplies. Having everything on hand will ensure a smooth and efficient painting process. Here are the supplies you’ll need:
- Paint or stain: Choose a high-quality paint or stain specifically designed for outdoor use. Opt for a color that complements your home’s exterior.
- Deck cleaner: Look for a deck cleaner that effectively removes dirt, mildew, and stains from the surface of the deck. Ensure it is suitable for your deck’s material.
- Pressure washer: A pressure washer will facilitate the cleaning process by removing dirt and debris deeply embedded in the wood or composite material.
- Sandpaper: Select a medium-grit sandpaper to smooth out rough spots, splinters, or flaking paint on the deck surface.
- Paintbrushes: Have a variety of paintbrushes, including a wide brush for larger areas and a smaller brush for corners and edges.
- Roller and tray: A paint roller and tray are ideal for large, flat surfaces. They will help you achieve a more even coat with less effort.
- Painter’s tape: Use painter’s tape to protect areas you don’t want to paint, such as railings, planters, or light fixtures.
- Drop cloths or plastic sheeting: Cover any surrounding plants, furniture, or surfaces to protect them from paint splatters or spills.
- Safety equipment: Don’t forget to prioritize your safety. Wear protective gloves, goggles, and a respirator mask to shield yourself from harmful chemicals and dust.
- Deck repair kit: If your deck has any damaged areas, gather a deck repair kit containing wood or composite fillers, epoxy, and putty knives to fix them before painting.
By having all these supplies ready, you’ll be well-prepared to tackle the deck painting process smoothly and efficiently. Now that you have everything you need, it’s time to prepare the deck for painting.
Prepare the Deck
Preparing the deck is a crucial step in ensuring a successful paint job. Proper preparation will help the paint adhere better and result in a more durable and long-lasting finish. Follow these steps to prepare your deck for painting:
- Clean the deck: Start by removing any furniture, plants, or debris from the deck. Sweep the surface thoroughly to get rid of loose dirt and leaves. Use a leaf blower for more efficiency.
- Clear the cracks: Inspect the deck for any dirt, leaves, or debris stuck in the cracks between the boards. Use a putty knife or a screwdriver to clear them out.
- Tighten loose boards: Check for any loose or squeaky boards and secure them with screws or nails. This will ensure a sturdy and stable deck surface.
- Remove old paint or stain: If your deck has old paint or stain that is peeling or flaking, it’s essential to remove it before applying a new coat. Use a paint scraper or a sander to strip off the old finish. Be careful not to damage the wood or composite material.
- Inspect for rot or damage: Carefully examine the deck for any signs of rot, mold, or structural damage. Replace any rotting or damaged wood boards and repair any structural issues before proceeding with painting.
- Trim vegetation: Trim any overhanging branches or bushes that come into contact with the deck. This will prevent moisture buildup and potential damage to the new paint job.
- Cover nearby surfaces: Use drop cloths or plastic sheeting to protect any nearby surfaces, such as siding, plants, or outdoor furniture, from paint splatters or spills.
- Mask off areas: Apply painter’s tape to any areas you want to keep paint-free, such as railings, light fixtures, or adjacent surfaces. This will ensure clean lines and a professional-looking finish.
By thoroughly preparing your deck, you’ll set a solid foundation for the painting process. Taking the time to clean, repair, and protect your deck will result in a beautiful and long-lasting finish. With the deck prepped and ready, it’s time to move on to the next step: cleaning the deck.
Clean the Deck
Cleaning the deck is an essential step before painting as it removes dirt, grime, mildew, and any other substances that can hinder paint adhesion. Here’s how to effectively clean your deck:
- Sweep the deck: Start by sweeping the deck surface to remove loose dirt, leaves, and debris. Pay attention to corners and between the boards.
- Use a deck cleaner: Choose a deck cleaner that is suitable for your deck’s material (wood or composite). Follow the manufacturer’s instructions on how to dilute and apply the cleaner.
- Apply the deck cleaner: Using a pump sprayer or a brush, apply the deck cleaner to the deck surface. Work in small sections, making sure to cover the entire area.
- Scrub the deck: Use a stiff-bristle brush or a deck scrubber to scrub the deck surface, focusing on areas with stains or mildew. Apply pressure to remove embedded dirt and grime.
- Rinse thoroughly: After scrubbing, thoroughly rinse the deck with a garden hose or a pressure washer. Start from the highest point and work your way down to ensure all dirt and cleaner residue are washed away.
- Inspect for any remaining stains: Once the deck is dry, inspect the surface for any remaining stains or areas that require further cleaning. For stubborn stains, you may need to repeat the cleaning process or use a specialized stain remover.
- Allow the deck to dry completely: It’s crucial to allow the deck to dry completely before proceeding with any further steps. Moisture trapped in the wood or composite material can hinder paint adhesion and lead to peeling or bubbling.
Cleaning the deck not only prepares it for painting but also ensures that the surface is free from contaminants that can compromise the finish. Once the deck is clean and dry, you can move on to the next step: inspecting and repairing any damaged areas.
Repair any Damaged Areas
Before you start painting your deck, it’s crucial to inspect and repair any damaged areas. Addressing these issues will not only improve the appearance of the deck but also prevent further damage and ensure a smooth surface for painting. Here’s how to repair common deck problems:
- Replace rotten or damaged boards: Carefully examine the deck for any boards that are rotting, splintered, or severely damaged. Use a saw to cut out the damaged section and replace it with a new board of the same size and material.
- Repair loose nails or screws: Check for any loose or protruding nails or screws on the deck surface. Use a hammer or screwdriver to tighten them or replace them if necessary.
- Fill cracks or gaps: If your deck has small cracks or gaps between the boards, use a wood or composite filler to fill them in. Apply the filler according to the manufacturer’s instructions and smooth it out with a putty knife.
- Smooth out rough spots: Sand any rough or splintered areas on the deck surface using sandpaper or a power sander. Smoothing out the surface will create a more even and polished finish.
- Check for loose handrails or balusters: Inspect the handrails and balusters to ensure they are secure and stable. Tighten any loose screws or replace damaged components to ensure safety and structural integrity.
By addressing these issues before painting, you’ll not only improve the overall appearance of your deck but also ensure its longevity. Take the time to thoroughly inspect and repair any damaged areas. Once your deck is in good condition, you can move on to the next step: sanding the deck.
Read more: How To Finish The Ends Of Composite Decking
Sand the Deck
Sanding the deck is a crucial step to create a smooth and uniform surface for painting. It helps remove any remaining old paint, smooth out imperfections, and promote better paint adhesion. Follow these steps to effectively sand your deck:
- Choose the right sandpaper: Select medium-grit sandpaper (around 80-100 grit) for initial sanding and fine-grit sandpaper (around 120-150 grit) for final sanding. Use a random orbital sander or a belt sander for large deck surfaces.
- Start with the handrails and vertical surfaces: Begin sanding the handrails and any vertical surfaces first. Use a sanding block or sandpaper to cover these areas thoroughly. Sand in the direction of the wood grain for the best results.
- Sand the deck boards: Move on to sanding the deck boards. Start at one end and work your way across the entire surface, going in the direction of the wood grain. Make sure to sand evenly and avoid applying too much pressure to prevent gouging the wood.
- Pay attention to edges and corners: Use sandpaper or a sanding sponge to sand the edges and corners of the deck. These areas may require a bit more effort to remove remnants of old paint or smooth out rough spots.
- Clean up the sanding residue: After sanding, sweep or vacuum the deck to remove any sanding residue. This will ensure a clean surface for painting and prevent particles from interfering with the paint’s adhesion.
- Consider a final hand sanding: To achieve an exceptionally smooth finish, you can opt for a final hand sanding with fine-grit sandpaper. This step is optional but can make a significant difference in the final result.
Sanding the deck not only creates a smooth surface but also helps open up the wood pores, allowing the paint to penetrate and adhere better. Ensure that you thoroughly sand the entire deck to achieve optimal results. With the sanding complete, you are now ready for the next step: applying primer to the deck.
Apply Primer
Applying primer to your deck is an essential step that helps improve paint adhesion and enhances the longevity of the paint job. Primer acts as a base coat that seals the surface, providing a smooth and uniform canvas for the paint. Follow these steps to effectively apply primer to your deck:
- Choose the right primer: Select a primer specifically designed for exterior surfaces and compatible with your deck’s material. Consider using a primer with mildew-resistant properties for added protection.
- Prepare the primer: Mix the primer according to the manufacturer’s instructions. Stir it well to ensure an even consistency.
- Protect nearby areas: Use painter’s tape and plastic sheeting to cover any adjacent surfaces or areas you don’t want to prime, such as railings or plants.
- Start with the handrails and vertical surfaces: Begin applying primer to the handrails and vertical surfaces using a brush. Work in smooth, even strokes, following the direction of the wood grain.
- Apply primer to the deck boards: Move on to the deck boards, using a roller or a brush for larger areas. Coat the deck boards evenly, paying attention to any cracks or crevices.
- Allow the primer to dry: Follow the drying time specified by the primer manufacturer. It’s essential to give the primer enough time to dry thoroughly before applying the paint.
- Sand if necessary: If you notice any imperfections or rough spots after the primer has dried, lightly sand those areas with fine-grit sandpaper to achieve a smoother surface.
- Cleanup: Clean your brushes and rollers thoroughly with the appropriate cleaning solution recommended by the primer manufacturer.
Applying primer to your deck is an important step to ensure the best results for your paint job. It provides a solid foundation for the paint and contributes to a more professional and long-lasting finish. With the primer applied and dried, you are now ready to choose the right paint for your deck.
Before painting your deck, make sure to thoroughly clean and sand the surface to remove any old paint or debris. This will help the new paint adhere better and last longer.
Choose the Right Paint
Choosing the right paint for your deck is crucial to ensure a durable and visually appealing finish. The paint you select should be specifically designed for outdoor use and capable of withstanding harsh weather conditions. Consider the following factors when choosing the right paint for your deck:
- Deck material: Determine whether your deck is made of wood or composite material. Different paints are formulated for each type of material, ensuring optimal adhesion and protection.
- Finish: Decide on the desired finish for your deck. You can choose from options like matte, satin, semi-gloss, or high-gloss finishes. Consider the aesthetic appeal as well as the level of maintenance each finish requires.
- Color: Select a color that complements your home’s exterior and personal style. Keep in mind that lighter colors tend to reflect more sunlight, which can help prevent the deck from becoming too hot in sunny weather.
- Weather resistance: Look for a paint that offers excellent weather resistance. It should be able to withstand UV rays, moisture, and temperature fluctuations without fading, cracking, or peeling.
- Durability: Consider the durability of the paint and its ability to withstand heavy foot traffic, furniture placement, and other factors that may cause wear and tear on the deck surface.
- Eco-friendly options: If you’re environmentally conscious, opt for paints that are low in volatile organic compounds (VOCs) or labeled as eco-friendly.
- Read product reviews: Before making a final decision, read customer reviews to gain insights into the performance and longevity of the paint you’re considering.
It’s important to choose high-quality paint that meets your specific needs and provides long-lasting protection for your deck. Consult with paint experts or professionals to help you make an informed decision based on your deck’s material, climate, and personal preferences. Once you have selected the right paint, you can move on to the exciting step of painting your deck.
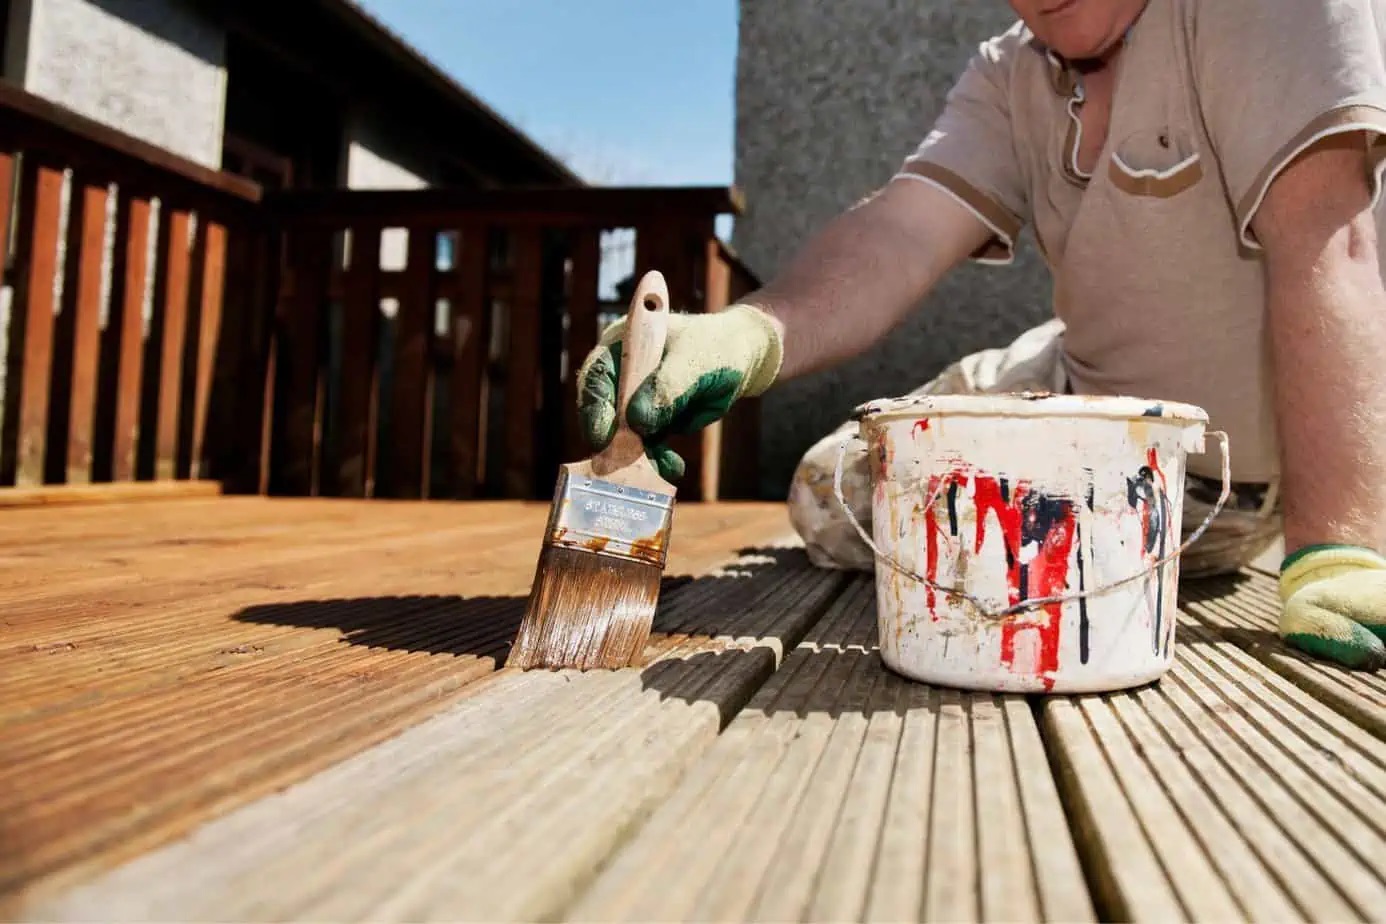
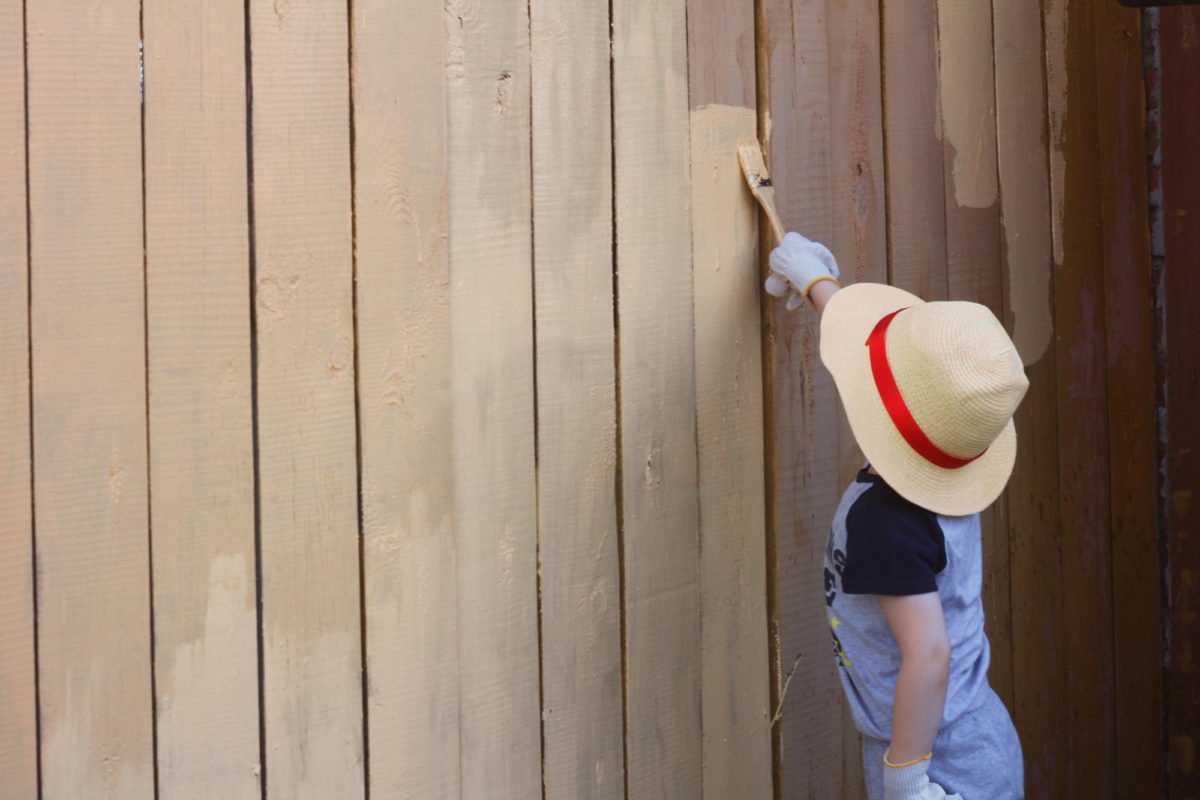
Start Painting
Now that you have prepared the deck, applied primer, and chosen the right paint, it’s time to start painting! Follow these steps to achieve a smooth and professional-looking finish:
- Check the weather: Ensure that the weather conditions are suitable for painting. Avoid painting on extremely hot, cold, or rainy days, as it can affect the drying process and the overall quality of the paint job.
- Stir the paint: Thoroughly stir the paint to ensure an even consistency and distribute any settling pigments or additives.
- Work in sections: Divide your deck into manageable sections to make the painting process more efficient. Start with an area that allows you to maintain a wet edge while working.
- Cut in the edges: Use a paintbrush to “cut in” the edges of the deck, including the areas around railings, posts, and corners. This ensures a clean and precise finish.
- Use a roller: For larger areas, use a roller to apply the paint. Dip the roller into the paint tray, removing any excess paint, and apply an even coat using long, overlapping strokes.
- Paint in the direction of the wood grain: Always paint in the same direction as the wood grain to enhance the natural look of the deck and achieve a uniform finish.
- Apply thin coats: It’s better to apply two or three thin coats of paint rather than one thick coat. This allows for better drying and ensures proper adhesion to the deck surface.
- Smooth out any drips: If you notice any paint drips or pooling, use a brush to smooth them out before they dry.
- Allow proper drying time: Follow the drying time specified by the paint manufacturer. It’s crucial to allow each coat to dry completely before applying the next one.
- Inspect and touch-up: Once the paint has dried, inspect the deck for any missed spots or uneven areas. Touch up those areas with a brush or roller for a seamless finish.
Take your time with the painting process, ensuring each coat is applied evenly and allowed to dry thoroughly. With patience and attention to detail, your deck will soon be transformed into a beautiful and protected outdoor space. After painting, it’s important to apply multiple coats for optimal coverage and durability.
Apply Multiple Coats
Applying multiple coats of paint to your deck is essential for achieving a durable and long-lasting finish. Multiple coats help provide better coverage, increase the paint’s resistance to weather conditions, and enhance overall color richness. Follow these steps to properly apply multiple coats:
- Allow the first coat to dry: After applying the initial coat of paint, it’s crucial to allow it to dry completely. Follow the drying time recommended by the paint manufacturer.
- Inspect for any missed spots or uneven areas: Once the first coat has dried, inspect the deck for any missed spots or areas that may need additional attention or touch-ups. Use a brush or roller to correct these areas before applying the next coat.
- Apply subsequent coats: Apply the second coat of paint following the same techniques used for the first coat. Ensure even coverage by using long, overlapping strokes that follow the wood grain.
- Observe adequate drying time: Allow each subsequent coat to dry completely before applying additional coats. Depending on the paint type and weather conditions, it may take a few hours or even a day for the paint to fully dry.
- Check for uniform coverage: After each coat has dried, inspect the deck for any inconsistencies in coverage. If necessary, apply additional coats to ensure a uniform and thorough paint job.
- Continue the process until satisfied: Repeat the process of applying coats, allowing drying time, and inspecting until you are satisfied with the level of paint coverage and overall appearance of your deck.
Applying multiple coats of paint provides added protection and improves the longevity of the finish. It’s crucial to be patient and take the time to allow each coat to dry before proceeding. By doing so, you’ll achieve a beautiful and resilient painted deck that withstands the test of time. After applying the final coat, it’s important to allow for proper drying and curing time.
Allow for Drying and Curing Time
After applying the final coat of paint to your deck, it’s essential to allow for adequate drying and curing time. This step is crucial to ensure that the paint fully adheres to the surface and achieves its maximum durability. Here’s what you need to know about drying and curing time:
Drying Time:
- Touch Dry: The paint may feel dry to the touch within a few hours. However, this doesn’t mean it is fully cured and ready for use.
- Recoat Time: Follow the drying time specified by the paint manufacturer. It will usually range from a few hours to a day. Make sure to allow for this time before applying additional coats.
- Foot Traffic: Avoid allowing any foot traffic on the freshly painted deck until it is completely dry. Walking on the surface too soon can cause smudging, imprints, or damage to the paint job.
- Weather Conditions: Consider the current weather conditions when determining drying time. Humidity, temperature, and air circulation can affect drying time. Ideally, choose a day with low humidity and moderate temperatures for painting to ensure optimal drying.
Curing Time:
- Full Cure: While the paint may feel dry in a matter of hours, it typically takes several days or even weeks for the paint to fully cure and harden. During this time, it is important to avoid heavy use or placing heavy objects on the surface.
- Protective Measures: Be cautious when placing furniture, plants, or other objects on the deck until the paint has fully cured. Using protective pads or covers can help prevent any potential damage or marks on the freshly painted surface during the curing process.
- Maintenance and Cleaning: Wait until the paint is fully cured before cleaning or performing any maintenance tasks on the deck. This will ensure that the paint is well-settled and less vulnerable to damage.
It’s essential to be patient and allow ample drying and curing time to achieve the best results for your painted deck. Rushing the process can compromise the integrity and durability of the paint job. Once the paint is fully dried and cured, you can proceed to the final step: cleaning up and maintaining your newly painted deck.
Clean Up and Maintenance Tips
After completing the painting process, it’s important to properly clean up and adopt maintenance practices to ensure the longevity and beauty of your freshly painted deck. Here are some clean-up and maintenance tips to follow:
- Clean up:
- Dispose of any used paint cans, brushes, rollers, and other painting supplies according to local regulations.
- Clean your brushes, rollers, and other tools immediately after use using the appropriate cleaning solution recommended by the paint manufacturer.
- Remove any remaining tape and plastic sheeting used to protect adjacent surfaces during the painting process.
- Dispose of any drop cloths or plastic sheeting, ensuring they are properly cleaned or discarded based on their material.
- Maintenance tips:
- Broom sweep or gently hose down your deck regularly to remove dirt, dust, and debris that may accumulate over time.
- Avoid using abrasive cleaning tools that can scratch or damage the paint surface. Opt for a soft-bristle brush or mop when necessary.
- Address any spills or stains promptly by cleaning them with mild soap and water. Avoid using harsh chemicals or cleaners that can damage the paint finish.
- Inspect your deck periodically for any signs of wear, chipping, or peeling. Touch up any damaged areas with paint and ensure proper adhesion.
- Consider adding a protective sealant or topcoat to further enhance the durability and resilience of the paint job.
- Avoid dragging heavy furniture or sharp objects across the deck surface to prevent scratches or gouges.
- Regularly trim vegetation or plants near the deck to maintain proper air circulation and prevent moisture buildup.
- Keep the deck surface clear of leaves, standing water, and other debris to avoid potential damage and promote a longer lifespan.
By following these clean-up and maintenance tips, you’ll be able to keep your newly painted deck looking fresh and vibrant for years to come. Regular care and attention will help protect your investment and ensure that you can enjoy your beautiful and weather-resistant deck for many seasons.
With the completion of these steps, you can now sit back, relax, and appreciate the hard work you’ve put into painting your deck. Enjoyment and relaxation await in your transformed outdoor space!
Conclusion
Painting your deck not only enhances its appearance but also provides essential protection against the elements. By following the step-by-step process outlined in this article, you can achieve a fresh, weather-resistant finish that rejuvenates your outdoor space. From gathering supplies to cleaning, repairing, sanding, and applying multiple coats of paint, each step plays a crucial role in creating a durable and visually appealing deck.
Proper preparation, such as cleaning the deck, repairing any damaged areas, and sanding the surface, ensures a smooth canvas for painting. Applying primer creates a strong base for the paint, improving adhesion and durability. Choosing the right paint for your deck’s material and climate is key to achieving a long-lasting finish, while proper application techniques, such as cutting in the edges and using rollers, help create a professional-looking result.
Allowing sufficient drying and curing time between coats and after the final coat is critical for achieving optimal results. Following the recommended guidelines for drying and curing ensures that your paint fully adheres and provides excellent weather resistance. Once the painting process is complete, practicing proper clean-up and maintenance, such as regular cleaning, addressing spills promptly, and inspecting for wear, will prolong the life and beauty of your painted deck.
Remember, your deck is an extension of your home, and a well-maintained and visually appealing outdoor space sets the stage for relaxation, entertainment, and enjoyment. Through careful preparation, thoughtful application, and ongoing maintenance, you can transform your deck into a stunning and durable outdoor oasis that will be the envy of your neighbors.
So gather your supplies, roll up your sleeves, and get ready to paint your deck for a fresh, weather-resistant finish that will bring new life to your outdoor living area for years to come. Happy painting!
Frequently Asked Questions about How To Paint A Deck For A Fresh, Weather-Resistant Finish
Was this page helpful?
At Storables.com, we guarantee accurate and reliable information. Our content, validated by Expert Board Contributors, is crafted following stringent Editorial Policies. We're committed to providing you with well-researched, expert-backed insights for all your informational needs.


0 thoughts on “How To Paint A Deck For A Fresh, Weather-Resistant Finish”