Home>Articles>How To Stain A Deck For A Beautiful, Long-Lasting Finish
Articles
How To Stain A Deck For A Beautiful, Long-Lasting Finish
Modified: August 27, 2024
Discover expert tips and tricks for staining your deck with our informative articles. Achieve a stunning and durable finish that will last for years.
(Many of the links in this article redirect to a specific reviewed product. Your purchase of these products through affiliate links helps to generate commission for Storables.com, at no extra cost. Learn more)
Introduction
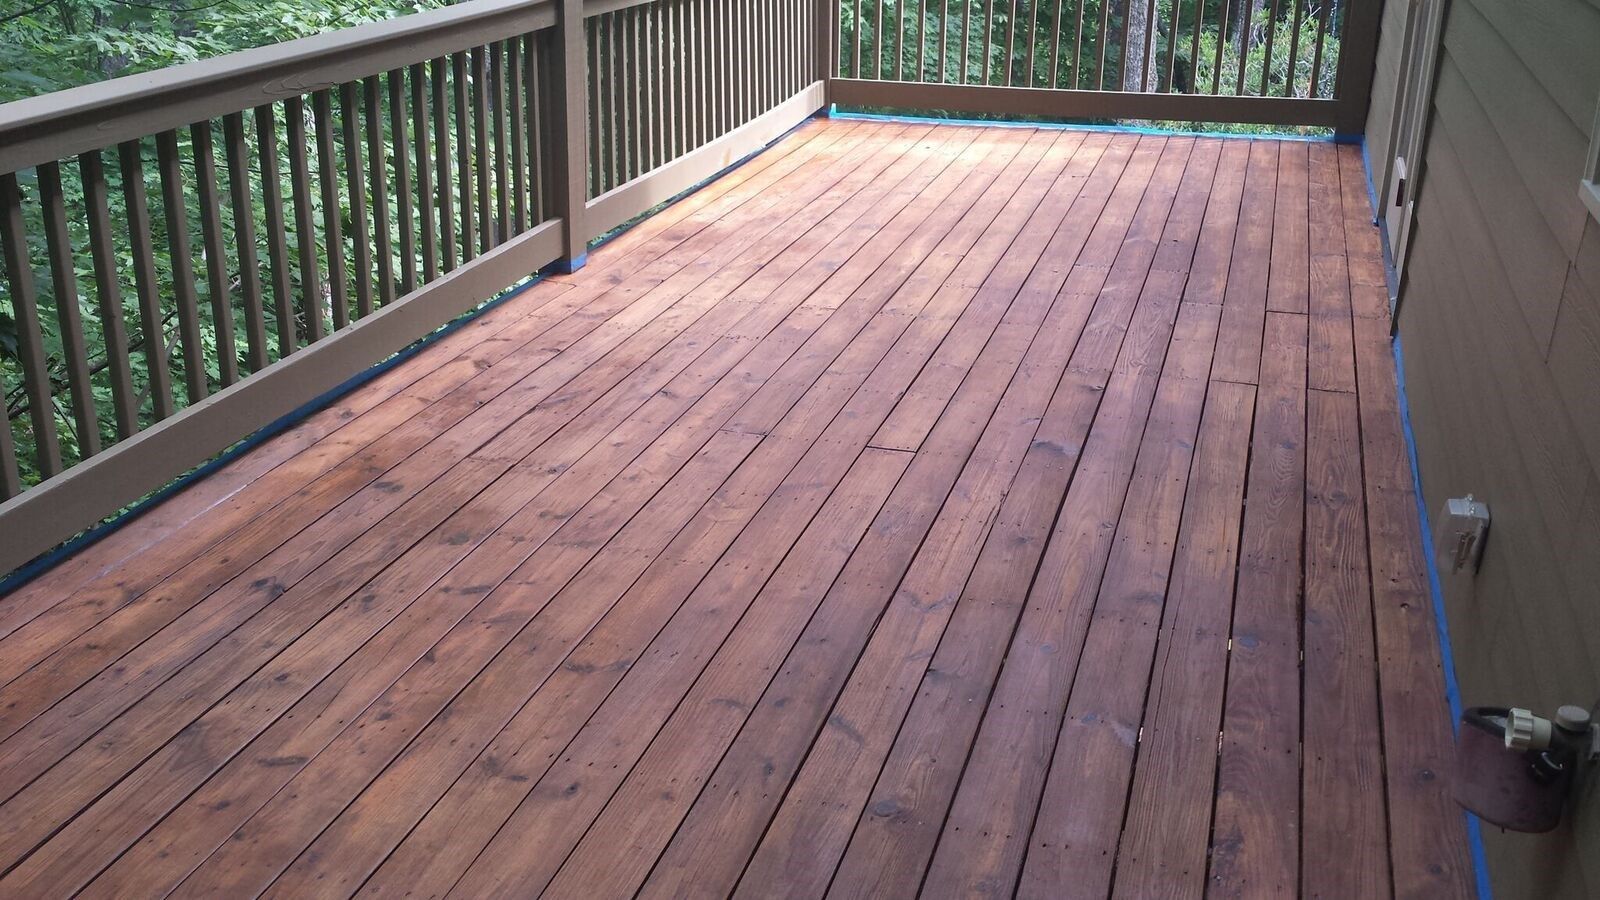
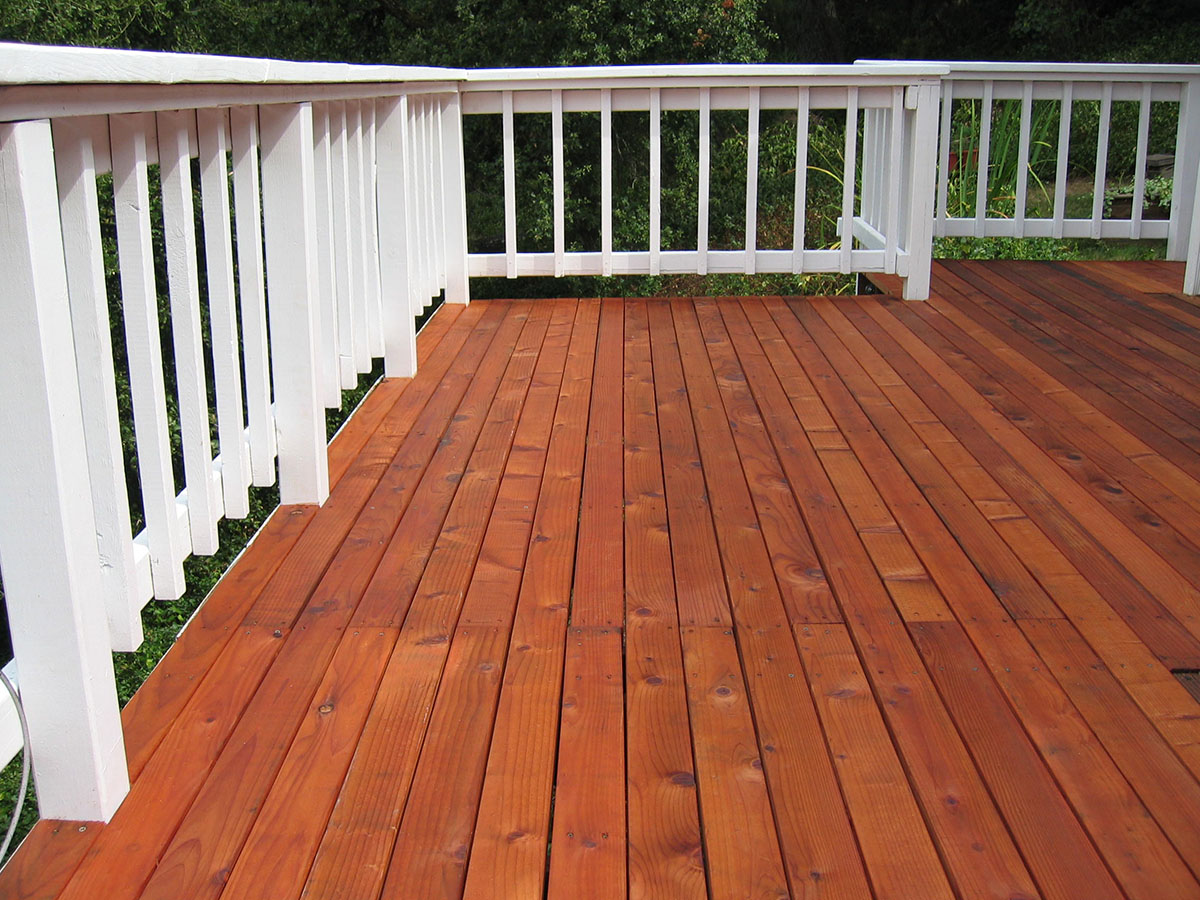
A beautifully stained deck can enhance the overall aesthetic appeal of your outdoor space, while also providing protection against the elements. Whether you’re planning to host a backyard barbecue or simply want a peaceful place to relax and unwind, staining your deck can make a world of difference. In this article, we will guide you through the process of staining a deck for a beautiful, long-lasting finish.
Staining a deck is not only about adding color; it also plays a crucial role in preserving the wood, extending its lifespan, and protecting it from water damage, UV rays, and mildew. By investing some time and effort, you can transform your weathered and worn deck into a vibrant and durable outdoor space that you can enjoy for years to come.
Before diving into the staining process, it’s important to gather all the necessary materials. This includes the stain itself, brushes or rollers, a deck cleaner, sandpaper or a sander, and protective gear such as gloves and eye protection. Once you have everything you need, you’re ready to embark on the journey of staining your deck.
But first, you need to prepare the deck properly. This involves removing any furniture, planters, or other objects from the surface. Take the time to inspect the deck, looking for any loose or damaged boards that need to be fixed before proceeding. If there are any nails or screws that are sticking out, make sure to secure them, as they can cause issues when applying the stain.
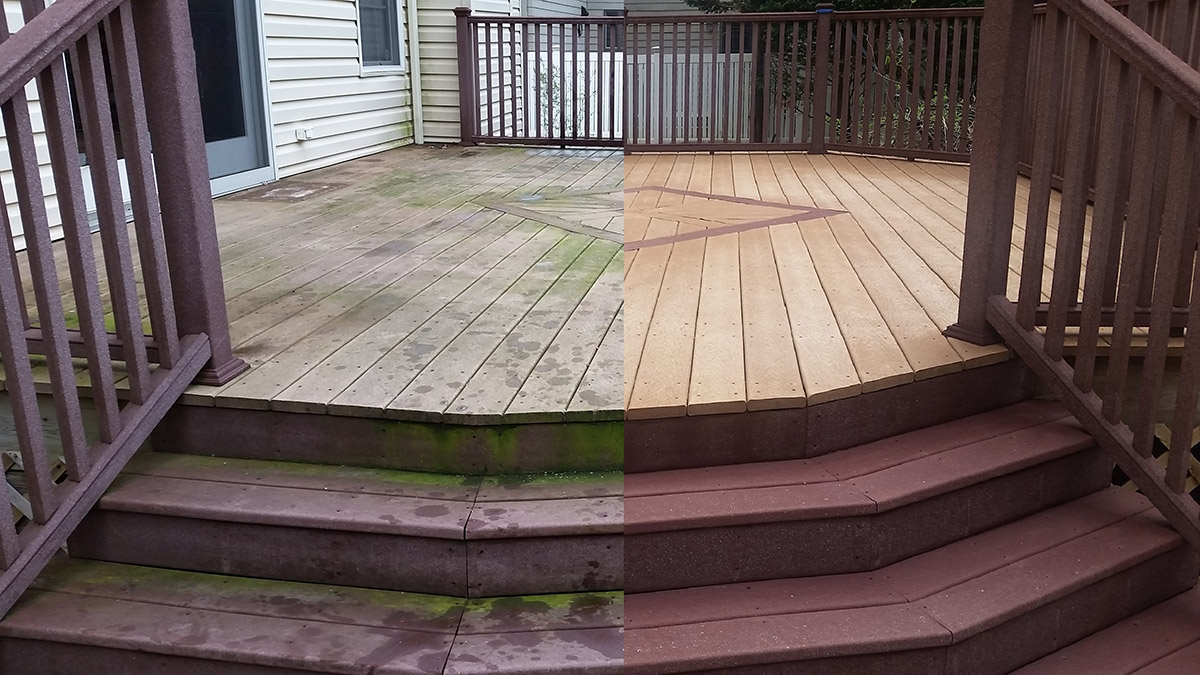
Cleaning the deck is the next crucial step. Over time, dirt, debris, and mildew can accumulate on the surface, making it difficult for the stain to penetrate and adhere properly. Use a deck cleaner or a mixture of water and mild detergent to scrub the deck surface, removing any dirt and grime. Rinse thoroughly with a hose or pressure washer to ensure all cleaning residue is removed.
Key Takeaways:
- Staining your deck not only enhances its appearance but also protects it from the elements, extending its lifespan and providing a vibrant outdoor space for years to come.
- Choosing the right stain and applying it with care and precision is essential for achieving a professional, long-lasting finish that enhances the natural beauty of your deck.
Materials Needed
Before you begin staining your deck, it’s essential to gather all the necessary materials. Being prepared will make the process smoother and more efficient. Here is a list of materials you’ll need:
- Deck stain: Choose a high-quality stain specifically formulated for exterior wood. Consider factors such as color, opacity, and durability when selecting the stain.
- Deck cleaner: Use a specialized deck cleaner to effectively remove dirt, grime, and mildew from the surface of the deck.
- Sandpaper or sander: Depending on the condition of your deck, you may need sandpaper or a power sander to smooth rough surfaces and remove old stain or paint.
- Brushes or rollers: Purchase high-quality brushes or rollers designed for deck staining. These will ensure a smooth and even application of the stain.
- Protective gear: It’s important to protect yourself during the staining process. Wear gloves, eye protection, and a mask to safeguard against any potential hazards.
- Drop cloths or plastic sheets: Cover nearby plants, furniture, or any other areas that you want to protect from the stain.
- Paint tray or bucket: You’ll need a container to pour the stain into during the application process.
- Stirring stick: Use a stirring stick to mix the stain thoroughly before applying it to the deck.
- Paint thinner or mineral spirits: These solvents are useful for cleaning up any spills or mistakes during the staining process.
- Sandpaper or sanding block: If you decide to sand the deck, you’ll need sandpaper or a sanding block to smooth the surface.
Make sure to gather all these materials before you start staining your deck. It’s better to have everything in hand to avoid any interruptions during the process. Additionally, following the manufacturer’s instructions on the stain container and other materials is crucial to achieve the best results.
Preparing the Deck
Before you begin staining your deck, it’s essential to prepare the surface properly. This involves a series of steps to ensure that the stain adheres well and provides a long-lasting finish. Follow these guidelines to prepare your deck for staining:
- Clear the deck: Remove any furniture, planters, or other objects from the deck surface. This will give you unrestricted access to all areas and prevent them from getting stained accidentally.
- Inspect for damage: Carefully examine the deck for any loose or damaged boards. Replace or repair any boards that are unstable or showing signs of deterioration. Hammer any protruding nails or screws back in place.
- Clean the deck: Use a deck cleaner or a mixture of water and mild detergent to scrub the entire deck surface. Pay special attention to areas with stubborn dirt or stains. A scrub brush or a power washer can help remove dirt, grime, and mildew effectively. Rinse thoroughly with water to remove any residue from the cleaning process.
- Check for moisture: Verify that the deck is dry before proceeding with staining. Moisture can affect the adhesion and penetration of the stain. Perform a moisture test by placing plastic sheets on various sections of the deck. If condensation forms under the plastic after 24 hours, the deck is still too moist for staining.
- Consider sanding: If the deck has rough spots, flaking paint, or previous stain that is peeling, sanding might be necessary. Use a power sander or sandpaper to smooth the surface and remove any loose stain or paint. Sanding also helps open up the wood pores for better stain absorption.
- Clean up debris: Sweep away any dust, debris, or residue left from the cleaning or sanding process. This will ensure a clean surface for the stain to adhere to.
- Protect surrounding areas: Take precautions to cover nearby plants, furniture, or any other areas that you want to protect from accidental stain splatters. Use drop cloths or plastic sheets to prevent any unwanted staining.
Taking the time to prepare your deck properly is crucial for achieving a professional-looking finish and ensuring the longevity of the stain. With a clean and well-prepared surface, the stain will have a better chance of penetrating the wood and providing optimal protection against the elements.
Cleaning the Deck
Cleaning your deck thoroughly before staining is essential to achieve the best results. Over time, dirt, grime, and mildew can accumulate on the surface, preventing the stain from adhering properly and compromising the overall finish. Follow these steps to effectively clean your deck:
- Clear the deck: Remove any furniture, plants, or other objects from the deck surface. This will allow you to clean every inch of the deck without any obstructions.
- Sweep the deck: Begin by sweeping away any loose debris such as leaves, twigs, and dirt. Use a broom or a leaf blower to clear the surface.
- Choose a deck cleaner: Select a deck cleaner that is specifically formulated for wooden decks. Look for one that is eco-friendly and safe for plants and pets.
- Dilute the cleaner: Follow the manufacturer’s instructions to dilute the deck cleaner with water. Pour the solution into a garden sprayer or a bucket, depending on the recommended application method.
- Apply the cleaner: Starting from one end of the deck, apply the cleaner to the surface, working in small sections. Use a scrub brush or a long-handled brush to agitate the cleaner and loosen the dirt and grime. Pay extra attention to high-traffic areas and spots with stubborn stains.
- Let it sit: Allow the deck cleaner to sit on the surface for the specified amount of time, usually around 10-15 minutes. This will give the cleaner enough time to penetrate and break down the dirt and grime.
- Scrub and rinse: Using a scrub brush or a pressure washer, scrub the deck surface again to remove the loosened dirt and grime. Work in the direction of the wood grain to avoid damaging the surface. Rinse the deck thoroughly with clean water, ensuring that all cleaning residue is removed.
- Dry the deck: Allow the deck to dry completely before proceeding with the next steps. Depending on the weather conditions, this may take a few hours or even a whole day.
Cleaning your deck not only improves the appearance but also ensures that the stain can penetrate the wood effectively for a long-lasting finish. Following these steps will help remove dirt, grime, and mildew, allowing the stain to adhere properly and protect the deck from the elements.
Sanding the Deck
Sanding the deck is an important step in the preparation process, especially if your deck has rough spots, flaking paint, or previous stain that is peeling. Sanding helps to smooth the surface, remove any imperfections, and open up the wood pores for better stain absorption. Follow these steps to effectively sand your deck:
- Choose the right sandpaper: Select the appropriate grit of sandpaper for your deck. For initial sanding or removing a thick layer of old stain or paint, start with a coarse grit (around 40-60). For final sanding and smoothing, use a medium grit (around 80-120).
- Protect yourself: Wear protective gear such as gloves, safety glasses, and a dust mask to shield yourself from the dust generated during sanding.
- Start sanding: Begin sanding the deck in the direction of the wood grain. Use a power sander for larger areas or sandpaper wrapped around a sanding block for smaller sections or corners that are hard to reach. Apply even pressure and keep the sander or sandpaper moving along the wood surface.
- Focus on problem areas: Pay extra attention to areas with rough spots, peeling paint, or stain remnants. Sand them thoroughly to create a smooth and uniform surface. Take your time to ensure that all imperfections are properly addressed.
- Clean up: After sanding, use a broom, vacuum, or damp cloth to remove the sanding dust from the deck. Make sure the surface is clean and free of any debris before proceeding to the next steps.
Sanding the deck not only improves its appearance but also enhances the stain’s ability to penetrate the wood fibers. It creates a smooth surface for the stain to adhere to and ensures a more uniform and professional finish. Taking the time to sand your deck properly will greatly contribute to the overall longevity and beauty of the stained deck.
Before staining your deck, make sure to thoroughly clean and dry the surface to ensure the stain adheres properly and lasts longer. This will help prevent peeling and flaking over time.
Read more: How Long Will Trex Decking Last
Applying the Stain
Now that your deck is cleaned and prepared, it’s time to apply the stain. Applying the stain properly is crucial for achieving an even and long-lasting finish. Follow these steps to effectively apply the stain to your deck:
- Choose the right weather: It’s important to choose a day with favorable weather conditions for staining your deck. Ideally, the temperature should be between 50 and 90 degrees Fahrenheit, and there should be no rain or strong winds forecasted.
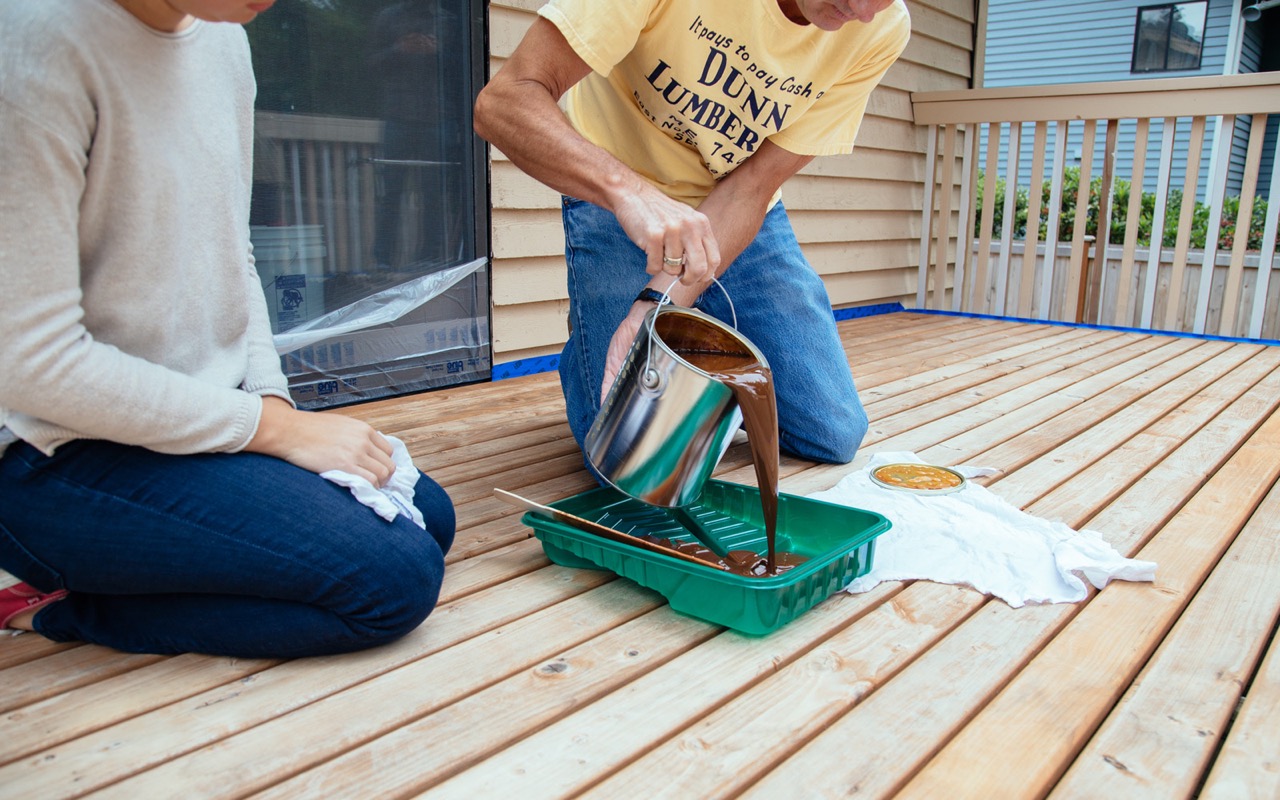
- Stir the stain: Before opening the stain container, thoroughly stir it with a stirring stick. This will help ensure that the color pigments are evenly distributed throughout the stain.
- Start from the top: Begin applying the stain from the top of the deck, working your way down to the bottom. This will prevent the stain from dripping onto areas that have already been stained.
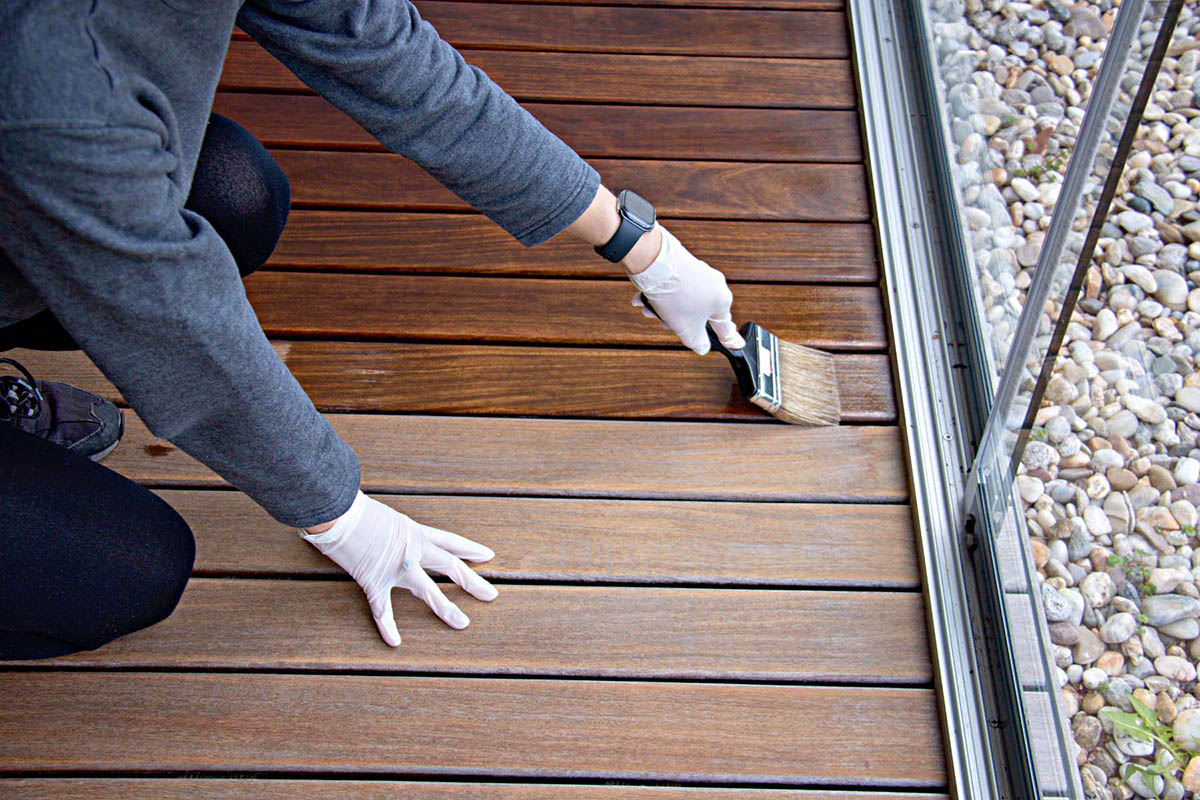
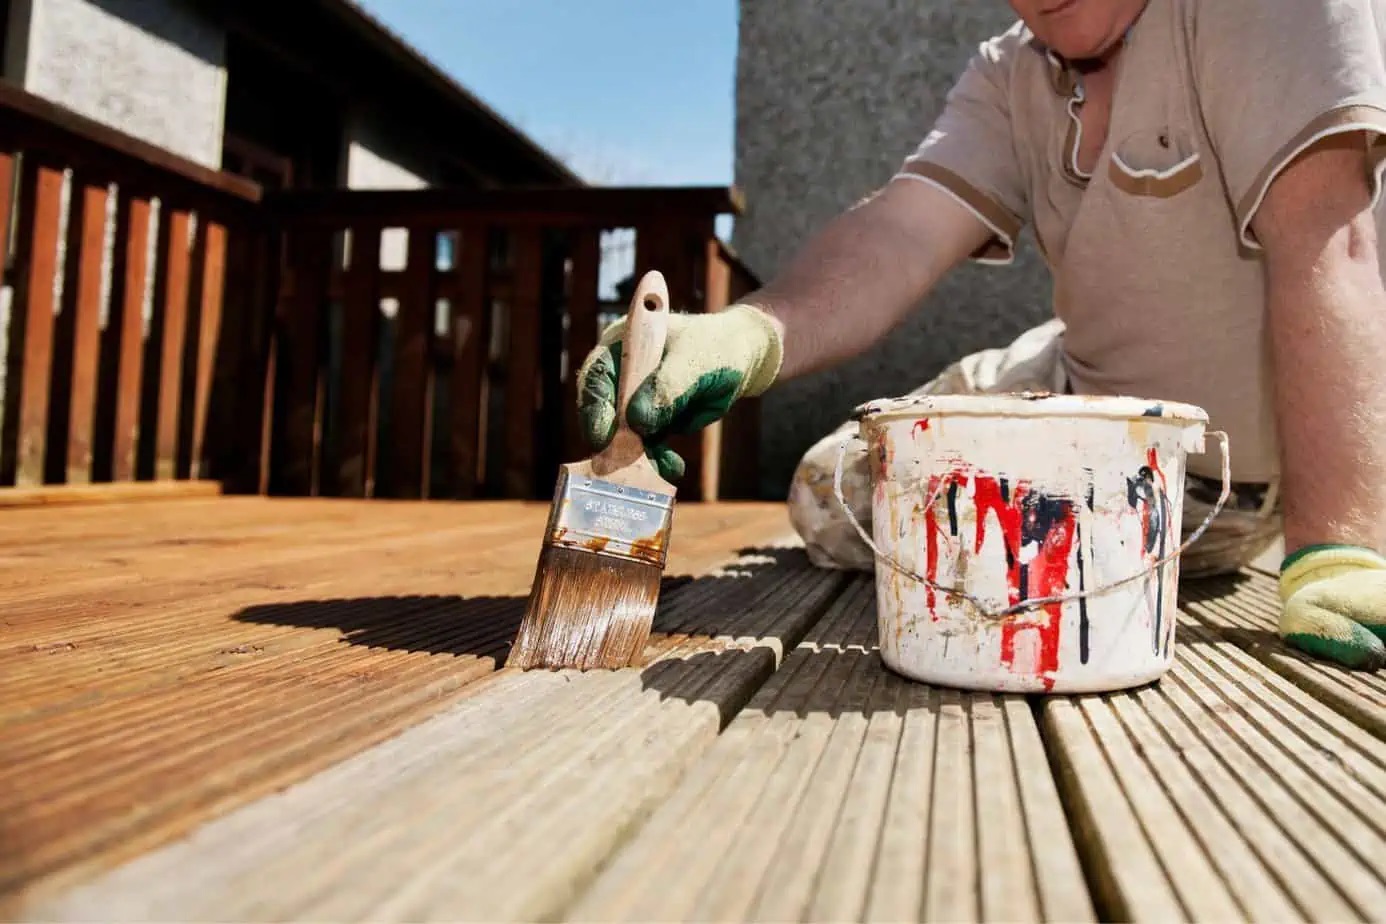
- Use a brush or roller: Dip a high-quality brush or roller into the stain, and apply it in the direction of the wood grain. Work in small sections, applying an even coat of the stain. Ensure that the stain is being absorbed into the wood.
- Apply in the shade: Whenever possible, try to apply the stain in the shade or during cooler hours of the day. This will allow the stain to dry more slowly, preventing the formation of lap marks or uneven drying.
- Apply multiple coats: Depending on the desired opacity and the type of stain used, you may need to apply multiple coats. Allow each coat to dry thoroughly before applying the next one. Follow the manufacturer’s recommendations for drying time.
- Pay attention to edges and corners: Use a smaller brush or a sponge to reach corners, edges, and hard-to-reach areas. Ensure that these areas are properly coated with stain.
- Wipe off excess stain: After applying the stain, use a clean cloth or rag to wipe off any excess stain on the surface. This will help prevent tacky or sticky spots and promote even drying.
Take your time when applying the stain, and pay close attention to the coverage and consistency of the application. Properly applied stain will enhance the natural beauty of the wood, while providing protection against the elements.
Remember to follow the manufacturer’s instructions and recommended drying times for the specific stain you’re using. Proper application and drying will ensure a beautiful, long-lasting finish for your deck.
Choosing the Right Stain
When it comes to staining your deck, choosing the right stain is crucial for achieving the desired color, durability, and overall finish. With a wide variety of options available, it’s important to consider a few key factors before making your selection. Here are some considerations to keep in mind when choosing the right stain for your deck:
- Stain type: There are two main types of deck stains: transparent and solid color. Transparent stains allow the natural beauty and grain of the wood to show through, while solid color stains offer more coverage and hide the wood’s natural characteristics. Decide which type of stain best suits your aesthetic preferences.
- Color: Determine the color you want for your deck. Stains are available in a range of hues, from clear and natural tones to bold and vibrant colors. Consider the overall style and color scheme of your outdoor space when selecting a stain color.
- Opacity: Opacity refers to the level of coverage provided by the stain. If you want the wood’s natural grain to be visible, choose a stain with lower opacity. If you prefer a more uniform and opaque finish, opt for a stain with higher opacity.
- Durability: Look for a stain that offers excellent durability and resistance to UV rays, water, and mildew. A durable stain will help protect your deck from the elements and ensure a long-lasting finish.
- Application method: Consider the ease of application when choosing a stain. Some stains are specifically designed for brush application, while others work well with rollers or sprayers. Choose a stain that matches your preferred application method.
- Environmentally friendly: If you’re concerned about the environmental impact, look for stains that are labeled as eco-friendly or low VOC (volatile organic compounds). These stains have lower levels of harmful chemicals and are safer for the environment.
- Brand and quality: Research and choose a reputable brand known for their quality deck stains. Reading product reviews and seeking recommendations can help ensure you select a stain that is reliable and will provide a satisfactory result.
Take your time to evaluate these factors and select a stain that aligns with your desired look, durability requirements, and environmental considerations. It’s recommended to test the stain on a small, inconspicuous area of your deck before applying it to the entire surface to ensure you’re satisfied with the color and finish.
Remember, choosing the right stain is essential for achieving a beautiful and long-lasting finish on your deck. It will enhance the overall appearance of your outdoor space and provide protection against the elements, ensuring your deck remains a stunning centerpiece for years to come.
Stain Application Techniques
Applying stain to your deck requires careful and precise techniques to ensure an even and professional finish. Following the right application techniques will result in a beautifully stained deck. Here are some essential tips to keep in mind when applying stain to your deck:
- Clean and prepare the deck: Before applying the stain, make sure the deck is thoroughly cleaned and prepared. Remove any dirt, grime, or old flaking stains. Sand any rough spots and ensure the deck surface is smooth.
- Protect surrounding areas: Cover nearby plants, furniture, or any other surfaces you want to protect from the stain. Use drop cloths or plastic sheets to prevent any accidental splatters or stains.
- Follow the manufacturer’s instructions: Read and follow the instructions provided by the stain manufacturer. Each stain may have specific application instructions, such as the recommended number of coats, drying times, and application methods.
- Use a staining brush or roller: Choose a high-quality staining brush or roller that is suitable for your stain type. Brushes are ideal for smaller areas, edges, and hard-to-reach spots, while rollers are best for larger sections. Make sure the brush or roller is clean and free from any debris or previous stain residue.
- Apply in the direction of the wood grain: Always apply the stain in the direction of the wood grain for a more even and natural-looking finish. This allows the stain to penetrate the wood fibers effectively.
- Work in small sections: Divide your deck into small sections and work on one section at a time. Apply a generous and even coat of stain, making sure to cover the entire surface of the wood. Avoid leaving any dry patches or streaks.
- Overlap wet edges: To avoid visible lines or streaks, overlap the wet stain with the next section as you work. This ensures the stain blends seamlessly and dries evenly.
- Wipe off excess stain: After applying the stain, use a clean cloth or rag to wipe off any excess stain on the surface. This helps prevent tacky areas and allows for better absorption into the wood.
- Apply multiple thin coats: Depending on the desired color and opacity, multiple thin coats of stain may be required. Allow each coat to dry thoroughly before applying the next one. This helps achieve a more uniform and durable finish.
- Pay attention to drying time: Follow the recommended drying time provided by the stain manufacturer. Avoid walking on the freshly stained deck until it is completely dry to prevent footprints and other marks.
By following these stain application techniques, you can achieve a professional and long-lasting finish on your deck. Take your time, work carefully, and be thorough in your application to ensure the stain enhances the beauty and protection of your outdoor space.
Drying and Curing
After applying the stain to your deck, it’s important to allow sufficient time for drying and curing. Proper drying and curing ensure that the stain fully adheres to the wood and provides a long-lasting finish. Here are some key points to keep in mind during the drying and curing process:
- Follow manufacturer’s guidelines: Different stains have different drying times, so it’s crucial to follow the drying and curing guidelines provided by the manufacturer. This information can typically be found on the stain can or packaging.
- Allow for proper ventilation: Ensure that the stained deck has proper ventilation during the drying process. Open windows and doors, if possible, to promote air circulation. This will aid in the drying and curing process.
- Avoid foot traffic: Avoid walking on the freshly stained deck until it has dried completely. This helps prevent smudges, footprints, and other marks that could mar the finish. The drying time can vary depending on factors such as temperature, humidity, and the type of stain used, so refer to the manufacturer’s guidelines.
- Keep pets and children away: Ensure that pets and children are kept away from the freshly stained deck during the drying and curing process. Stains may contain chemicals that can be harmful if ingested or if they come into contact with eyes or skin.
- Check for tackiness: After the recommended drying time has elapsed, lightly touch the stained surface to check for tackiness. If the stain feels sticky or tacky to the touch, it needs more time to dry. Wait until the surface is dry and no longer tacky before proceeding.
- Avoid water exposure: It is crucial to keep the stained deck dry during the curing process. Avoid exposing the freshly stained surface to water, such as rain or sprinklers, for at least 48 hours or as recommended by the stain manufacturer. Moisture can interfere with the curing process and affect the durability of the finish.
- Be patient: Allow ample time for the stain to fully cure. Curing time can vary depending on the specific stain product and environmental conditions. Waiting for the proper curing time will ensure that the stain has fully set and will provide long-lasting protection for your deck.
Proper drying and curing are critical for achieving a durable and beautiful finish on your deck. By following these guidelines and allowing sufficient time for the stain to dry and cure, you’ll ensure that your deck stays protected and maintains its aesthetic appeal for years to come.
Read more: How Long Does Wood Decking Last
Maintaining the Stained Deck
Once you have successfully stained your deck and it has dried and cured, it’s important to properly maintain it to ensure its longevity and continued beauty. Regular deck maintenance will help protect the stain and keep your deck looking its best. Here are some essential tips for maintaining your stained deck:
- Clean regularly: Regularly sweep off any dirt, leaves, or debris that may accumulate on the deck surface. Use a garden hose or pressure washer to wash away any stubborn dirt or stains. Avoid using harsh chemicals or abrasive cleaners that can damage the stain.
- Inspect for damage: Periodically inspect your deck for any signs of damage, such as loose boards, splintering, or discoloration. Repair or replace any damaged boards promptly to prevent further issues.
- Reapply stain when needed: Depending on the type of stain and the amount of foot traffic your deck receives, you may need to reapply stain every few years. Monitor the condition of the stain and look for signs of wear or fading. When it’s time to refresh the stain, clean the deck thoroughly, sand if necessary, and apply a new coat of stain following the same application process as before.
- Protect the deck from the elements: Consider using outdoor rugs or mats in high traffic areas to protect the stained deck surface from excessive wear. Trim branches from nearby trees to prevent leaves and debris from accumulating on the deck. Ensure proper drainage to avoid pooling water that can cause damage to the wood and stain.
- Apply a sealant: To provide extra protection to your stained deck, consider applying a clear water-resistant sealant. This will help prolong the life of the stain and further protect the wood from moisture and UV rays.
- Take care of spills promptly: Accidental spills should be cleaned up promptly to avoid staining and damage. Wipe up any spills immediately using a cloth or paper towel. If necessary, use a mild detergent and water solution to clean the area, being careful not to scrub too harshly and damage the stain.
- Regularly check for mold or mildew: Keep an eye out for any signs of mold or mildew growth on your deck. This can occur in areas with high humidity or dampness. Use a mold and mildew cleaner specifically formulated for outdoor use to remove any growth. Consider improving airflow and sunlight exposure to prevent future mold or mildew issues.
- Protect furniture and accessories: Use furniture pads or coasters under outdoor furniture to prevent scratching or indentations on your stained deck. Avoid dragging heavy furniture or sharp objects across the deck.
By following these maintenance tips, you’ll help preserve the beauty and longevity of your stained deck. Regular cleaning, inspections, and necessary touch-ups will ensure that your deck remains a stunning and functional outdoor space for you to enjoy for years to come.
Frequently Asked Questions about How To Stain A Deck For A Beautiful, Long-Lasting Finish
Was this page helpful?
At Storables.com, we guarantee accurate and reliable information. Our content, validated by Expert Board Contributors, is crafted following stringent Editorial Policies. We're committed to providing you with well-researched, expert-backed insights for all your informational needs.


0 thoughts on “How To Stain A Deck For A Beautiful, Long-Lasting Finish”