Home>Interior Design>How To Caulk A Shower: Simple Steps To A Fresh Finish
Interior Design
How To Caulk A Shower: Simple Steps To A Fresh Finish
Modified: January 19, 2024
Learn how to caulk your shower like a pro with our simple step-by-step guide, ensuring a flawless and refreshed interior design.
(Many of the links in this article redirect to a specific reviewed product. Your purchase of these products through affiliate links helps to generate commission for Storables.com, at no extra cost. Learn more)
How to Caulk a Shower: Simple Steps to a Fresh Finish
Caulking a shower is an essential part of bathroom maintenance. Over time, the caulking around your shower can become discolored, cracked, or moldy, compromising both the appearance and functionality of your shower. By taking the time to caulk your shower properly, you can ensure a fresh and watertight finish that will protect your bathroom from water damage. In this article, we will walk you through the simple steps to caulk a shower effectively.
Key Takeaways:
- Properly preparing the shower, cutting the caulk tube at a 45-degree angle, and applying consistent pressure to the trigger ensures a professional and watertight finish for your shower caulking project.
- Regular maintenance and timely caulking not only enhance the appearance of your bathroom but also prolong the life of your shower, protecting it from water damage and leaks.
Read more: How To Caulk A Shower Tile
Step 1: Gather Your Supplies
Before you start caulking, it’s important to gather all the necessary supplies. You will need a caulk gun, silicone caulk specifically designed for bathrooms, a caulk remover or scraper, denatured alcohol, and some rags or paper towels. Make sure you have everything you need within reach to ensure a smooth and efficient process.
Step 2: Prepare the Shower
To achieve a clean and professional finish, you need to remove the old caulk and properly prepare the area. Use a caulk remover or scraper to carefully remove the old caulk. This will ensure that the new caulk adheres well and prevents any future leaks. Once the old caulk is removed, clean the area thoroughly with denatured alcohol to remove any remaining residue. Finally, dry the surface completely before proceeding to the next step.
Step 3: Cut the Caulk Tube
Before you start applying the caulk, you need to cut the caulk tube properly. Choose the appropriate size nozzle for the job, and then cut the tip of the caulk tube at a 45-degree angle. This angled cut will allow for a smoother and more controlled application of the caulk.
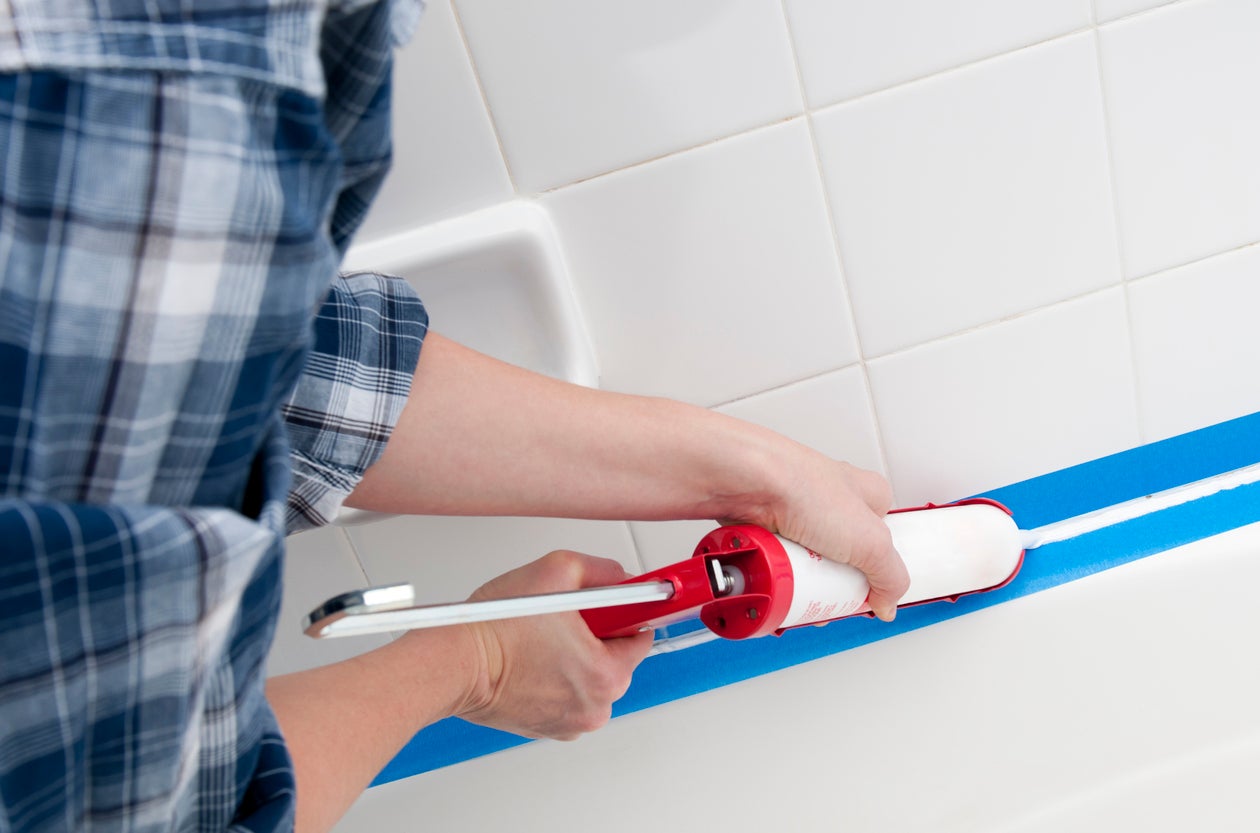
Step 4: Apply the Caulk
Hold the caulk gun at a 45-degree angle and apply consistent pressure to the trigger. Start at one corner of the shower and work your way around, applying a steady and even bead of caulk along the joint between the shower tiles and the tub or shower tray. Keep a caulk tool or your finger nearby to smooth the caulk as you go. This will help ensure a neat and professional-looking finish.
Step 5: Clean Up
Once you have finished applying the caulk, it’s time to clean up any excess or smudges. Use a damp rag or paper towel to remove any caulk that may have spread beyond the joint. If you encounter stubborn caulk residue, you can use denatured alcohol to dissolve and clean it. Cleaning up any mess or residue will leave your shower looking fresh and tidy.
Step 6: Allow the Caulk to Dry
Different types of silicone caulk have varying drying times, so it’s important to follow the manufacturer’s instructions. Generally, silicone caulk takes about 24 hours to dry completely. During this time, it’s crucial to avoid any contact with water. Make sure to keep the shower area dry and free from any moisture until the caulk is fully cured.
Step 7: Inspect and Touch Up
Once the caulk is dry, inspect the shower for any missed spots or gaps. If you notice any areas that need additional caulk, simply apply another bead of caulk and smooth it out accordingly. This final touch-up will ensure that your shower is properly sealed and protected from leaks.
By following these simple steps, you can easily caulk your shower and achieve a fresh and watertight finish. Regular maintenance and timely caulking will not only enhance the appearance of your bathroom but also prolong the life of your shower. Don’t neglect this important task and enjoy a leak-free and beautiful shower for years to come.
Introduction
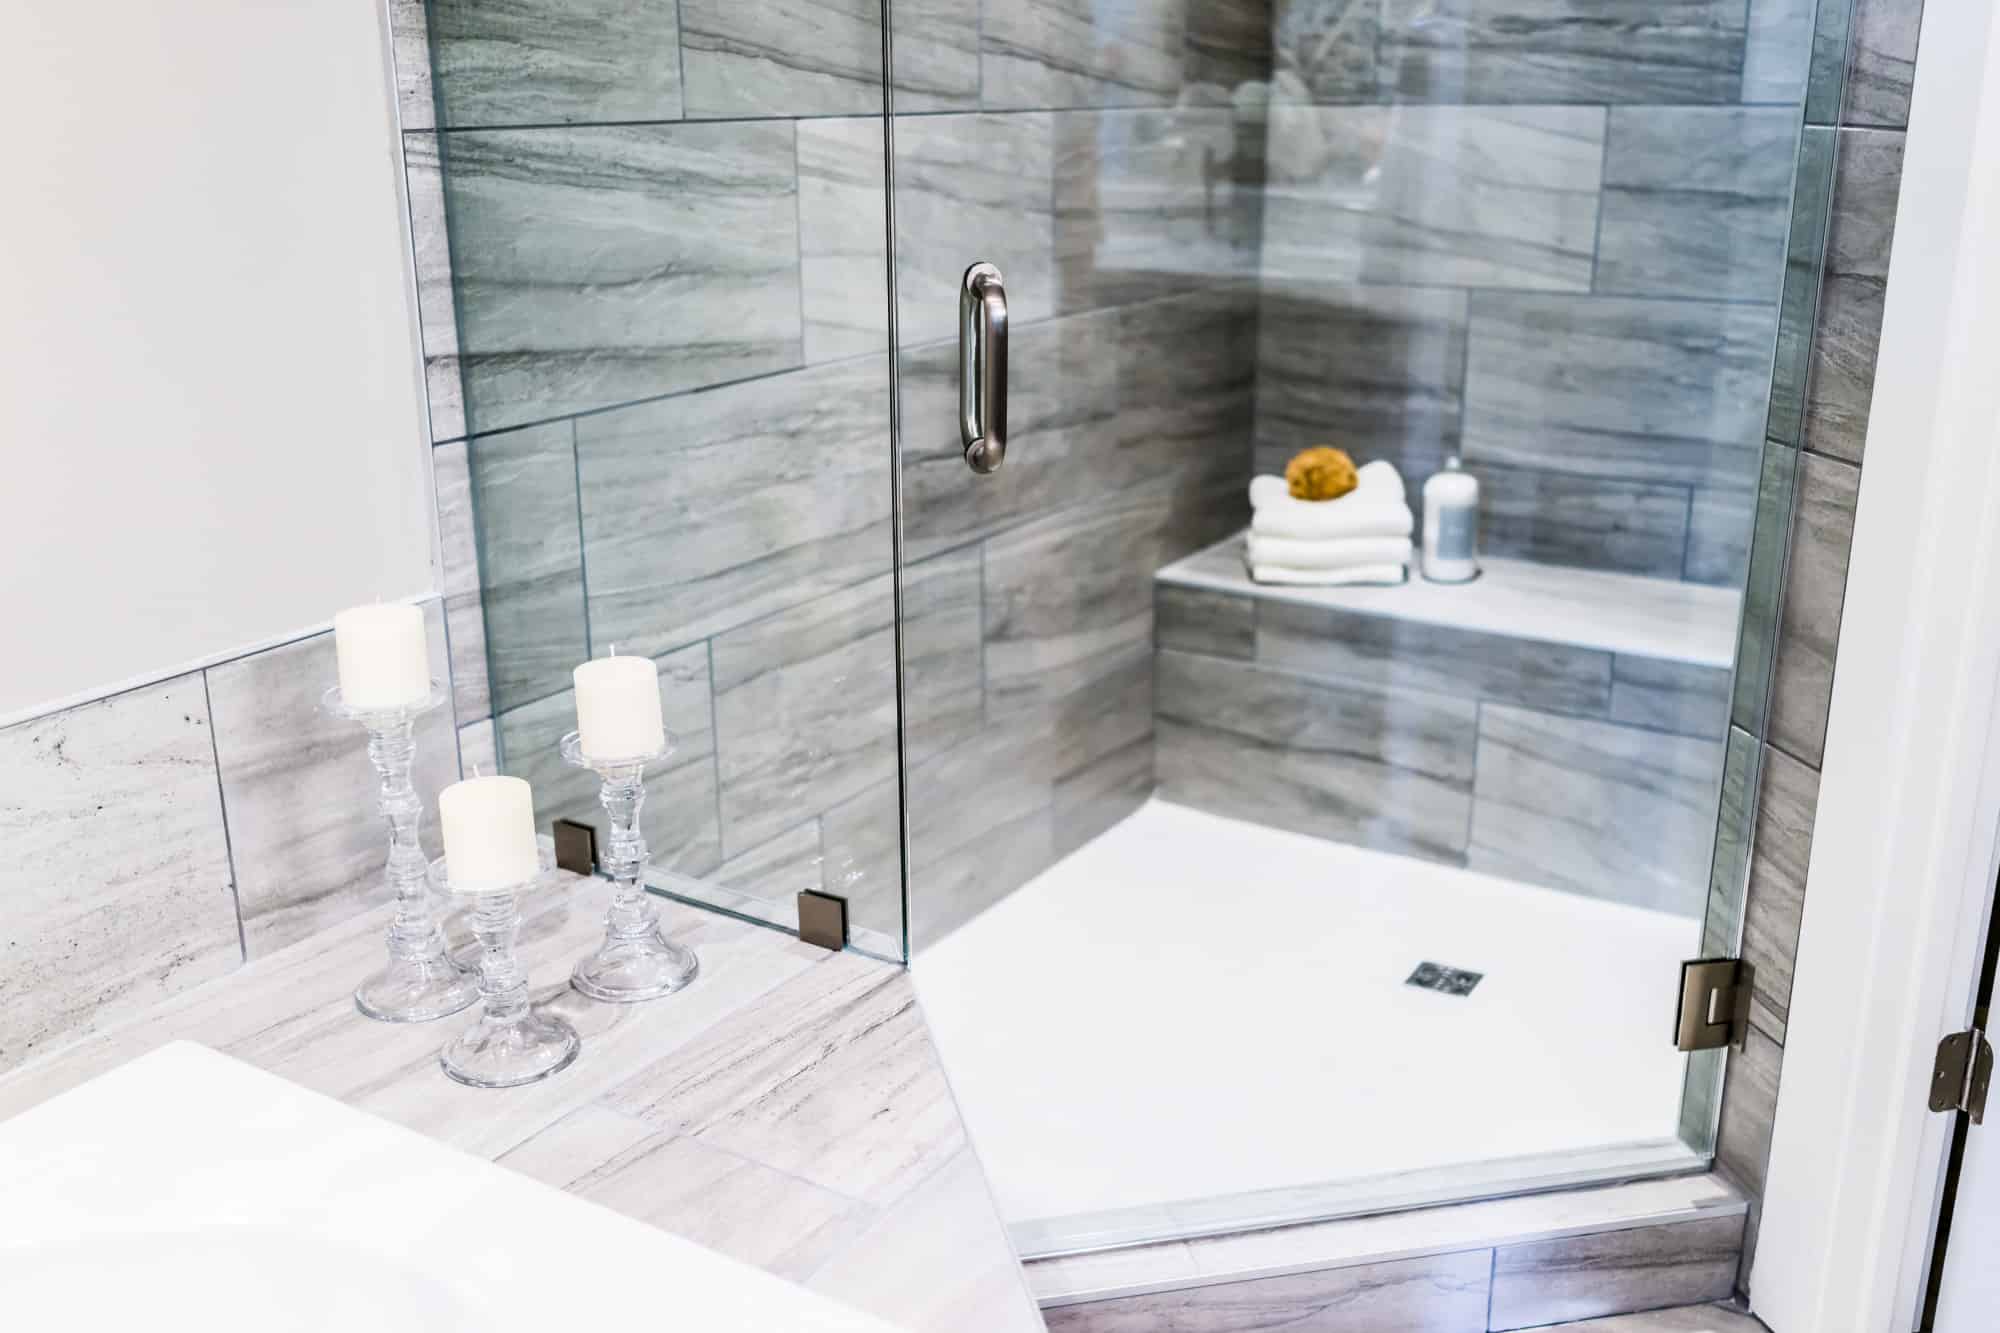
A well-maintained shower is not only pleasing to the eye but also essential for the overall functionality and longevity of your bathroom. One of the key maintenance tasks for a shower is caulking – the process of sealing gaps and joints with a waterproof material to prevent water from penetrating into the walls or floors. Over time, the caulk in your shower can deteriorate, resulting in a less effective seal, discoloration, or even mold growth. That’s why knowing how to caulk a shower properly is crucial for keeping your bathroom in top condition.
Caulking a shower may seem like a daunting task, but with the right guidance and tools, it can be a straightforward and rewarding DIY project. This article will take you through the simple steps to caulk a shower effectively, ensuring a fresh and watertight finish.
Before diving into the steps, it’s important to gather all the necessary supplies. You will need a caulk gun, silicone caulk specifically designed for bathrooms, a caulk remover or scraper, denatured alcohol, and some rags or paper towels. Once you have everything ready, you can move on to preparing the shower.
Preparing the shower is a crucial step that involves removing the old caulk and cleaning the area. Using a caulk remover or scraper, carefully remove the existing caulk to create a clean surface for the new caulk. Make sure to clean the area thoroughly with denatured alcohol to remove any residue or dirt. Once cleaned, allow the surface to dry completely.
Now it’s time to cut the caulk tube. Choosing the appropriate size nozzle for the job and cutting the tip of the caulk tube at a 45-degree angle will allow for smooth and controlled application. With the caulk tube ready, it’s time to start applying the caulk.
Holding the caulk gun at a 45-degree angle, apply consistent pressure to the trigger while moving along the joint between the shower tiles and the tub or shower tray. It’s important to maintain an even and steady bead of caulk. Use a caulk tool or your finger to smooth the caulk as you go, ensuring a neat and professional finish.
Once the caulk is applied, it’s essential to clean up any excess or smudges. Use a damp rag or paper towel to remove any caulk that may have spread beyond the joint. Stubborn caulk residue can be dissolved and cleaned with denatured alcohol.
After completing the caulking process, allow the caulk to dry according to the manufacturer’s instructions. This typically takes around 24 hours, during which time it’s important to keep the shower area dry and avoid any contact with water.
Finally, inspect the caulked areas for any missed spots or gaps. If necessary, apply additional caulk and smooth it out to ensure a proper seal.
By following these simple steps, you can effectively caulk your shower and achieve a fresh and watertight finish. Regular maintenance and timely caulking will not only enhance the appearance of your bathroom but also prevent water damage and prolong the life of your shower. So, let’s get started and give your shower the attention it deserves.
Key Takeaways:
- Properly preparing the shower, cutting the caulk tube at a 45-degree angle, and applying consistent pressure to the trigger ensures a professional and watertight finish for your shower caulking project.
- Regular maintenance and timely caulking not only enhance the appearance of your bathroom but also prolong the life of your shower, protecting it from water damage and leaks.
Read more: How To Caulk A Shower Tile
Step 1: Gather Your Supplies
When it comes to caulking a shower, having the necessary supplies on hand is essential. Here are the items you will need for the job:
Caulk gun:
A caulk gun is a handheld tool used to dispense caulk with precision and control. Look for a high-quality caulk gun that is durable and easy to use.
Silicone caulk:
Choose a silicone-based caulk specifically designed for use in bathrooms. Silicone caulk is waterproof, flexible, and resistant to mold and mildew. Opt for a caulk that matches the color of your shower tiles or choose a clear option for a seamless finish.
Caulk remover or scraper:
If your shower already has old caulk, you will need a caulk remover or scraper to effectively remove it. These tools help to strip away the old caulk, creating a clean surface for the new caulk to adhere to.
Read more: Simple Steps To Start A Small Beehive
Denatured alcohol:
Denatured alcohol is a solvent that can effectively clean the surface before applying new caulk. It helps to remove any dirt, grime, or residue, ensuring optimal adhesion of the new caulk. Have a bottle of denatured alcohol on hand for the cleaning process.
Rags or paper towels:
Keep some rags or paper towels nearby for wiping away excess caulk or cleaning up any spills or messes during the caulking process. These will come in handy for achieving a neat and tidy finish.
Having all of these supplies readily available before starting the caulking process will ensure a smooth and efficient experience. You won’t have to interrupt your progress by searching for missing tools or materials. Take the time to gather your supplies and set up a designated area for your caulking project. This way, you’ll be well-prepared and can focus on achieving a fresh and professional finish for your shower.
Remember, investing in quality supplies will result in a better outcome, so don’t hesitate to choose caulk guns, silicone caulk, and caulk removers that are known for their reliability and effectiveness. With the right tools in hand, you’ll be ready to move on to the next step of caulking your shower with confidence.
Step 2: Prepare the Shower
To ensure a successful caulking job, it is essential to properly prepare the shower beforehand. This step involves three important tasks: removing the old caulk, cleaning the area, and drying the surface. Let’s dive into each of these tasks in detail:
1. Remove old caulk:
Before applying new caulk, it is crucial to remove the old caulk thoroughly. Old caulk can become discolored, cracked, or moldy over time, compromising both the appearance and effectiveness of the seal. Use a caulk remover or scraper to carefully strip away the old caulk. Take your time and work systematically along the joint between the shower tiles and the tub or shower tray. Ensure that no traces of the old caulk remain.
2. Clean the area:
Once the old caulk is removed, it’s time to clean the area. Use a mild detergent or a bathroom cleaner to scrub the surface and remove any dirt, soap scum, or other residues. Pay close attention to the joint between the tiles and the tub or tray, as this is where the new caulk will be applied. Use a sponge or a soft cloth to thoroughly clean the surface and ensure it is free from any debris or contaminants.
3. Dry the surface:
After cleaning the area, it is crucial to allow the surface to dry completely before applying the new caulk. Moisture can interfere with the caulk’s adhesion and affect its effectiveness. Use a clean towel or allow the surface to air dry naturally. Take special care to ensure that all areas, including the joint and surrounding tiles, are completely dry.
By taking the time to remove the old caulk, clean the area, and dry the surface, you are laying the foundation for a successful caulking job. These steps ensure that the new caulk will adhere properly, providing a watertight seal and promoting a clean and professional-looking finish. Rushing through the preparation process can lead to subpar results and even cause the new caulk to fail prematurely.
So, allocate sufficient time to complete these tasks thoroughly. Remember, proper preparation is key to achieving a long-lasting and attractive caulking job for your shower.
Step 3: Cut the Caulk Tube
Once you have gathered your supplies and prepared the shower, it’s time to move on to a crucial step in the caulking process: cutting the caulk tube. This step ensures that you have the right size nozzle and a clean, angled tip for precise application of the caulk. Let’s explore the two key aspects of cutting the caulk tube in detail:
1. Choose the appropriate size nozzle:
Not all caulk tubes come with the same size nozzle, so it’s important to choose the right size for your project. The size of the nozzle determines the diameter of the caulk bead that will be dispensed. For most standard caulking jobs, a 1/4-inch or 3/8-inch nozzle is typically suitable. However, if you are caulking wider gaps or joints, you may need a larger size nozzle.
2. Cut the tip of the caulk tube at a 45-degree angle:
To achieve a smooth and controlled application of the caulk, it is essential to cut the tip of the caulk tube at a 45-degree angle. This angled cut allows for more precise dispensing of the caulk and aids in achieving a neat finish. Using a utility knife or a caulk tube cutter, carefully cut the tip of the caulk tube at the desired angle. Make sure the cut is clean, without any burrs or jagged edges.
By choosing the appropriate size nozzle and cutting the caulk tube at a 45-degree angle, you will have greater control over the flow of the caulk and achieve a cleaner application. This step may seem small, but it can make a significant difference in the overall appearance and effectiveness of the caulked joint.
Remember to take your time and exercise caution when cutting the caulk tube. Use a sharp blade or a caulk tube cutter to ensure a clean and precise cut. If necessary, practice cutting on a scrap piece of cardboard or paper before moving on to the actual caulk tube.
Once you have successfully cut the caulk tube, you are ready to proceed with the application of the caulk. With the right size nozzle and an angled tip, you will have the tools needed to apply the caulk smoothly and accurately. Take pride in your attention to detail, as it will contribute to a professional-looking finish for your shower caulking project.
Step 4: Apply the Caulk
After preparing the shower and cutting the caulk tube, it’s time to apply the caulk. This step requires precision and control to ensure a neat and effective seal. Let’s break down the process of applying the caulk into three key techniques:
1. Hold the caulk gun at a 45-degree angle:
To achieve an even and controlled application of the caulk, hold the caulk gun at a 45-degree angle. This angle allows the caulk to flow smoothly and ensures that it tightly fills the joint between the tiles and the tub or shower tray. Position the caulk gun in your dominant hand and keep it at a consistent angle throughout the application process.
2. Apply consistent pressure to the trigger:
As you hold the caulk gun at a 45-degree angle, apply consistent pressure to the trigger to dispense the caulk. Slowly squeeze the trigger while maintaining a steady and even flow of caulk. Avoid applying too much pressure, as it can result in excess caulk and a messy finish. Aim for a steady bead of caulk that is just enough to fill the joint.
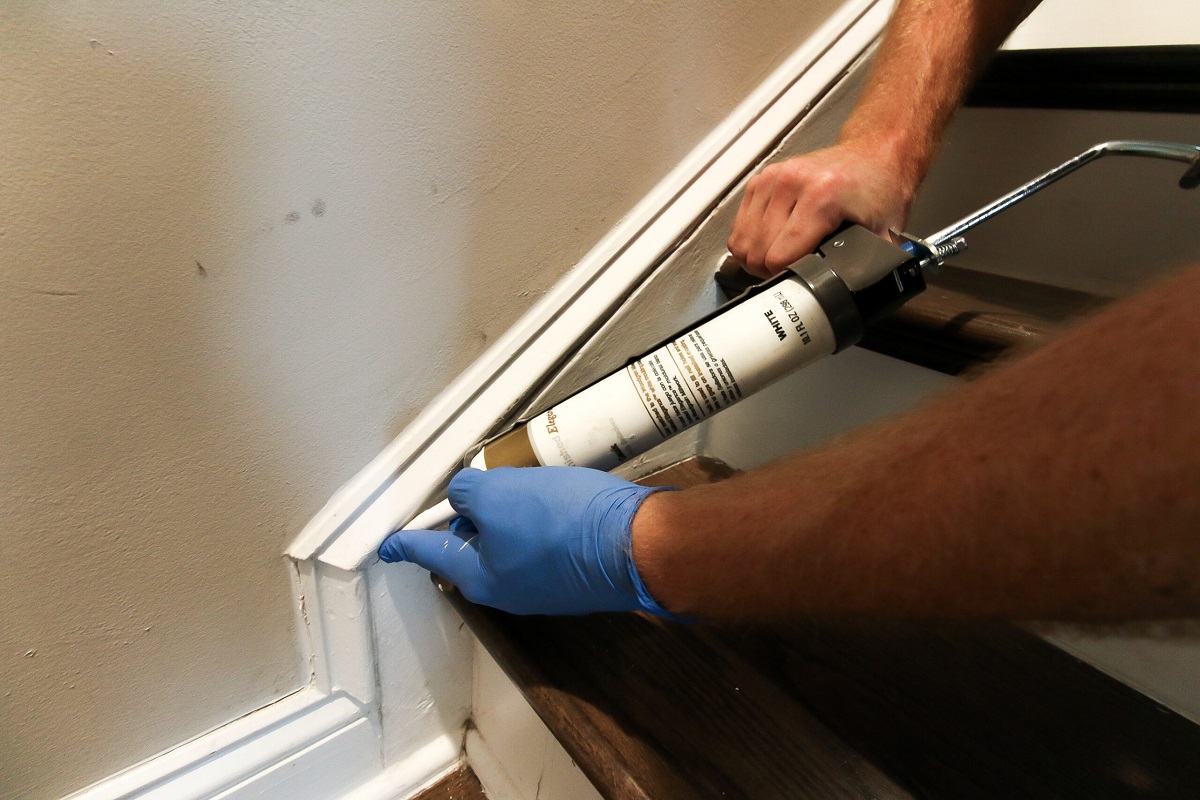
3. Smooth the caulk with a caulk tool or finger:
To achieve a professional-looking finish, smooth the caulk immediately after applying it. You can use a caulk tool or your finger for this step. A caulk tool helps to create a clean and uniform finish, as it contours the caulk smoothly along the joint. If using your finger, make sure it is clean and wet to prevent sticking. Gently run your finger along the caulk, applying light pressure to smooth out any unevenness.
Remember, as you apply the caulk, work in small sections and maintain a steady pace to ensure consistency. It’s better to apply the caulk in shorter sections and smooth it immediately rather than applying a long stretch of caulk that may dry before you can properly smooth it.
Take your time during this step to ensure an even and neat application of the caulk. If you make a mistake or notice any imperfections, you can always reapply the caulk and smooth it again before it dries.
By following these techniques of holding the caulk gun at a 45-degree angle, applying consistent pressure to the trigger, and smoothing the caulk with a tool or finger, you can achieve a clean and professional finish for your shower caulking project. The attention to detail at this stage will result in a watertight seal and contribute to the overall aesthetic appeal of your shower.
Step 5: Clean Up
After applying the caulk, it’s time to clean up and ensure a neat and tidy finish. This step involves removing any excess caulk and cleaning up any mess or residue left behind. Let’s explore the two important tasks in the clean-up process:
1. Remove excess caulk:
Once you have applied the caulk along the joint, it’s important to remove any excess caulk before it dries. Excess caulk can create unsightly bulges or can interfere with the effectiveness of the seal. Use a caulk tool or a putty knife to gently remove any excess caulk. Hold the tool at a slight angle and run it along the joint to lift or scrape away the excess caulk. Take your time to ensure that the joint is smooth and the caulk is evenly distributed.
2. Use denatured alcohol to clean any mess or residue:
If you notice any caulk residue or mess on the tiles or surrounding surfaces, use denatured alcohol to clean it up. Denatured alcohol is an effective solvent that can dissolve and remove caulk residue without damaging the underlying surfaces. Dampen a clean cloth or paper towel with denatured alcohol and gently wipe away the residue. Make sure to thoroughly clean the area, paying extra attention to the joint, and leave it looking fresh and clean.
During the clean-up process, it’s crucial to work carefully and avoid smudging or spreading the caulk further. Use gentle motions and take your time to ensure a meticulous clean-up.
By removing excess caulk and cleaning up any mess or residue, you achieve a clean and polished finish for your shower caulking project. This attention to detail enhances the overall appearance and ensures that the caulking looks professional and well-maintained.
Remember, cleaning up promptly not only enhances the aesthetics but also prevents the caulk from adhering to unwanted surfaces, which can be difficult to remove later. By investing a little extra time in clean-up, you can achieve a result that will last and keep your shower looking fresh and well-maintained for years to come.
Step 6: Allow the Caulk to Dry
After applying the caulk and cleaning up, it’s crucial to allow the caulk to dry completely before using the shower. This step ensures that the caulk forms a strong and watertight seal. Here’s what you need to know about drying time:
Follow the manufacturer’s instructions for drying time:
Different types of silicone caulk have varying drying times, so it’s important to read and follow the manufacturer’s instructions. Typically, silicone caulk takes about 24 hours to dry completely. However, the exact drying time may depend on factors such as humidity, temperature, and the specific brand of caulk used.
During the drying process, it’s important to avoid any contact with water or moisture. Ensure that the shower area remains dry and free from splashes or leaks that could disrupt the drying caulk. Avoid using the shower or allowing water to come into contact with the caulk until it is fully cured.
While waiting for the caulk to dry, it’s a good idea to provide proper ventilation to help expedite the drying process. Open windows or use fans to circulate air and remove any excess moisture from the bathroom. This will promote quicker drying and aid in achieving a durable and long-lasting seal.
Patience is key during this step, as rushing the drying process can compromise the integrity of the caulk and result in a weaker seal. Allow the recommended drying time to ensure that the caulk sets and bonds effectively, providing the best possible protection against water damage.
By following the manufacturer’s instructions for drying time, you can be confident that the caulk will cure properly, creating a solid and long-lasting seal for your shower. Resisting the temptation to use the shower prematurely will ensure that the caulk has the time it needs to fully set and provide optimal performance.
So, exercise patience and plan accordingly, allowing ample drying time for the caulk. Once it is fully cured, you can proceed with confidence, knowing that your shower is protected and ready for use.
Step 7: Inspect and Touch Up
Once the caulk has dried, it’s essential to inspect the caulked areas to ensure a complete and effective seal. This final step allows you to identify any missed spots or gaps that may need additional attention. Here’s what you need to do:
Check for any missed spots or gaps:
Take a close look at the caulked joint between the shower tiles and the tub or shower tray. Carefully examine the entire length of the joint to check for any areas where the caulk may be missing or did not adhere properly. Look for any gaps or spaces that could potentially allow water to seep through. Use good lighting and take your time to conduct a thorough inspection.
Apply additional caulk if necessary:
If you find any missed spots, gaps, or areas that require touch-ups, address them by applying additional caulk. Load the caulk gun with fresh caulk and carefully fill in the gaps or spots that need attention. Hold the caulk gun at a 45-degree angle as before and apply consistent pressure to ensure a steady flow of caulk. Smooth the newly applied caulk with a caulk tool or your finger to blend it seamlessly with the existing caulk.
By inspecting the caulked areas and applying touch-ups as needed, you can achieve a watertight seal and address any potential areas of concern. This final step ensures that the caulk is properly applied and provides optimal protection against water damage.
Throughout the inspection and touch-up process, maintain the same level of attention to detail that you employed during the initial application of the caulk. Take the time to carefully assess the caulked joint, and be thorough in applying additional caulk where required. The goal is to achieve a flawless and seamless finish that protects your shower and enhances its appearance.
Once you’re satisfied with the inspection and any necessary touch-ups, step back and admire your work. By diligently checking for missed spots or gaps and applying additional caulk as needed, you have ensured a complete and reliable seal for your shower.
Remember, regular maintenance and periodic inspections of the caulked areas can help prolong the integrity of the caulk. By addressing any issues promptly and taking proactive measures, you can enjoy a beautifully sealed shower for years to come.
Conclusion
Caulking a shower may seem like a daunting task, but with the right guidance and a little patience, it can be a manageable and rewarding DIY project. By following the simple steps outlined in this guide, you can achieve a fresh, watertight finish for your shower that not only enhances its appearance but also protects against water damage.
Starting with gathering the necessary supplies, including a caulk gun, silicone caulk, caulk remover or scraper, denatured alcohol, and rags or paper towels, ensures you are well-prepared for the job. Properly preparing the shower by removing old caulk, cleaning the area, and ensuring that the surface is dry is crucial for creating an optimal environment for the new caulk to adhere to.
Cutting the caulk tube at a 45-degree angle and choosing the appropriate size nozzle allows for precise and controlled application, resulting in a neat finish. Applying the caulk at a 45-degree angle, maintaining consistent pressure on the trigger, and smoothing the caulk with a caulk tool or finger ensures an even and professional-looking seal.
Cleaning up any excess caulk and using denatured alcohol to remove any mess or residue contributes to a polished final result. Allowing the caulk to dry completely, following the manufacturer’s instructions for drying time, is essential for the caulk to fully set and provide an effective seal against moisture.
Lastly, inspecting the caulked areas and applying any necessary touch-ups ensures a complete and reliable seal. By checking for missed spots or gaps and addressing them promptly with additional caulk, you are reinforcing the water resistance and durability of your shower.
Regular maintenance and periodic inspections of the caulked areas are recommended to ensure the integrity of the seal. By staying vigilant and addressing issues promptly, you can prevent water damage and extend the life of your caulk.
Remember, caulking a shower is a crucial maintenance task that not only enhances the aesthetics of your bathroom but also protects against potential water damage. By following the steps outlined in this guide and taking the time to do the job properly, you can achieve a beautiful, well-sealed shower that will serve you well for years to come. So, don’t delay – it’s time to give your shower the attention it deserves!
Frequently Asked Questions about How To Caulk A Shower: Simple Steps To A Fresh Finish
Was this page helpful?
At Storables.com, we guarantee accurate and reliable information. Our content, validated by Expert Board Contributors, is crafted following stringent Editorial Policies. We're committed to providing you with well-researched, expert-backed insights for all your informational needs.


0 thoughts on “How To Caulk A Shower: Simple Steps To A Fresh Finish”