
Articles
How To Paint Concrete For A Fresh Look
Modified: November 1, 2024
Learn how to paint concrete surfaces to give them a fresh and revived appearance. Our articles provide you with step-by-step guides and expert tips for achieving stunning and long-lasting results.
(Many of the links in this article redirect to a specific reviewed product. Your purchase of these products through affiliate links helps to generate commission for Storables.com, at no extra cost. Learn more)
Introduction
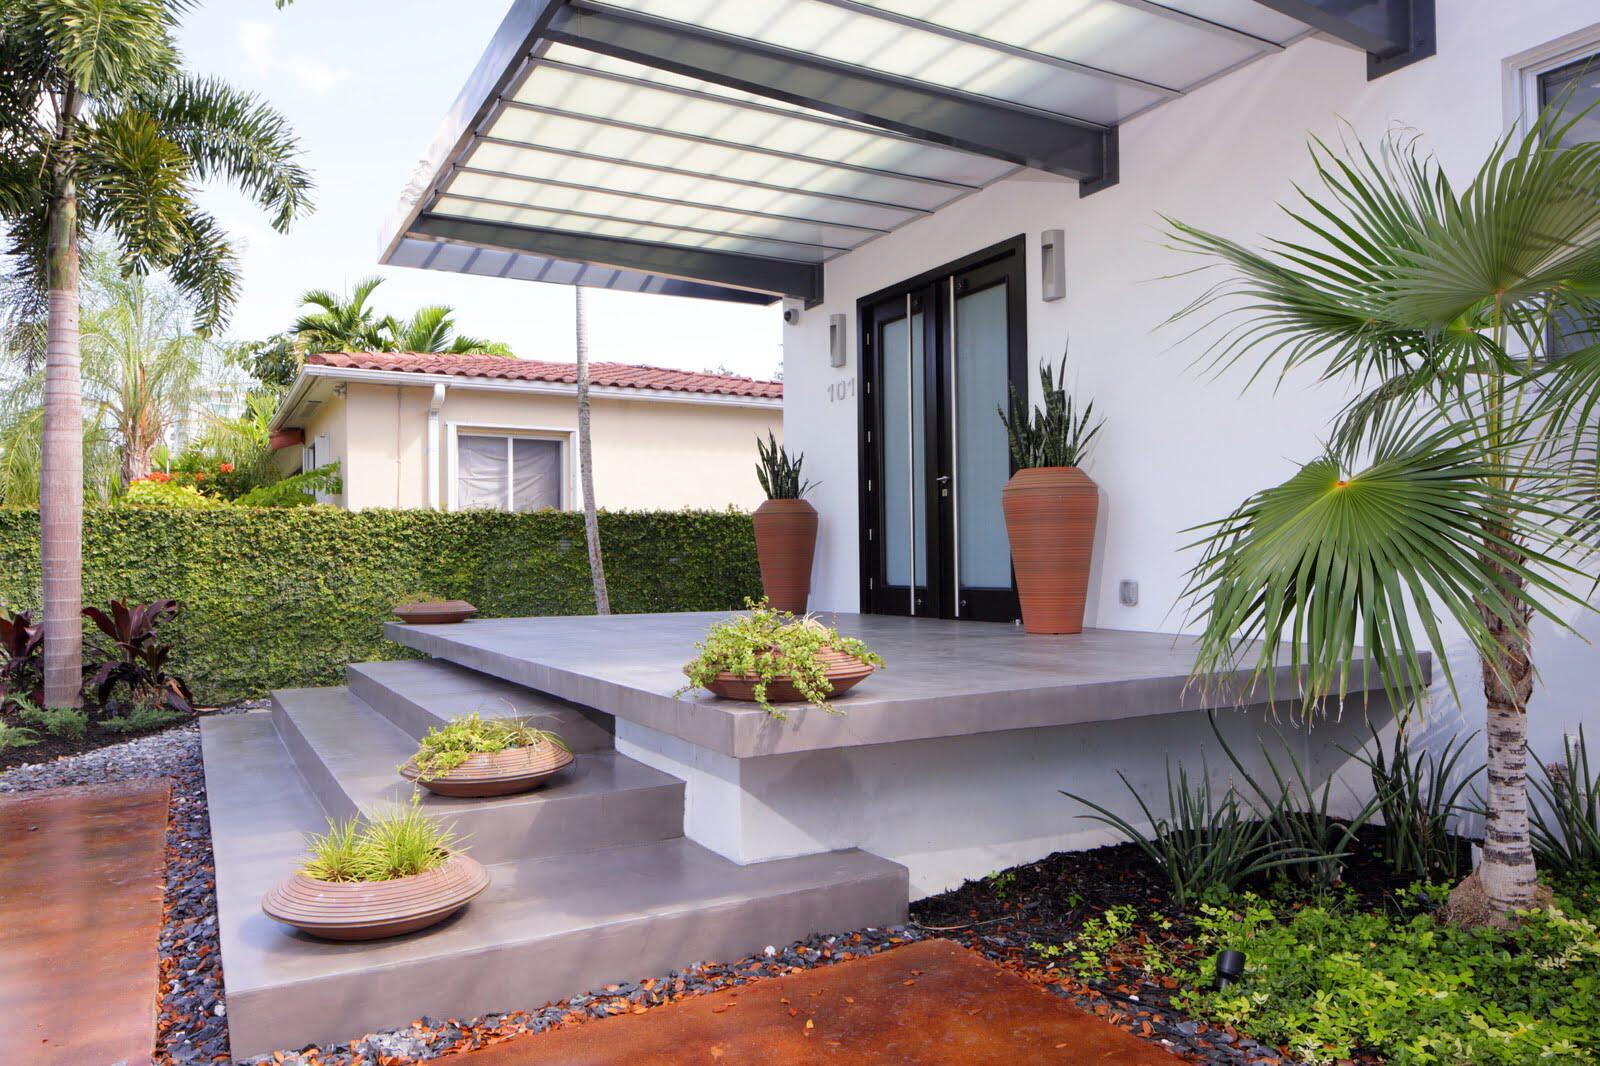
Concrete is a versatile and durable material often used for driveways, patios, and other outdoor surfaces. Over time, however, concrete can become dull, stained, or cracked, diminishing the overall appearance of your property. If you’re looking to refresh and revitalize your concrete surfaces, painting can be a great solution.
In this article, we will walk you through the process of painting concrete to give it a fresh and attractive look. Whether you want to spruce up your old, worn-out concrete or add a pop of color to a new concrete surface, we have you covered.
Before diving into the painting process, it’s essential to understand that proper preparation and the right choice of paint are crucial for achieving long-lasting and aesthetically pleasing results. By following the steps outlined in this article, you can ensure a successful concrete painting project that will enhance the beauty and functionality of your outdoor spaces.
From preparing the concrete surface to choosing the appropriate paint and applying it correctly, we will guide you through each step. We will also provide tips on maintaining the painted concrete to keep it looking its best for years to come.
So, let’s roll up our sleeves and get ready to transform your concrete surfaces into stunning focal points that will enhance the overall appeal of your home or business!
Key Takeaways:
- Transform worn-out concrete into a vibrant, durable surface by following proper preparation, choosing the right paint, and applying multiple coats for a professional finish.
- Preserve the beauty of your painted concrete with regular maintenance, prompt attention to spills, and protection from harsh weather, ensuring long-lasting appeal and durability.
Read more: How To Paint A Concrete Driveway
Preparing the Concrete Surface
Before you can start painting your concrete surface, it’s essential to prepare it properly. Preparing the concrete surface not only ensures better adhesion of the paint but also helps in achieving a more uniform and long-lasting finish. Here are the key steps to follow:
- Clean the surface: Begin by thoroughly cleaning the concrete surface to remove any dirt, grease, oil, or other contaminants. You can use a pressure washer or a stiff brush along with a suitable cleaning solution. Rinse the surface with clean water and allow it to dry completely.
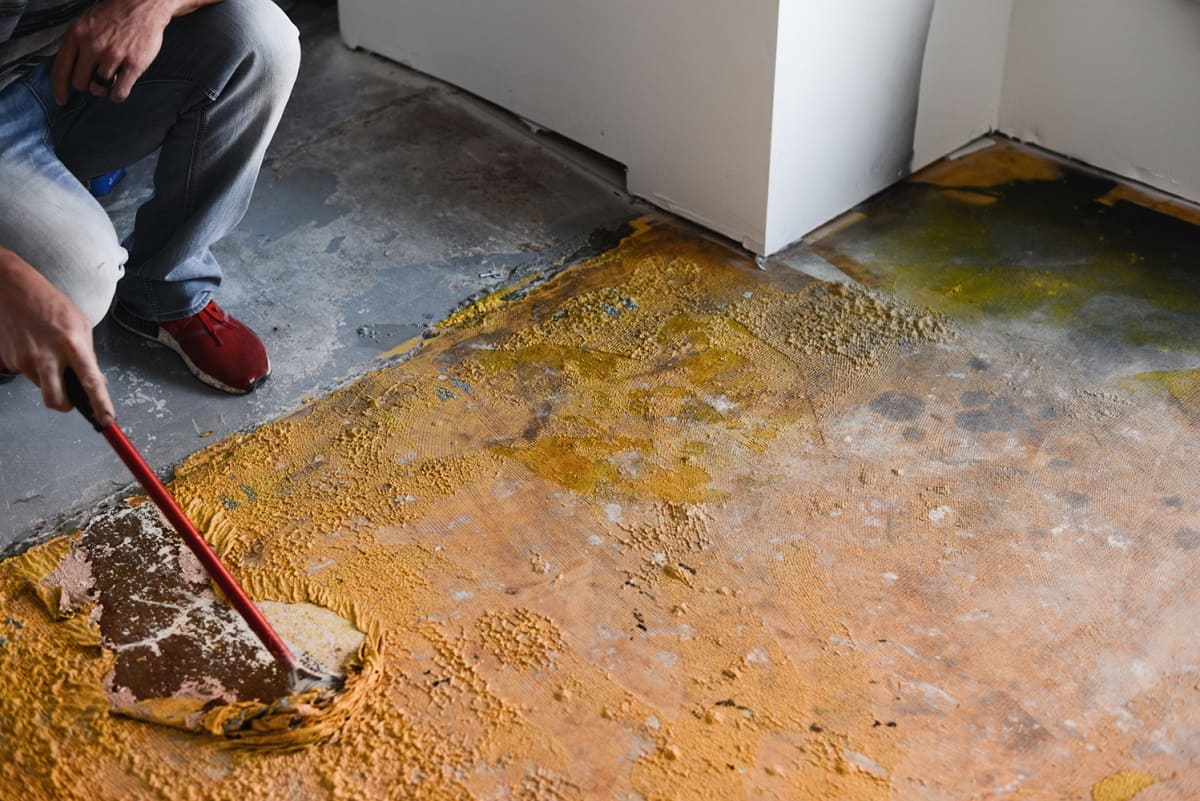
- Remove any existing paint or coatings: If there is any existing paint or coatings on the concrete, it’s essential to remove them. Use a paint stripper or a mechanical method such as sanding or grinding to strip away the old paint. Make sure to wear protective gear, such as gloves and a mask, when working with paint strippers or using mechanical methods.
- Repair cracks and imperfections: Inspect the concrete surface for any cracks, holes, or other imperfections. Use a concrete filler or patching compound to repair these areas. Follow the manufacturer’s instructions for mixing and applying the filler. Once the repairs are done, allow the filler to cure completely before moving on to the next step.
- Etch the surface: Etching the concrete surface helps to create a rougher texture, which improves the adhesion of the paint. You can use an etching solution or a mixture of water and muriatic acid. Follow the manufacturer’s instructions and take appropriate safety precautions when working with acid. Scrub the surface with a stiff brush or use a mechanical method such as shot blasting or sanding to etch the concrete. Rinse the surface thoroughly with clean water and allow it to dry completely.
- Smooth rough patches: If there are any rough or uneven patches on the concrete surface, you may need to use a grinder or a sander to smooth them out. This will ensure a more even application of the paint.
By properly preparing the concrete surface, you create a clean, smooth, and well-prepared canvas for the paint. This will help the paint adhere better and result in a more attractive and long-lasting finish. Take the time to complete these preparation steps, as they are crucial for the success of your concrete painting project.
Choosing the Right Paint
Choosing the right paint for your concrete project is crucial as it determines the overall look, durability, and longevity of the painted surface. Here are some factors to consider when selecting the right paint:
- Type of paint: There are different types of paint suitable for concrete surfaces. Acrylic latex paint is a popular choice for outdoor concrete as it is durable, breathable, and resistant to UV rays. Epoxy paint is another option, known for its high strength and excellent adhesion. It provides a glossy finish and is often used in high-traffic areas.
- Finish: Consider the desired finish for your concrete surface. You can choose from various finishes, including matte, satin, semi-gloss, or high gloss. Keep in mind that glossier finishes tend to be more reflective and can highlight surface imperfections.
- Color: Select a color that complements your overall aesthetic vision. Take into account the existing colors in your outdoor space, surrounding elements, and personal preferences. Consider using a color that matches or coordinates with the architectural style of your property.
- Quality: Invest in high-quality paint to ensure better coverage, adhesion, and longevity. Cheaper paints may require more coats and may not hold up well against weather conditions and foot traffic. Opt for reputable brands known for their durability and performance.
- Resistant properties: Depending on your specific needs, you may want to choose a paint with specific resistant properties. For example, if your concrete surface is frequently exposed to moisture, you may opt for a waterproof or moisture-resistant paint. If you live in an area with extreme weather conditions, consider a paint that offers UV resistance or is formulated to withstand harsh environments.
It’s essential to carefully read the product specifications, labels, and instructions provided by the manufacturer. They will provide important information regarding application, coverage, drying time, and any additional steps or considerations during the painting process. Consulting with a paint professional or seeking advice from the paint manufacturer can also help in selecting the right paint for your specific project.
Remember, choosing the right paint is key to achieving the desired look and ensuring the durability and longevity of your freshly painted concrete surface. It’s worth spending the time and effort to make an informed decision that will result in a beautiful and long-lasting finish.
Gathering the Required Materials
Before you begin painting your concrete surface, it’s important to gather all the necessary materials and tools. Having everything prepared ahead of time will save you from unnecessary trips to the store and ensure a smooth and efficient painting process. Here are the essential materials and tools you will need:
- Paint: Purchase the paint of your choice, ensuring that it is specifically formulated for use on concrete surfaces. Consider the type of paint (acrylic latex, epoxy, etc.), finish, color, and any additional properties you require (such as moisture resistance or UV protection).
- Primer: Depending on the condition of your concrete surface and the type of paint you are using, you may need a primer. The primer helps the paint adhere better and can improve the overall coverage and durability of the painted surface. Check the paint manufacturer’s instructions to determine if a primer is necessary.
- Paint roller or brush: Choose a high-quality paint roller or brush suitable for the type of paint you are using. For large, flat areas, a roller with a long nap is ideal, while a brush can be used for smaller or more intricate areas.
- Paint tray: A paint tray is necessary if you’re using a roller. It allows you to evenly distribute the paint and remove excess paint from the roller.
- Painters tape: Use painters tape to protect areas that you don’t want to be painted, such as edges, borders, or nearby structures. Apply the tape carefully to ensure clean and crisp lines.
- Drop cloths or plastic sheets: Cover any nearby plants, furniture, or other surfaces that you want to protect from paint splatters or drips. Drop cloths or plastic sheets will prevent any potential damage from occurring.
- Safety gear: Proper safety gear is essential during any painting project. Wear goggles or safety glasses to protect your eyes, gloves to protect your hands, and a mask or respirator to avoid inhaling any paint fumes or particles.
- Cleaning supplies: Keep cleaning supplies handy to clean up any spills, splatters, or messes during the painting process. This can include water, rags or paper towels, and a mild detergent or cleaning solution.
- Extension pole (if using a roller): An extension pole can be useful for reaching high or difficult-to-access areas when using a roller.
- Scraper or putty knife: Keep a scraper or putty knife available to remove any loose paint or debris from the concrete surface before painting.
Having all these materials within reach will save you time, effort, and potential frustration during the painting process. Ensure that the materials are of good quality to achieve the best possible results. Additionally, follow all safety guidelines provided by the paint and tool manufacturers to protect yourself and others while painting.
Cleaning the Concrete
Properly cleaning the concrete before painting is crucial for achieving a smooth and long-lasting finish. Cleaning helps remove dirt, grease, oil, and other contaminants that can hinder paint adhesion. Here’s how to clean your concrete surface effectively:
- Sweep the area: Begin by sweeping the concrete surface to remove loose debris, dirt, and dust. Use a broom or a brush with stiff bristles to thoroughly clean the area. Pay attention to corners, edges, and hard-to-reach spots.
- Pressure wash: If your concrete surface is heavily soiled or stained, consider using a pressure washer. A pressure washer can provide a more thorough and efficient cleaning. Follow the manufacturer’s instructions for operating the pressure washer and ensure that you have the appropriate nozzle and pressure setting for the job.
- Apply a cleaning solution: For stubborn stains or oil/grease spots, you may need to use a cleaning solution. There are various commercial concrete cleaners available on the market. Follow the manufacturer’s instructions for dilution and application. Apply the cleaning solution to the stained areas and scrub with a stiff brush or broom to loosen the stains.
- Rinse with clean water: After applying the cleaning solution, rinse the entire concrete surface with clean water. Use a hose or pressure washer to remove any remaining cleaning solution and loosened dirt. Ensure that all cleaning residues are completely rinsed away.
- Allow the surface to dry: Once you have completed the cleaning process, allow the concrete surface to dry completely before proceeding with the painting. Drying time can vary depending on weather conditions and the porosity of the concrete. It’s crucial to ensure that the surface is thoroughly dry to prevent any moisture from affecting the paint adhesion or causing paint peeling.
By cleaning the concrete surface thoroughly, you create a clean and suitable canvas for the paint. Removing dirt, grease, and stains will help the paint adhere better and result in a more even and attractive finish. Take the time to clean the concrete surface properly to ensure the best possible results for your painting project.
Read more: How To Prepare A Concrete Floor For Painting
Repairing Cracks and Imperfections
Before painting your concrete surface, it’s essential to repair any cracks, holes, or imperfections to ensure a smooth and uniform finish. Here’s a step-by-step guide on how to repair cracks and imperfections in your concrete:
- Clean the area: Start by cleaning the cracked or damaged area of the concrete. Use a broom or brush to remove any loose debris, dirt, or dust. If necessary, use a pressure washer to thoroughly clean the area and ensure a clean surface for repairs.
- Fill the cracks or holes: Use a suitable concrete filler or patching compound to fill the cracks or holes. Choose a filler specifically designed for repairing concrete. Follow the manufacturer’s instructions for mixing the filler and applying it to the damaged areas. Use a putty knife or trowel to spread the filler evenly, ensuring that it completely fills the cracks or holes.
- Smooth the surface: After filling the cracks or holes, use a putty knife or trowel to smooth the surface of the filler. Feather the edges to blend the repaired area with the surrounding concrete. This will help create a seamless and visually pleasing finish.
- Allow the filler to dry: Give the filler sufficient time to dry and cure. Refer to the manufacturer’s instructions for the recommended drying time. It’s important to ensure that the filler is completely dry and hardened before proceeding to the next step.
- Sand and smooth: Once the filler is dry, use sandpaper or a sanding block to smooth the repaired area. Sanding helps to create a level and even surface, ensuring that the repaired area blends seamlessly with the rest of the concrete. Use a vacuum or brush to remove any dust or debris after sanding.
- Clean the surface: Finally, clean the entire concrete surface again to remove any remaining dust or debris. Use a broom or brush, and if needed, a pressure washer, to ensure a clean and debris-free surface. Allow the concrete to dry completely before moving on to the painting phase.
By repairing cracks and imperfections in your concrete, you not only ensure a smoother and more appealing surface but also prevent further damage and potential water penetration. Take the time to properly repair the concrete before painting to achieve a professional and long-lasting result. Remember to follow the instructions provided by the filler manufacturer for optimal application and drying time.
Applying a Primer
Applying a primer to your concrete surface before painting is an important step that can greatly improve the adhesion and durability of the paint. The primer helps create a strong bond between the concrete and the paint, resulting in a more even and long-lasting finish. Here’s how to apply a primer to your concrete:
- Clean the surface: Before applying the primer, ensure that the concrete surface is clean and free of any dust, dirt, or debris. Use a broom, brush, or pressure washer to thoroughly clean the surface, and allow it to dry completely.
- Choose the right primer: Select a primer specifically designed for use on concrete surfaces. Consider the type of paint you will be using and choose a primer that is compatible with it. Read the product label and instructions carefully to ensure that you have the correct primer for your project.
- Mix the primer (if required): Some primers may require mixing before application. Follow the manufacturer’s instructions for properly mixing the primer. Use a stir stick or a paint mixer to ensure that the primer is well blended.
- Apply the primer: Using a paint roller or brush, apply the primer to the concrete surface. Start from one corner and work your way across the area, ensuring even coverage. Use long, smooth strokes to minimize brush marks or roller lines. If you are working on a large surface, you may want to use an extension pole for easier application.
- Allow the primer to dry: Refer to the manufacturer’s instructions for the recommended drying time of the primer. It’s crucial to allow the primer to dry completely before applying the paint. Drying times can vary depending on factors such as temperature and humidity.
- Inspect the surface: Once the primer is dry, inspect the surface for any missed spots or areas that may require touch-ups. If needed, apply an additional coat of primer to ensure complete coverage.
- Clean the tools: After finishing the primer application, clean your paint roller or brush with water or an appropriate cleaning solution. This will prevent the primer from drying on the tools, making them harder to clean later.
By applying a primer to your concrete surface, you create a strong foundation for the paint and improve its longevity and appearance. The primer helps in better adhesion, preventing paint peeling or chipping over time. Take the time to properly apply the primer, ensuring even coverage and allowing sufficient drying time, for optimal results in your concrete painting project.
When painting concrete for a fresh look, make sure to clean the surface thoroughly and use a high-quality concrete paint specifically designed for outdoor use to ensure long-lasting results.
Choosing the Appropriate Painting Technique
When it comes to painting concrete surfaces, choosing the right painting technique is essential for achieving a smooth and professional finish. The painting technique you select will depend on various factors, including the size and shape of the surface, the type of paint you are using, and your personal preference. Here are some popular techniques to consider:
- Roller painting: Roller painting is a common technique for large, flat areas of concrete. It is efficient and helps to cover large spaces quickly. Use a high-quality paint roller with a long nap suitable for the type of paint you are using. Apply the paint in a systematic manner, working in sections and using a consistent pattern to ensure even coverage.
- Brush painting: Brush painting is often used for smaller or more detailed areas where a roller cannot reach. It allows for better control and precision, especially when painting around edges, corners, or intricate designs. Use a high-quality brush specifically designed for the type of paint you are using. Apply the paint with smooth strokes, following the natural contours of the surface.
- Spraying: Spraying is another option for painting concrete surfaces, especially when working on large areas or surfaces with irregular shapes. It provides an even and consistent finish and can save time compared to other techniques. However, it requires proper equipment, such as a paint sprayer, and may require more attention to overspray and masking off surrounding areas to avoid unintentional paint coverage.
- Combination technique: Depending on the nature of your concrete project, you may find it beneficial to use a combination of painting techniques. For example, you may use a roller for the larger areas and a brush for the edges or areas that require more precision. This approach can help achieve a balanced and seamless finish.
When selecting a painting technique, consider factors such as the texture of the concrete surface, the type of paint you are using, and the desired outcome. It can be helpful to practice on a small inconspicuous area or a test panel before proceeding with the entire surface.
Remember to follow the paint manufacturer’s instructions regarding application techniques and drying times. This will ensure that you achieve the best possible result and maximize the durability and longevity of your painted concrete surface.
Ultimately, the painting technique you choose should align with your project goals and personal preferences, resulting in a finished product that satisfies your aesthetic vision and withstands the test of time.
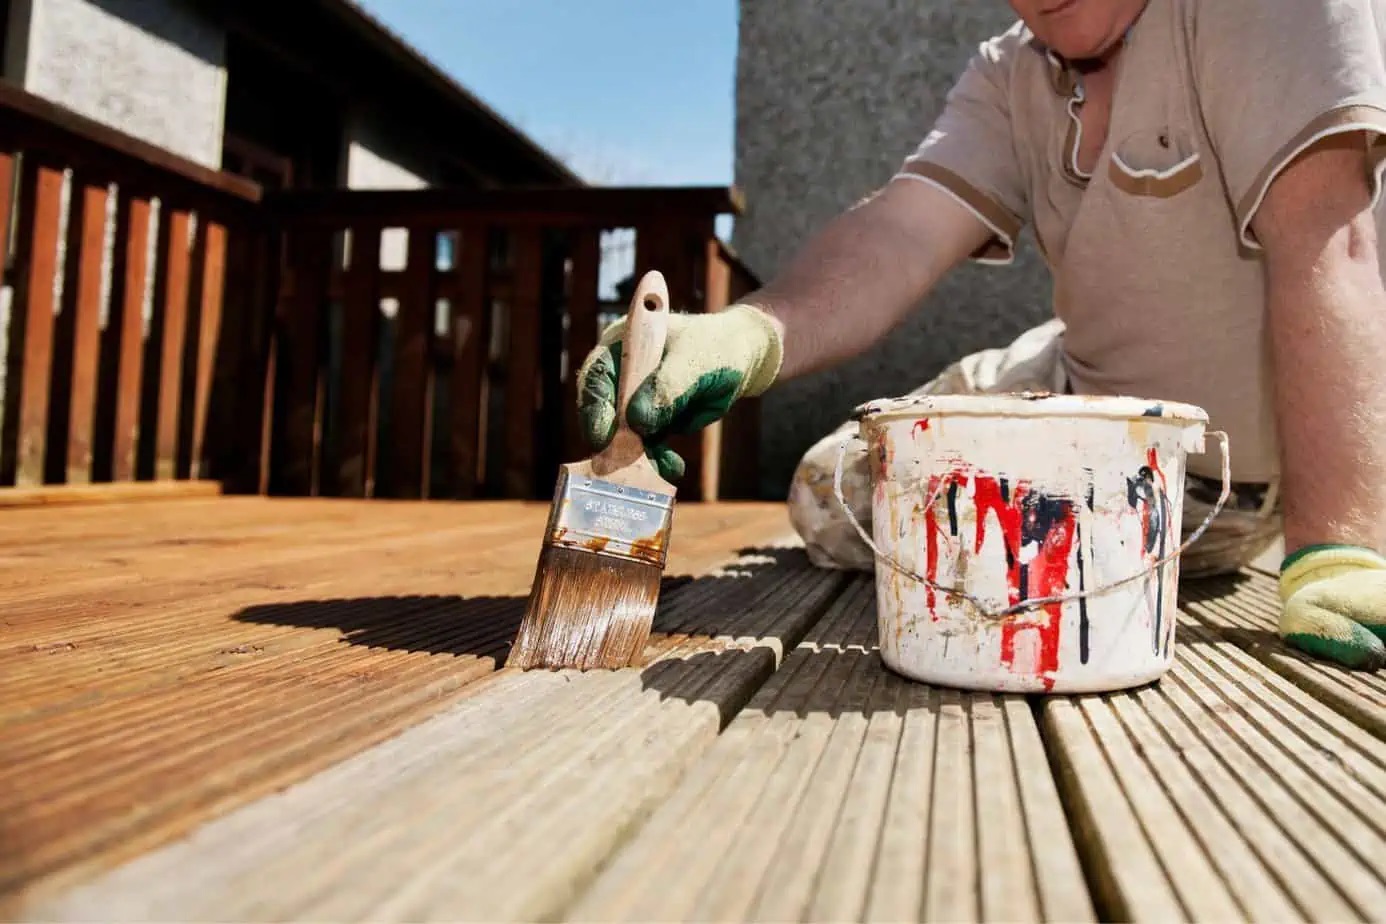
Painting the Concrete Surface
Now that you have prepared the concrete surface, chosen the right paint, and gathered the necessary materials, it’s time to start painting. Follow these steps to ensure a successful and professional-looking paint job:
- Stir the paint: Before you start painting, thoroughly stir the paint to ensure an even consistency. Use a stir stick or a paint mixer to mix the paint properly and break up any settled pigments.
- Cut in the edges: Start by cutting in the edges of the concrete surface using a brush. Apply the paint along the edges, corners, and joints, ensuring that the paint is evenly distributed. This will create a clean and well-defined boundary for the rest of the painting process.
- Start painting: Once the edges are cut in, use a roller or brush to apply the paint to the larger areas of the concrete surface. If you’re using a roller, dip it into the paint tray and roll off the excess paint. Begin rolling the paint onto the surface using even strokes and medium pressure. For brush painting, dip the brush into the paint and remove any excess by tapping it against the side of the paint container. Apply the paint in smooth, overlapping strokes, working in small sections.
- Work in manageable sections: To ensure even coverage and prevent the paint from drying too quickly, work in manageable sections. Paint an area that you can comfortably reach without straining and complete it before moving on to the next section. This will help avoid visible seams or inconsistencies in the final result.
- Apply multiple coats if needed: Depending on the type of paint you are using and the desired coverage, you may need to apply multiple coats. Follow the paint manufacturer’s instructions regarding drying time between coats. Allow each coat to dry completely before applying the next one, ensuring that you achieve the desired color and finish.
- Keep the application consistent: Whether you’re using a roller or a brush, it’s important to maintain a consistent application method throughout the painting process. This will help create a uniform appearance and minimize noticeable variations in texture or color. Avoid excessive rolling or brushing, as it can lead to uneven coverage or visible brush marks.
- Observe drying and curing time: After you have finished painting, allow the paint to dry according to the manufacturer’s instructions. Drying time can vary based on factors such as temperature, humidity, and the type of paint used. Curing time, which refers to the time it takes for the paint to fully harden and achieve maximum durability, may take several days or even weeks. Avoid heavy traffic or placing objects on the freshly painted surface until it is fully cured.
When painting concrete, it’s important to work carefully and methodically to achieve a professional-looking finish. Take your time, be patient, and pay attention to detail. Regularly inspect your work to ensure even coverage and address any areas that may require touch-ups or additional coats.
Properly painted concrete surfaces can greatly enhance the appearance of your outdoor areas. Enjoy the process and take pride in the transformation you’re making to your concrete surfaces.
Read more: How To Paint Your Concrete Patio
Applying Multiple Coats if Necessary
When it comes to painting concrete surfaces, applying multiple coats is often necessary to achieve the desired color, coverage, and durability. Multiple coats help ensure a more uniform and long-lasting finish. Here’s what you need to know about applying multiple coats of paint to your concrete surface:
- Assess the coverage: After the first coat of paint has dried, assess the coverage to determine if additional coats are needed. Depending on factors such as the type of paint, the color, and the porosity of the concrete, you may find that additional coats are necessary to achieve the desired appearance.
- Check for transparency or streaks: Look for any areas where the concrete surface is still visible or where the painted surface appears streaky. These areas may require additional coats to create a more solid and even color.
- Consider the intensity of the color: If you are using a paint color that is particularly light or vibrant, you may need to apply multiple coats to achieve the full intensity of the color. Lighter or brighter colors often require more coats to cover the natural gray of the concrete.
- Follow the paint manufacturer’s instructions: Refer to the manufacturer’s instructions for the paint you are using. They will provide guidance on the number of recommended coats and drying times between coats. Following these instructions ensures the best results and maximizes the performance of the paint.
- Apply additional coats evenly: When applying multiple coats, it’s important to maintain consistency in the application method. Use the same painting technique as in the initial coat and apply the additional coats with the same level of care and attention to detail.
- Allow proper drying time: Ensure each coat has fully dried before applying the next one. Drying times can vary depending on factors such as temperature and humidity. Rushing the process by applying the next coat too soon can result in poor adhesion, streaking, or uneven finish. Be patient and allow ample drying time.
- Inspect and touch up as needed: After each coat has dried, inspect the painted surface for any areas that may require touch-ups or additional coats. Address any uneven coverage or areas with less paint by applying touch-ups or applying another coat to achieve a seamless and consistent finish.
- Consider proper curing time: While the paint may initially dry within a few hours, it’s important to allow the painted surface to fully cure before subjecting it to heavy traffic or placing objects on it. Curing times can vary based on factors such as the type of paint used and environmental conditions. Follow the manufacturer’s instructions for the recommended curing time before regular use of the painted concrete surface.
Applying multiple coats of paint to your concrete surface ensures better coverage, color depth, and overall durability. Take the time to assess the coverage after each coat, follow the recommended drying times, and make necessary touch-ups or additional coats for a flawless and long-lasting finish.
Remember, a little extra effort in applying multiple coats will result in a beautifully transformed concrete surface that enhances the overall appearance of your outdoor spaces.
Sealing the Painted Concrete
Sealing the painted concrete surface is a crucial step to enhance its durability, protect it from wear and tear, and prolong its lifespan. A sealer forms a protective barrier that shields the paint from damage caused by moisture, UV rays, stains, and daily use. Here’s what you need to know about sealing painted concrete:
- Wait for the paint to fully cure: Before applying a sealer, it’s important to allow the painted concrete surface to fully cure. Refer to the paint manufacturer’s instructions for the recommended curing time. Typically, it is recommended to wait at least a couple of weeks, if not longer, for the paint to fully cure before applying a sealer.
- Choose the right sealer: There are various types of sealers available for concrete surfaces. Consider factors such as the location of the painted concrete (indoors or outdoors), the level of traffic it will encounter, and the type of paint used. Acrylic sealers are commonly used for painted concrete surfaces due to their durability, UV resistance, and ease of application.
- Clean the painted surface: Thoroughly clean the painted concrete surface to remove any dirt, dust, or debris. Use a mild detergent or concrete cleaner and a scrub brush or pressure washer to ensure a clean and debris-free surface. Rinse the surface with clean water and allow it to dry completely before applying the sealer.
- Apply the sealer: Follow the manufacturer’s instructions for the application of the sealer. Use a paint roller or a sprayer to evenly apply the sealer to the painted concrete surface. Work in small sections to ensure consistent coverage. Avoid applying the sealer too thickly, as it can result in a milky or uneven finish.
- Allow drying and curing time: Give the sealer ample time to dry and cure. Drying times can vary depending on the type of sealer and environmental conditions. Avoid foot traffic or placing objects on the sealed surface until it is fully dry and cured. Follow the manufacturer’s instructions for the recommended drying and curing times.
- Consider multiple coats: Depending on the type of sealer and the desired level of protection, you may need to apply multiple coats. Ensure each coat is completely dry before applying the next one. Multiple coats of sealer provide a stronger and more resilient protective layer.
- Maintain the sealed surface: Regularly maintain the sealed painted concrete surface to extend its lifespan. Avoid using harsh chemicals or abrasive cleaners that can damage the sealer. Clean the surface regularly with a mild detergent and water, and promptly address any spills or stains to prevent them from penetrating the sealer. If the sealer begins to show signs of wear over time, consider reapplying a fresh coat of sealer for continued protection.
Sealing the painted concrete surface is a vital step in preserving its beauty and longevity. The sealer provides added protection against environmental elements, daily use, and potential staining, ensuring that your painted concrete stays vibrant and durable for years to come.
Remember to follow the manufacturer’s instructions for the sealer and exercise proper safety precautions when applying it. With proper sealing and maintenance, your painted concrete surface will maintain its appeal and withstand the test of time.
Curing and Drying Time
After completing the painting process for your concrete surface, it’s crucial to allow sufficient time for both curing and drying. Curing and drying are essential stages that contribute to the overall strength, durability, and appearance of the painted concrete. Here’s what you need to know about curing and drying time:
Curing Time:
Curing refers to the process through which the paint and underlying layers chemically bond and harden. It is a critical phase that ensures the long-term integrity of the painted concrete. The curing time can vary depending on factors such as the type of paint used, weather conditions, and the thickness of the paint layers. Here are some guidelines to follow:
- Follow the paint manufacturer’s instructions: The paint manufacturer will provide specific recommendations regarding the curing time for their product. It is important to carefully read and follow these instructions to ensure optimal curing.
- Typical curing time: In general, paint on concrete surfaces may take several days to a few weeks to fully cure. During this time, it’s crucial to avoid heavy traffic, dragging objects, or placing heavy items on the painted surface. Be cautious and allow the paint ample time to fully bond and harden.
- Protect from moisture: To facilitate proper curing, it is important to protect the painted concrete surface from moisture during this stage. Avoid exposing the surface to rain, sprinklers, or any other sources of water that could potentially affect the curing process.
- Allow for ventilation: Proper ventilation can aid the curing process by allowing the paint to dry uniformly. Ensure that the painted area has adequate airflow to expedite the curing time and prevent moisture buildup.
Drying Time:
Drying refers to the process of the solvent or water content of the paint evaporating, leaving the pigment and binder to form a solid film. It is important to allow the paint to fully dry before subjecting it to normal use. Here are some factors to consider regarding drying time:
- Follow the paint manufacturer’s instructions: The paint manufacturer will provide specific recommendations regarding the drying time for their product. It’s crucial to adhere to these instructions and allow the paint sufficient time to dry before exposing it to normal use.
- Typical drying time: Drying time can vary depending on factors such as temperature, humidity, and the type of paint used. In general, it is recommended to allow at least 24 hours for the paint to dry before light foot traffic. However, for optimal results, it’s best to wait several days or more before subjecting the painted surface to heavy traffic or placing objects on it.
- Avoid premature use: Even if the surface feels dry to the touch, it is important to remember that the paint may still be susceptible to damage if subjected to heavy use or pressure before it is fully dried. Be patient and exercise caution to prevent any potential harm to the newly painted concrete.
- Consider environmental conditions: Factors such as high humidity or low temperatures can prolong the drying time of the paint. It’s important to consider these conditions and adjust the drying time accordingly, allowing for a longer period if needed.
By following the recommended curing and drying times, you ensure that the paint on your concrete surface will have sufficient time to fully bond, harden, and dry. Patience during these stages significantly contributes to the longevity and durability of the painted surface, ensuring that it maintains its vibrant appearance for years to come.
Maintaining the Painted Concrete
To keep your painted concrete surface looking its best and ensure its longevity, regular maintenance is essential. Proper maintenance not only enhances the aesthetics but also helps protect the paint from damage and extends its durability. Here are some tips for maintaining your painted concrete:
- Clean regularly: Regular cleaning is important to remove dirt, dust, and other debris that can accumulate on the painted surface. Use a broom or a soft-bristle brush to sweep away loose dirt, and use a mop or a hose to clean the surface with a mild household detergent or a specially formulated concrete cleaner. Avoid using abrasive cleaners or stiff brushes that can damage the paint.
- Address spills promptly: Accidental spills, such as oil, grease, or harsh chemicals, should be addressed promptly. Wipe up spills immediately with a clean cloth or paper towel. If necessary, use a gentle cleaning solution to remove any residue. Avoid letting spills sit on the painted surface for too long, as they can potentially stain the paint.
- Avoid abrasive objects: Be cautious when placing and moving objects on the painted concrete surface. Avoid dragging heavy furniture or items that can potentially scratch or chip the paint. Use protective pads or felted bases underneath furniture to prevent scratches and minimize damage.
- Protect against sharp objects: Avoid dropping or dragging sharp objects on the painted concrete, as they can cause scratches or punctures. Use mats, rugs, or protective pads in high-traffic areas to minimize the risk of damage.
- Inspect for wear and tear: Regularly inspect the painted surface for any signs of wear, chipping, or peeling. Address any damaged areas promptly to prevent further damage and restore the appearance of the painted concrete. Use touch-up paint or consider repainting the affected areas if necessary.
- Protect from harsh weather: If your painted concrete surface is exposed to harsh weather conditions, consider providing additional protection. Use a waterproof cover or awning to shield the surface from excessive rain, snow, or prolonged sunlight. This can help prevent fading and deterioration of the paint.
- Consider periodic resealing: Depending on the type of paint and sealer used, periodic resealing may be necessary to maintain the integrity and appearance of the painted surface. Consult the paint and sealer manufacturer’s instructions to determine the recommended frequency of resealing. It’s important to thoroughly clean the surface and follow proper application techniques when resealing.
- Follow manufacturer’s recommendations: Always refer to the paint and sealer manufacturer’s instructions and follow their recommendations regarding maintenance and care. They will provide specific guidelines for your particular product to ensure the best results and longevity.
By implementing these maintenance practices, you can preserve the beauty and durability of your painted concrete surface. Regular cleaning, prompt attention to spills, and protecting the surface from damage go a long way in maintaining the vibrancy and integrity of the paint.
Be proactive in identifying and addressing any issues that may arise, and follow recommended guidelines for resealing or touch-up painting when necessary. With proper maintenance, your painted concrete will continue to be a stunning and long-lasting part of your outdoor space.
Read more: How To Paint My Concrete Porch
Conclusion
Painting concrete surfaces is an excellent way to breathe new life into your outdoor spaces and enhance their aesthetic appeal. By following the steps outlined in this article, you can achieve professional results and transform dull, worn-out concrete into a fresh and attractive surface. Proper preparation, choosing the right paint, and applying multiple coats if necessary are crucial in achieving a durable and visually appealing finish.
Remember to take the time to clean and repair the concrete surface, choose the appropriate paint and primer, and gather all necessary materials before starting the painting process. Applying the paint using the right technique, whether it’s a roller, brush, or sprayer, ensures an even and uniform coverage.
Sealing the painted concrete surface provides an added layer of protection against moisture, UV rays, and daily wear, prolonging the lifespan of the paint. Curing and drying time are crucial stages that require patience and allow the paint to fully bond and harden.
To maintain the beauty and durability of your painted concrete, regular cleaning, prompt attention to spills, and protecting the surface from damage are crucial. Periodic resealing and addressing any wear and tear will help keep the painted concrete looking its best for years to come.
Whether you’re rejuvenating your driveway, sprucing up your patio, or adding a touch of color to your outdoor space, painting concrete can transform and revitalize your surroundings. Embrace the process, unleash your creativity, and enjoy the result of a vibrant and visually pleasing painted concrete surface.
So, grab your brushes and rollers, gather your materials, and let the painting begin. Get ready to witness the remarkable transformation of your concrete surfaces into stunning focal points that will enhance the overall allure of your home or business!
Frequently Asked Questions about How To Paint Concrete For A Fresh Look
Was this page helpful?
At Storables.com, we guarantee accurate and reliable information. Our content, validated by Expert Board Contributors, is crafted following stringent Editorial Policies. We're committed to providing you with well-researched, expert-backed insights for all your informational needs.


0 thoughts on “How To Paint Concrete For A Fresh Look”