Articles
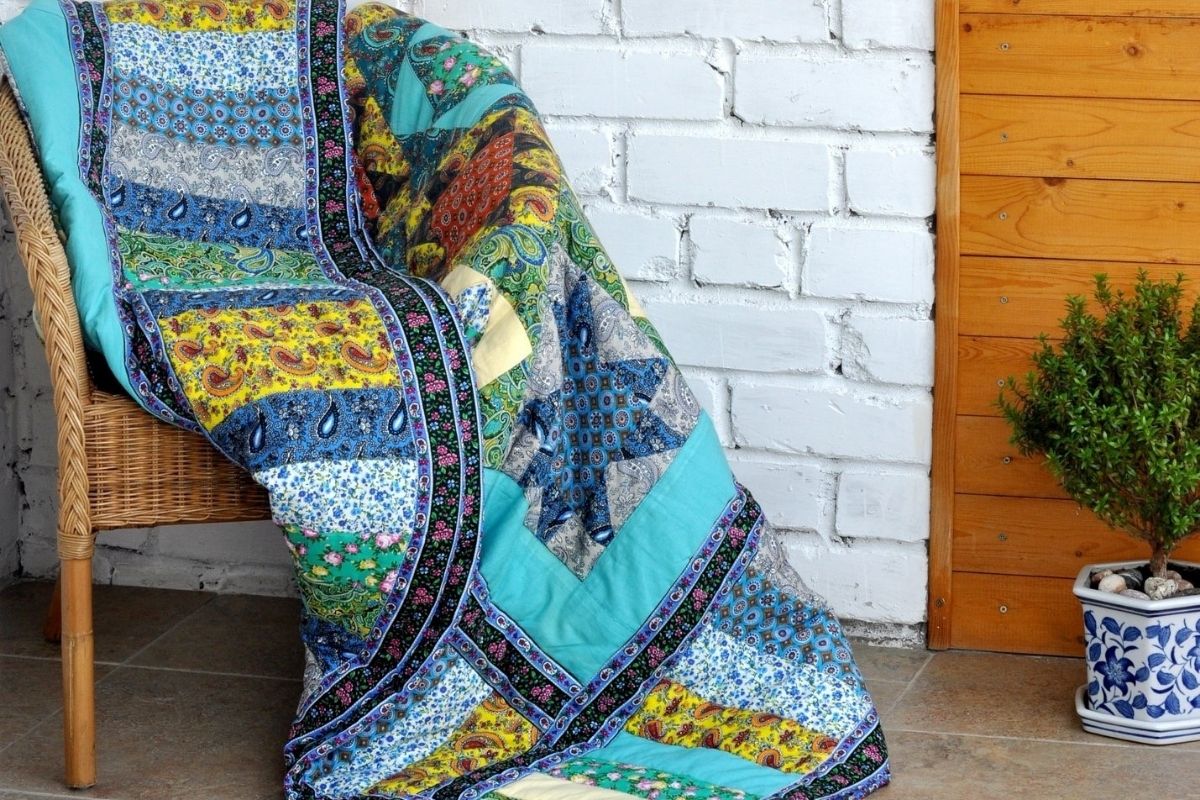
How To Make A Lap Quilt
Modified: August 22, 2024
Learn how to make a beautiful lap quilt with these insightful articles. Explore step-by-step instructions, helpful tips, and creative ideas to create your own unique masterpiece.
(Many of the links in this article redirect to a specific reviewed product. Your purchase of these products through affiliate links helps to generate commission for Storables.com, at no extra cost. Learn more)
Introduction
Welcome to the wonderful world of quilting! Making a lap quilt is a fantastic project for quilters of all skill levels. Whether you’re a beginner looking to enhance your sewing skills or an experienced quilter in search of a new project, a lap quilt is a versatile and practical choice. In this article, we’ll guide you through the steps to create a beautiful and cozy lap quilt that you can cherish or gift to someone special.
Quilting is not only a creative outlet but also a form of artistic expression. Each quilt tells a story, with the fabric choices, design, and stitching coming together to create something unique and meaningful. A lap quilt, as the name suggests, is a smaller-sized quilt that’s perfect for curling up with on the couch, snuggling under during chilly evenings, or adding a pop of color and warmth to any room.
While making a lap quilt may seem daunting at first, fear not! With proper guidance and a step-by-step approach, you can easily create a quilt that you’ll be proud of. Throughout this article, we’ll cover everything you need to know, from choosing the right fabrics and design to piecing the quilt top, quilting the layers together, and adding the finishing touches.
If you’re new to quilting, don’t worry. We’ll explain each step in detail, ensuring you have a solid understanding of the process. Additionally, if you’re an experienced quilter, you can still benefit from the tips and tricks we’ll share along the way. So let’s dive in and start creating your very own lap quilt!
Key Takeaways:
- Quilting is a creative and meaningful art form that allows you to weave together fabrics, colors, and patterns to create a one-of-a-kind lap quilt that radiates warmth and beauty.
- By following the step-by-step process outlined in this article, you can tap into your creativity, hone your sewing skills, and create a truly special lap quilt that holds sentimental value and love.
Read more: How Big Should A Lap Quilt Be
Choosing Fabrics and Design
When it comes to making a lap quilt, one of the most exciting parts is choosing the fabrics and design. The fabric selection will set the tone and personality of your quilt, while the design will determine the overall look and feel. Here are some tips to help you make the best choices:
- Consider the Purpose: Think about how the lap quilt will be used. If it’s intended as a decorative piece, you can explore bold and vibrant patterns. If it’s meant for cozying up on the couch, consider softer and more comfortable fabrics.
- Color Palette: Determine the color scheme you want for your lap quilt. You can opt for a monochromatic look, choose complementary colors, or experiment with contrasting hues. Consider the room where the quilt will be placed and select colors that harmonize with it.
- Fabric Types: Quilting cotton is a popular choice for lap quilts due to its durability and wide variety of prints. However, feel free to explore other options such as flannel, linen, or even upcycled fabrics to add a unique touch to your quilt.
- Prints and Patterns: Look for fabrics with different prints and patterns to create visual interest. Mix florals with geometrics, stripes with polka dots, or solids with intricate designs. Be playful and experiment with combinations that resonate with your personal style.
- Scale and Proportion: Consider the scale of the prints. Larger prints can make a bold statement, while smaller prints can add a delicate touch. Aim for a balanced composition by incorporating a variety of print sizes.
- Theme or Story: If you’re looking to create a themed lap quilt, choose fabrics that tell a story. You can explore nature-inspired themes, seasonal motifs, or even personal memories by incorporating fabrics with sentimental value.
Once you have an idea of the fabrics and design you want, it’s a good idea to create a mock-up or sketch of your lap quilt. This will help you visualize how the fabrics and patterns will come together and allow you to make any necessary adjustments before cutting into your precious materials.
Remember, choosing fabrics and design is a personal and creative process. Don’t be afraid to trust your instincts and have fun with it. The key is to create a lap quilt that reflects your style and brings you joy every time you see it.
Gathering Materials
Now that you have a clear idea of the fabrics and design for your lap quilt, it’s time to gather the materials you’ll need to bring your vision to life. Here’s a list of essential items:
- Fabric: Estimate the amount of fabric you’ll need based on the desired size of your lap quilt. Consider the quilt top, backing fabric, border fabric, and binding fabric. It’s a good idea to get a bit more fabric than you think you’ll need, just in case.
- Thread: Choose a high-quality thread that complements your fabric choices. Cotton thread in a coordinating color is commonly used for quilting projects.
- Quilt Batting: This is the layer of material that goes between the quilt top and the backing. There are various types of quilt batting to choose from, including cotton, polyester, wool, or a blend of these materials. Select the batting based on your desired level of warmth and loftiness.
- Quilting Tools: You’ll need a few basic tools such as sharp fabric scissors, a rotary cutter, a cutting mat, quilting rulers, and pins or clips to hold the fabric in place.
- Sewing Machine: A sewing machine is essential for piecing the quilt top, sewing borders, and quilting the layers together. Make sure your machine is in good working condition and has the appropriate needles and presser feet for quilting.
- Iron and Ironing Board: Pressing your fabric and seams is an important part of achieving precise and professional-looking results. Ensure you have a reliable iron and a sturdy ironing board.
- Quilt Marking Tools: Depending on the quilting design you choose, you may need marking tools such as fabric markers, chalk, or water-soluble pens to transfer the pattern onto the fabric.
- Quilt Binding: Choose a fabric or bias tape for creating the binding, which will be used to finish the edges of your lap quilt.
- Optional Embellishments: If you want to add some extra flair to your lap quilt, consider embellishments like buttons, appliques, or embroidery floss.
Before starting your lap quilt project, take some time to gather all the materials. This ensures that you have everything you need at hand and minimizes interruptions once you begin the sewing process. Additionally, it’s a good idea to read through the instructions of your specific quilt pattern, if you’re using one, to ensure you have all the necessary materials specific to that design.
With your materials in hand, it’s time to move on to the next step: cutting the fabric.
Cutting the Fabric
Now that you have gathered all the necessary materials for your lap quilt, it’s time to cut the fabric. Accurate cutting is crucial for achieving precise piecing and a well-finished quilt. Here’s a step-by-step guide to help you cut your fabric:
- Prepare Your Work Area: Clear a large, flat work surface and ensure you have enough room to spread out your fabric. This will make it easier to measure and cut accurately.
- Pre-Wash and Press: If you haven’t already done so, pre-wash and press your fabric to remove any sizing or shrinkage. This will ensure that your lap quilt maintains its shape and size after completion.
- Refer to Your Quilt Pattern: If you’re following a specific quilt pattern, carefully read through the instructions to determine the required dimensions and cutting measurements for each piece. If you’re creating your own design, make note of the desired block size or dimensions.
- Use a Rotary Cutter: A rotary cutter is a handy tool for accurate and efficient fabric cutting. Ensure your blade is sharp and use a cutting mat under your fabric to protect your work surface.
- Measure and Mark: Use a quilting ruler to measure and mark the fabric according to your cutting instructions. Take your time to double-check your measurements before making any cuts. Accurate cutting will ensure that your quilt pieces fit together correctly.
- Cut with Care: Hold the ruler firmly in place and use the rotary cutter to cut along the marked lines. Take slow and deliberate strokes, exerting steady pressure for a clean and even cut.
- Label and Organize: As you cut your fabric pieces, it’s essential to label and organize them to avoid confusion later on. Use sticky notes or fabric markers to label each piece with its corresponding pattern or size.
Remember to cut all your fabric pieces in one cutting session to maintain consistency and accuracy. This will ensure that your lap quilt comes together seamlessly.
It’s also important to note that the number of fabric pieces and their specific measurements will vary depending on the design and size of your lap quilt. Take your time and refer to your pattern or design measurements to make precise cuts.
Once you have cut all the necessary fabric pieces, you’re ready to move on to piecing the quilt top.
Piecing the Quilt Top
Now that you have all your fabric pieces cut, it’s time to start piecing the quilt top. This is where you’ll bring your chosen design to life. Follow these steps to ensure a successful and visually appealing lap quilt top:
- Arrange Your Pieces: Lay out your fabric pieces according to your design or pattern. Take some time to experiment with the placement and arrangement until you’re satisfied with the overall look.
- Start with Blocks or Rows: If your lap quilt design consists of blocks, assemble each block one at a time. If it’s a row-by-row design, begin by sewing the pieces together row by row.
- Use a Quarter-Inch Seam Allowance: When sewing your fabric pieces together, use a quarter-inch seam allowance throughout the process. This is a standard seam allowance in quilting and ensures that your pieces fit together accurately.
- Pin or Clip the Fabric: Before sewing, pin or use sewing clips to secure the fabric pieces together. This prevents shifting and ensures precise alignment as you sew each seam.
- Press the Seams: After sewing each seam, press the fabric flat with an iron. This helps set the seam and creates a crisp and polished look. Press the seams to one side, alternating directions with each row or block to reduce bulk.
- Continue Piecing: Repeat the process of sewing, pressing, and assembling the fabric pieces until the lap quilt top is complete. Take your time and pay attention to the details to ensure accurate piecing.
Throughout the piecing process, refer to your design or pattern to ensure you’re following the correct layout and order. If you’re creating your own design, be mindful of color placement, contrast, and balance to achieve the desired visual impact.
As you piece the quilt top, you may also choose to add borders or sashing between blocks or rows to enhance the design. This is a personal preference and can be customized according to your creative vision.
Once your quilt top is complete, give it a final press with an iron to remove any wrinkles or creases. Admire your handiwork, as you’re one step closer to completing your beautiful lap quilt.
Read more: How To Make A Bean Bag Lap Tray
Sewing Borders
Now that your quilt top is pieced together, it’s time to add the finishing touch by sewing borders. Borders not only frame your lap quilt but also add visual interest and can help adjust the overall size if needed. Follow these steps to sew borders onto your quilt top:
- Measure Your Quilt Top: Begin by measuring the length and width of your quilt top. This will help determine the size of the borders you’ll need to cut.
- Cut the Border Strips: Cut fabric strips for your borders, making sure their width is consistent. To calculate the length of each strip, measure the corresponding edge of your quilt top and add the desired border width twice (once for each side).
- Pin or Clip the Borders: With the right sides together, pin or use sewing clips to attach the border strips to the quilt top. Start by aligning the ends of the strip with the corresponding edges of the quilt top and distribute any excess fabric evenly along the sides.
- Sew the Borders: Using a quarter-inch seam allowance, sew the border strips to the quilt top. Take your time to sew slowly and ensure the border is sewn evenly along all edges. Press the seams toward the border strips.
- Trim Excess Fabric: After sewing the borders, trim any excess fabric or threads for a neat and tidy finish.
- Measure and Attach Side Borders: Measure and cut two border strips for the remaining sides of your quilt top. Pin or clip the strips to the sides, aligning the ends and distributing the fabric evenly. Sew the side borders with a quarter-inch seam allowance, pressing the seams toward the border strips.
- Press the Borders: Once all the borders are sewn, press them with an iron to set the seams and create crisp edges. This will give your lap quilt a polished look.
When selecting border fabric, consider choosing a complementary color or pattern that enhances the overall design of your lap quilt. Borders can be as narrow or as wide as you desire, depending on your preference and the style you’re aiming for.
Remember to measure your quilt top accurately and sew the borders securely. Careful and precise border sewing ensures that your lap quilt maintains its shape and durability for years to come.
With the addition of borders, your lap quilt is well on its way to being completed. The next step is assembling the quilt sandwich by layering the backing, batting, and quilt top.
When making a lap quilt, be sure to prewash your fabric to prevent shrinkage and bleeding of colors. This will ensure that your quilt stays looking great for years to come.
Making the Quilt Sandwich
Creating the quilt sandwich is an important step in the quilting process. It involves layering the quilt top, batting, and backing to prepare for quilting. Follow these steps to make the quilt sandwich:
- Prepare the Backing: Start by preparing the backing fabric, ensuring it is larger than the quilt top on all sides. Trim and square the fabric if necessary.
- Layer the Batting: Lay the quilt batting on top of your work surface. Smooth out any wrinkles or folds to ensure an even layer throughout.
- Place the Quilt Top: Carefully position the quilt top on top of the batting. Align the edges and ensure it is centered on the batting.
- Secure the Layers: To hold the layers together, use quilting safety pins or basting spray. If using safety pins, place them at regular intervals across the quilt sandwich, ensuring all layers are secure. If opting for basting spray, follow the instructions on the can to apply it between the layers.
- Smooth and Flatten: Gently smooth out any wrinkles or bumps in the layers. Start from the center and work your way out to the edges. This will help create a flat and even quilt sandwich.
- Check for Smoothness: Double-check for any folds or puckers in the layers and adjust them as necessary. Smoothness in the quilt sandwich will contribute to a more polished finished quilt.
It is essential to ensure that all layers are flat and wrinkle-free before moving on to the next steps of quilting. Taking the time to properly layer the quilt sandwich will result in a more professional-looking final product.
Once the quilt sandwich is prepared, you’re ready to move on to quilting the layers together.
Quilting the Layers Together
Quilting the layers together is an important step that adds dimension, texture, and stability to your lap quilt. There are various methods to quilt, including hand quilting and machine quilting. Here, we’ll focus on machine quilting, which is commonly used for lap quilts. Follow these steps to quilt your lap quilt:
- Select the Quilting Design: Decide on the quilting design you want to incorporate into your lap quilt. This can be simple straight lines, free-motion quilting, or a specific pattern or motif. Take the time to plan and mark your quilting design on the quilt top if desired.
- Prepare Your Sewing Machine: Ensure your sewing machine is in good working condition. Change to a quilting needle appropriate for your fabric and quilting technique. Select the thread color that complements your lap quilt design.
- Start in the Middle: Begin quilting in the center of the lap quilt and work your way outward. This helps distribute any puckering or shifting more evenly across the quilt as you quilt the layers together.
- Stay in Control: As you quilt, guide your fabric gently under the needle, keeping the layers flat and properly aligned. Take your time and maintain a consistent speed while quilting.
- Secure Your Quilting Stitches: At the beginning and end of each quilting row or section, backstitch or lock your stitches to secure them. This prevents the stitches from unraveling over time.
- Pause and Adjust: Periodically pause to check your quilting stitches and adjust the tension on your machine if needed. This ensures that your stitches are balanced and the quilt layers are secure.
- Continue Quilting: Move steadily across the lap quilt, quilting the layers together according to your chosen design. Take breaks when needed, but try to maintain a consistent quilting rhythm to achieve even stitch lengths.
- Finishing the Quilting: Once you’ve quilted the entire lap quilt, take a step back and admire your work. Check for any areas that may need additional quilting or reinforcement. Make any necessary adjustments or add extra quilting as desired.
Remember, quilting is a personal and creative process, so feel free to experiment and make the quilting design your own. The goal is to create a lap quilt that reflects your style and vision.
With the layers quilted together, your lap quilt is almost complete. The next step is adding the binding to finish the edges and give your quilt a polished and professional look.
Binding the Quilt
Adding the binding to your lap quilt is the final step that gives it a clean and finished look. The binding not only secures the edges of the quilt but also adds a decorative element. Follow these steps to bind your lap quilt:
- Prepare the Binding Fabric: Cut fabric strips for the binding, ensuring they are wide enough to cover the thickness of the quilt’s edges. The length of the strips will depend on the size of your quilt, plus a few extra inches for joining the ends.
- Join the Binding Strips: To create a continuous binding strip, sew the short ends of the fabric strips together at a 45-degree angle. Trim the excess fabric, press the seam open, and fold the strip in half lengthwise, wrong sides together.
- Attach the Binding: Starting in the middle of one side of the quilt, align the raw edges of the binding strip with the raw edges of the quilt’s front side. Leave a few inches of binding free at the beginning. Pin or clip the binding in place.
- Machine or Hand Stitch: Using a sewing machine or needle and thread, stitch the binding to the quilt, sewing along the folded edge of the binding strip. Take care to sew through all layers, ensuring a secure and even stitch.
- Miter the Corners: When you reach a corner, stop sewing a few inches away. Fold the binding strip up at a 45-degree angle, then fold it back down, aligning it with the next side of the quilt. Continue sewing, starting from the corner fold, to secure the mitered corner.
- Finish the Binding: When you reach the starting point, overlap the binding strip and cut it, leaving a few inches of overlap. Tuck the raw end inside the folded end and sew it securely in place to create a seamless finish.
- Press the Binding: Gently press the binding away from the quilt with an iron, taking care not to stretch the fabric. This will set the stitches and give your lap quilt a professional finish.
Once the binding is attached and pressed, take a moment to admire your finished lap quilt. Your hard work and attention to detail have paid off, and now you have a beautiful, cozy, and functional quilt to enjoy or gift to someone special.
Remember, binding can be done in various ways, and there are different techniques and styles you can explore. Choose the method that suits your preference and complements the overall design of your lap quilt.
With the binding complete, your lap quilt is ready for the final finishing touches.
Read more: How To Make A Quilt
Finishing Touches
With your lap quilt almost complete, it’s time to add some finishing touches to make it truly special. Here are a few options to consider:
- Label Your Quilt: Attach a personalized label to your lap quilt to make it even more memorable. Include your name, the date, and any other relevant details that hold meaning for you.
- Add Embellishments: Consider adding embellishments to your lap quilt for extra flair. This could be embroidery, applique, buttons, or even fabric paints. Be creative and let your imagination run wild!
- Quilt Label: Create a quilt label using fabric and fabric pens or embroidery. Include a heartfelt message or quote to add a personal touch and make it a cherished family heirloom.
- Binding Embellishment: For a decorative edge, consider adding a decorative binding technique, such as a scalloped or flanged binding.
- Quilt Hanging Sleeve: If you plan to hang your lap quilt on a wall, attach a hanging sleeve to the back of the quilt. This allows you to easily display your creation as a work of art.
- Wash and Block: Before using or gifting your lap quilt, give it a gentle wash to remove any sizing or marks. Dry it flat or hang it to air dry. If necessary, block it to ensure it lays flat and square.
- Gift Wrap or Display: If you’re gifting the lap quilt, consider wrapping it in a beautiful fabric or presenting it in a decorative way. This adds an extra element of surprise and excitement for the recipient.
These finishing touches not only add unique elements to your lap quilt but also make it more personal and meaningful. Take the time to add these details to create a truly remarkable piece.
Finally, step back and admire your completed lap quilt. It’s the culmination of your creativity, skill, and dedication. Whether you decide to keep it for yourself or gift it to someone special, your lap quilt represents your talent and the love put into its creation.
Congratulations on completing your lap quilt! Enjoy the warmth and comfort it provides, and take pride in your accomplishment. Happy quilting!
Conclusion
Congratulations on embarking on the journey of creating your very own lap quilt! By following the steps outlined in this article, you have learned how to choose fabrics and design, gather materials, cut the fabric, piece the quilt top, sew borders, make the quilt sandwich, quilt the layers together, bind the quilt, and add the finishing touches. Throughout this process, you have tapped into your creativity, honed your sewing skills, and created a one-of-a-kind quilt that radiates warmth and beauty.
Quilting is not just a craft; it is an art form that allows you to weave together fabrics, colors, and patterns to create something truly special. Your lap quilt is a reflection of your unique style and the stories you tell through your choice of fabrics and design.
Whether you made this lap quilt for yourself or as a gift for someone else, it holds a tremendous amount of sentimental value and love. Each stitch represents the care and attention you put into its creation, and the finished quilt is a testament to your talents as a quilter.
As you cuddle up under your lap quilt or see the joy on the face of the recipient, remember the joy and satisfaction that quilting brings. It is a hobby that allows for endless possibilities, endless creativity, and endless warmth, both physically and emotionally.
Whether you continue to create more lap quilts or venture into larger quilting projects, know that you have the foundation and knowledge to create beautiful and meaningful pieces. Share your love for quilting, inspire others with your creations, and continue to embrace the joy that this craft brings.
Thank you for joining us on this quilting journey. Happy quilting!
Frequently Asked Questions about How To Make A Lap Quilt
Was this page helpful?
At Storables.com, we guarantee accurate and reliable information. Our content, validated by Expert Board Contributors, is crafted following stringent Editorial Policies. We're committed to providing you with well-researched, expert-backed insights for all your informational needs.


0 thoughts on “How To Make A Lap Quilt”