Articles
How To Paper Piece A Quilt Block
Modified: August 16, 2024
Learn how to paper piece a quilt block with our informative articles. Find step-by-step instructions, helpful tips, and expert advice to master this technique.
(Many of the links in this article redirect to a specific reviewed product. Your purchase of these products through affiliate links helps to generate commission for Storables.com, at no extra cost. Learn more)
Introduction
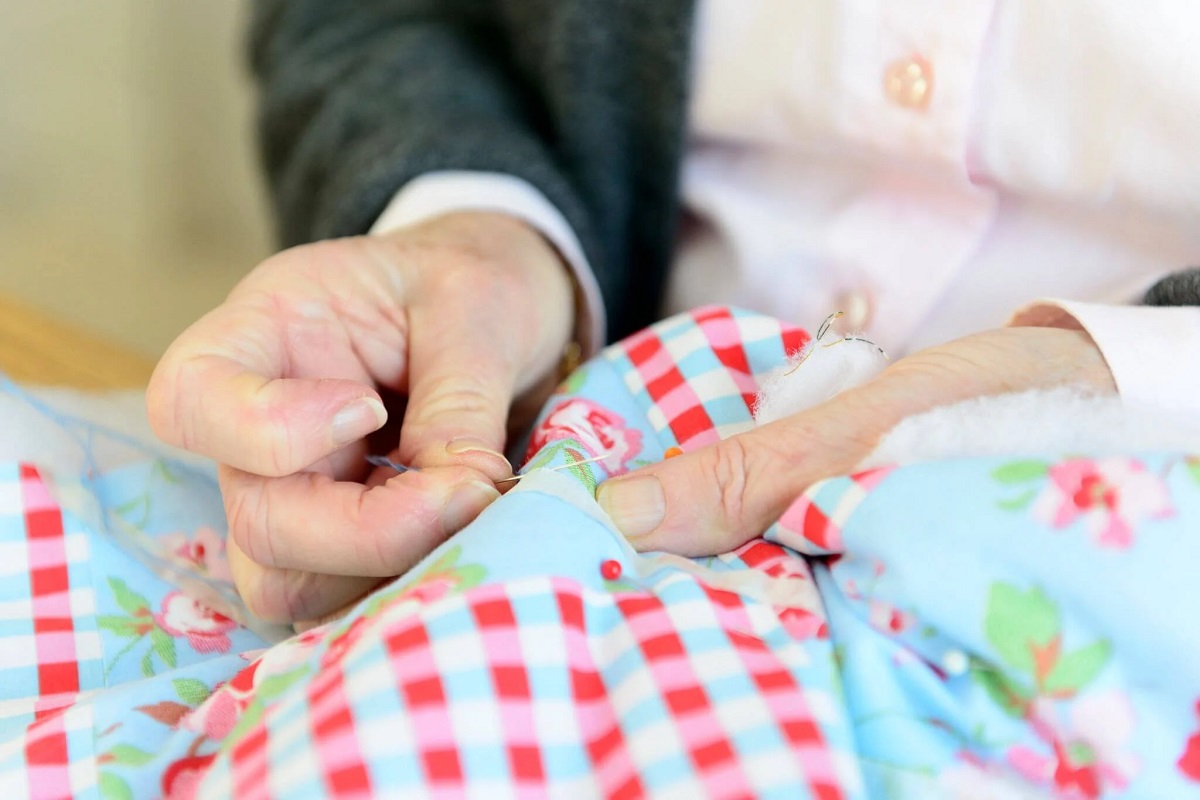
Paper piecing, also known as foundation piecing, is a popular quilting technique that allows you to create intricate and precise quilt blocks with ease. Whether you’re a beginner or a seasoned quilter, paper piecing can open up a world of design possibilities and challenge your creativity.
In this article, we will explore the fundamentals of paper piecing, step-by-step instructions on how to paper piece a quilt block, and some helpful tips and troubleshooting advice along the way. So, dust off your sewing machine and grab your quilting supplies, because we’re about to embark on a quilting journey!
Before we dive into the process of paper piecing, let’s first understand what it is and why it’s a valuable technique in quilting.
At its core, paper piecing involves sewing fabric onto a paper or foundation template. This template acts as a guide for stitching your fabric pieces precisely, resulting in crisp and accurate quilt blocks. The paper provides stability and prevents the fabric from shifting during the sewing process, ensuring your block turns out perfectly.
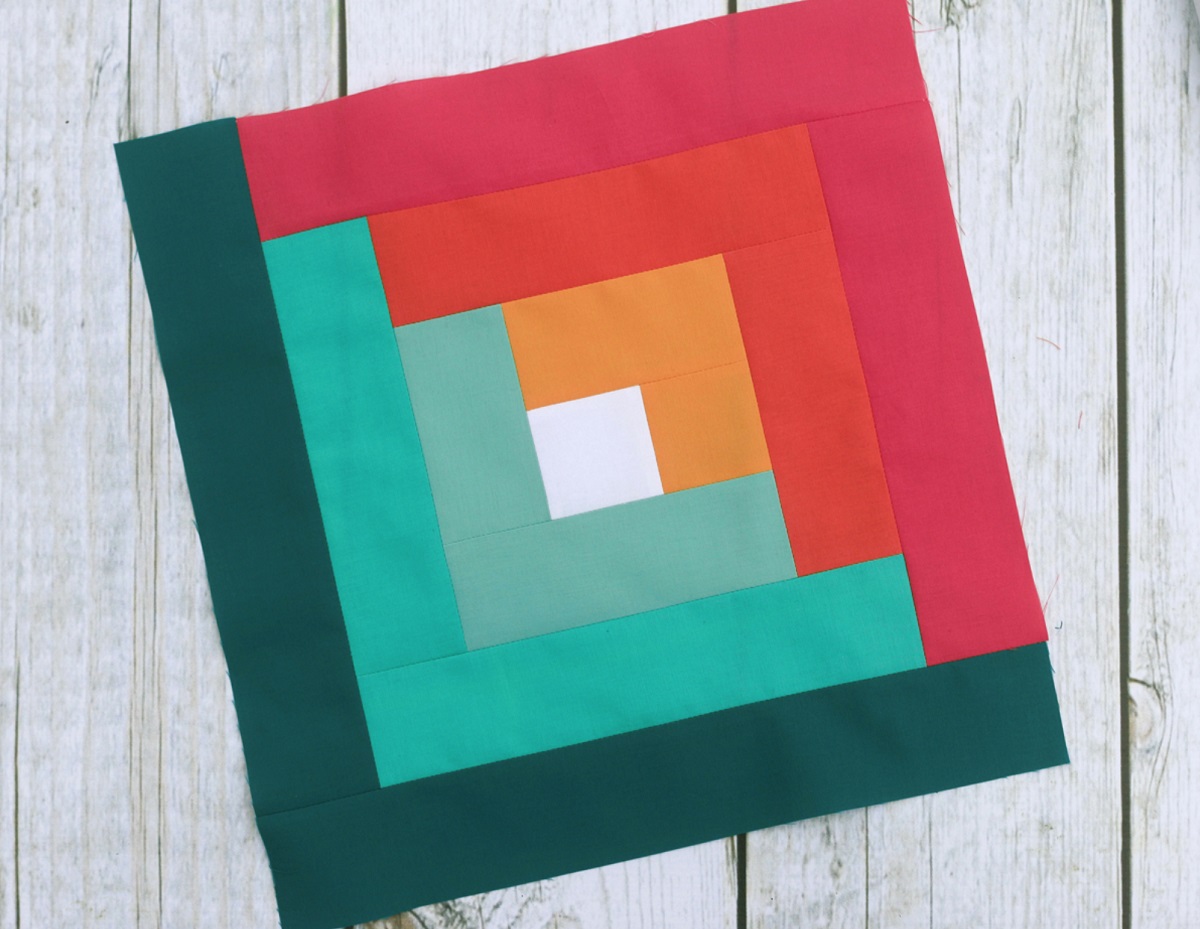
One of the major advantages of paper piecing is its ability to create complex geometric designs and sharp angles that may be challenging to achieve with traditional piecing methods. It allows for precise placement of fabric pieces, making it ideal for intricate patterns and blocks with small pieces.
Paper piecing also reduces fabric waste since you can cut your fabric pieces to exact measurements, minimizing the risk of error and ensuring efficient use of fabric. Additionally, it helps maintain consistent seam allowances throughout the block, resulting in a cohesive and professional-looking finished quilt.
Now that you have a basic understanding of what paper piecing is and why it’s beneficial, it’s time to gather the necessary tools and materials to get started. Let’s move on to the next section.
Key Takeaways:
- Paper piecing allows quilters to achieve precise, intricate designs with ease, making it ideal for creating complex geometric patterns, reducing fabric waste, and handling small fabric pieces.
- To excel in paper piecing, start small, use precise stitch lengths, and stay organized. Embrace the learning process, experiment with different patterns, and celebrate your accomplishments along the way.
Read more: How To Piece A Quilt
What is Paper Piecing?
Paper piecing, also known as foundation piecing, is a quilting technique that involves sewing fabric onto a paper or foundation template to create precise and intricate quilt blocks. It is a popular method used by quilters of all skill levels to achieve stunning results.
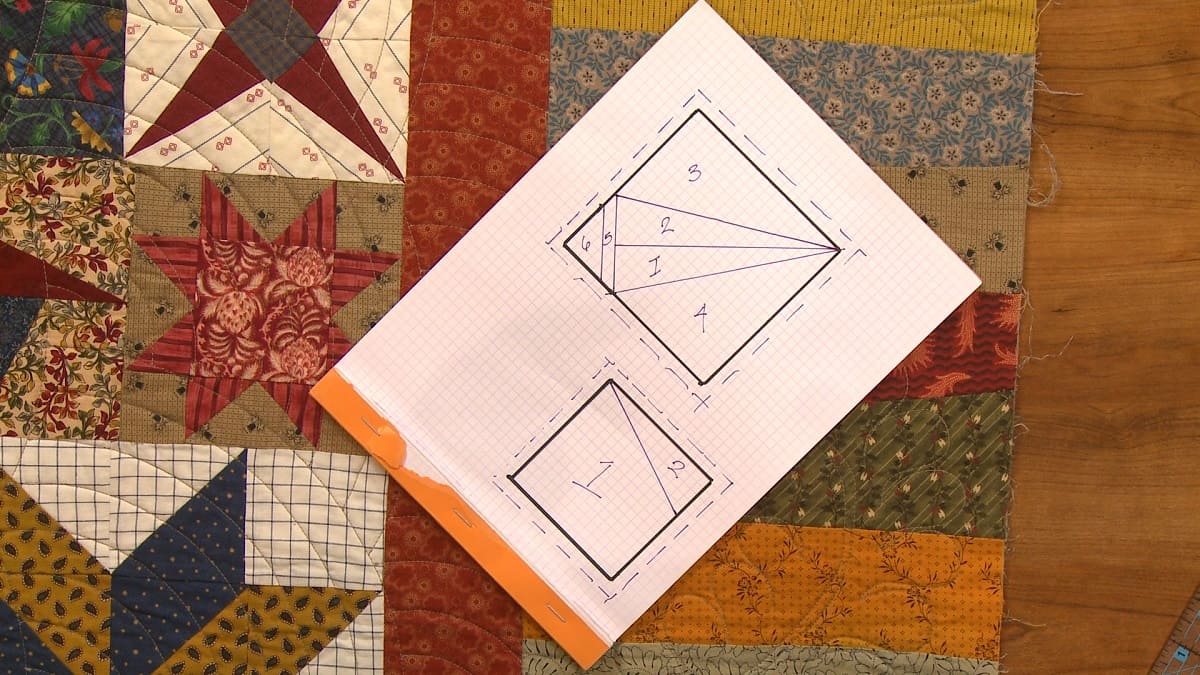
The foundation template in paper piecing serves as a guide for stitching the fabric pieces together. It helps maintain accuracy by providing stability and preventing fabric stretching or shifting during the sewing process. The template is designed with numbered or lettered sections that correspond to the fabric pieces, making it easier to follow the pattern and ensure proper placement.
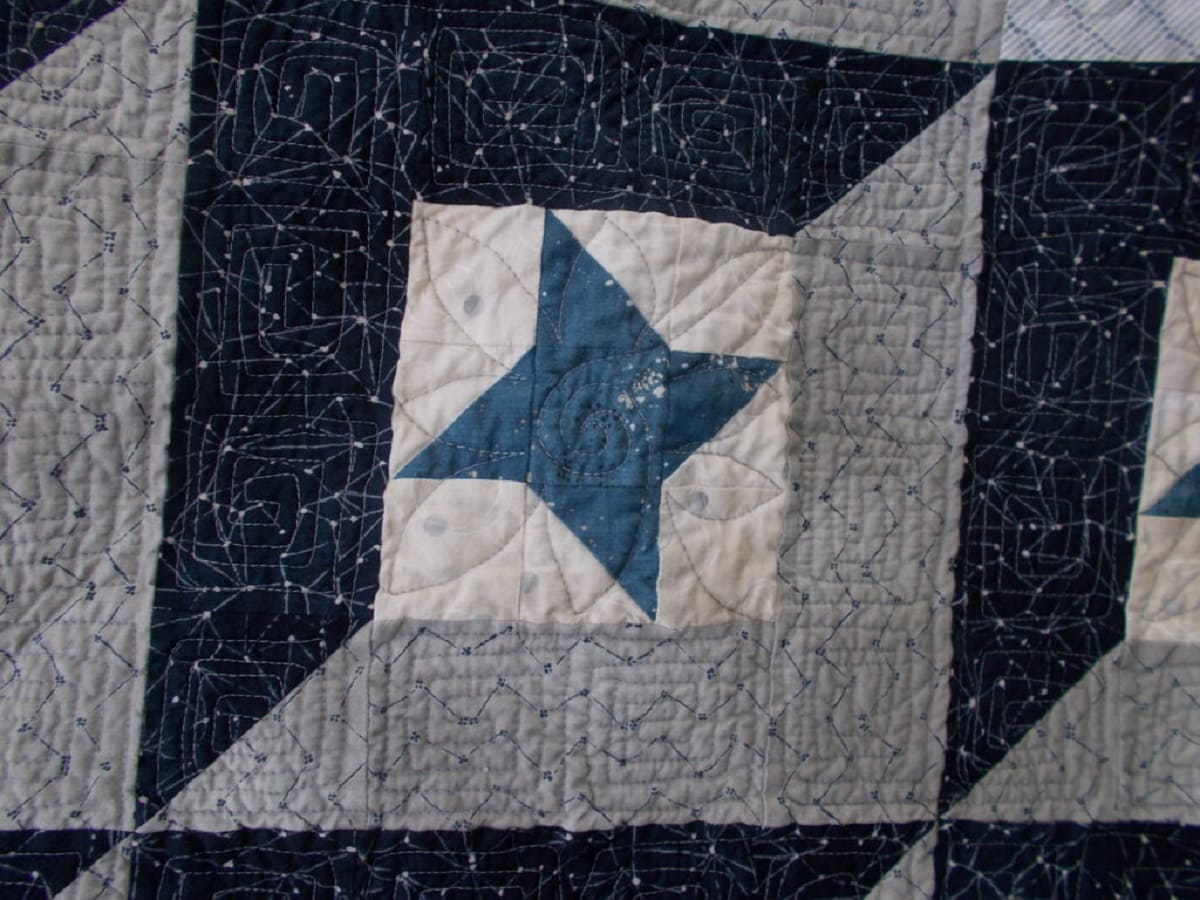
One of the key advantages of paper piecing is its ability to create complex geometric designs and sharp angles. This technique allows quilters to achieve intricate patterns, such as star blocks, flying geese, or intricate motifs, with precision and ease. By sewing fabric directly onto the foundation template, you can achieve crisp and accurate points, seams, and angles that may be challenging to achieve with traditional piecing methods.
In addition to creating precise blocks, paper piecing also offers other benefits. It reduces fabric waste by allowing you to cut your fabric pieces to exact measurements, minimizing the risk of cutting errors. This efficient use of fabric is especially valuable when working with expensive or limited fabric prints. Paper piecing also helps maintain consistent seam allowances throughout the block, resulting in a cohesive and professional-looking finished quilt.
Another advantage of paper piecing is its ability to handle small pieces of fabric. It allows quilters to work with intricate designs that may require small triangles, odd angles, or precise curves. With paper as a stabilizer, these small fabric pieces become easier to handle, sew, and align accurately.
While paper piecing offers many benefits, it is important to note that it does require some additional time and preparation compared to traditional piecing methods. The process involves several steps, including selecting or designing a pattern, preparing the foundation templates, cutting the fabric pieces, sewing them onto the templates, and removing the paper after the block is complete.
Now that you have a clear understanding of what paper piecing is and the advantages it offers, let’s move on to the next section, where we will discuss the tools and materials you’ll need to get started with paper piecing.
Tools and Materials
Before diving into the world of paper piecing, it’s important to gather the necessary tools and materials. Here’s a list of items you’ll need to ensure a successful and enjoyable paper piecing experience:
- Fabric: Choose high-quality quilting cotton in various colors and prints. Fat quarters or scraps are great options for paper piecing projects as they provide a wide variety of fabric choices without the need for large yardages.
- Foundation Paper or Template: You’ll need a foundation paper or template on which to sew your fabric pieces. Foundation papers are designed specifically for paper piecing and can be easily torn away after stitching. Alternatively, you can use lightweight printer paper or vellum paper.
- Rotary Cutter and Cutting Mat: A rotary cutter and cutting mat are essential tools for accurately cutting your fabric into precise measurements. Ensure your rotary cutter has a sharp blade for clean cuts.
- Ruler: A clear acrylic ruler with gridlines is indispensable for measuring and cutting fabric pieces with accuracy. A ruler with a ¼-inch marking will help you maintain consistent seam allowances.
- Sewing Machine: Use a reliable sewing machine equipped with a straight stitch setting. Consider using a quarter-inch foot or a seam guide to help achieve precise seam allowances.
- Iron and Ironing Board: A well-pressed fabric is essential for accurate piecing. Have an iron and ironing board ready for pressing seams and fabric pieces.
- Small Scissors or Fabric Shears: These will come in handy for trimming fabric pieces and cutting thread.
- Pins or Wonder Clips: Use pins or wonder clips to hold fabric pieces in place before sewing.
- Seam Ripper: Mistakes happen, so keep a seam ripper nearby to correct any errors without damaging your fabric.
- Pencil or Hera Marker: Use a pencil or a Hera marker to mark the seam allowance on your foundation paper or template.
- Design or Pattern: Choose a paper piecing pattern or design that appeals to you. There are numerous free and paid patterns available online or in quilting books and magazines.
Having these tools and materials at hand will ensure a smooth and enjoyable paper piecing experience. Now that you have your supplies ready, let’s move on to the next section where we will discuss how to choose a pattern for your paper piecing project.
Choosing a Pattern
When it comes to paper piecing, the pattern you choose will greatly influence the final look of your quilt block. Whether you’re a beginner or an experienced quilter, selecting the right pattern is essential for a successful and enjoyable paper piecing project. Here are some factors to consider when choosing a pattern:
Skill Level: Consider your skill level and experience with paper piecing. If you’re new to paper piecing, it’s best to start with simpler patterns that have fewer pieces and straightforward construction. As you gain confidence and experience, you can gradually move on to more complex and intricate designs.
Design Complexity: Think about the complexity of the pattern’s design. Some patterns feature simple geometric shapes, while others may involve intricate curves, multiple small pieces, or sharp angles. Choose a design that aligns with your comfort level and desired challenge.
Block Size: Consider the finished size of the block you want to create. Smaller blocks are generally quicker to complete and require less fabric, making them ideal for small projects or incorporating into larger quilt designs. On the other hand, larger blocks can showcase intricate details and make a bold statement.
Theme or Style: Think about the theme or style you want to achieve in your quilt. Do you prefer traditional, modern, or whimsical designs? There are plenty of patterns available to suit different tastes and aesthetics. Explore quilting books, online tutorials, and pattern websites to find inspiration and patterns that resonate with you.
Pattern Source: Consider where you want to source your pattern from. There are various options available, including free patterns found online, paid patterns from independent designers, or patterns included in quilting books and magazines. Whichever source you choose, ensure you have access to clear instructions and accurate templates.
Personal Preference: Ultimately, choose a pattern that excites you and sparks your creativity. It’s important to enjoy the process of paper piecing, so select a design that you find visually appealing and that you will be proud to display in your finished quilt.
Once you’ve considered these factors and have selected a pattern that meets your criteria, make sure to read through the instructions thoroughly before beginning your paper piecing project. Familiarize yourself with any terms or techniques that may be new to you, and gather the necessary fabric and supplies specific to the pattern requirements.
Now that you’ve chosen a pattern for your paper piecing project, it’s time to move on to the next section, where we will discuss how to prepare the templates before cutting the fabric.
Preparing the Templates
Before you can start cutting your fabric and sewing it onto the templates, you’ll need to prepare the foundation templates for your paper piecing project. This step is crucial for ensuring accurate and precise piecing. Here’s how to prepare the templates:
1. Find or Create a Template: Depending on the pattern you’ve chosen, you may already have a template provided. If not, you’ll need to create one. You can either draw the template by hand or use computer software specifically designed for creating quilting templates. Make sure the template matches the finished size specified in the pattern instructions.
2. Trace the Template: Place the foundation paper or template on a flat surface, such as your cutting mat or a light table. Use a pencil or a Hera marker to trace the outline of the template onto the foundation paper. Be sure to mark any reference points, such as numbered or lettered sections, that will assist you during the piecing process.
3. Add Seam Allowance: Measure and mark a quarter-inch seam allowance around the traced template on the foundation paper. This will serve as a guideline for sewing your fabric pieces and will ensure accurate piecing. Use a ruler with a quarter-inch marking to help you achieve consistent seam allowances.
4. Duplicate the Templates: Depending on the number of blocks you plan to make, you may need to duplicate the templates. Use a copy machine or trace additional templates onto separate foundation papers. This will save you time and effort in the long run, especially if you want to create multiple identical blocks for your quilt.
5. Cut Out the Templates: Once you have traced and added seam allowances to your foundation templates, carefully cut them out along the outer line. Use small scissors or a craft knife for precise cutting. Take your time and ensure that each template is accurately cut, as any inaccuracies will impact the final result of your piecing.
6. Organize and Label: If you are working with multiple templates or a complex pattern, it’s helpful to organize and label them. Use small envelopes, plastic sleeves, or labeled Ziploc bags to keep your templates organized and easily accessible. Label each template with the corresponding block name or number to ensure smooth assembly later.
Once you’ve prepared the templates, you’re ready to move on to the next step: cutting the fabric needed for your paper piecing project. Preparing accurate and well-labeled templates will set a solid foundation for a successful and enjoyable paper piecing experience.
Now that you have your templates ready, let’s continue to the next section, where we will discuss how to cut the fabric for your paper piecing project.
Read more: How To Make A Block Quilt
Cutting the Fabric
Now that you have prepared the templates for your paper piecing project, it’s time to cut the fabric pieces that will bring your quilt block to life. Follow these steps to ensure accurate and precise cuts:
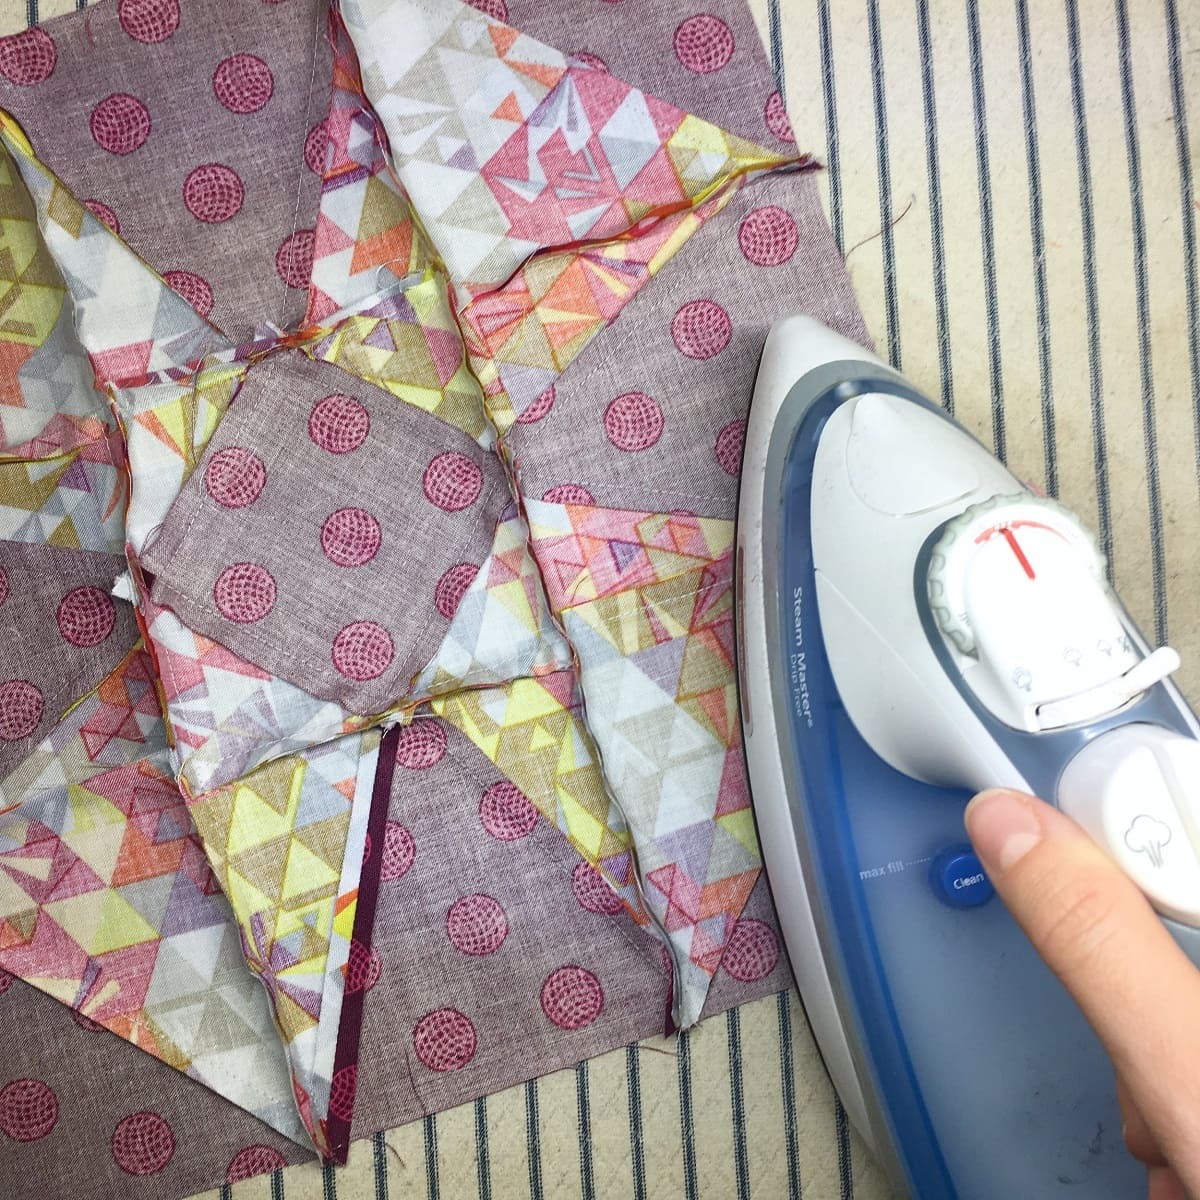
1. Iron the Fabric: Start by ironing your fabric to remove any wrinkles or creases. Pressing the fabric will ensure that you have a smooth and flat surface to work with, allowing for more accurate measurements and cutting.
2. Refer to the Pattern: Consult the pattern instructions to determine the fabric requirements for each section of the block. Pay attention to the number, size, and placement of fabric pieces indicated in the pattern.
3. Measure and Cut: Using the measurements provided in the pattern, use a rotary cutter, a clear acrylic ruler, and a cutting mat to accurately cut the fabric pieces. Align the ruler with the cutting lines on the fabric and make clean, straight cuts. Take care to cut precisely along the seams’ edges, ensuring accurate piecing later on.
4. Label the Fabric Pieces: To avoid confusion during the piecing process, it’s essential to label your fabric pieces. If the pattern doesn’t include labeling instructions, use small pieces of masking tape or write directly on the fabric with a washable fabric marker or pencil. Label each fabric piece with the corresponding section or letter from the template.
5. Organize the Fabric Pieces: As you cut the fabric pieces, it’s helpful to keep them organized. Use small containers or resealable bags to separate and store the fabric pieces for each section or color. This will make it easier to locate the correct pieces when it’s time to sew them onto the templates.
6. Double-Check Measurements: Before moving on to the next fabric piece, double-check the measurements to ensure the accuracy of your cuts. Making accurate cuts is crucial for precise and seamless piecing of the quilt block.
As you cut the fabric for your paper piecing project, remember to handle the fabric pieces with care to avoid stretching or distorting them. Take your time and measure twice to minimize any errors that could impact the final result of your quilt block.
Now that your fabric pieces are ready, it’s time to move on to the next section, where we will discuss the process of assembling the block using paper piecing techniques.
When paper piecing a quilt block, use a smaller stitch length to perforate the paper easily for removal later.
Assembling the Block
Now that you have your fabric pieces cut and labeled, it’s time to start assembling your quilt block using the paper piecing technique. Follow these steps to ensure accurate and precise piecing:
1. Start with Section 1: Begin with the fabric piece labeled for Section 1 of the template. Place the fabric piece on the back (wrong side) of the template, aligning it with the edges and ensuring it covers the entire section.
2. Pin or Secure the Fabric: To hold the fabric securely in place, you can either use pins or wonder clips. Place the pins or clips near the edges of the fabric to ensure it stays in position while sewing.
3. Sew the First Seam: Take another fabric piece labeled for Section 2 and align it with the edge of Section 1, right sides together. Ensure that the edges of the fabric pieces line up precisely. Sew along the seam line between Section 1 and Section 2, starting and ending with a few backstitches to secure the seam.
4. Press and Trim: After stitching the seam, press it open using an iron. Set the seam by pressing it from the back of the template. Trim the excess fabric, leaving a ¼-inch seam allowance along the stitched seam.
5. Continue Adding Fabric Pieces: Repeat the process of adding fabric pieces, sewing along the designated seam lines, pressing the seams open, and trimming the excess fabric. Follow the numerical or alphabetical order indicated on the template until you have covered all sections of the template with fabric.
6. Complete the Final Section: Once you have added fabric pieces to all sections of the template, trim the final piece of fabric, ensuring it extends beyond the edges of the template. This will allow for proper seam allowances when joining multiple blocks or adding borders to your finished quilt.
7. Remove Pins or Clips: Carefully remove the pins or wonder clips from the block to prevent them from getting caught in the sewing machine while stitching subsequent seams.
8. Press the Block: Before removing the block from the template, press it from the back to set the seams and ensure a crisp and flat block. Take extra care not to press directly on the paper template, as it may crumple or distort the shape.
Repeat the above steps for each block you need to complete your quilt. As you gain more experience with paper piecing, you may find ways to streamline the process and work on multiple blocks simultaneously.
Remember, precision and accuracy are key when paper piecing. Take your time, double-check measurements, and ensure that each seam is sewn accurately. The result will be an intricately pieced quilt block that looks stunning and professional.
Now that your block is assembled, it’s time to move on to the next section, where we will discuss the process of removing the paper from the block.
Removing the Paper
After assembling your quilt block using the paper piecing technique, the next step is to remove the paper from the back of the block. Removing the paper not only eliminates bulk but also allows the fabric to drape properly and enhances the overall appearance of the block. Follow these steps to remove the paper:
1. Evaluate the Block: Before removing the paper, take a close look at your quilt block to ensure that all seams are securely stitched and the fabric pieces are well attached. If any seams look weak or loose, reinforce them by stitching over them again before proceeding.
2. Gently Fold Along the Seam Lines: Carefully fold the block along the seam lines, folding it in a way that exposes the paper on the back while keeping the fabric intact. This will create a crease along the seam lines, making it easier to remove the paper without accidentally pulling or distorting the fabric.
3. Start Removing the Paper: Beginning from one corner of the block, gently peel back the paper from the fabric. Use your fingers or a pair of tweezers to loosen any stubborn bits of paper that may be stuck between the stitches. Take your time and be patient while removing the paper to avoid tearing or stretching the fabric.
4. Remove Paper from Each Section: Work systematically, removing the paper from each section of the block. Start with the sections that have the fewest overlapping seams or small pieces. Gradually move on to the more complex sections as you gain confidence in the removal process.
5. Inspect for Remaining Paper: Once you have removed the majority of the paper from the block, inspect it closely for any remaining bits of paper. Pay special attention to areas where multiple seams intersect or small corners where paper fragments may be lodged. Use tweezers or the tip of a pin to gently lift and remove any remaining paper pieces.
6. Press the Block Again: After removing all the paper, press the block once more to ensure that the fabric lies flat. Use a low to medium heat setting on your iron, and press from the back of the block to avoid flattening any decorative seams or fabric textures on the front.
Tip: If you plan to create multiple quilt blocks, it’s a good idea to remove the paper from one block before starting the next. This way, you can reuse the template and save time in the cutting and preparation phases.
By following these steps, you can successfully remove the paper from your quilt block, revealing the beautiful piecing and allowing the fabric to shine. Now that the paper is gone, let’s move on to the next section, where we will discuss the finishing touches and cleaning up after paper piecing.
Finishing and Cleaning Up
With the paper removed from your quilt block, it’s time to add the finishing touches and clean up any remaining traces of paper. Follow these steps to complete your paper piecing project:
1. Trim the Block: Square up the edges of your quilt block using a ruler and rotary cutter. Align the ruler with the finished measurements specified in the pattern instructions and trim the block to ensure it is perfectly square and the correct size.
2. Add Borders (Optional): If desired, you can add borders to your quilt block to frame and enhance the design. Measure the sides of your block and cut fabric strips to the desired width for the borders. Sew the borders to the edges of the block, ensuring they are properly aligned and not stretching the block out of shape.
3. Press the Block: Give your block a final press from the front side to set the seams and create a polished finish. Use a low to medium heat setting on your iron and always press from the fabric side to avoid flattening any decorative seams or fabric textures.
4. Clean Up: After completing your paper piecing project, it’s time to clean up your workspace. Discard any remaining bits of paper scraps, trimmings, or thread snippets. Put away your tools and materials properly, making sure they are organized and ready for your next project.
5. Inspect the Block: Take a moment to carefully inspect your finished block. Check for any loose threads, missed stitches, or fabric distortions. If needed, make any necessary repairs or adjustments before moving on to incorporating the block into your larger quilt design.
6. Store or Display: Depending on your next steps, store your completed block in a safe place, keeping it flat to avoid any creasing or damage. Alternatively, if you plan to display the block or use it as a sample for future references, consider framing it or displaying it in a quilt block hanger for others to admire.
With the finishing touches in place and your workspace tidied up, you have successfully completed your paper piecing project. Give yourself a pat on the back for creating a meticulously pieced and beautifully designed quilt block.
Now that you have a grasp of the paper piecing technique and how to complete a block, you can move forward with more complex patterns and designs. With practice and experience, you’ll become even more confident and skilled in paper piecing.
As you embark on future projects, don’t forget to enjoy the process and embrace the creativity that paper piecing offers. Happy quilting!
Read more: How To Make Snowball Quilt Block
Tips and Troubleshooting
As with any quilting technique, paper piecing comes with its own set of tips and potential challenges. Here are some helpful tips and troubleshooting advice to improve your paper piecing experience:
1. Start Small: If you’re new to paper piecing, begin with simpler patterns and smaller blocks to build your skills and confidence. As you become more comfortable with the technique, you can gradually take on more complex projects.
2. Use a Smaller Stitch Length: When paper piecing, using a smaller stitch length (around 1.8 or 2.0) can make it easier to remove the paper later on. The shorter stitches also provide more durability to the seams.
3. Finger-Press before Ironing: Finger-pressing the seams as you go can help set the stitches and reduce bulk. Before using an iron, run your finger along the seam lines to create a crease. This will make it easier to press the seams open or to the side.
4. Consider Reinforcement Stitches: In areas with multiple intersecting seams or where fabric pieces may be under stress, add reinforcement stitches. Sew a few extra stitches over those sections to ensure they stay securely in place.
5. Sewing Machine Needle Position: Adjust your sewing machine’s needle position, if possible, to align with the quarter-inch seam allowance. This will help you stitch accurately along the seam lines and achieve consistent seam allowances.
6. Color-Code or Label Fabric Pieces: Keep track of your fabric pieces by using color-coded pins or labels. This will make it easier to identify which fabric is supposed to go where, especially when working with intricate patterns.
7. Stay Organized: Keep your workspace organized by using small containers, bags, or trays to sort and store your fabric pieces, templates, and notions. This will save you time and minimize the risk of misplacing important items.
8. Test with Scrap Fabric: Before sewing fabric onto the actual templates, do a test run with scrap fabric to familiarize yourself with the pattern, templates, and construction process. This will help identify any potential issues and allow you to make adjustments without wasting precious fabric.
Troubleshooting:
Problem: Fabric shifting during sewing.
Solution: Use pins, wonder clips, or fabric glue to hold the fabric pieces securely in place before sewing. Sew slowly and carefully to prevent fabric movement.
Problem: Template tearing or warping.
Solution: Use a sturdy paper or foundation template and handle it gently to avoid tearing. Consider using a light spray adhesive to temporarily adhere the fabric to the paper, providing more stability during sewing.
Problem: Difficulty removing the paper.
Solution: Score the paper along the seam lines with a straight pin before attempting to remove it. This will help weaken the paper fibers and make it easier to peel away without pulling on the fabric.
Problem: Uneven or inconsistent seam allowances.
Solution: Use a ruler with a quarter-inch marking to guide your fabric placement and maintain consistent seam allowances. Take your time and double-check the seam allowance before sewing each fabric piece.
Remember, practice makes perfect, and each paper piecing project is an opportunity to improve your skills. Don’t be discouraged by mistakes or challenges along the way. Learn from them and embrace the learning process.
Now armed with these tips and troubleshooting solutions, you are ready to take on your next paper piecing project with confidence and creativity.
Congratulations on your journey into the art of paper piecing, and happy quilting!
Conclusion
Congratulations on completing this comprehensive guide to paper piecing! You now have a solid understanding of the technique, along with step-by-step instructions, tips, and troubleshooting advice to help you create stunning and precise quilt blocks. Whether you’re a beginner or an experienced quilter, paper piecing offers endless possibilities for designing unique and intricate blocks.
Throughout this journey, we explored the definition of paper piecing and its advantages, such as the ability to achieve sharp angles and intricate designs. We also covered the essential tools and materials you’ll need, including fabric, foundation paper, cutting tools, and a sewing machine.
You learned how to choose a pattern that aligns with your skill level, design preferences, and desired block size. We also discussed the importance of properly preparing the templates and accurately cutting the fabric to ensure precise piecing.
With the step-by-step guidance provided, you gained the knowledge of how to assemble the block by sewing fabric onto the templates, and how to remove the paper once the block is complete, resulting in a professional-looking and visually stunning piece.
We also provided tips and troubleshooting advice to enhance your paper piecing experience, such as starting small, using precise stitch lengths, and staying organized. Additionally, we offered solutions to common challenges, including fabric shifting, template tearing, and uneven seam allowances.
Now, armed with these insights and skills, you’re ready to embark on your own paper piecing adventures. Whether you create intricate quilt blocks for a quilt top, incorporate them into smaller projects, or explore your creativity with unique designs, paper piecing will surely elevate your quilting repertoire.
Remember, practice and patience are key. As you continue to delve into the world of paper piecing, allow yourself the freedom to experiment and explore different patterns, fabrics, and color combinations. With each project, you’ll refine your skills and develop your own signature style.
Enjoy the process of bringing your vision to life, and don’t forget to celebrate your accomplishments along the way. Quilting is not just about the finished product; it’s about the joy, satisfaction, and sense of accomplishment you experience throughout the journey.
So, grab your sewing machine, embrace your creativity, and dive into the wonderful world of paper piecing. Quilting awaits you with open arms, ready to welcome you into an artistic and fulfilling endeavor.
Frequently Asked Questions about How To Paper Piece A Quilt Block
Was this page helpful?
At Storables.com, we guarantee accurate and reliable information. Our content, validated by Expert Board Contributors, is crafted following stringent Editorial Policies. We're committed to providing you with well-researched, expert-backed insights for all your informational needs.


0 thoughts on “How To Paper Piece A Quilt Block”