
Articles
How To Put A 9V Battery In A Smoke Detector
Modified: February 24, 2024
Learn how to properly install a 9V battery in a smoke detector with our step-by-step guide. Read our informative articles for more helpful tips and advice.
(Many of the links in this article redirect to a specific reviewed product. Your purchase of these products through affiliate links helps to generate commission for Storables.com, at no extra cost. Learn more)
Introduction
Welcome to our comprehensive guide on how to put a 9V battery in a smoke detector. Smoke detectors are crucial safety devices that help protect you and your loved ones from the dangers of fire. Regularly checking and replacing the batteries in your smoke detectors is essential to ensure they are functioning properly.
In this article, we will walk you through the step-by-step process of inserting a 9V battery in a smoke detector. Whether you’re a new homeowner or simply need a refresher, this guide will provide you with all the necessary information to complete this task safely and effectively.
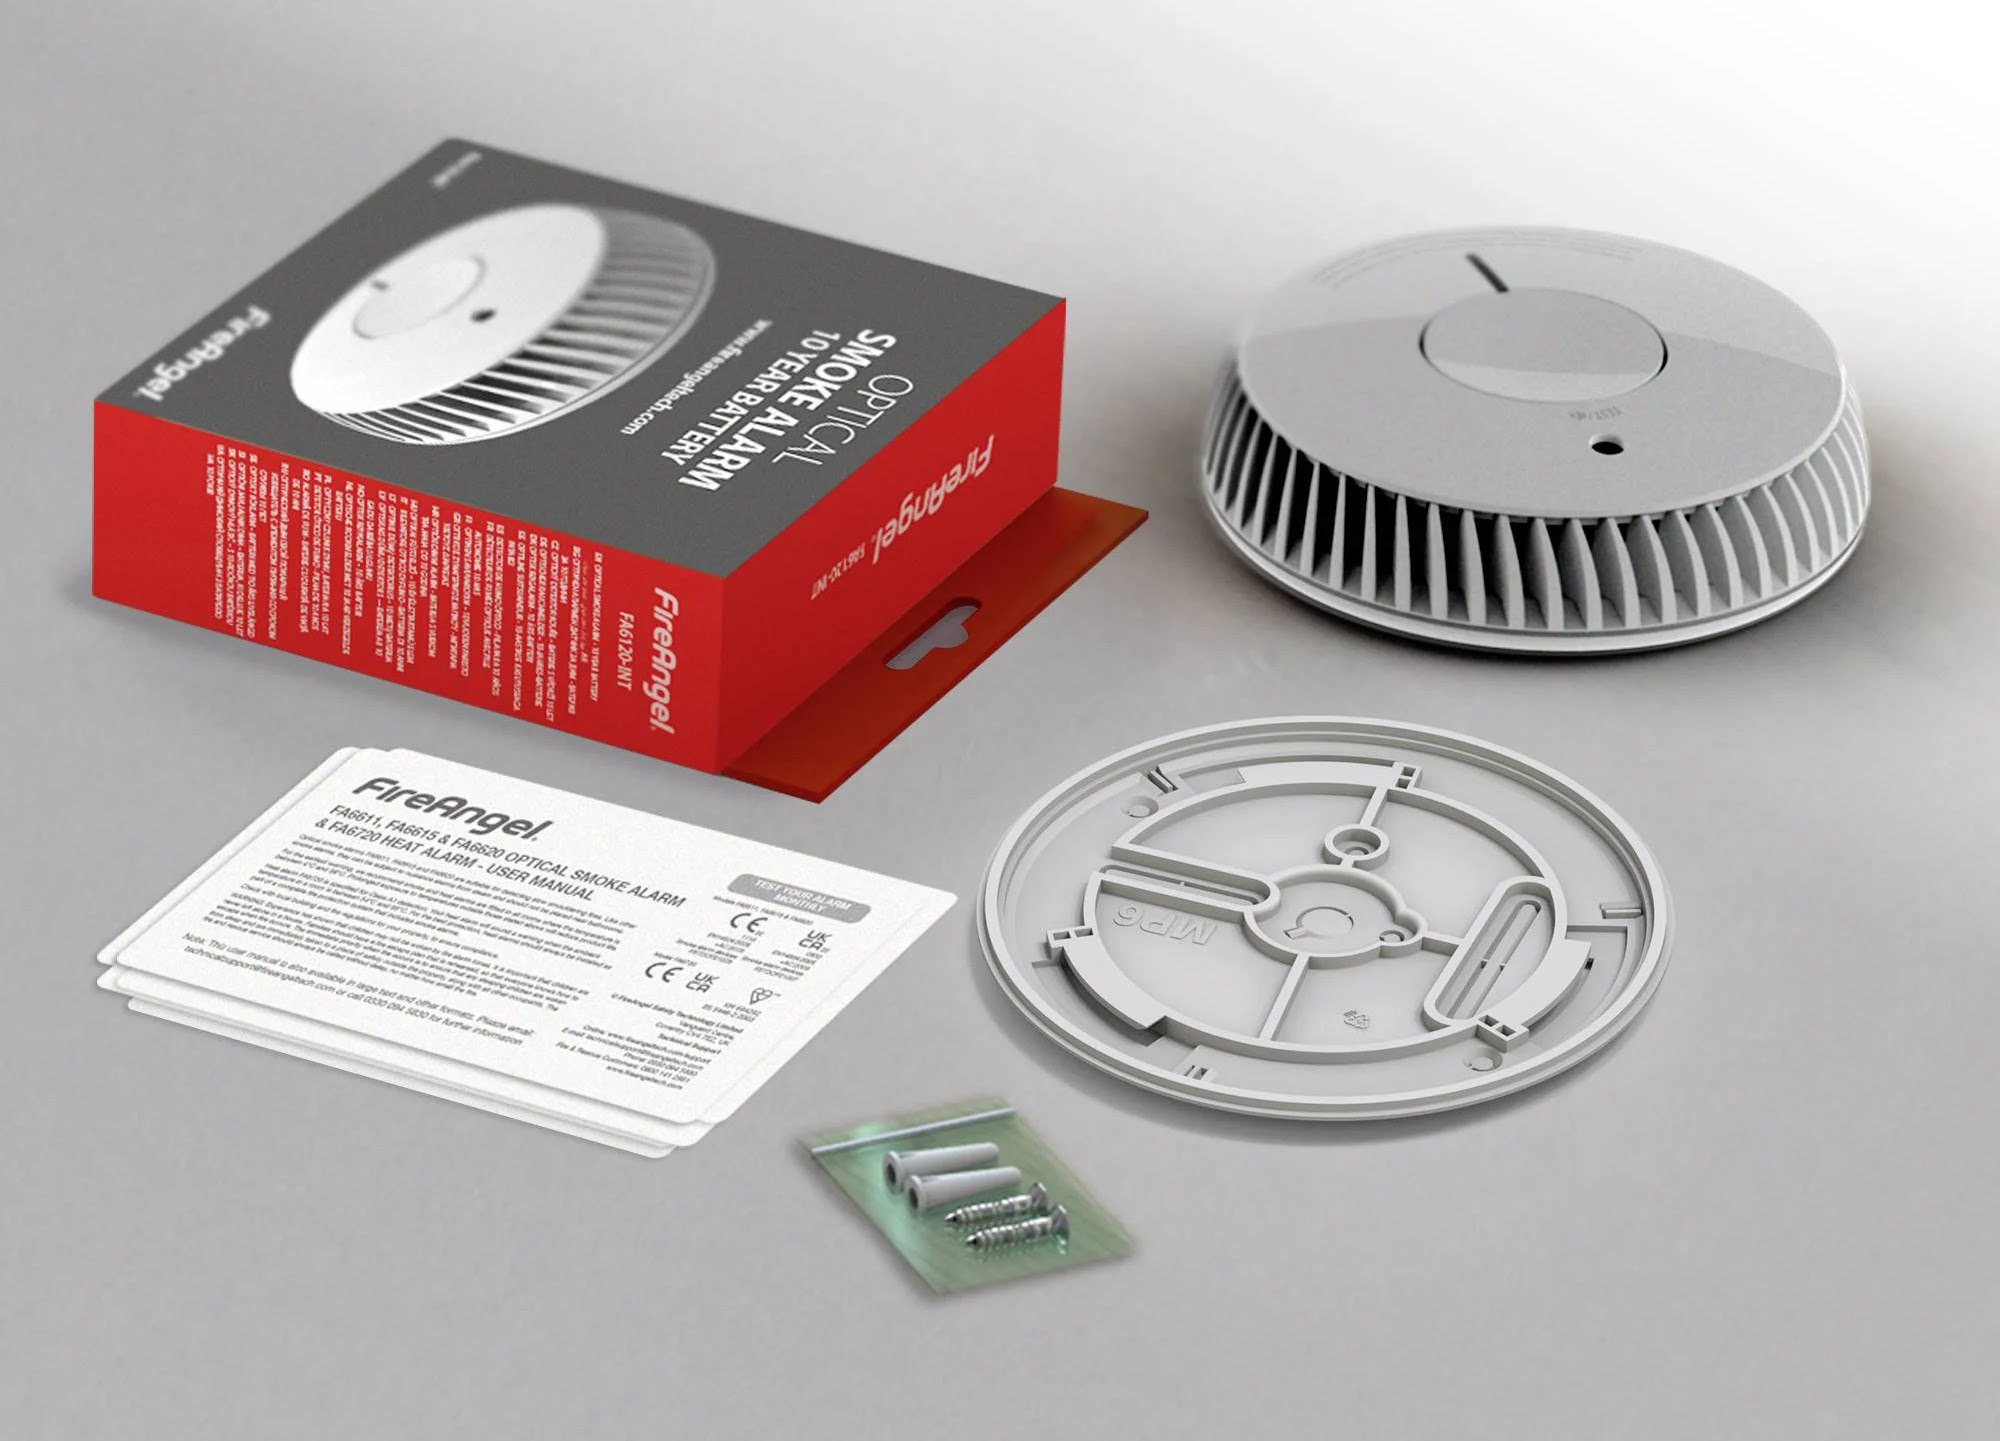
Before we dive into the steps, let’s highlight the tools you will need for this process:
Tools Required:
- A new 9V battery
- A small step stool or ladder (if needed)
Once you have gathered these tools, you’ll be ready to begin the process. Remember, it’s important to take your time and exercise caution throughout the process to avoid any accidents or damage to the smoke detector.
Now, let’s move on to the first step: Gathering the necessary tools.
Key Takeaways:
- Regularly testing and replacing the 9V battery in your smoke detector is crucial for home safety. Follow our comprehensive guide to ensure proper functionality and protect your loved ones from fire hazards.
- Gather the necessary tools, locate the smoke detector, and handle the 9V battery with care to maintain a robust fire safety system in your home. Regular testing and maintenance are essential for maximum protection.
Step 1: Gathering the necessary tools
Before you start the process of changing the battery in your smoke detector, it’s important to gather all the necessary tools. Having everything you need at hand will help streamline the process and minimize the chances of encountering any issues along the way.
Here are the tools you will need:
- A new 9V battery: Make sure you have a fresh 9V battery on hand before starting the process. It’s important to use a high-quality battery to ensure the long-term functionality of your smoke detector.
- A small step stool or ladder (if needed): Depending on the placement of your smoke detector, you may require a small step stool or a ladder to reach it safely. Ensure that the ladder or step stool is sturdy and positioned on a level surface before climbing on it.
By ensuring that you have all the necessary tools ready before starting, you will be able to complete the process smoothly and without any unnecessary delays.
Once you have gathered the tools, it’s time to move onto the next step: Locating the smoke detector.
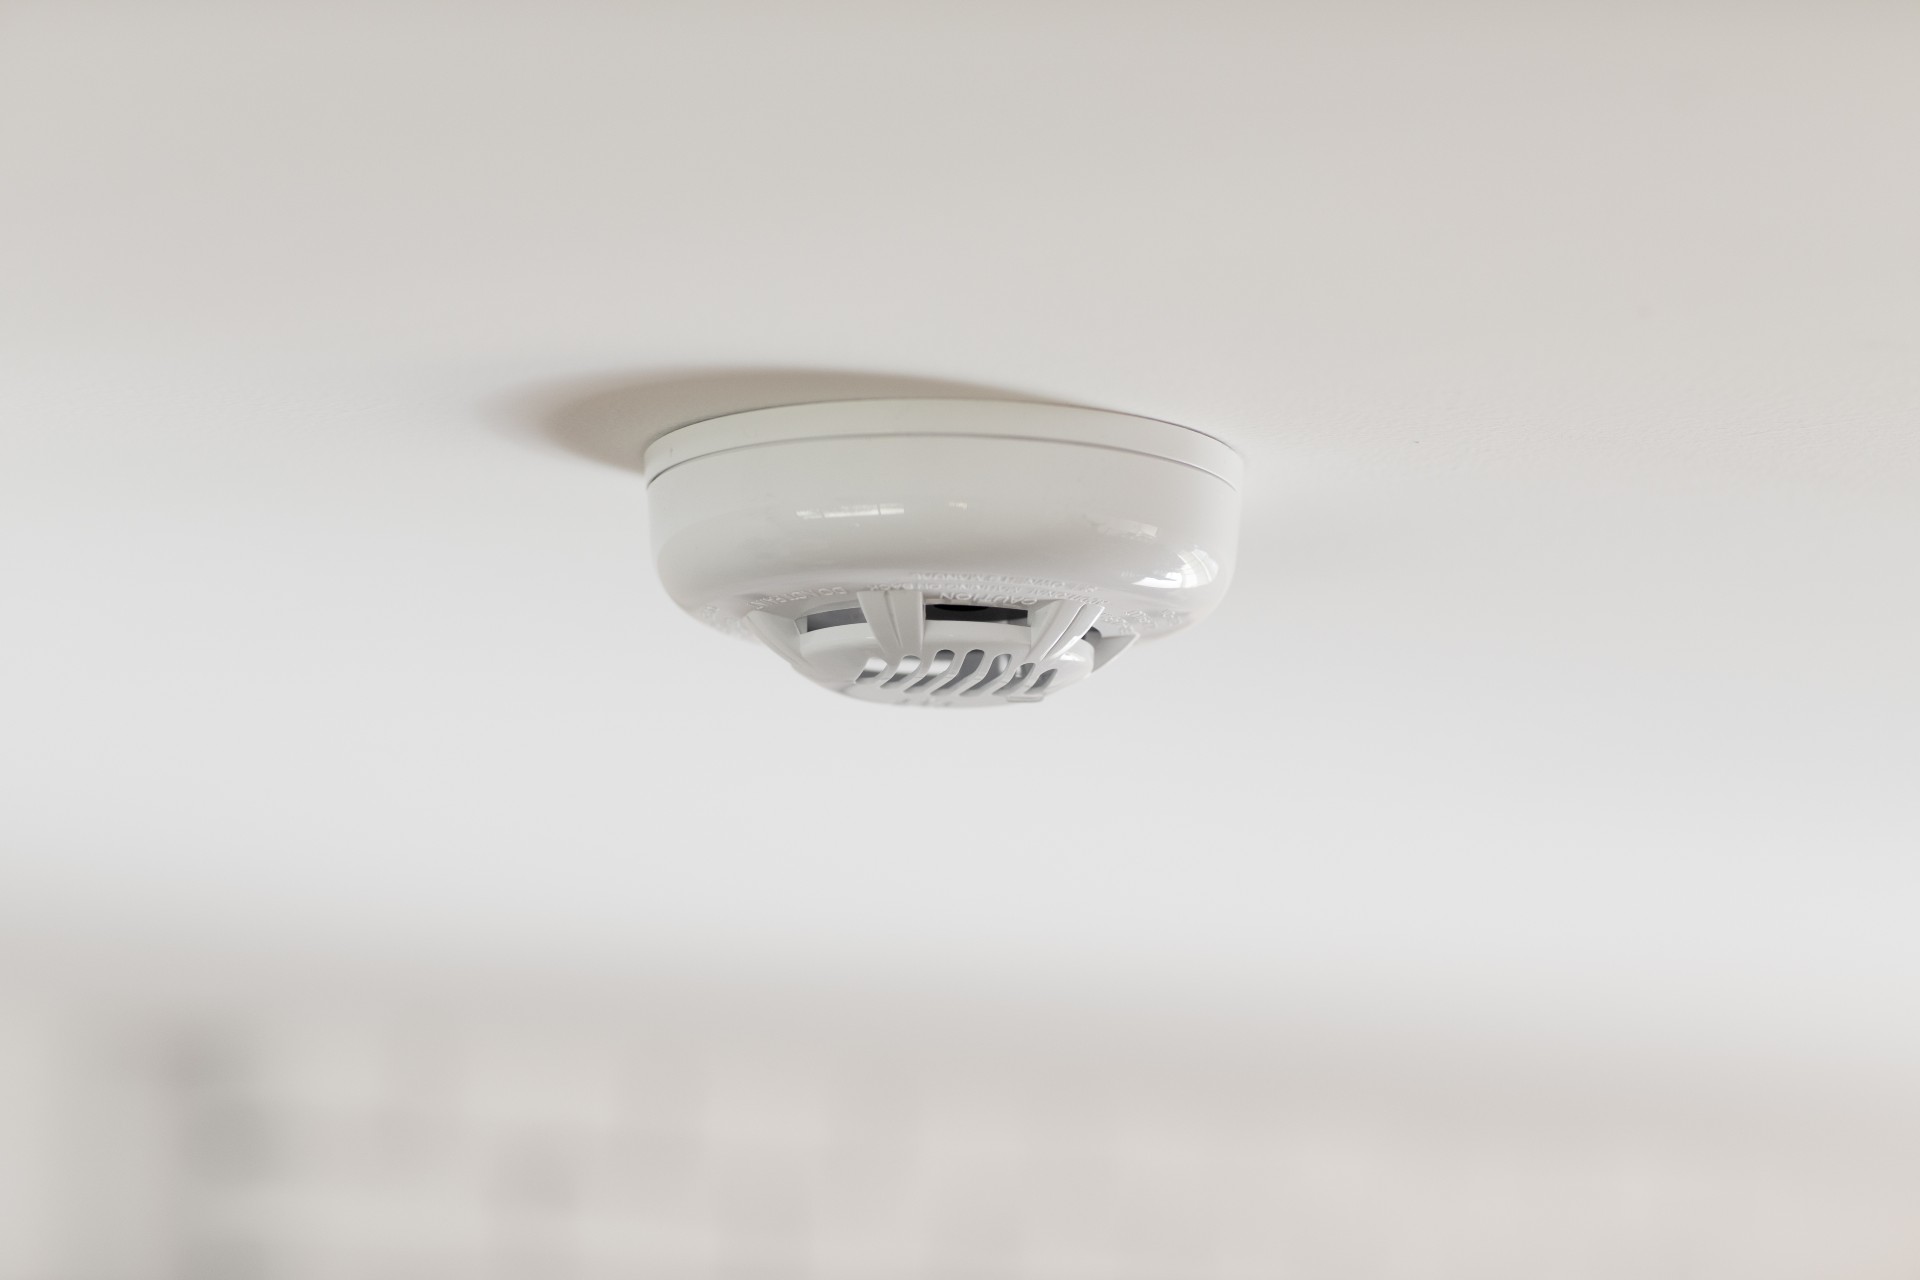
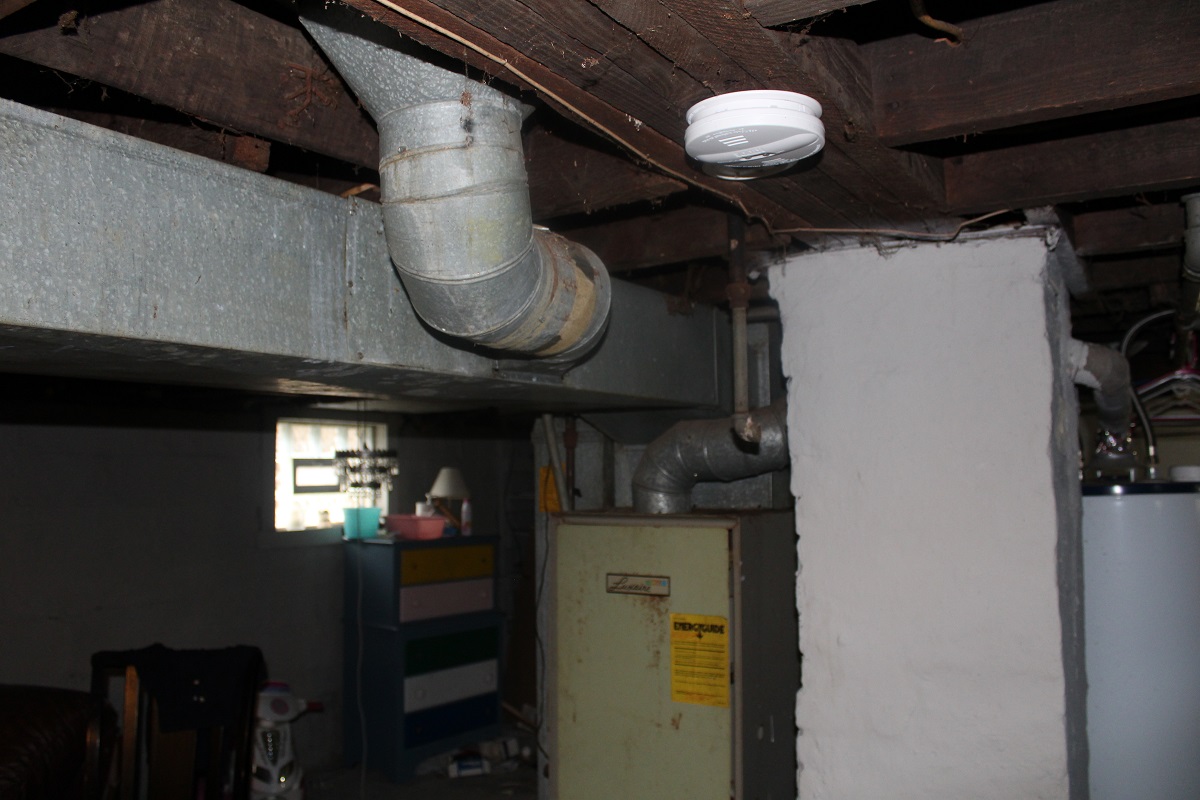
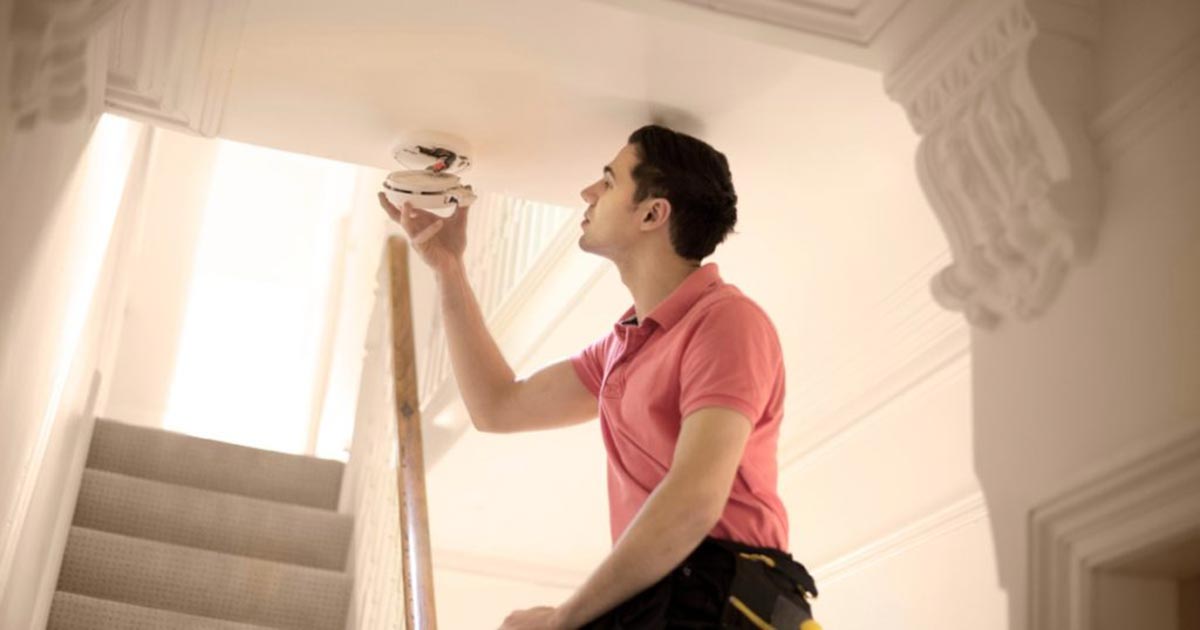
Step 2: Locating the smoke detector
Before you can insert the 9V battery into your smoke detector, you need to locate where it is installed. Smoke detectors are commonly installed on the ceiling or high on the walls, usually in hallways or bedrooms. Take a moment to familiarize yourself with the layout of your home and identify the smoke detector(s) you will be working with.
If you have multiple smoke detectors in your home, make a note of their locations to ensure you check and replace the batteries in all of them. It’s crucial to maintain a functional battery in all of your smoke detectors to provide maximum safety coverage throughout your home.
If you are uncertain about the location of your smoke detectors, here are some common areas to check:
- In the hallway close to bedrooms
- Near the kitchen
- In the living room or common areas
Once you have located the smoke detector, position yourself safely to access it. If you need a step stool or ladder to reach the smoke detector, ensure that it is set up securely on a level surface.
Now that you have located the smoke detector, it’s time to move on to the next step: Opening the smoke detector.
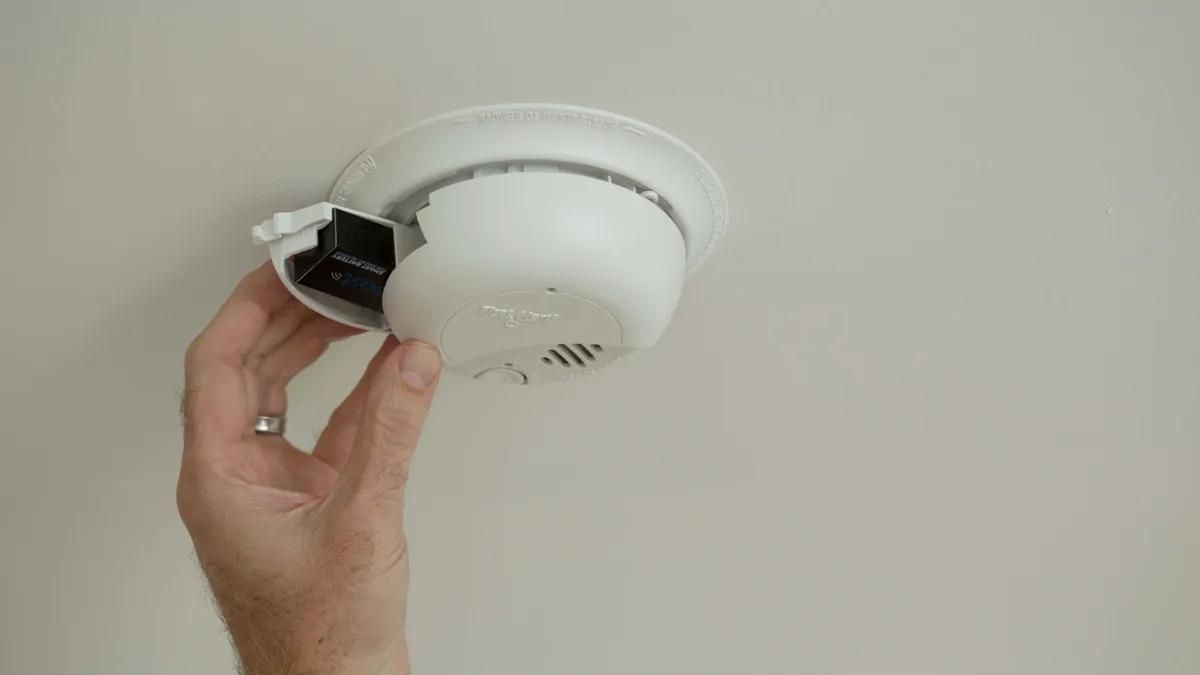
Step 3: Opening the smoke detector
In order to access the battery compartment of your smoke detector, you will need to open it. The process of opening the smoke detector may vary depending on the model you have, but the general steps are quite similar.
Before you begin, make sure to turn off the power to the smoke detector. This can usually be done by switching off the circuit breaker that controls the smoke detector or by removing the main battery if it is a hardwired unit.
Here are the general steps to open a smoke detector:
- Inspect the smoke detector for any screws or latches. Some smoke detectors have a small screw or latch that needs to be removed or released to open the unit.
- If there are screws, use a screwdriver to carefully remove them. Place the screws in a safe place to avoid misplacing them.
- If there are latches, press or release them to open the smoke detector. Be gentle to avoid causing any damage to the unit.
- Slowly separate the smoke detector components to reveal the battery compartment. The battery compartment is usually located in the back or bottom of the unit.
Once you have successfully opened the smoke detector, you will be able to proceed to the next step: Identifying the battery slot.
Remember to handle the smoke detector with care and avoid applying excessive force while opening it. If you encounter any difficulties or if the smoke detector is sealed or inaccessible, refer to the manufacturer’s instructions or seek professional assistance.
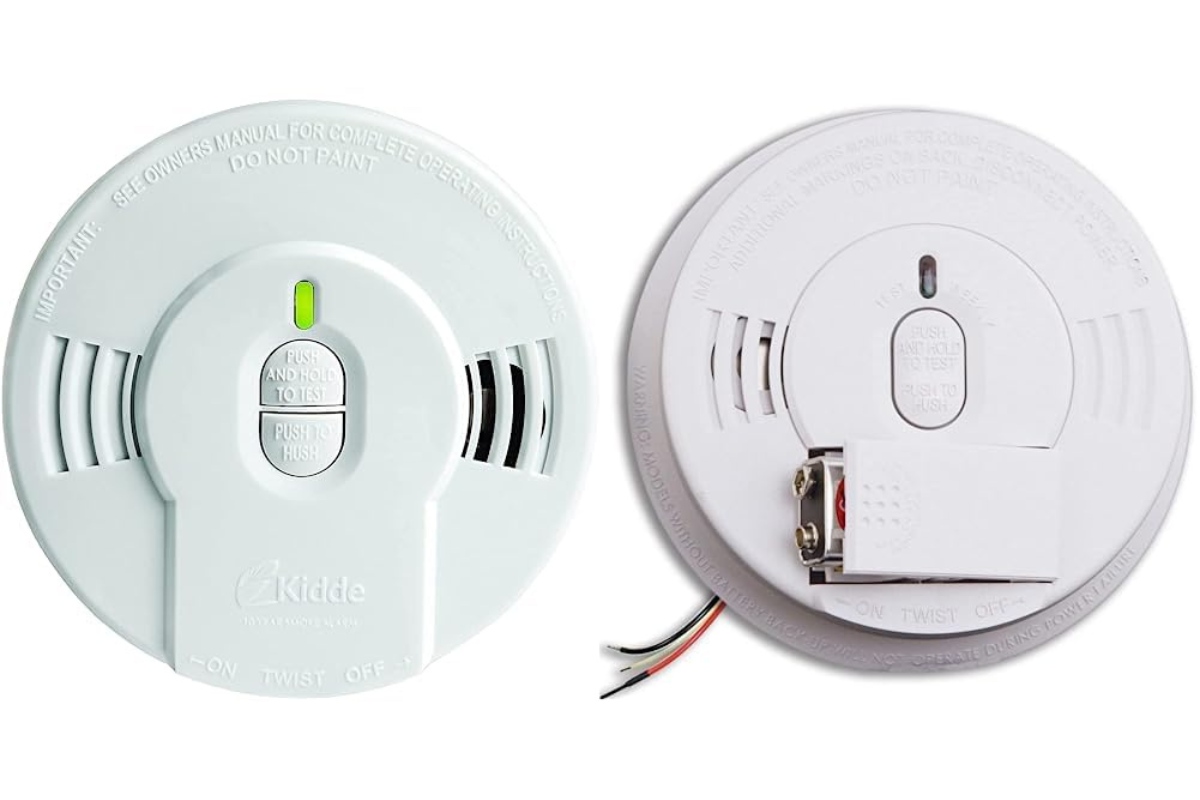
Step 4: Identifying the battery slot
After successfully opening the smoke detector, it’s time to identify the battery slot. The battery slot is where you will insert the new 9V battery to power the smoke detector.
Here are the steps to identify the battery slot:
- Inspect the interior of the smoke detector for a clearly marked battery compartment. The battery compartment is usually a small rectangular or square-shaped compartment.
- Look for any icons or labels indicating the correct orientation of the battery. Most smoke detectors have markings that show which side of the battery should face up or down.
- Take note of any additional instructions provided by the manufacturer. Some smoke detectors may have specific guidelines for inserting the battery.
If you encounter any difficulties in identifying the battery slot or understanding the orientation of the battery, refer to the user manual or instructions provided by the manufacturer. These resources will provide you with detailed information on the specific model of your smoke detector.
Once you have identified the battery slot and understand the correct orientation of the battery, you are ready to move on to the next step: Inserting the 9V battery.
Remember, it’s important to handle the battery with care and avoid touching the metal terminals to prevent any damage or interference with the functionality of the battery and smoke detector.
When replacing the 9V battery in a smoke detector, always follow the manufacturer’s instructions for proper installation. Make sure the battery is inserted with the correct polarity (+ and -) to ensure the detector functions correctly.
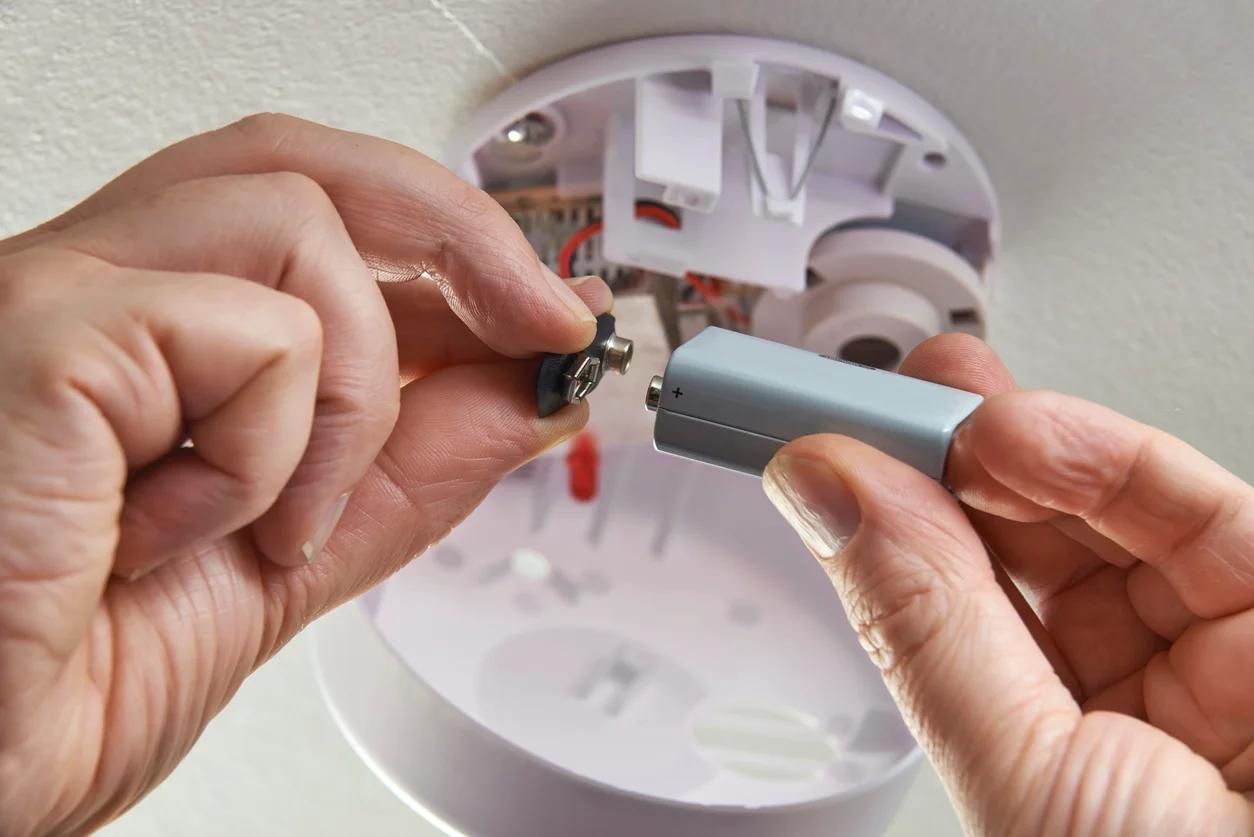
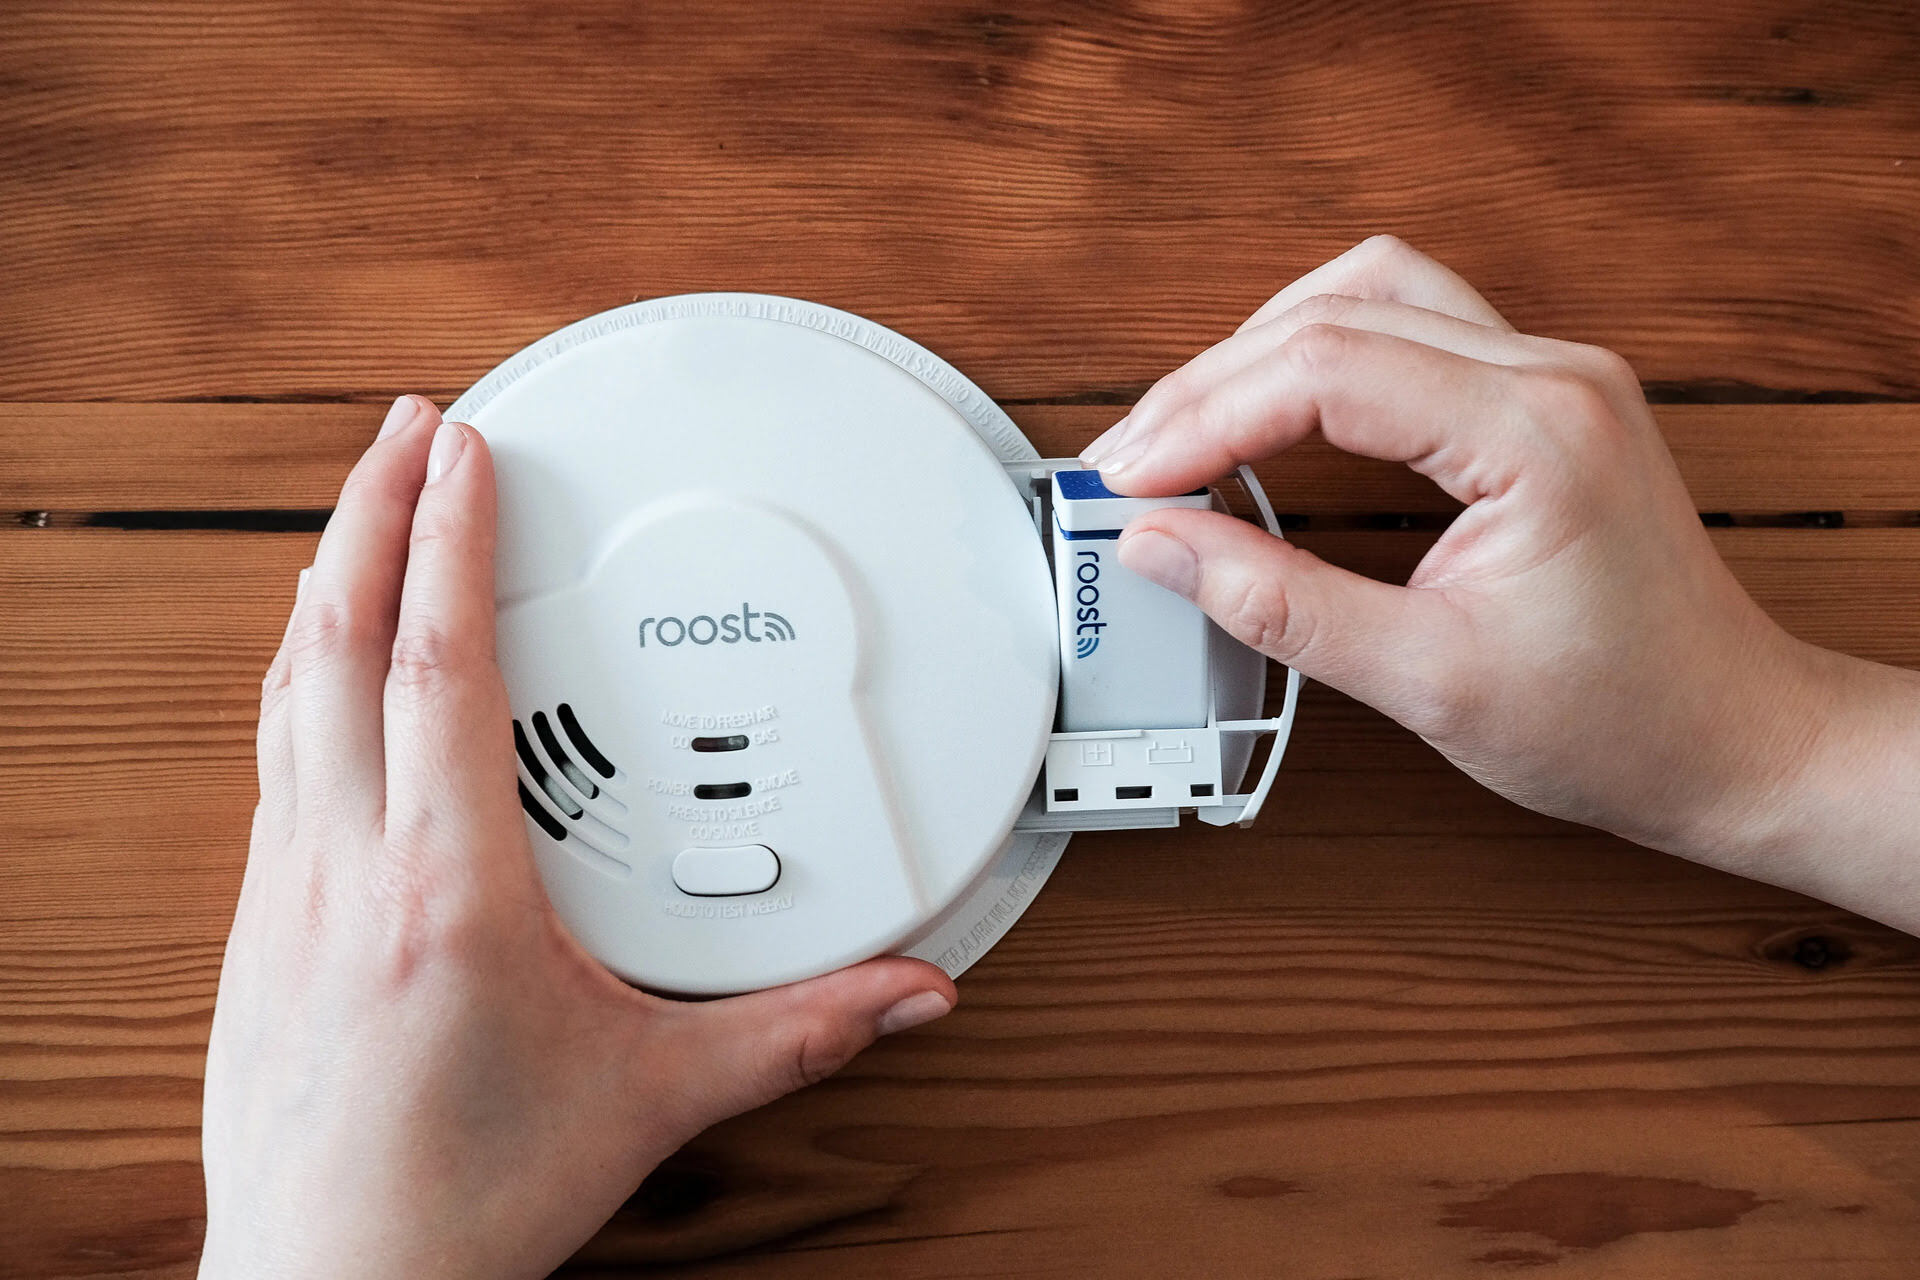
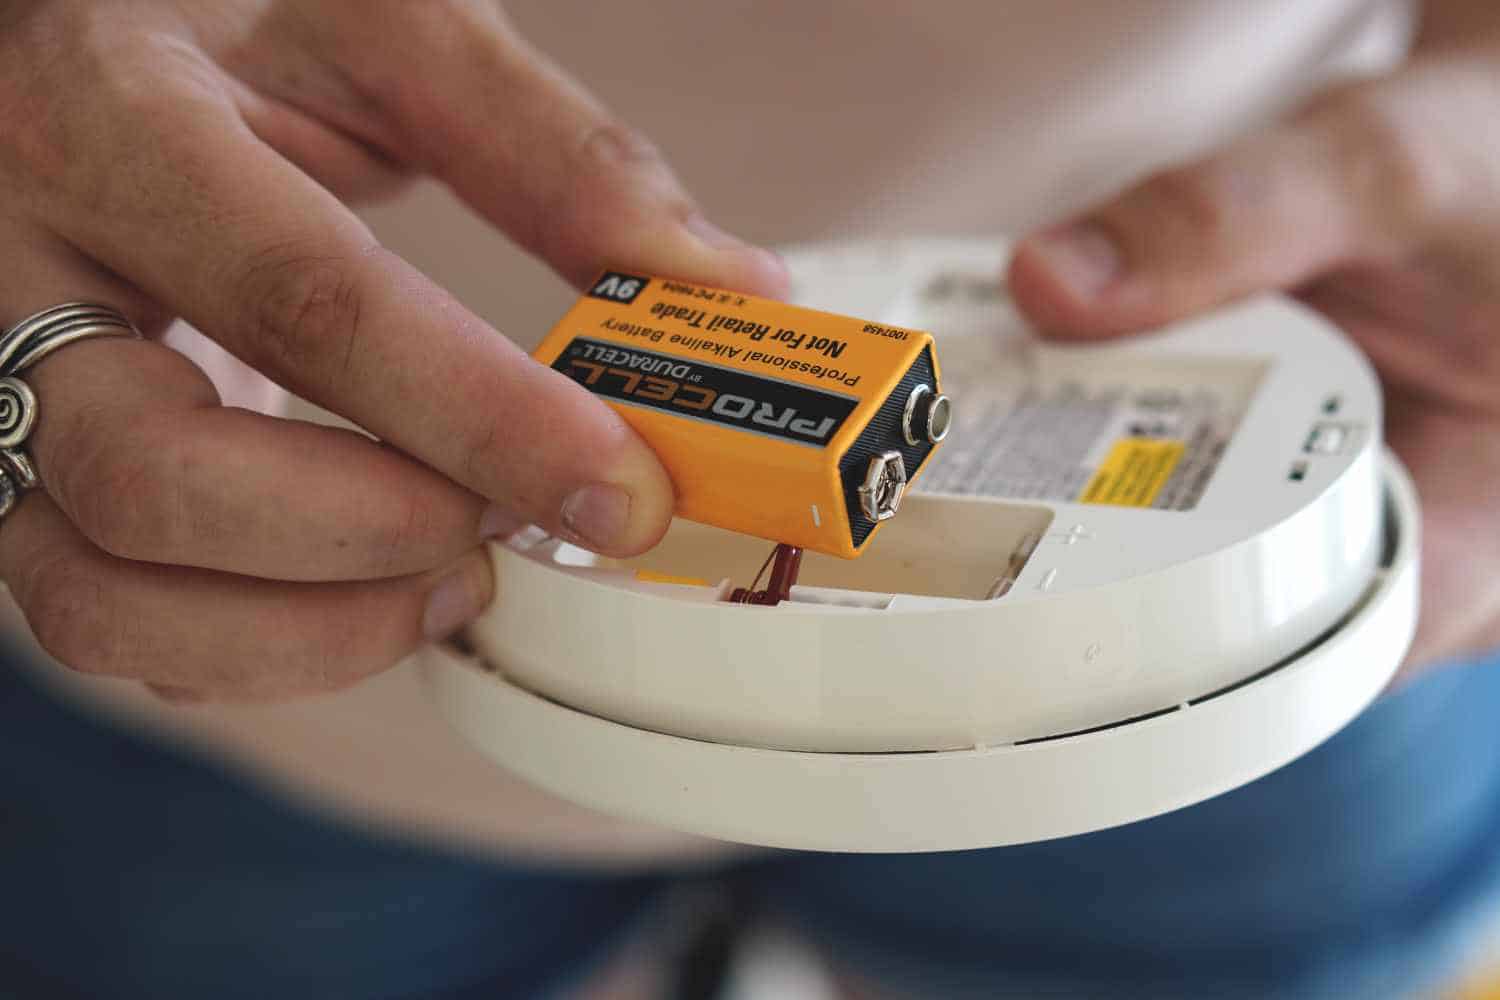
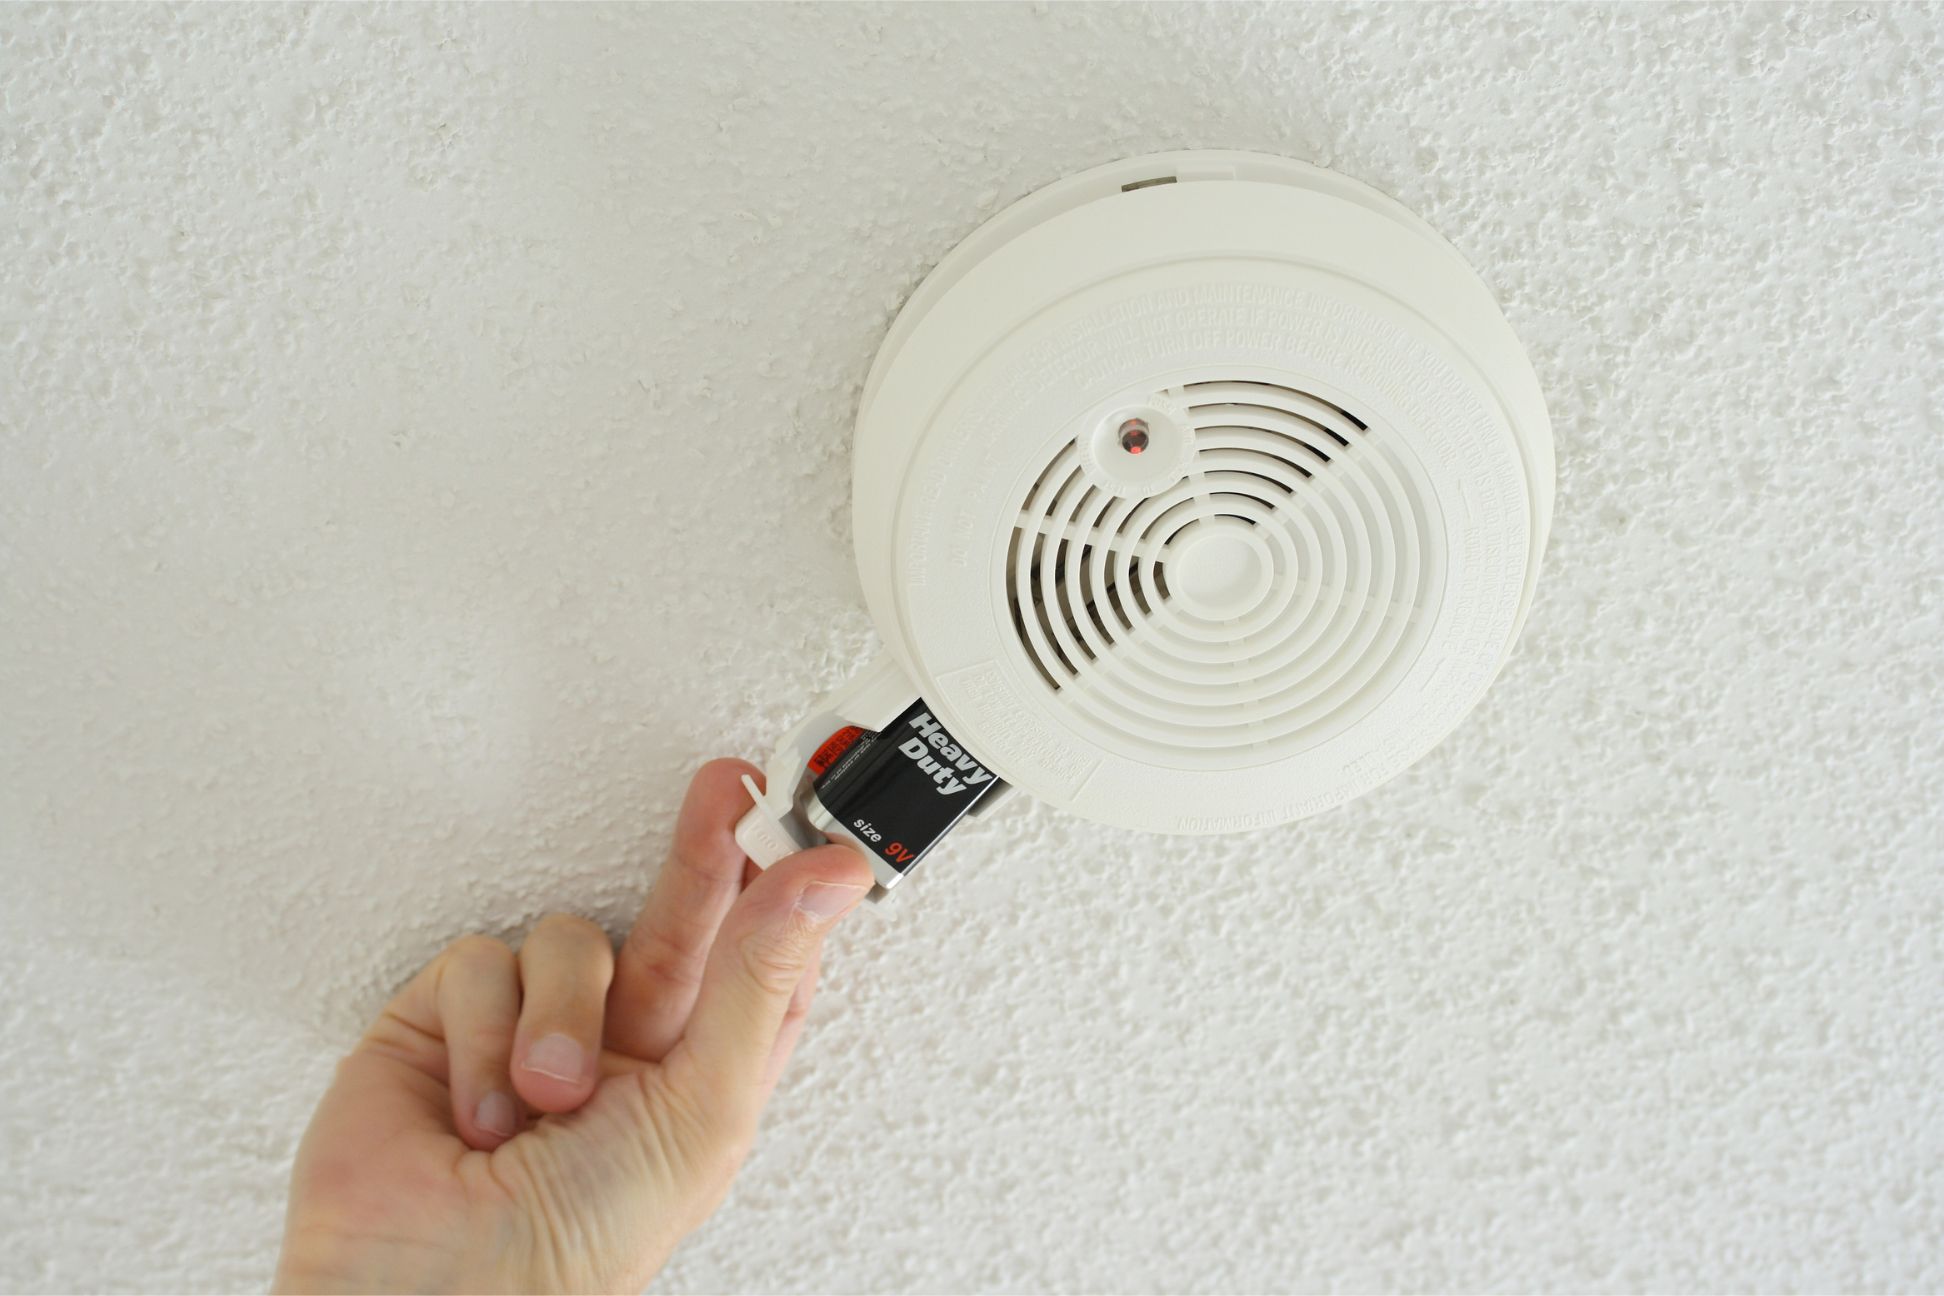
Step 5: Inserting the 9V battery
Now that you have located the battery slot and understand the correct orientation, it’s time to insert the new 9V battery into your smoke detector. Follow these steps to complete this process:
- Ensure that the smoke detector is still powered off. If you accidentally turned it on while identifying the battery slot, switch it back off.
- Take the new 9V battery and position it correctly according to the markings or icons inside the battery compartment. Make sure the positive (+) and negative (-) terminals align with the corresponding markings.
- Gently insert the battery into the compartment, ensuring a secure fit. Be careful not to force the battery as it may damage the terminals or the compartment itself. If the battery does not fit easily, double-check the orientation and try again.
- Once the battery is properly inserted, you can close the battery compartment. Align the components of the smoke detector and carefully press them together until they click or latch securely.
It’s worth noting that some smoke detectors may have additional mechanisms or buttons to press or release in order to fully secure the battery compartment. Refer to the manufacturer’s instructions if you encounter any additional steps or difficulties during this process.
With the 9V battery inserted correctly and the battery compartment closed, you can move on to the next step: Closing the smoke detector.
Remember, safety should always be the top priority. If you have any concerns or questions about the process, consult the manual or seek professional assistance.
Step 6: Closing the smoke detector
After successfully inserting the 9V battery and ensuring that it is securely positioned in the battery compartment, it’s time to close the smoke detector. Closing the smoke detector properly is important to maintain its integrity and functionality.
Follow these steps to close the smoke detector:
- Align the different components of the smoke detector carefully. Ensure that the battery compartment lines up properly with the rest of the unit.
- Gently press the components of the smoke detector together until you hear a click or notice that they latch securely. This indicates that the smoke detector is closed and sealed.
- Double-check the smoke detector to ensure that there are no gaps or loose parts. A properly closed smoke detector should be secure and snug without any obvious signs of damage or misalignment.
- If your smoke detector has screws, use a screwdriver to reattach them to the smoke detector. Make sure the screws are tightened but not overly tightened to avoid damaging the unit.
Once you have closed the smoke detector, take a moment to inspect it and ensure that it appears intact and functional. If you notice any signs of damage or if the smoke detector does not close properly, refrain from using it and consider seeking professional assistance or replacing the unit.
With the smoke detector closed and secure, it’s time for the final step: testing the smoke detector to ensure proper functionality.
Remember, safety should always be your priority. Take your time and be cautious while closing the smoke detector to avoid any accidents or damage.
Step 7: Testing the smoke detector
After completing the process of inserting the 9V battery and closing the smoke detector, it’s important to test the smoke detector to ensure that it is functioning properly. Testing the smoke detector regularly is essential to ensure the safety of your home and loved ones.
Follow these steps to test your smoke detector:
- Ensure that the battery compartment is securely closed and that the smoke detector is properly installed in its designated location.
- Locate the “test” button on the smoke detector. This button is usually labeled and easily identifiable.
- Press and hold the test button for a few seconds until you hear a loud alarm sound. This is a simulated test of the smoke detector’s functionality.
- Listen for the alarm to sound loudly and consistently. If the alarm sounds weak or muffled, it could be an indication of a low battery or a problem with the smoke detector itself.
- If the alarm sounds strongly and clearly, be assured that your smoke detector is functioning properly. If not, you may need to check the battery connection or consider purchasing a new smoke detector.
- After testing the smoke detector, use the reset button (if available) to stop the alarm or wait for it to automatically reset.
It is recommended to test your smoke detector on a monthly basis and replace the batteries annually or as recommended by the manufacturer. This regular maintenance ensures that the smoke detector is always in working order.
By testing your smoke detector regularly and replacing the batteries when necessary, you are taking proactive steps to safeguard your home and family from the risk of fire.
Congratulations! You have successfully completed the process of putting a 9V battery in a smoke detector and ensuring its proper functionality. Regularly checking and maintaining your smoke detectors is a crucial step in ensuring the safety of your home and loved ones.
If you have multiple smoke detectors in your home, make sure to repeat these steps for each one to maintain a comprehensive fire safety system throughout your residence.
Remember, it is essential to follow the manufacturer’s instructions specific to your smoke detector model. If you have any concerns or issues, don’t hesitate to consult the user manual or seek professional assistance.
Thank you for taking the time to read this comprehensive guide. Stay safe!
Read more: How To Store 9V Batteries
Conclusion
Ensuring that your smoke detectors are equipped with fresh and functioning batteries is a critical step in maintaining the safety of your home. In this comprehensive guide, we have walked you through the step-by-step process of putting a 9V battery in a smoke detector.
We started by gathering the necessary tools, which include a new 9V battery and a small step stool or ladder if needed. We then discussed the importance of locating the smoke detector and how to identify its position in your home.
Next, we explained how to safely open the smoke detector, identifying the battery slot, and orienting the battery correctly. We emphasized the importance of handling the battery with care and avoiding any damage to the smoke detector.
After inserting the 9V battery, we guided you through the process of closing the smoke detector and ensuring a secure fit. We emphasized the significance of checking for any gaps or loose parts and properly securing the components.
Finally, we emphasized the importance of regularly testing your smoke detector to ensure its proper functionality. We provided clear instructions on how to test the alarm and recognize any potential issues. Regular testing and maintenance are vital for a robust fire safety system in your home.
We hope that this guide has provided you with the knowledge and confidence to properly put a 9V battery in your smoke detector. By following these steps and conducting regular maintenance, you are taking proactive measures to protect your home and loved ones from the dangers of fire.
Remember, safety should always be your top priority. If you encounter any difficulties or have concerns during this process, consult the manufacturer’s instructions or seek professional assistance.
Thank you for following this guide, and stay safe!
Frequently Asked Questions about How To Put A 9V Battery In A Smoke Detector
Was this page helpful?
At Storables.com, we guarantee accurate and reliable information. Our content, validated by Expert Board Contributors, is crafted following stringent Editorial Policies. We're committed to providing you with well-researched, expert-backed insights for all your informational needs.

0 thoughts on “How To Put A 9V Battery In A Smoke Detector”