Home>Articles>How To Change The Battery In A CPI Smoke Detector
Articles
How To Change The Battery In A CPI Smoke Detector
Modified: August 22, 2024
Learn how to change the battery in a CPI smoke detector with our informative articles. Keep your home safe and secure with our step-by-step guide.
(Many of the links in this article redirect to a specific reviewed product. Your purchase of these products through affiliate links helps to generate commission for Storables.com, at no extra cost. Learn more)
Introduction
Welcome to our comprehensive guide on how to change the battery in a CPI smoke detector. Smoke detectors are essential safety devices that provide early warning in the event of a fire, allowing you and your loved ones to escape to safety. Regularly replacing the batteries in your smoke detector is crucial to ensure the device functions properly and provides reliable protection for your home.
In this article, we will walk you through the step-by-step process of changing the battery in a CPI smoke detector. By following these instructions, you can ensure that your smoke detector remains in optimal working condition, providing you with peace of mind.
Before we begin, it’s important to note that CPI smoke detectors come in different models, so the specific steps may vary slightly depending on the type of detector you own. However, the general principles and guidelines outlined in this article should apply to most CPI smoke detector models.
Before you start, it’s essential to prioritize safety. Make sure you follow all safety procedures and take necessary precautions to minimize any risks. If you are unsure or uncomfortable with the process, it’s always best to consult a professional.
Now, let’s gather the tools and materials you’ll need for this task.
Key Takeaways:
- Regularly replacing the battery in your CPI smoke detector is crucial for optimal functionality and home safety. Follow the step-by-step guide to ensure a smooth and successful battery replacement process.
- Prioritize safety by adhering to essential precautions and consulting the user manual for your specific CPI smoke detector model. Test the smoke detector regularly to ensure proper functionality and peace of mind.
Safety Precautions
When working with smoke detectors, it’s important to keep safety as your top priority. Here are some essential safety precautions to follow:
- Ensure the area around the smoke detector is well-lit and free from any obstacles or hazards.
- Before starting any work, make sure to turn off the power to the smoke detector by switching off the circuit breaker or removing its batteries.
- Wear protective gloves and safety goggles to protect your hands and eyes from any potential harm.
- Avoid using any sharp or metal objects when handling the smoke detector to prevent damage to the device or injury to yourself.
- If you encounter any signs of damage or malfunction during the battery replacement process, such as cracked casing or exposed wires, stop immediately and contact a professional for assistance.
- Do not forcefully remove the smoke detector from the mounting bracket. Follow the manufacturer’s instructions for detaching the device properly.
- Dispose of the old battery properly by following the appropriate recycling procedures in your area. Do not throw it in the regular trash.
- Always test the smoke detector after replacing the battery to ensure it is functioning correctly.
By adhering to these safety precautions, you can minimize any potential risks and ensure a safe and successful battery replacement process for your CPI smoke detector.
Now that we’ve covered the safety precautions, let’s move on to the tools and materials you’ll need for the battery replacement.
Tools and Materials Needed
Before starting the battery replacement process, it’s important to gather the necessary tools and materials. Here’s a list of what you’ll need:
- Stepladder or sturdy chair: To safely reach and access the smoke detector.
- Replacement battery: Make sure to purchase the correct battery type and size for your CPI smoke detector. Refer to the manufacturer’s instructions or the existing battery for specifications.
- Screwdriver: Depending on the model of your smoke detector, you may need a Phillips or flat-head screwdriver to remove the screws securing the casing.
- Clean cloth: To wipe away any dust or debris from the smoke detector or your hands.
These basic tools and materials should be sufficient for most CPI smoke detector battery replacement procedures. Ensure that you have them readily available before you begin.
Now that you have everything you need, let’s move on to the step-by-step process of changing the battery in your CPI smoke detector.
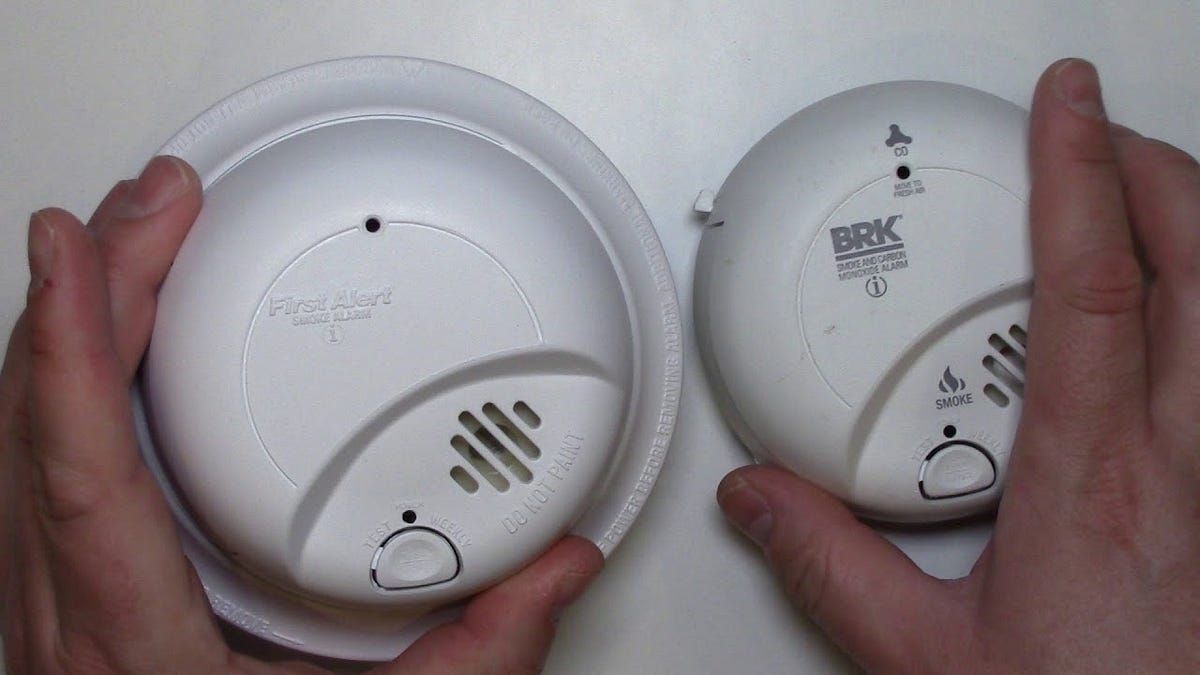
Step 1: Identifying the Type of CPI Smoke Detector
The first step in changing the battery in your CPI smoke detector is to identify the type of smoke detector you have. CPI smoke detectors come in different models, and the process may vary slightly depending on the specific model you own.
Look for any labels, markings, or indications on the smoke detector itself or in the user manual that can help you determine the model. Some common CPI smoke detector models include the SD101, SD120, and SD200. Knowing the model of your smoke detector will ensure that you follow the appropriate instructions for battery replacement.
If you are unable to determine the exact model, you can also look for visual cues on the smoke detector. Some models may have specific design elements or features that can help you identify them.
Additionally, if you still have the packaging or any documentation from when you purchased the smoke detector, check for any details that might indicate the model.
If you are unsure about the model or have any questions, it’s always best to consult the CPI smoke detector’s user manual or contact CPI directly for assistance. They will be able to provide you with accurate information and instructions specific to your smoke detector model.
Once you have identified the type of CPI smoke detector you have, you can proceed to gather the necessary supplies and tools for the battery replacement process.
Step 2: Gathering the Necessary Supplies
Now that you have identified the type of CPI smoke detector you own, it’s time to gather the necessary supplies for the battery replacement process.
Here’s what you’ll need:
- Replacement battery: Check the user manual or the existing battery in your smoke detector to determine the correct battery type and size. Common battery types for CPI smoke detectors include 9-volt or AA batteries.
- Stepladder or sturdy chair: Depending on the height of your smoke detector, you may need a stepladder or a sturdy chair to safely reach the device.
- Screwdriver: Some CPI smoke detector models may require a screwdriver to remove the casing. Check the user manual or inspect the smoke detector to determine if a screwdriver is needed, and if so, whether a Phillips or flat-head screwdriver is required.
- Clean cloth: It’s always a good idea to have a clean cloth on hand to wipe away any dust or debris from the smoke detector or your hands during the battery replacement process.
Once you have gathered all the necessary supplies, ensure that you have a safe and well-lit work area where you can comfortably perform the battery replacement process. Clear any obstructions or potential hazards around the smoke detector to ensure easy access.
Now that you have all the tools and materials needed, you’re ready to proceed to the next step: preparing for battery replacement.
Step 3: Preparing for Battery Replacement
Before you begin the battery replacement process for your CPI smoke detector, it’s important to take a few preparatory steps to ensure a smooth and successful procedure.
Here’s what you need to do:
- Ensure the power is off: Before you start working on the smoke detector, make sure to turn off the power to the device. If your smoke detector is connected to your home’s electrical system, switch off the circuit breaker that controls the smoke detector. Alternatively, if your smoke detector operates solely on batteries, remove the batteries to disconnect the power.
- Allow the smoke detector to settle: Once the power is turned off, it’s advisable to let the smoke detector settle for a few minutes to allow any residual charge to dissipate. This will help ensure your safety during the battery replacement process.
- Read the user manual: Take a few moments to review the user manual or any provided instructions specific to your CPI smoke detector model. Familiarize yourself with the recommended battery replacement procedure and any special considerations or precautions.
- Gather your tools and materials: Double-check that you have all the necessary tools and materials for the battery replacement, including the replacement battery, a stepladder or sturdy chair, a screwdriver (if required), and a clean cloth.
- Clear the area: Remove any potential obstructions or hazards around the smoke detector to ensure easy access and a safe working environment.
By following these preparatory steps, you’ll be ready to proceed with the battery replacement process for your CPI smoke detector. In the next step, we will cover how to remove the smoke detector from its mounting bracket.
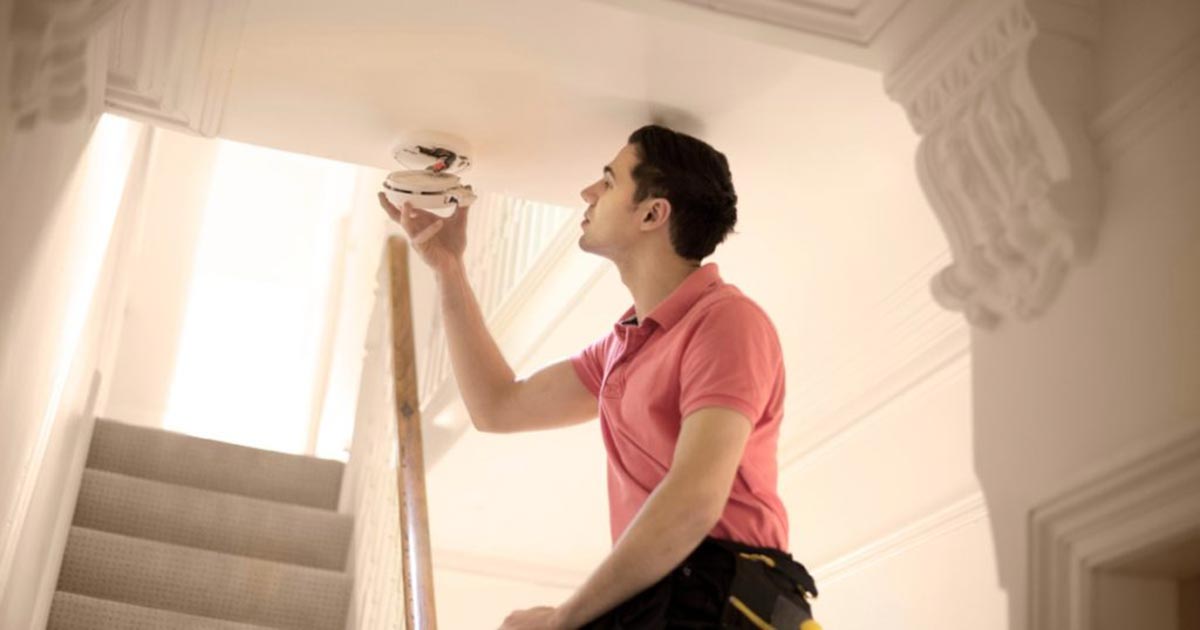
Step 4: Removing the Smoke Detector from Mounting Bracket
Now that you have prepared for the battery replacement, it’s time to proceed with removing the CPI smoke detector from its mounting bracket. This step may vary slightly depending on the specific model of your smoke detector, but the general process should be similar.
Follow these steps to remove the smoke detector:
- Position the stepladder or sturdy chair beneath the smoke detector so that you can safely reach it.
- Locate the mounting bracket that holds the smoke detector in place. It is usually attached to the ceiling or wall.
- Depending on the model, you may need to twist the smoke detector counterclockwise or push upward to release it from the mounting bracket. If there are any locking mechanisms or tabs, be sure to disengage them carefully.
- Gently pull the smoke detector away from the mounting bracket, allowing the wires or connectors to extend as necessary.
- If there are any screws securing the smoke detector to the mounting bracket, use a screwdriver to remove them. Set the screws aside for later.
- Once the smoke detector is detached from the mounting bracket, carefully lower it from the ceiling or wall.
It’s important to handle the smoke detector with care and avoid any excessive force that could damage the device or wiring. If you encounter any difficulties or are unsure about the removal process, consult the user manual or contact CPI for guidance.
With the smoke detector now removed from the mounting bracket, we can proceed to the next step: opening the smoke detector casing.
When changing the battery in a CPI smoke detector, always use a high-quality alkaline battery and test the detector after installation to ensure it is functioning properly.
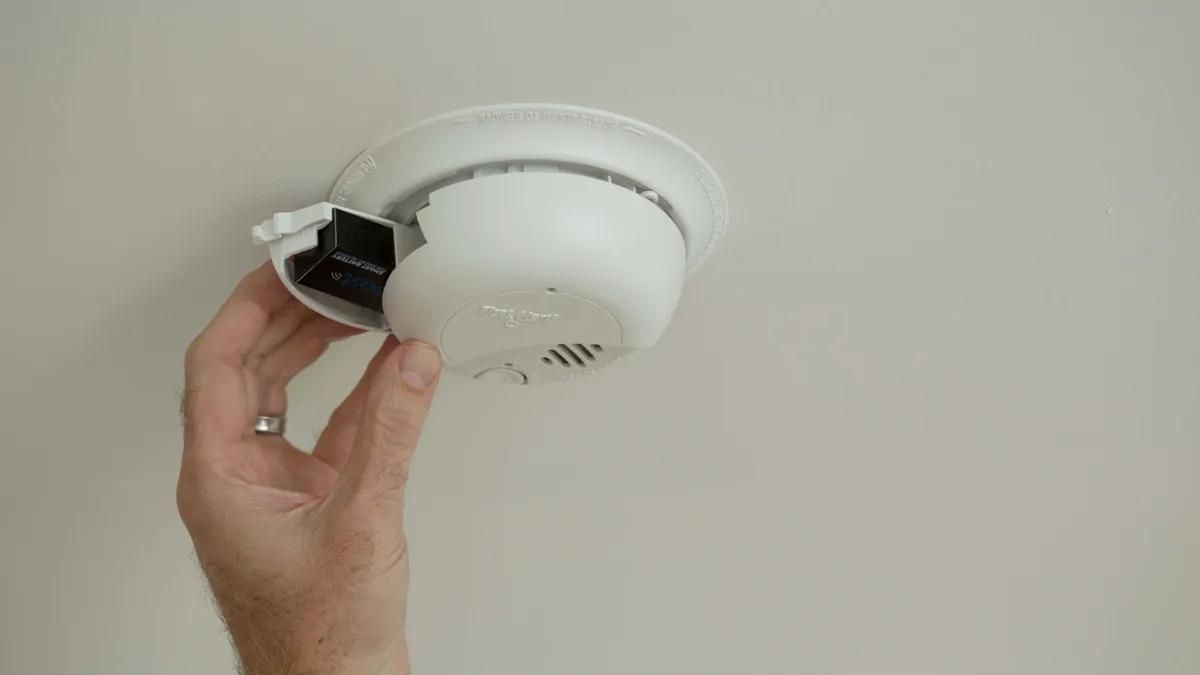
Step 5: Opening the Smoke Detector Casing
With the CPI smoke detector removed from its mounting bracket, the next step is to open the casing to access the battery compartment. This will allow you to safely replace the old battery with a new one.
Follow these steps to open the smoke detector casing:
- Inspect the smoke detector to identify the points of access to the casing. Most CPI smoke detectors have a latch or a tab that secures the casing.
- Locate the latch or tab and gently press or slide it to release the casing. You may need to use a small flat-head screwdriver or your fingers to manipulate the latch or tab.
- Once the latch or tab is released, carefully lift or separate the smoke detector casing from the main body. Be cautious of any wires or connectors.
- If there are any screws holding the casing in place, remove them using a screwdriver. Set the screws aside for later.
- With the casing open, you should now have access to the battery compartment.
It’s important to handle the smoke detector and its casing with care, as they can be delicate. Avoid using excessive force that could damage the device or its components.
If you encounter any difficulties or are unsure about the process, consult the user manual or contact CPI for assistance.
Now that the smoke detector casing is open, we can move on to the next step: removing the old battery.
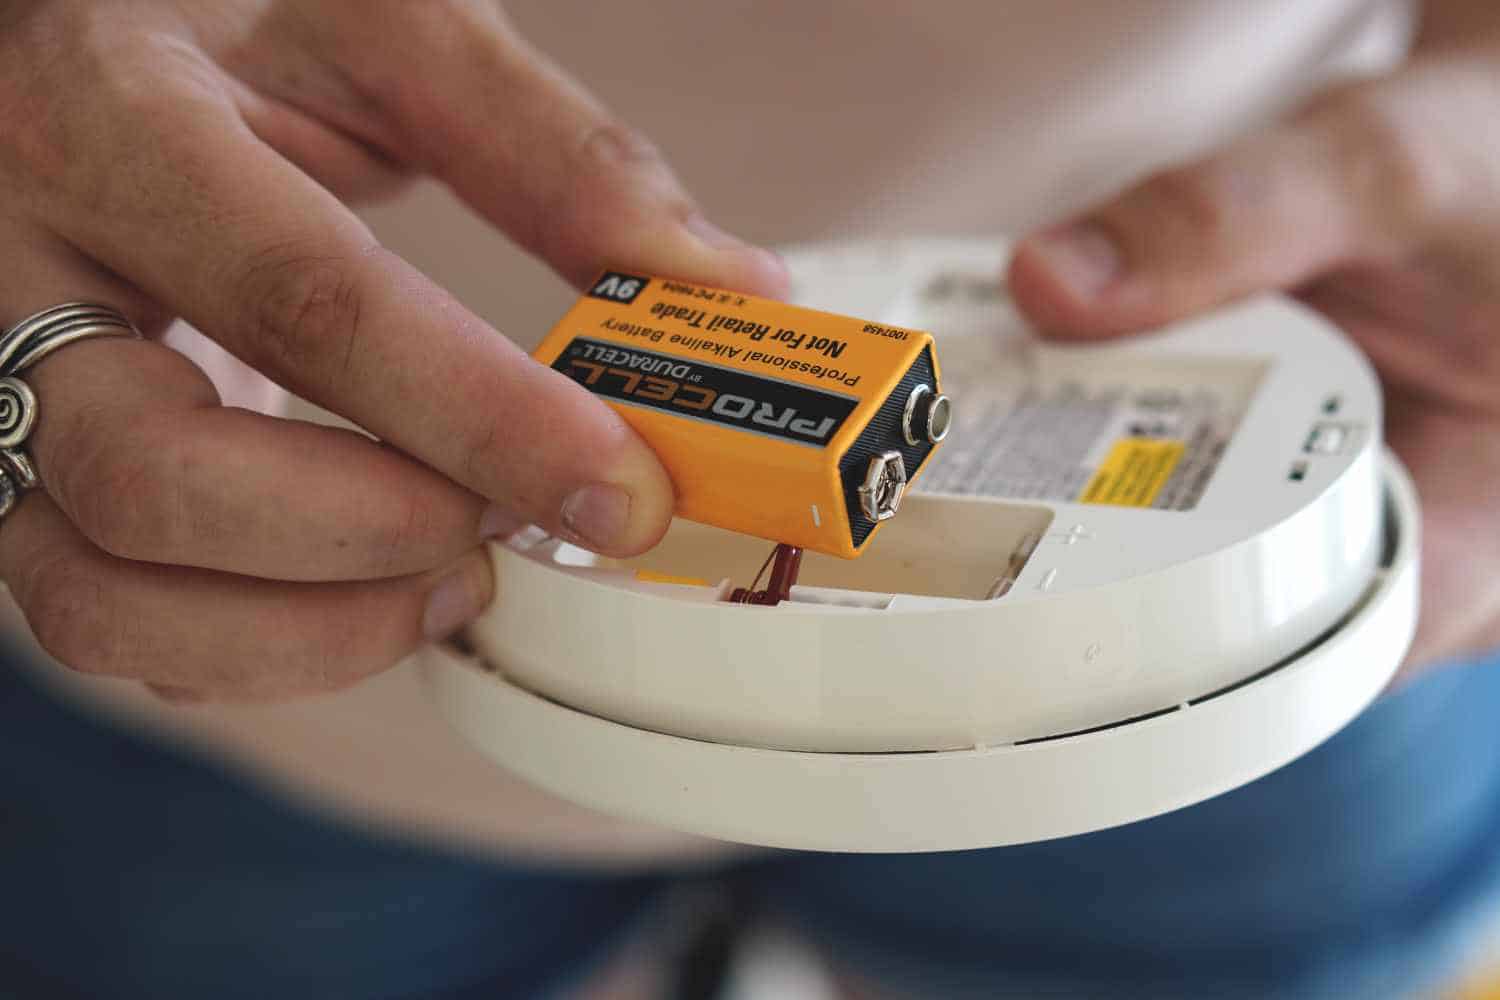
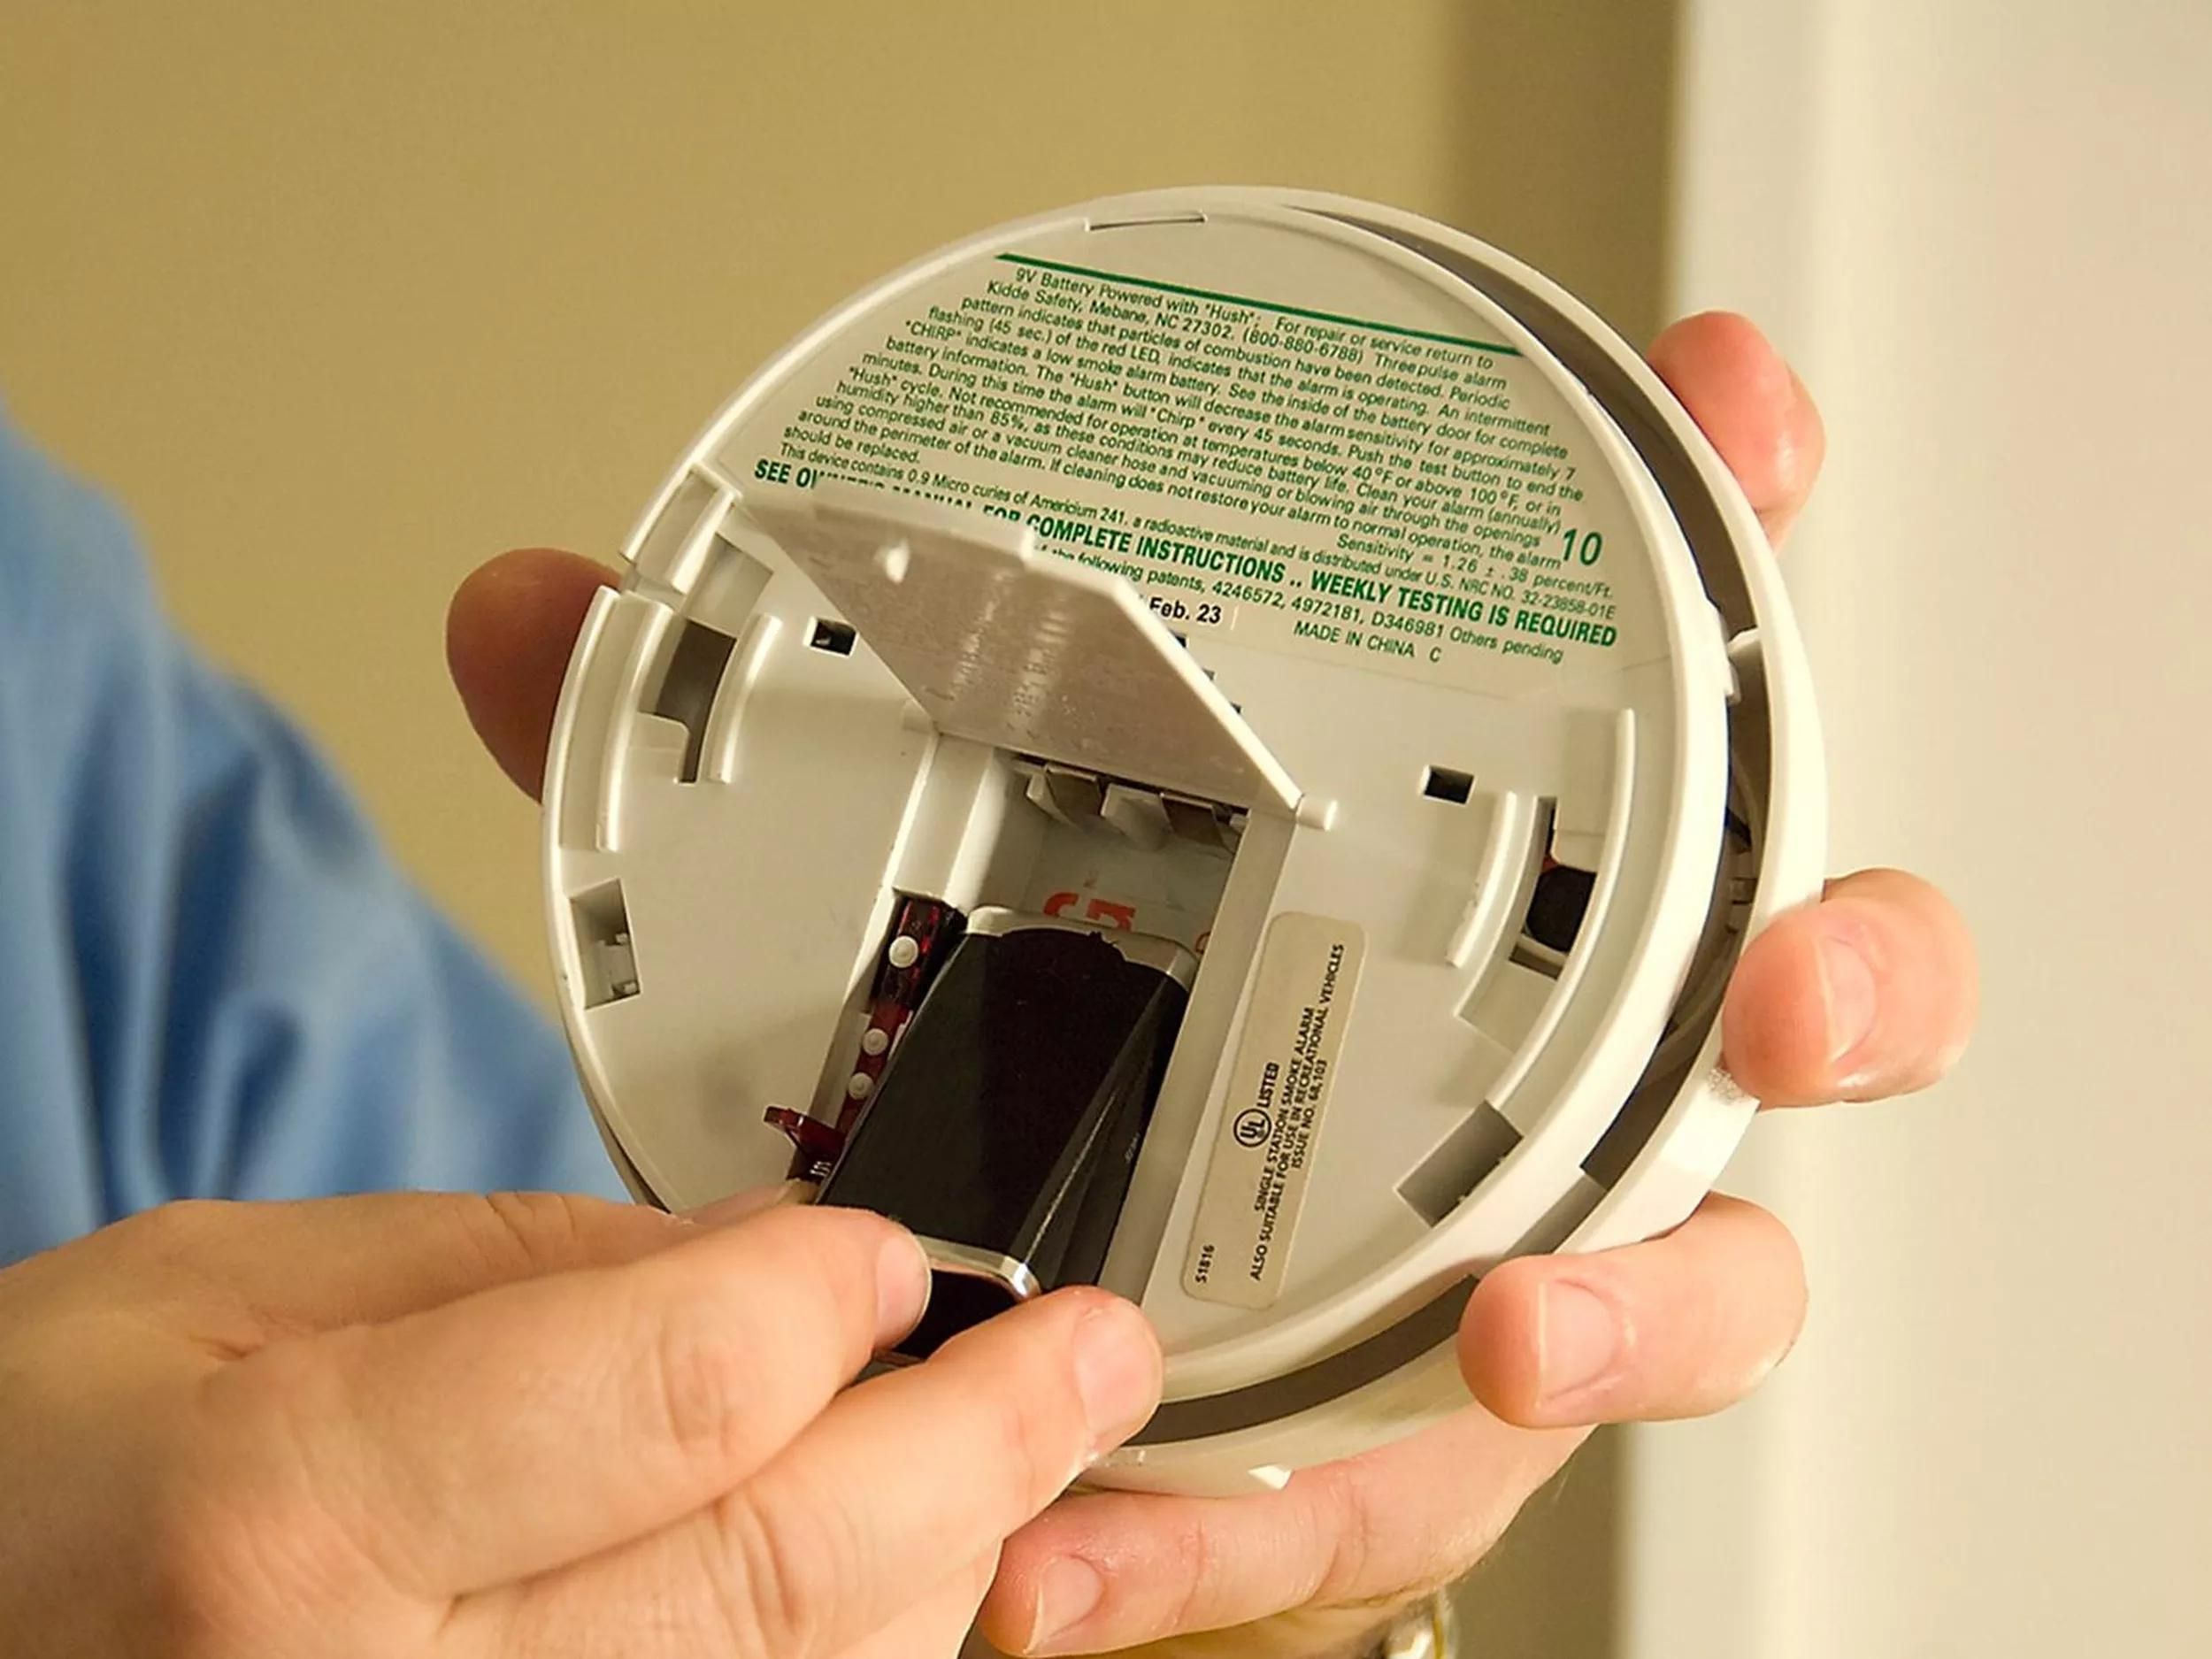
Step 6: Removing the Old Battery
With the smoke detector casing open, it’s time to remove the old battery. Follow these steps to safely remove the old battery from your CPI smoke detector:
- Locate the battery compartment within the smoke detector casing. It is typically a small compartment that houses the battery.
- Take note of how the old battery is positioned within the compartment. Pay attention to the battery’s positive (+) and negative (-) terminals, as this will be important when installing the new battery.
- With clean hands, carefully grip the old battery and gently remove it from the battery compartment. Be cautious not to damage or break any wires or connectors inside the compartment.
- Properly dispose of the old battery according to the recycling guidelines in your area. It’s important to handle and dispose of batteries responsibly to minimize environmental impact.
During this step, it’s crucial to handle the old battery with care, as it may still contain a charge and could potentially cause harm. To ensure your safety, it’s recommended to wear protective gloves while handling the old battery.
If you encounter any difficulties or resistance when removing the old battery, double-check for any clips, tabs, or fasteners that may be securing it in place. Refer to the user manual or contact CPI for guidance if needed.
Now that the old battery has been removed, we can proceed to the next step: installing the new battery.
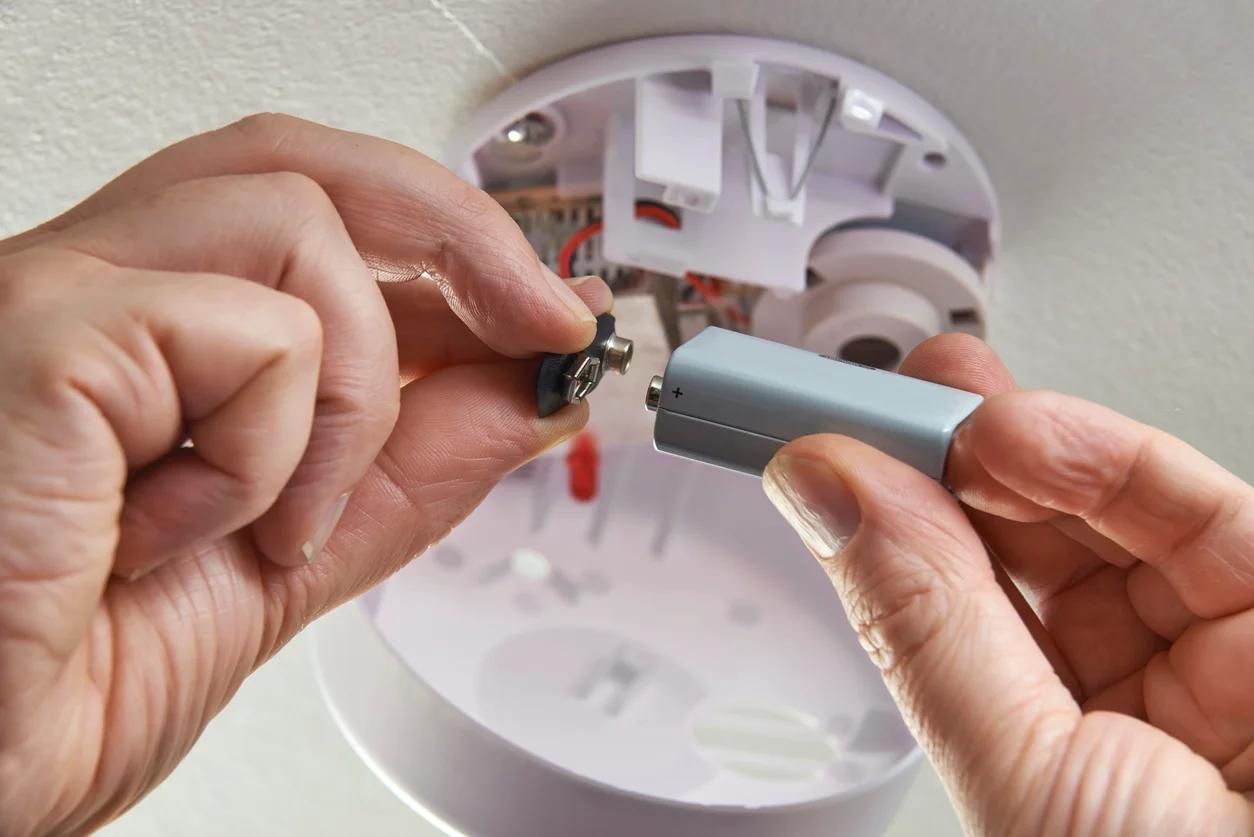
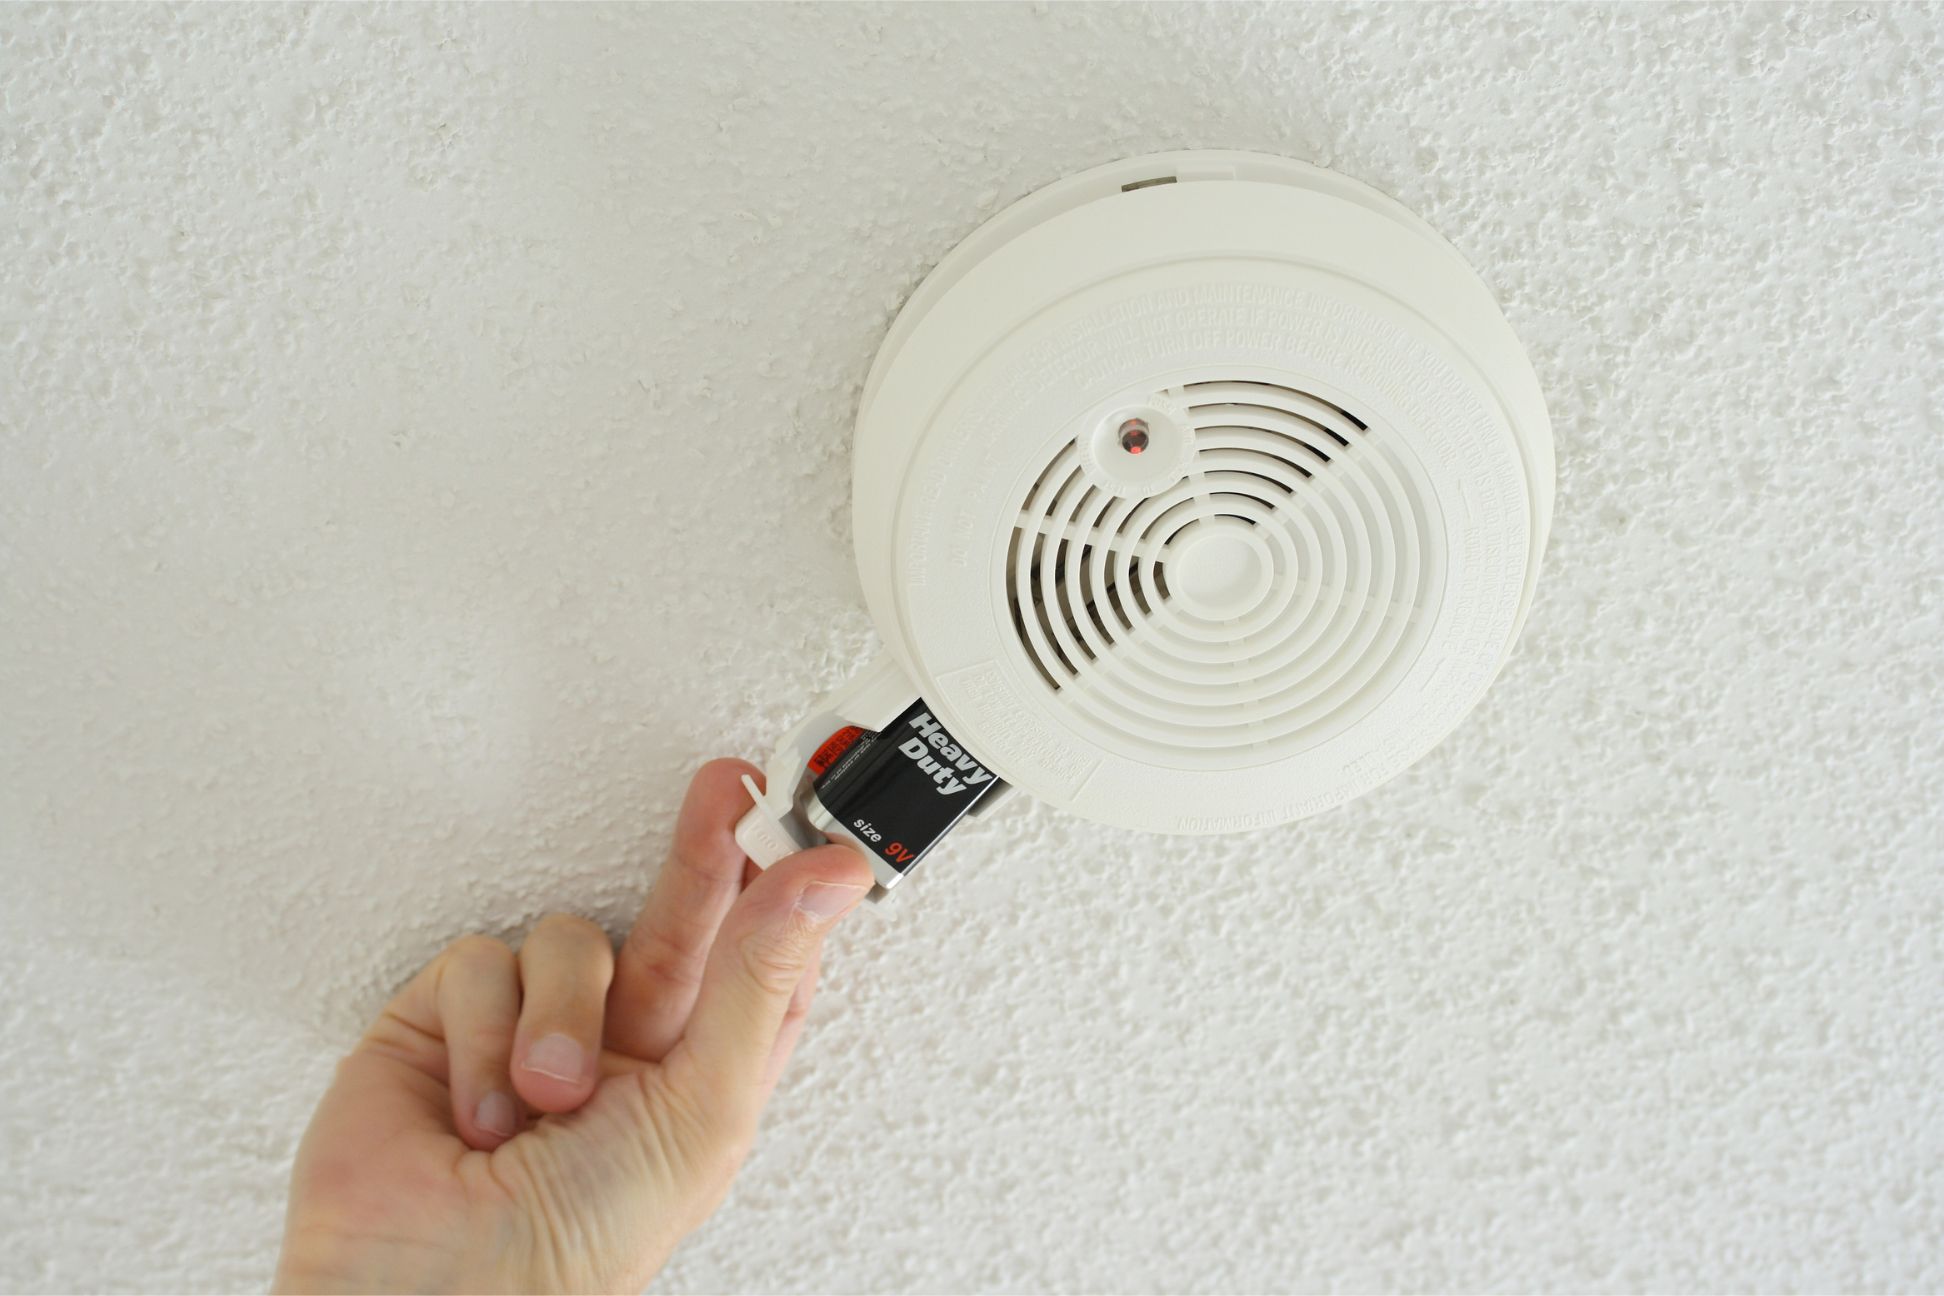
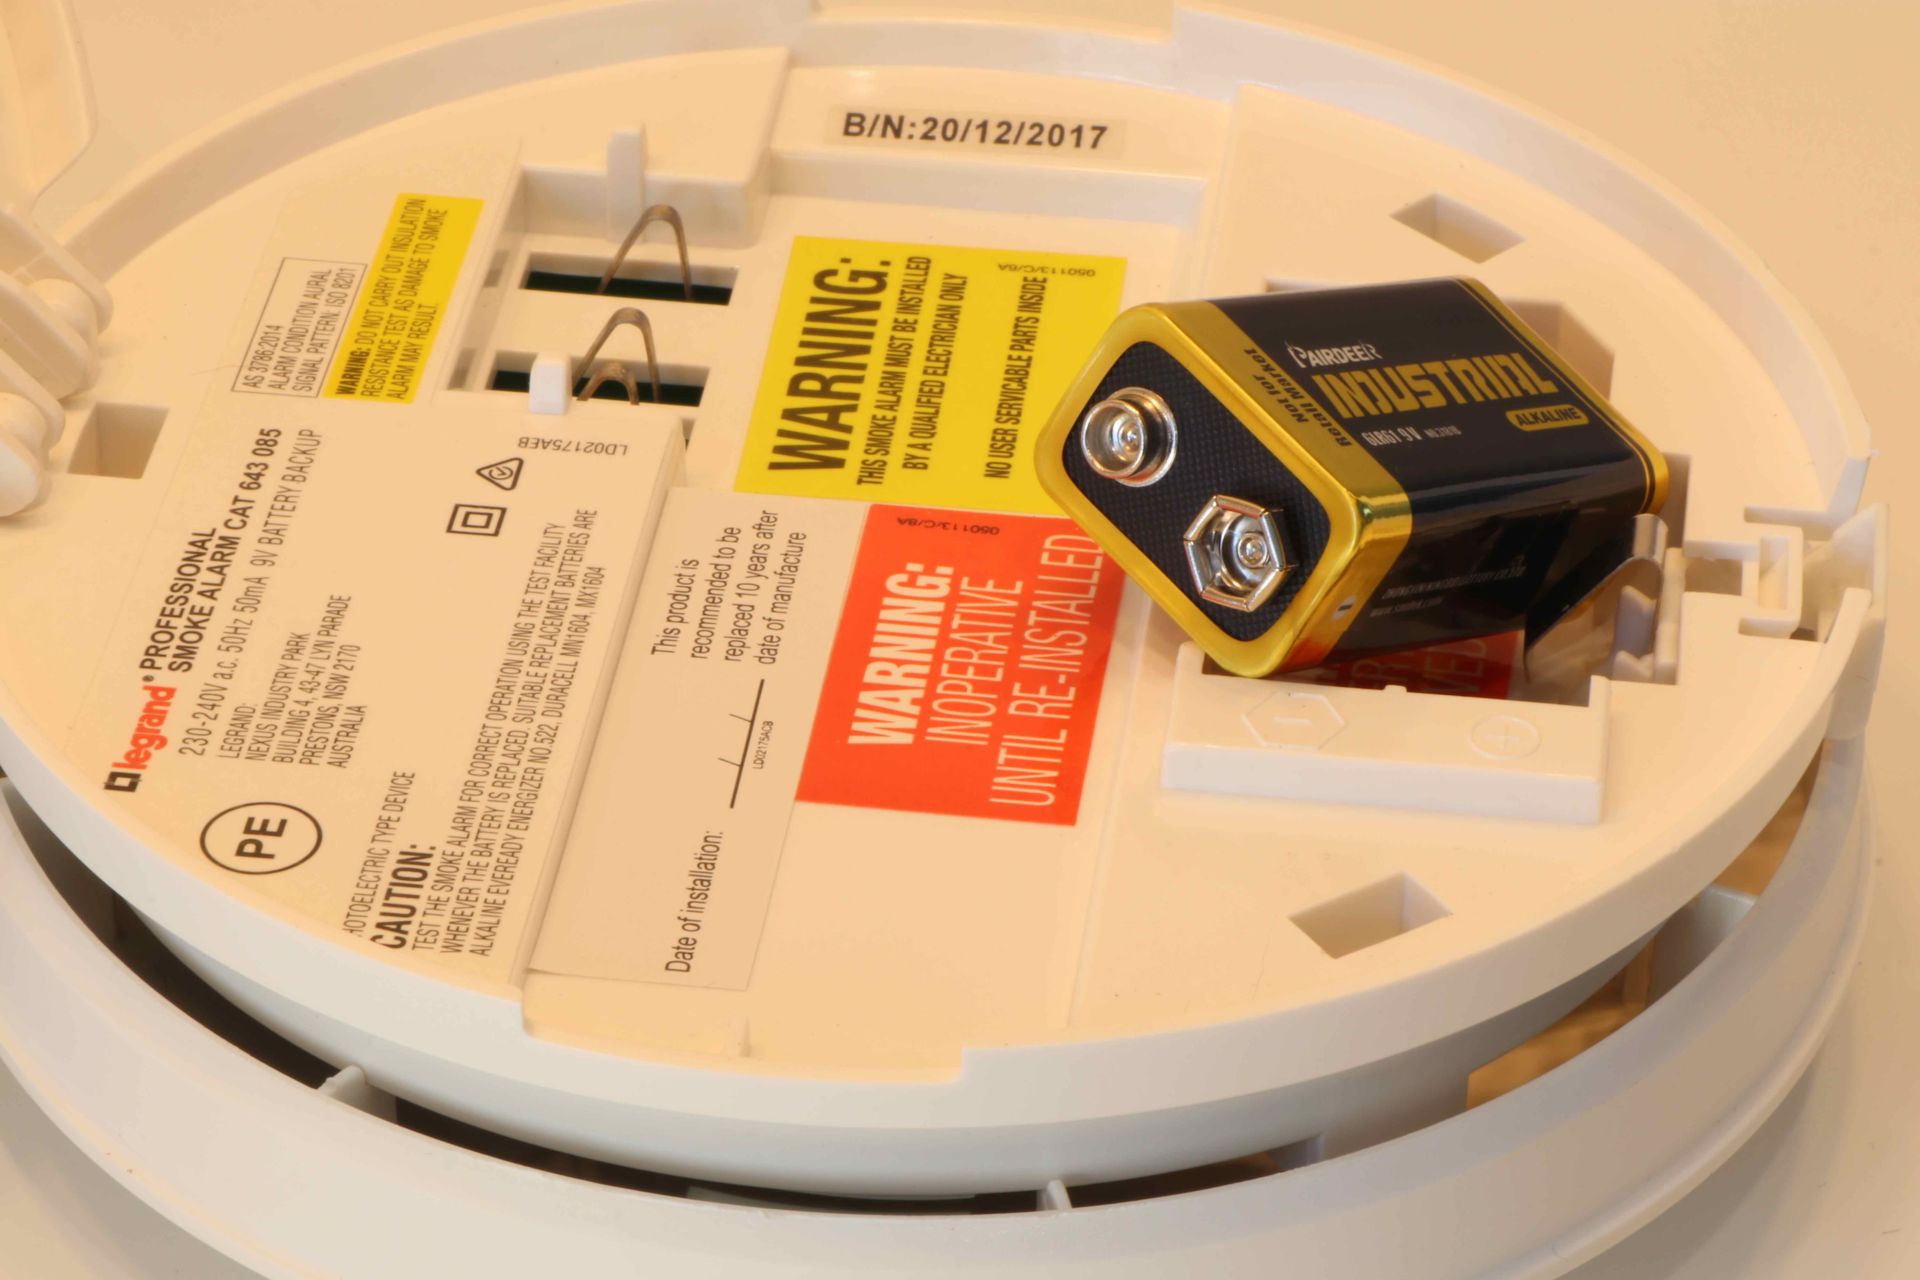
Step 7: Inserting the New Battery
With the old battery removed, it’s time to insert the new battery into your CPI smoke detector. Follow these steps to properly insert the new battery:
- Make sure you have the correct replacement battery for your CPI smoke detector. Refer to the user manual or the markings on the smoke detector for the specific battery type required.
- Check the orientation of the new battery. Ensure that the positive (+) and negative (-) terminals align with the markings inside the battery compartment.
- With clean hands, hold the new battery and position it correctly within the battery compartment. Gently place the battery in, ensuring a secure fit without forcing it.
- Double-check that the battery is properly inserted and the terminals are making contact. This is important to ensure proper functionality.
It’s essential to handle the new battery with care to avoid any damage or mishandling. If the new battery is not functioning properly or does not fit correctly, do not force it. Double-check that you have the correct battery size and type for your CPI smoke detector.
Once the new battery is securely inserted, the smoke detector is ready to be closed up. In the next step, we will cover how to close the smoke detector casing.
Step 8: Closing the Smoke Detector Casing
Now that the new battery is inserted into the CPI smoke detector, it’s time to close the casing to ensure proper protection and functionality of the device. Follow these steps to securely close the smoke detector casing:
- Align the smoke detector casing with the main body of the device.
- Gently press or slide the casing back into place, ensuring that it fits snugly and securely.
- If there were screws removed earlier, use a screwdriver to reinsert and tighten them. Ensure they are securely fastened but be careful not to overtighten.
- Double-check that the casing is properly closed, with no gaps or openings that could compromise the smoke detector’s performance.
It’s important to handle the smoke detector and its casing delicately, as they can be fragile. Avoid applying excessive pressure or force that could lead to damage or misalignment.
If you encounter any difficulties or the casing does not seem to close properly, double-check that the components are properly aligned and that there are no obstructions preventing the casing from closing. Additionally, refer to the user manual or contact CPI for further assistance if needed.
With the smoke detector casing securely closed, we can move on to the next step: reattaching the smoke detector to the mounting bracket.
Step 9: Reattaching the Smoke Detector to Mounting Bracket
Now that the smoke detector casing is securely closed, it’s time to reattach the CPI smoke detector to its mounting bracket. Follow these steps to safely and properly reattach the smoke detector:
- Position the smoke detector back onto the mounting bracket carefully, ensuring that any wires or connectors align properly.
- If there are screws that were removed earlier, use a screwdriver to reinsert and tighten them to secure the smoke detector to the mounting bracket. Again, ensure they are securely fastened but avoid overtightening.
- Ensure the smoke detector is firmly and securely attached to the mounting bracket without any wobbling or loose connections.
- If there are any locking mechanisms or tabs on the smoke detector and mounting bracket, engage them to ensure a secure fit.
Take your time during this step to ensure that the smoke detector is securely reattached. A loose or improperly attached smoke detector may not function correctly or provide accurate detection.
If you encounter any difficulties or the smoke detector does not seem to easily fit back onto the mounting bracket, double-check that the wires or connectors are properly aligned and that any locking mechanisms or tabs are disengaged.
Once the smoke detector is securely reattached to the mounting bracket, we can move on to the final step: testing the smoke detector to ensure it is functioning properly.
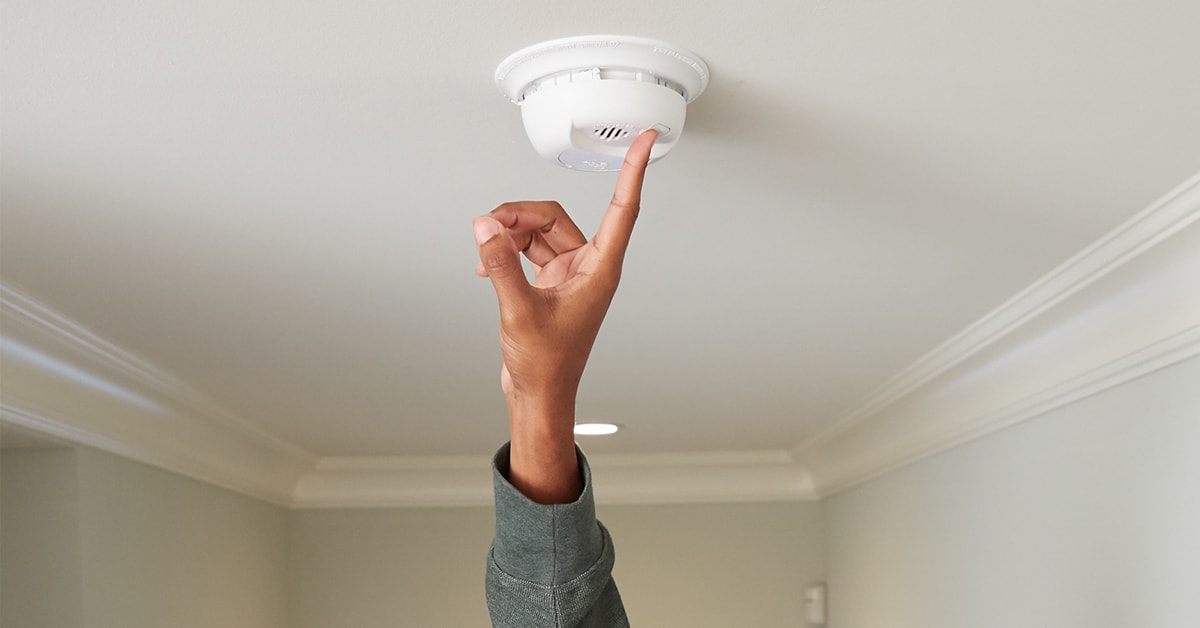
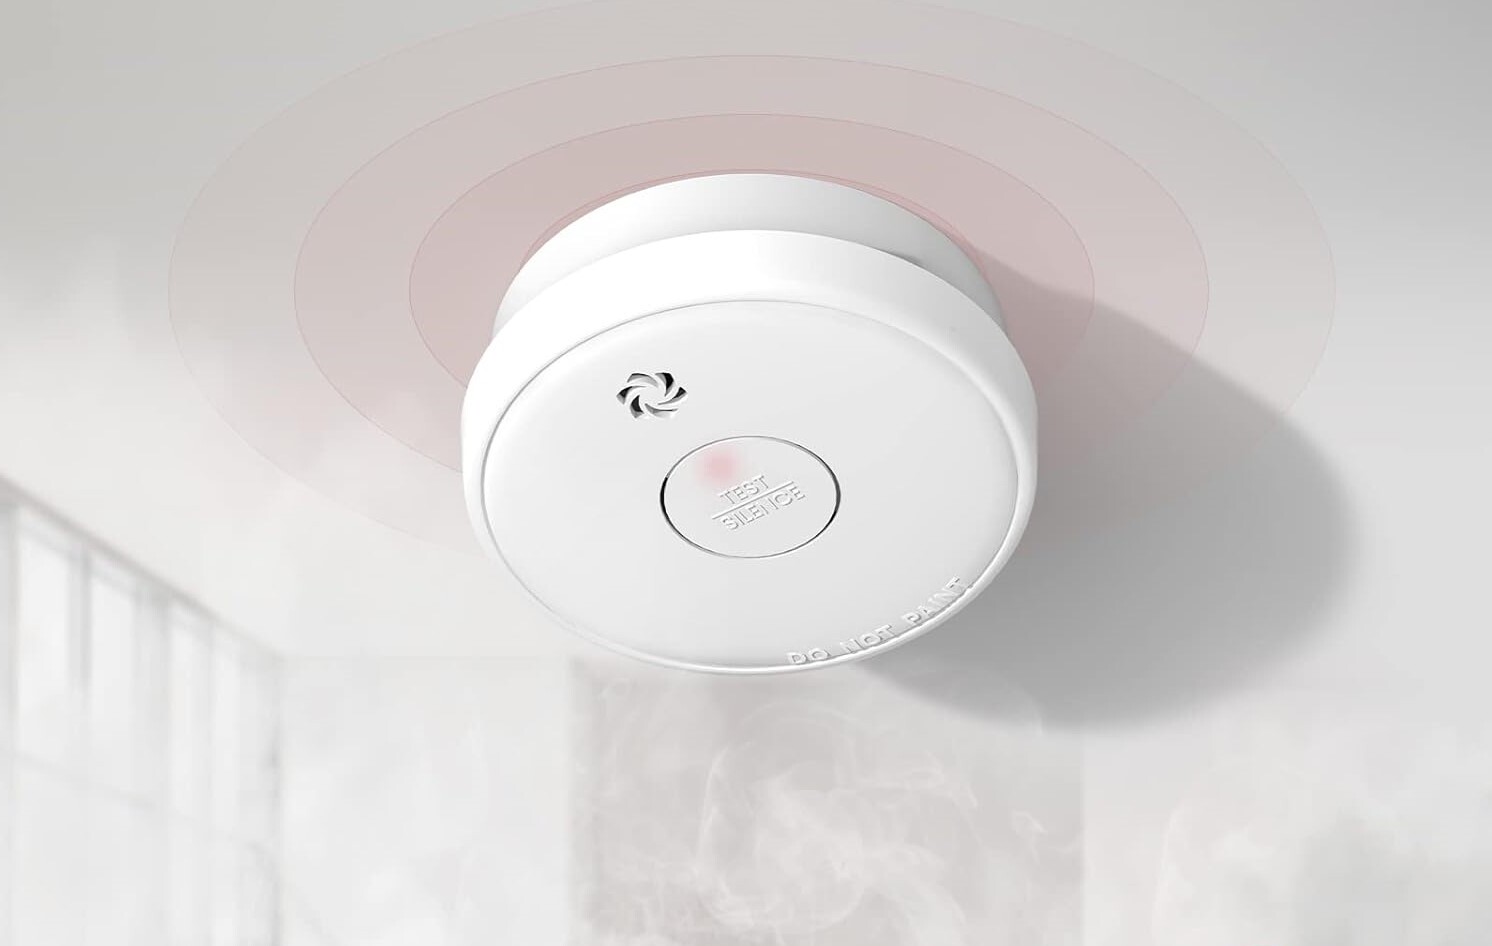
Step 10: Testing the Smoke Detector
After completing the battery replacement and reattaching the CPI smoke detector to its mounting bracket, it’s crucial to test the smoke detector to ensure that it is functioning properly. Testing the smoke detector regularly is essential for the safety of your home and family. Follow these steps to test the smoke detector:
- Ensure that the power to the smoke detector is turned on. If it operates solely on batteries, ensure that the new battery is properly inserted and connected.
- Stand a safe distance away from the smoke detector to avoid triggering false alarms.
- Press the test button on the smoke detector. The test button is usually located on the front or side of the device.
- Observe and listen for any indicators that the smoke detector is functioning correctly. This may include a loud alarm sound and flashing LED lights.
- If the smoke detector does not produce any sound or show signs of activation, double-check the battery connection, ensure the battery is inserted correctly, or consult the user manual for troubleshooting steps.
It’s crucial to regularly test your smoke detector to ensure it is functioning properly. Ideally, you should test your smoke detector at least once a month following the battery replacement and even more frequently if recommended by the manufacturer.
If you encounter any issues during the testing process or if the smoke detector does not operate as expected, it’s recommended to consult the user manual, contact CPI for support, or seek assistance from a professional technician.
Congratulations! You have successfully completed the battery replacement process and tested your CPI smoke detector. By regularly maintaining and testing your smoke detector, you can help ensure the safety of your home and loved ones in the event of a fire emergency.
Before concluding, take a moment to review the entire process and ensure that all the steps were followed correctly. If you have any questions or concerns, don’t hesitate to seek professional assistance.
We hope this guide has been helpful in guiding you through the process of changing the battery in your CPI smoke detector. Stay safe!
Conclusion
In conclusion, changing the battery in your CPI smoke detector is a vital maintenance task that ensures the device’s proper functionality and your family’s safety. By following the step-by-step guide provided in this article, you can confidently replace the battery in your CPI smoke detector and ensure its optimal performance.
We began by introducing the importance of regularly changing the battery in a smoke detector and emphasized the significance of prioritizing safety throughout the process. We then discussed the tools and materials you will need, such as a replacement battery, a stepladder or chair, a screwdriver, and a clean cloth.
We covered various steps, including identifying the specific CPI smoke detector model, preparing for the battery replacement, removing the smoke detector from the mounting bracket, opening the smoke detector casing, removing the old battery, inserting the new battery, closing the smoke detector casing, reattaching the smoke detector to the mounting bracket, and finally, testing the smoke detector to ensure proper functionality.
We emphasized the importance of following safety precautions throughout the battery replacement process. Additionally, we reminded you to consult the user manual or contact CPI if you encounter any difficulties or have any questions.
By regularly testing your smoke detector and replacing the battery as needed, you can have peace of mind knowing that your CPI smoke detector is functioning properly and providing reliable fire detection in your home. Remember to test your smoke detector monthly and replace the battery as recommended by the manufacturer.
Thank you for taking the time to read this comprehensive guide on how to change the battery in a CPI smoke detector. We hope this article has been informative and has provided you with the necessary knowledge and confidence to carry out the battery replacement process. Stay safe and well-prepared!
Frequently Asked Questions about How To Change The Battery In A CPI Smoke Detector
Was this page helpful?
At Storables.com, we guarantee accurate and reliable information. Our content, validated by Expert Board Contributors, is crafted following stringent Editorial Policies. We're committed to providing you with well-researched, expert-backed insights for all your informational needs.

0 thoughts on “How To Change The Battery In A CPI Smoke Detector”